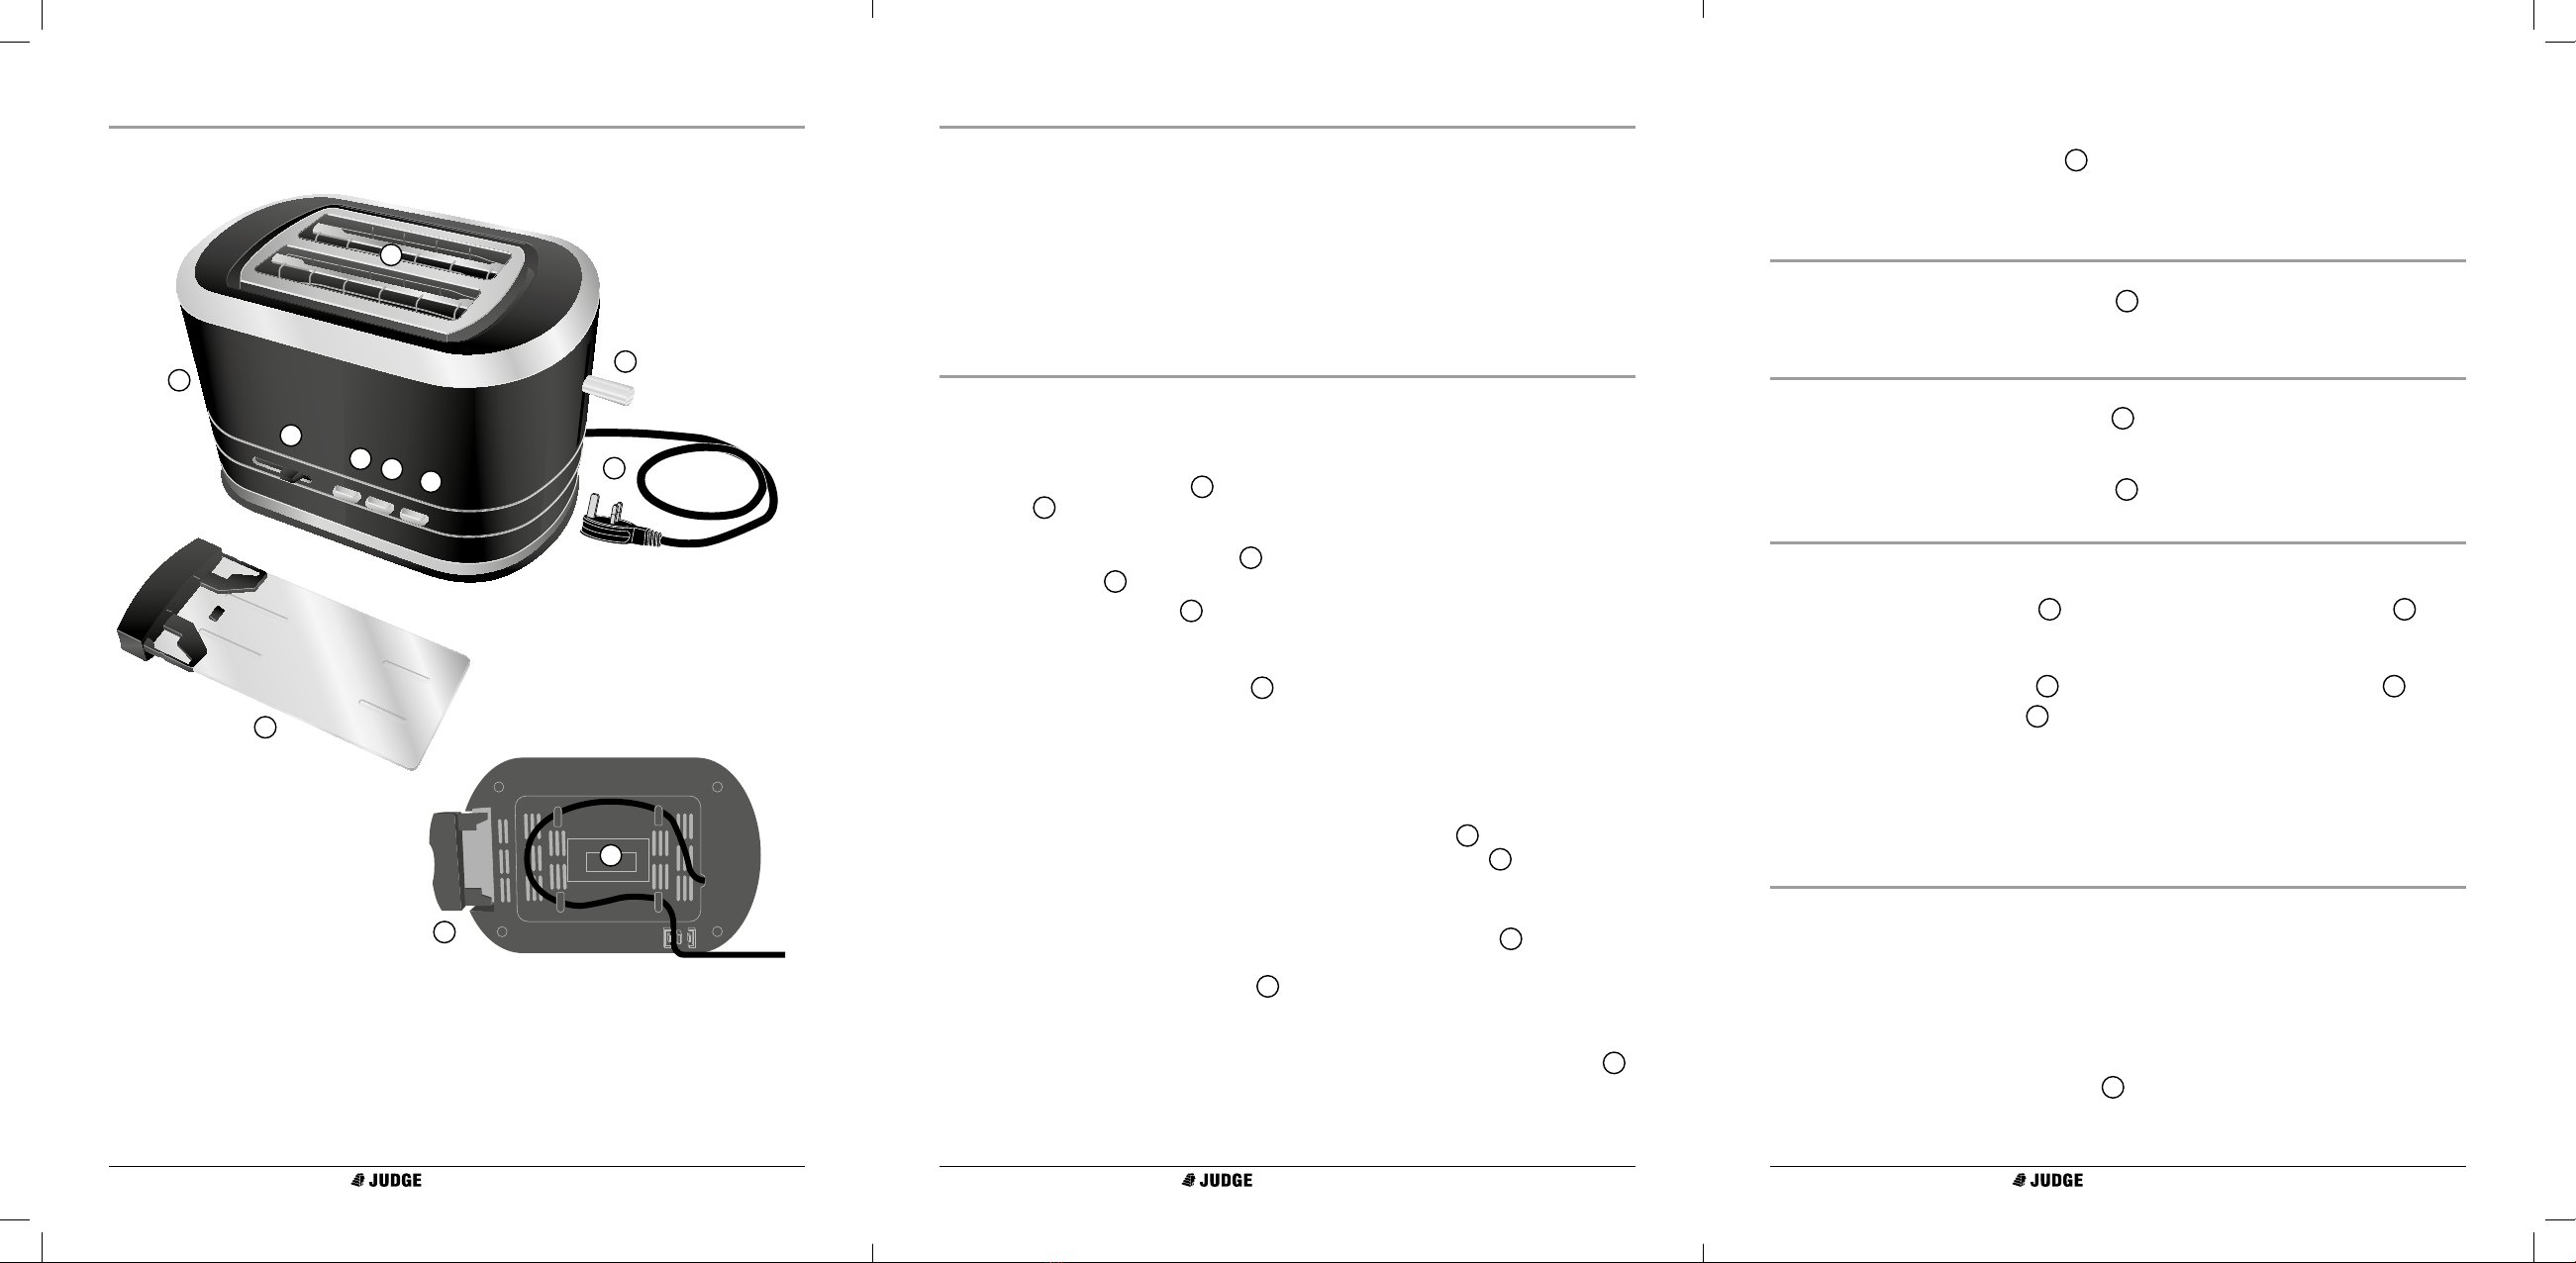
Two-slice Toaster Two-slice ToasterTwo-slice Toaster
BLACK
Two-slice Toaster
Instruction Manual
Model No. JEA40
PLEASE READ THIS INSTRUCTION MANUAL CAREFULLY
BEFORE USE AND RETAIN FOR LATER REFERENCE
UNPACK YOUR TOASTER CAREFULLY AND REMOVE
TEMPORARY PACKING PIECES, LABELS AND STICKERS
• Unplug the appliance whenever it is not in use.
• THE APPLIANCE MUST ALWAYS BE EARTHED - always connect to a
mains socket with an earth connection.
• Never leave the appliance unattended when it is operating.
• The Mains Lead 10 should be positioned so as not to cause an
obstruction or to overhang the edge of the surface, where it could
accidentally be snagged or pulled by children.
• Do not use the appliance outdoors.
• Do not place the appliance close to a heat source.
• Site the Toaster on a rm level surface; if necessary, protect
vunerable surfaces with a heat insulating pad.
• The appliance should be sited away from soft furnishings or other
ammable material.
• Ensure that the Mains Lead 10 is not near any hot surface.
• Pull the plug (do not pull Mains Lead 10) to disconnect from mains
socket.
• Do not pull the Mains Lead 10 to move the appliance.
• It is not recommended that the appliance be used with an extension
lead. If this cannot be avoided, ensure that the extension lead is of
the correct electrical rating.
• As the appliance becomes hot during use, take care when handling it.
• The appliance should be used only as instructed and for the purpose
for which it was intended; there is potential for injury or damage from
misuse.
• Do not use the appliance with a timer or programming device.
• Do not switch on or attempt to operate the appliance if it appears to
be faulty in any way - contact Judge Customer Services at the address
given in the warranty section.
• Never attempt to make any repair to the appliance yourself - contact
Judge Customer Services at the address given in the warranty section.
• DO NOT IMMERSE ANY PART OF THE TOASTER, OTHER THAN THE
CRUMB TRAY, IN WATER.
• Should the appliance accidentally fall into water, unplug immediately
and do not use; contact Judge Customer Services at the address given
in the warranty section.
• The appliance is intended for domestic use only.
• Please keep your purchase receipt.
Judge 2 Year Domestic Electrical Guarantee
The Judge Guarantee covers the product to be free of
defects in materials and workmanship for a period of TWO
YEARS from the date of original retail purchase. During this
period, JUDGE will, at their option, repair or replace defective
parts of the product, or replace the product, providing the
Use Care and Safety Advice have been followed.
The Guarantee does not cover damage, defect or failure
caused by or resulting from accidents, external damage,
alteration, modication, abuse, misuse or misapplication.
The Guarantee does not cover any damage caused by
taking the appliance apart yourself, or attempting to repair
the appliance yourself.
THE PRODUCT IS INTENDED FOR DOMESTIC USE ONLY.
Please keep your Purchase Receipt and contact us directly if
you encounter any problems with your product.
HORWOOD SHALL NOT BE LIABLE FOR INCIDENTAL
OR CONSEQUENTIAL DAMAGES RESULTING FROM THE
USE OF THIS PRODUCT (INCLUDING COLOUR FADING,
SCRATCHES OR ACCUMULATED DIRT) WITHOUT
FOLLOWING THE USE, CARE & SAFETY INSTRUCTIONS.
Note: Due to the introduction of improvements from time to time,
the right is reserved to supply products which dier slightly from those
illustrated and described in this publication.
Errors and Omissions Excepted.
JUDGE CUSTOMER SERVICES, HORWOOD,
AVONMOUTH WAY,
BRISTOL,
BS11 9HX, GREAT BRITAIN
customerservice@horwood.co.uk
www.judgecookware.co.uk
Tel: 0117 940 0000
CORRECT DISPOSAL OF THIS PRODUCT
This marking indicates that this product should not be disposed with other household
wastes throughout the EU. To prevent possible harm to the environment or human health
from uncontrolled waste disposal, recycle it responsibly to promote the sustainable reuse
of material resources. To return your used device, please use the return and collection
systems or contact the retailer where the product was purchased. They can take this
product for environmental safe recycling.
FOR DOMESTIC USE ONLY
Specication
Name Model
No.
Rated Voltage Rated
Frequency
Rated Power
Judge Two-Slice Toaster JEA40 230V 50z 800W