- 3 -
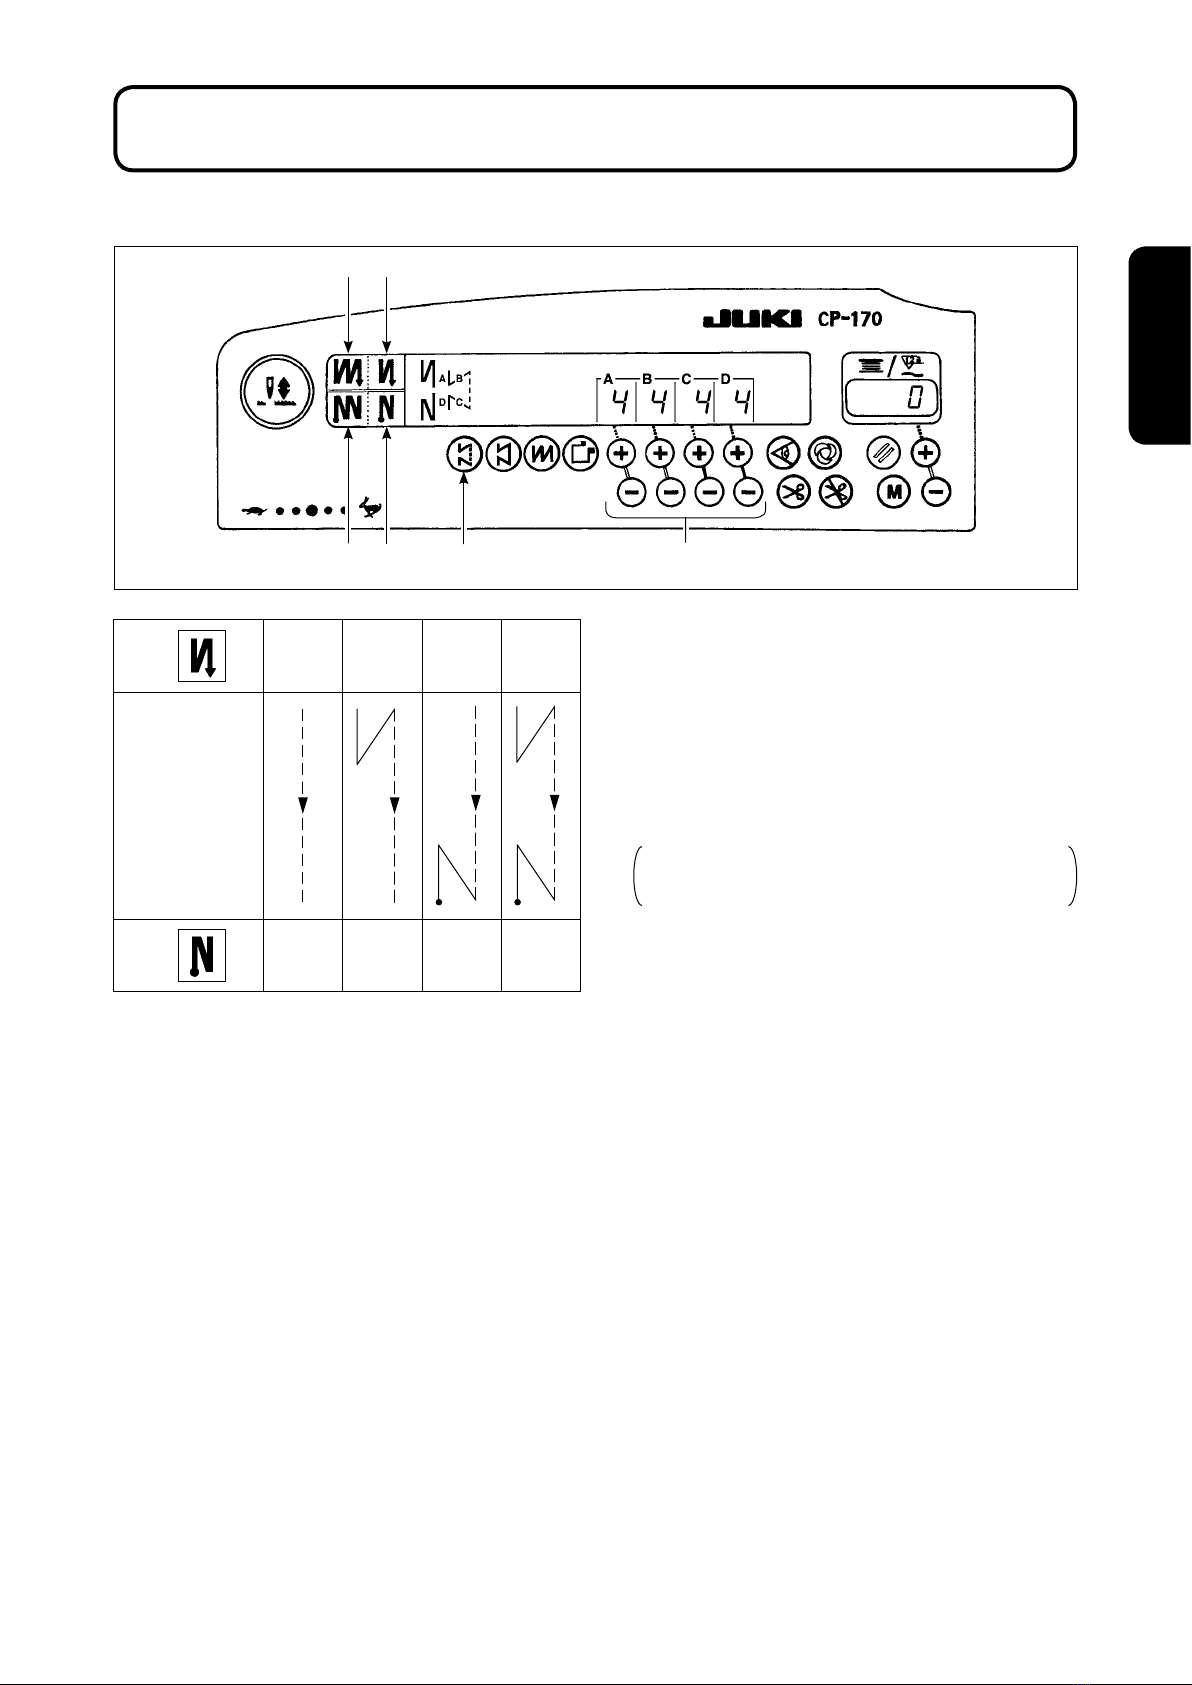
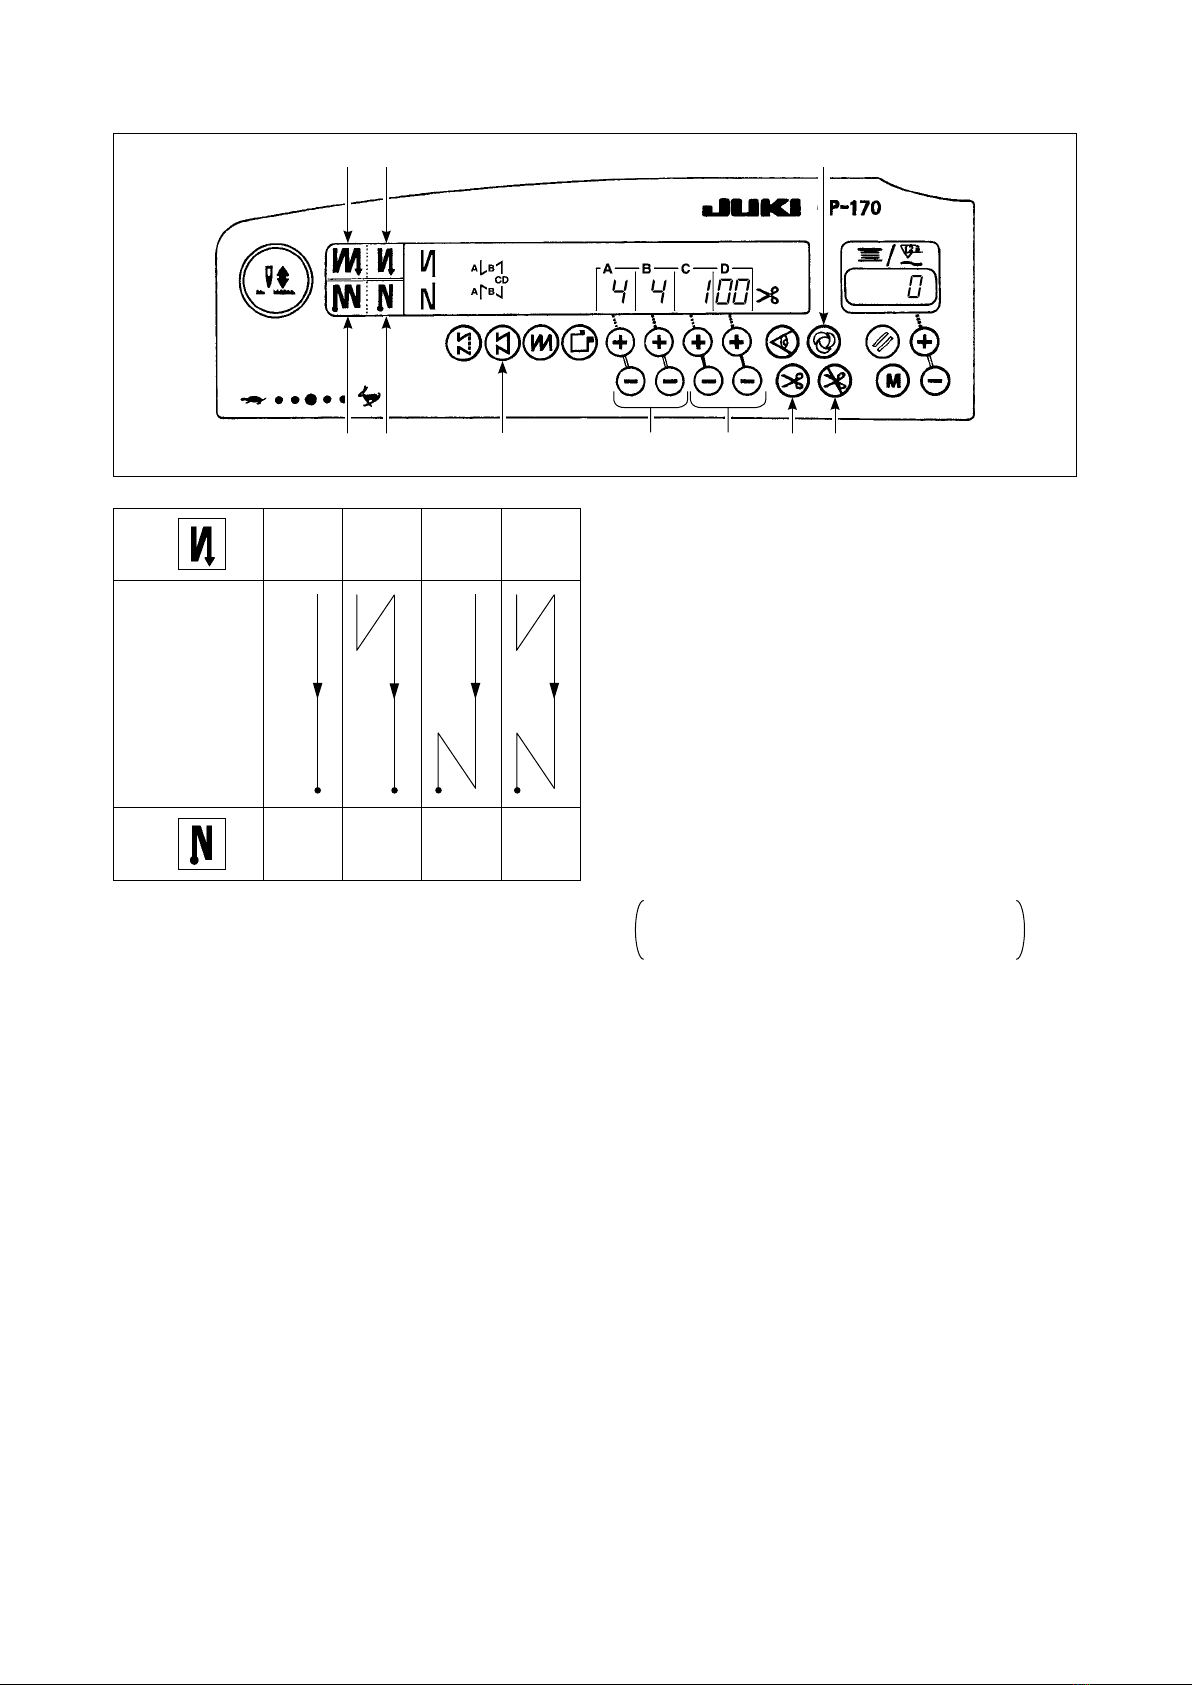
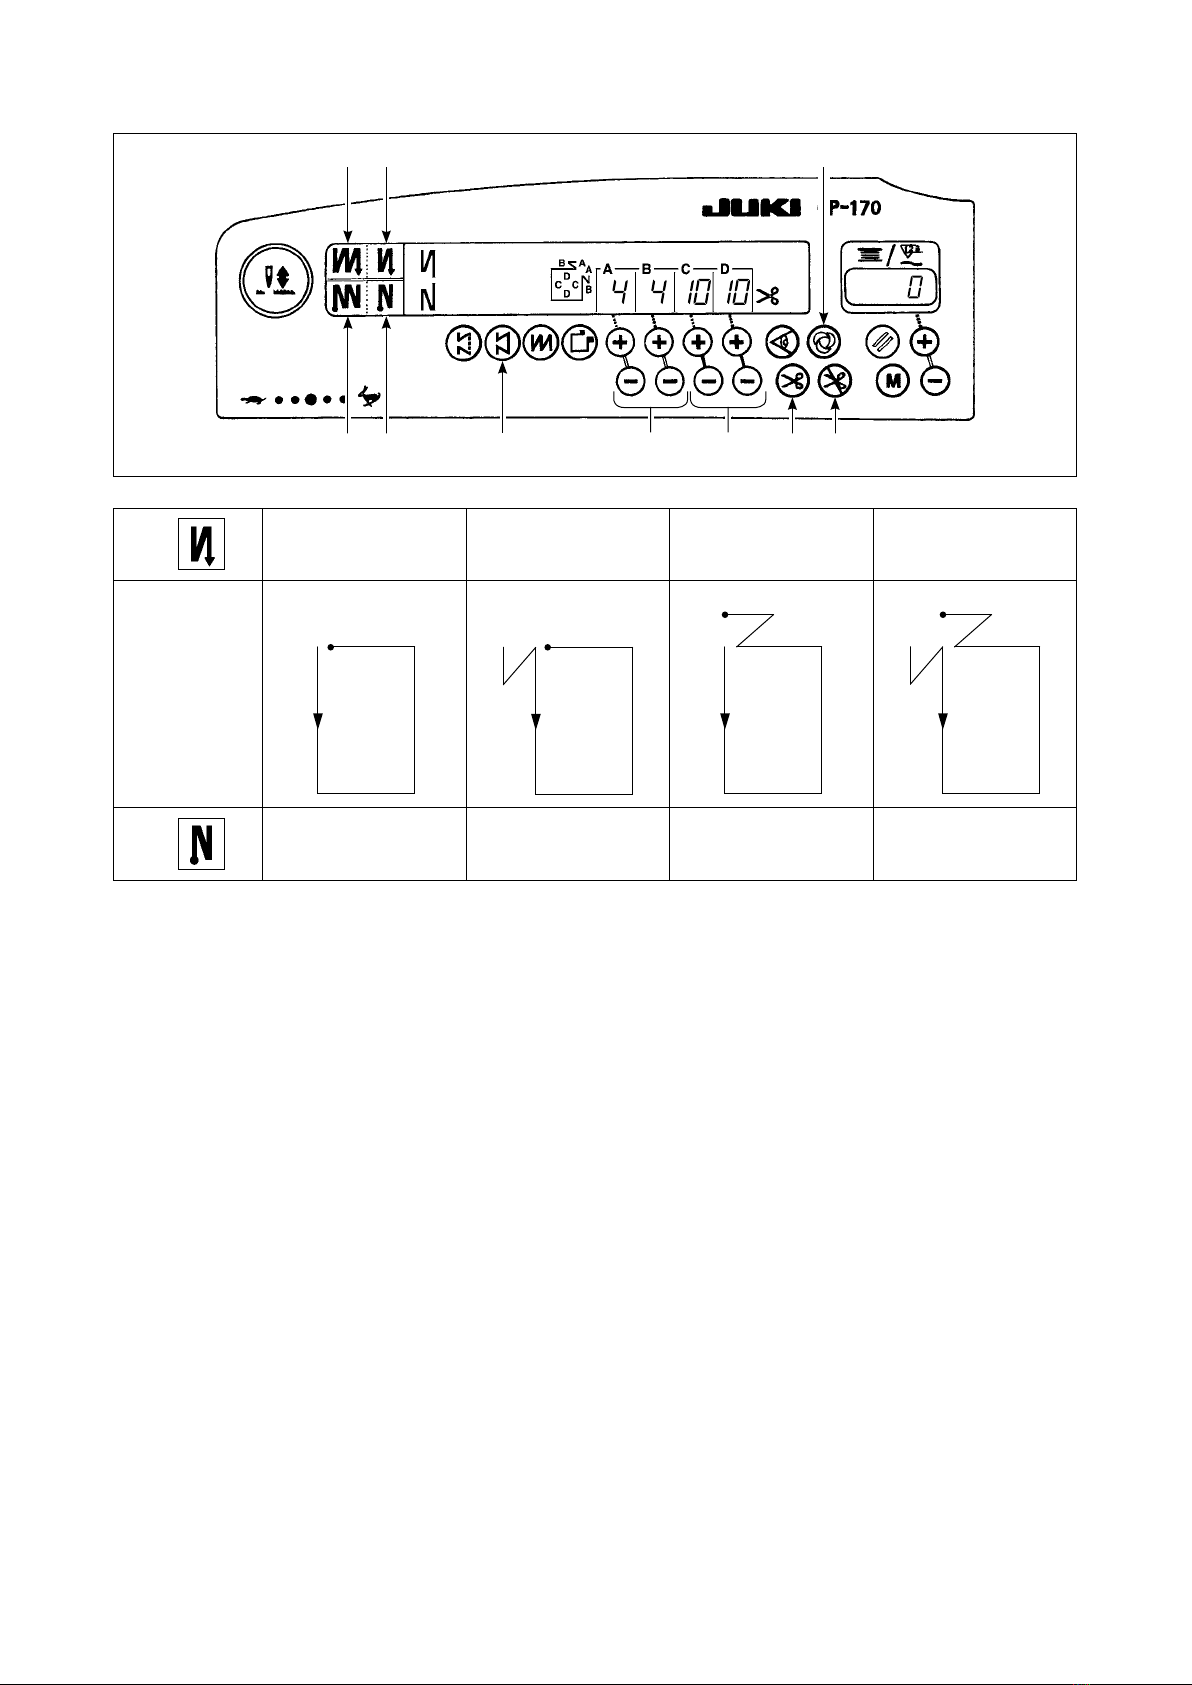
4. EXPLANATION OF THE CONTROL PANREL
1Pattern selector switch
• Used for selecting a pattern from among the
four different patterns.
2Double reverse stitching (for start) switch
• Used for turning ON/OFF the double reverse
stitching for start.
3Double reverse stitching (for end) switch
• Used for turning ON/OFF the double reverse
stitching for end.
4Automatic reverse stitching (for start) switch
• Used for turning ON/OFF the automatic
reverse stitching for start.
5Automatic reverse stitching (for end) switch
• Used for turning ON/OFF the automatic
reverse stitching for end.
6Switches for setting the number of stitches
• Used for setting the number of stitches to be
sewn in processes A through D.
7Material edge sensor ON/OFF switch
• Rendered effective when the material edge
sensor is installed on the machine.
• Used for setting whether or not the material
edge sensor is used during sewing.
8One-shot automatic stitching switch
• Rendered effective when the material edge
sensor is installed on the machine or when
the sewing machine is operated under the
constant-dimension stitching mode.
• Start the sewing machine with this switch, and
the sewing machine will run automatically until
the material edge is detected or the end of a
constant-dimension stitching is reached.
9Automatic thread trimming switch
• Rendered effective when the material edge
sensor is installed on the machine or when
the sewing machine is operated under the
constant-dimension stitching mode.
• Even keep depressing the front part of the
pedal, the sensor can detect the material
edge, or after the completion of the constant-
dimension stitching mode, the machine will
automatically perform thread trimming.
!0 Thread trimming prohibition switch
•
Used for prohibiting thread trimming at any occasion.
!1
Bobbin thread counter/thread trimming counter
• Bobbin thread counter/thread trimming counter
can be changed over by the function of the control
box main body.
Bobbin thread counter :
• Indicates the amount of bobbin thread while
counting it by subtracting from the set value.
• When the bobbin thread remaining amount
detecting device is installed on the machine, the
counter indicates the number of times of detecting.
Thread trimming counter :
• Every time thread trimming is performed, the
counter value is added.
!2 Bobbin counter reset switch
• Used for returning the value shown on the
bobbin thread counter to the initial value.
!3 Bobbin thread amount setting switch
• Used for setting the amount of bobbin thread.
• When the thread trimming counter is selected,
it is reset to [0].
!4
No. of pcs. counter
•
The indication shown on the counter increase while
coupling up the number of niched pieces of gament
every time the machine performs thread trimming.
[Changeover selection of needle bar stop position
when the pedal is in its neutral position]
• Pressing the needle up/down compensation
switch, turn ON the power to the machine, and
the needle bar stop position when the pedal is
in its neutral position is changed over to down
position/up position.
• Conrmation of the stop position can be
performed at the front cover of the control box.
When up position stop is specied : " nP UP "
When down stop position is specied : " nP Lo "
!5 Function setting switch
• Pressing the function setting switch, turn ON
the power to the machine, and it is possible
to change the various function setting values.
The case is the same as the control panel of
the front of the control box.
The respective functions may not be used in accordance with the combined control box.
!4 2 4 8 !1
3 5 9 1 !5
61
!3
7!2