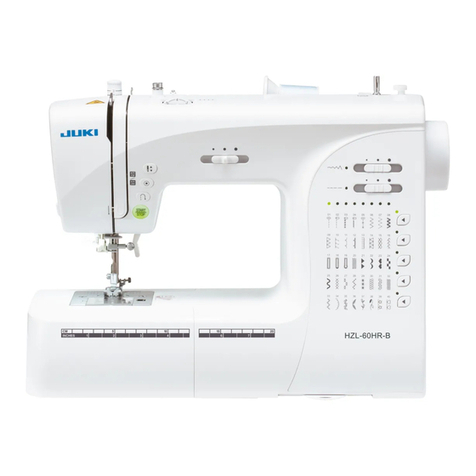
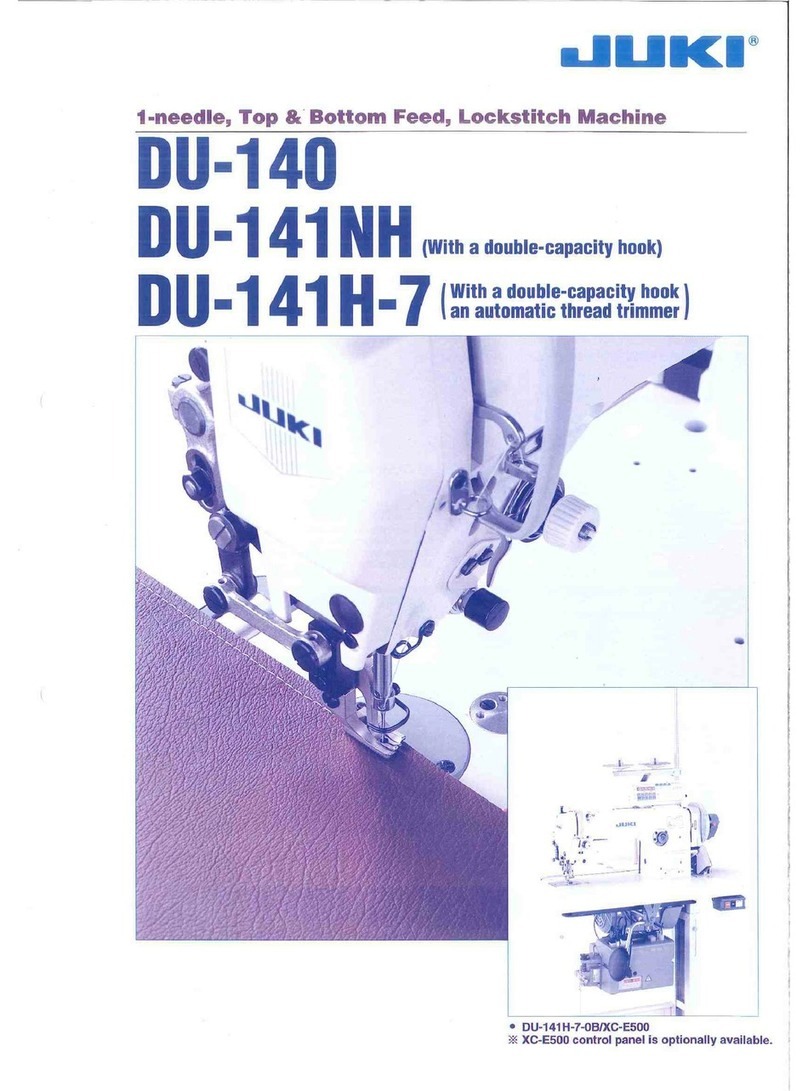
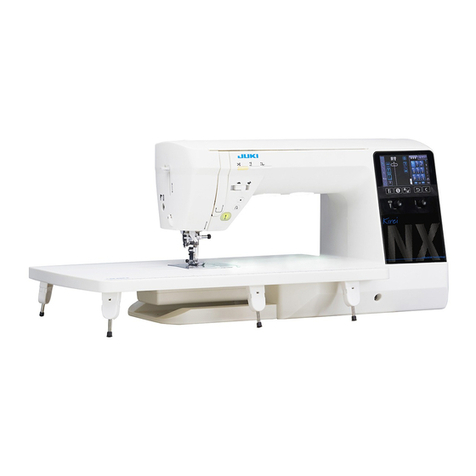
JUKI HZL-60 CE User manual

Portable Zigzag Sewing Machine
dLIUU"
Machine
a
coudre Compacte
INSTRUCTIONMANUAL
MANUEL D'INSTRUCTIONS

"IMPORTANT
SAFEGUARDS"
"IMPORTANT
SAFETY
INSTRUCTIONS"
"When usingan electricalappliance,basic safety precautions should always befollowed, includingthe following:"
"Readall instructionsbefore usingthis sewing machine."
'IDANGERTO
reducethe riskof electricshock:"
1. "An appliance should never be left unattendedwhen plugged in. Always unplugthis appliancefrom the electric outlet
immediatelyafter usingand beforecleaning."
2. "Alwaysunplugbefore relamping.Replacebulbwith sametype rated 15Watts."
II
WARNINGTO
reducethe risk of burns,fire, electric shock, or injuryto persons:"
1. "Do not allow to be usedas a toy. Close attentionisnecessary when this appliance is used by or near children:"
2.
"Use this applianceonly for its intended use as described inthis manual. Use only attachments recommendedby the
manufactureras contained inthis manual."
3.
"Never operate this appliance if it has a damaged cord or plug, if it is not working properly,if it has been dropped or
damaged, or droppedintowater. Returnthe applianceto the nearestauthorizeddealer or servicecenterfor examination,
I
repair, electricalor mechanicaladjustment."
4.
"Never operate the appliancewith any air openings blocked. Keep ventilation openings of the sewing machine andfoot
controller free from the accumulationof lint, dust, and loosecloth."
5.
"Keepfingers away from all movingparts.Special care is requiredaround the sewing machine needle."
6.
"Alwaysusethe proper needle plate.The wrong platecan causethe needleto break."
7.
"Do not use bent needles."
8.
"Do not pull or pushfabric while stitching. It may deflect the needlecausing itto break."
9.
"Switchthe sewingmachineoff ("0") when makingany adjustmentsinthe needlearea, suchasthreadingneedle, changing
needle,threadingbobbin, or changing presser foot, and the like."
10."Alwaysunplugsewing machinefrom the electricaloutlet when removingcovers, lubricating, or when makingany other
user servicingadjustments mentionedinthe instructionmanual."
11."Never drop or insertany object into any opening."
12."Do not useoutdoors."
13.
"Do not operate where aerosol (spray)productsare beingusedor where oxygen isbeingadministered."
14."To disconnect,turn all controlsto the off ("0") position,then removeplugfromoutlet."
15."Do not unplugby pullingon cord.To unplug, graspthe plug, notthe cord."
Be sure to disconnectthe plug from the wall outlet
before replacing the sewing machine needle, or
lubricatingthe machine.
"SAVE
THESE
INSTRUCTIONS"
"This sewing machine is intendedfor household use only."
r
Do not use thinner or other similar sol!
the machine. rents to clean Donotexpose the machineto direct sunlight or humid
atmosphere.
When not in use, be sure unplugthe machine.

"NOTESDE SECURITE IMPORTANTES"
"Lorsquevous utilisez un appareilelectrique,des precautionselernentair
es doivent
"Lisezattentivernent ces instructionsavant d'utiliser cette machine
a
coudre." toujours &re suivies, comrne celles-ci."
II
DANGER
pourreduirele risquedYlectrocution.'
1.
"Un
appareilne doit jarnais arelaissesanssurveillance lorsqu'ilest branche.Toujours debranchercetappareildusecteur
irnrnediaternentapres utilisation et avant de le nettoyer."
2. "Toujoursdebrancher avant de changerI'arnpoule.RernplacerI'arnpoule par unedu rngme type (15 watts)."
"ATTENTION
pour les risquesde brclure. Oectrocutionset de blessure~.'~
1. "Ne pas utiliser cet appareil cornrne un jouet. Porter uneattentionparticuliere lorsque cet appareilest utilise par des
enfants."
2.
"N'utiliser cet appareilque dans lecadrede ses fonctions, rnentionneesdans le presentrnanuel. N'utiliser que lespieces
fournies ou recornrnandeespar lefabricantdans ce rnanuel."
3. "Ne pasutilisercet appareil si unede ses prisesou cordonsest endornrnage,ous'il nefonctionne pascorrecternent.S'il
est tornbe, a ete endornrnage,tornbe dans I'eau, retourner I'appareilaupres de votre revendeur le plusprochepour un
reparation,ou uneverificationtechniqueou electrique."
4.
"Ne jarnais utiliser cet appareil dans un lieu depourvu d'aeration. Maintenez une ventilation suffisanteautours de la
machineet du rheostatet eviter la poussiere et leschutes detissusaux alentours des sourcesd'aeration de la machine."
5. "Eloignervos doigts des pieces mobilesde lamachine.Faitesparticulierernentaux mouvernentsde I'aiguille."
6.
"Toujours utiliser laplaqueaiguille appropriee. Unplaquenonapproprieepeutfaire casser I'aiguille."
7.
"Ne pasutiliserd'aiguilles courbes."
8.
"Ne pastirer ou pousser letissu lorsquevous cousez., cela pourraitabirner, voire casser I'aiguille."
9.
"MettreI'interrupteurde la machineen position <OFF> lorsquevous rnanipulez I'aiguille,ou I'enfilez.De rnerne lorsque
vous changez lepiedpresseur."
1O."Debranchez toujoursvotre machinelorsquevous 6tez lecapot, lorsquevous la nettoyez,oupourtout autre mani~ulation
mentionneedans le rnanueld'instruction."
11."Nejarnais laisserd'objet entrer dans lesouvertur~
12."Nepas utiliser
a
I'exterieur."
13."Nepasutiliserlorsqu'unaerosol a ete pulverise,
(
14."Avantdedebrancher lamachine, rnettre I'interrup
15."Ne pasdebrancher entirant sur le cordon. Pour d
"RETENEZCES INSTRUCTIOI
"Cettemachine
a
coudreest destinee
a
une utilisatior
es de la machine."
,u lorsquede I'oxygenea ete adrninistre."
teur en position eteint <OFF>."
ebrancher,tenir la prise, pas le cordon."
Soyez certain8 de dhconnecter la prise dusecteur
Avant de changer une aiguille, ou de nettoyer la
Machine.
NS"
i
dornestique uniquernent."
Ne pasutiliserdediluantsoudesolvantspournettoyer
la machine.
-
Lorsqu'elle n'est pasutilish,dhbranchezlamachine.
Ne pasexposerla machineaux rayonsdusoleilou
a
desatmosphere humide.

CONTENTS/TABLE DES MATI@
RES
CONTENTS
...........................................................
Importantsafeguards 1
Accessories
.........................................................................
3
Principalparts
......................................................................
4
Major functions
.................................................................
5.6
Windingthe bobbin
...........................................................
7.8
Threadingthe machine
...................................................
9.10
Automatic NeedleThreading
PullingUp The BobbinThread
Changingthe presserfeet
.................................................
11
................................
Howto remove and insert the needle 11
Needleto be purchased
....................................................
12
Types of feet and their application
.....................................
12
How to adjust threadtension
........................................
13
Stitch lengthof each stitch pattern
....................................
13
List of fabric. thread and needle
........................................
14
Straightstitch
....................................................................
15
...................................................................
Reversestitch 16
Zigzag stitch
......................................................................
17
Stitchwidth vs stitch length
Overcasting 17
I
.......................................................................
Bottonholes
..................................................................
18.19
Corded Buttonhole
............................................................
19
..........................................................................
Blindstitch 20
..........................................................
Insertingzippers 21.22
Lapped lnsertion
Centeredlnsertion
..................................................
Reinforcingstretch stitch 23
Patchwork
........................................................................
23
How to replace lightbulb 24
I
..................................................
Cleaning
............................................................................
24
.......................................................
Performance checklist 25
INDEX
Consignesde securiete
.......................................................
2
Accessoires
.........................................................................
3
.
.
P~ecesprincipales
................................................................
4
Fonctionsprincipales
........................................................
5.
6
Remplir la canette
.............................................................
7.8
Enfilerlamachine
...........................................................
9.10
Enfilageautomatiquede I'aiguille
Faireremonter le fil de canette
Changerde piedpresseur
.................................................
11
Commentmettreet retirerI'aiguille
...................................
11
Aiguilles
a
acheter
.............................................................
12
................................
Lesdifferents.piedset leurutilisation 12
Comment ajuster latension du fil
......................................
13
..........................................
Longueurdesdifferents points 13
Tissus. fils et aiguilles
........................................................
14
..........................................................................
Pointdroit 15
.....................................................................
Pointsd'arret 16
......................................................................
Pointzigzag 17
Rapport longueur
I
largeur
............................................................................
Surfilage 17
................................................................
Boutonnieres 18.19
...................................................
Boutonnieresrenforcees 19
....................................................................
Point invisible 20
............................................
Pose de fermetures eclair 21.22
Insertionsrecouvertes
Fermeturescentrdes
...........................................................
Pointtriple renforce 23
........................................................................
Patchwork 23
....................
Remplacementde I'ampoule de la machine 24
..................................................
Nettoyagede la machine 24
...................................
Resolutionde problemescourants 26
Blindstitchpresserfoot Overcastingfoot
Pied poursurfilage Piedourlet invisible Seam ripper
Dbcoupevite(pourboutonnitoni8res) Needlepack
Screwdriver
Bobbins
(3)
Tournevis
Canettes
(3)
Boited'aiguilles
Speedcontroller
Rheostat
PrincipalParts
/
Pieces principales
Bobbin winder
Ddvidoirde canette
Spool pin
Tigeportebobine Bobbinwinding regulator
Regulateur du rernplissagede lacanette
Threadtension dial
Cadran d'ajustement de tension Stitch lengthdial
Cadran de longueur de point
Threadspoolcap
Disque de retenue de la
bobine
Facecover
Capot frontal
Reversestitchlever
Levier de marchearribre
Hook cover
Cpsuledeprotectionducrochet
Auxiliarybed
Plateauamovible
Handwheel
Volant
Stitchpatterndial
Boutonde selectiondu point
Light/Power switch
lnterrupteurmarchelarr8t
Speedcontrollerreceptable
Prisedu rheostat
Patterndisplay panel
Tableaude points
Handle
Poigneede transport
Presserfoot lever
Releveurde pied
Needlethreader
Needleclamp
Vis serreaiguille
Presser foot releaselever Needle
Levier de degagement de lasemelle Aiguille
Presser foot holder Presser foot
Piedpresseur
Feeddog
Plaqueaiguille Griffesd'entrainement
Bobbin
Canette
Hookcover
Capsulede protectiondu crochet

Major Functions
/
Fonctionsprincipales
H
Speedcontroller
Push speed controller plug into
receptable at the right end of the
machine.
Plugpowercordintoelectricoutlet.
H
Utilisationdu rheostat
Branchezlerheostatdans la prise
sur lec8te droit de la machine.
Branchez I'autre extremite du
cordonsur lesecteur.
To run the machine depress the
foot-operatedspeed controller.
The harderyou press, the faster
the machinewill sew. To stop the
machine, remove your foot from
the controller.
Pour fairefonctionner lamachine,
appuyer sur le rheostatavec votre
pied.
Plus vous appuyez fort, plus la
machine ira vite. Pour arreter la
machine, Btez votre pied du
rheostat.
H
Light switch
H
Mise sous tension de la
machine
]
H
Handwheel
H
Volant
H
Presser foot lever
(A)Presser foot goes up.
(6)
Presser foot comes down.
H
Levier du piedpresseur
(A)
Le piedse Ieve.
(6)
Le pied se baisse.
--
H
Reversestitch lever
The reverse stitch is used at the
beginning and end of a seam to
secure it.
H
Levierde marche arriere
La marche arriere est utiliseeau
debut et
a
lafind'une couture pour
laskuriser.
--\
H
Thread tension dial
VVTOdecrease the needle thread
tension
@To increase ttie needle thread
tension
H
Cadrande tension du fil
(A) Pour diminuer la tension du fil
(e)
Pouraugmenter la tensiondu fil
III
Automatic stitch
8
?
g
"I
111
length
Longueur de point
autornatique
H
Stitch lengthdial
v9To increasethe stitch length
@)TOdecrease the stitchlength
H
Cadran de reglage de la
longueurdu point
@Pour augmenter la longueur du
point
@Pourdiminuer lalongueurdu point
H
Convertingthe machineto
free-arm
Drawthe auxiliary bedto left side.
H
Convertir la machine en
bras libre
Faireglisser lebrasamoviblevers
la gauche.
-
Pointer
H
Stitch patterndial
H
Cadran de selection du
point

Stitch pattern
Tableau des points
Leftside positior
Positiongauche
I
I
:
Centerposition
&
Positiondruite
Straightstitch
Point droit
Straightstitchfor elastic
Pointdroit pourjerseys
Zigzag stitch
Pointzigzag
3-stepzigzagstitch
Zigzag pique
Scallopstitch
Feston
Patternstitch
Point invisible
Blindstitch
Point invisible
Blindstitchfor elastic
Point invisible(jerseys)
Arrowhead
Point cocotte
Patchwork
Pointpatchwork
Overcasting
Pointoverlock
Stretchreinforcingstitch
Point triple renforce
Buttonholing
Boutonniere

Winding The Bobbin
Bobinagede la canette
Threadingfor winding the bobbin
Schema d'enfilage pour remplir la canette
Bobbinwinding regulator
Regulateur du remplissage
,
de lacanette
1
W
Openthe hookcover.
I
r
WOter la capsule de
protection ducrochet
Take out the bobbin.
Retirerlacanette.
3
Threadspool cap
Placethe spool and cap
Disquede retenue
ontothe spoolpin.
de la bobme Small spool
W
Placer la bobine et le
disque sur la tige porte
bobine.
Thread spoolcap Largespool
Disquede retenue Grosse bobine
de la bobine
/
W
Hookthe thread intothe
threadguide.
W
Crocheter lefil dans le
guidefil
W
Followthreading path
intothebobbinwinder
threadguide.
f
WSuivre le schema
d'enfilage jusqu'au
guidefildudevidoirde
6
Bobbinwinding
Placethebobbinonthe
regulator
bobbinwindingshaft.
-
Pressthebobbinagainstthe
winding regulator.
W
Placerlacanettesur le
support.
winder Presser la canette contre le
I
/
\
\b6v/doir
de
1
regulateur de rernplissage.

H
Depressspeedcontroller
towind bobbin.
H
Appuyer sur le rheosta
pour remplir lacanette.
Pushthe bobbinbackto
the left.
Cut the thread and take the
bobbinoff the shaft.
HPousser la canette
a
nouveauvers la gauche.
Coupez le fil et dter la canette
dusupport.
H
Placethe bobbin incase
with thread pullingoff as
illustrated.
Pullthe thread intothe
groove of the bobbin
case.
Thread
0,
place the thread on
the groove
@
and draw thread
to rear of machine.
H
Tirer lefildanslafentedu
boitier de la canette.
Fit
0
placer lefil dans la fente
@
et amener le fit ver I'arri8re
de
la machine.
Closethe hook cover.
Remettre la capsule de
protectionde la canette.
H
Placer la canette dans
son emplacement en
tenantle le fil comme
indique.

ThreadingThe Machine
How tothreadthe machine
Enfilagede lamachine
Commentenfiler la machine
Raisethe presser foot
lever.
Mettrelereleveurdepied
en positionhaute.
Hookthe thread intothe
threadguide.
Crocheter le fil dans le
guidefil.
Passthe thread down
from
Q
and
0.
Pour enfiler la machine,
suivrelesetapes
63
et
0.
Passthethreadaround
@
beforepullingthe thread
upward.
Passez lefilautour de
@
avantdetirer verslehaut.
.Turn the handwheel to
placethe take-up inthe
higestposition.
mToumer le volant pour
que letendeur soit
a
sa
positionla plushaute.
Hookthethreadinthread
guide
0
fromthe right.
Crocheter le fil dans le
guidefildepuisladroite.
Automatic NeedleThreading
Enfilaqe automatique de l'aiquille
Lower the presser foot
lever.
The needle should be in the
highestposition.
H
Abaissez lelevier dupied
presseur.
Caiguille doit 6tre dans sa
positionlaplus haute.
Pushthe threading lever
down.
Lower the threading lever and
placethethread onto
0.
UAbaisser le levier de
I'enfiteaiguille.
Arnener lefit dans lecrochetde
I'enfite aiguillecornrne indique.

Pushthe threading lever
all the way down and a
hook will go throughthe
eye of the needle.
Passthe thread infront of the
needleand belowthe hook.
Appuyerafondsur I'enfile
aiguille et son crochet
entrera dans le chas de
I'aiguille.
Amener lefil devant I'aiguilleet
sous lecrochet.
Slowlyreleasethe needle
threader and itwill return
to itsoriginalposition.
Reliichez doucement
I'enfile aiguillepour qu'il
retourne
a
sa position
initiale.
Pullthe loop of thread
that isat the back of the
needleout about
4"
Tirer sur la bouclede fil
derriere I'aiguille
d'environ
5
cm.
Pulling
Up
The BobbinThread
Faire remonter lefildecanette
Holdthe needlethread lightly with the left handandturnthe handwheel
toward you untilthe needleentersthe needleplate.
Continueturningthe handwheelwhile holdingthe needlethread untilthe needlerises.
Tenir lefild'aiguille delicatement avec la maingaucheet tournez levolant
vers vousjusqu'a ce que I'aiguillepassesous la plaqueaiguille.
Continuez
a
toumer levolant tout en tenant lefil d'aiguille,jusqu'a ce que I'aiguilleremonte.
Tighenthe holdonthe needlethread untilthe bobbinthread ispulledup.
Undothe loopwith your finger.
Tirer sur lefild'aiguille jusqu'a ce que lefilde Canetteremonte.
DBfairelaboucleavec vos doigts.
Pullbothneedleandbobbinthreadsoutabout
4"
andpassthem underthe
presserfoot to the back of the machine.
Tirer sur lesfilsd'aiguille et de canetted'environ
5
cmetfaites lespasser
sous lepiedpresseurde la machine.

ChangingThe Presser Feet
Changement du piedpresseur
W
Removethepresserfoot.
Raisethe presserfoot lever.
Relever lepiedpresseur.
Relevez le levier du pied
presseur.
.Push the presser foot
releaselever.
W
Appuyer sur lelevier de
d6gagement
de
lasernelle.
Alignthepresserfoot pin
with the marker line on
needleplate.
Aligner lepiedpresseur
avec lalignereperesur la
plaqueaiguille.
.Move the presser foot
lifter tothe downandthe
newfoot will snapon.
Abaisser lelevierdupied
presseur pour que le
nouveau pied se fixe
automatiquement.
.low To RemoveAnd InsertThe Needle
Zomment changerd'aiguille
A
CAUTION
:
Make sure to disconnectthe plugfrom
thewalloutletbeforeinsertingtheneedle.
ATENTION
:
Assurezvousded'avoir debranchela
machinedusecteur avant de mettre
unenouvelleaiguille.
Removingthe needle.
(1
)
Turnthe handwheeltoward
you to until the needle bar
reachesitshighest position.
(2)
Loosen the needle clamp
screw.
Retirer I'aiguille
(1)
Tournez le volant vers vous
jusqu'd ce que I'aiguillesoit
en positionhaute.
(2)
Desserrez la vis serre
aiguille.
The flat part should face away
fromyou.
Letalon platest vers I'arrihre de
la machine
Attaching the needle.
(The needle cannot be
inserted unless
it
is
correctly positioned.)
Holdthe needlewith itsflat part
facingawayfromyou, and insert
itfullyuntilittouchesthestopper
pin.
InsererI'aiguille (L'aiguille
nepeutQtrein&& quesi
elle est positionnee
correctement.)
MaintenirI'aiguilleavec letalon
plat vers I'arrihre, ins6rez
I'aiguilleentihrement,jusqu'h la
butee.
Securely tighten the needle
clamp screw, using the
screwdriverfurnished with the
machine.
W
Fixez I'aiguille avec la vis en
utilisant le tournevis, tout en
tenant I'aiguille.

Needlesto be purchased
Referencedes aiguilles
a
utiliser
Whenpurchasingspareneedles,specify
HAxl (130ff05H)for householdsewing
-y
Needlesize
machine or HAxlsp (knitting needle). Taitle de I'aiguille
Lorsque vous achetez des aiguilles,
The
larger
the
number,
the
precisez la reference Haxl (1301705) thicker
pour machine
B
coudredomestique. Plus le nombre est grand,
plus I'aiguilleest large
*
Check the needlefor its straightness
Alignernent
occasionally. Any bent needle would
causestitchskipping, thread breakage
or damageto materials.
*
VBrifiez r6gulibrementque I'aiguille soit
Surface plate en bon&at. UneaiguilleBpointeeserait
la cause de saut du point de cassede
fil ou pourrait endommager votre
machine.
Types
Of
FeetAnd Their Application
Les differentspiedset leursappkications
Standardpresserfoot
Piedpresseurstandard
-
--~
-
Zipperfoot
Piedferrneture Eclair
Stitch pattern
Programme
Overcasting
Piedsurfilage
Blindstitchpresserfoot
Piedourlet invisible
Buttonholefoot
Piedboutonnibre
Typical applications
Designations
Straightstitch
Point droit
Straightstitchfor elastic
Point droit6lastique
Zigzagstitch
Point zigzag
Overcasting3-stepzigzag stitch
Zigzag pique
Stretch reinforcingstitch
Point triple
Scallopstitch
feston
Patternstitch
Assemblage
Settingzipper
Poseferrneture Bclair
Overcasting(Overlocking)
Surfilage(overlock)
Blindstitch
Point invisible
Blindstitchfor elastic fabric
Point invisible(pour tissu stretch)
Buttonholing
Boutonnibres

How To Adjust ThreadTension
Comment ajuster lestensions
The upper thread tension istoo low.
La
tension du fil superieur est trop Idche.
Correctthe thread tension
Ajuster la tension du fil
Upperthread (Needlethread)
Filsuperieur (fild'aiguille)
To increasin~
upper threac
tension
latensiondu fil
suerieur
Bobbinthread
Filde canette
Upperthread (~eedlethread)
Filsuperieir (fild'aiguille)
Middle of fabri
thickness
Milieudes tissus Tissu (dess
The upper thread tension istoo high.
La tension du fil suptirieur est trop tendue
Bobbinthread
Filde canette
Upperthread (Needlethread)
Filsuperieur (fild'aiguille)
+
Bobbinthread
upper thread
tension
Pour diminuer
latensiondu
fil
superieur
The upper threadand bobbinthread should interlockat the middleof
thefabric thicknessas illustrated.
Lefit sup6rieuret lefilde cancettedoiventse nouerau milieudes deux
tissus comme indiquk. Filde canette
Stitch Length
Of
Each Stitch Pattern
Longueur moyennede chaque programme
Stitch
Point
Straightstitch
Pointdroit Zigzagstitch
Pointzig zag Blindstitch
:$$stitch
Point invisible
Zigzag
pique
Patternstitch stitch
1
Buttonholing
Pointsd'assemblage Feston Boutonniere
m
m
a
I
I
m
I
m
b&
t
For elastic
fabric
2
:::
#'
For elastic
fabric
Pour
tissus
extenslbles
i--
Pour tissus
Automatic
2.5 0.5 0.4
-
0.6
Automatique
Bestadjustment
Meilleurrbglage
Automatic
stitch length
Amplitude de
rkglagepossible
Adjustment
example
Exempless
automatique
)-)
(0.2)
(1)

Fabric,Thread
And
NeedleTable
Fabric
\
Thread
tension
dial
Cottonthread #80
-
100 (No.9)
Synthetic thread/
Georgette Finethread No.11
Tricot
p~
Synthetic #60
-
00
Knittingneedle
No.11
Wool and synthetic Silk
fiber cloth Synthetic
Generalcottonand Cotton
synthetic cloth Synthetic
Light-weightjersey Silk Knittingneedle
#50
I
N0.11
1
1'5-3
Generalwool and #50
-
60
synthetic cloth N0.11
-
14
Denim Cotton
Synthetic #30-50#30
-
50
1
No.14
-
16
Jersey
Coating
I
Silk #50
The knittingneedles (HAxlsp)effectivelyprevent stitchskipping,and are idealfor sewingstretchyfabrics.
Tissus, Filset aiguilles
Tissu
\
Tissu Fil
Tension du fil
Tissu
fin
lin
Cr6pe
Filcoton #80
-
100
Filsynthetique
00
fil fin
Aiguillejersey
Tricot
Laineet vetements
en fibre synthetique
Coton
Synthetique #60
-
100
Soie #80
Synthetique #60
-
100
Coton #50
-
80
Synthbtique #50
-
60
Tissu moyen
Jerseysfins Aiguillejersey
No.11 1.5
-
3
Soie #50
Synthetique #50
-
60
Laineet
synthbtiques
Tissu dpais
Coton #30
-
50
Synthbtique #30
-
50
Jean
Soie #50
Synthetic #50
-
60
Jersey
Soie #50
*
Les aiguillesjersey (HAxlsp)evitent de sauter lepointet sont idbalespour les tissus stretch.

StraightStitch
Pointdroit
Thestraight stitch isthe basic stitch.
Le
point droit est lepointde base
W
Select a stitch pattern.
@
For elastic fabric stitch
W
Selectionnezunprogramme
@
Point pourtissuextensible
I
Standardpresser
foot
Pied
standard
Makesure that the presser
foot iscorrect.
WAssurez vous que vous
utilisez lebonpied.
W
Setthefabric and lower the
presserfoot.
Place the fabric under the presser
foot so the needle will enter the
sewingstart point of the fabric.
Pull both the needle and bobbin
threadsto the rear of the machine
and lowerthepresserfoot.
W
Disposeruntissuet baisser
le pied presseur.
Placezletissu sous lepiedpresseur
pour queI'aiguilleentredans letissu
au debut de la couture.Tirer les fils
d'aiguilleet decanettevers I'arriere
de la machine et baisser le pied
presseur.
Selectthestitchlengthrange.
Set the stitch lengthdial
2
to
2.5
for
normalsewing.
W
Selectionnezla longueurdu
point
Reglez la longueur entre
2
et
2.5
pour unecouture normale.
W
Beginsewing.
W
Commencez lacouture.
W
Lightly holdthefabric with
your hands.
Be careful not to apply excessive
pulling force to the fabric while
sewing.
W
Maintenezletissuavec with
vos mainsdoucement.
Faitesattention
a
nepas retenirtrop
fortvotretissu lorsquevous cousez.
I
7
W
Adjustthe sewing speed.
'
/
,
I
W
Ajustezlavitessedecouture.
Stopsewing.
W
Arretez decoudre.
Removethefabric fromthe
machine.
After finishing a seam, raise the
needle and the presser foot, and
slowly pullthe fabric from under the
presserfoot.
Otez letissude la machine.
Apres avoir termin6 une couture,
relevez lepied presseur,et retirez
delicatementletissu.

Threadcuttinggroove
W
Cut thethreads, usingthe
thread cuttinggroove.
Hold the upper and bobbin
threads together, pull them out
about
4"
and cut them with the
thread cutting groove locatedat
the rearof the presserfoot.
W
Coupezlesfils,enutilisant
lecoupefil.
Maintenezlefil superieur et lefil
de canette ensemble, tirez les
d'environ
5
cm et coupez lesavec
le coupe fil derriere le pied
presseur.
Knotthetwothreadsonthe
wrong sideof thefabric.
Pullthe upperthreadto thewrong
side of the fabric, and knot the
upperand bobbinthreads.
Cut the threads as close to the
knotas possible.
This technique is useful for
securingthe patternstitches.
W
Nouez les deuz fils sur le
dessousdutissu.
I
I
Tirez le fil superieur vers le
dessous du tissu et nouez les
deux fils entre eux. Coupez les
deuxfils aussipresdu nceud que
possible.Cettetechnique est utile
pour skuriser lepoint.
0
Forelasticfabric straight stitch
I
ReverseStitch
Points
d'arret
I
I
Fabric
j
Tissu
I
I
I
I
I
I
I
,
:I/
"f
\
The reversestitch isusedat the
beginningand end of aseam to
secure it.
La
marchearriereest utiliskau
debut et
a
la fin de la couture
pour la securiser.
@Press the reverse stitch
button.
Beginsewing.
@Appuyezsur leboutonde
marchearriere.
@Detachthefingerfromthe
reversestitch button, sew
the straight stitch.
@Lachez le bouton de
marchearriereet cousez
en pointdroit.
@Press the reverse stitch
button.
OAppuyez sur leboutonde
marchearriere.
4
@Stopsewing.
@Arr&tezlacouture.

Zigzag Stitch
Pointzigzag
Selectthe desiredstitct
pattern.
Slectionnezleprogrammt
souha
ite.
2
Standardpresserfoot
Piedpresseurstandard
Makesurethatthepressel
foot iscorrect.
Assurez vous que vou:
utilisezle bonpied.
Stitchwidth
vs.
stitchlength
Largeur de point
1
Longueur depoint
Pattern
Progamme
Stitchwidth
Largeur de point
Stitch length
Longueur de point
Usedto preventfabricfrom fraying.
Utilis6pour6viter que letissu ne sUfiloche.
Selectthe stitch pattern.
There are threestitchtypes that
can be used for overcasting.
Slectionnez
le
programme.
Troistypesdepointpeuvent&re
utilis6spour surfiler.
Set the stitch length.
+
Automatic stitch length
Reglez la longueur de
automatique
point.
.f
-,
1-2
Overcasting foot
Piedsurfilage
Standardpresserfoot
Piedstandard
I
Replacethe presserfoot.
Changes
de
piedpresseur.
4
Guide
Guide
I
.In caseof theovercasting
presserfoot.
Placethe fabric againstthe foot
guide so that the needle sews
closeto theedge.
Pourle piedsurfilage
Placezletissucontreleguidedu
pied pour que I'aiguille couse
~resdu bord.

Buttonholes
Boutonnieres
Installthe presser foot for
buttonholing.
Install it so that its scale comes to
the left-handside.
Disposezlepiedboutonniere
comme indique.
Disposez le pied pour que
I'ouverturedu pied soi
h
found vers
I'avant.
Markthefabric.
Mark the fabric to indicate the
buttonholeplacement.
Marquer letissu.
Marquez le tissu pour indiquer la
positionde la boutonniere.
Pushthe slide and set the
mark.
Lowerthebottonholefoot so thatthe
mark isat the center of the needle
hole inthe foot.
Faites glisser le pied vers
I'arriereet rep6rez la marque.
Abaisser le pied de facon
a
ce que
la marque soit au centre de la
I
boutonniere.
Selectthe buttonholestitch
pattern.
Steps of procedure for making
a
choiceof patternto be sewn.
S6lectionnezle programme
boutonniere.
Les etapes de la boutonniere se
sklectionnent
a
I'aidedu sklecteur
de point.
Adjusting stitch balanceof buttonholestitching.
Ajustementde labalancedepointde la boutonniere.
Theadjustingscrew isldcatedonthe
underhandwheeland
tin
beturned
with a screwdriverthroughthe hole.
La vis d'ajustementest situkesous
--
le volant et peut etre r6aIe
a
I'aide
d'un tournevis
a
travers
k
trou.
Incorrect
Incorrect Adjustment
I
Correct
Ajustement
I
correct
Stopper pin
Open thecompleted
Aiguillede s6curitB
buttonhole, usingthe seam
51
ripper.
I
Seam ripper
DBcoupevite
.
Ouvrir la boutonniere en
utilisant ledecoupevite.

Inthe eventof buttonholingfailure
Si votre boutonnieren'est pas complete
Inthecasewhereabuttonholingfailurehasarisenwhen
the machine has beensewingthe right-parallelseam
of the buttonhole
Si votre boutonniereest interrompuealors que vous
realisezla partiegauche de celle-ci.
1.
Liftthe prescerfoot and undothe seam.
2.
Select the
"
3
"
usingthe patternselectordial.
3.
Runthe machineidleby approximately
10
stitches.
4.
Select the
"
-
"
usingthe patternselector dial.
A
Then, performthe bottonholing again from the sewing
start position.
1.
Relwez lepiedpresseuret defaiteslacouture.
2.
Selectionnez
"
9
"
en utilisantleselecteurde point.
3.
Cousez environune dizainede points.
4.
Selectionnez
"
7:
-
"
en utilisantleselecteurde point.
-
Puisrealiserlesautresboutonniereensuivantleschema
classique.
Inthecasewhereabuttonholingfailurehasarisenwhen
the machine has beensewing the left-parallelseam of
the buttonhole.
Si votre boutonniereest interrompue alors que vous
realisezla partiedroite de celle-ci.
1.
Liftthe presserfoot and undothe seam.
2.
Select the
"
2
"
usingthe patternselectordial.
Then, performthe buttonholing again from the sewing
start position.
1.
Relwez lepiedpresseur et defaiteslacouture.
2.
Selectionnez
"
1:
"
en utilisantle selecteurde point.
-
-
Puisrealiserlesautresboutonniereensuivant leschema
classique.
CordedButtonholes
Boutonnieresrenforcees
Sewinga cord intothe buttonholeswill
preventthem from becominglooseand
they will last longer. Buttonhole twist
thread may be usedfor cording.
Coudre un cordonnet dans les
boutonnieres6vitequ'elles soient trop
laches et lesfera durer plus lontemps.
Cord
Cordonnet
(front)
(back)
(Dessus) (Dessous)
Howto set the cord.
Comment disposer le
cordonnet.
-
When you sew buttonholeswithcording, passthecordthrough theend
of the buttonholefoot and knot the ends of the threads at the front.
Then, attach the buttonhole foot to the presser bar and sew the
buttonhole.Pullthe cording tight intothe sewn buttonholeandcut off
the excesscord.
LorsqueLous inserez un cordonnet dans la boutonniere. Passez le
cordonnetpar lebout du piedboutonniereet nouez lesextremitesdefil
au devant du pied.Puis, fixez le pied boutonnieresur la machine et
cousezla boutonniere.Tirez lecordonnetdans laboutonniereet coupez
l'excedent de cordonnet.
Table of contents
Other JUKI Sewing Machine manuals