II. HOW
TO
OPERATE
THE
MACHINE
1.
General
instruction
After
the
machine
has
been
set
up,
bring
down
the
needle
by
rotating
the
handwheel
with
your
hand,
switch
on
the
machine
on
tril
and
check
that
the
motor
rotates
in
the
correct
direction
by
watching
the
rotation
of
the
handwheel.
The
handwheel
must
rotate
counterclockwise
watching
from the open side of the handwheel.
If you fail to judge it, you can repeat to
switch
on and off the
machine
until the directionis
found.
o Clean up the installed machine.
o
Before
starting
to
operate
the
machine,
read
through
the
separate
INSTRUCTION
BOOK
of
DDL-555,
DLN-415,
DLU-450
or
DLD-432.
o
Do
not
drive
the
machine
before
theoil
reservoir
is
filled
with
the
lubricating
oil.
o
Do
not
replace
the
motor
pulley
with
a
larger
one
within
first
1
month.
You
may
operate
the
machine
at a
higher
speed
depending
on the
necessity
of
sewing
works
and
operator's
ability
after the first 1 month has passed,
o Keep away from the needle dropping place when you switch the machine on.
o Do not fail to switch off the machine before you tilt the machine head backwards for lubrica
tionor
clearing
or
removing
the
V-belt.
(If
you
mistakenly
tread
onthe
pedal,
the
motor
pulley
will
be stopped immediately by
means
of the built-in safety
device
in the caseof "HITACHI"
motor
assembly.)
o When you move the machine to other places, to not hold it with the cover located on the rear
of
the
handwheel.
o
Even
if you tread on the pedalbackwards (heel-down) immediatelyafter the machineisswitch
ed on or the thread is trimmed, the needle would not come down or the thread trimmer would
not
work.
Such thread
trimming
motion is
performed
only after the pedalhasbeentrod once
forwards (toe-down).
2.
Lubrication
and
amount
of
oil
Beforestarting to operate the
machine,
fillthe oil
reservoir
up to the"HIGH" marked
level
with
JUKI
industrial
lubricating
oil.
Refer
to the
corresponding
paragraph
in the
separate
INSTRUC
TION
BOOK.
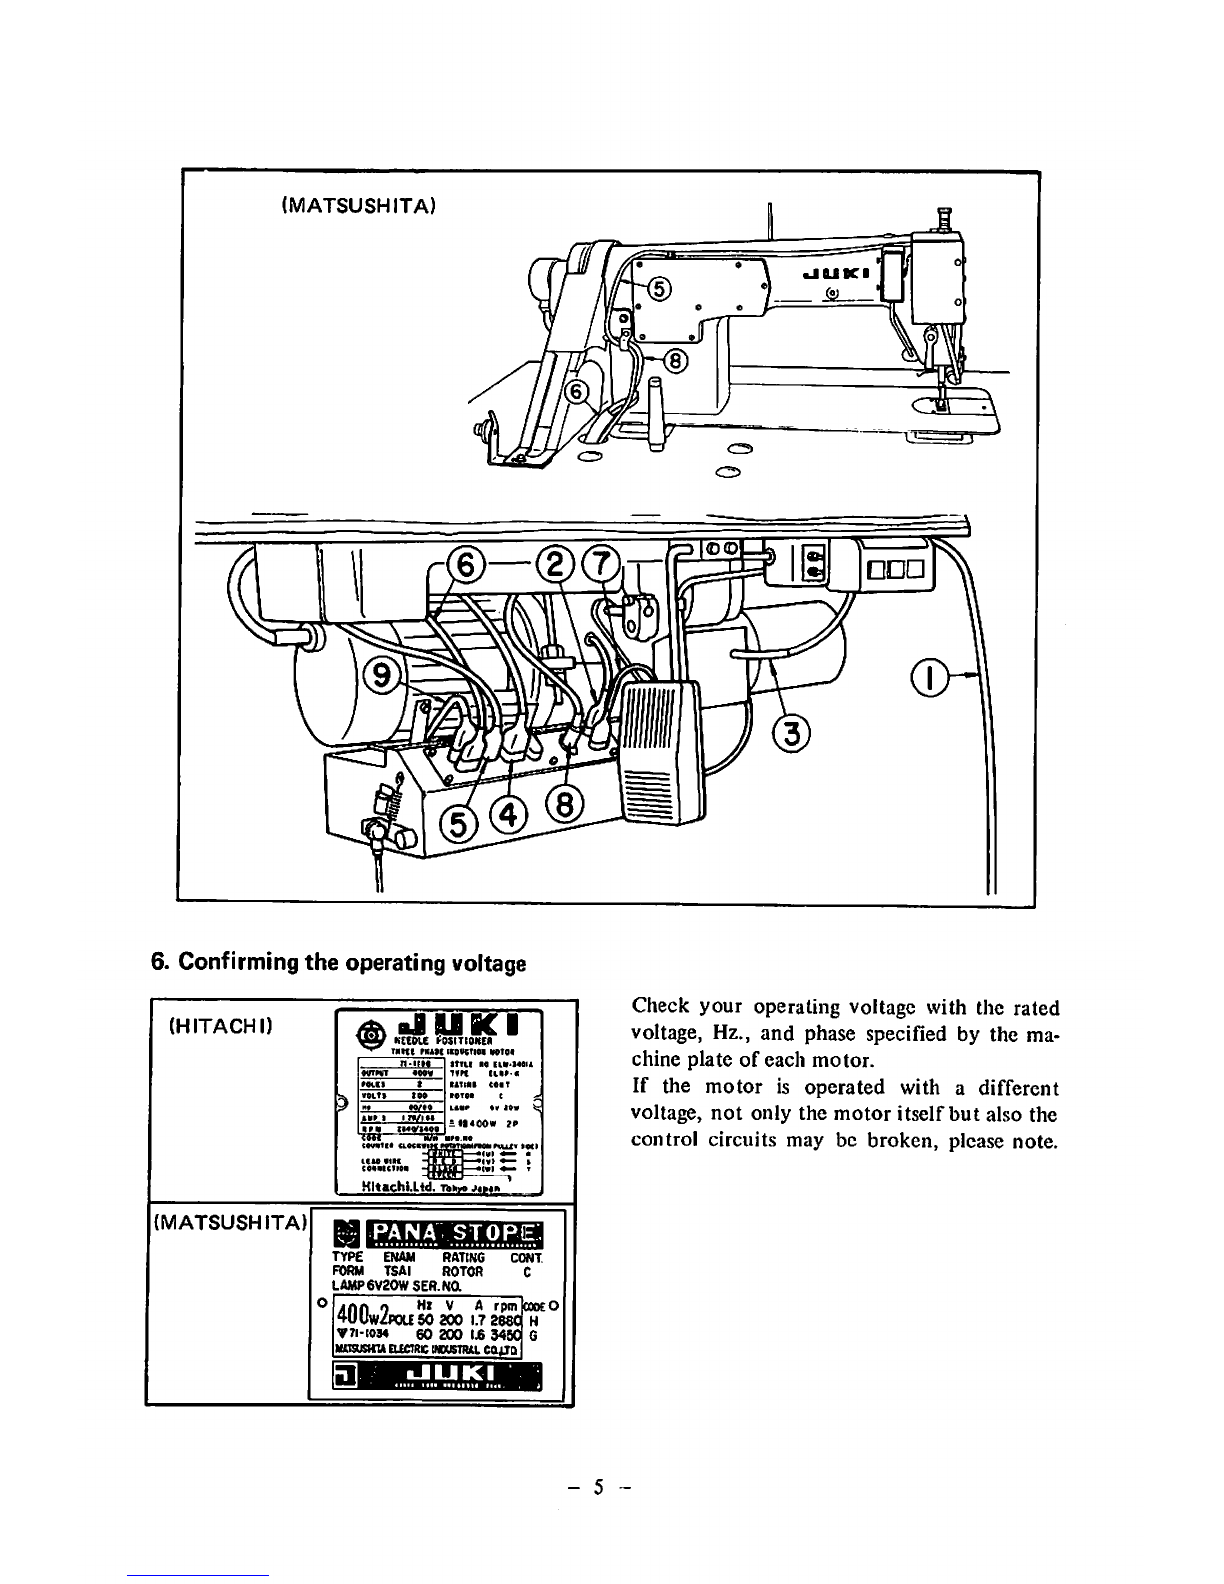
3. Checking
the
pedal action
o Firstly, check your machinewithout passingthe threads.
o
Switch
on the
machine,
and the
needle
will
beheldat it's
highest
position
without
fail.
Even
the
needle
staying
at a
lower
position
will
be
brought
upand
held
at the
highest
position
by switching on the machine,
o Whenyou switch on the machine, do not put your hand under the needle.
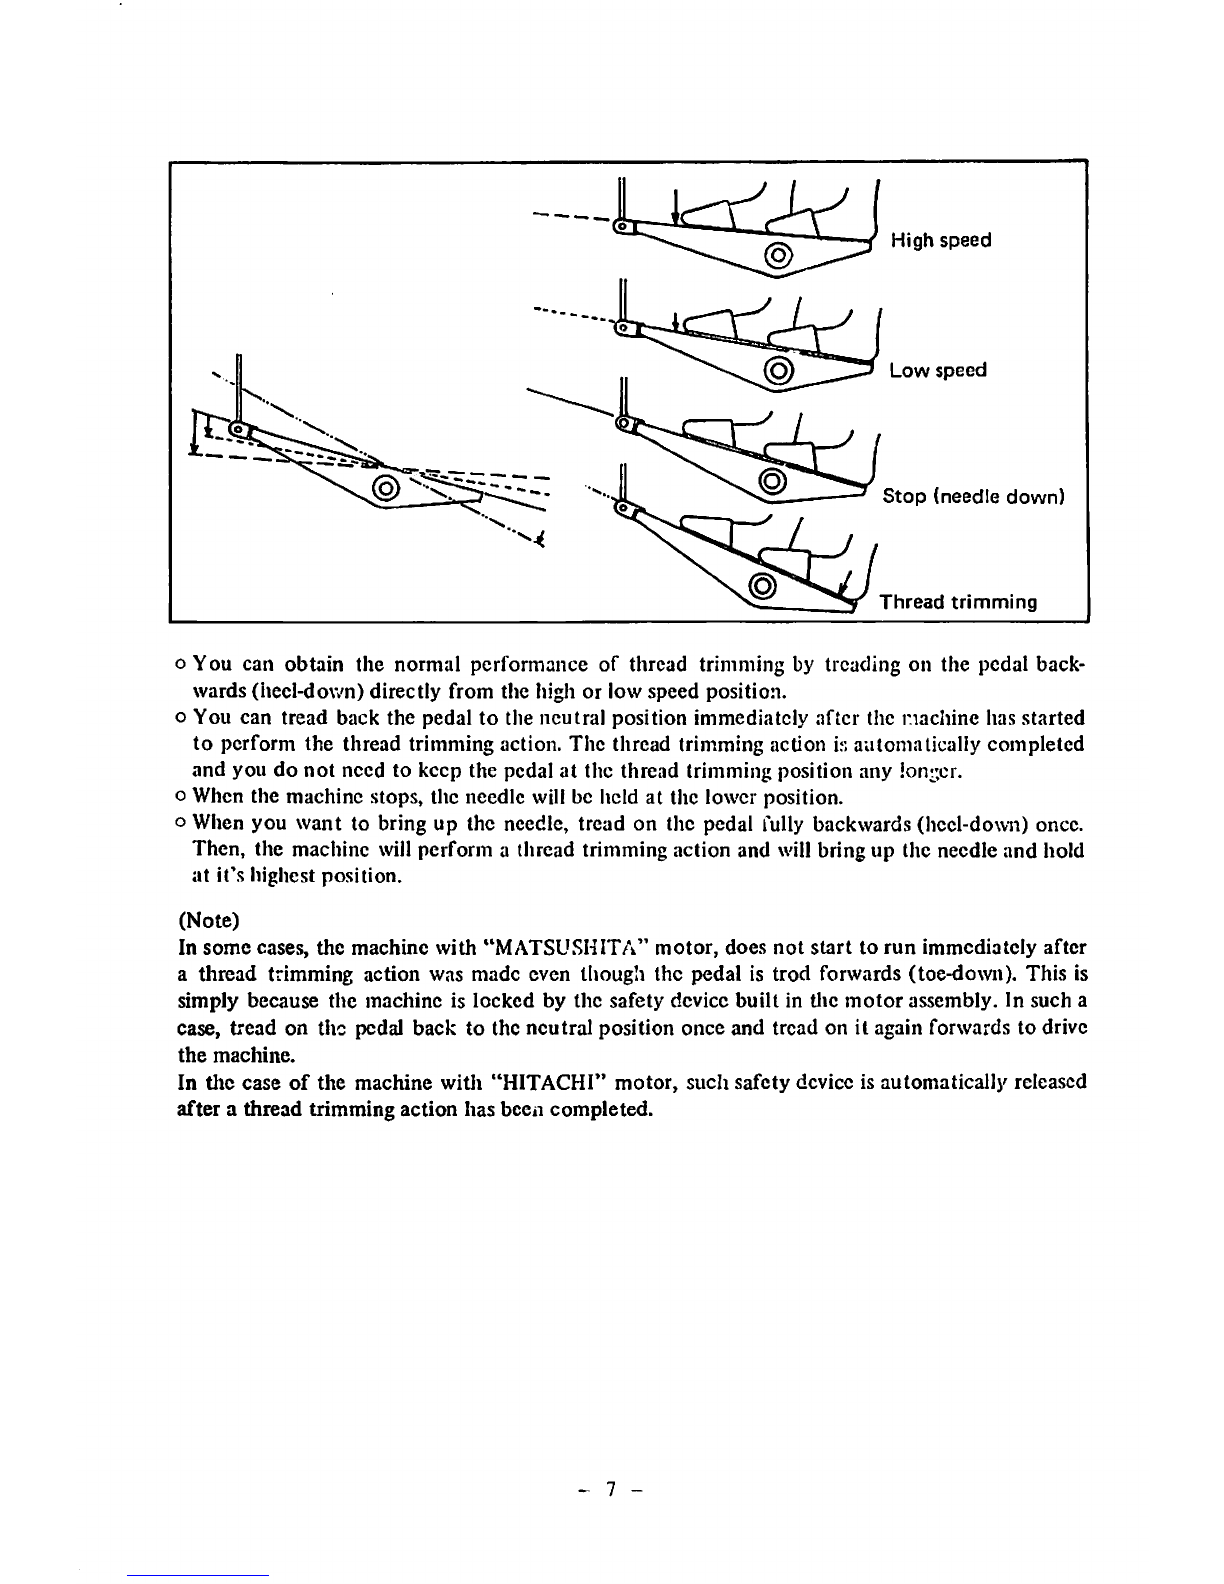
4. How
to
operate
the
pedal
As
the
following
illustration
shows,
the pedalof this
model
isoperatedin4
stages.
(1) Placeyour feet gently on the pedal at the stop position.
(The needle is held at the lowest position).
(2) Tread on the pedal lightly forwards (toe-down), and the machine starts to rotate at a low
speed.
(3)
Tread
on
the
pedal
further
forwards
(toe-down),
and
the
machine
will
increase
it's
speed
gradually
and
attain
the
maximum
speed
when
it
has
been
trod
down
fully.
However,
when
the switch for the counter-back stitching is turned on, the machine will attain it's maximum
sewing
speed
only after the
count-back
stitch has
been
formed,
even
though
you treadon
the
pedal
fully.
- 6