Jumbuck HS-19CB1 User manual


Page
2
of
22
Charcoal BBQ with Adjustable Tray Height
Instruction Manual
Model: HS-19CB1
WARNING
Read these instructions carefully before use!
FOR OUTDOOR USE ONLY
DO NOT
PLACE FLAMMABLE ARTICLES ON OR AGAINST THIS APPLIANCE
DO NOT
OPERATE THIS APPLIANCE BEFORE READING THE INSTRUCTION BOOKLET
DO NOT
STORE CHEMICALS, FLAMMABLE MATERIALS OR SPRAY AEROSOLS NEAR THIS APPLIANCE
DO NOT
OPERATE THIS APPLIANCE INDOORS
DO NOT
OPERATE THIS APPLIANCE IN AN ENCLOSED AREA

Page
3
of
22
TABLE OF CONTENTS
SAFETY INSTRUCTIONS …………………………………………………………………………………..….……….. 4
GENERAL NOTES …………………………………………………………………………………..….………..……….. 4
EXPLODED PARTS VIEW………………………………………………………………………………………………. 5
PARTS LIST…………………………………………………………………………………………..……..……..……….. 6
BOLT PACK……………………………………………………………………………….……..……..……..……..…….. 8
ASSEMBLY STEPS…………………………………………………………………………………………………………. 9
COOKING FOR THE FIRST TIME…………………………………………………………………………………….. 19
HOW TO USE THE BBQ ……………………………………………………………………………………….……….. 19
COOKING METHODS ……………………………………………………………………………………….…………… 20
PERIODIC CLEANING……………………………………………………………………………………….….………… 20
STORAGE WHEN NOT IN USE………………………………………………………………………………….…….. 20
WARRANTY………………………………………………………………………………………………….……………….. 21

Page
4
of
22
SAFETY INSTRUCTIONS
1.
This BBQ is an OUTDOOR APPLIANCE ONLY. It must NOT be used indoors.
2. READ ALL OPERATING INSTRUCTIONS BEFORE USE.
3. Do not store chemicals or flammable materials near this appliance.
4. Unsupervised children should not be near the BBQ while cooking or during warm up or cool down.
5. People with flammable clothing such as nylon etc. should keep well away from the BBQ when it is
operating.
6. Do not leave the BBQ unattended while fuel is alight in the BBQ.
7. Particular care must be taken when adding charcoal to the hot BBQ to prevent burns.
8. This BBQ should not be located under overhead combustible construction or roof covering. A
clearance of 1000 mm from all sides to any combustible construction should be maintained at all
times.
9. This appliance is not intended for use by persons (including children) with reduced physical,
sensory or mental capabilities, or lack of experience and knowledge, unless they have been given
supervision or instruction concerning use of the appliance by a person responsible for their safety.
10. Children should be supervised to ensure that they do not play with the appliance.
11. Always wear shoes and protective clothing while operating this BBQ. The BBQ is hot while in use
and will remain so for some time after use. Always wear protective mitts and avoid touching hot
surfaces at all times.
12. Never move the BBQ when it is in use. Allow to cool before moving or storing.
13. Improper installation, amendment, service or maintenance may cause property damage, personal
injury or death.
14. Keep a bucket of water nearby for emergencies.
General Notes
1. Always fully extinguish ash before disposal.
2. Note the heat of the fire may discolour the BBQ over a period of time.
3. Remove promotional stickers (where fitted) from the BBQ before use.
4. Locate and use BBQ on flat, level surfaces only.
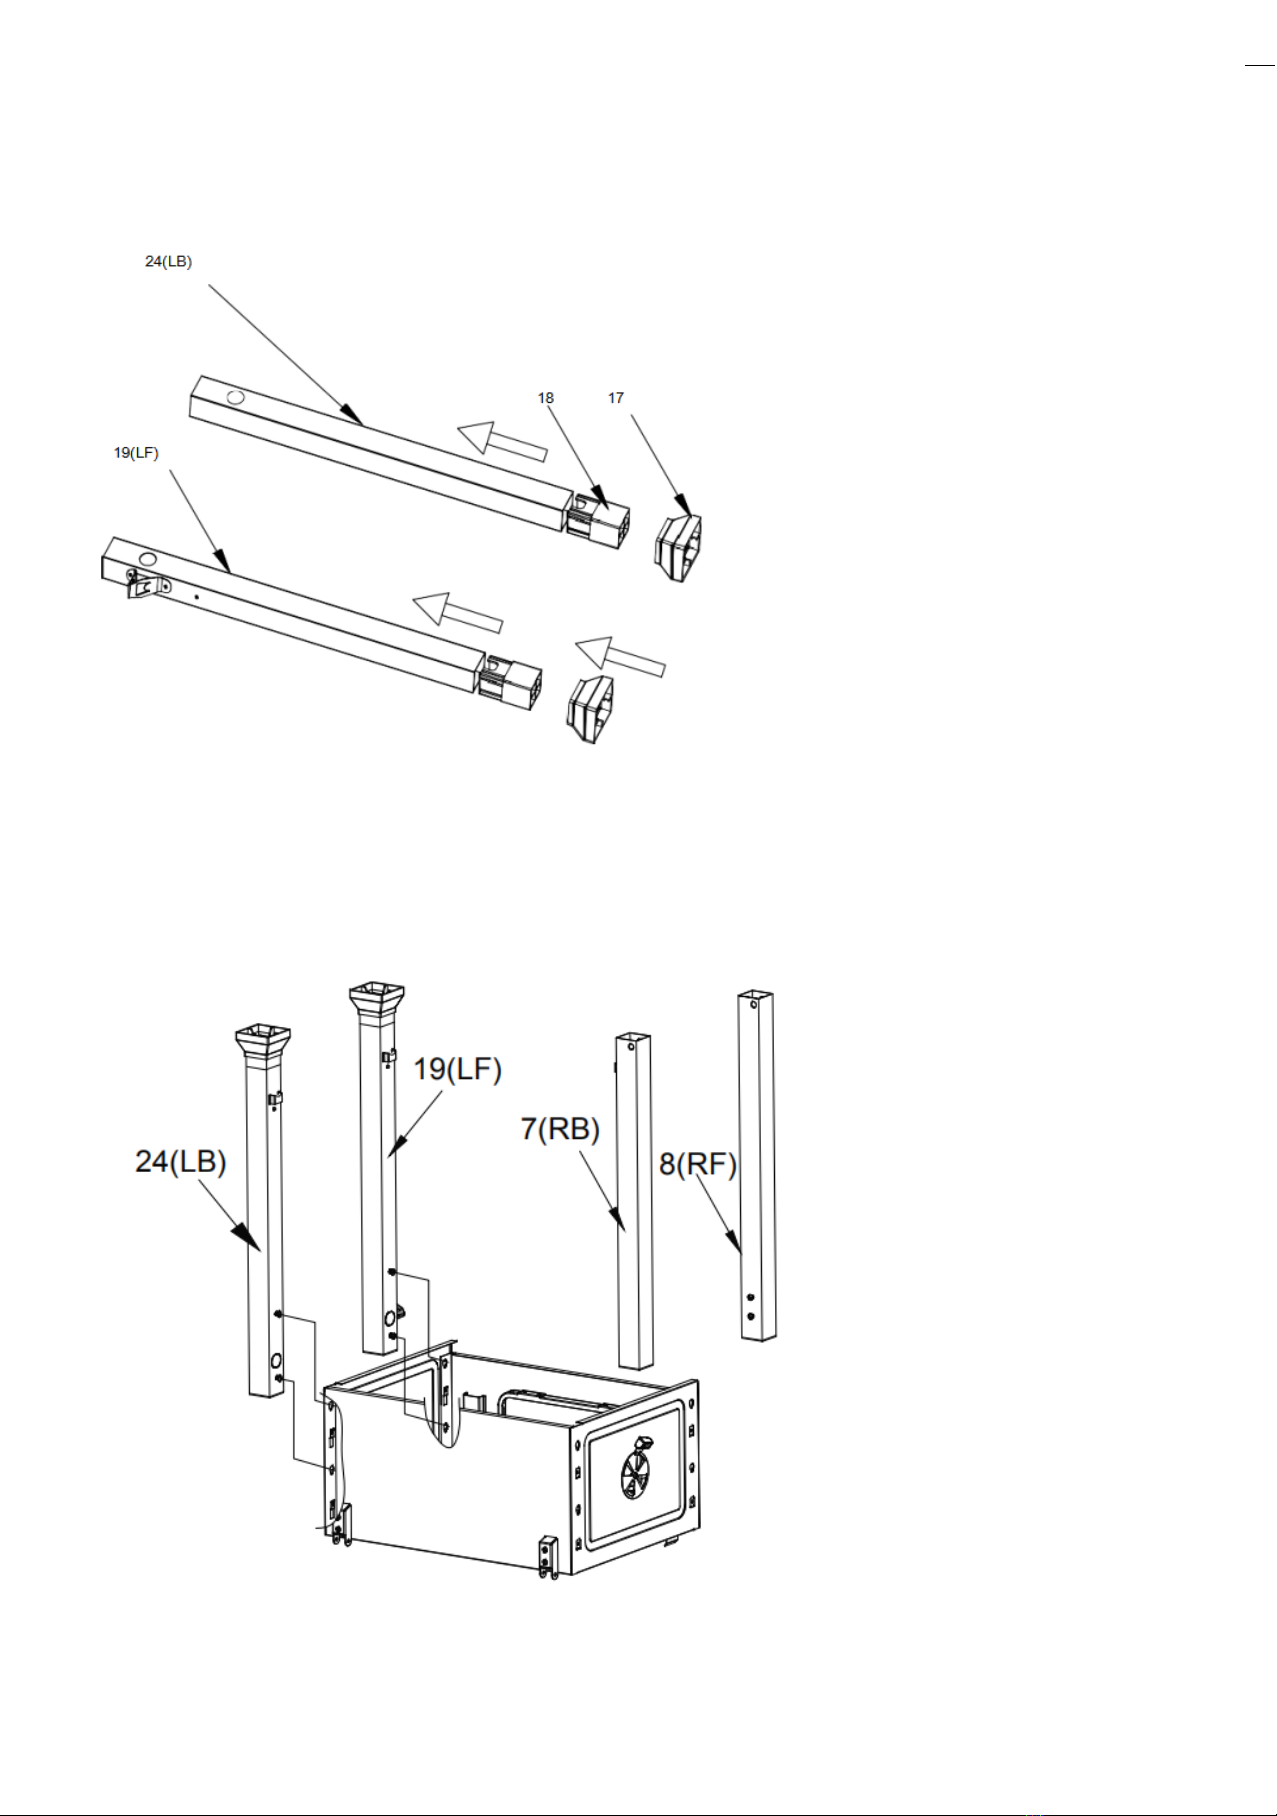
5. Read the assembly instructions of this booklet before removing the contents of the carton.
6. Do not attempt to operate this BBQ while a cover is on.
7. Overloading the BBQ with fuel may damage the BBQ. The maximum fuel load recommended is 2kg.

Page
5
of
22
Exploded Parts View
1
2
29 3
28
27
26
4
25 5
6
24
23
7
22 14
13
21 15
20
19 12
18 8
17 16
9
10
11

Page
6
of
22
Parts List
1
Hood handle
2
Handle seat X 4
3
Hood
4
Back panel of firebox
5
Side table
6
Right side panel of
firebox
7
Right rear leg of shelf
8
Right front leg of shelf
9
Wheel axle
10
Wheel X 2
11
Wheel cover X 2
12
Ash tray
13
Front panel of firebox
14
Lifting handle of
charcoal tray
15
Handle of ash tray
16
Bottom rack

Page
7
of
22
17
Cap of leg X 3
18
Connecting piece X 2
19
Left front leg of shelf
20
Bottle cap box
21
Handle of charcoal
door
22
Handle seat of
charcoal door
23
Locking plate of
charcoal door
24
Left rear leg of shelf
25
Side handle
26
Left side panel of
firebox
27
Charcoal tray
28
Cooking grill X 2
29
Warming rack

Page
8
of
22
Bolt Pack
A
Nut: M10
1
F
Washer: M6
1
B
Bolt: M6*10
1
G
Bolt: M5*30
2
C
Washers: M6
1
H
Hinge pin
2
D
Nut:M6
1
I
Clip
3
E
Spring washer: M6
1
J
Bolt: M5*20
2
L
Fibre Washer
2

Page
9
of
22
Assembly Steps
Always wear gloves during assembly of this BBQ.
STEP 1
Assemble the front panel of firebox (13) and back panel of firebox (4) and left side panel of firebox (26) and
right side panel of firebox (6) as shown.

Page
10
of
22
STEP 2
Assemble the connecting piece (18)and cap of leg (17) on the left front leg of shelf (19) and left rear leg of
shelf (24) as shown.
STEP 3
Assemble the left front leg of shelf (19) and left rear leg of shelf (24) and right front leg of shelf (8) and
right rear leg of shelf (7) with 8pcs screws as shown.
P.S.: 8 screws are already in position on the legs.

Page
11
of
22
STEP 4
Assemble the wheel (10) and wheel axle (9) with nut (A) 2pcs.
1 pcs nut (A) is already in position on the wheel axle. Then fit the wheel cover (11)
STEP 5
Assemble the bottom rack (16) on the legs as shown.

Page
12
of
22
STEP 6
Assemble the lifting handle of charcoal tray (14) on the front panel of firebox with Bolt (B) 1pcs and
washer (C) 1pcs as shown.
STEP 7
Assemble the charcoal tray (27) on the front panel of firebox left and right lifting pieces as shown. Insert
Clip (I) 1pcs on the charcoal tray support as shown.

Page
13
of
22
23
F
STEP 8
Assemble the handle of charcoal door (21) and handle seat of charcoal door (22) and locking plate of
charcoal door (23) with nut (D) 1pcs and spring washers (E) 1pcs on the charcoal door as shown.
STEP 9
Push the side handle (25) on the leg as shown. It will click into place.

Page
14
of
22
STEP 10
Assemble the side table (5) on the shelf as shown.

Page
15
of
22
STEP 11
1. Assemble the hood handle (1), Fibre Washers (2) and handle seat (2) with bolt (G) 2pcs on the hood (3) as
shown.
STEP 12
2. Assemble the complete hood with R pin (I) 2pcs and hinge pin (H) 2pcs on the firebox as shown.

Page
16
of
22
STEP 13
Assemble the handle of ash tray (15) and handle seat (2) with bolt (J) 2pcs on the ash tray (12) as shown.
STEP 14
Insert the ash tray on the shelf as shown.

Page
17
of
22
STEP 15
Assemble the warming rack (29) on the firebox as shown.
STEP 16
Insert the cooking grill (28) on the firebox as shown.

Page
18
of
22
STEP 17
Assemble the bottle cap box (20) on the left front leg as shown.
Completed Assembly

Page
19
of
22
Cooking for the first time
•Wash the cooking surfaces and warming shelf before use.
•The BBQ may have an unpleasant odour during the first use and this is normal. To avoid this odour
during cooking, we recommend the BBQ is burnt in with 2kg of fuel prior to cooking food for the first
time.
•Strong winds can affect the cooking performance of your BBQ so factor in this element when positioning
your BBQ outdoors for cooking.
•Avoid continually turning the meat over. When cooking internal juices rise to the surface of the meat
and then settle. Each time you turn the meat over, the juices are lost.
•Avoid burning or charring food.
•Allow meat to rest before serving.
•Never use your BBQ in a garage, porch, shed, breezeway or any other enclosed area. Your BBQ is to be
used outdoors only.
How to use the bbq
•Open the front door and load the charcoal tray with the desired amount of charcoal. Don’t overload the
BBQ.
•Light the charcoal with fire lighters, or some other safe method. Don’t use a liquid accelerant to light the
charcoal.
•Ensure vents are open during lighting.
•The BBQ is generally ready for cooking when the coals form a white ash on the surface. This is the
optimum time for cooking.
•Add charcoal via front door as required to maintain heat. Lower the Charcoal grate before adding
charcoal.
•Use a BBQ Mitt and a prodder/poker (not supplied with this BBQ) to move hot fuel to the desired
location on the charcoal tray.
•Don’t douse the BBQ with water to extinguish the fire, this may warp the hot metal parts and cause
premature rusting.
•Temperature can be controlled by the amount of Charcoal being used and the amount of air vent
opening in the hood and firebox. Opening the vents will obtain a higher heat and closing the vents will
lower the heat.

Page
20
of
22
Cooking methods
Direct Method
The direct method involves placing the food directly above the heat/fuel source.
Indirect Method
The indirect method is used for roasting & baking where the food is placed in a baking tray however, the tray
is not placed directly above the heat. This method requires the fuel source to be heaped into 2 piles on the left
and right sides of the charcoal tray with the baking tray located centrally on the grill.
Periodic cleaning
Your BBQ will look better and last longer if you keep it clean.
Grease can build up on the frame itself. Most of it can be cleaned off with hot water and a soapy cloth. Use a
non-caustic cleanser for more stubborn stains.
You should remove the spent ash after every use. Never touch the hot surfaces of the BBQ for cleaning until
the BBQ has cooled down completely.
Never hose down the BBQ with a garden hose or a high pressure washer.
Storage when not in use
1. Store the BBQ in a dry place.
2. If you intend to leave your BBQ outside, make sure it is protected from the elements with a heavy-duty
cover (not included). For aftermarket BBQ cover sales, contact Pacific Gas and Heating on Tel: 1300 793978.
Email: info@pacificgas.com.au
Table of contents
Other Jumbuck Grill manuals

Jumbuck
Jumbuck HS-Gens-310 User manual

Jumbuck
Jumbuck GEN-SE-25T User manual

Jumbuck
Jumbuck HS-UM006D Parts list manual

Jumbuck
Jumbuck PORTLAND Parts list manual

Jumbuck
Jumbuck HS-UM006AS Parts list manual

Jumbuck
Jumbuck HS-CB001 User manual

Jumbuck
Jumbuck CIRCA HS-A160 Parts list manual

Jumbuck
Jumbuck GEN-D325 User manual

Jumbuck
Jumbuck Fineline JBPB219 Parts list manual

Jumbuck
Jumbuck DELTA 2 Parts list manual