Jumbuck BG2039B2 User manual

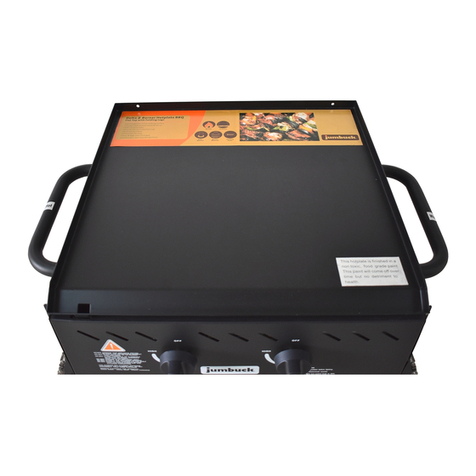
2 Burner Tabletop BBQ
Burner Solid
Hotplate Automatic
Ignition Burner
Material Cooking
Plate
STEEL
2
S/Steel
470W x 364D (mm) solid steel cooking surface
Powerful 20 MJ/hr stainless steel burners
Powder coated steel frame & fascia
Adjustable feet for all-surface stability
Hose and regulator included (Universal LPG only)
Important: Please retain these instructions for future use
THIS BARBEQUE IS INTENDED FOR OUTDOOR USE ONLY
Model BG2039B2
Dimensions: 618 (W) x 430 (D) x 213 (H) mm

1
IMPORTANT HEALTH & SAFETY INFORMATION
Please keep these instructions
1. WARNING! FOR OUTDOOR USE ONLY!
DO NOT USE INDOORS
•Please read these instructions carefully
prior to assembly and use.
•The barbecue has to be installed on a
secure level base prior to use.
•Failure to follow these instructions could
lead to serious injury and/or signicant
damage to property.
•Do not start the barbecue if there is
any doubt over the correct assembly,
ignition, gas control or cooking of the
unit.
•These instructions should be retained for
future reference.
•For use with ULPG cylinder gas only.
•The barbecue must have a minimum
side clearance from any combustible
material of at least 250mm. Additionally
there must be a clearance of at least
1500mm above the cooking surface of
the barbecue, 250mm clearance at the
back.
• Do not use or store ammable materials
in or near this appliance.
•Do not place article on or against this
appliance.
•Do not modify this appliance.
•Do not spray aerosols in the vicinity of
this appliance while it is in operation.
•A lit barbecue should be attended at all
times.
•Gas cylinder MUST be stored vertically.
•Avoid dousing the barbecue with water.
•Turn off the gas cylinder when the
barbecue is not in use.
•Always allow the barbecue to completely
cool down before covering.
•For safety reasons it is advisable to keep
a re extinguisher and re blanket close
to hand.
•Unsupervised children, elderly and
inrm should not be allowed close to the
barbecue during pre-heat, cooking, burn
off or cooling down of the unit.
•Please remove/dispose of all transit
protection (polythene packing and plastic
bags) carefully and keep out of the reach
of children.
• Do not use the barbecue in a conned
and/or habitable space, e.g. houses, tents,
caravans, motor homes, boats. Danger of
carbon monoxide poisoning fatality.
•WARNING! This barbecue will become
very hot, do not move it during operation.
•WARNING! Keep out of reach of
children and pets.
•Do not install in, or connect to the
consumer piping or gas system of a boat
or caravan.
2. GAS TYPE AND REGULATOR
•This barbecue is only designed to run off
ULPG cylinder gas.
• To ensure maximum performance a gas
cylinder of 9kg and minimum of 4.5kg is
recommended.
• The regulator supplied should be rmly
tightened but care must be taken not to
over-tighten the connections.
•The regulator supplied is the correct
regulator for this item.
•Do not attempt to connect gas to a
barbecue that is not secure in a frame or
trolley.
•DO NOT USE AN ADAPTOR AT THE
CYLINDER CONNECTION.
2
2
IMPORTANT HEALTH & SAFETY INFORMATION
Please keep these instructions
3. IF YOU SMELL GAS
DO NOT ATTEMPT TO OPERATE THE
BARBECUE UNTIL THE CAUSE OF THE
GAS SMELL HAS BEEN IDENTIFIED AND
ELIMINATED
•Immediately isolate the gas supply by
turning the gas off at the gas cylinder.
• Extinguish all naked ames.
•Do not operate any electrical devices close to
the barbecue.
•Check for leaks as described on page 9 under
Section 4: ‘PRECAUTIONARY LEAK TEST’.
•Ensure that local area is well ventilated to
remove any excess gas.
•If the gas smell continues the barbecue
should not be operated under any
circumstances and it is important to make
immediate contact with the customer
service centre.
4. PRECAUTIONS
BEFORE FIRST TIME OPERATION AND
AFTER EACH GAS CYLINDER EXCHANGE/
REFILL, ALL CONNECTIONS SHOULD BE
CHECKED FOR GAS LEAKS
•Connections can be checked for leaks
by using a soapy water solution as per
described on page 9 under Section 4:
‘PRECAUTIONARY LEAK TEST’.
• Naked ames (matches or other open
ames) must not be used to check for leaks,
this is a dangerous practice to be avoided.
•Flammable liquids of any description,
including petrol, lighter uid, oils, etc must
not be stored close to the barbecue.
• Spare or extra gas cylinders must NOT
be stored within close proximity of this
barbecue or any other gas or electric
appliance.
• Spare or extra gas cylinders should not
be stored where they are exposed to
continuous direct sunlight, as this is a
potentially dangerous practice.
•The position of the assembled barbecue
should be such that the gas cylinder is not
left exposed to direct sunlight as this is a
potentially dangerous situation.
•Please read and follow all instructions in this
manual, if in doubt as to any operational
or safety precaution contact the customer
service centre.
•Please ensure the gas cylinder is positioned
outside of the barbecue frame. It must not
be positioned underneath the barbecue.
• For storage and cylinder exchange,
disconnect the cylinder only. Do not
disconnect hose from the appliance.
3

3
PARTS LIST
Model BG2039B2
33
11
77
22
55
44
66
Part Description Qty
1Firebox 1pc
2 Barbeque Feet 4pcs
3 Cooking Plate 1pc
4 M5 Screws 2pcs
5 Grease Cup Holder 1pc
6 Grease Cup 1pc
7 Hose & Regulator 1pc
4

4
ASSEMBLY INSTRUCTIONS
Model BG2039B2
STEP 1 Remove the cooking plate (Part 3)
STEP 2 Turn the Firebox (Part 1) over and fasten the four Barbeque Feet
(Part 2) as shown in the diagram below
5

5
ASSEMBLY INSTRUCTIONS
STEP 3 a) Turn the Firebox (Part 1) over standing on the four Barbeque
Feet (Part 2) as shown in the diagram below
b) Place the Cooking Plate onto the Firebox aligning and
inserting the four cooking plate supports in to the four rebox
holes as shown in the diagram below
STEP 4 Remove the two pre-assembled M5 Screws (Part 4) found on the
left side of the rebox side panel as shown in the diagram below
6

6
ASSEMBLY INSTRUCTIONS
STEP 5 Attach the Grease Cup Holder (Part 5) to the left side of rebox
panel with the two M5 Screws (Part 4) as shown in the diagram
below
STEP 6 Place the Grease Cup (Part 6) onto the Grease Cup Holder (Part 5)
as shown in the diagram below
7

7
ASSEMBLY INSTRUCTIONS
STEP 7 a) Attach the Hose & Regulator (Part 7) to the gas cylinder
b) It is fastened in an anti-clockwise direction
Do not over-tighten
8

8
Any enclosure in which the appliance is used
shall comply with one of the following:
•An enclosure with walls on all sides, but at least
one permanent opening at ground level and no
overhead cover (EXAMPLE 1)
•Within a partial enclosure that includes an
overhead cover and two walls (EXAMPLES 2 & 3)
•Within a partial enclosure that includes an
overhead cover and more than two walls, the
following shall apply:
A) at least 25% of the total wall area is
completely open; and
B) at least 30% of the remaining wall area is
open and unrestricted (EXAMPLES 4 & 5)
•In the case of balconies, at least 20% of the total
of the side, back and front wall areas shall be
and remain open and unrestricted.
SETTING UP THE BARBEQUE
THIS APPLIANCE SHALL ONLY BE USED
IN AN ABOVE GROUND OPEN AIR
SITUATION WITH NATURAL
VENTILATION
1. POSITIONING
•Please make sure that the barbecue is NOT
positioned underneath any combustible
material or surface.
•There MUST be a clearance of at least
250mm from the sides of the barbecue
to any combustible materials or surfaces.
There must also be a clearance of at least
1500mm above the cooking surfaces to any
combustible surface, and 500mm clearance
at the back.
•Flammable materials of any description
MUST be kept well away from the barbecue.
•The barbecue must be positioned such that
the gas cylinder is kept away from direct
sunlight.
•The barbecue must be positioned to avoid
walkways, gangways and general pedestrian
access.
•The nature of a barbecue is such that
many of the surfaces are hot to touch, the
positioning of the barbecue should take into
consideration the possibility of accidental
hand or body contact.
Open side at least 25%
of total wall area
Open side at least 25%
of total wall area
30% or more in total
of the remaining wall area
is open and unrestricted
EXAMPLE 1
EXAMPLE 2 EXAMPLE 3
EXAMPLE 4 EXAMPLE 5
9

9
2. PRECAUTIONS
DO NOT OBSTRUCT ANY AIRFLOW PATH OR
VENTILATION PATHS OF THE BARBECUE
•Do not obstruct any ventilation ports on the
body of the barbecue.
•The gas cylinder must be securely placed on the
gas cylinder hook as supplied.
•It is important that the gas cylinder is not
positioned under the barbecue when in
operation.
•The gas cylinder must be kept out of direct
sunlight and away from any heat sources.
• During a gas cylinder swap or re-ll ensure that
all control knobs are in the ‘OFF’ position and
there are no naked ames in close proximity.
•Gas hoses must NOT be twisted kinked or under
any form of tension, the gas hoses should hang
freely with no bends, folds or kinks.
• No part of the exible hose should come into
contact with any part of the barbecue that will
become hot during operation.
•A regular inspection of the hose should be made
to ensure that it is not cracking, breaking cutting
or deteriorating in any other way.
•Any damage to the hose requires an immediate
replacement.
3. GAS CYLINDER CONNECTION
•Check that all the control knobs are in the ‘OFF’
position before any attempt is made to connect
the regulator to the gas cylinder.
•Double check that the gas cylinder valve is
securely in the ‘OFF’ position before attempting
to connect the regulator to the gas cylinder.
•When connecting the regulator to the gas
cylinder it is important to note that this
connection is a ‘LEFT HAND THREAD’.
A left hand thread is tightened in an ‘ANTI-
CLOCKWISE DIRECTION’.
SETTING UP THE BARBEQUE
POL FITTING
5/8” SAE THREAD
•Should there be any concern in making the
correct regulator connection please contact the
after sales service number list in this manual.
4. PRECAUTIONARY LEAK TEST
LEAK TESTS MUST BE CARRIED OUT IN
A WELL VENTILATED AREA
• Conrm all control knobs are in the ‘OFF’
position.
•Open the gas control valve on the gas cylinder
or regulator.
•To check for gas leaks a solution of soapy water
is required.
NEVER USE AN OPEN FLAME TO CARRY
OUT A GAS LEAK TEST
•The gas piping system MUST be checked for
leaks by brushing the soapy water solution
across each joint including valve connections,
hose connections, side burner connections and
regulator connections.
•If bubbles appear across any joint or connection
there is a leak:
o Immediately turn the gas valve ‘OFF’.
o Check and retighten all gas connections
and joints.
o Repeat Section 4. PRECAUTIONARY LEAK TEST.
o If the leak has been corrected then the
barbecue can be used.
o Immediately turn the gas valve ‘OFF’.
o If the leak has not been xed DO NOT
USE YOUR BARBECUE. Contact the Customer
Service Centre as listed on the warranty
card for assistance.
10

10
1. WARNINGS
•Before using the barbecue please ensure you
have read and understood all information in this
entire instructions manual.
2. PRIOR TO COOKING
•It is advisable to wash the cooking surface with
soapy water, rinse with fresh water then apply
a light coating of cooking oil before starting to
cook.
•When you are lighting your barbecue for the
rst time, read ‘STARTING THE BARBECUE’.
Turn the burners to the ‘LOW’ position and leave
it running for 15 minutes. Your barbecue is now
ready for rst use.
Note: During manufacturing the cooking surface
was covered with a non-toxic and food safe
coating. This coating may come over 0ff ime. Its
purpose is purely to protect your barbecue during
transport and against damage.
3. STARTING THE BARBEQUE
• Make sure there are no obstructions of airow
to the gas unit. Spiders and insects can nest
within and clog the burner/venturi tube at the
orice. A clogged burner tube can lead to a re
beneath the appliance. Ensure there is no excess
grease and other cooking residue to prevent fat
re.
•Ensure that all the controls are in the ‘OFF’
position before attempting to light the
barbecue.
•Turn on the gas supply at the gas cylinder.
•Select burner to light. Push and turn the selected
control knob to ‘HIGH’.
•If ignition does not occur within 5 seconds, turn
burner control knob to ‘OFF’.Wait 2 minutes and
repeat the lighting procedure.
OPERATING YOUR BARBEQUE
WARNING: IF AFTER THE SECOND ATTEMPT
THE BARBECUE STILL FAILS TO IGNITE THERE
MAY BE A FAULT WITH THE IGNITER,
CONTACT SHOULD BE MADE WITH THE
AFTER SALES SUPPORT PROVIDER.
MANUAL IGNITION
•To light the barbecue manually, use a 90mm
long lit match and position it next to the burner
from underneath the rebox and turn the
burner to ‘HIGH’ position.
DO NOT TURN A CONTROL KNOB ON UNTIL
A LIGHTED MATCH IS INSERTED UNDER
THE BBQ
4. AFTER COOKING
•Ensure ALL control knobs are turned to ‘OFF’
by turning in a clockwise direction.
• Once the burners have extinguished turn
the gas off at the gas cylinder.
•See cleaning instructions on the following
page.
OFF
HIGH
LOW
11

11
BEFORE ANY CARE AND MAINTENANCE
IS ATTEMPTED PLEASE ENSURE THAT THE
BARBECUE CONTROLS ARE IN THE ‘OFF’
POSITION AND THAT ALL SURFACES HAVE BEEN
GIVEN SUFFICIENT TIME TO COOL DOWN.
Please note the following when maintaining
and caring for your barbecue:
•Cleaning your barbecue regularly will help to
keep the product in good condition.
•Throwing cold water over any hot surface of the
barbecue is NOT recommended and is dangerous.
•Avoid handling and touching hot parts of the
barbecue.
•Your barbecue should be covered when left
unused for long periods especially during the
long winter breaks.
1. CLEANING THE HOT PLATE
After you have nished cooking it is best to clean
the cooking surface while it is still warm. Scrape
off all excess food using a stiff plastic spatula
or paper towel secured with tongs so that you
don’t burn yourself. DO NOT use metal scraping
tools on this hot plate as you will scratch the
surface and leave the metal prone to rusting.
Ensure a lm of oil remains on the plate to
protect the cooking surfaces against rust.
You should also spray a light lm of cooking oil
on the plate for additional protection.
2. CARE OF THE BURNERS
•Normal use and burn off should ensure that any
excess food and juices are burnt off and this will
help to keep the burners clean.
•The burners should be checked and cleaned
regularly. It is important to check that the burner
holes are free of debris and insects.
•Blockages and debris should be carefully
removed using a pipe cleaner.
CARE & MAINTENANCE
•Ensure that when the burners are replaced they
are positioned correctly over the control valves,
care must be taken not to damage the valves.
3. CARE OF THE BARBEQUE BODY
•Regular care and maintenance of the barbecue
body will signicantly increase its life and long
term appearance.
• Excess grease and fat can be removed with a soft
scraper.
•It is not necessary to remove all the grease from
the body.
•If required painted surfaces of the barbecue
body can be cleaned by using hot soapy water
and a soft bristled brush and cloth.
•Care must be taken not to immerse the gas
controls (manifold and injectors) in water.
•When re-assembling the barbecue after cleaning
it is important to check that the barbecue
functions correctly.
4. MAINTENANCE OF FIXINGS
• Over time and with regular use the xing screws
and nuts may start to become loose, a regular
check of all xings is recommended.
•It is recommended to replacement the hose &
regulator assembly after 2 - 3 years.
5. STORAGE
• To ensure maximum life from your barbecue it
should always be stored in a cool dry place.
•If you choose to store the main barbecue inside
the gas cylinder must be disconnected and
stored outside under the following conditions:
o Always store the gas cylinder outside in a
well ventilated area.
o Ensure that the gas cylinder is not stored in
direct sunlight or close to heat sources and
other dangerous appliances.
o Keep the gas cylinder out of reach of
children.
12

12
TROUBLESHOOTING GUIDE
Problem Potential Cause Corrective Action
Cannot light
burners Gas cylinder is empty Check and rell/exchange gas cylinder
Regulator is faulty Check and replace if required
Blocked burner Check and clean all burner holes
Blocked gas jets Check and clean gas jets
Blocked gas hose Check and clean gas hose
Burners have a low
ame or ashback
Gas cylinder may be too small Change to a larger cylinder
Blocked burner Check and clean all burner holes
Blocked gas jets Check and clean gas jets
Blocked gas hose Check and clean gas hose
High winds Move barbecue to a sheltered position
13

13
DISCLAIMERS
•The manufacturer reserves the right to change
and amend the specications without prior
notice.
•Failure to follow the instructions in this manual
will void any warranties offered on the product.
• Modications to the barbecue in any fashion will
null and void the warranty of the item.
•Any replacement components should be
supplied from the customer service centre.
•The correct regulator and valves must be used
with this barbecue. The use of incorrect or
faulty valves and regulators can create a
dangerous condition. The use of inappropriate
regulators and valves valves will void the
warranty.
•This warranty does not cover claims arising from
fat res.
•This warranty does not cover rust as we connot
control the enviroment in which the barbecue is
stored.
TECHNICAL SPECIFICATIONS
IF AT ANY TIME YOU ARE IN ANY DOUBT ABOUT
THE CORRECT COMPONENTS TO BE USED WITH
THIS BARBECUE OR ANY OTHER ASPECT OF
THE BARBECUE’S USE AND FUNCTION, PLEASE
CONTACT OUR CUSTOMER SUPPORT
CUSTOMER SERVICE CENTRE:
PHONE:
1300 667 146 (AUS)
0800 585 300 (NZ)
EMAIL:
Model BG2039B2
Gas Type UNIVERSAL LPG
Burner Injector Size 0.88mm
Burner Gas Consumption 10MJ/hr
Burner Gas Pressure 2.75 Kpa
Total Gas Consumption 20 MJ/hr
Approval Number GMK 10738
14
Table of contents
Other Jumbuck Grill manuals

Jumbuck
Jumbuck CIRCA HS-A160 Parts list manual

Jumbuck
Jumbuck Fineline JBPB219 Parts list manual

Jumbuck
Jumbuck HS-UM006AS Parts list manual

Jumbuck
Jumbuck PORTLAND Parts list manual

Jumbuck
Jumbuck BG1507B6 User manual

Jumbuck
Jumbuck HS-16JCG601-B User manual

Jumbuck
Jumbuck GEN-D325 User manual

Jumbuck
Jumbuck HS-FP002 User manual

Jumbuck
Jumbuck HS-CB001 User manual

Jumbuck
Jumbuck GEN-SE-25T User manual