•
How
to
reset
your
unit
•
Your
preset
adjustments
will
also
be
erased.
•
How
to
forcibly
ejeda
disc
~
+0
[Hold]
•
Be
careful
not
to
drop
the
disc
when
it
ejem.
•If
this
does
not
work,
reset
your
unit.
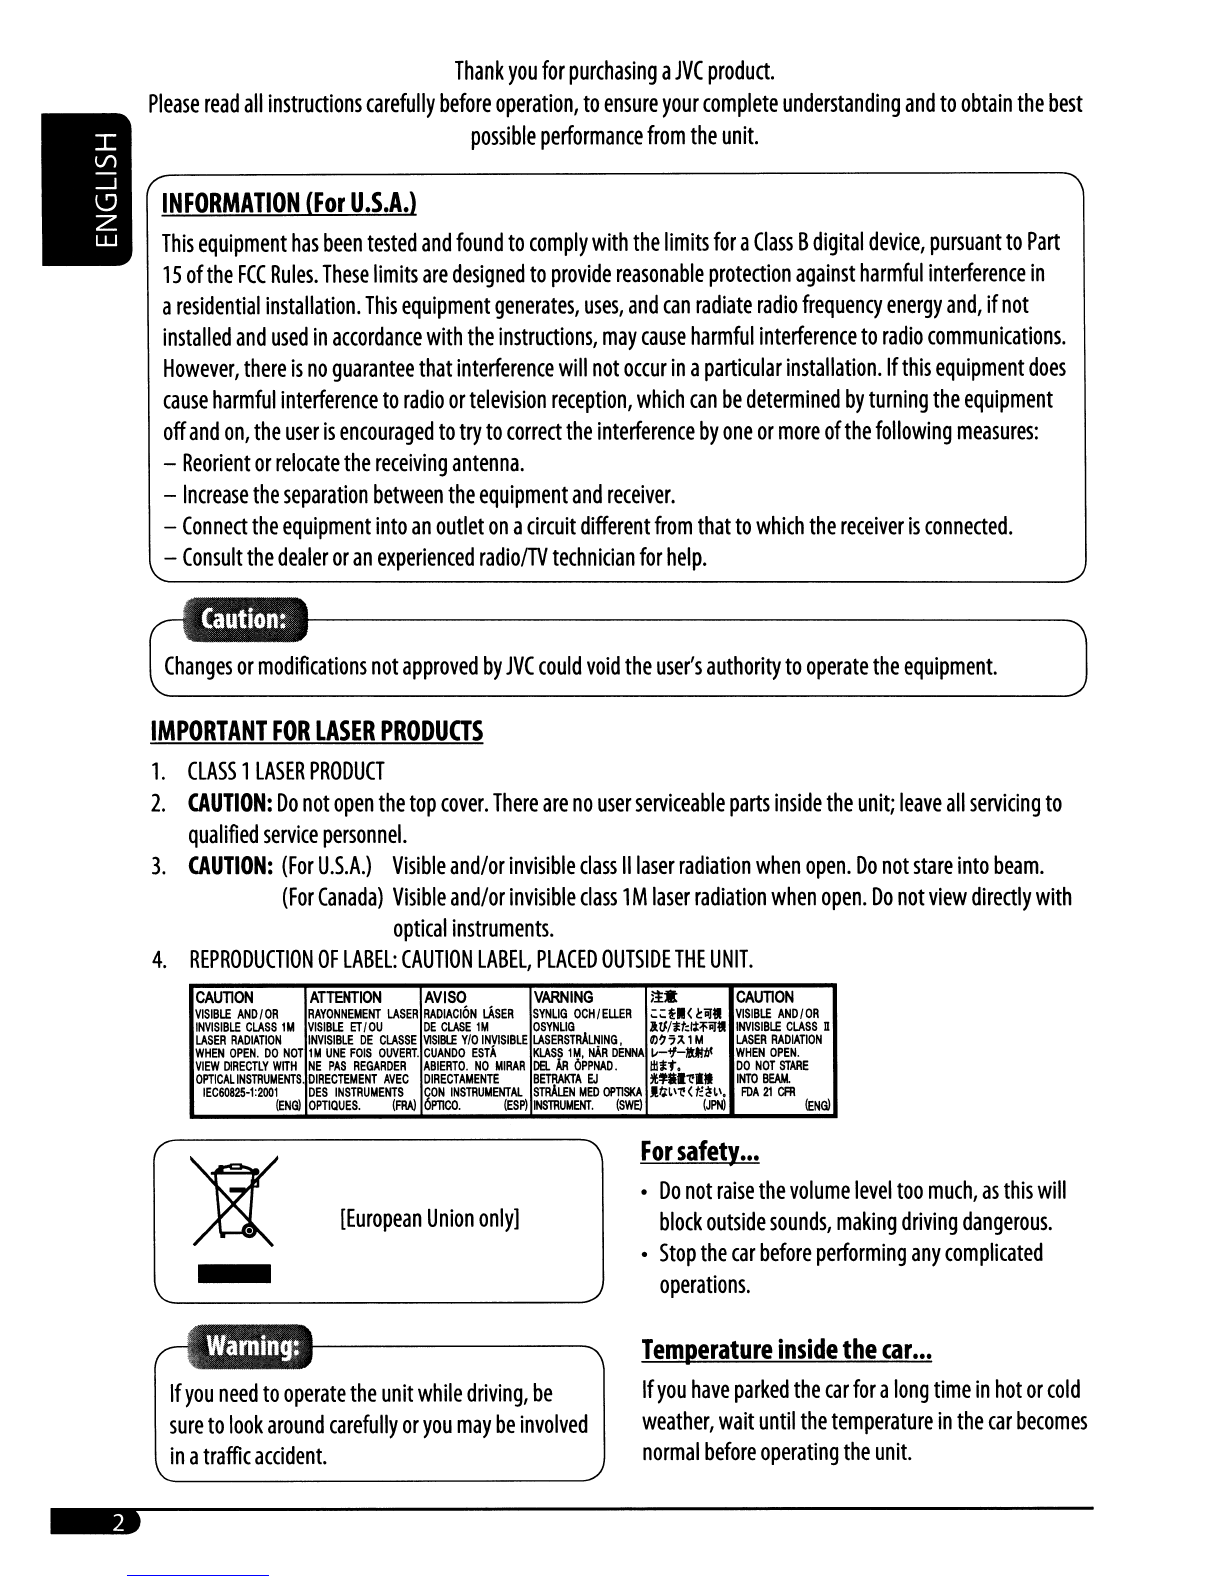
•
How
to
use
the M
MODE
button
If
you
press
M
MODE,
the
unit
goes
into
functions
mode,
then
the
number
buttons
and
",/.
buttons
will
work
as
different
function
buttons.
Ex.:
When
number
button
2
works
as
MO
(monaural)
button.
CONTENTS
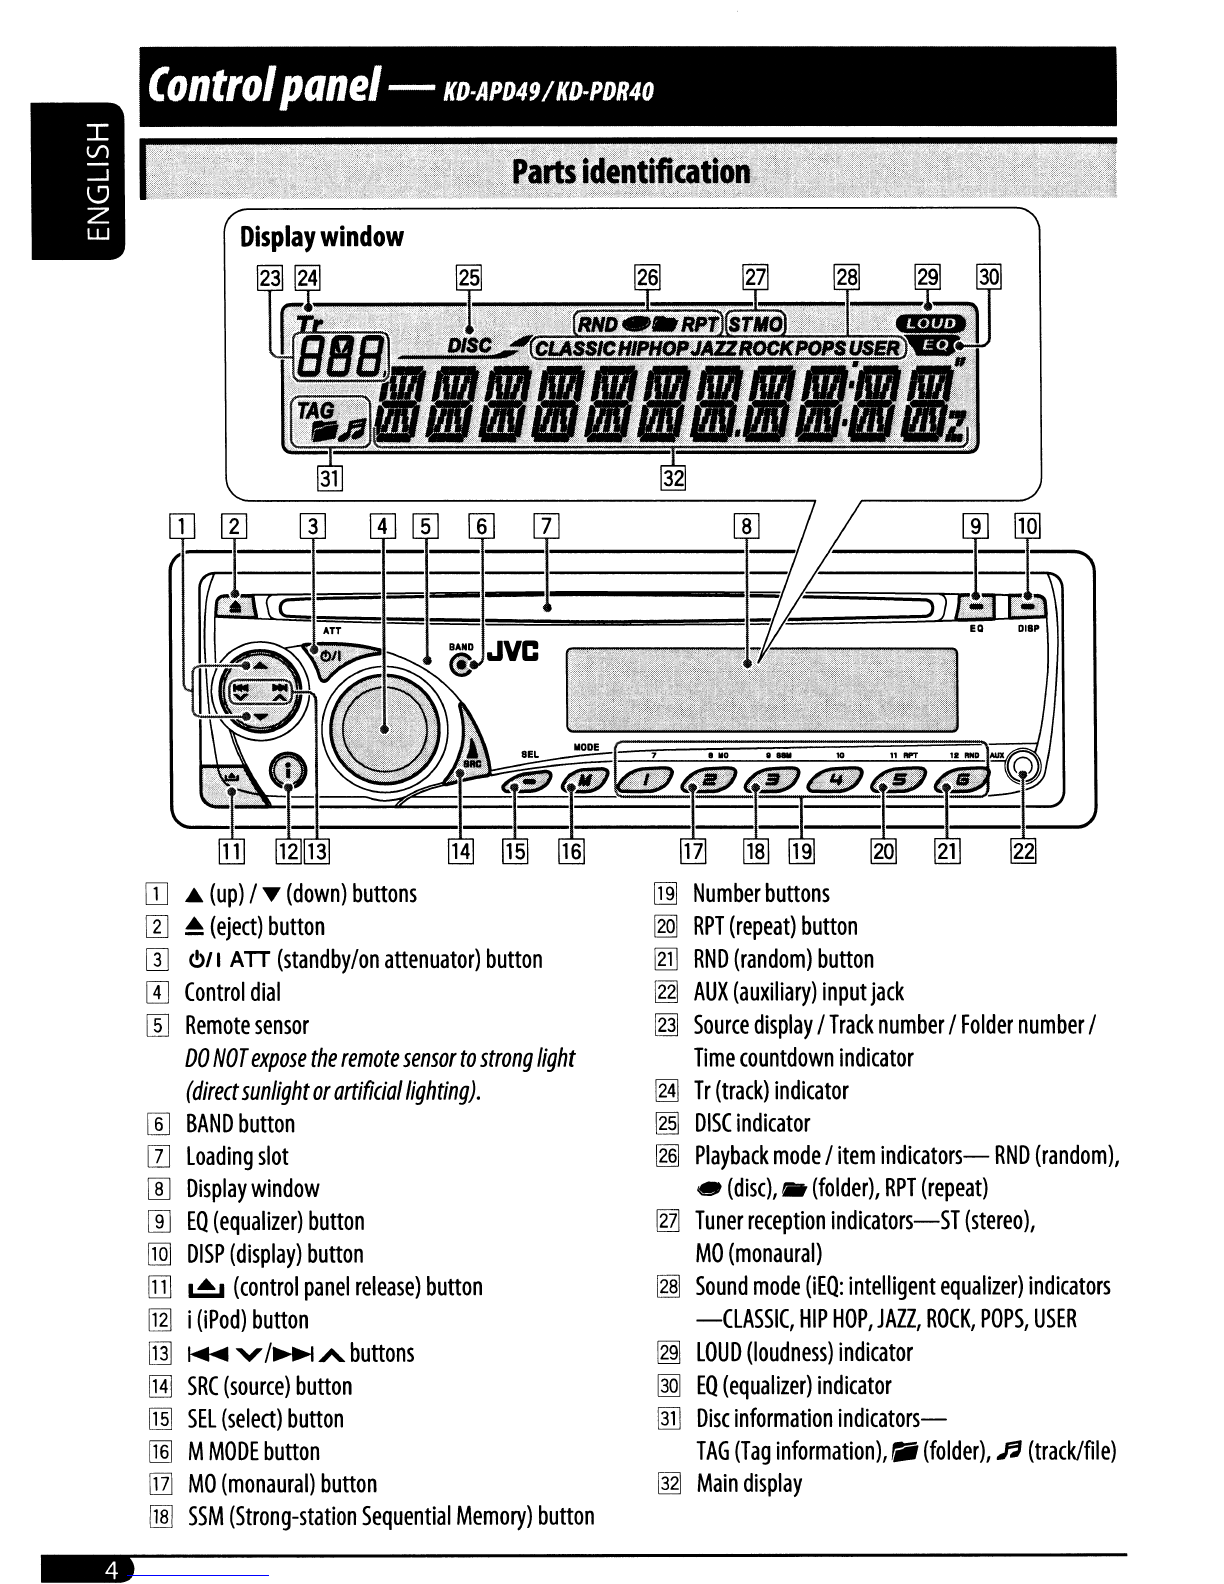
Control
panel-
KD-APD4911lD-PDR40...
4
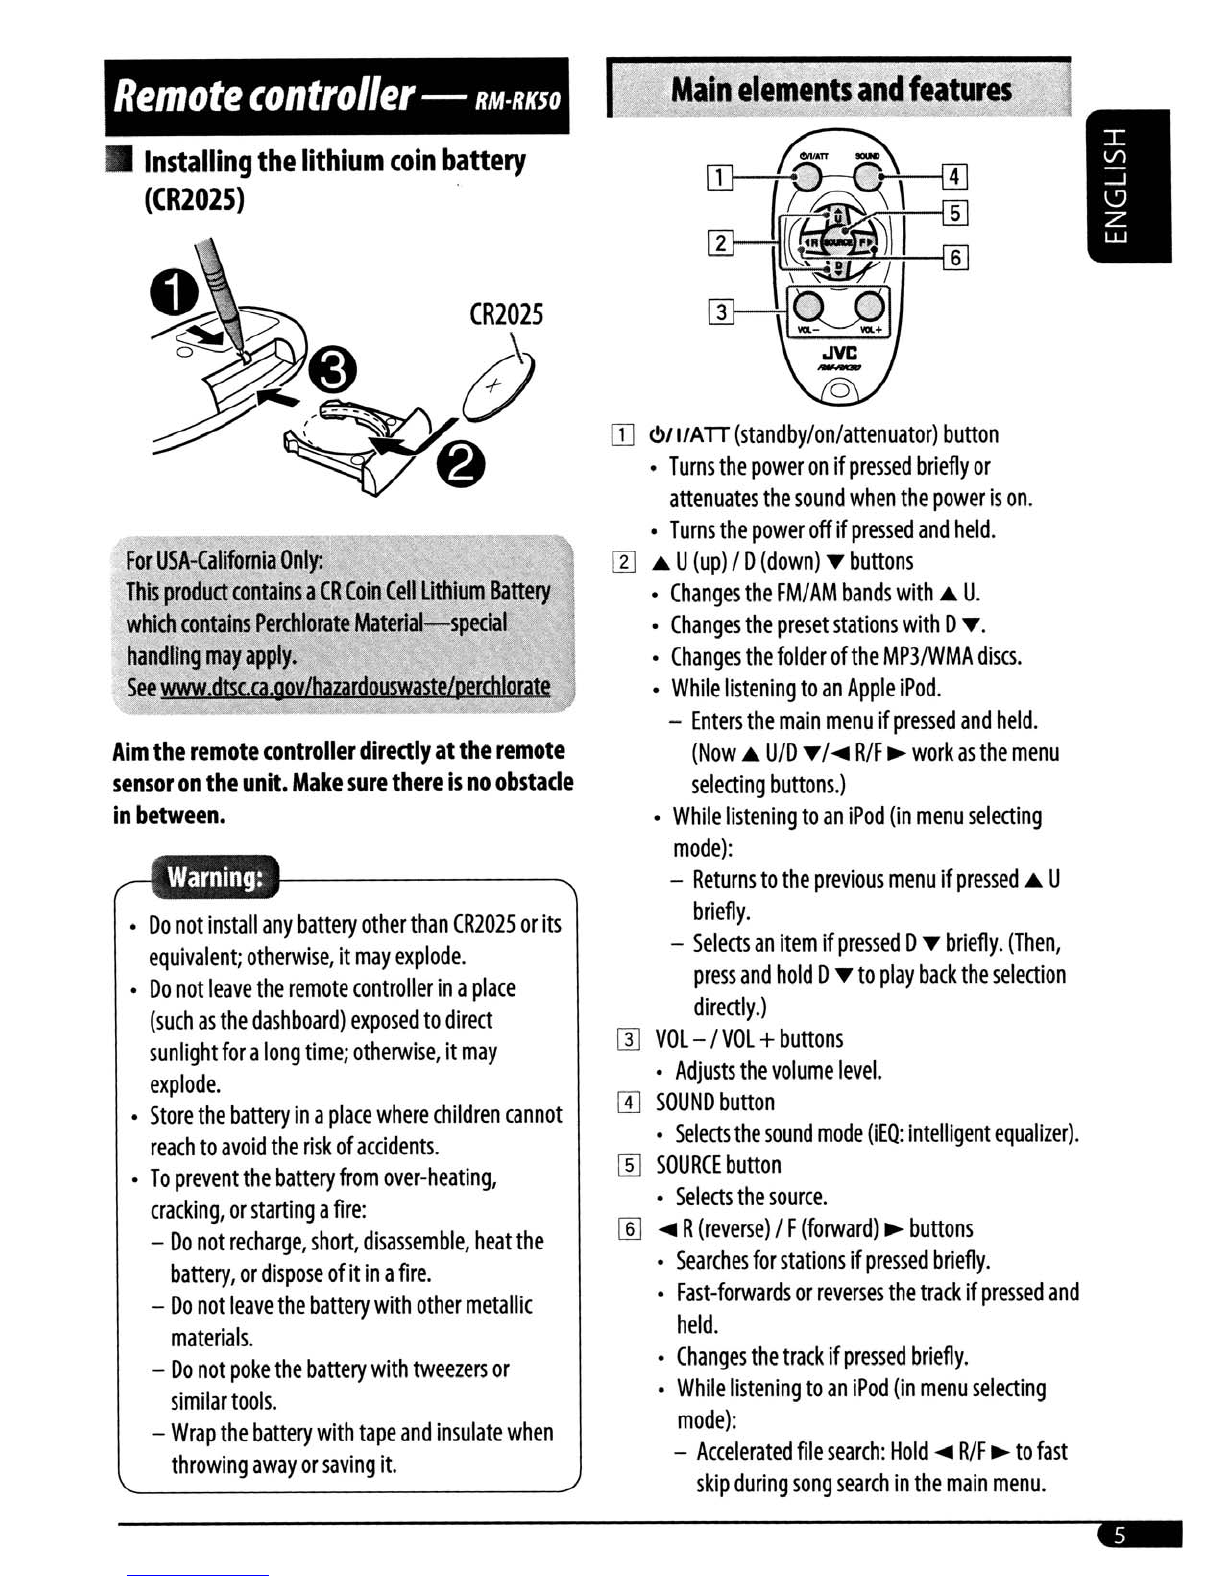
Remote
controller
-
RM·RIlSO...........
5
Getting
started................................
6
Ba~e
operations...................................................
6
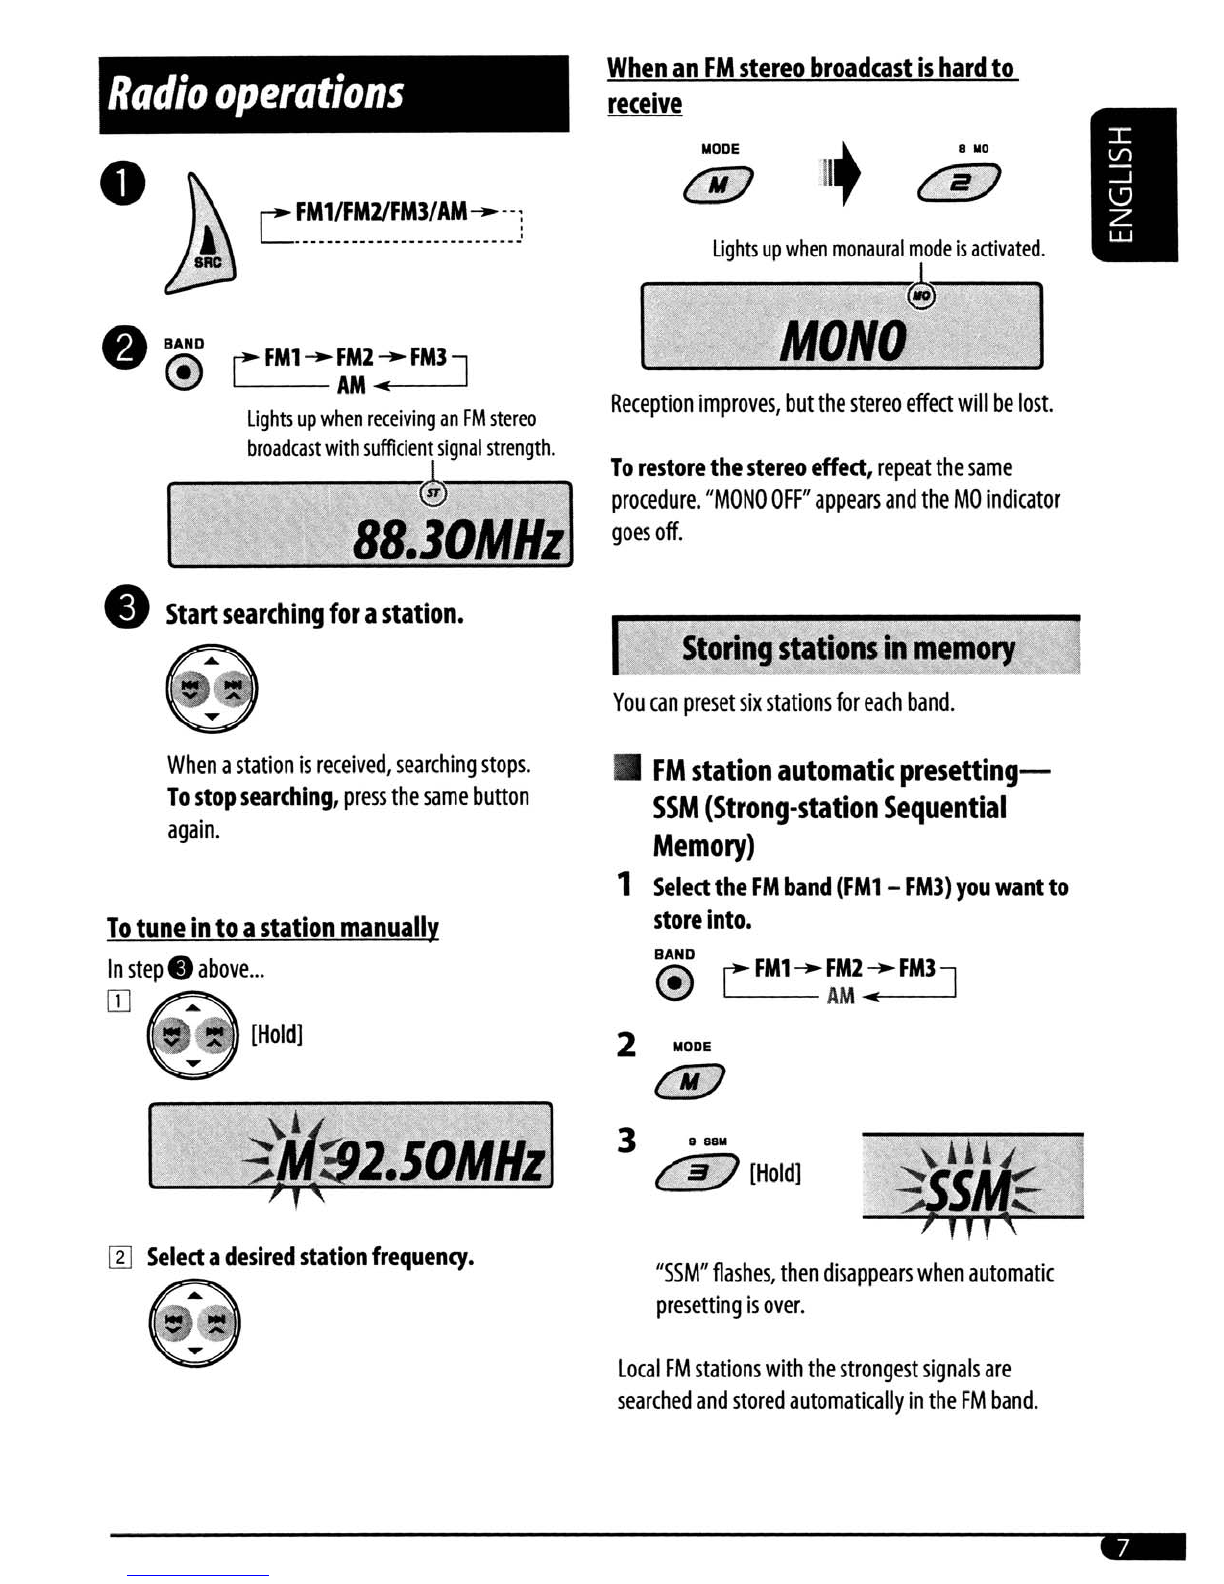
Radio
operations
7
Disc
operations
8
Playing
a
disc
In
the
un~
8
iPod
operations
10
Sound
adjustments..........................
12
General
settings
-
PSM
14
Other
external
component
operations
16
ntle
assignment..............................
16
Maintenance
17
More
about
this
unit
17
Troubleshooting
20
Specifications
22
WODE
."
The
control
panel
illustrations
used
for
explanation
in
this
manual
is
of
KD-APD49
.
To
use
these
buttons
for
their
original
fundions
again
after
pressing
M
MODE,
press
M
MODE
again.
•
Waiting
for
about
5
seconds
without
pressing
any
of
these
buttons
will
automatically
cancels
the
functions
mode.
KO-APD49
is
equipped
with
the
steering
wheel
remote
control
function
.
•
See
the
installation/Connection
Manual
(separate
volume)
for
connection.
•
Detaching
the
control
panel
•
Attaching
the
control
panel
---------------------