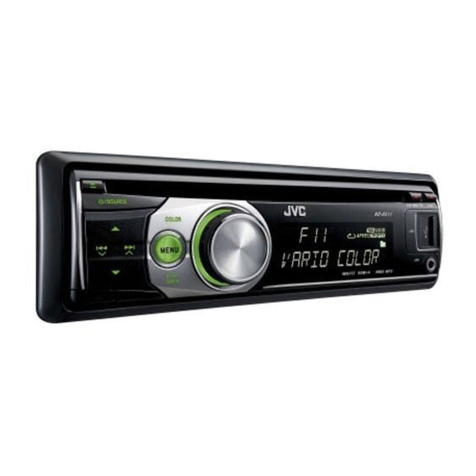
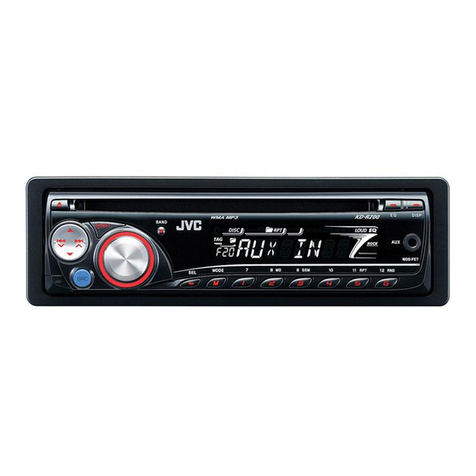
JVC KD-G285 User manual

ENGLISH
INDONESIA
CD RECEIVER KD-G285
ALAT PENERIMA CD KD-G285
For canceling the display demonstration, see page 5.
Untuk membatalkan tampilan demonstrasi, lihat halaman 5.
For installation and connections, refer to the separate manual.
Untuk instalasi dan penyambungan, lihat buku pedoman terpisah.
INSTRUCTIONS
BUKU PETUNJUK
GET0345-004A
[UN]
Cover_KD-G285[U]1.indd 2Cover_KD-G285[U]1.indd 2 11/17/05 6:03:08 PM11/17/05 6:03:08 PM

ENGLISH
2
Thank you for purchasing a JVC product.
Please read all instructions carefully before operation, to ensure your complete understanding and to
obtain the best possible performance from the unit.
IMPORTANT FOR LASER PRODUCTS
1. CLA 1 LA ER PRODUCT
2. CAUTION: Do not open the top cover. There are no user serviceable parts inside the unit; leave
all servicing to qualified service personnel.
3. CAUTION: Visible and invisible laser radiation when open and interlock failed or defeated.
Avoid direct exposure to beam.
4. REPRODUCTION OF LABEL: CAUTION LABEL, PLACED OUT IDE THE UNIT.
How to detach/attach the control
panel
Detaching...
Attaching...
Warn ng:
If you need to operate the unit while driving,
be sure to look ahead carefully or you may be
involved in a traffic accident.
Caut on on volume sett ng:
Discs produce very little noise compared
with other sources. Lower the volume
before playing a disc to avoid damaging
the speakers by the sudden increase of the
output level.
How to reset your un t
• Your preset adjustments will also be erased.
• If a disc is loaded, it will eject. Be careful not to
drop the disc.
How to forc bly eject a d sc
• If this does not work, reset your unit.
• Be careful not to drop the disc when it ejects.
EN02-05_KD-G285[U]1.indd 2EN02-05_KD-G285[U]1.indd 2 11/28/05 2:50:00 PM11/28/05 2:50:00 PM

ENGLISH
3
How to read th s manual
• Button operations are mainly explained with
the illustrations in the tabel below.
• ome related tips and notes are explained in
“More about this unit” (see pages 14 and 15).
Press briefly.
Press repeatedly.
Press either
one.
Press and hold until your
desired response begins.
Press and hold both
buttons at the same time.
The following marks are used to indicate...
: Built-in CD player operations.
: External CD changer operations.
:
Indicator displayed for the
corresponding operation.
How to use the MODE button
If you press MODE, the unit goes into functions
mode, then the number buttons and 5/∞
buttons work as different function buttons.
Ex.: When number button 2 works as
MO (monaural) button.
To use these buttons for their original
functions again after pressing MODE, wait for
5 seconds without pressing any of these buttons
until the functions mode is cleared or press
MODE again.
CONTENTS
Control panel ................................... 4
Gett ng started ................................. 5
Basic operations .................................................... 5
Rad o operat ons .............................. 6
D sc operat ons ................................. 7
Playing a disc in the unit ...................................... 7
Playing discs in the CD changer ............................ 7
Sound adjustments ........................... 10
General sett ngs — PSM ................... 11
External component operat ons
............. 12
Remote controller — RM-RK60 .............. 12
Ma ntenance .................................... 13
More about th s un t ......................... 14
Troubleshoot ng ............................... 16
Spec f cat ons ................................... 17
For safety...
• Do not raise the volume level too much, as
this will block outside sounds, making driving
dangerous.
• top the car before performing any
complicated operations.
Temperature ns de the car...
If you have parked the car for a long time in hot
or cold weather, wait until the temperature in
the car becomes normal before operating the
unit.
Time countdown indicator
EN02-05_KD-G285[U]1.indd 3EN02-05_KD-G285[U]1.indd 3 10/26/05 11:04:13 AM10/26/05 11:04:13 AM
ENGLISH
4
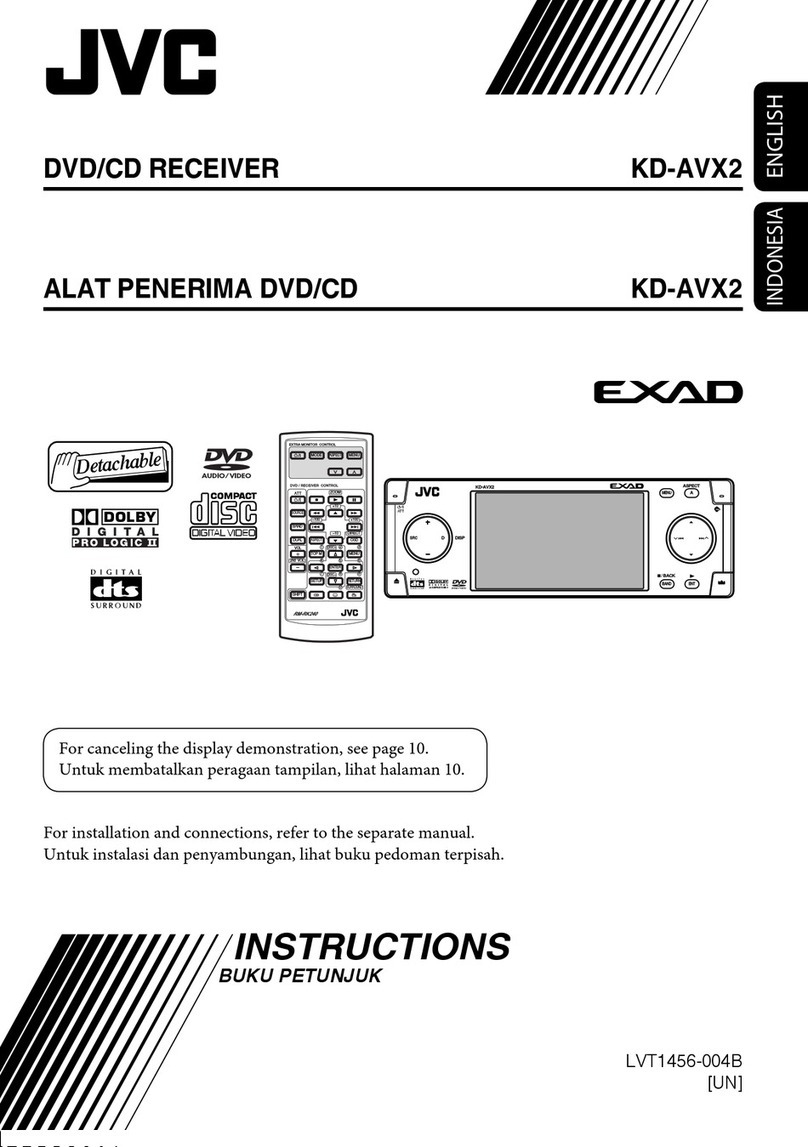
Control panel
Parts identification
Display window
1 4 /¢ buttons
2 (standby/on attenuator) button
3 5 (up) / ∞ (down) buttons
4 Loading slot
5 Display window
6 0 (eject) button
7 EQ (equalizer) button
8 Remote sensor
• You can control this unit with an
optionally purchased remote controller.
For details, see pages 12 and 13.
• DO NOT expose the remote sensor to
strong light direct sunlight or artificial
lighting).
9 SR (source) button
p BAND button
q ontrol dial
w SEL (select) button
e MO (monaural) button
r SSM (Strong-station Sequential Memory)
button
t Number buttons
y RPT (repeat) button
u RND (random) button
i MODE button
o DISP (display) button
; (control panel release) button
Display window
a MP3 indicator: Lights up only when
playback an MP3 disc in the CD changer.
s Playback source indicators—
H: Lights up only when CD-CH is selected
as the playback source.
DIS : Lights up for the built-in CD player.
d Playback mode / item indicators—
RND (random), (disc), RPT (repeat)
f LOUD (loudness) indicator
g EQ (equalizer) indicator
h Sound mode ( -EQ: custom equalizer)
indicators—JAZZ, LASSI , HIP HOP,
POPS, RO K, USER
j Tr (track) indicator
k Source display / Volume level indicator /
Time countdown indicator
l Main display
/ Tuner reception indicators— ST (stereo),
MO (monaural)
EN02-05_KD-G285[U]1.indd 4EN02-05_KD-G285[U]1.indd 4 10/26/05 12:26:45 PM10/26/05 12:26:45 PM

ENGLISH
5
Basic settings
• See also “General settings — PSM” on page
11.
1
2
1 Canceling the display
demonstrations
Select “DEMO,” then “DEMO OFF.”
2 Setting the clock
Select “ LO K H” (hour), then adjust
the hour.
Select “ LO K M” (minute), then
adjust the minute.
3 Finish the procedure.
To check the current clock
time while the power is
turned off
To check the other
information while
listening to the radio
Clock Ô Frequency
Getting started
Basic operations
~ Turn on the power.
* You cannot select these sources i they
are not ready or not connected.
! For FM/AM tuner
⁄ Adjust the volume.
@ Adjust the sound as you want.
(See page 0.)
To drop the volume in a
moment (ATT
To restore the sound, press
it again.
To turn off the power
Volume level appears.
Volume level indicator
EN02-05_KD-G285[U]1.indd 5EN02-05_KD-G285[U]1.indd 5 10/26/05 11:15:35 AM10/26/05 11:15:35 AM

ENGLISH
6
Radio operations
~
Ÿ
! Start searching for a station.
When a station is received, searching
stops.
To stop searching, press the same button
again.
To tune in to a station manually
In step ! above...
1
2 Select a desired station frequency.
When an FM stereo broadcast is hard to
receive
Reception improves, but stereo effect will be
lost.
To restore the stereo effect, repeat the same
procedure. “MONO OFF appears and the MO
indicator goes off.
Storing stations in memory
You can preset six stations for each band.
FM station automatic presetting —
SSM (Strong-station Sequential
Memory)
1 Select the FM band (FM1 – FM3) you
ant to store into.
2
3
“SSM flashes, then disappears when
automatic presetting is over.
Local FM stations with the strongest signals are
searched and stored automatically in the FM
band.
Lights up when receiving an FM stereo
broadcast with sufficient signal strength.
Selected band appears.
Lights up when monaural mode is activated.
EN06-11_KD-G285[U]1.indd 6EN06-11_KD-G285[U]1.indd 6 10/26/05 11:02:21 AM10/26/05 11:02:21 AM

ENGLISH
7
Disc operations
Playing a disc in the unit
All tracks will be played repeatedly until you
change the source or eject the disc.
To stop play and e ect the disc
Playing discs in the CD changer
All discs in the magazine will be played
repeatedly until you change the source.
• Ejecting the magazine will also stop playing.
~
* If you have changed the external input
setting to “EXT IN” (see page 11), you
cannot select the D changer.
Ÿ Select a disc.
For disc number from 01 – 06:
For disc number from 07 – 12:
Manual presetting
Ex.: Storing FM station of 92.5 MHz into preset
number 4 of the FM1 band.
1
2
3
Listening to a preset station
1
2 Select the preset station (1 – 6) you
ant.
or
Preset number flashes for a while.
To be continued...
EN06-11_KD-G285[U]1.indd 7EN06-11_KD-G285[U]1.indd 7 10/26/05 11:02:23 AM10/26/05 11:02:23 AM

ENGLISH
8
About the CD changer
It is recommended to use a JVC
MP3-compatible CD changer with your unit.
• ou can also connect MP3-incompatible
CD changers. However, these units are not
compatible with MP3 discs.
• ou cannot use the CH-X99, CH-X100, and
KD-MK series CD changers with this unit.
• ou cannot play any WMA disc in the CD
changer.
• For connection, see Installation/Connection
Manual (separate volume).
To fast-forward or reverse the track
To go to the next or previous tracks
To go to the next or previous folders (only for
MP discs)
To locate a particular track for CD directly
To select a number from 01 – 06:
To select a number from 07 – 12:
Other main functions
Skipping tracks quickly during play
Only possible on JVC
MP -compatible CD changer
• While playing an MP3 disc in the CD
changer, you can skip tracks within the same
folder.
Ex.: To select track 32 while playing a track
whose number is a single digit (1 to 9)
1
2
Each time you press the button, you can
skip 10 tracks.
• After the last track, the first track will be
selected and vice versa.
3
EN06-11_KD-G285[U]1.indd 8EN06-11_KD-G285[U]1.indd 8 11/17/05 9:33:53 AM11/17/05 9:33:53 AM

ENGLISH
9
Selecting the playback modes
You can use only one of the following playback
modes at a time.
1
2 Select your desired playback mode.
7 Repeat play
Mode Plays repeatedly
TRK RPT : The current track.
DISC RPT* : All tracks of the current disc.
RPT OFF : Cancels.
7 Random play
Mode Plays at random
DISC RND : All tracks of the current disc.
MAG RND* : All tracks of the inserted
discs.
RND OFF : Cancels.
* Only while playing discs in the CD
changer.
Prohibiting disc ejection
You can lock a disc in the loading slot.
To cancel the prohibition, repeat the same
procedure.
Changing the display information
While playing an audio CD
While playing an MP3 disc
EN06-11_KD-G285[U]1.indd 9EN06-11_KD-G285[U]1.indd 9 11/2/05 5:44:08 PM11/2/05 5:44:08 PM

ENGLISH
10
Sound adjustments
You can select a preset sound mode suitable to
the music genre (C-EQ: custom equalizer).
BAS
(bass)
TRE
(treble)
LOUD
(loudness)
USER
(Flat sound) 00 00 FF
ROCK
(Rock or disco music) +03 +01 N
CLASSIC
(Classical music) +01 –02 FF
POPS
(Light music) +04 +01 FF
HIP HOP
(Funk or rap music) +02 00 N
JAZZ
(Jazz music) +02 +03 FF
Preset values
Indication (For)
Ex.: When “ROCK” is selected
Adjusting t e sound
You can adjust the sound characteristics to your
preference.
1
2
Indication, [Range]
BAS*1 (bass), [–06 to +06]
Adjust the bass.
TRE*1 (treble), [–06 to +06]
Adjust the treble.
FAD*2 (fader), [R06 to F06]
Adjust the front and rear speaker balance.
BAL (balance), [L06 to R06]
Adjust the left and right speaker balance.
LOUD*1 (loudness), [L UD N or
L UD FF]
Boost low and high frequencies to produce a
well-balanced sound at low volume level.
VOL (volume), [00 to 30 or 50*3]
Adjust the volume.
*1 When you adjust the bass, treble, or loudness,
the adjustment you have made is stored for
the currently selected sound mode (C-EQ)
including “U ER.”
*2 If you are using a two-speaker system, set the
fader level to “00.”
*3 Depending on the amplifier gain control
setting. ( ee page 11 for details.)
EN06-11_KD-G285[U]1.indd 10EN06-11_KD-G285[U]1.indd 10 11/16/05 6:34:43 PM11/16/05 6:34:43 PM

ENGLISH
11
3 Adjust the PSM item selected.
4 Repeat steps 2 and 3 to adjust other
PSM items if necessary.
5 Finish the procedure.
Indications Selectable settings, [reference page]
DEMO
Display
demonstration
DEMO ON : [Initial]; Display demonstration will be activated
automatically if no operation is done for about 20 seconds,
[5].
DEMO OFF : Cancels.
CLOCK H
Hour adjustment
– 2, [5]
[Initial: 1 (1:00)]
CLOCK M
Minute
adjustment
00 – 59, [5]
[Initial: 00 (1:00)]
DIMMER
Dimmer
ON : Dims the display illumination of this unit.
OFF : [Initial]; Cancels.
EXT IN*4
External input
CHANGER : [Initial]; To use a CD changer, [7].
EXT IN : To use another external component, [ 2].
AMP GAIN
Amplifier gain
control
You can change the maximum volume level of this unit.
LOW PWR : VOL 00 – VOL 30 (Select this if the maximum power of
the speaker is less than 50 W to prevent them from being
damaged.)
HIGH PWR : [Initial]; VOL 00 – VOL 50
*4 Displayed only when one of the following sources is selected—F , A , or DISC.
General settings — PSM
You can change PSM (Preferred Setting Mode)
items listed in the table that follows.
1
2 Select a PSM item.
EN06-11_KD-G285[U]1.indd 11EN06-11_KD-G285[U]1.indd 11 11/17/05 9:12:34 AM11/17/05 9:12:34 AM

ENGLISH
12
External component
operations
You can connect an external component to
the CD changer jack on the rear using the Line
Input Adapter—KS-U 7 (not supplied) or AUX
Input Adapter—KS-U 8 (not supplied).
• For connection, see Installation/Connection
Manual (separate volume).
~
If “EXT IN” does not appear, see page 11
and select the external input (“EXT IN”).
Ÿ Turn on the connected component
and start playing the source.
! Adjust the volume.
⁄ Adjust the sound as you want.
(See page 10.)
To check the other
information while
listening to an external
component
Clock Ô EXT IN
Remote controller — RM-RK60
This unit can be remotely controlled as
instructed here (with an optionally purchased
remote controller). We recommend that you
use remote controller RM-RK60 with your unit.
Installing the lithium coin battery
(CR2 25)
Aim the remote controller directly at the
remote sensor on the unit. Make sure there is
no o stacle in etween.
Warning:
• Do not install any battery other than
CR202 or its equivalent; otherwise, it may
explode.
• Store the battery in a place where children
cannot reach to avoid risk of accident.
• To prevent the battery from over-heating,
cracking, or starting a fire:
– Do not recharge, short, disassemble,
heat the battery, or dispose of it in a fire.
– Do not leave the battery with other
metallic materials.
– Do not poke the battery with tweezers or
similar tools.
– Wrap the battery with tape and insulate
when throwing away or saving it.
EN12-17_KD-G285[U]1.indd 12EN12-17_KD-G285[U]1.indd 12 11/17/05 9:14:55 AM11/17/05 9:14:55 AM

ENGLISH
13
Maintenance
How to clean the connectors
Frequent detachment will deteriorate the
connectors.
To minimize this possibility, periodically wipe
the connectors with a cotton swab or cloth
moistened with alcohol, being careful not to
damage the connectors.
Moisture condensation
Moisture may condense on the lens inside the
CD player in the following cases:
After starting the heater in the car.
If it becomes very humid inside the car.
Should this occur, the CD player may
malfunction. In this case, eject the disc and
leave the unit turned on for a few hours until
the moisture evaporates.
How to handle discs
When removing a disc from
its case, press down the center
holder of the case and lift the disc
out, holding it by the edges.
Always hold the disc by the
edges. Do not touch its recording surface.
When storing a disc into its case, gently insert
the disc around the center holder (with the
printed surface facing up).
Make sure to store discs into the cases after
use.
Main elements and features
1 (standby/on attenuator) button
Turns the power on if pressed briefly or
attenuates the sound when the power is
turned on.
Turns the power off if pressed and held.
2 SRC (source) button
Selects the source.
3 R (reverse) / F (forward) buttons
Searches for stations if pressed briefly.
Fast-forwards or reverses the track if
pressed and held.
Changes the tracks of the disc if pressed
briefly.
4 SOUND button
Selects the sound mode (C-EQ: custom
equalizer).
5 U (up) / D (down) buttons
Changes the FM/AM bands with U.
Changes the preset stations with D.
While playing an MP3 disc on an
MP3-compatible CD changer:
– Changes the disc if pressed briefly.
– Changes the folder if pressed and held.
6 VOLUME – /+ buttons
Adjusts the volume level.
Caution:
Connector
Center holder
To be continued...
EN12-17_KD-G285[U]1.indd 13EN12-17_KD-G285[U]1.indd 13 11/17/05 9:26:33 AM11/17/05 9:26:33 AM

ENGLISH
14
To keep discs clean
A dirty disc may not play correctly.
If a disc does become dirty, wipe it
with a soft cloth in a straight line
from center to edge.
• Do not use any solvent
(for example, conventional record cleaner,
spray, thinner, benzine, etc. to clean discs.
To play new discs
New discs may have some rough
spots around the inner and outer
edges. If such a disc is used, this
unit may reject the disc.
To remove these rough spots, rub the edges
with a pencil or ball-point pen, etc.
Warped disc
Sticker
Do not use the following discs:
Sticker residue
Stick-on label
More about this unit
Basic operations
Turning on the power
• By pressing SRC on the unit, you can also
turn on the power. If the source is ready,
playback also starts.
Turning off the power
• If you turn off the power while listening to a
disc, disc play will start from where playback
has been stopped previously, next time you
turn on the power.
Tuner operations
Storing stations in memory
• During SSM search...
– All previously stored stations are erased
and stations are stored newly.
–
Received stations are preset in No. 1 (lowest
frequency to No. 6 (highest frequency .
– When SSM is over, the station stored in
No. 1 will be automatically tuned in.
• When storing a station manually, the
previously preset station is erased when a new
station is stored in the same preset number.
Disc operations
Caution for DualDisc playback
• The Non-DVD side of a “DualDisc” does
not comply with the “Compact Disc Digital
Audio” standard. Therefore, the use of
Non-DVD side of a DualDisc on this product
may not be recommended.
EN12-17_KD-G285[U]1.indd 14EN12-17_KD-G285[U]1.indd 14 11/17/05 9:19:57 AM11/17/05 9:19:57 AM

ENGLISH
15
Changing the source
• If you change the source, playback also stops
(without ejecting the disc).
Next time you select DISC” for the playback
source, disc play starts from where it has been
stopped previously.
Ejecting a disc
• If the ejected disc is not removed within
15 seconds, the disc is automatically inserted
again into the loading slot to protect it from
dust. (Disc will not play this time.)
General settings—PSM
• If you change the AMP GAIN” setting from
HIGH PWR” to LOW PWR” while the
volume level is set higher than VOL 30,” the
unit automatically changes the volume level to
VOL 30.”
General
• This unit has been designed to reproduce
CDs and CD-Rs (Recordable)/CD-RWs
(Rewritable) in audio CD (CD-DA).
• When a disc has been loaded, selecting
DISC” for the playback source starts disc
play.
Inserting a disc
• When a disc is inserted upside down, the disc
automatically ejects.
• Do not insert 8 cm discs (single CD) and
unusual shape discs (heart, flower, etc.) into
the loading slot.
Playing a CD-R or CD-RW
• Use only finalized” CD-Rs or CD-RWs.
• This unit can play back multi-session discs;
however, unclosed sessions will be skipped
while playing.
• Some CD-Rs or CD-RWs may not play
back on this unit because of their disc
characteristics, or for the following reasons:
– Discs are dirty or scratched.
– Moisture condensation occurs on the lens
inside the unit.
– The pickup lens inside the unit is dirty.
– CD-R/CD-RW on which the files are
written with Packet Write” method.
– There are improper recording conditions
(missing data, etc.) or media conditions
(stained, scratched, warped, etc.).
• CD-RWs may require a longer readout time
since the reflectance of CD-RWs is lower than
that of regular CDs.
• Do not use the following CD-Rs or CD-RWs:
– Discs with stickers, labels, or a protective
seal stuck to the surface.
– Discs on which labels can be directly printed
by an ink jet printer.
Using these discs under high temperatures or
high humidities may cause malfunctions or
damage to the unit.
EN12-17_KD-G285[U]1.indd 15EN12-17_KD-G285[U]1.indd 15 11/17/05 1:03:24 PM11/17/05 1:03:24 PM

ENGLISH
16
Symptoms Remedies/Causes
General
• Sound cannot be heard from the
speakers.
• Adjust the volume to the optimum level.
• Check the cords and connections.
• This unit does not work at all. Reset the unit (see page 2).
FM/AM
• SSM automatic presetting does not
work.
Store stations manually.
• Static noise while listening to the
radio.
Connect the antenna firmly.
Disc playback
• Disc cannot be played back. Insert the disc correctly.
• CD-R/CD-RW cannot be played
back.
• Tracks on the CD-R/CD-RW cannot
be skipped.
• Insert a finalized CD-R/CD-RW.
•
Finalize the CD-R/CD-RW with the component
which you used for recording.
• Disc can be neither played back nor
ejected.
• Unlock the disc (see page 9).
• Eject the disc forcibly (see page 2).
• Disc sound is sometimes interrupted. • Stop playback while driving on rough roads.
• Change the disc.
• Check the cords and connections.
• “NO DISC” appears on the display. Insert a playable disc into the loading slot.
CD changer
• “NO DISC” appears on the display. Insert a disc into the magazine.
• “NO MAG” appears on the display. Insert the magazine.
• “RESET 8” appears on the display. Connect this unit and the CD changer correctly
and press the reset button of the CD changer.
• “RESET 1” – “RESET 7” appears on
the display.
Press the reset button of the CD changer.
• The CD changer does not work at all. Reset the unit (see page 2).
Troubleshooting
What appears to be trouble is not always serious. Check the following points before calling a service
center.
EN12-17_KD-G285[U]1.indd 16EN12-17_KD-G285[U]1.indd 16 10/26/05 11:03:51 AM10/26/05 11:03:51 AM

ENGLISH
17
Specifications
AUDIO AMPLIFIER SECTION
Maximum Power Output:
Front: 50 W per channel
Rear: 50 W per channel
Continuous Power Output (RMS):
Front: 1 W per channel into 4 Ω, 40 Hz
to 20 000 Hz at no more than 0.8%
total harmonic distortion.
Rear: 1 W per channel into 4 Ω, 40 Hz
to 20 000 Hz at no more than 0.8%
total harmonic distortion.
Load Impedance: 4 Ω (4 Ω to 8 Ω allowance)
Tone Control Range:
Bass: ±10 dB at 100 Hz
Treble: ±10 dB at 10 kHz
Frequency Response: 40 Hz to 20 000 Hz
Signal-to-Noise Ratio: 70 dB
Line-Out Level/Impedance:
2.0 V/20 kΩ load (full scale)
Output Impedance: 1 kΩ
Other Terminals: CD changer
TUNER SECTION
Frequency Range:
FM: 87.5 MHz to 108.0 MHz
AM: 531 kHz to 1 602 kHz
[FM Tuner]
Usable Sensitivity: 11.3 dBf (1.0 μV/75 Ω)
50 dB Quieting Sensitivity:
16.3 dBf (1.8 μV/75 Ω)
Alternate Channel Selectivity (400 kHz): 65 dB
Frequency Response: 40 Hz to 15 000 Hz
Stereo Separation: 30 dB
[AM Tuner]
Sensitivity: 20 μV
Selectivity: 35 dB
CD PLAYER SECTION
Type: Compact disc player
Signal Detection System: Non-contact optical
pickup (semiconductor laser)
Number of Channels: 2 channels (stereo)
Frequency Response: 5 Hz to 20 000 Hz
Dynamic Range: 6 dB
Signal-to-Noise Ratio: 8 dB
Wow and Flutter: Less than measurable limit
GENERAL
Power Requirement:
Operating Voltage:
DC 14.4 V (11 V to 16 V allowance)
Grounding System: Negative ground
Allowable Operating Temperature:
0°C to +40°C
Dimensions (W × H × D):
Installation Size (approx.):
182 mm × 52 mm × 150 mm
Panel Size (approx.):
188 mm × 58 mm × 11 mm
Mass (approx.):
1.4 kg (excluding accessories)
Design and specifications are subject to change
without notice.
EN12-17_KD-G285[U]f.indd 17EN12-17_KD-G285[U]f.indd 17 12/7/05 4:10:56 PM12/7/05 4:10:56 PM

2
INDONESIA
Terima kasih telah membeli produk JVC.
Harap membaca seluruh petunjuk dengan teliti sebelum mengoperasikan, untuk memastikan anda
memahami secara keseluruhan dan mendapatkan performansi terbaik dari unit ini.
PENTING UNTUK PRODUK-PRODUK LASER
1. PR DUK LASER KELAS 1
2. PERHATIAN: Jangan membuka penutup atas. Tidak ada bagian yang dapat diperbaiki oleh
pengguna di dalam unit tersebut; biarkanlah semua bagian yang diperbaiki untuk memenuhi
syarat perbaikan teknis.
3. PERHATIAN: Radiasi laser yang terlihat dan tidak terlihat ketika membuka dan salah sambung
atau gagal. Hindari sorotan pencahayaan yang langsung.
4. REPR DUKSI DARI LABEL: LABEL PERHATIAN, TEMPATKAN DI LUAR UNIT TERSEBUT.
Cara melepas/memasang panel
kontrol
Melepas...
Memasang…
Peringatan
Jika anda perlu mengoperasikan unit
tersebut sementara mengemudi, pastikan
untuk melihat ke atas dengan hati-hati atau
anda mungkin terlibat suatu kecelakaan lalu
lintas.
Perhatian pada pengaturan volume
Disk-disk menghasilkan sangat kecil noise
(derau) dibandingkan dengan sumber yang
lain. Kecilkan volume sebelum disk untuk
menghindari kerusakan speaker-speaker
dengan penambahan mendadak dari level
keluaran.
Bagaimana mereset unit anda
• Penyetelan-penyetelan pengaturan awal anda
akan terhapus juga.
• Jika sebuah disk sudah dimuat, akan
dikeluarkan. Hati-hati untuk tidak
menjatuhkan disk tersebut.
Bagaimana secara paksa
mengeluarkan sebuah disk
• Jika ini tidak bekerja, coba mengeset kembali
(reset) alat penerima anda.
• Hati-hati untuk tidak menjatuhkan disk
tersebut ketika dikeluarkan.
IN02-05_KD-G285[UN]1.indd 2IN02-05_KD-G285[UN]1.indd 2 11/28/05 5:30:21 PM11/28/05 5:30:21 PM

3
INDONESIA
Bagaimana membaca manual ini
• Opreasi tombol secara umum dijelaskan
dengan ilustrasi dalam tabel di bawah ini.
• Beberapa saran dan catatan yang berkaitan
dijelaskan dalam “Lebih lagi tentang alat
penerima ini” (lihat halaman 1 dan 15).
Tekan dengan singkat.
Tekan secara berulang.
Tekan salah satu.
Tekan dan tahan sampai
respon yang anda
harapkan dimulai.
Tekan dan tahan kedua
tombol pada waktu
bersamaan.
Tanda berikut digunakan untuk
mengindikasikan...
: Pengoperasian pemutar CD yang
terdapat di dalam.
:
Pengoperasian CD changer eksternal.
:
Indikator ditampilkan untuk
pengoperasian yang bersangkutan.
Bagaimana menggunakan tombol
MODE
Jika anda menekan MODE, alat penerima masuk
ke dalam mode fungsi-fungsi, kemudian tombol-
tombol nomor dan tombol-tombol 5/∞ bekerja
sebagai tombol-tombol yang berbeda fungsi.
Contoh: Ketika tombol nomor 2 bekerja
sebagai tombol MO (mono).
Untuk menggunakan tombol-tombol ini untuk
fungsi aslinya setelah menekan MODE, tunggu
5 detik tanpa menekan tombol apa pun sampai
mode fungsi kosong atau tekan lagi MODE.
DAFTAR ISI
Panel kontrol ................................... 4
Memulai .......................................... 5
Pengoperasian dasar ............................................. 5
Pengoperasian radio ......................... 6
Pengoperasian disk .......................... 7
Memutar sebuah disk di dalam unit ..................... 7
Memutar disk di dalam CD changer ...................... 7
Penyetelan suara-suara .................... 0
Pengaturan-pengaturan umum
— PSM .........................................
Pengoperasian komponen eksternal
... 2
Remote kontrol — RM-RK60 ................. 2
Perawatan ....................................... 3
Lebih lagi tentang alat penerima ini ... 4
Pemecahan Masalah ......................... 6
Spesifikasi-spesifikasi ....................... 7
Untuk keselamatan...
• Jangan menaikkan level volume terlalu tinggi
karena akan menghalangi suara dari luar, dan
membahayakan perjalanan anda.
• Hentikan mobil sebelum melakukan
pengoperasian yang rumit.
Suhu dalam mobil...
Jika anda telah memarkir mobil terlalu lama
dalam cuaca yang panas atau dingin, tunggu
hingga suhu dalam mobil menjadi normal
kembali sebelum mengoperasikan unit ini.
Indikator hitung mundur waktu
IN02-05_KD-G285[UN]1.indd 3IN02-05_KD-G285[UN]1.indd 3 11/29/05 9:03:47 AM11/29/05 9:03:47 AM

4
INDONESIA
Panel kontrol
Pengenalan bagian-bagian
Jendela tampilan
1 Tombol-tombol 4 /¢
2 Tombol (standby/hidup pelemah)
3 Tombol-tombol 5 (naik) / ∞ (turun)
4 Celah pemuatan
5 Jendela tampilan
6 Tombol 0 (keluar)
7 Tombol EQ (equalizer)
8 Sensor remote kontrol
• Anda dapat mengendalikan unit ini
dengan pengontrol jauh opsional yang bisa
anda beli.
ntuk lebih jelas, lihat halaman 12 dan
13.
• JANGAN membiarkan sensor remote
kontrol pada cahaya kuat (sinar matahari
langsung atau pencahayaan buatan).
9 Tombol SRC (sumber)
p Tombol BAND
q Tombol kontrol
w Tombol SEL (pilih)
e Tombol M (mono)
r Tombol SSM (Memori Urutan Stasiun-
Kuat)
t Tombol-tombol nomor
y Tombol RPT (ulang)
u Tombol RND (acak)
i Tombol M DE
o Tombol DISP (tampilan)
; Tombol (pelepas panel kontrol)
Jendela tampilan
a Indikator MP3: Lampu menyala hanya
ketika sebuah MP3 disk diputarkan di dalam
CD changer.
s Indikator-indikator sumber putar ulang—
CH: Lampu menyala hanya ketika CD-CH
dipilih sebagai sumber putar ulang.
DISC: Menyala untuk alat pemutar CD.
d Mode putar ulang / indikator item—RND
(acak), (disk), RPT (ulang)
f Indikator L UD (kekerasan)
g Indikator EQ (equalizer)
h Indikator-indikator mode suara (C-EQ:
kostum equalizer)—JAZZ, CLASSIC,
HIP H P, P PS, R CK, USER
j Indikator Tr (trek)
k Tampilan sumber / Indikator level volume /
Indikator hitung mundur waktu
l Tampilan utama
/ Indikator-indikator penerima tuner—ST
(stereo), M (mono)
IN02-05_KD-G285[UN]1.indd 4IN02-05_KD-G285[UN]1.indd 4 11/15/05 4:30:13 PM11/15/05 4:30:13 PM
Other manuals for KD-G285
1
Table of contents
Languages:
Other JVC Car Receiver manuals

JVC
JVC 0302KKSMDTJEIN User manual

JVC
JVC KD-PDR41 Quick start guide

JVC
JVC KD-DV5101 User manual

JVC
JVC KD-S14 User manual

JVC
JVC KD-AVX77 - EXAD - DVD Player User manual

JVC
JVC KD-R463 User manual

JVC
JVC KV-V8 Guide

JVC
JVC KDG430 - Radio / CD User manual

JVC
JVC EXAD KD-AVX44 Guide

JVC
JVC KD-DV7306 User manual