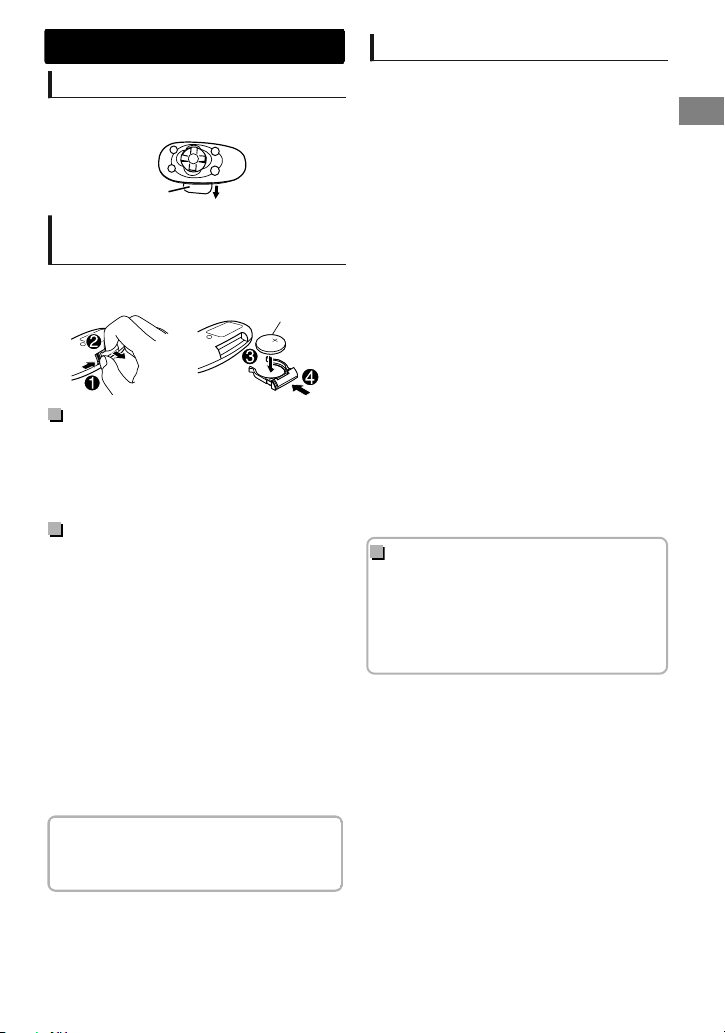
JVC KW-R400 User manual

[TIPE]
[TAPE MOBIL]
CD RECEIVER / ALAT PENERIMA CD
For canceling the display demonstration, see page 4. /
Untuk membatalkan tampilan demonstrasi, lihat halaman 4.
ENGLISH
INDONESIA
INSTRUCTIONS
BUKU PETUNJUK
ʷʾʿʿƖʷʷʻ
ƾƿ
KW-R500/KW-R400
For installation and connections, refer to the separate manual.
Untuk instalasi dan penyambungan, lihat buku pedoman terpisah.

Thank you for purchasing a JVC product.
Please read all instructions carefully before operation, to ensure your complete understanding and to
obtain the best possible performance from the unit.
IMPORTANT FOR LASER PRODUCTS
1. CLASS 1 LASER PRODUCT
2. CAUTION: Do not open the top cover. There are no user serviceable parts inside the unit;
leave all servicing to qualified service personnel.
3. CAUTION: Visible and/or invisible class 1M laser radiation when open. Do not view
directly with optical instruments.
4. REPRODUCTION OF LABEL: CAUTION LABEL, PLACED OUTSIDE THE UNIT.
[European Union only]
Warning:
Stop the car before operating the unit.
Caution:
Adjust the volume so that you can hear sounds
outside the car. Driving with the volume too high
may cause an accident.
Avoid using the USB device or iPod/iPhone if it
might hinder driving safety.
Caution on volume setting:
Digital devices (CD/USB) produce very little noise
compared with other sources. Lower the volume
before playing these digital sources to avoid
damaging the speakers by the sudden increase of
the output level.
Temperature inside the car:
If you have parked the car for a long time in hot
or cold weather, wait until the temperature in the
car becomes normal before operating the unit.
Condensation:
When the car is air-conditioned, moisture may
collect on the laser lens. This may cause disc read
errors. In this case, remove the disc and wait for
the moisture to evaporate.
How to reset your unit
Your preset adjustments will also be erased.
How to forcibly eject a disc
(Hold)
Be careful not to drop the disc when it ejects.
If this does not work, reset your unit.
Maintenance
Cleaning the unit
Wipe off the dirt on the panel with a dry silicon or
soft cloth. Failure to observe this precaution may
result in damage to the unit.
2|ޓENGLISH
2011/12/5ޓ17:2:39KW-R500_UN_EN

Preparing
When you use the remote controller for the first
time, pull out the insulation sheet.
Insulation sheet
Replacing the lithium coin
battery
If the effectiveness of the remote controller
decreases, replace the battery.
CR2025
Caution:
Danger of explosion if battery is incorrectly
replaced. Replace only with the same or
equivalent type.
Battery shall not be exposed to excessive heat
such as sunshine, fire, or the like.
Warning:
Do not install any battery other than CR2025 or
its equivalent.
Do not leave the remote controller in places
(such as dashboards) exposed to direct
sunlight for a long time.
Store the battery in places out of reach of
children.
Do not recharge, short, disassemble, heat the
battery, or dispose of it in a fire.
Do not place the battery with other metallic
materials.
Do not poke the battery with tweezers or
similar tools.
Insulate the battery by wrapping it with tape
when disposing or storing it.
KW-R500 is equipped with the steering wheel
remote control function. For details, refer also to
the instructions supplied with the remote
adapter.
Remote controller
.................................................. 3
Preparation ............................................................ 4
Canceling the display demonstration
Setting the clock
Basic operations ................................................... 4
Radio ........................................................................ 6
CD/USB .................................................................... 7
iPod/iPhone
(KW-R500 only)
............................... 8
External components ......................................... 9
Bluetooth姞
.............................................................. 9
Illumination color adjustments
(KW-R500 only)
...................................................... 10
Brightness adjustments .................................. 11
Sound adjustments .......................................... 11
Menu operations ............................................... 12
Additional information ................................... 14
Troubleshooting ................................................ 16
Specifications ..................................................... 17
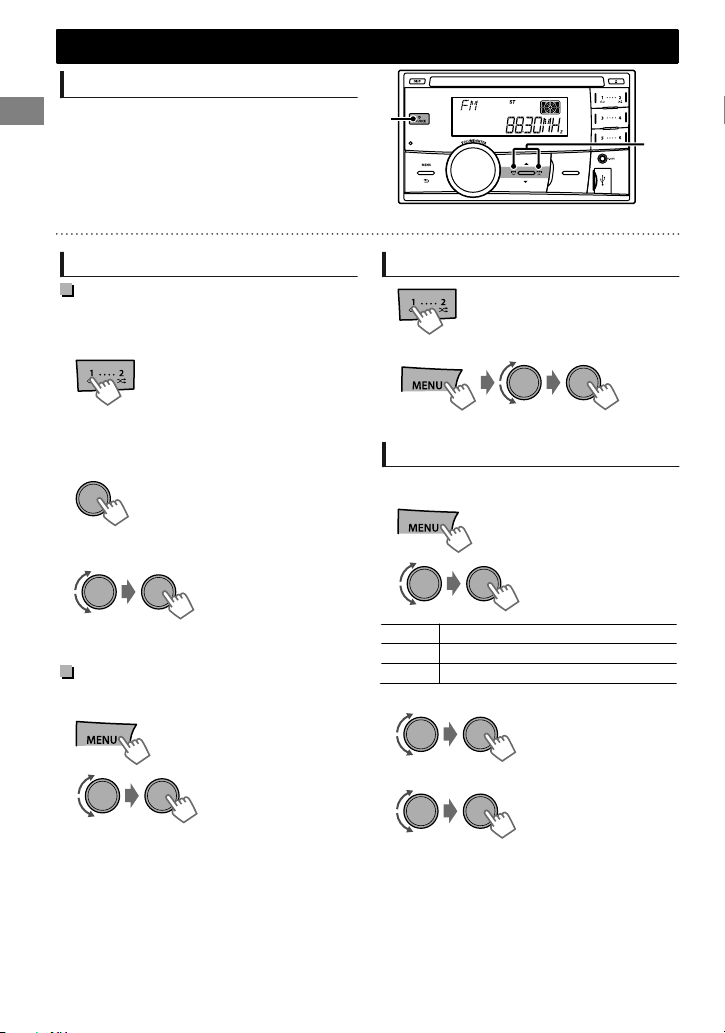
How to read this manual:
This manual mainly explains operations using
the buttons on the control panel.
< > indicates the displays on the control
panel.
[XX] indicates the initial setting of a menu
item.
Contents
Remote controller
ENGLISHޓ|3
2011/12/5ޓ17:2:39KW-R500_UN_EN

Canceling the display
demonstration
The display demonstration is always turned on
unless you cancel it.
(Hold)
1
(Initial setting)
2
3Select <DEMO OFF>.
4Press MENU to exit.
Setting the clock
(Hold)
1
2Select <CLOCK>.
3Select <CLOCK SET>.
4Adjust the hour.
5Adjust the minute.
6Press MENU to exit.
Basic operations
Display information
Changes the display information. (Press)
Scrolls the current display information. (Hold)
Source Display
Radio Frequency )Clock
CD/USB Album title/Artist* -Track title* -Track no./Playing time -Track
no./Clock -(back to the beginning)
*“NO NAME”appears for conventional CDs or if not recorded.
iPod/iPhone (HEAD MODE/
IPOD MODE) *1
iPod/iPhone (EXT MODE) *1 EXT MODE)Clock
External Components (AUX) F-AUX or R-AUX)Clock
Bluetooth Audio BT AUDIO)Clock
*1 For KW-R500 only.
Preparation
Preparation
4|ޓENGLISH
2011/12/5ޓ17:2:39KW-R500_UN_EN

Remote controller
USB input terminal
Front AUX input jack
DO NOT expose to bright sunlight.
Remote sensor
Ejects the disc
Display window
Control dial
Loading slot
Control panel
KW-R500
KW-R400
Aim the remote controller directly at the sensor.
When you press or hold the following button(s)...
Control panel Remote
controller General function
SOURCE
—
Turns on.
Turns off. (Hold)
Press the SOURCE button on the control panel and turn
the control dial within 2 seconds to select the source.
SOURCE Press repeatedly to select the source.
Control dial
(turn)
VOL - / + Adjusts the volume level.
— Selects items.
Control dial
(press)
)
Mutes the sound or pauses playback.
Press the button again to cancel muting or resume
playback.
— Confirms selection.
—Enters <BRIGHTNESS>menu directly. (KW-R400 only)
('page 11)
iPod — Switches to iPod source. (KW-R500 only)
Number
buttons
(1- 6)
—
Selects the preset stations.
Stores the current station into the selected number button.
(Hold) ('page 6)
EQ SOUND Selects the preset sound mode. ('page 11)
—Returns to the previous menu.
Exits from the menu. (Hold)
/ / Selects a preset station. ('page 6)
Selects MP3/WMA folder. ('page 7)
/ /
Searches for a station automatically. ('page 6)
Searches for a station manually. (Hold)
Selects track. ('page 7, 8)
Fast-forwards or reverses track. (Hold)
Basic operations
ENGLISHޓ|5
2011/12/5ޓ17:2:39KW-R500_UN_EN

Searching for a station
Select <FM> or <AM>.
Auto search. (Press)
Manual search. (Hold)
“M”flashes, then press the button repeatedly.
A
B
“ST”lights up when receiving an FM stereo broadcast with sufficient signal strength.
Storing stations in memory
Manual presetting
You can preset up to 18 stations for FM and 6
stations for AM.
While listening to a station...
(Hold)
The preset number flashes and “MEMORY”
appears. The current station is stored to the
selected number button (1 - 6).
- - - - - - - - or - - - - - - - -
(Hold)
“PRESET MODE”flashes.
1
The preset number flashes and “MEMORY”
appears.
2Select preset number.
Auto presetting (FM only)
SSM (Strong-station Sequential Memory)
You can preset up to 18 stations for FM.
(Hold)
1
-<TUNER>
-<SSM>
-<SSM 01 – 06>
“SSM”flashes. When all the stations are stored,
“SSM”stops flashing.
2
To preset <SSM 07 – 12>/<SSM 13 – 18>,
repeat steps 1 and 2.
Selecting a preset station
- - - - - - - - or - - - - - - - -
You can also select a preset station using / .
Setting the Radio Timer
You can tune in to a preset station at a specific
time regardless of the current source.
(Hold)
1
-<TUNER>
-<RADIO TIMER>
-<OFF>/<ONCE>/
<DAILY>
[OFF] Cancels Radio Timer.
ONCE Activates once.
DAILY Activates daily.
2
-<FM>/<AM>
-<01>... <18>for FM/
<01>... <06>for AM
3Select the preset station.
4Set the activation time.
5Press MENU to exit.
lights up after the Radio Timer has been set.
Only one timer can be set. Setting a new timer
will override the previous setting.
The Radio Timer will not activate if the unit is
turned off or if <AM>is set to <OFF>after
selecting an AM station for the timer.
Radio
Radio
6|ޓENGLISH
2011/12/5ޓ17:2:39KW-R500_UN_EN

Playing a CD/USB device
Label side
The source changes to “CD”and playback starts.
USB 2.0 cable
(not supplied)
USB input terminal
The source changes to “USB”and playback starts.
This unit can play MP3/WMA files stored in CD-R, CD-RW, and USB mass storage device (such as a USB
memory and Digital Audio Player).
Make sure all important data has been backed up. We shall bear no responsibility for any loss of data
in USB mass storage class device while using this system.
Ejected disc not removed within 15 seconds will reload automatically.
If the disc cannot be ejected, 'page 2.
Selecting a folder/track
Selects folder.
(For MP3/WMA)
Selects track. (Press)
Fast-forwards or reverses
the track. (Hold)
Selecting a track/folder from
the list
1
(For MP3/WMA)
2Select a folder.
For MP3/WMA
If the disc contains many folders or tracks, you
can fast search for desired folder or track by
turning the control dial quickly.
3Select a track.
Selecting the playback modes
You can select one of the following playback
modes at a time.
Press 1for REPEAT.
Press 2for RANDOM.
Press again to exit.
- - - - - - - - or - - - - - - - -
(Hold)
<REPEAT>)<RANDOM>
1
2
REPEAT
RPT OFF Cancels repeat playback.
TRACK RPT Repeats current track.
FOLDER RPT * Repeats current folder.
RANDOM
RND OFF Cancels random playback.
FOLDER RND *
Randomly plays all tracks of
current folder, then tracks of
next folders.
ALL RND Randomly plays all tracks.
* For MP3/WMA
CD/USB
CD/USB
ENGLISHޓ|7
2011/12/5ޓ17:2:39KW-R500_UN_EN

iPod/iPhone
KW-R500 only
Playing an iPod/iPhone
USB 2.0 cable (accessory of the iPod/iPhone)
USB input terminal
The source changes to “USB”-“USB-IPOD”and playback starts.
Selecting the control mode
#<HEAD MODE>/<IPOD MODE>/
<EXT MODE>
HEAD
MODE
Controls iPod playback through this
unit.
IPOD
MODE
Controls iPod playback from the
iPod/iPhone.
EXT
MODE
Allows any audio signals from iPod/
iPhone.
You can also change the setting using <IPOD
SWITCH>in the menu. ('page 13)
Selecting a track
Applicable under <HEAD MODE/IPOD MODE>
only.
Selects track/chapter.
(Press)
Fast-forwards or reverses
the track. (Hold)
Selecting a track from the list
Applicable under <HEAD MODE>only.
1
PLAYLISTS)ARTISTS)ALBUMS)SONGS)
PODCASTS)GENRES)COMPOSERS)(back to
the beginning)
2Select the desired list.
Repeat this step until the desired track is selected.
If the selected menu contains many tracks, you
can fast search for the desired track by turning
the control dial quickly.
3Select the desired track.
Selecting the playback modes
Applicable under <HEAD MODE>only.
You can select one of the following playback
modes at a time.
Press 1for REPEAT.
Press 2for RANDOM.
Press again to exit.
- - - - - - - - or - - - - - - - -
(Hold)
<REPEAT>)<RANDOM>
1
2
REPEAT
ONE RPT Functions the same as “Repeat
One”of the iPod.
ALL RPT Functions the same as “Repeat
All”of the iPod.
RANDOM
RND OFF Cancels random playback.
SONG RND Functions the same as “Shuffle
Songs”of the iPod.
ALBUM RND Functions the same as “Shuffle
Albums”of the iPod.
“ALBUM RND”is not applicable for some iPod/
iPhone.
8|ޓENGLISH
2011/12/5ޓ17:2:39KW-R500_UN_EN

For details, refer also to the instructions supplied with the external components.
Playing an external component from Front/Rear AUX
Portable audio
player, etc.
3.5 mm stereo mini plug
(not supplied)
3.5 mm stereo mini plug
(with “L” shaped
connector) (not supplied)
1Connect to F-AUX on the control panel
and/or R-AUX on the rear panel.
(Hold)
-<SRC SELECT>
-<F-AUX>/<R-AUX>
-<F-AUX ON>or
<R-AUX ON>
Press MENU to exit.
2Set the source as necessary.
3Select <F-AUX> or <R-AUX>.
4Turn on the connected component and
start playing the source.
Use a 3-terminal plug head stereo mini plug for optimum audio output. Otherwise, sound
may be interrupted or unclear while listening to an external component.
Bluetooth
姞
For Bluetooth operations, it is required to connect the Bluetooth adapter, KS-BTA100
(separately purchased) to the auxiliary input jack (R-AUX/BT ADAPTER) on the rear of
the unit. ('Installation/Connection Manual)
KS-BTA100 is not available in some countries. Please contact your dealer where you
purchased this unit.
Operations may be different depending on the connected Bluetooth device. For
details, refer also to the instructions supplied with the device.
Preparation
For details on registering and using the Bluetooth device, refer to the instructions manual supplied with
KS-BTA100.
1Register (pair) a Bluetooth device with KS-BTA100.
-<SRC SELECT>
-<R-AUX>
-<BT ADAPTER>
2Change the <SRC SELECT> settings of this unit.
(Hold)
3Press MENU to exit.
KS-BTA100
External components
External components
ENGLISHޓ|9
2011/12/5ޓ17:2:39KW-R500_UN_EN

Illumination color adjustments
KW-R500 only
Display zone
Button zone
All zone: Includes both Button zone and
Display zone.
Selecting the preset color
You can select a preset color for <BUTTON
ZONE>,<DISP ZONE>, and <ALL ZONE>
separately.
(Hold)
1
2Select <COLOR>.
BUTTON ZONE COLOR 01-29/USER/
COLOR FLOW 01-03*
* Color changes in
different speeds.
DISP ZONE
ALL ZONE
Initial color: BUTTON ZONE [06], DISP ZONE
[01], ALL ZONE [06].
If <ALL ZONE>is selected, the button and
display illumination will change to the current/
selected <BUTTON ZONE>color.
3
4Press MENU to exit.
Storing your own adjustments
You can store your own day and night colors for
<BUTTON ZONE>and <DISP ZONE>separately.
(Hold)
1
2Select <COLOR SETUP>.
DAY
COLOR
BUTTON
ZONE
Select a primary
color <RED/GREEN/
BLUE>, and then
adjust the level
<00-31>. Repeat this
procedure until you
have adjusted all the
three primary colors.
Your adjustment is
automatically stored
to “USER”.
If “00”is selected for
all the primary colors
for <DISP ZONE>,
nothing appears on
the display.
DISP
ZONE
NIGHT
COLOR
BUTTON
ZONE
DISP
ZONE
MENU
COLOR
ON Changes the display and
buttons illumination
during menu, list search,
and playback mode
operations.
OFF
NIGHT COLOR/DAY COLOR is changed by
turning on/off your car’s headlight.
3
4Press MENU to exit.
10 |ޓENGLISH
2011/12/5ޓ17:2:39KW-R500_UN_EN

You can select your preferred brightness for <BUTTON ZONE>,<DISP ZONE>separately.
Brightness button is only available for KW-R400.
For KW-R500, 'page 12.
1
BUTTON ZONE BUTTON 00 to 31
DISP ZONE DISP 00 to 31
2
3Press MENU to exit.
Sound adjustments
This unit memorizes sound settings adjusted for each individual source.
Selecting the preset sound
You can select a preset sound mode, for each
individual source, suitable for the music genre.
- - - - - - - - or - - - - - - - -
Press repeatedly.
DYNAMIC-VOCAL BOOST-BASS BOOST-
USER-FLAT-NATURAL-(back to the beginning)
Storing your own adjustments
While listening, you can adjust and store the tone
level for each individual source.
Easy Equalizer
(Hold)
1
(Initial: [XX])
SUB.W* 00 to 08 [08]
BASS LVL -06 to +06 [+05]
MID LVL -06 to +06 [00]
TRE LVL -06 to +06 [+05]
The adjustments are stored and <USER>is
activated.
2Adjust the level.
* Available only when <L/O MODE> is set to
<SUB.W>. ('page 12)
Pro Equalizer
(Hold)
1
-<PRO EQ>
-<BASS>/<MIDDLE>/
<TREBLE>
2
Adjust the sound elements of the selected tone.
BASS (Initial: [XX])
Frequency 60/80/[100]/200 Hz
Level LVL -06 to +06 [+05]
Q[Q1.0]/Q1.25/Q1.5/Q2.0
MIDDLE
Frequency 0.5/[1.0]/1.5/2.5 kHz
Level LVL -06 to +06 [00]
Q Q0.75/Q1.0/[Q1.25]
TREBLE
Frequency 10.0/[12.5]/15.0/17.5 kHz
Level LVL -06 to +06 [+05]
Q[Q FIX]
3
4Repeat steps 2 and 3 to adjust other tones.
The adjustments are stored and <USER>is
activated.
5Press MENU to exit.
Brightness adjustments
ENGLISHޓ|11
2011/12/5ޓ17:2:39KW-R500_UN_EN

(Hold)
If no operation is done for about 60 seconds, the
operation will be canceled.
1
2
3Repeat step 2 if necessary.
To return to the previous menu, press .
To exit from the menu, press DISP or MENU.
Menu item Selectable setting (Initial: [XX])
DEMO For settings, 'page 4.
CLOCK
COLOR For settings, 'page 10. (KW-R500 only)
COLOR SETUP
DIMMER
DIMMER SET Selects the display and button illumination adjusted in the <BRIGHTNESS>/
<COLOR SETUP>setting.
[AUTO]: Changes between the Day and Night adjustments when you turn
off/on the car headlights. *1
ON: Selects the Night adjustments.
OFF: Selects the Day adjustments.
BRIGHTNESS DAY[31]/NIGHT[15]: Brightness settings for the display and button
illumination for day and night.
BUTTON ZONE/DISP ZONE: Sets the brightness levels 00 — 31.
DISPLAY
SCROLL *2 [ONCE]: Scrolls the display information once.
AUTO: Repeats scrolling (at 5-second intervals).
OFF: Cancels.
TAG DISPLAY [ON]: Shows the TAG information while playing MP3/WMA tracks.
OFF: Cancels.
PRO EQ For settings, 'page 11.
AUDIO
FADER *3*4 R06 — F06[00]: Adjusts the front and rear speaker output balance.
BALANCE *4 L06 — R06[00]: Adjusts the left and right speaker output balance.
LOUD
(Loudness)
ON: Boosts low and high frequencies to produce a well-balanced sound at
a low volume level.
[OFF]: Cancels.
VOL ADJUST
(Volume adjust)
-05 — +05[00]: Presets the volume adjustment level of each source,
compared to the FM volume level. Before adjustment, select the source you
want to adjust. (“VOL ADJ FIX”appears if “FM”is selected.)
L/O MODE
(Line output
mode)
Select if the LINE OUT (REAR) terminals on the rear panel are connected to
the speakers or subwoofer through an external amplifier.
SUB.W: Subwoofer
[REAR]: Speakers
*1 The illumination control lead connection is required. (See “Installation/Connection Manual”.)
This setting may not work correctly on some vehicles (particularly on those having a control
dial for dimming). In this case, change the setting to other than <DIMMER AUTO>.
*2 Some characters or symbols will not be shown correctly (or will be blanked) on the display.
*3 If you are using a two-speaker system, set the fader level to “00”.
*4 This adjustment will not affect the subwoofer output.
Menu operations
Menu operations
12 |ޓENGLISH
2011/12/5ޓ17:2:39KW-R500_UN_EN

Menu item Selectable setting (Initial: [XX])
AUDIO
SUB. W *5
(Subwoofer)
OFF: Cancels.
[ON]: Turns on the subwoofer output.
SUB.W LPF *6
(Subwoofer low-
pass filter)
LOW 55Hz/MID 85Hz/[HIGH 120Hz]: Audio signals with frequencies
lower than 55 Hz/85 Hz/120 Hz are sent to the subwoofer.
SUB.W LEVEL *6
(Subwoofer level)
00 — 08[08]: Adjusts the subwoofer output level.
HPF *6
(High-pass filter)
LOW 100Hz/MID 120Hz/HIGH 150Hz: Activates the High Pass Filter.
Audio signal with frequencies lower than 100 Hz/120 Hz/150 Hz are cut off
from the front/rear speakers.
[OFF]: Deactivates. (All signals are sent to the front/rear speakers.)
BEEP
(Keytouch tone)
[ON]/OFF: Activates or deactivates the keypress tone.
TEL MUTING *7
(Telephone
muting)
ON: Mutes the sounds of the unit while using the mobile phone system
(not connected through Bluetooth adapter KS-BTA100).
[OFF]: Cancels.
AMP GAIN
(Amplifier gain)
LOW POWER: Limits the maximum volume level to 30. (Select if the
maximum input power of each speaker is less than 50 W to prevent
damaging the speakers.)
[HIGH POWER]: The maximum volume level is 50.
TUNER
SSM For settings, 'page 6. (Displayed only when the source is “FM”.)
MONO
(Monaural mode)
Displayed only when the source is “FM”.
[OFF]: Enables stereo FM reception.
ON: Improves the FM reception but stereo effect will be lost.
IF BAND
(Intermediate
frequency band)
[AUTO]: Increases the tuner selectivity to reduce interference noises
between adjacent stations. (Stereo effect may be lost.)
WIDE: Subject to interference noises from adjacent stations, but sound
quality will not be degraded and the stereo effect will remain.
RADIO TIMER For settings, 'page 6.
IPOD SWITCH
(iPod/iPhone control)
[HEAD MODE]/IPOD MODE/EXT MODE:
For settings, 'page 8. (Displayed only when the source is “USB-IPOD”.)
(KW-R500 only)
SRC SELECT
AM *8 [ON]/OFF: Enables or disables “AM”in source selection.
F-AUX *8
(Front auxiliary
input)
[ON]/OFF: Enables or disables “F-AUX”in source selection.
R-AUX *8
(Rear auxiliary
input)
ON/OFF: Enables or disables “R-AUX”in source selection.
[BT ADAPTER]: Select if the rear auxiliary input jack is connected to the
Bluetooth adapter, KS-BTA100 ('page 9). The source name will be
changed to “BT AUDIO”.
*5 Displayed only when <L/O MODE> is set to <SUB.W>.
*6 Displayed only when <SUB.W> is set to <ON>.
*7 To activate this function, select <SRC SELECT>#<R-AUX>#<R-AUX ON>/<R-AUX OFF>.
*8 Displayed only when the unit is in any source other than the corresponding source “AM/
F-AUX/R-AUX/BT AUDIO”.
Menu operations
ENGLISHޓ|13
2011/12/5ޓ17:2:39KW-R500_UN_EN

About discs
This unit can only play the following CDs:
This unit can play back multi-session discs;
however, unclosed sessions will be skipped
during playback.
Unplayable discs
Discs that are not round.
Discs with coloring on the recording surface or
discs that are dirty.
Recordable/ReWritable disc that has not been
finalized. (For details on disc finalization, refer
to your disc writing software and your disc
recorder instruction manual.)
8 cm CD. Attempting to insert using an adapter
can cause malfunction. There may also be
problems ejecting the disc if inserted.
Handling discs
Do not touch the recording surface of the disc.
Do not stick tape etc. on the disc, or use a disc
with tape stuck on it.
Do not use any accessories for the disc.
Clean from the center of the disc and move
outwards.
Clean the disc with a dry silicon or soft cloth.
Do not use any solvents.
When removing discs from this unit, pull them
out horizontally.
Remove any burrs from the center hole and
disc edge before inserting a disc.
DualDisc playback
The Non-DVD side of a “DualDisc”does not
comply with the “Compact Disc Digital Audio”
standard. Therefore, the use of Non-DVD side of a
DualDisc on this product may not be
recommended.
About audio files
Playable files
File extensions: MP3(.mp3), WMA(.wma)
Bit rate:
MP3: 8 kbps - 320 kbps
WMA: 32 kbps - 192 kbps
Sampling frequency:
MP3: 48 kHz, 44.1 kHz, 32 kHz, 24 kHz,
22.05kHz, 16 kHz, 12 kHz, 11.025 kHz, 8 kHz
WMA: 48 kHz, 44.1 kHz, 32 kHz
Variable bit rate (VBR) files. (The elapsed time
for VBR files will not be displayed correctly.)
Unplayable files
MP3 files:
- encoded in MP3i and MP3 PRO format
- encoded in an inappropriate format
- encoded with Layer 1/2
WMA files:
- encoded in lossless, professional, and voice
format
- not based upon Windows Media® Audio
- copy-protected with DRM
Files which include data such as AIFF, ATRAC3,
etc.
Maximum number of characters
for file/folder name
Varies depending on the disc format used
(includes 4 extension characters—<.mp3> or
<.wma>).
ISO 9660 Level 1 and 2: 64 characters
Romeo: 64 characters
Joliet: 32 characters
Windows long file name: 64 characters
Others
This unit can show WMA Tag and ID3 Tag
Version 1.0/1.1/2.2/2.3/2.4 (for MP3).
The search function works but search speed is
not constant.
Additional information
14 |ޓENGLISH
2011/12/5ޓ17:2:39KW-R500_UN_EN

About USB device
When connecting a USB cable, use the USB 2.0
cable.
You cannot connect a computer or portable
HDD to the USB input terminal of the unit.
Connect only one USB device to the unit at a
time. Do not use a USB hub.
USB devices equipped with special functions
such as data security functions cannot be used
with the unit.
Do not use a USB device with 2 or more
partitions.
This unit cannot recognize a USB device whose
rating is other than 5 V and exceeds 1 A.
This unit may not recognize a memory card
inserted into the USB card reader.
This unit may not play back files in a USB
device properly when using a USB extension
cord.
Depending on the shape of the USB devices
and connection ports, some USB devices may
not be attached properly or the connection
might be loose.
Operation and power supply may not work as
intended for some USB devices.
The maximum number of characters for:
– Folder names: 63 characters
– File names: 63 characters
– MP3 Tag: 60 characters
– WMA Tag: 60 characters
This unit can recognize a total of 65 025 files,
255 folders (255 files per folder including folder
without unsupported files), and of 8
hierarchies.
Cautions
Do not pull out and attach the USB device
repeatedly while “READING”is shown on the
display.
Electrostatic shock at connecting a USB device
may cause abnormal playback of the device. In
this case, disconnect the USB device then reset
this unit and the USB device.
Do not leave a USB device in the car, expose to
direct sunlight, or high temperature. Failure to
do so may result in deformation or cause
damages to the device.
About iPod/iPhone
iPod/iPhone that can be connected to this unit:
- iPod touch (4th generation)
- iPod touch (3rd generation)
- iPod touch (2nd generation)
- iPod touch (1st generation)
- iPod classic
- iPod with video (5th generation)*
- iPod nano (6th generation)
- iPod nano (5th generation)
- iPod nano (4th generation)
- iPod nano (3rd generation)
- iPod nano (2nd generation)
- iPod nano (1st generation)*
- iPhone 4S
- iPhone 4
- iPhone 3GS
- iPhone 3G
- iPhone
*<IPOD MODE>/<EXT MODE>are not
applicable.
It is not possible to browse video files on the
“Videos”menu in <HEAD MODE>.
The song order displayed on the selection
menu of this unit may differ from that of the
iPod.
When operating an iPod/iPhone, some
operations may not be performed correctly or
as intended. In this case, visit the following JVC
website:
<http://www3.jvckenwood.com/english/car/
index.html> (English website only).
Trademark and license notice
Microsoft and Windows Media are either
registered trademarks or trademarks of
Microsoft Corporation in the United States
and/or other countries.
“Made for iPod” and “Made for iPhone” mean
that an electronic accessory has been designed
to connect specifically to iPod, or iPhone,
respectively, and has been certified by the
developer to meet Apple performance
standards. Apple is not responsible for the
operation of this device or its compliance with
safety and regulatory standards. Please note
that the use of this accessory with iPod, or
iPhone may affect wireless performance.
iPhone, iPod, iPod classic, iPod nano, and iPod
touch are trademarks of Apple Inc., registered
in the U.S. and other countries.
Additional information
ENGLISHޓ|15
2012/2/28ޓ20:18:27KW-R500_UN_EN

Symptom Remedy/Cause
4General
No sound, sound interrupted or
static noise.
Check the cords, antenna and cable connections.
Check the condition of the disc, connected device and
recorded tracks.
“MISWIRING CHK WIRING THEN
RESET UNIT”/“WARNING CHK
WIRING THEN RESET UNIT”
appears on the display and no
operations can be done.
Ensure the terminals of the speaker leads are properly insulated
with tape before resetting the unit. ('page 2)
If the message does not disappear, consult your JVC car audio
dealer or kits supplying company.
The unit does not work at all. Reset the unit. ('page 2)
Source cannot be selected. Check the <SRC SELECT>setting. ('page 13)
The correct characters are not
displayed (e.g. album name).
This unit can only display letters (upper case), numbers, and a
limited number of symbols.
4FM/AM
SSM automatic presetting does
not work.
Store stations manually.
4CD/USB/iPod/iPhone
“PLEASE”and “EJECT”appear
alternately on the display.
Press [], then insert the disc correctly.
“IN DISC”appears on the display. The disc cannot be ejected properly. Make sure nothing is
blocking the loading slot.
“READING”keeps flashing on the
display.
A longer readout time is required. Do not use too many
hierarchical levels and folders.
Reload the disc or reattach the USB device.
Tracks/folders are not played
back in the order you have
intended.
The playback order is determined by the file name (USB) or the
order in which files were recorded (disc).
The elapsed playing time is not
correct.
This sometimes occurs during playback. This is caused by how
the tracks are recorded on the disc.
“NOT SUPPORT”appears on the
display and track skips.
Check whether the track is a playable file format.
“CANNOT PLAY”flashes on
the display.
The unit cannot detect the
connected device.
Check whether the connected device is compatible with this
unit. (USB: 'page 17) (iPod/iPhone: 'page 15)
Ensure that the device contains files in the supported
formats. ('page 14)
Reattach the device.
The iPod/iPhone does not turn
on or does not work.
(For KW-R500 only.)
Check the connection between this unit and iPod/iPhone.
Detach and reset the iPod/iPhone using hard reset. For
details on resetting the iPod/iPhone, refer to the instruction
manual supplied with the iPod/iPhone.
Check whether <IPOD SWITCH>setting is appropriate.
('page 8)
Troubleshooting
Troubleshooting
16 |ޓENGLISH
2011/12/5ޓ17:2:39KW-R500_UN_EN

AUDIO AMPLIFIER SECTION
Maximum Power Output 50 W per channel
Continuous Power Output (RMS) 20 W per channel into 4Ω, 40 Hz to 20 000 Hz at
less than 1% total harmonic distortion.
Load Impedance 4Ω (4Ω to 8Ω allowance)
Frequency Response 40 Hz to 20 000 Hz
Signal-to-Noise Ratio 70 dB
Line-Out, Subwoofer-Out Level/Impedance 4.8 V/20 kΩ load (full scale)
Output Impedance ≤ 600Ω
TUNER SECTION
FM Frequency Range 87.5 MHz to 108.0 MHz
Usable Sensitivity 9.3 dBf (0.8 μV/75Ω)
50 dB Quieting Sensitivity 16.3 dBf (1.8 μV/75Ω)
Alternate Channel
Selectivity (400 kHz) 65 dB
Frequency Response 40 Hz to 15 000 Hz
Stereo Separation 40 dB
AM Frequency Range 531 kHz to 1 611 kHz
Sensitivity/Selectivity 20 μV/40 dB
CD PLAYER SECTION
Signal Detection System Non-contact optical pickup (semiconductor
laser)
Number of Channels 2 channels (stereo)
Frequency Response 5 Hz to 20 000 Hz
Signal-to-Noise Ratio 98 dB
Wow and Flutter Less than measurable limit
USB SECTION
USB Standard USB 1.1, USB 2.0
Data Transfer Rate (Full Speed) Max. 12 Mbps
Compatible Device Mass storage class
Compatible File System FAT 32/16/12
Playable Audio Format MP3/WMA
Maximum Supply Current DC 5 V "1 A
GENERAL
Power Requirement (Operating Voltage) DC 14.4 V (11 V to 16 V allowance)
Grounding System Negative ground
Allowable Operating Temperature 0°C to +40°C
Dimensions
(W × H × D)
Installation Size approx. 178 mm × 100 mm × 156 mm
Panel Size approx. 184 mm × 112 mm × 22 mm
Mass 1.4 kJ(excluding accessories)
Subject to changes without notice.
Specifications
Specifications
ENGLISHޓ|17
2011/12/5ޓ17:2:39KW-R500_UN_EN

Terima kasih telah membeli produk JVC.
Harap membaca seluruh petunjuk dengan teliti sebelum mengoperasikan, untuk memastikan anda
memahami secara keseluruhan dan mendapatkan performansi terbaik dari unit ini.
PENTING UNTUK PRODUK-PRODUK LASER
1. PRODUK LASER KELAS 1
2. PERHATIAN: Jangan membuka penutup atas. Tidak ada bagian yang dapat diperbaiki
oleh pengguna di dalam unit tersebut; biarkanlah semua bagian yang
diperbaiki untuk memenuhi syarat perbaikan teknis.
3. PERHATIAN: Apabila terbuka, radiasi laser kelas 1M dapat terlihat dan/atau tidak terlihat.
Jangan langsung melihatnya dengan alat optik.
4. REPRODUKSI DARI LABEL: LABEL PERHATIAN, TEMPATKAN DI LUAR UNIT TERSEBUT.
[Hanya Uni Eropa]
Peringatan:
Hentikan mobil sebelum mengoperasikan unit.
Perhatian:
Sesuaikan volume agar Anda masih dapat
mendengar suara di luar mobil. Mengemudi
sembari mendengar volume unit yang terlalu
tinggi dapat menyebabkan kecelakaan.
Hindari penggunaan perangkat USB atau iPod/
iPhone jika hal ini dapat mengganggu keamanan
pengemudian Anda.
Perhatian pada pengaturan volume:
Perangkat digital (CD/USB) tidak terlalu berisik jika
dibandingkan dengan sumber lainnya. Turunkan
volume sebelum memutar sumber-sumber
digital ini untuk menghindari kerusakan pada
pengeras suara akibat peningkatan level output
[keluaran] yang tiba-tiba.
Suhu dalam mobil:
Jika anda telah memarkir mobil terlalu lama
dalam cuaca yang panas atau dingin, tunggu
hingga suhu dalam mobil menjadi normal
kembali sebelum mengoperasikan unit ini.
Kondensasi:
Jika mobil dilengkapi AC, uap air bisa bertumpuk
pada lensa laser. Kondisi bisa menyebabkan
kesalahan baca pada disk. Untuk mengatasi hal ini,
keluarkan disk dan tunggu sampai uap air menguap.
Bagaimana cara mereset unit
anda
Penyetelan-penyetelan pengaturan awal anda
akan terhapus juga.
Bagaimana secara paksa
mengeluarkan sebuah disk
(Tahan)
Hati-hati untuk tidak menjatuhkan disk
tersebut ketika dikeluarkan.
Jika ini tidak bekerja, coba mengeset kembali
(reset) unit anda.
Perawatan
Membersihkan unit
Seka kotoran pada panel dengan silikon kering
atau kain halus. Jika tindakan pencegahan ini
tidak dilakukan, unit ini bisa mengalami
kerusakan.
2|ޓINDONESIA
2011/12/5ޓ16:58:32KW-R500_UN_IN

Mempersiapkan
Jika Anda menggunakan remote kontrol untuk
pertama kali, lepaskan lembar perekat.
Lembar perekat
Mengganti baterai koin litium
Jika efektivitas remote kontrol menurun,
gantilah baterainya.
CR2025
Perhatian:
Bahaya ledakan, jika salah mengganti baterai.
Hanya mengganti dengan jenis yang sama
atau setara.
Baterai tidak boleh terpaparkan ke udara panas
yang berlebihan seperti sinar matahari, api atau
semacamnya.
Peringatan:
Jangan memasang baterai selain CR2025 atau
yang setara.
Jangan meninggalkan remote kontrol dalam
tempat (seperti dasbor) yang terkena sinar
matahari langsung untuk waktu yang lama.
Simpan baterai di tempat yang tidak dapat
dijangkau anak-anak.
Jangan mengisi ulang, hubung pendek, ambil
bagian, memanaskan baterai atau
menempatkannya dalam api.
Jangan meletakkan baterai bersama bahan-
bahan dari logam lainnya.
Jangan mendorong baterai dengan penjepit
atau alat yang sejenis.
Sekat baterai dengan membungkusnya
menggunakan selotip saat membuang atau
menyimpannya.
KW-R500 dilengkapi dengan fungsi kontrol jarak
jauh roda kemudi. Untuk rincian selengkapnya,
lihat juga buku petunjuk yang disediakan
bersama remote adapter.
Remote kontrol .................................................... 3
Persiapan ................................................................ 4
Membatalkan display demonstrasi
Pengaturan jam
Pengoperasian dasar .......................................... 4
Radio ........................................................................ 6
CD/USB .................................................................... 7
iPod/iPhone
(KW-R500 saja)
................................ 8
Komponen eksternal .......................................... 9
Bluetooth姞............................................................. 9
Penyesuaian warna sinar
(KW-R500 saja)
....................................................... 10
Penyesuaian kecerahan .................................. 11
Penyesuaian suara ............................................ 11
Pengoperasian menu ...................................... 12
Informasi tambahan ......................................... 14
Pemecahan Masalah ........................................ 16
Spesifikasi ............................................................ 17
Cara membaca manual ini:
Manual ini terutama menjelaskan
pengoperasian menggunakan tombol-
tombol pada panel kontrol.
< > menunjukkan tampilan-tampilan pada
panel kontrol.
[XX] menunjukkan pengaturan awal suatu
item menu.
Daftar isi
Remote kontrol
INDONESIAޓ|3
2011/12/5ޓ16:58:32KW-R500_UN_IN

Membatalkan display
demonstrasi
Peragaan tampilan selalu dalam kondisi
dihidupkan kecuali Anda membatalkannya.
(Tahan)
1
(Pengaturan awal)
2
3Pilih <DEMO OFF>.
4Tekan MENU untuk keluar.
Pengaturan jam
(Tahan)
1
2Pilih <CLOCK>.
3Pilih <CLOCK SET>.
4Setel jam.
5Setel menit.
6Tekan MENU untuk keluar.
Pengoperasian dasar
Informasi tampilan
Mengubah informasi tampilan. (Tekan)
Menggulir informasi tampilan saat ini. (Tahan)
Sumber Tampilan
Radio Frekuensi )Jam
CD/USB Judul album/Artis* -Judul trek* -No. trek/Waktu putar -No. trek/
Jam -(kembali ke permulaan)
*“NO NAME”muncul untuk CD konvensional atau jika tidak direkam.
iPod/iPhone (HEAD MODE/
IPOD MODE) *1
iPod/iPhone (EXT MODE) *1 EXT MODE)Jam
Komponen eksternal (AUX) F-AUX atau R-AUX)Jam
Audio Bluetooth BT AUDIO)Jam
*1 Untuk KW-R500 saja.
Persiapan
Persiapan
4|ޓINDONESIA
2011/12/5ޓ16:58:32KW-R500_UN_IN
Other manuals for KW-R400
1
This manual suits for next models
1
Table of contents
Languages:
Other JVC Car Receiver manuals