MODE D’EMPLOI
FRANÇAIS
Merci d’avoir porté votre choix sur ce produit JVC.
Veuillez lire attentivement ce mode d’emploi avant la mise en fonctionnement pour vous
assurer des performances optimales et une plus longue vie de service de l’appareil.
CONSIGNES DE SECURITE
ENREGISTREMENT A PARTIR DE LA RADIO
1. Insérez une cassette dans la platine cassette et refermez le couvercle.
2. Réglez le sélecteur FUNCTION sur TUNER et accordez une station de radio.
3. Pressez REC ¶pour commencer l’enregistrement. REC ¶et PLAY 2se verrouilleront.
4. Pressez STOP/EJECT §pour arrêter l’enregistrement.
5. Pour éteindre la radio, glissez le sélecteur FUNCTION sur TAPE / OFF.
CONSEIL POUR L’ENREGISTREMENT A PARTIR DE LA RADIO
Pour interrompre temporairement l’enregistrement, pressez PAUSE 8. Pressez à nouveau PAUSE 8pour reprendre
l’enregistrement.
ENREGISTREMENT SYNCHRONISE A PARTIR D’UN CD
1. Insérez une cassette dans la platine cassette et refermez le couvercle.
2. Réglez le sélecteur FUNCTION sur CD.
3. Insérez le CD que vous souhaitez enregistrer dans le logement à CD.
4. Sélectionnez la plage que vous souhaitez enregistrer en appuyant sur 4(SKIP/SEARCH) ou ¢(SKIP/SEARCH).
Puis appuyez sur REC ¶.
CONSEIL
L’emploi de la touche PAUSE 8à la place de la touche STOP/EJECT §pour interrompre provisoirement l’enregistrement
vous permet d’enregistrer le son avec une plus grande netteté.
UTILISATION DU LECTEUR DE CD
FUNCTION
PROGRAM REPEAT
PUSH
(SKIP/SEARCH)
(SKIP/SEARCH)
(STOP)
LECTURE D’UN CD
1. Réglez le sélecteur FUNCTION sur CD. “– –” clignote, puis “00” apparaît sur l’affichage si aucun CD n’est chargé.
2. Pressez )PUSH pour ouvrir le couvercle du logement à CD.
3. Insérez un CD sur le plateau, l’étiquette dirigée vers le haut.
4. Refermez le couvercle du logement à CD. Le nombre total de plages sur le CD apparaît.
5. Pressez 6. La lecture démarre à partir de la plage 1. Le numéro de la plage actuelle s’affiche sur l’affichage.
Pour faire une pause de lecture, pressez 6. “3” clignote sur l’affichage. Pressez à nouveau sur 6pour reprendre la
lecture.
Pour arrêter la lecture, pressez 7(STOP). Attendez quelques secondes que le CD s’arrête de tourner complètement, puis
retirez le CD.
Pour retirer le CD, ouvrez le couvercle du logement à CD, et retirez-le avec soin.
SAUT
La fonction de saut vous permet de localiser rapidement le début de toute plage d’un CD, y compris la plage en cours de
lecture.
Pendant la lecture:
• Pressez 4(SKIP/SEARCH) une fois pour revenir au début de la plage actuelle.
• Pressez 4(SKIP/SEARCH) deux fois successivement pour revenir au début de la plage précédente.
• Pressez ¢(SKIP/SEARCH) pour passer au début de la plage suivante.
En mode d’arrêt:
Pressez plusieurs fois 4(SKIP/SEARCH) ou ¢(SKIP/SEARCH) jusqu’à ce que l’affichage indique le numéro de la
plage que vous souhaitez écouter, puis pressez 6. La lecture démarre à partir de la plage sélectionnée.
RECHERCHE
•Pendant la lecture, maintenez ¢(SKIP/SEARCH) pressé pour avancer rapidement sur un disque.
•Pendant la lecture, maintenez 4(SKIP/SEARCH) pressé pour reculer rapidement sur un disque.
REPETITION
La touche REPEAT vous permet de répéter la plage actuelle, toutes les plages sur le CD ou tout le programme. A chaque
pression de la touche, vérifiez sur l’affichage quel mode de répétition vous avez choisi.
•Lorsque “REP” clignote sur l’affichage:
La plage actuelle est lue de manière répétée.
•Lorsque “REP” s’affiche en continu sur l’affichage:
Toutes les plages sur le CD ou tout le programme sont lus de manière répétée.
LECTURE PROGRAMMEE
1. En mode d’arrêt, pressez PROGRAM pour passer en mode création de programme.“ ” et “01” se mettent à clignoter sur
l’affichage.
2. Pressez 4(SKIP/SEARCH) ou ¢(SKIP/SEARCH) pour sélectionner un numéro de plage.
3. Pressez PROGRAM pour mémoriser le numéro de plage sélectionée dans le programme.
4. Répétez les étapes 2 et 3.
Il est possible de mémoriser jusqu’à 20 plages dans le programme. Si vous avez sélectionné plus de 20 plages, les
plages programmées sont effacées à partir de la première plage.
5. Pressez 6pour démarrer la lecture du programme.
Pour confirmer l’ordre des plages programmées, pressez PROGRAM en mode d’arrêt.
Pour annuler le programme, pressez 7(STOP) en mode d’arrêt. “ ” disparaît de l’affichage.
LECTURE D’UN CD-R OU CD-RW
Les CD-R (enregistrables) ou CD-RW (réinscriptibles) édités par l’utilisateur sont lisibles seulement s’ils sont
déjà “finalisés”.
•Vous pouvez lire vos CD-R ou CD-RW originaux enregistrés en format CD musical. (Cependant, leur lecture
peut être impossible à cause de leurs caractéristiques ou des conditions d’enregistrement.)
•Avant la lecture d’un CD-R ou CD-RW, lisez attentivement les instructions ou précautions les concernant.
•Certains CD-R ou CD-RW peuvent ne pas être lisibles sur cet appareil à cause des caractéristiques du
disque, de dommages ou taches dessus, ou bien si la lentille du lecteur est sale.
•Les CD-RW peuvent exiger un temps d’extraction plus long. (Cela parce que leur réflectance est inférieure à
celle des CD ordinaires.)
Précautions pour la lecture de disques à double face
La face non DVD d’un disque à “DualDisc” n’est pas compatible avec le standard“Compact Disc Digital Audio”.Par conséquent,
l’utilisation de la face non DVD d’un disque à double face sur cet appareil n’est pas recommandée.
ENTRETIEN ET MAINTENANCE
NETTOYAGE DE L’EXTERIEUR
Déconnectez l’appareil du secteur avant de nettoyer l’extérieur avec un chiffon à poussière doux.
MANIPULATION DES CD
•Ne touchez pas la surface des signaux. Saisissez les bords, ou bien un bord et le trou.
•Ne collez pas d’étiquettes ou de ruban adhésif sur la surface étiquetée. Ne rayez pas et n’endommagez pas l’étiquette.
• Les disques tournent à grande vitesse dans le lecteur. N’utilisez pas de disques endommagés (rayés ou gondolés).
NETTOYAGE DES CD
•Les disques sales peuvent produire des sautes dans le son du CD. Maintenez toujours les disques propres en les
essuyant doucement avec un chiffon doux du centre vers l’extérieur.
•Si un disque devient sale, humidifiez un chiffon doux avec de l’eau, essorez-le, éliminez doucement la saleté, puis
essuyez avec un chiffon sec pour éliminer toutes les gouttes d’eau.
•N’utilisez pas de spray de nettoyage pour disque analogique ou d’agent antistatique sur les disques. Ne nettoyez pas les
disques avec de la benzène, du diluant, ou un autre solvant volatil, car ils pourraient abîmer la surface du disque.
ENTRETIEN DES CASSETTES
•N’exposez pas les cassettes en plein soleil ou à un endroit chaud.Les températures élevées peuvent gondoler l’enveloppe
ou endommager la bande elle-même.
•Conservez les cassettes dans leurs boîtes quand elles ne sont pas utilisées.
•Les cassettes peuvent être effacées par les champs magnétiques produits par des aimants, des moteurs électriques, des
transformateurs électriques ou d’autres dispositifs.Maintenez les cassettes à l’écart des aimants et champs magnétiques.
NETTOYAGE DES TETES
Des particules d’oxyde de fer de la bande magnétique peuvent s’accumuler sur les pièces en contact avec la bande. Ces
dépôts peuvent entraîner un effacement incomplet, un son de lecture assourdi et peuvent empêcher l’arrêt automatique.
Pour nettoyer la platine cassette, ouvrez le logement à cassette, pressez la touche PLAY 2et nettoyez doucement les têtes,
le cabestan et le galet presseur avec un dispositif de nettoyage de têtes.
Débranchez toujours le cordon d’alimentation avant le nettoyage, et prévoyez un temps de séchage de 30 minutes après
l’emploi d’un nettoyant liquide. Nettoyez les têtes toutes les 25 heures de fonctionnement.
•N’utilisez jamais d’objets métalliques sur ou près des têtes.
•Ne laissez pas de matériel de nettoyage tomber dans l’assemblage de cassette.
TELECOMMANDE
(SKIP/SEARCH)
(STOP)
REPEAT
(SKIP/SEARCH)
PROGRAM
CONSEILS DE DEPANNAGE
SPECIFICATIONS
Lecteur de disque compact
Type : Lecteur de disque compact
Détection des signaux : Dispositif de lecture optique sans contact (laser semi-conducteur)
Nombre de canaux : 2
Radio
Gammes de fréquences : FM 88 MHz - 108 MHz
AM 530 kHz - 1 700 kHz
Antennes : Antenne FM télescopique
Antenne à noyau de ferrite pour AM
Platine cassette
Système de plages : Stéréo 2 canaux 4 plages
Moteur : Moteur CC à régulateur électronique pour le cabestan
Têtes : Tête en permalloy dur pour l’enregistrement/lecture, tête magnétique pour
l’effacement
Temps de bobinage rapide : Env. 120 sec. (cassette C-60)
Généralités
Enceintes : 10 cm ×2 (4 Ω, 3 W)
Puissance : 2 W + 2 W, distortion harmonique totale de 10%, 4 Ω
Prise de sortie : PHONES ×1 (∅3,5 mm, stéréo)
Alimentation : Secteur 120 V Ó, 60 Hz
12 V CC (piles “R20/D (13F)” ×8)
Consommation : 17 W (en service)
1,5 W (en veille)
Dimensions : 435 mm (I) ×156 mm (h) ×241 mm (p)
Poids : Env. 2,8 kg (sans piles)
Accessoires fournis : Cordon d’alimentation ×1
Télécommande ×1
La conception et les spécifications sont soumises à changements sans préavis.
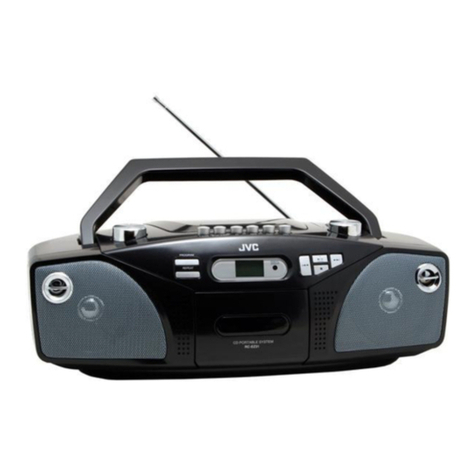
CHAINE CD PORTABLE
RC-EZ31B
AC IN
Affichage
Problème Solution
• Vérifiez que le cordon d’alimentation est fermement branché dans
la prise secteur (ou que les piles sont neuves).
•Débranchez l’appareil un moment, puis rebranchez-le.
•Vérifiez la prise murale en branchant un autre appareil.
•Ajustez le volume.
•Vérifiez que vous avez sélectionné la fonction correcte: CD, TAPE
ou TUNER et que les écouteurs sont déconnectés.
•Ajustez l’antenne télescopique FM pour améliorer la réception FM.
•Tournez l’appareil pour améliorer la réception AM.
•Essayez d’éteindre les appareils électriques proches de l’appareil,
par exemple téléviseur, sèche-cheveux, aspirateur ou lampe
fluorescente.
• Vérifiez qu’il y a un CD sur le plateau.
•Vérifiez que la face étiquetée est dirigée vers le haut.
•Vérifiez que le mode de pause n’est pas activé.
•Vérifiez que la fonction CD est sélectionnée.
•Nettoyez le CD (comme expliqué dans “ENTRETIEN ET MAINTE-
NANCE”).
•Vérifiez que le CD n’est pas gondolé, rayé ou endommagé d’une
autre façon.
•Vérifiez qu’il n’y a pas de vibrations ou chocs affectant l’appareil;
déplacez l’appareil si nécessaire.
•Contrôlez la tête d’enregistrement et nettoyez-la si nécessaire.
L’appareil ne
s’allume pas
Pas de son
Mauvaise réception de
la radio
Le CD n’est pas lu
Sautes dans le son du
CD
Enregistrements
déformés ou parasités
BEAT CUT
2
MONO
1
FM ST
DEMARRAGE
ALIMENTATION
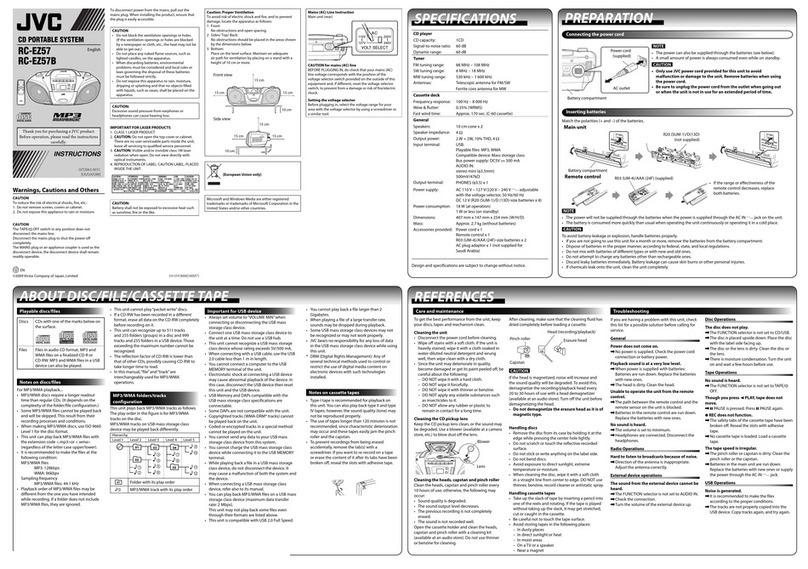
Cette chaîne CD portable fonctionne sur piles ou sur le secteur.
FONCTIONNEMENT SUR PILES
Insérez huit piles format D (non fournies) et vous pourrez emporter votre
chaîne n’importe où.Ouvrez le couvercle du logement à piles sur l’arrière
de l’appareil en appuyant sur les deux onglets. Insérez les piles comme
indiqué sur l’appareil.
Informations importantes sur les piles
•Si l’appareil doit rester inutilisé pendant un mois ou plus, retirez-en
les piles parce qu’elles peuvent fuir et provoquer des dommages.
•Mettez les piles au rebut de la manière correcte, conformément aux
lois fédérales, de l’état concerné ou locales.
•Jetez immédiatement les piles fuyantes. Elles pourraient provoquer des brûlures cutanées ou d’autres blessures.
FONCTIONNEMENT SUR LE SECTEUR
Branchez le cordon d’alimentation dans la prise AC IN Óà l’arrière de l’appareil, et dans une prise murale secteur.
Pour votre sécurité
Le cordon d’alimentation est polarisé (une lame plus large que l’autre) et il s’insère
uniquement dans un sens dans les prises secteur. Si la fiche ne s’insère pas
complètement dans la prise, retournez-la et essayez à nouveau de l’insérer dans
ce sens. Si elle ne s’insère toujours pas, contactez un électricien qualifié pour
changer la prise, ou utilisez avec une autre prise. N’essayez pas de contourner
cette caractéristique de sécurité.
ATTENTION:
1. UTILISEZ UNIQUEMENT LE CORDON D’ALIMENTATION JVC FOURNI
AVEC CET APPAREIL POUR EVITERTOUT MAUVAIS FONCTIONNEMENT
OU DOMMAGE A L’APPAREIL. RETIREZ LES PILES QUAND VOUS
UTILISEZ LE CORDON D’ALIMENTATION.
2. DEBRANCHEZ BIEN LE CORDON D’ALIMENTATION DE LA PRISE MURALE QUAND VOUS SORTEZ OU SI
L’APPAREIL DOIT RESTER INUTILISE PENDANT UNE PERIODE PROLONGEE.
ANTENNES
L’antenne AM est intégrée, aussi l’ajustement de la position de l’appareil peut améliorer la réception AM. L’antenne FM
télescopique à l’arrière de l’appareil peut être étendue et tournée pour améliorer la réception FM.
COMMANDES GENERALES
Sélecteur FUNCTION – Réglez-le pour sélectionner la fonction TUNER, TAPE ou CD.
Réglez le sélecteur FUNCTION à TAPE
/
OFF sans presser de touche de la platine cassette pour mettre l’appareil hors
tension.
Commande VOLUME – Tournez la commande de volume pour augmenter ou diminuer le volume.
ECOUTE DE LA RADIO
ACCORD D’UNE STATION DE RADIO
1. Réglez le sélecteur FUNCTION à TUNER pour allumer la radio.
2. Réglez BAND à FM ou AM.
3. Accordez la station souhaitée en tournant le bouton TUNING.
4. Pour éteindre la radio, réglez le sélecteur FUNCTION sur TAPE / OFF.
COMMUTATEUR BEAT CUT
Le commutateur BEAT CUT sert aussi à changer de mode de réception FM.
•Energistrement d’une station AM
Des interférences sont possibles à l’enregistrement d’émissions AM. Dans ce cas, réglez
le commutateur BEAT CUT sur “1” ou “2”.
•Changement du mode de réception FM
Quand une émission FM stéréo est difficile à recevoir ou parasitée, commutez à “2” (MONO).
La réception sera améliorée.
Pour rétablir la réception stéréo, commutez à “1”.
UTILISATION DE LA PLATINE CASSETTE
PAUSE STOP/EJECT FF REW PLAY REC
REC ¶– Pressez pour enregistrer à partir de la radio ou du lecteur de CD.
PLAY 2– Pressez pour lire une cassette.
REW ¡– En mode d’arrêt, pressez pour rebobiner la bande jusqu’à son début.
FF 1– En mode d’arrêt, pressez pour faire défiler la bande jusqu’à sa fin.
STOP/EJECT §– Pressez pour arrêter le fonctionnement actuel de la bande, ou pour ouvrir le couvercle du logement à
cassette quand aucune commande n’est active.
PAUSE 8– Pressez pour interrompre le mode de lecture ou d’enregistrement de cassette. Pressez une seconde fois pour
revenir en mode de lecture ou d’enregistrement de cassette.
LECTURE D’UNE CASSETTE
1. Réglez le sélecteur FUNCTION sur TAPE / OFF.
2. Pressez STOP/EJECT §pour ouvrir le couvercle du logement à cassette.
3. Insérez une cassette dans le logement, le côté ouvert dirigé vers le haut et la face à lire vers l’extérieur.
4. Refermez fermement le couvercle.
5. Pressez REW ¡ou FF 1pour faire défiler la bande jusqu’au point de démarrage souhaité.
6. Pressez PLAY 2pour commencer la lecture de la cassette. La cassette est lue jusqu’à la fin de la face, puis s’arrête
automatiquement.
ENREGISTREMENT SUR UNE CASSETTE
Vous pouvez enregistrer à partir de la radio ou du lecteur de CD.
Utilisez une cassette normale polarisée pour obtenir un bon enregistrement.
Noter qu’il peut être illégal de réenregistrer des cassettes préenregistrées, des disques analogiques
ou numériques sans l’accord du titulaire des droits d’auteur de l’enregistrement audio ou vidéo, de
l’émission ou du programme câblé et de tout travail documentaire, dramatique, musical ou artistique
qu’ils contiennent.
PROTECTION CONTRE L’EFFACEMENT
Quand vous enregistrez de nouveaux matériaux, la platine
cassette recouvre tout ce qu’il y a sur la bande. Pour protéger
une cassette contre l’effacement accidentel, brisez l’un des
onglets en plastique ou les deux (un pour chaque côté de la
bande) de la cassette.Si vous souhaitez par la suite enregistrer
sur la cassette, fermez le trou avec du ruban adhésif.
AVERTISSEMENT
Un léger relâchement de la bande peut provoquer des rayures, ou pire encore, elle peut se rompre.
Si vous notez un certain relâchement, retendez-la avec un crayon avant d’insérer la cassette dans le
logement.
A NOTER
L’emploi de cassettes de plus de 120 minutes n’est pas recommandé, parce qu’une détérioration des caractéristiques est
possible et que la bande s’emmêle facilement sur le galet presseur et le cabestan.
601-EZ3100-040
LVT1524-004B
[C]
Antenne télescopique FM
Logement à piles
1105KMMBICMTS
FR
© 2005 Victor Company of Japan, Limited
AC IN Ó
PHONES
BEAT CUT
DO NOT EXPOSE TO RAIN OR MOISTURE
NE PAS EXPOSER À LA PLUIE NI À L'HUMIDITÉ
ATTENTION:RISQUE DE CHOC ELECTRIQUE, NE PAS OUVRIR
CAUTION
RISK OF ELECTRIC SHOCK
DO NOT OPEN
The lightning flash with arrowhead symbol, within an equilateral triangle is intended to alert the
user to the presence of uninsulated “dangerous voltage” within the product’s enclosure that may
be of sufficient magnitude to constitute a risk of electric shock to persons.
The exclamation point within an equilateral triangle is intended to alert the user to the presence of
important operating and maintenance (servicing) instructions in the literature accompanying the
appliance.
For U.S.A.
This equipment has been tested and found to comply with the limits for a Class B digital device, pursuant to
part 15 of the FCC Rules.
These limits are designed to provide reasonable protection against harmful interference in a residential
installation.
This equipment generates, uses and can radiate radio frequency energy and, if not installed and used in
accordance with the instructions, may cause harmful interference to radio communications. However, there
is no guarantee that interference will not occur in a particular installation. If this equipment does cause
harmful interference to radio or television reception, which can be determined by turning the equipment off
and on, the user is encouraged to try to correct the interference by one or more of the following measures:
Reorient or relocate the receiving antenna.
Increase the separation between the equipment and receiver.
Connect the equipment into an outlet on a circuit different from that to which the receiver is connected.
Consult the dealer or an experienced radio/TV technician for help.
ATTENTION
Des changements ou modifications non approuvés par JVC pourront invalider l’autorité de l’utilisateur à opérer
cet appareil.
Pour le Canada:
This Class B digital apparatus complies with Canadian ICES-003.
Cet appareil numérique de la classe B est conforme à la norme NMB-003 du Canada.
WARNING: TO REDUCE THE RISK OF FIRE OR ELECTRIC SHOCK,
DO NOT EXPOSE THIS APPLIANCE TO RAIN OR MOISTURE.
Attention –– Interrupteur STANDBY/ON!
Déconnectez la prise d’alimentation pour couper complètement le courant. L’interrupteur ne coupe jamais
complètement la ligne d’alimentation, quelle que soit sa position. L’alimentation ne peut pas être télécommandée.
ATTENTION
Afin d’éviter tout risque d’électrocution, d’incendie, etc.:
1. N’enlevez pas les vis, les capots et n’ouvrez pas le boîtier.
2. N’exposez pas l’appareil à la pluie ou à l’humidité.
3. Pour déconnecter l’alimentation du réseau électrique, tirez sur la fiche principale.
Lors de l’installation du produit, assurez-vous que la fiche est facilement accessible.
IMPORTANT POUR PRODUITS LASER
1. PRODUIT LASER CLASSE 1
2. ATTENTION: Risque de radiations laser visible and invisible quand l’appareil est ouvert et que le système de
verrouillage ne fonctionne pas ou a été mis hors service. Évitez toute exposition directe au rayon.
3. ATTENTION: Ne pas ouvrir le couvercle du dessus. Il n’y a aucune pièce utilisable à l’intérieur. Laisser à un
personnel qualifié le soin de réparer votre appareil.
Prise secteur

