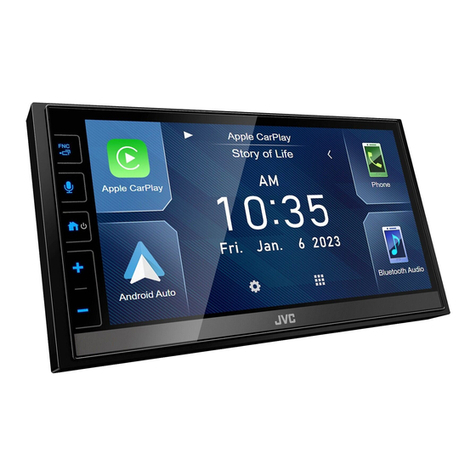
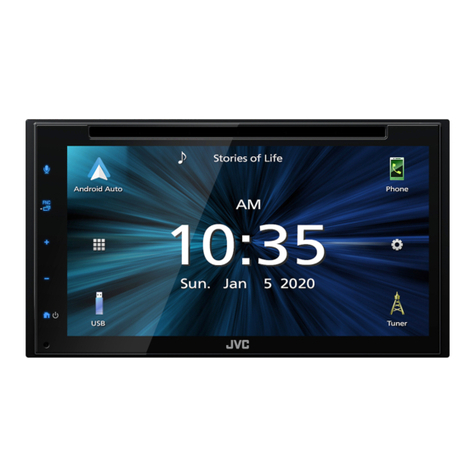
JVC KW-M785BW User manual

KW-M785BW
MONITOR WITHRECEIVER
INSTRUCTION MANUAL
This instruction manual is used to describe the models listed above. Model availability and features (functions)
may differ depending on the country and sales area. B5A-4054-00 (RN)
ENGLISH
00KWM785BWR.indb100KWM785BWR.indb1 2022/10/1116:532022/10/1116:53

Important NoticeImportant Notice
To ensure proper use, please read through this
manual before using this product. It is especially
important that you read and observe WARNINGS
and CAUTIONS in this manual.
Please keep the manual in a safe and accessible
place for future reference.
WARNINGS
To prevent accidents and damages
• DO NOT install any unit or wire any cable in a
location where;
–it may obstruct the steering wheel and gearshift
lever operations.
–it may obstruct the operation of safety devices such
as air bags.
–it may obstruct visibility.
• DO NOT raise the volume level too much, as this will
make driving dangerous by blocking outside sounds,
and may cause hearing loss.
• DO NOT operate the unit while driving. If you need
to operate the unit while driving, be sure to look
around carefully.
• Stop the car before performing any complicated
operations.
• The driver must not watch the monitor while driving.
CAUTIONS
To care for the unit
• If you have parked the car for a long time in hot or
cold weather, wait until the temperature in the car
becomes normal before operating the unit.
To care for the monitor
• The monitor built into this unit has been produced
with high precision, but it may have some ineffective
dots. This is inevitable and is not considered
defective.
• Do not expose the monitor to direct sunlight.
• Do not operate the touch panel using a ball-point
pen or similar tool with a sharp tip.
Touch the keys on the touch panel with your finger
directly (if you are wearing a glove, take it off).
• When the temperature is very cold or very hot...
–Chemical changes occur inside, causing
malfunction.
–Pictures may not appear clearly or may move
slowly. Pictures may not be synchronized with
the sound or picture quality may decline in such
environments.
On the volume setting
• Digital devices produce very little noise compared
with other sources. Lower the volume before playing
these digital sources to avoid damaging the speakers
by sudden increase of the output level.
About GPS
When you turn on this unit for the first time, you
must wait while the system acquires GPS signals
from satellites. This process could take up to
several minutes. Make sure your vehicle is outdoors
in an open area away from tall buildings and trees
for fastest acquisition. Once the system acquires
GPS signals, this unit will acquire them quickly each
time you turn on this unit.
ENGLISHi
00KWM785BWR.indbi00KWM785BWR.indbi 2022/10/1116:532022/10/1116:53

Important NoticeImportant Notice
ENGLISH ii
00KWM785BWR.indbii00KWM785BWR.indbii 2022/10/1116:532022/10/1116:53

ContentsContents
Component Names and Basic Operations.....3
Monitor panel....................................................................................3
Home screen......................................................................................3
Turning on the power..................................................................3
Turning off the power..................................................................3
Adjusting the volume...................................................................4
Attenuating the sound................................................................4
Turning off the AV source..........................................................4
Initial settings.....................................................................................4
Date and clock settings...............................................................5
In-Car Connections.............................................5
USB connection................................................................................6
Bluetooth® connection................................................................6
Connections setting................................................................... 10
Various Screens and Operations ...................12
Source/option selection screen..........................................12
Source control screen................................................................ 12
List/setting screen........................................................................13
Apps ....................................................................14
Using Apps of iPhone — Apple CarPlay........................ 14
Using the Apps of an Android™ device
— Android Auto™........................................................................16
Using the Apps of an Android device
— USB Mirroring...........................................................................17
USB ......................................................................18
Playback operations.................................................................... 18
Video playback operations..................................................... 19
Search operations........................................................................ 20
Settings for USB playback ....................................................... 21
Tuner...................................................................21
Listening to the radio.................................................................21
Setting the tuner mode............................................................23
Presetting stations in the memory.................................... 23
Selecting a preset station........................................................24
Other External Components ..........................24
HDMI/AV-IN devices................................................................... 24
Cameras.............................................................................................. 25
Bluetooth® Device ............................................26
Bluetooth mobile phone.........................................................26
Bluetooth mobile phone settings...................................... 28
Bluetooth audio player............................................................. 29
Settings ..............................................................30
Audio settings ................................................................................ 30
Display settings..............................................................................35
Input settings..................................................................................38
System settings..............................................................................39
Remote Controller............................................42
Preparation.......................................................................................42
Basic operations (RM-RK258)................................................. 43
Searching for a station directly............................................ 43
Installation and Connection...........................44
Before installation ........................................................................44
Installing the unit..........................................................................45
Removing the trim plate.......................................................... 46
Installing the supplied GPS antenna................................46
Connecting external components.................................... 47
Wiring connection....................................................................... 48
References .........................................................49
Maintenance ...................................................................................49
More information......................................................................... 49
Troubleshooting...............................................51
Specifications ....................................................55
Trademarks and Licenses................................58
Important Notice on Software............................................. 59
EULA ..................................................................................................... 59
About this manual
The displays and panels shown in this manual are
examples used to provide clear explanations of the
operations. For this reason, they may be different
from the actual displays or panels.
This manual mainly explains operations using the
buttons on the monitor panel and keys on the
touch panel. For operations using the remote
controller, see page 43.
< > indicates the various screens/menus/
operations/settings that appear on the touch
panel.
[ ] indicates the keys and source names on the
touch panel.
Indication language: English indications are used
for the purpose of explanation. You can select the
indication language from the <Settings> menu
(page 39).
This symbol on the product means
there are important operating and
maintenance instructions in this manual.
Be sure to carefully read instructions in
this manual.
Important NoticeImportant Notice
2ENGLISH
00KWM785BWR.indb200KWM785BWR.indb2 2022/10/1116:532022/10/1116:53
Component Names and Basic OperationsComponent Names and Basic Operations
Monitor panel
1 32
4
5
6
7
8
(USB1)5V 1.5A
1Remote sensor
2Screen (touch panel)
3Monitor panel
4FNC - button
• FNC (Press): Pops up the function menu (page
13)
• (Hold): Changes the screen from the playback
source to the others.
–While Apple CarPlay or Android Auto is
connected, switches to the current background
playback source screen and vice versa.
–While no device for Apple CarPlay or Android
Auto is connected, switches to the current
background playback source screen and the
other setting-related screen, home screen, or
source selection screen and vice versa.
5button: (Press) Activates the voice recognition.
–When no device for Apple CarPlay, Android
Auto, and Bluetooth phone is connected,
pressing and holding this button displays
Bluetooth pairing waiting dialog (page 7).
6/button
• (Press): Turns on the power.
• (Hold): Turns off the power.
• (Press): Displays the Home screen (see the
following) while the power is on.
7Volume +/–buttons
8USB terminal from the rear panel
The buttons on the monitor illuminate and change
the color periodically with the unit turned on.
• To change the color, see page 36.
Home screen
• You can customize the Home screen (pages 35
to 37)
• To display the Home screen from other screens, press
the / button.
Sat. Jan. 01 2022
Apple CarPlay
Where you are now in this <
Touching the operation keys performs the following
actions:
1The current playback source information.
Displays the current playing source control screen.
• Touching [ < ] scrolls the text if not all of the text
is shown.
2Selects the playback source.
• To change the sources, see page 37.
3Displays the <Settings> screen.
4Displays the clock time and/or artwork screen.
• To change the information, see page 36.
• When you touch the clock time indication, you
can move to the <Clock> screen, see page 5.
5Displays all selectable playback sources and
options.
Turning on the power
• When you turn on this unit for
the first time, you must wait
while the system acquires GPS
signals from satellites. This
process could take up to several
minutes.
Turning off the power
On the monitor panel:
(Hold)
3ENGLISH
00KWM785BWR.indb300KWM785BWR.indb3 2022/10/1116:532022/10/1116:53

Turning off the AV source
1 Display the source/option selection
screen.
On the Home screen:
2 Turn off the AV source.
On the source/option selection screen (page 12):
• You can also use the pop-up function menu
(page 13).
Initial settings
When you power on the unit for the first time or
initialize the unit, the <Initial Settings> screen
appears.
Perform the initial settings.
Initial Settings
Demonstration
Language
Rear Camera
User Customize
Finish
ON
English
Enter
Enter
Viewing Angle Enter
OFF
Once completed, Home screen appears.
<Demonstration> (page 37)
• ON (Initial): Activates the display demonstration.
• OFF: Deactivates the display demonstration.
<Language> (page 39)
Select the text language used for on-screen
information.
• English (Initial)/Español
• GUI Language: Local (the language selected
above) (Initial)/English: Select the language used for
displaying operation keys and menu items.
<Rear Camera> (page 38)
Make the settings to display the picture from the
connected rear view camera.
<User Customize> (page 35)
Change the display design.
<Viewing Angle> (page 37)
Select the viewing angle in relation to the monitor to
make the image on the screen easier to see.
• Under 0° (Initial)/5°/10°/15°/20°
Component Names and Basic OperationsComponent Names and Basic Operations
On the screen:
1 Display the source/option selection
screen.
On the Home screen:
2 Turn off the power.
On the source/option selection screen (page 12):
Adjusting the volume
You can adjust the volume (00 to
40) by pressing +to increase and
pressing –to decrease.
• When volume level is below 15,
holding +increases the volume
continuously to level 15.
Attenuating the sound
On the source control screen:
To cancel attenuation:
4ENGLISH
00KWM785BWR.indb400KWM785BWR.indb4 2022/10/1116:532022/10/1116:53

Date and clock settings
You can adjust the date and clock as follows using the
<System> screen.
1 Display the Home screen.
2 Display the <Settings> screen.
On the Home screen:
3 Display the <System> screen (1), and
then enter the item-setting screen you
want to change (2).
Settings
Language
Clock
Time Format
Time Zone
Enter
English
Enter
Enter
Enter
Audio
Display
Input
Key
System
Clock Adjust
Eg. when selecting <Clock>
4 Set or adjust the date and clock.
<Clock> *
Select the method to set the date and clock.
• GPS-SYNC (Initial): Synchronizes the clock time
with GPS.
• Manual: Sets the clock manually using <Clock
Adjust>. See the following.
<Time Format>
Select the time display format.
• 12-Hour (Initial)/24-Hour
<Time Zone>
Select the time zone for your residential area.
• Pacific Time/Central Time/Mountain Time/
Eastern Time (Initial), etc.
<Clock Adjust>.
Touch [J]/[K](1) to adjust the date (year/month/
date), and adjust the hour/minute. Touch [SET] (2)
to finish setting the clock.
Year Month Date Hour Minute
/ / 1:
Clock Adjust
2022 1 AM4 1
SET
<Daylight Saving Time>
(Not used when the clock is set manually)
Activate this by selecting the additional time for
Daylight Saving Time (if available in your residential
area).
• OFF (Initial)/30min/1Hr
* You can also display the
<Clock>
screen by touching the clock
area if shown on the Home screen.
To operate your smartphone hands-free, and Apps of
the smartphone (Apple CarPlay, Android Auto, and
USB Mirroring), the following connections are required.
• For Wired Apple CarPlay (page 14), connect
iPhone with USB.
• For Wireless Apple CarPlay (page 14), connect
iPhone with Bluetooth (Wi-Fi is auto-connected).
• For Android Auto (page 16):
–Android device with Android version 6.0 or later
can be used with USB (In this case, Bluetooth is
auto-connected, but Wi-Fi is not available)
–To wirelessly use Android Auto with this unit,
connect Android device with Bluetooth (Wi-Fi is
auto-connected)
–You need a compatible Android device (see below)
with an active data plan.
• An Android device with Android version
11 or later and 5 GHz Wi-Fi (subject to local
regulations*); or
• A Google-branded or Samsung-branded device
with Android version 10; or
• A Samsung Galaxy S8, Galaxy S8+ or Note 8, with
Android 9
–You can find more information at
<g.co/androidauto/requirements>.
* Refer to the local regulations of your residential area.
In-Car ConnectionsIn-Car Connections
Component Names and Basic OperationsComponent Names and Basic Operations
5ENGLISH
00KWM785BWR.indb500KWM785BWR.indb5 2022/10/1116:532022/10/1116:53

Bluetooth® connection
Information for using Bluetooth devices
Bluetooth is a short-range wireless radio
communication technology for mobile devices such as
mobile phones (smartphones), portable PCs, and other
devices. Bluetooth devices can be connected without
cables and communicate with each other.
• Some Bluetooth devices may not be used with this
unit depending on the Bluetooth version of the
device.
Pairing a Bluetooth device
When you connect a Bluetooth device to the unit for
the first time, register the device to this unit (pairing).
Pairing allows Bluetooth devices to communicate with
each other.
• The pairing method differs depending on the
Bluetooth version of the device.
–For devices with Bluetooth 2.1:
You can pair the device and the unit using SSP
(Secure Simple Pairing) which only requires
confirmation.
–For devices with Bluetooth 2.0:
You need to enter a PIN code both on the device
and the unit for pairing.
USB connection
Connect your smartphone (iPhone or Android device)
for using Apps on the screen of this unit.
• You can also connect a USB mass storage class
device such as a USB memory, digital audio player,
etc. to the unit. But you cannot connect a PC,
portable HDD and USB hub.
AB
(USB1)5V 1.5A
USB terminal from the rear panel
iPhone/Android device
USB device
AFor connecting your Android device, use the USB
cable (commercially available)
BFor connecting your iPhone, use the USB cable for
iPhone KS-U62 (optional accessory)
In-Car ConnectionsIn-Car Connections
• For USB Mirroring (page 17) connect the Android
device both with USB and Bluetooth.
• For Hands-Free Phone (page 26) and Bluetooth
audio player (page 29), connect your device with
Bluetooth®.
• For HDMI device connection and its usage, see
pages 24 and 47.
• For AV-IN device connection and its usage, see
pages 24 and 47.
6ENGLISH
00KWM785BWR.indb600KWM785BWR.indb6 2022/10/1116:532022/10/1116:53

In-Car ConnectionsIn-Car Connections
• Once the connection is established, it is registered
in the unit until you initialize the Bluetooth settings
(page 40) or the unit itself (page 40). Up to five
devices can be registered in total.
• To use the Bluetooth function, you need to turn on
the Bluetooth function of the device.
Auto pairing
When <Auto Pairing> is set to [ON] (page 28),
Bluetooth devices are automatically paired.
• For iPhone with Apple CarPlay and Android device
with Android Auto: When the device is connected
via USB, it is automatically paired regardless of this
setting.
Automatic Wi-Fi connections
This unit is equipped with the Wi-Fi function.
• You can turn on or off the Wi-Fi function on the
<Wireless/HDMI SETUP> settings. To use the
Wi-Fi function, select [Wi-Fi] (page 40).
Once your iPhone or Android device is paired
successfully with Bluetooth or connected with
USB for Apple CarPlay or for Android Auto, it is
automatically connected with Wi-Fi. And from the
next time on, it is automatically connected through
Wi-Fi.
• Turn on the Bluetooth and Wi-Fi functions on your
iPhone or Android device.
• It is necessary to connect the GPS antenna in order
to use wireless Apple CarPlay.
4 Search for the unit “KW-M785BW” from
your Bluetooth device.
5 Confirm the request both on the device
and the unit.
On the device:
Confirmation method varies for the device.
On the unit:
BT Pairing request
To perform BT Pairing
Please confirm the device display
KW-MXXXXX (device name)
012345 (PIN code)
Pair Cancel
Pairing is complete.
To reject the request: Touch [Cancel].
6 Register the usage of the Bluetooth
device.
• See "Registering the usage of the devices" on
page 9.
Pairing a Bluetooth device using SSP
(for Bluetooth 2.1)
1 Display the Home screen.
2 Display the <Device List> screen.
From the Home screen (page 3), touch as
follows:
Then, on the <Settings> screen, touch as follows:
[System] →<Connections SETUP> : [Enter]
On the <Connections SETUP> screen, touch as
follows:
<Device List> : [Enter]
• You can also use the pop-up function menu to
display the <Device List> screen (page 13).
3 Make the unit ready for pairing.
On the <Device List> screen:
Please open Bluetooth settings on your device and
select the device name below
KW-MXXXXX
Cancel
7ENGLISH
00KWM785BWR.indb700KWM785BWR.indb7 2022/10/1116:532022/10/1116:53

4 Make the unit ready for pairing.
On the <Device List> screen:
Please open Bluetooth settings on your device and
select the device name below
KW-MXXXXX
Cancel
5 Search for the unit “KW-M785BW” from
your Bluetooth device.
6 Select the unit “KW-M785BW” on your
Bluetooth device.
Pairing is complete.
7 Register the usage of the Bluetooth
device.
• See "Registering the usage of the devices" that
follows.
Once pairing is completed, see the leftmost column.
• For iPhone compatible with wireless Apple
CarPlay
• For Android device compatible with Android
Auto
Pairing a Bluetooth device using a PIN code
(for Bluetooth 2.0)
1 Display the Home screen.
2 Display the <PIN Code Set> screen.
From the Home screen (page 3), touch as
follows:
Then, on the <Settings> screen, touch as follows:
[System] →<Connections SETUP> : [Enter]
On the <Connections SETUP> screen, touch as
follows:
<PIN Code> : [Enter]
3 Enter the PIN code.
PIN Code Set
0000
123
456
78
0 Enter Clear
9
• Initial PIN code : [0000]
• If you do not need to change the PIN code [0000],
just touch [Enter].
• To change the PIN code, see page 11.
In-Car ConnectionsIn-Car Connections
Once pairing is completed...
• For iPhone compatible with wireless Apple
CarPlay
A confirmation message appears.
– Touch [Yes] to display the Apple CarPlay screen for
wireless connection.
– Touch [No] not to use Apple CarPlay for the
time being. To use Apple CarPlay, select it on the
<Device List> screen.
• For Android device compatible with Android
Auto
When [Android Auto] (initial) is selected for the
<Android Mode Select> setting (page 11),
Android Auto is automatically activated, and this
Android device is registered as Android Auto device.
– If Apple CarPlay is active currently, a warning
message may appear, asking whether Android
Auto or Apple CarPlay is to be used (depending on
iPhone version).
8ENGLISH
00KWM785BWR.indb800KWM785BWR.indb8 2022/10/1116:532022/10/1116:53

• Touch [ < ] scrolls the text if not all of the text is
shown.
• For list/setting screen operations, see also page
13.
2 Select the device you want to use.
Device Name 1
Device Name 2
Device Name 3
Device Name 4
Device Name 5
Device Name 6
Device List
• When Apple CarPlay or Android Auto is activated
for the selected device, it will be disconnected.
A warning message appears. Touch [Yes] to
continue.
3 Select the profile for the selected device.
Please Select a profile
Close
TEL(HFP)1
TEL(HFP)2
Audio(A2DP) / APP(SPP)
USB Mirroring
• [TEL(HFP)1]/[TEL(HFP)2]: To use the device as
hands-free phone 1 and 2.
• [Audio(A2DP)/APP(SPP)]: To use the device as
Bluetooth audio or Apps (Apple CarPlay/Android
Auto).
• [USB Mirroring]: To use the device as USB
Mirroring.
Registering the usage of the devices
You can confirm and change the usage (profile) of the
registered devices on the <Device List> screen.
• You can also connect/disconnect and delete
unwanted devices on the device list.
1 Display the <Device List> screen.
From the Home screen (page 3), touch as
follows:
Then, on the <Settings> screen, touch as follows:
[System] →<Connections SETUP> : [Enter]
On the <Connections SETUP> screen, touch as
follows:
<Device List> : [Enter]
Device Name 1
Device Name 2
Device Name 3
Device Name 4
Device Name 5
Device Name 6
Device List
The currently activated (connected) devices are
highlighted on the list.
• Six devices can be displayed on the list; five
devices connected by Bluetooth and one by USB.
• You can also use the pop-up function menu to
display the <Device List> screen (page 13).
In-Car ConnectionsIn-Car Connections
4 Touch [Close] to finish.
The <Device List> screen is displayed again. This
unit searches for the device you have just set the
usage (profile) for, and activates the device if it is
connected.
About the profile icons
• Available profile for the listed devices are in white.
When the profile is active for the devices, it becomes
blue. Unavailable device and profile are in gray.
• Bluetooth icon is displayed only when the device is
connected by Bluetooth.
• Apple CarPlay and Android Auto icons illuminate
when they are active.
• Mirroring icon is displayed when the device is
selected as Mirroring in profile setting.
Icon Profile Status (on/off/unavailable)
Bluetooth Bluetooth connection
HFP1 Hands-Free phone 1
HFP2 Hands-free phone 2
A2DP Bluetooth audio player
SPP Apps
Apple
CarPlay
Apple CarPlay
Android
Auto
Android Auto
Mirroring USB Mirroring
9
ENGLISH
00KWM785BWR.indb900KWM785BWR.indb9 2022/10/1116:532022/10/1116:53

In-Car ConnectionsIn-Car Connections
Deleting the registered devices
1 Display the <Device List> screen.
From the Home screen (page 3), touch as
follows:
Then, on the <Settings> screen, touch as follows:
[System] →<Connections SETUP> : [Enter]
On the <Connections SETUP> screen, touch as
follows:
<Device List> : [Enter]
2 Display the <Device Remove> screen.
On the <Device List> screen:
3 Select the device you want to delete.
All
All
CP Device 1
Delete
Device 2
Device 3
AAP Device 1
BT Device 1
Device Remove
• To select all devices, touch [ ].
• To deselect all devices, touch [].
4 Touch [Delete].
A warning message appears. Touch [Yes] to delete.
Connections setting
You can change various settings for the connected
devices.
1 Display the <Connections SETUP> screen.
From the Home screen (page 3), touch as
follows:
Then, on the <Settings> screen, touch as follows:
[System] →<Connections SETUP> : [Enter]
On the <Connections SETUP> screen, you can
change and confirm the following item settings.
• For list/setting screen operations, see also page
13.
Connections SETUP
Device List
PIN Code
Device Name
Bluetooth Device Address
TEL SETUP
Initialize Enter
Enter
00:00:00:00:00:00:00
(Model name)
0000
Enter
Connections SETUP
Device Audio Control
Driving Position
Android Mode Select
Enter
Reset Android Auto Wireless Connection
Enter
Enter
Wi-Fi Setup
Enter
Left Right
Adding the registered devices
1 Display the <Device List> screen.
From the Home screen (page 3), touch as
follows:
Then, on the <Settings> screen, touch as follows:
[System] →<Connections SETUP> : [Enter]
On the <Connections SETUP> screen, touch as
follows:
<Device List> : [Enter]
2 Activate registration.
On the <Device List> screen:
3 Follow the procedure previously
explained.
• Pairing a Bluetooth device using SSP
(for Bluetooth 2.1), see page 7.
• Pairing a Bluetooth device using a PIN code
(for Bluetooth 2.0), see page 8.
10 ENGLISH
03KWM785BWRBody01.indd1003KWM785BWRBody01.indd10 2022/10/1211:592022/10/1211:59

In-Car ConnectionsIn-Car Connections
<Device List>
Devices connected for Apple CarPlay, Android
Auto, USB Mirroring, Bluetooth phone, and
Bluetooth audio are listed. You can check their
names and their status on the list (page 9).
<PIN Code>
• To change the PIN code, enter a new PIN code
and touch [Enter] to finish.
• To correct the PIN code input, touch and hold
[Clear], and re-enter a new PIN code.
• This setting is available only when iPhone with
Apple CarPlay is not connected.
<Device Name>
Shows the device name of this unit to be shown on
the Bluetooth device — KW-M785BW.
<Bluetooth Device Address>
Shows the Bluetooth device address of this unit.
<Initialize>
Initialize the Bluetooth settings (page 40).
<TEL SETUP>
See step 2 on page 28.
• This setting is available only when iPhone with
Apple CarPlay is not connected.
<Wi-Fi Setup>
Shows the device name, device address and
password of this unit.
<Device Audio Control>
Go to step 2.
<Driving Position>
Sets your driver’s seat position of your car — [LEFT]
(initial) or [RIGHT].
This setting changes the sidebar/button position
of Apple CarPlay/Android Auto screens accordingly
with the driver seat position.
• This setting is available only when iPhone with
Apple CarPlay and Android device with Android
Auto are not connected.
<Android Mode Select>
Selects Android device usage for Apps — either
[Android Auto] (initial) (page 16) or [Mirroring
for Android] (page 17).
• This setting is available only when AV source is
turned off with no device connected via USB.
<Reset Android Auto Wireless Connection>
Reset Android Auto wireless connection when
you want to change the password for wireless
connection manually. The system of this unit is
rebooted after touching [Yes].
2 Touch [Enter] to display the selected item
screen.
On the <Device Audio Control> screen:
Device Audio Control
Guidance/Voice Recognition Volume
Phone Incoming Volume
Phone Calling/Talking Volume
Media Volume
Enter
Speech Quality Adjust
Enter
Enter
Enter
15
• <Guidance/Voice Recognition Volume> can
be set separately for <Apple CarPlay> and
<Android Auto> within the range of 00 to 40
(Initial: 19).
• <Phone Incoming Volume>, <Phone Calling/
Talking Volume> can be set separately for
<Apple CarPlay> and <Android Auto/
Bluetooth> within the range of 00 to 40 (Initial:
15).
• <Speech Quality Adjust>:
<Microphone Level> can be set within the
range of –10 to +10 (Initial: –4).
<Echo Cancel Level>, <Noise Reduction
Level> can be set within the range of –5 to +5
(Initial: 0).
• <Media Volume> can be set within the range of
00 to 40 (Initial: 15).
11ENGLISH
00KWM785BWR.indb1100KWM785BWR.indb11 2022/10/1116:532022/10/1116:53

Various Screens and OperationsVarious Screens and Operations
[Apple CarPlay] Displays the home screen of Apple
CarPlay.
[Android Auto] Displays the home screen of
Android Auto.
[Bluetooth
Audio]
Plays a connected Bluetooth audio
player.
[Phone] Displays the phone control screen.
[USB] Plays files on a USB device.
[AV-IN] Switches to the external AV
component connected to the AV-
IN input terminal.
[Tuner] Switches to the radio broadcast.
[USB Mirroring] Displays the screen of USB
Mirroring.
[HDMI] Switches to the HDMI device.
[AV Off] Turns off the AV source.
[Power Off] Turns off the power.
To return to the Home screen
Press the / button on the monitor panel or touch
[X].
You can display or change to other screens at any time
to show information, change the playback source,
change the settings, etc.
Source/option selection screen
Touch [ ] on the Home screen to display the source/
option selection screen.
SETUP
HDMI AV Off
Power Off
USB Mirroring
Phone
Bluetooth Audio USB AV-INAndroid Auto
Apple CarPlay
Camera Apps
Now Playing
Bluetooth Audio
Tuner
Touching the operation keys performs the following
actions:
[Camera] Switches to the camera view.
[Apps] Switches to the currently available
Apps – [Apple CarPlay] or
[Android Auto].
[Now Playing] Displays the source currently
played back.
[SETUP] Displays the <Settings> screen.
[X] Closes the screen and return to the
Home screen.
Source control screen
You can operate the playback source using the source
control screen.
• The operation keys and information displayed vary
for each source. Here the common operation keys
are explained. For more about the other operation
keys, see the respective page of each source section.
1Current playback source icon and name
• Touch [ > ] to show the source icons on the Home
screen. Then touch [ < ] to hide the other icons.
2Content information area
• Touch [ < ] to scroll the text if not all of the text is
shown.
• Touch [ < ] to widen the window to show more
detailed information. Then touch [ > ] to close the
window.
3Phone control screen indicator
• Touch to display the phone control screen (page
27).
12 ENGLISH
00KWM785BWR.indb1200KWM785BWR.indb12 2022/10/1116:532022/10/1116:53
Various Screens and OperationsVarious Screens and Operations
4Sound attenuating key (page 4)
5TEL indicator is shown when a hands-free phone is
connected.
6Clock display
7Operation window tab
• Touch [ > ] to widen the operation window to
show more operation keys besides those shown
on the operation key area (9). Then touch [ < ] to
close the window.
8TI indicator (page 22)
9Operation key area
Using gesture control
You can also control playback by moving your finger
on the touch panel as follows (for some sources, the
gesture control is not available).
• Sliding the finger up/down:
Selects a folder.
• Sliding the finger left/right:
Selects a file.
• Moving your finger clockwise/counterclockwise:
Increases/decreases the volume.
Using the pop-up function menu
You can easily access the frequently used features.
1 Display the pop-up function menu.
2 Touch one of the following items you
want to use.
[ ] Displays the <Device List> screen
(page 9).
[ - ] • (Touch) Switches the screen.
• (Hold) Turns off the screen.
[ ]* Displays the <Settings> screen
(page 30).
[ ]* Displays the <User Customize>
screen and you can change the
background screen (page 35).
[ ]* Displays the <Screen
Adjustment> screen (page 37).
[ ]* Displays the view from the
connected camera (page 25).
* You can change the last four items to display on the pop-up
function menu. For details, see <Key Customize> on page 42.
To close the pop-up function menu
Press FNC- on the monitor panel or touch the
screen anywhere other than the pop-up function
menu.
List/setting screen
Below are the common operation keys which appear
on the list/setting screen.
• The appearance or location of the operation keys
may differ, however the similar operation keys have
the same operations.
• Available operation keys differ depending on the
setting screens. Not all these operation keys are
shown on every screen.
Play
A-Z
Top
Up
13ENGLISH
00KWM785BWR.indb1300KWM785BWR.indb13 2022/10/1116:532022/10/1116:53
Various Screens and OperationsVarious Screens and Operations
Touching the operation keys performs the following
actions:
1Returns to the upper layer.
*1
2Finishes the setting and closes the current screen.
3Plays all files in the folder containing the current
file.
*2
4(Not displayed for folder list)
Enters alphabet search
to list the items in alphabetical order.
*2
When a key pad is displayed, follow the procedure
below.
1Touch the first letter you want to search for.
• To search by a number, touch [1,2,3...].
• To search by a symbol, touch [#].
2Select your desired item on the search result
list.
5Returns to the root folder.
*2
6Returns to the upper layer.
*2
7Changes the page to display more items.
8Returns to the previous screen.
*1 Only for Bluetooth Audio
*2 Only for USB
You can use the Apps installed in your iPhone and
Android device by using “Apple CarPlay,” “Android
Auto,” and “USB Mirroring.”
• For iPhone: You can use Apple CarPlay (see the
following).
• For Android device: You can use Android Auto
(page 16) and USB Mirroring (page 17).
Preparation:
Make sure that the microphone is connected (page
48).
Using Apps of iPhone — Apple CarPlay
About Apple CarPlay
Apple CarPlay is a smarter, safer way to use your
iPhone in the car. Apple CarPlay takes the things you
want to do with iPhone while driving and displays
them on the screen of this unit. You can get directions,
make calls, send and receive messages, and listen to
the music from iPhone while driving. You can also use
Siri voice control to make it easier to operate iPhone.
• For details about Apple CarPlay, visit
<https://apple.com/ios/carplay/>.
AppsApps
Compatible iPhone devices
You can use Apple CarPlay with the following iPhone
models.
iPhone 6S, 6S Plus, 7, 7 Plus, 8, 8 Plus, X, XS, XS Max,
XR,11, 11 Pro, 11 Pro Max, SE (1st/2nd generation), 12,
12 mini, 12 Pro, 12 Pro Max, 13, 13 mini, 13 Pro,
13 Pro Max
Connecting iPhone compatible with Apple
CarPlay
See pages 5 to .
If two iPhone devices compatible with Apple
CarPlay are connected wirelessly, the device
recognized first is used for Apple CarPlay. To use the
other iPhone, select it on the <Device List> screen.
14 ENGLISH
00KWM785BWR.indb1400KWM785BWR.indb14 2022/10/1116:532022/10/1116:53

AppsApps
Apple CarPlay screen operation
You can use the Apps of the connected iPhone.
The items displayed and the language used on the
screen differ among the connected devices.
1Application buttons
Starts the application.
2Short cut buttons
3[ ] button
• (Touch) Displays the home screen of Apple
CarPlay.
• (Hold) Activates Siri.
4[HOME] button
*
Exits the Apple CarPlay screen and displays the
Home screen.
* This icon design may change depending on the iOS version.
To exit the Apple CarPlay screen
Touch [HOME] on the Apple CarPlay screen, or press
the / button on the monitor panel.
Starting Apple CarPlay
Once the wireless setting and connection are done for
the first time, the source is automatically changed, and
you can use of the Apps of the connected iPhone.
• Unlock your iPhone beforehand.
• You cannot use Apple CarPlay when the screen
recording function is enabled on the iPhone.
To change the source from the others
Touch [Apple CarPlay] on the source/option selection
screen (page 12).
SETUP
HDMI AV Off
Power Off
USB Mirroring
Phone
Bluetooth Audio USB AV-INAndroid Auto
Apple CarPlay
Camera Apps
Now Playing
Bluetooth Audio
Tuner
The Apple CarPlay screen is displayed.
Using Siri
You can activate Siri while the Apple CarPlay screen is
displayed.
On the monitor panel:
1 Press the button on the monitor panel.
2 Talk to Siri through the microphone.
To deactivate Siri, press the button again.
On the Apple CarPlay screen:
1 Touch and hold [ ].
2 Talk to Siri through the microphone.
To deactivate Siri, touch [ ].
Switching the Apple CarPlay screen and the
current playback source screen
You can switch the Apple CarPlay screen and the
current playback source screen when the App of the
Apple CarPlay without audio-output is used.
Press and hold FNC- button on the
monitor panel.
• Each time you press and hold the button, the screen
alternates.
• You can also use the pop-up function menu
(page 13).
–The screen cannot be switched in some cases, such
as while the picture from the connected camera or
a message window is displayed.
15
ENGLISH
00KWM785BWR.indb1500KWM785BWR.indb15 2022/10/1116:532022/10/1116:53
Using the Apps of an Android™ device —
Android Auto™
About Android Auto
Android Auto enables you to use features of your
Android device convenient for driving. You can easily
access route guidance, make calls, listen to music, and
access convenient features on the Android device
while driving.
• For details about Android Auto, visit <https://www.
android.com/auto/> and <https://support.google.
com/androidauto>.
Compatible Android devices
See page 5.
Connecting an Android device compatible with
Android Auto
See pages 5 to .
• If two Android devices compatible with Android
Auto are connected wirelessly, the device
recognized first is used for Android Auto. To use
the other Android device, select it on the <Device
List> screen.
• Bluetooth mobile phone currently connected is
disconnected when Android device with Android
Auto is connected with Bluetooth.
AppsApps
Starting Android Auto
Selecting [Android Auto] on the screen displays the
Android Auto screen and enable use of the Apps of the
connected Android device.
• Unlock your Android device beforehand.
Preparation:
Select [Android Auto] for the <Android Mode
Select> setting (page 11).
To change the source from the others
Touch [Android Auto] on the source/option selection
screen (page 12).
SETUP
HDMI AV Off
Power Off
USB Mirroring
Phone
Bluetooth Audio USB AV-INAndroid Auto
Apple CarPlay
Camera Apps
Now Playing
Bluetooth Audio
Tuner
The Android Auto screen is displayed.
Operation buttons on the Android Auto
screen
You can perform the operations of the Apps of the
connected Android device. The items displayed on the
screen differ among the connected Android device.
1
1Application/information buttons
Starts the application or displays information.
To exit the Android Auto screen
Press the / button on the monitor panel.
Using voice guidance of the Android device
You can activate the voice guidance of the Android
device while the Android Auto screen is displayed.
1 Press the button on the monitor panel.
The voice guidance is activated.
2 Speak to the microphone to operate the
Android device.
16 ENGLISH
00KWM785BWR.indb1600KWM785BWR.indb16 2022/10/1116:532022/10/1116:53
AppsApps
To cancel the voice guidance, press the button.
Each time you press the button, the voice guidance
turns on and off.
Switching the Android Auto screen and the
current playback source screen
You can switch the Android Auto screen and the
current playback source screen when the App of the
Android Auto without audio-output is used.
Press and hold FNC- button on the
monitor panel.
• Each time you press and hold the button, the screen
alternates.
• You can also use the pop-up function menu
(page 13).
–The screen cannot be switched in some cases, such
as while the picture from the connected camera or
a message window is displayed.
Using the Apps of an Android device — USB
Mirroring
This feature is only used with Android device.
By installing JVC’s Mirroring OA App into your Android
device, the screen of the Android device is displayed
on the monitor panel of this unit, and you can operate
the Android device using the touch panel of this unit.
• For details about JVC’s Mirroring, visit
<https://www.jvc.net/cs/car/>.
Compatible Android devices
Android version 7.0 or later
Installing JVC’s Mirroring OA App
You can obtain “Mirroring OA for JVC” in Google Play.
• Make sure to install the most recent version into your
Android device.
• When you use “Mirroring OA for JVC” for the
first time, the terms of service are displayed. It is
necessary to agree to the terms of service to use this
feature.
Connecting an Android device with JVC’s
Mirroring OA App installed
Connect an Android device with JVC’s Mirroring OA
App installed via both USB and Bluetooth connection
(page 6).
Starting USB Mirroring
Preparation:
• Unlock your Android device beforehand.
• Make sure that the JVC’s Mirroring OA App is
installed.
• Select [Mirroring for Android] for the <Android
Mode Select> setting (page 11).
1 Connect the Android device.
1Connect the device with Bluetooth.
–Pair the device with the unit via Bluetooth.
See "Pairing a Bluetooth device" on page 6.
–Select [USB Mirroring] on the profile setting of
the <Device List> screen (page 9).
2Then, connect the device with USB.
Then follow steps 2 to 4 below on the Android device
screen:
2 Touch the icon of JVC’s Mirroring OA App.
3 Touch [OK] to start JVC’s Mirroring OA
App.
4 Touch [Start now] to capture the Android
device screen to the screen of this unit.
17ENGLISH
00KWM785BWR.indb1700KWM785BWR.indb17 2022/10/1116:532022/10/1116:53

AppsApps
5 Touch [USB Mirroring].
On the source/option selection screen (page 12).
SETUP
HDMI AV Off
Power Off
USB Mirroring
Phone
Bluetooth Audio USB AV-INAndroid Auto
Apple CarPlay
Camera Apps
Now Playing
Bluetooth Audio
Tuner
The Android device screen is displayed on the
monitor screen of this unit. You can access your
Android device from this unit.
To exit the Android device screen
Press the / button on the monitor panel.
Playback operations
Starting playing the USB
All files in the USB device will be played repeatedly
until you change the source or disconnect the USB
device.
• When no USB device is connected:
Connect a USB device to the USB terminal.
The playback source changes to [USB] and playback
starts.
• When a USB device is already connected:
Select [USB] as the source.
From the Home screen (page 3), touch as follows:
Playback information and key operation
USB
USBUSB
1Displays/hides the following operation keys
[ ][ ] Selects a folder.
[ ] Selects repeat playback mode by
touching repeatedly.*
[MODE] Displays the <USB Mode> screen.
2Jacket picture (artwork) is shown if any
3Playing time/playback status
4Content information
• Touching [ < ] scrolls the text if not all of the text
is shown.
5Operation keys
[ ] Displays the <Equalizer> screen
(page 31).
[ ] Displays the search method selection
window.
[S]/[T]• (Touch) Selects a file.
• (Hold) Reverses/forwards search.
[IW]Starts/pauses playback.
[ ] Selects random playback mode.*
6Repeat/Random mode indicator
7File type indicator (MUSIC/MOVIE/PICTURE)
8Playlist (PLIST) indicator: displayed when Category
List/Link Search is selected.
9Current playback file information
(file type/folder no./file no.)
* You cannot activate repeat playback mode and random playback
mode at the same time.
18 ENGLISH
00KWM785BWR.indb1800KWM785BWR.indb18 2022/10/1116:532022/10/1116:53
Other manuals for KW-M785BW
1
Table of contents
Other JVC Monitor manuals

JVC
JVC DT-V21G11Z User manual

JVC
JVC DMX129DAB User manual

JVC
JVC KW-M180DBT User manual

JVC
JVC LM-17G/EA User manual

JVC
JVC DT-V20L1D User manual

JVC
JVC TM-1011G User manual

JVC
JVC GM-H40L2A Quick start guide

JVC
JVC TM-H1900G User manual

JVC
JVC TM-H1900G User manual

JVC
JVC TM-A210GU - Color Monitor User manual

JVC
JVC NV-PD4200 Administrator Guide

JVC
JVC GM-H40L2A User manual

JVC
JVC LM-193B User manual

JVC
JVC DT-V1900CG User manual

JVC
JVC TM-1650SU - Color Monitor User manual

JVC
JVC TM-H1950CG User manual

JVC
JVC DT-R17L4DU - Studio Monitor W/hdsdi User manual

JVC
JVC CL-R190 User manual

JVC
JVC KV-MR9000 User manual

JVC
JVC KW-V660BT User manual