ENGLISH - 7 -
Enter the Feature Menu directly, pressing the YELLOW
button.
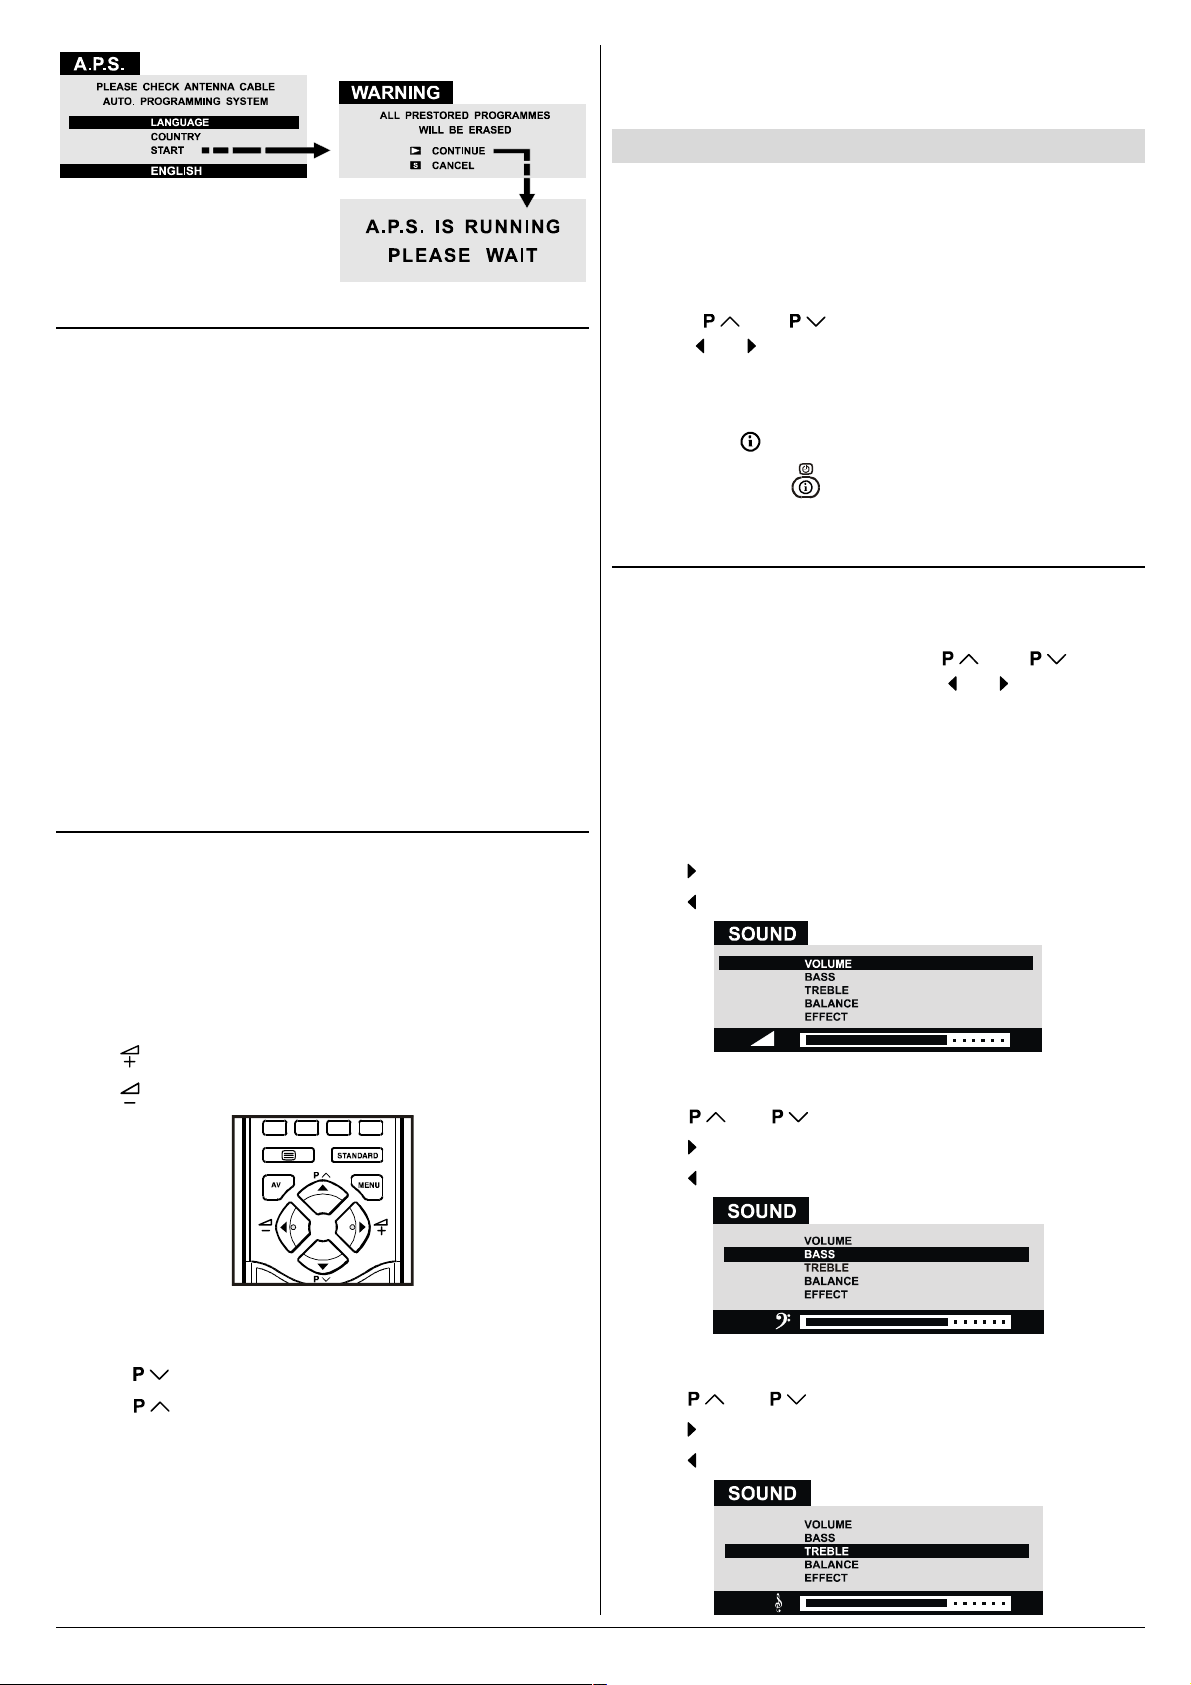
Sleep Timer:
As you enter the feature menu, Sleep imer will be the first
selected option.
Use or button to change the value of the sleep timer
between Off, 0:15, 0:30, 0:45, 1:00, 1:15, 1:30, 1:45, 2:00
hours. Your V will get into standby mode when the period
you selected passes after you make the selection.
Child Lock:
In Feature Menu, press or button to select Child
Lock. Using or button turn Child Lock On or Off.
When Off is selected, there will be no difference in the opera-
tion of your V. When On is selected, the V can only be
controlled by the remote control handset. In this case, the
front panel buttons (except the Switch On/Off button) will not
work.
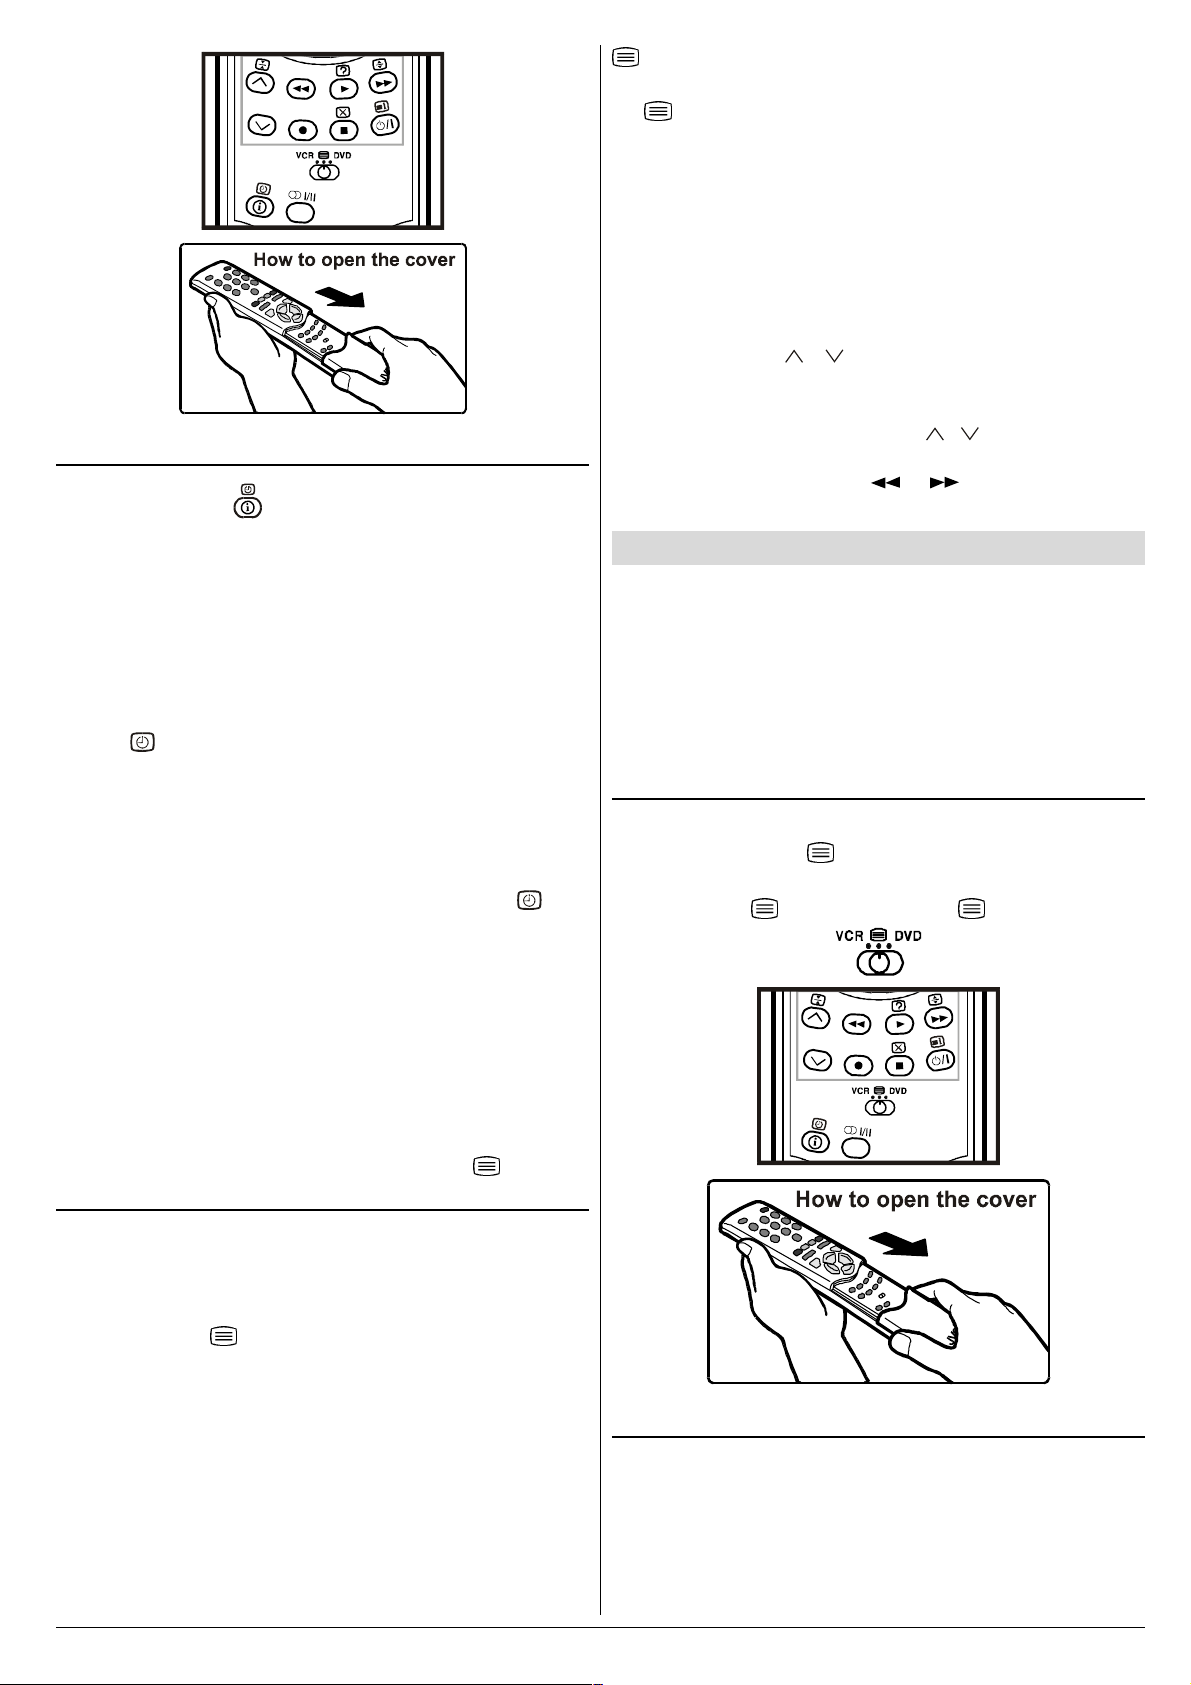
Installation Menu
his menu consists of uning, Program. (Programming) and
TV Config. (Configuration) sub-menus.
Press MENU button, now you are in main menu. In the
main menu, select INSTALL. using or button,
then enter the Installation menu pressing or button.
or
Enter the Installation Menu directly, pressing the BLUE but-
ton.
,167$//
781,1*
352*5$0
79&21),*
TUNING Menu
TUNING menu is used to programme a channel in a Vs
programme number manually or to modify the current pro-
gramme numbers settings.
In the INSTALL menu, select TUNING. hen press or
button to enter the TUNING menu.
To programme a channel in a TVs programme
number manually:
1. Programme will be the first selected item as you enter the
TUNING menu. Pressing or button select the pro-
gramme number where you want to the tuned channel to
be stored. (You may also type the programme number us-
ing the digit buttons.)
2. Press or button to select Band. Using or
button to select the band in which you want to search a
channel.
3. Press or button to select Search.Press or
button to start searching. (Press button to search
forward.Press button to search backwards.)
If the found channel is not the desired one, press or
button to start searching again.
o stop searching before a channel is found, press the re-
verse direction button. For example, when the V is search-
ing forward with button, press button to stop searching.
If you know the channel number which you want to find, you
can find the channel directly.
Press or button to select Channel, then press
or button to select the channel number, or enter the
number with the digit buttons.
4. If you want to name the new channel, press or
button to select Name.
Press or button to select the position and press
or button to select a letter.
5. If the channel reception is poor, fine-tune the channel.
Press or button to select Fine uning,then
press or to fine-tune the channel.
6. After the all settings are completed, store the new
channels setting to the programme number which you se-
lected. Press or button to select Store, then
press or to store it.
If you want to modify the current programme numbers
setting (for e ample, changing name, etc.) :
1. Select the programme number you want to modify the
settings while no menu appears.
2. Display the uning menu.
3. Follow o programme a channel in a Vs programme
number manually: section and change the settings of
the current programme number.
Note:
Do not use Program item in the Tuning menu to select the
programme number. If you select the programme number
with Program item and store the settings, the selected pro-
gramme number s current settings are cancelled.
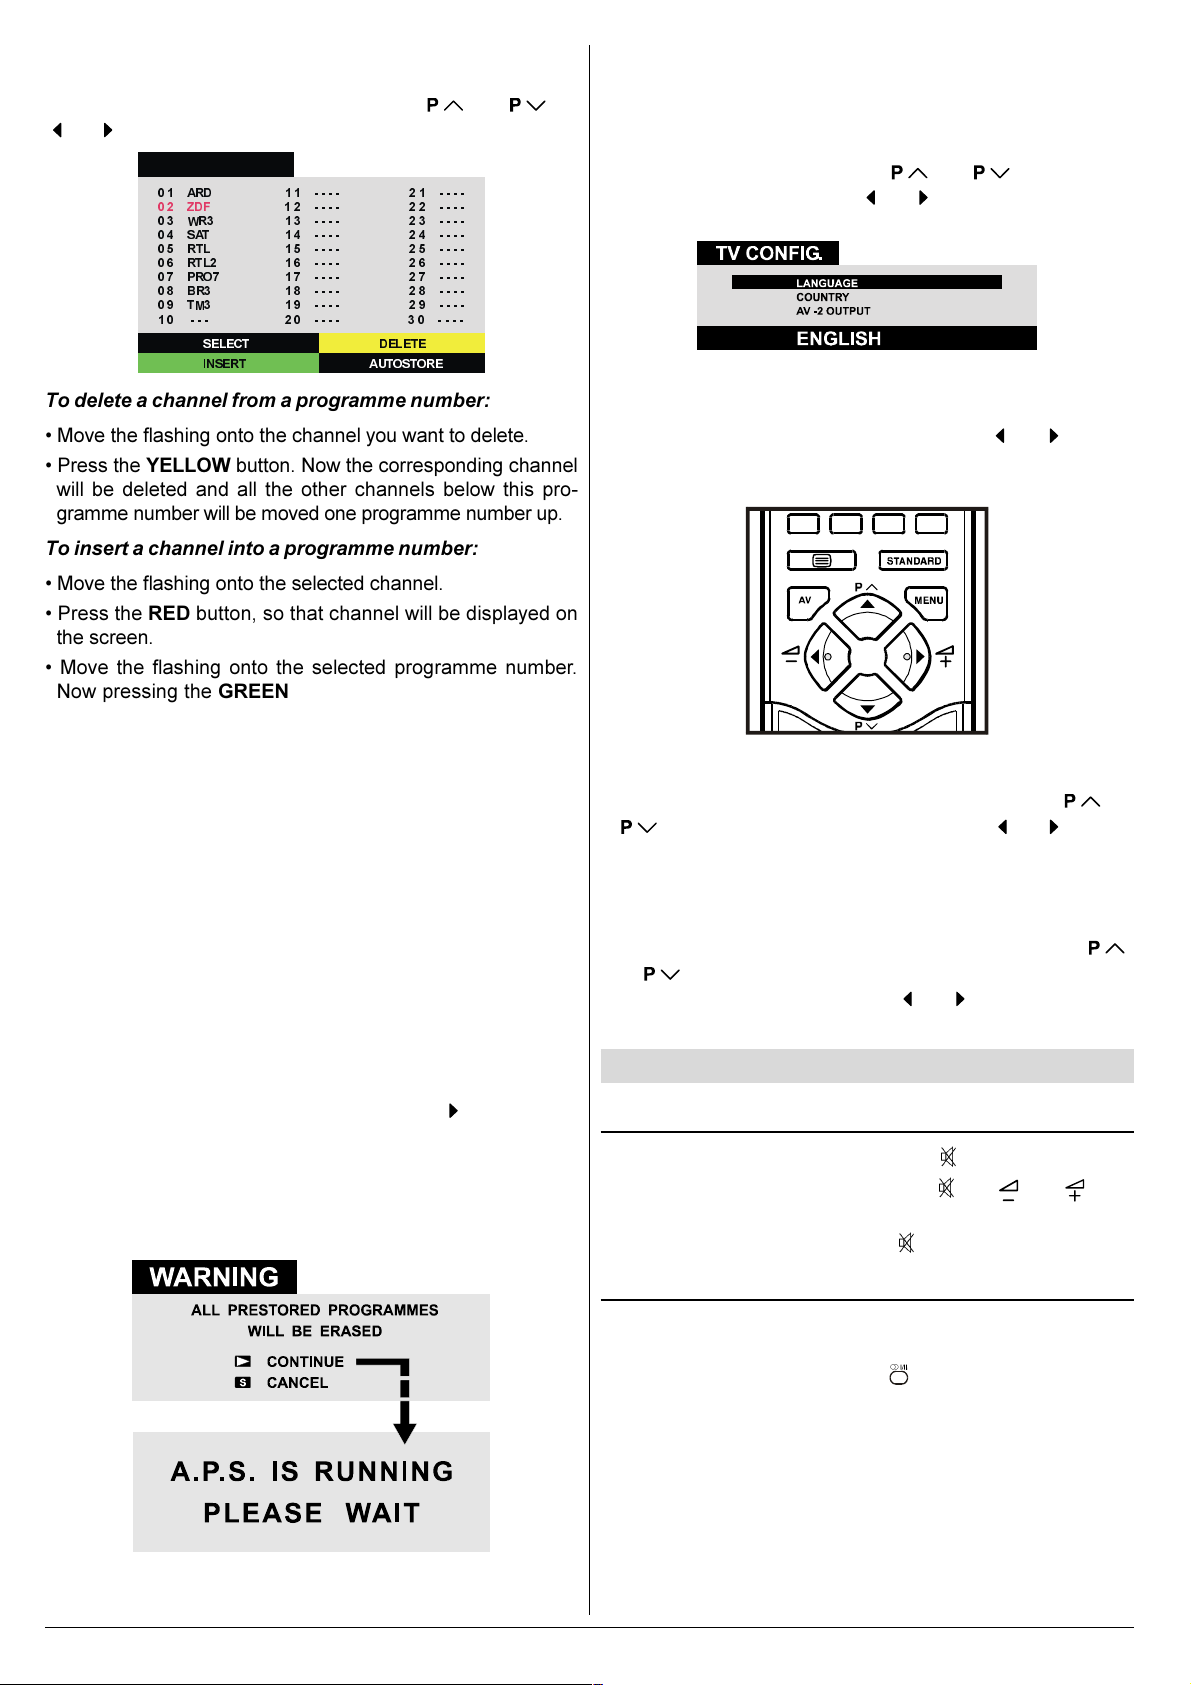
PROGRAM. (Programming) Menu
Program. (Programming) menu is used to display the pro-
gramme names and numbers. You can use this menu to de-
lete a channel, to insert a channel and to autostore the pro-
grammes.
Select the PROGRAM. menu pressing or but-
ton and open it pressing or button. When you enter the
programme menu, all the programme numbers and names
will be displayed on the screen. he programme number and
name of the tuned channel will be shown by the red colour.
All the other channel numbers will be black and at first the
programme number 0 will be flashing. You can move the
flashing number using or or or button. As
you pass through the programme numbers this way, to reach
the programme number you want, the channels correspond-
ing to the programme numbers you pass through will not be
tuned.