Jya Fjord User manual

Fjord Air Purifier User Manual
Руководство пользователя очистителя воздуха Fjord
Manual de Usuario del Purificador de Aire Jya Fiordo
Manuale dell'utente del purificatore d'aria Fiordo
Fjord Luftreiniger Benutzerhandbuch
Mode d’emploi du purificateur d’air Fjord
Manual de Usuários do Purificador de Ar Fiorde
Instrukcja obsługi oczyszczacza powietrza Fjord
1-11
12-22
23-33
34-44
45-55
56-66
67-77
78-88

01
When the power adapter is damaged, it must be replaced with
a genuine power adapter purchased from the manufacturer or
after-sales service department.
This appliance can be used by children aged from 8 years and
above and persons with reduced physical, sensory or mental
capabilities or lack of experience and knowledge if they have
been given supervision or instruction concerning use of the
appliance in a safe way and understand the hazards involved.
Children shall not play with the appliance. Cleaning and user
maintenance shall not be made by children without supervision.
This appliance contains a UV-C emitter.
Do NOT replace the UV-C emitter.
Unintended use of the appliance or damage to the housing may
result in the escape of dangerous UV-C radiation. UV-C radiation
may, even in little doses, cause harm to the eyes and skin.
Appliances that are obviously damaged must not be operated.
WARNING

02
Precautions
· Turn o and unplug the purifier before moving it.
· Do not turn on the purifier when the filter is not installed properly.
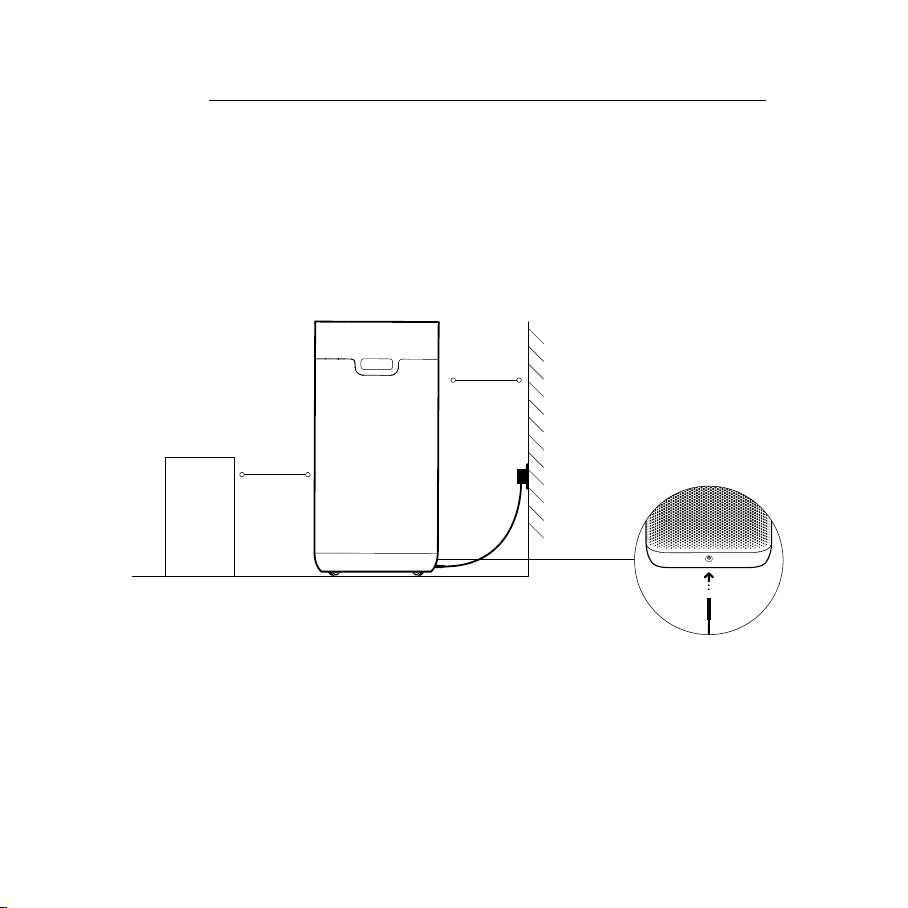
· Maintain a distance of at least 20 cm between the air inlets and walls or other objects.
· The purifier must be placed on firm and flat floor.
· Prior to cleaning or other maintenance, the appliance must be disconnected from the supply mains.
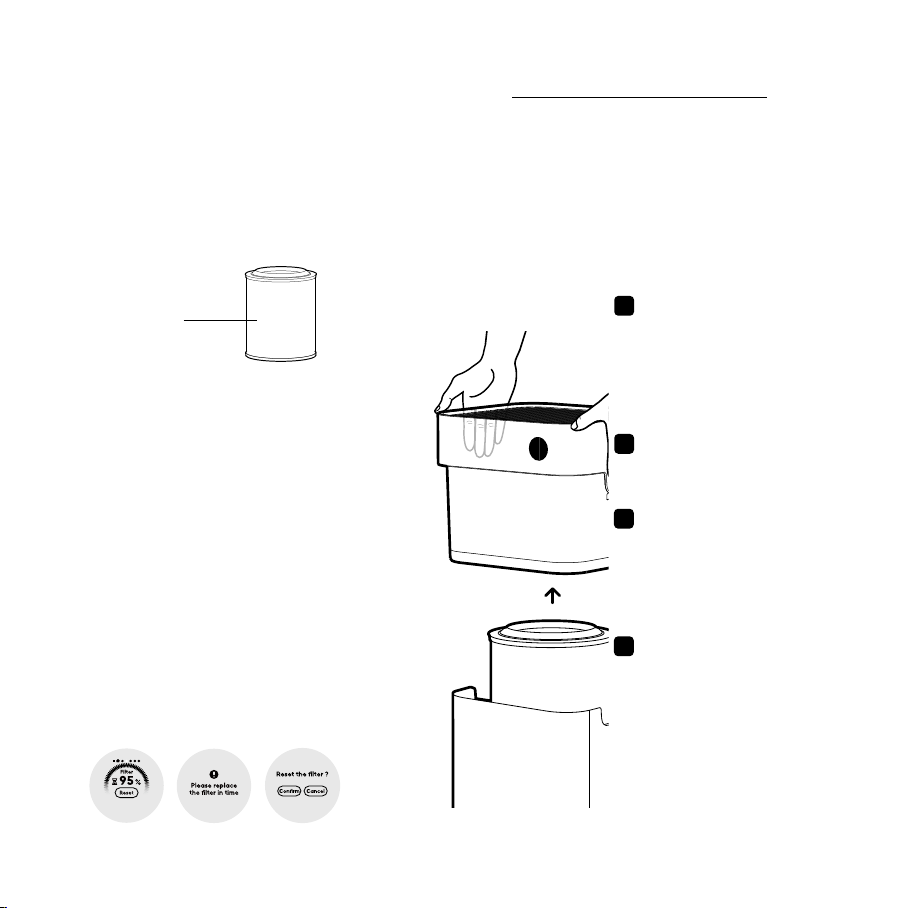
· Frequently remove dust, hair, and other particles from the outer mesh screen of the filter, so as to reduce the
chance of bacteria growth.
· Remove dust, hair, and particles from the purifier's air inlets to prevent a reduction of air intake.
· Cover the air outlet to prevent dust, hair, and other particles from falling in when the purifier is left unused for a
long time.
To avoid fire, electric shocks, or other damage, use the power adapter and electrical outlet as instructed below:
· Do not excessively pull, twist or bend the power adapter, as this may expose or break the cord's core.
· The power adapter must be plugged into a suitable electrical outlet.
· Use the power adapter that is provided with the purifier, do not use any third party power adapters.
· Always unplug the purifier before carrying out maintenance to or moving the air purifier.
· Immediately stop using the purifier when it makes unusual sounds, gives off bad odors, overheats, or its fan
rotates irregularly.
· Do not stick your fingers or foreign objects into the protective parts, movable parts, air inlets, or air outlets.
· Keep objects such as hairs or fabrics away from the purifier to avoid blocking the air inlets or air outlets.
· Do not sit on, lean on or tilt the purifier.
· When using in conjunction with gas-fueled appliances (such as gas stoves, gas heaters), please ventilate
suciently to avoid carbon monoxide poisoning.
· Do not pour liquids, nor throw powders or other small substances into the purifier's air outlet.
Do not use the purifier in the following circumstances, as they may result in electric shocks, fire, or other damage:
· Near open flames, such as candles, incense burners, stoves, fireplaces, cigarettes, firecrackers, lighters,
multipurpose torches, candle lighters, or fire pans.
· Near appliances that generate high temperatures, such as electric heaters, fan heaters, electric foot
warmers,electric stoves, electric irons.
· Make sure no inflammable objects get into the purifier.
· In unstable locations where the purifier can easily fall over.
· In environments that are extremely hot, humid, or damp, such as bathrooms.

03
Power Button
Gas Sensor
Fan Grille
Power Port
Release Buttons
Air Inlets
Touch Display
Screen
Note: In this manual, the illustrations of the product and its accessories and the user interface
are schematic diagrams for reference only.The actual product may vary from that shown in the
schematic diagrams due to product updates and upgrades. Please refer to the actual product.
Read this manual carefully before
use, and retain it for future reference.
Front View Rear View
Product Overview

04
For optimal performance, make sure the distances
between purifier's air inlets and other objects such as
walls meet the requirements as suggested above.
Connect power adapter to the power port at
the bottom of the purifier, and plug it to an
electrical outlet.
Note: For optimal air purification, keep doors and windows closed
during use.
Placing the purifier Connecting to an electrical outlet
Installation
>20cm
>20cm

05
1-20 μg/m3
21-35 μg/m3
35-55 μg/m3
>55 μg/m3
Excellent
Good
Moderate
Unhealthy
Excellent
Good
Moderate
Unhealthy
Excellent
Good
Moderate
Unhealthy
Air Quality Indicator
Turning On/Off
Display Instructions
Tap the power button to turn on the purifier. While
the purifier is on, tap the power button to turn it o.
After power on, the main screen will rotate in the main interface of PM2.5, PM10, TVOC in turn.
The indicator will display green, yellow, orange or red
according the worst value of PM2.5、TVOC、PM10.
How to Use
PM2.5 Interface TVOC InterfacePM10 Interface
Note: PM10 refers to coarse particles have an aerodynamic
diameter ranging from 2.5 to 10μm (PM10–PM2.5). Examples of
coarse particles include dust, pollen, spores, and fly ash.
Note: Upon activation, the Gas sensor inside this purifier takes
the air quality as the initial standard value. If there are changes
in the air TVOC during operation, the Gas sensor will perform
calculations based on the current indoor air quality (IAQ). The
TVOC is displayed according to 4 dierent levels, and the air
quality indicator status also changes accordingly.
PM2.5
TVOC
PM10

06
Main Screen
Automatic: Automatically switch modes according to
the indoor air quality.
Sleep: Ultra-low noise for a comfortable sleeping
environment.
Favorite: Set and save the coverage area and the
purifying eciency in the app.
Power: The device will run with the maximum speed and
output the maximum amount of clean air.
Filter lifespan remaining
and filter resetting
Screen brightness
adjustment
Wi-Fi settings UV light on/off setting
Operation Modes
Tip: After the screen is o, press the screen to wake up
Swipe left on the main screen to enter the
five setting interfaces in sequence, and
return to the main screen after 10 seconds
of no operation.
Press on the main screen to quick
switch the 4 operation modes.
Swipe Rignt
Temperature and
Humidity Interface
In the "Operation Modes" interface, the highlighted state mode is the current operating
mode, click to select the corresponding mode.
How to Use
Screen operation
Swipe Left
Function Settings
Interface

07
Wi-Fi Settings
Resetting Wi-Fi
When unable to connect to the purifier to the app,
swipe left on the main screen to enter the Wi-Fi setting
interface, click "Reset" and "Confirm", then jump to the
Wi-Fi setting interface, check the Wi-Fi icon flashes,
Wi-Fi reset successfully.
Screen brightness adjustment
Swipe left on main screen, switch to the screen
brightness adjustment interface, tap "+" and "-" to
adjust 6 levels of brightness.
Tap the screen can make the screen wake up when
screen is o, it will enter screen o status again if no
operation for 5 seconds.
Enabling/Disabling Wi-Fi
Swipe left on the main screen to enter the Wi-Fi setting
interface, click “Disable” and “Confirm”, Wi-Fi disabled.
You can also enable the Wi-Fi in Wi-Fi setting interface.
On/O interface, press “Enable” or “Disabled” for UV
light On/O.
UV light On/o setting
Swipe left on the main screen, switch to UV Light
Wi-Fi Staus
Swipe left on the main screen to enter the Wi-Fi
setting interface,check current Wi-Fi status.
Connected ( Wi-Fi icon lights on)
Waiting for connecting (Wi-Fi icon flashes)
Disabled
Enabling/Disabling the child lock function
Press and hold the screen and power button
simultaneously for 3 seconds with 3 beeps, check
lock icon displaying on screen for 2 seconds,
child lock is enabled. You cannot operate the
device when the child lock is on.
Press and hold the screen and power button
simultaneously for 3 seconds with 3 beeps, check
unlock icon displaying on screen for 2 seconds,
child lock is disabled.
How to Use
Note: : When Wi-Fi is disabled, the reset operation can turn
on Wi-Fi.

08
Checking Filter Lifespan
Swipe left on the main screen, switch to
filer lifespan remaining and filter resetting
interface, you can check the filter lifespan
remaining.
Filters should be
replaced every
6–12 months
Filter Replacement Reminder
When the filter lifespan is less than 10%, a
reminder of the expiration will pop up on
screen, tap the prompt to jump to the filter
lifespan remaining and reset interface, the
reminder will pop up the next time when the
device is turned on or every 24hrs.
Filters should be replaced every 6–12 months.
Please replace the filter as soon as possible
to ensure normal operation and optimal air
purification.
Filter Status
How to replace filter
Make sure to turn o the air purifier and disconnect power before replacing the filter.
Note: To avoid injuries, do not stick your fingers in between the top and the bottom part when opening or
installing the filter compartment.
1Opening the filter
compartment
Press and hold the release
buttons with both of your
hands, and lift up the upper
compartment of the purifier.
2Removing the old filter
Remove the old filter upwards.
3
4
Installing the new filter
Resetting the filter
Install the filter into the
filter compartment, and
then place back the upper
compartment of the purifier.
Swipe left on the main screen,
switch to filer lifespan remaining
and filter resetting interface,
click “Reset” and “Confirm“,
filter reset successfully, and the
purifier restarts to calculate the
filter lifespan.
Filter and Replacing the Filter Instructions

09
Intelligent Control
with Apple HomeKit
Open the Home app on your iPhone/iPad.
Tap "Add Accessory" and then scan the HomeKit setup code on the
product sticker (two stickers on the device unit, see illustration), or enter
the eight-digit setup code above the HomeKit Setup Code. The device
will then be linked to the Apple Home app.
The device can be linked to Smartmi Link after
linking to HomeKit. Go to the Personal Info
page on Smartmi Link. Tap "HomeKit Info" and
then link the HomeKit device as prompted.
Devices linked to Smartmi Link can also be
added to HomeKit. Go to the Device Control
page on Smartmi Link. Tap "Add to HomeKit" in
"Settings" and then link the device to HomeKit
as prompted.
Note:
Please ensure that your Wi-Fi network
is both available and has Internet
access. Place your phone as close to
this product as possible. (This product
does not support 5G networks).
To control this accessory which
is compatible with HomeKit, it is
recommended to use iOS 13.0 or a
later version.
Please keep the HomeKit setup code,
as you will need to scan the code
to link the device to HomeKit after a
factory reset.
iPad and iPhone are trademarks of
Apple Inc., registered in the U.S. and
other countries.
Controlling this HomeKit-enabled
accessory automatically and away
from home requires a HomePod, Apple
TV, or iPad set up as a home hub. It is
recommended that you update to the
latest software and operating system.
1
2
HomeKit
Setup Code
Linking the Device
to Smartmi Link
This product has been linked
to the Smartmi Link and can
be controlled using the app.
Scan the QR code or search
for "Smartmi Link" on the app
store to download and install
the app. Go to the app's
homepage, click "+" in the
middle of the page, then add
the device as prompted.
Note: Please ensure that your
Wi-Fi network is both available
and has Internet access.
Place your phone as close to
this product as possible. (This
product does not support 5G
This product will be listed as
"Jya Fjord Air Purifier" in the
app's device listingnetworks)

10
Make sure to turn o the air purifier and disconnect power before cleaning.
Note: It is forbidden to directly rinse or spray the purifier
with water. Do not wipe the purifier with a soaking wet
cloth to prevent water from getting into it.
Cleaning the air purifier
To ensure your purifier works and purifies properly,
use a vacuum cleaner or soft cloth to remove any
dust clinging to Air inlets or housing walls.
Cleaning the laser particle sensor
Use a non-sharp tool to open the cover of the
laser particle sensor, then use an air blow gun
or hair dryer to clean the sensor and the filter
on the cover, as illustrated in the figure.
Note: Do not use hot air.
Care &Maintenance

11
Product Name Jya Fjord Air Purifier
Model JYKQJHQ01
Rated Voltage 24V
Power Adapter Rated Input 100-240V~, 50/60Hz, 1.2A
Rated Power 48 W
Color Dark gray
Net Weight Approx. 6.5 kg
Item Dimensions 290 × 260 × 535 mm
Eective Coverage 31~54m2 *
Noise Level ≤66 dB(A)
Particle's Clean Air Delivery Rate 450m3/h
TVOC's Clean Air Delivery Rate 150m3/h
Particle Purification Eciency High
Network Standby Power
Consumption
< 2.0 W
Wireless Connectivity Wi-Fi IEEE 802.11 b/g/n 2.4 GHz
Storage Temperature -10℃to 40℃
Storage Humidity 5%–90%
*Calculated according to standard GB/T 18801-2015
(CADR Particle)
(CADR TVOC)
Hereby, Jya Smart Home (tianjin) Limited.
declares that the radio equipment - Jya Fjord
Air Purifier, type JYKQJHQ01
is in compliance with Directive 2014/53/EU.
The full text of the EU declaration of conformity
is available at the following internet address:
https://smartmiglobal.com/doc.html
All products bearing this symbol are waste
electrical and electronic equipment (WEEE
as in directive 2012/19/EU) which should not
be mixed with unsorted household waste.
Instead, you should protect human health and
the environment by handing over your waste
equipment to a designated collection point for
the recycling of waste electrical and electronic
equipment, appointed by the government
or local authorities. Correct disposal and
recycling will help prevent potential negative
consequences to the environment and human
health. Please contact the installer or local
authorities for more information about the
location as well as terms and conditions of
such collection points.
RF Specification:
Wi-Fi 2.4 G (2400–2483.5 MHz), Max. RF Output Power: <20 dBm
Under normal use of condition, this equipment should be kept a separation
distance of at least 20cm between the antenna and the body of the user.
Production Date: See packaging
For details of the importer, please refer to the box.
Regulatory Compliance Information
Europe — EU declaration of conformity
Specifications

12
Меры предосторожности
Если шнур электропитания поврежден, замените его оригинальным
шнуром, приобретенным у производителя или в соответствующем
сервисном центре.
Дети в возрасте от 8 лет и лица с ограниченными физическими,
сенсорными или умственными способностями или недостаточным
опытом и знаниями могут использовать это устройство под
наблюдением или после получения инструкций по технике
безопасности и осознания возможных рисков.
Дети не должны играть с устройством. Не разрешайте детям чистить
устройство и выполнять другие мероприятия по уходу за ним без
присмотра взрослых.
Этот прибор содержит излучатель УФ-С.
НЕ заменяйте излучатель UV-C.
Использование прибора не по назначению или повреждение корпуса
может привести к утечке опасного УФ-излучения. УФ-С излучение может
даже в небольших дозах нанести вред глазам и коже.
Приборы с очевидными повреждениями эксплуатировать нельзя.
·
·
·
·
·
·
·

13
Меры предосторожности
· Перед перемещением выключите очиститель воздуха и выньте штепсель из розетки.
· Очиститель воздуха не включится при неправильной установке решетки вентилятора и крышки отсека для фильтра.
· Между воздухозаборными отверстиями и стенами или другими предметами должно оставаться расстояние минимум 20см.
· Перед чисткой или техническим обслуживанием устройство следует отключить от питающей сети.
· Часто удаляйте пыль, волосы и другие частицы с внешнего сетчатого экрана фильтра, чтобы снизить вероятность роста
бактерий.
· Удаляйте пыль, волосы и частицы из воздухозаборных отверстий очистителя воздуха, чтобы не допустить снижения
забора воздуха.
· Накройте выпускное отверстие воздуха, чтобы не допустить попадания пыли, волос и других частиц, когда очиститель
воздуха не используется в течение длительного времени.
Во избежание пожара, поражения электрическим током и другого ущерба используйте шнур питания и электрические
розетки согласно приведенной ниже инструкции:
· Не прилагайте чрезмерное усилие для вытягивания шнура питания, не скручивайте и не сгибайте его, поскольку это
может привести к оголению или разлому электрического провода шнура питания.
· Шнур питания должен вставляться в подходящий электрический разъем.
· Используйте шнур питания, который поставляется с очистителем воздуха, не используйте какие-либо сторонние шнуры
питания.
· Всегда вынимайте шнур электропитания очистителя воздуха из розетки при выполнении технического обслуживания
или перемещении очистителя воздуха.
· Немедленно прекратите использование очистителя воздуха при появлении необычных шумов, неприятного запаха,
перегреве или неравномерном вращении вентилятора.
· Не вставляйте пальцы или инородные предметы в защитные детали, подвижные детали, воздухозаборные отверстия
или выпускные отверстия воздуха.
· Не допускайте попадание в очиститель воздуха таких предметов, как волосы или ткань, чтобы избежать закупоривания
воздухозаборных отверстий или выпускных отверстий воздуха.
· Не сидите на очистителе, не опирайтесь на него и не наклоняйте его.
· При использовании вместе с газовым оборудованием (например, газовыми печами или водонагревателями) обеспечьте
достаточную вентиляцию, чтобы избежать отравления угарным газом.
· Не наливайте какую-либо жидкость, не насыпайте порошки или какие-либо другие вещества и выпускное отверстие
воздуха очистителя воздуха.
Не используйте очиститель воздуха при следующих обстоятельствах, поскольку это может привести к поражению
электрическим током, пожару или другому ущербу:
· Около источников открытого пламени, например, свечей, кадильниц, плит, каминов, сигарет, хлопушек, зажигалок,
универсальных горелок, аколитов или жаровен.
· Около приборов, производящих высокую температуру, например, электрических нагревателей, вентиляторных
воздухонагревателей, электрических грелок для ног, электроплит и электрических утюгов.
· Примите меры, чтобы в очиститель воздуха не попадали воспламеняемые предметы.
· В неустойчивом положении, когда очиститель воздуха легко может перевернуться.
· В среде с чрезвычайно высокой температурой, влажностью или сыростью, например, в ванной.

14
Кнопка питания
Газовый
сенсор
Защитная решетка
вентилятора
Кнопки фиксатора
Сенсорный
дисплей
Внимание: в настоящем руководстве изображения изделия и его принадлежностей, а также
пользовательского интерфейса приведены в ознакомительных целях. Фактическое изделие
может отличаться от изображений из-за обновлений и усовершенствований изделия. См.
фактическое изделие.
Перед использованием внимательно
прочтите это руководство и сохраните
его для справки.
Лицевая сторона Задняя сторона
Обзор устройства
Воздухозаборные
отверстия
Разъем
питания

15
Для обеспечения эффективной работы устройства
убедитесь, что расстояние между воздухозаборными
отверстиями очистителя и другими предметами (например,
стенами) соответствует указанным выше требованиям.
Подключите адаптер питания к разъему
питания в нижней части очистителя и вставьте
вилку в электрическую розетку.
Внимание: для обеспечения эффективной очистки воздуха во
время работы очистителя рекомендуется закрывать двери и окна.
Размещение очистителя воздуха Подключение к электрической розетке
Установка
>20cm
>20cm

16
1-20 мкг/m3
21-35 мкг/m3
35-55 мкг/m3
>55 мкг/m3
Отлично
Хорошо
Нормально
Не соответствует
требованиям здоровья
Отлично
Хорошо
Нормально
Не соответствует
требованиям здоровья
Отлично
Хорошо
Нормально
Не соответствует
требованиям здоровья
Индикатор качества воздуха
Включение/выключение
Указания по работе дисплея
Чтобы включить очиститель, нажмите кнопку
питания. Когда очиститель включен, нажмите
кнопку питания, чтобы выключить его.
После включения питания на главном экране будут поочередно отображаться основной интерфейс значений
PM2.5, TVOC и PM10.
Индикатор будет гореть зеленым, желтым, оранжевым или красным
светом, когда значение параметров PM2.5, TVOC или PM10 достигает
самого низкого уровня.
Инструкции по применению
Интерфейс PM2.5 ИнтерфейсTVOCИнтерфейс PM10
Внимание: PM10 означает крупные частицы с аэродинамическим диаметром от 2,5
до 10 мкм (PM10-PM2.5). К крупным частицам относятся, например, пыль, пыльца,
споры и летучая зола.
Примечание: Газовый сенсор, которым оснащено данное устройство, использует
качество воздуха, измеренное после включения устройства, в качестве начального
базового значения. Если в процессе использования устройства содержание TVOC
воздуха изменяется, то газовый сенсор в соответствии с текущим качеством
воздуха в помещении выполняет необходимый расчет и отображает результат
на дисплее по шкале от 1 до 4. Также соответствующим образом изменяются
показания индикатора качества воздуха.
PM2.5
TVOC
PM10

17
Главный экран
Автоматический: автоматическое переключение режимов
в зависимости от качества воздуха в помещении.
Сон: режим сверхмалого шума для создания среды,
комфортной для сна.
Выбранный: настройка и сохранение зоны покрытия и
эффективности очистки воздуха в мобильном приложении.
Питание: устройство будет работать с максимальной скоростью
и выдавать максимальное количество чистого воздуха.
Оставшийся срок службы
фильтра и сброс фильтра
Регулировка
яркости экрана
Настройки Wi-Fi Настройка включения/
выключения УФ-
стерилизатора
Режимы работы
Рекомендация: после выключения экрана нажмите
на него для пробуждения
На главном экране проведите пальцем
влево для поочередного доступа к
пяти интерфейсам настроек и возврата
на главный экран после 10 секунд
бездействия.
Нажмите на главном экране для
быстрого переключения 4 режимов
работы.
Swipe Rignt
Интерфейс значений
температуры и
В «Интерфейсе выбора режима» состояние подсветки кнопок отображает текущее рабочее
состояние устройства. Нужный режим можно выбрать, нажав на соответствующую кнопку.
Работа экрана
Проведение пальцем влево
Интерфейс
настроек функций
Инструкции по применению

18
Настройки Wi-Fi
Сброс настроек WI-FI
При первом подключении очистителя к приложению
или невозможности подключения к нему проведите
пальцем влево по главному экрану для входа в
интерфейс настроек Wi-Fi; нажмите «Reset» (Сбросить)
и «Confirm» (Подтвердить), затем перейдите в интерфейс
настройки Wi-Fi и убедитесь, что значок Wi-Fi мигает
— настройки Wi-Fi успешно сброшены.
Регулировка яркости экрана
На главном экране проведите пальцем влево,
переключитесь на интерфейс регулировки яркости
экрана, нажмите «+» и «-» для регулировки 6 уровней
яркости.
Когда экран выключен, нажатие на экран приводит
к его пробуждению; при отсутствии какой-либо
активности в течение 10 секунд экран снова
перейдет в выключенное состояние.
Включение/выключение Wi-Fi
Проведите пальцем влево по главному экрану для входа в
интерфейс настроек Wi-Fi, нажмите «Disable» (Отключить)
и «Confirm» (Подтвердить) — Wi-Fi отключен. Также можно
включить Wi-Fi в интерфейсе настроек Wi-Fi.
УФ-стерилизатора; для включения/выключения
УФ-стерилизатора нажмите «Enable» (Включить)
или «Disabled» (Выключить).
Настройка включения/выключения УФ-стерилизатора
Проведите пальцем влево по главному экрану,
переключитесь на интерфейс включения/выключения
Состояние Wi-Fi
Проведите пальцем влево по главному экрану для
входа в интерфейс настроек Wi-Fi; здесь вы можете
просмотреть текущее состояние Wi-Fi.
Подключено (значок Wi-Fi горит)
Ожидание подключения (значок Wi-Fi мигает)
Отключено Включение/выключение функции блокировки от детей
Одновременно нажмите и удерживайте экран и кнопку
питания в течение 3 секунд, при этом прозвучат 3
звуковых сигнала; убедитесь, что на экране на 2
секунды появится значок блокировки блокировка
от детей включена. Вы не сможете управлять
устройством, когда включена блокировка от детей.
Одновременно нажмите и удерживайте экран и кнопку
питания в течение 3 секунд, при этом прозвучат 3
звуковых сигнала; убедитесь, что на экране на 2
секунды появится значок разблокировки
блокировка от детей отключена.
Внимание: если Wi-Fi отключен, при выполнении сброса он может
включиться.
Инструкции по применению

19
Проверка срока службы фильтра
На главном экране проведите пальцем влево,
переключитесь на интерфейс оставшегося
срока службы фильтра и сброса фильтра — вы
можете проверить оставшийся срок службы
фильтра.
Фильтры следует
менять через
каждые 6-12
месяцев.
Напоминание о замене фильтра
Когда срок службы фильтра составляет
менее 10 %, на экране появится напоминание
об истечении срока службы. Нажмите на
подсказку, чтобы перейти в интерфейс
оставшегося срока службы фильтра и сброса
фильтра. В следующий раз напоминание
появится на экране при включении
устройства или через каждые 24 часа.
Фильтры следует менять через каждые 6–12
месяцев. Для обеспечения нормальной
работы и оптимальной очистки воздуха
выполняйте замену фильтра в максимально
короткие сроки.
Состояние фильтра
Порядок замены фильтра
Перед заменой фильтра обязательно выключите очиститель воздуха и отключите питание.
Внимание: во избежание травм не просовывайте пальцы между верхней и нижней частями при
снятии или установке отсека фильтра.
1Снятие отсека для
фильтра
Нажмите и удерживайте
обеими руками кнопки
фиксаторов и извлеките
верхний отсек очистителя.
2Удаление старого фильтра
Извлеките старый фильтр по
направлению вверх.
3
4
Установка нового фильтра
Сброс фильтра
Установите фильтр в отсек
фильтра, а затем установите
на место верхний отсек
очистителя.
На главном экране проведите
пальцем влево, переключитесь
на интерфейс оставшегося
срока службы фильтра и сброса
фильтра, нажмите «Сбросить»
и «Подтвердить». Фильтр будет
успешно сброшен, и очиститель
перезапустится для расчета
срока службы фильтра.
Инструкция на фильтр и указания
по замене фильтра
This manual suits for next models
1
Table of contents
Languages:
Other Jya Air Cleaner manuals