K-array Concert Series Quick start guide

Stacking the Concert Series Ver. 1.1
STACKING THE CONCERT SERIES
RIGGING MANUAL
English

Stacking the Concert Series Ver. 1.1
2
TABLE of CoNTENTS
SYMBoLS ................................................................................ 3
1. INTRoDUCTIoN ..................................................................... 4
2. SYSTEM CoMpoNENTS ........................................................... 4
2.1 LoUDSpEAkER ENCLoSURES.................................................................. 4
2.3 STACkING hARDwARE ......................................................................... 5
3. SAfETY INfoRMATIoN............................................................ 6
4. pRoDUCT ovERvIEw.............................................................. 7
5. STACkING A CLUSTER............................................................. 9
5.1 STACkING A kh5/kh3 CLUSTER .............................................................. 9
5.2 STACkING A kh2 CLUSTER ...................................................................15
5.3 INSTALLING oN A kS5 SUBwoofER ....................................................... 21
6. SERvICE ............................................................................ 22

Stacking the Concert Series Ver. 1.1
3
SYMBoLS
This symbol alerts the user to the presence of recommendations about
product’s use and maintenance.
This symbol alerts the user to the presence of recommendations about the
product’s use and maintenance.
K-array declares that this device is in compliance with applicable CE
standards and regulations. Before putting the device into operation, please
observe the respective country-specific regulations!
Waste Electrical and Electronic Equipment (WEEE)
Please dispose of this product at the end of its operational lifetime by bringing
it to your local collection point or recycling center for such equipment.
This device complies with the Restriction of Hazardous Substances Directive.
Warning: DANGEROUS VOLTAGE.
Terminals marked with this symbol carry a risk of electric shock, therefore
external wiring connected to these terminals requires installation by a
qualified professional or the use of ready-made leads or cords.

Stacking the Concert Series Ver. 1.1
4
1. INTRoDUCTIoN
The following pages will instruct how to stack a KH5/KH3/KH2 cluster. Although this manual contains
an ample amount of useful information on rigging in general, it does not claim to be a comprehensive
resource on the subject. This manual assumes that the owner(s) and/or user(s) of a K-array system
are knowledgeable and experienced in the areas of rigging and flying loudspeaker systems.
The user must assume all responsibility for the appropriate use of K-array systems, in any particular
location or circumstance.
It is recommended to attend the training courses offered by K-array before proceeding with the
installation of the system.
2. SYSTEM CoMpoNENTS
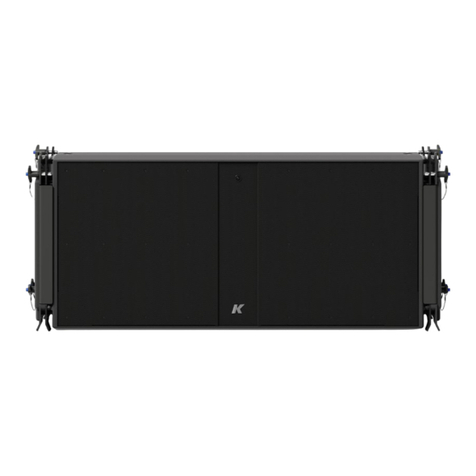
KH2 KH3
2.1 LoUDSpEAkER ENCLoSURES
KH5
Please read the KH5, KH3 and KH2 User
Guides carefully for important safety
information and operation details

Stacking the Concert Series Ver. 1.1
5
2.3 STACkING hARDwARE
K-HCBASE
Accessory to stack up to three KH5 or
up to four KH3
K-HCBASE2
Accessory to stack up to six KH2. Please note
that the only difference between the K-HCBASE
and the K-HCBASE2 is the diameter of the holes
for the pins

Stacking the Concert Series Ver. 1.1
6
3. SAfETY INfoRMATIoN
Laws and regulations: The suspension of large, heavy objects in public places is subject to numerous
laws and regulations at the national, federal, state, provincial, and local levels. This manual does not
address the specifics of any such applicable laws and government regulations. This manual details
procedures and practices consistent with those generally acknowledged as allowable and safe in
Europe. However, the user must assume responsibility for making sure that use of any K-array system
and its components in any particular circumstance or venue conforms to all applicable laws and
regulations in force at the time.
Personnel health and safety: During installation and setup, personnel should wear protective headgear
and footwear at all times. Under no circumstances should personnel climb on the loudspeaker
assembly.
Wind loads: In case of outdoor installation, assure that wind does not interfere with the system’s
stability, taking extra securities like chains, weights, ropes or any other certified anchoring systems.
Ground stacking: Do not ground stack a cluster on uneven ground or platform. If the system is ground
stacked on a structure, platform or stage always check that it can support the total weight of the
system. Always check the stability of the system. When stacking more than two KH5 or more than
three KH3 or more than four KH2, always secure the base to a stable surface with chains, ropes or
any other certified anchoring systems.
Read these instructions - Keep these instructions - Heed all warnings
Warning: failure to follow these safety instructions could result in fire,
shock or other injury or damage to the device or other property.

17,9in
455,77mm
47,1in
1195,08mm
43,5in
1104mm
14,6in
370mm
8,3in
209,95mm
20,5 in
520 mm
23,6 in
599,8 mm
8,3 in
210 mm
47,0 in
1194,6 mm
49,6 in
1260 mm
Stacking the Concert Series Ver. 1.1
7
Weight
61.2 kg (134.9 lbs)
4. pRoDUCT ovERvIEw
KH5 UNIT
Weight
46 kg (101.4 lbs)
KH3 UNIT

30,2 in
767 mm
0,3 in
8 mm
29,3 in
745 mm
0,3 in
8 mm
8,3 in
210 mm
13,6 in
345 mm
Stacking the Concert Series Ver. 1.1
8
Weight
31.2 kg (68.8 lbs)
KH2 UNIT
K-HCBASE/K-HCBASE2
25,7in
653,2mm
24,5in
621,5mm
0,5in
12,5mm
0,5in
12,5mm
0,5in
12mm
5,5in
139,4mm
5,0in
127mm
5,5in
140,4mm
5,7in
144,4mm

Stacking the Concert Series Ver. 1.1
9
5. STACkING A CLUSTER
The K-HCBASE accessory allows the stacking of up to three KH5 units and up to four KH3 units while
the K-HCBASE2 allows the stacking of up to six KH2 units.
5.1 STACkING A kh5/kh3 CLUSTER
The following step-by-step instructions explain how to stack a cluster composed of three KH5
elements. Follow the same procedure to stack a cluster composed of KH3 units.
1. Position the base on a flat surface and position the first KH5/KH3 unit as shown in the picture
below.
• Do not ground stack a cluster on uneven ground or platform.
If the system is ground stacked on a structure, platform or
stage always check that it can support the total weight of
the system.
• Do not gound stack more than three KH5 or four KH3 units.
• Always check the stability of the system. When stacking
three KH5 or four KH3, always secure the base to a stable
surface with chains, ropes or any other certified anchoring
systems.

Stacking the Concert Series Ver. 1.1
10
2. Insert the four 12x25 quick release pins supplied with the system to secure the unit to the base.
3. Level off the base so that the KH5/KH3 is in perfect vertical position.

Stacking the Concert Series Ver. 1.1
11
4. To connect another unit, insert the two plates supplied with the system as shown in the picture below
(the base is not shown).
5. Plug the two 12x25 quick release pins supplied with the system in the rear holes to secure the plates
to the KH5/KH3 enclosure.

Stacking the Concert Series Ver. 1.1
12
6. Insert two 12x25 quick release pins in the front holes corresponding to the angle you would like to
maintain between the two units.
7. Insert the next unit.

Stacking the Concert Series Ver. 1.1
13
8. Plug four 12x25 pins to secure the two units.
9. Repeat Steps 4 through 8 to connect the next unit.

Stacking the Concert Series Ver. 1.1
14
5.2 STACkING A kh2 CLUSTER
These step-by-step instructions explain how to stack a cluster composed KH2 units. Please note that
you will need the K-HCBASE2 accessory to stack the cluster. The K-HCBASE2 is very similar to the
K-HCBASE but features holes with a different diameter to insert smaller pins.
1. Position the base on a flat surface and position the first KH2 unit as shown in the picture below.
• Do not ground stack a cluster on uneven ground or platform.
If the system is ground stacked on a structure, platform or
stage always check that it can support the total weight of
the system.
• Do not gound stack more than 6 KH2.
• Always check the stability of the system. When stacking
more than four KH2, always secure the base to a stable
surface with chains, ropes or any other certified anchoring
systems.

Stacking the Concert Series Ver. 1.1
15
2. Insert the four 8x20 quick release pins supplied with the system to secure the unit to the base.
3Level off the base so that the KH2 is in perfect vertical position.

Stacking the Concert Series Ver. 1.1
16
4. To connect another unit, insert the two plates supplied with the system as shown in the picture below
(the base is not shown).
5. Plug the two 8x20 quick release pins supplied with the system in the rear holes to secure the plates
to the KH2 enclosure.

Stacking the Concert Series Ver. 1.1
17
6. Insert two 8x20 quick release pins in the front holes corresponding to the angle you would like to
maintain between the two units.
7. Insert the next unit.

Stacking the Concert Series Ver. 1.1
18
8. Plug four 8x20 pins to secure the two units.
9. Repeat Steps 4 through 8 to connect the next units.

Stacking the Concert Series Ver. 1.1
19
5.3 INSTALLING oN A kS5 SUBwoofER
Both the K-HCBASE and the K-HCBASE2 can be installed on a KS5 subwoofer to create a compact
powerful full range system.
Do not ground stack a cluster on uneven ground or platform. If
the system is ground stacked on a structure, platform or stage
always check that it can support the total weight of the system.

Stacking the Concert Series Ver. 1.1
20
6. SERvICE
To obtain service:
1) Contact the official K-array distributor in your country. Your local distributor will direct you to the
appropriate service center.
2) If you are calling for service, please have the serial number(s) of the unit(s) available for reference.
Ask for Customer Service, and be prepared to describe the problem clearly and completely.
3) If the problem cannot be resolved over the phone, you may be required to send the unit in for
service. In this instance, you will be provided with an RA (Return Authorization) number which
should be included on all shipping documents and correspondence regarding the repair. Shipping
charges are the responsibility of the purchaser.
Any attempt to modify or replace components of the device will invalidate your warranty. Service must
be performed by an authorized K-array service center.
Cleaning:
Use only a soft, dry cloth to clean the unit. Do not use any solvents, chemicals, or cleaning
solutions containing alcohol, ammonia, or abrasives. Do not use any sprays near the product or
allow liquids to spill into any openings.
The contents of this manual are furnished for informational purposes only. K-array s.u.r.l. assumes no responsibility for any errors or inaccuracies that may
appear in this manual. K-array s.u.r.l. reserves the right to make modifications without prior notice.
This manual suits for next models
3
Table of contents
Other K-array Speakers System manuals

K-array
K-array Python KP52 User manual

K-array
K-array Vyper KV52 User manual

K-array
K-array Pinnacle-KR II User manual

K-array
K-array Mugello-KH I User manual

K-array
K-array ninja kj50vb User manual

K-array
K-array Ko40 User manual

K-array
K-array Kobra KK200 User manual

K-array
K-array Kobra KK52 User manual

K-array
K-array KN6 User manual

K-array
K-array Redline KR100S User manual