5
(EN)English
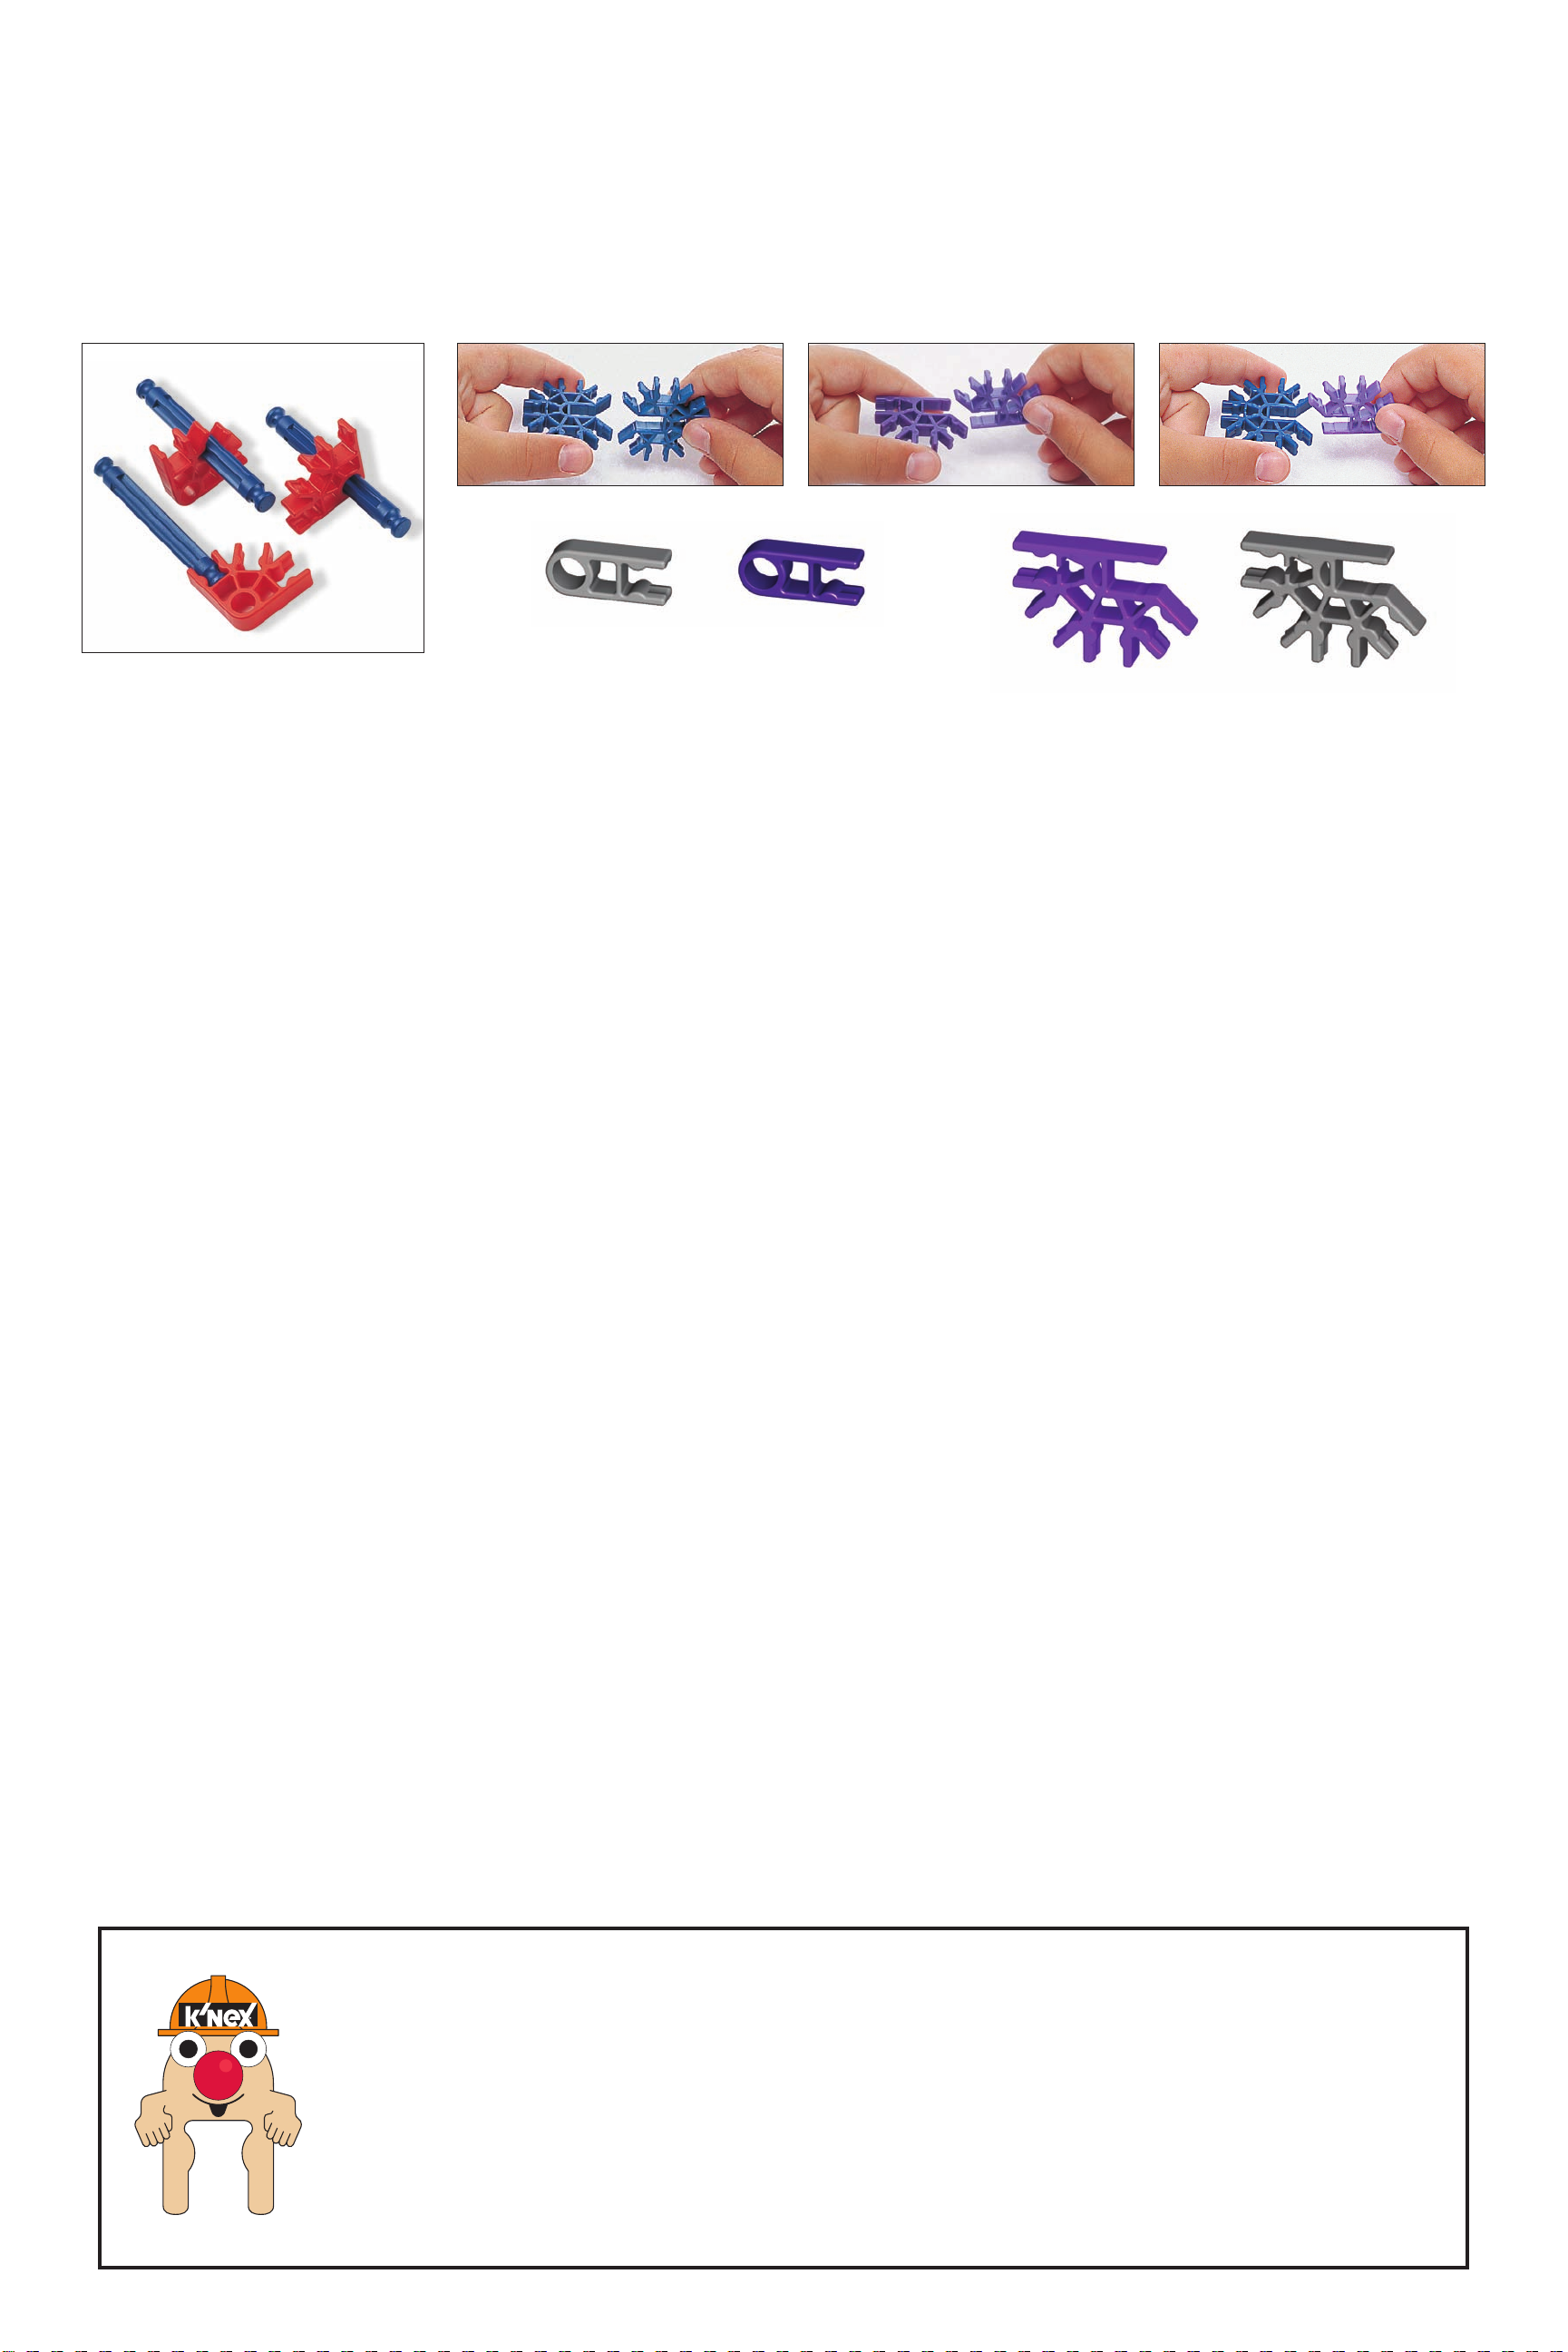
The above photos show the basic connections used to build the
Big Ball Factory.
These instructions show you how to build the front side of the
model first. Keep the large picture of the completed front side in
view on your left as you are working on these sections.
Next, you will add assemblies to the back side of the model.
Keep the large picture of the back side in view on your right, to
help you see where parts are attached.
On each page, there is a small picture of the model that shows
the section you are building. Arrows indicate where one section
fits into another.
As you add new pieces onto existing sections, the colors of
those sections are lightened in color. These light colors mean you
have already built that part of the model. New pieces to be added
are shown in their full K’NEX colors.
The lighter sections also show points of attachment, which are
indicated by full color.
BUILDING TIPS
•Be sure to put rods in the correct slots of connectors, so you
have proper angles in your finished model.
•It’s very important to position blue and purple connectors in a
specific direction. Pay close attention to the instructions, and
position these connectors horizontally or vertically exactly as
they are shown. Push together tightly.
•Once the balls are assembled, they cannot be taken apart.
•A ball may occasionally fall off the model. This is normal, your
Big Ball Factory is operating properly.
•If balls get stuck, spread connectors out to ends of rods,
so balls roll smoothly through the area.
•Keep model on a level surface.
(FR)Français
Les photos ci-dessus illustrent les raccordements utilisés pour la
construction de la grosse bille usine.
Ces instructions vous permettront de construire en premier la
partie avant du modèle. Quand vous commencez à construire les
différentes sections, placez à votre gauche l’illustration de toute la
partie avant pour vous guider.
Vous allez ensuite ajouter différents blocs à la partie arrière du
modèle. Placez à votre droite l’illustration de toute la partie arrière
pour voir comment les différents éléments sont rattachés.
Sur chaque page figure une petite illustration du modèle
correspondant à la section en cours de construction. Les flèches
indiquent le raccordement des différentes sections.
La couleur des sections s’éclaircit au fur et à mesure qu’elles
sont rajoutées, les couleurs claires correspondant aux sections
déjà construites. Les pièces à ajouter sont illustrées en couleurs
vives K’NEX.
Les sections plus claires illustrent également les points de
jonction, indiqués en pleines couleurs.
CONSEILS D’ASSEMBLAGE
•Veillez à bien insérer les tiges dans les bonnes fentes des
connecteurs pour avoir les angles souhaités une fois le
modèle fini.
•L’orientation des connecteurs bleus et violets est très
importante. Suivez soigneusement les instructions et placez
ces connecteurs à l’horizontale ou à la verticale, exactement
comme sur l’illustration. Enclenchez-les bien.
•Une fois les boules assemblées, elles ne peuvent plus être
démontées.
•Il est normal qu’une boule tombe du modèle de temps à autre.
Cela signifie que la grande usine à boules fonctionne
correctement.
•Si les boules se bloquent, écartez les connecteurs aux
extrémités des tiges pour que les boules puissent rouler
librement.
•Le modèle doit être placé sur une surface plate.
(DE)Deutsch
Die obigen Bilder zeigen die grundlegenden
Verbindungskombinationen, die für den Bau der großen Ballfabrik
verwendet werden.
Diese Anleitung zeigt Ihnen, wie zuerst die Vorderseite des
Modells gebaut wird. Legen Sie das große Bild der fertiggestellten
Vorderseite gut sichtbar links neben sich, während Sie an diesen
Abschnitten arbeiten.
Als nächstes werden Sie an der Rückseite des Modells
Bauteile anbringen. Legen Sie das große Bild der Rückseite gut
sichtbar rechts neben sich, um besser sehen zu können, wo die
Teile angebracht sind.
Auf jeder Seite befindet sich eine kleine Modellabbildung mit
dem Abschnitt, den Sie gerade bauen. Die Pfeile weisen auf die
Stellen hin, an denen ein Abschnitt in den anderen paßt.
Die Farben der Abschnitte, die bereits an die bestehenden
Abschnitte angefügt worden sind, erscheinen heller. Dadurch wird
angezeigt, daß Sie diesen Teil des Modells bereits gebaut haben.
Neue Teile, die hinzugefügt werden, sind in den ursprünglichen
kräftigen K’NEX-Farbtönen abgebildet.
In den helleren Abschnitten sind auch die Anbringungspunkte
angezeigt; diese sind in einem kräftigen Farbton abgebildet.
BAU-TIPS
•Achten Sie darauf, daß die Stangen an den
Verbindungsstücken in die richtigen Schlitze eingesetzt
werden, damit das fertige Modell die korrekten Winkel
aufweist.
•Es ist sehr wichtig, die blauen und lila Verbindungsstücke
in der korrekten Richtung anzuordnen. Beachten
Sie die Anleitung genau, und positionieren Sie diese
Verbindungsstücke genauso, wie sie abgebildet sind
(entweder horizontal oder vertikal). Fest zusammendrücken.
•Nachdem die Bälle zusammengebaut sind, können sie nicht
mehr auseinandergenommen werden.
•Gelegentlich kann ein Ball vom Modell fallen. Dies ist normal,
und Ihre große Ballfabrik funktioniert richtig.
•Falls Bälle steckenbleiben, schieben Sie die
Verbindungsstücke bis zu den Stangenenden, damit die Bälle
ungehindert durch diesen Bereich rollen können.
•Stellen Sie das Modell auf einer waagerechten Fläche auf.
(NL)Nederlands
De bovenstaande foto’s laten de basisverbindingen zien die
gebruikt worden om de Grote balfabriek te bouwen.
Deze aanwijzingen laten je zien hoe je de voorkant van het
model eerst bouwt. Houd de grote afbeelding van de voltooide
voorkant in het gezicht links terwijl je aan deze gedeeltes wekt.
Daarna voeg je samenstellen aan de achterkant van het model
toe. Hou de grote afbeelding van de achterkant in het gezicht
rechts zodat je kunt zien waar de onderdelen worden bevestigd.
Op elke bladzijde staat een kleine afbeelding van het model die
het gedeelte laat zien dat je aan het bouwen bent. Pijlen geven
aan waar het ene gedeelte in het andere past.
Terwijl je nieuwe stukken aan bestaande gedeeltes toevoegt,
worden de kleuren van die gedeeltes lichter. Deze lichte kleuren
betekenen dat je dat gedeelte van het model al hebt gebouwd.
Nieuwe stukken die toegevoegd moeten worden, worden in volle
K’NEX-kleuren getoond.
De lichtere gedeeltes laten ook de bevestigingspunten zien, die
aangegeven worden door de volle kleuren.
BOUWTIPS
• Zorgervoordatjedestaafjesindejuistesleuvenvande
verbindingsstukken zet, zodat je de juiste hoeken krijgt in het
voltooide model.
• Hetisergbelangrijkdatjedeblauweenpaarse
verbindingsstukken in een specifieke richting plaatst. Volg de
aanwijzingen zorgvuldig en plaats deze verbindingsstukken
horizontaal of verticaal precies zoals getoond. Duw ze stevig
in elkaar.
• Alsdeballeneenmaalinelkaarzijngezet,kunnenzeniet
meer uit elkaar worden gehaald.
• Erkanafentoeeenbalvanhetmodelafvallen.Ditisnormaal
en de Grote balfabriek werkt goed.
• Alseenbalvastkomttezitten,spreiddande
verbindingstukken uit tot de uiteinden van de staafjes, zodat
de ballen gelijkmatig door dat gebied rollen.
• Zethetmodelaltijdopeenwaterpasoppervlak.
(EN)LOOK OUT!
When you see this symbol on the instructions, pay close attention to the
area being pointed out. It’s important to build this section correctly, or the
model may not work properly.
(FR)ATTENTION !
Toutes les fois que ce symbole apparaît sur les instructions, il faudra faire
attention à la partie en question. Il signifie qu’il est important de construire
correctement cette section pour assurer le bon fonctionnement du modèle.
(DE)AUFGEPASST!
Wenn Sie in der Anleitung dieses Symbol sehen, achten Sie bitte genau auf den
Bereich, auf den das Symbol hinweist. Es ist wichtig, diesen Abschnitt richtig zu
bauen, oder das Modell nicht mehr richtig funktionieren.
(NL) PAS OP!
Wanneer je dit symbool op de aanwijzingen ziet staan, moet je de plek waar hij
naar wijst goed bekijken. Het is heel belangrijk dat je dit gedeelte juist in elkaar
zet, anders werkt het model misschien niet goed.
==
(EN)CAUTION: Keep hands, face, hair and clothing away from all moving parts.
(FR)ATTENTION : Garde les cheveux, les doigts, le visage et les vêtements à l’écart
de toutes les pièces mobiles.
(DE)VORSICHT: Haare, Finger, Gesicht und Kleidungsstücke nicht mit beweglichen
Teilen in Berührung kommen lassen.
(NL)OPGEPAST: Hou het haar, de vingers, het gezicht en kledij verwijderd van alle
bewegende onderdelen.
(EN)WARNING: CHOKINGHAZARD–Smallparts.Notforchildrenunder3years.
(FR)ATTENTION : RISQUED’ÉTOUFFEMENT–Piècesdepetitetaille.Neconvient
pasauxenfantsdemoinsde3ans.
(DE)ACHTUNG: ERSTICKUNGSGEFAHR–Kleinteile.NichtgeeignetfürKinderunter
3Jahren.
(NL)WAARSCHUWING: VERSTIKKINGSGEVAAR–Kleineonderdelen.Nietgeschikt
voorkinderenjongerdan3jaar.