Kaindl KSS User manual

Operation manual
KAINDL – Sharpening platform KSS
for drills and circular saw blades
Issue Feb. 2003, Technical changes may be done without
notification

Kaindl – Schleiftechnik Reiling Gmb , Remchingerstrasse 4, D – 75203 Königsbach
Tel.: 07232 / 4001-0 Fax: 07232 / 4001-30, Email: [email protected], http://www.kaindl.de
Description
I. Directed use
The Kaindl sharpening platform (in the following called SS) is exclusively determined for the
following purpose
- Occasional sharpening of spiral drills and circular saw blades.
For other operations as listed here, the machine is not destined for. That goes for un-
authorized use.
The directed use includes also reading this operation manual, as well as keeping all
containing directions of use – especially the safety information.
In case the KAINDL KSS is not used as per intended purpose, a save operation cannot be gran-
ted.
For all material- and personal damages, arising by not intended use, not the manufacturer, but
the operator is responsible!
II. Structure
(see picture 3)
III. Description of function
The KSS has been developed for sharpening spiral drills and circular saw blades. With a dia-
mond wheel, driven by your drill machine/driving motor, different positions can be fixed by use
of the ball joint adjustment. Saw blades are moved on the platform by use of the guiding- and
stop dog bolts towards the grinding wheel. Drills are sharpened with the additional fixation prism
(Cross facet shape).
IV. Technical data
Weight: ca. 3,5 Kg
Dimensions L x B x : 450 x 270 x 190 mm
Motor support: 43 mm (Euro norm)
Moving of motor: 90 mm
Fine-feeding : 28 mm
Clamping ranges drills: 3 – 16 mm
Version Feb. 2003, technical changes may be done without
notification

EC declaration of conformity
in sense of EC instruction (98/37/EC)
The manufacturer Kaindl-Schleiftechnik
Reiling Gmb
Remchinger Str. 4
75203 Königsbach-Stein
declares that the machine Sharpening platform KSS
described herein
refers to the security and health EC-Machine instruction (98/37/EC)
requirements of the following EC instructions
pplied harmonized norms: EN 292-1 and EN 292-2
Changes in design, which affect the technical data, listed in this operation manual
and the directed use, therefore change the machine substantially, make this declaration
invalid.
Königsbach den 27.02.2003
Reinhold Reiling, General Manager

Basic safety advise
Duty of taking care by the user
The sharpening platform has been designed and constructed under consideration of an endangering analysis and
careful selection of observed harmonized norms, as well as further technical specifications.
The machine corresponds to the state of the art and grants a maximum of safety.
This safety can only be achieved in daily work, when all necessary steps are taken by the user of the KSS. It is his
duty to take care, plan and control these steps.
The operator has above all to take care that:
the KSS is used as directed (see chapter description)
the KSS is used in flawless, workable condition.
required protection equipment for the operating personnel is available and will be used.
the operation manual is always in a readable condition, complete and available near the machine.
the sharpening platform is only operated by personnel, which is familiar with the operation manual and
especially with the included safety advises.
all safety and warning instructions are not removed from the KSS and kept readable.
Fundamental safety advise
The KAINDL has been designed under consideration, that even for untrained users, a safe operation is ensured.
Par example, a steel/diamond wheel has been selected, which cannot break, even under maximum stress.
Anyway by working with the KSS, some things have to considered for your own safety:
The KAINDL sharpening platform KSS is only allowed to be operated with the break proof and
destined Kaindl-diamond looking through grinding wheel (Order No.: 3SS02000)
Pay attention that for all adjustment works, the electric plug is pulled off.
During all grinding- and sharpening works, absolutely wear a safety glass (Safety glass is included)
Just sharpened saw blades having sharp teeth. Always wear safety gloves.
No not wear jewellery or clothes which may caught by turning parts. Cover long hair by a headband or
hair net.
Inhalation of fine dust is dangerous to your health. It is advisable to always wear a dust mask while
working
Advise: as per our knowledge so far, by occasional grinding, only 50 % of the MAK – rate (max working
place concentration) will be reached.
The machine is only allowed to be operated by personnel which are familiar
with this manual and are acting correspondingly !

Introduction
The new sharpening platform, developed by KAINDl offers a genuine alternative to bigger and considerably more
expensive machines. Due to it’s new and worldwide unique conception, it is possible to sharpen many different
drills and saw blades No matter if SS or chrome vanadium-, even carbide tipped saw blades are sharpened with
very high precision, whatever the diameter or tooth pattern. SS and carbide drills are sharpened with the 4-facet
shape, which is favoured by DIY enthusiasts and craftsmen. This shape facilitates drilling of flat and- or rounded
surfaces. Web thinning becomes unnecessary.
This new type of diamond wheel covered on three sides, having cooling holes, granting a clean cut of any cutting
material without burning (loss of hardness) of the cutting edges.
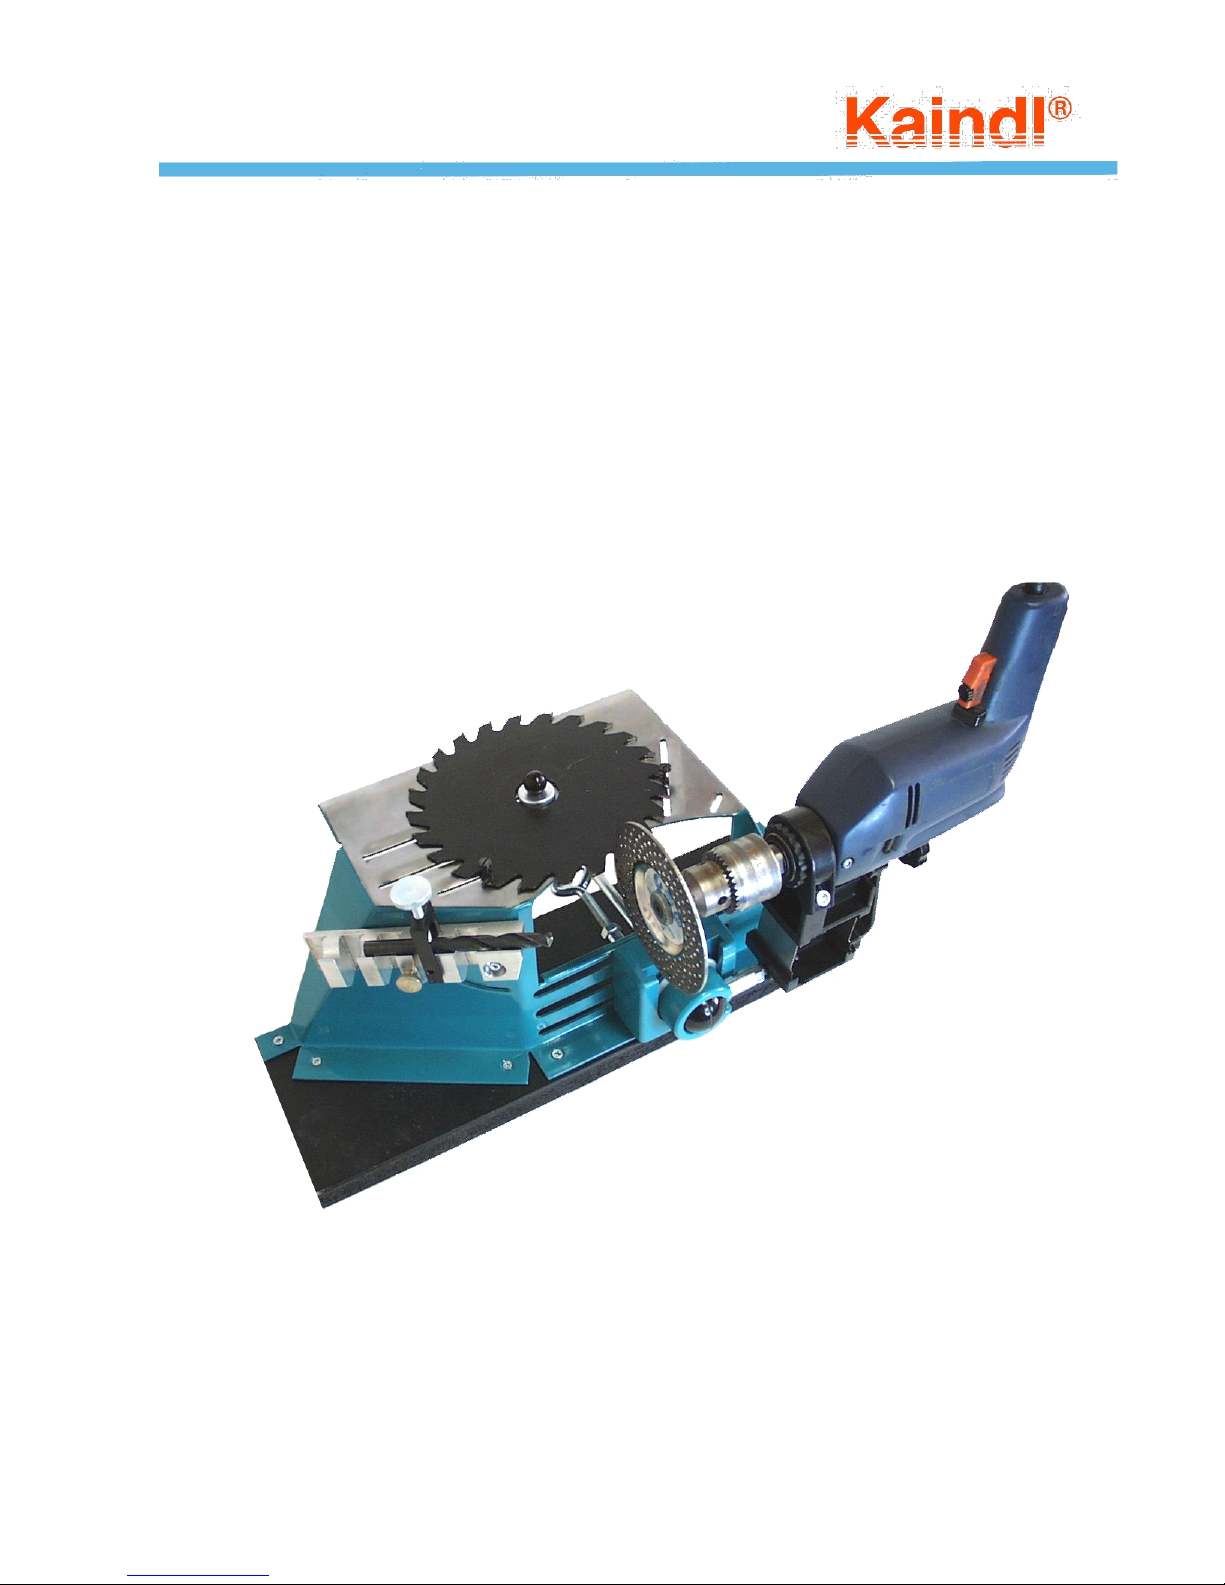
1. Set up of the platform/ Connection with your drill machine
Fix the platform by using the designated boring holes on a fix and stable base (e.g. working table) Fix the drill
(not included) on the provided 43 mm neck. Fix the KAINDL diamond wheel in the drill chuck.
2. Sharpening of drills
Open both adjustment screws (11) and place the drill machine with the grinding wheel in correct position drill
grinding. Pay attention that the drill support (6) is in position “cutting angle” (upper stop dog picture 1)
Fixation and adjustment of the drill
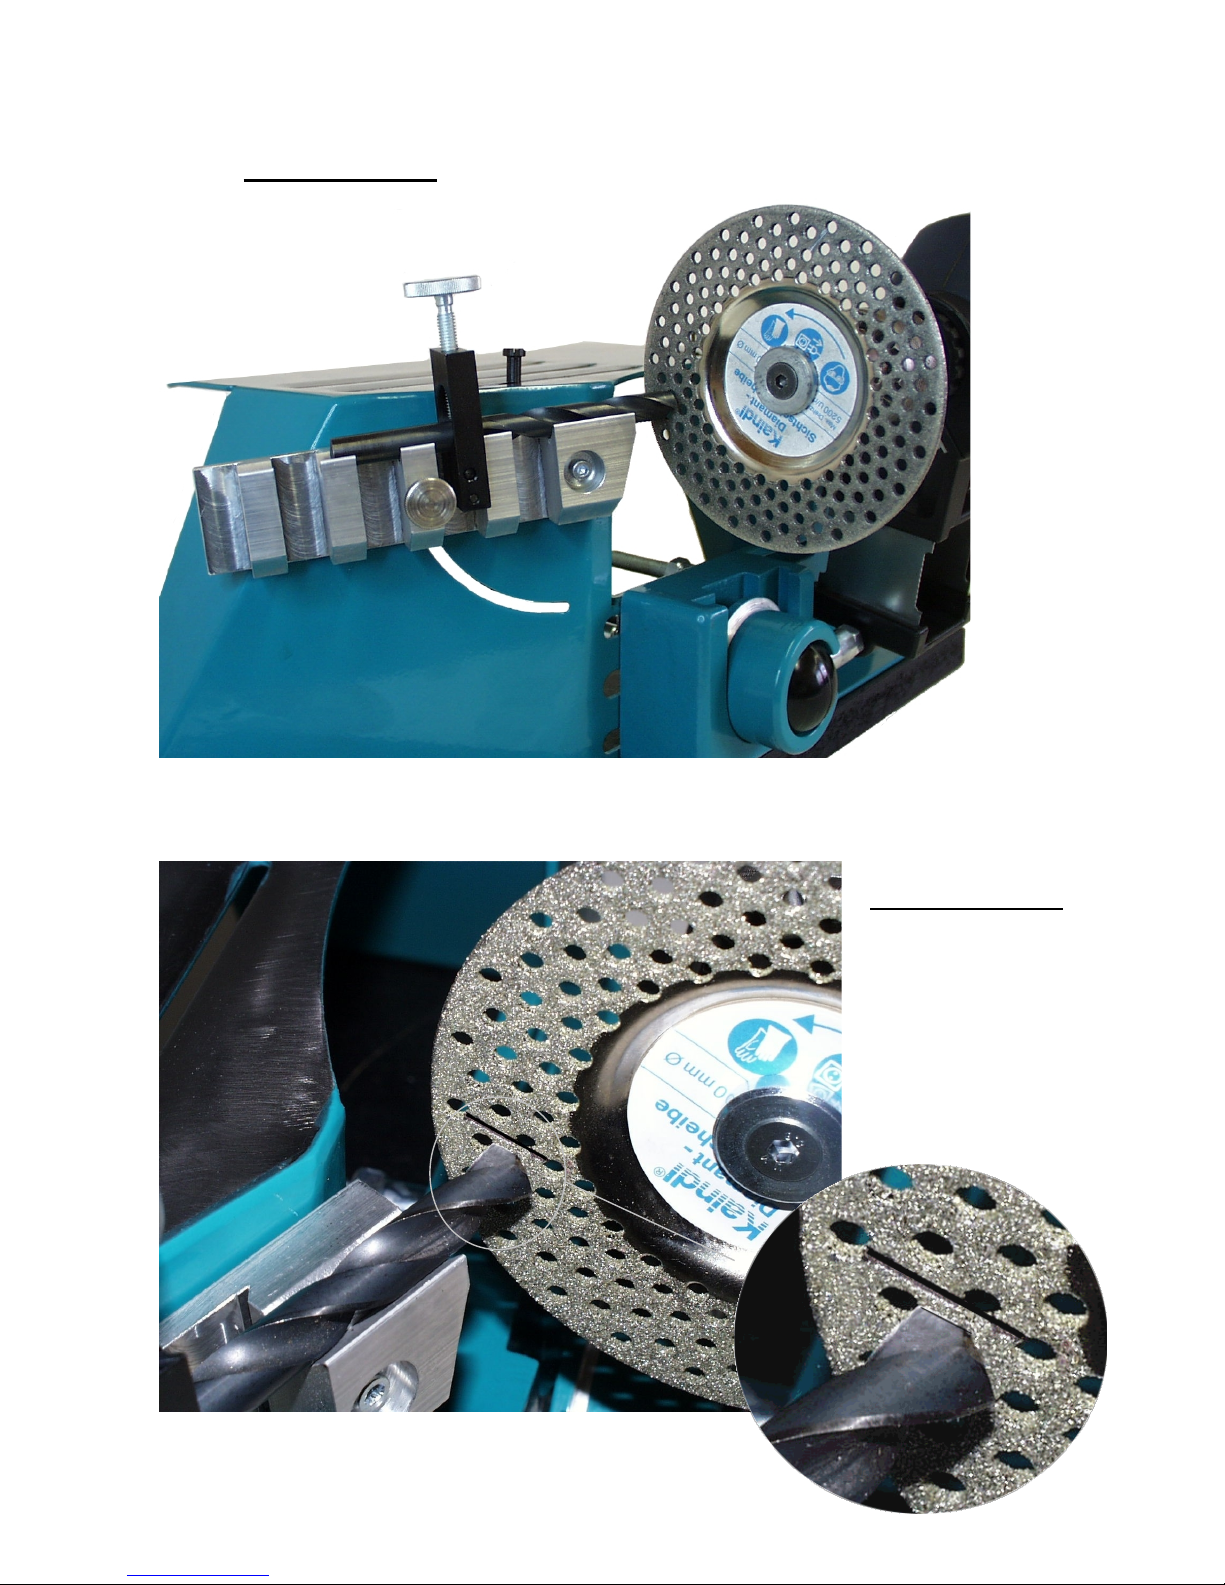
Place the drill as shown in picture (1) in the drill support (6).
Move the drill for adjustment towards the grinding wheel and align
the cutting edge parallel to the black adjustment marks (picture 2) on the
diamond grinding wheel. Now fix the knurled screw (4a) of the reversing
drill prism (4)
(Take care that the reversing drill prism (4) clamps the drill on the drill
shank and not the spiral of the drill. ).
Open the knurled screw (7) on the drill support (6) and move the prism
downward to the adjustment mark (5).
Slide the drill with the reversing prism forwards, direction grinding wheel
to the stop dog.
Advise: For getting best possible precision, pay attention, that while sharpening, the drill reversing prism (4)
fits tightly in the drill support (6) and the guidance groove is in accordance with the guidance notch.
Advise: The drills keeps fixed in the reversing prism (4) until the end of the grinding procedure. A change of
any adjustment is not requested.
Sharpening of the clearance angle surface (picture 4b)
Turn on the drill machine and move the grinding wheel using the feeding screw (8) to the drill, until the first side
of the drill is sharpened.
Now tear back the drill with the reversing prism (4),( away from the grinding wheel) and reverse the prism for
180°. Place the prism again in the same prism notch as before and pass the drill slowly in the prism notch (6a-d)
to the stop dog. Now your drill got 2 sides with a big clearance angle (picture 4b).
Sharpening of the cutting angle surface (picture 4a)
Take the drill with the prism out of the drill support (6) and turn the support by opening the knurled screw (7)
upward to the stop dog. Move back the grinding wheel with the feeding screw (8), in order the drill does not touch
the wheel when you place the drill in the drill support (6).
Important: take care that the reversing prism (4) fits tightly in the same prism notch as before (6a-d).
Slide the reversing prism (4) in the prism notch completely forwards to the stop dog. Turn on the drill machine
and move the grinding wheel forward with the feeding screw (8) towards the drill till one cutting edge is sharpened
approx. 2 mm. Now reverse the prism (4) with the drill for 180° , (Attention!) : same prism notch) and slide the re-
versing prism slowly to the stop dog.
This grants that both cutting edges are symmetric and equal.
Advise: the drill is then sharpened correctly, when he looks like as shown in picture 4
Correct position: drill grinding

Picture 1
Picture 2

Picture 3
1. Adjustment slots for saw blade stop dog
2. Magnet for saw blade fixation
3. Saw blade stop dog or reversing stop dog
4. Reversing drill prism
4a. Drill fixation screw (Reversing drill prism)
5. Adjustment marks
6. Drill support
6a-6d. Prism notches as support for reversing drill prism
7. Knurled screw for fixing the drill support prism
8. Motor feeding screw
9. Ball joint for adjustment of different grinding wheel positions
10. Fixation screw of ball joint
11. Adjustment screws for moving the ball joint
12. Saw blade sliding base
2
21
1
3
3
4
4
5
5
6
6
7
7
9
9
8
8
1
0
1
0
1
1
1
1
4
a
4
a
6
a
6
a6
b
6
b6
c
6
c6
d
6
d
a
a
Picture 4
1
2
1
2
b
b

Correct position: Saw blade
sharpening
3. Sharpening of saw blades
The new type of the supplied diamond wheel sharpens all saleable cutting materials. Therefore it is not necessary
to change the grinding wheel for sharpening different saw blades ( SS chrome-vanadium or carbide).
Open the adjustment screws (11) and place your drill machine in correct position: saw blade sharpening
3.1 Sharpening of inside tooth
For adjusting the saw blade, shift both stop dogs in the way that
the tooth to be sharpened is in a 90 ° angle to the adjustment
slots (1). One stop dog always serves as pivot, the other as
stop dog.
Fix the saw blade with magnet (2) (picture 5).
Advise: Check if the saw blade can be turned easily on the support,
if not, please use the supplied saw blade sliding base (12)
Open the ball fixation screw (10) of the ball joint (9)
and place the grinding wheel parallel to the tooth to
be ground. Fix the ball joint (9) with the ball fixation screw (10)
in this position. By use of the feeding screw (8) move the
grinding wheel to the tooth, till the inside tooth is sharpened correctly.
Now mark this sharp tooth with a felt pen.
Then turn the saw blade over the stop dog, away from the grinding wheel (picture 6) . Now one tooth after
another is sharpened until you come back to the marked tooth. In case some teeth are not sharpened, feed
a little more with the grinding wheel towards the tooth and repeat the complete operation.
Advise: Before you turn on your drill machine, simulate the grinding operation without having connected
your drill machine to electric current. So you can check again the adjustments done, for drills or saw blades
Picture 5 Picture 6
Pivot
Stop dog
Stop dog
Pivot

3.2 Sharpening of outside tooth
In most of the cases you can sharpen the outside tooth using the same stop dog adjustments. Only the drill
machine has to be moved to another position. For the positioning, always fix the saw blade with the magnet (2),
to prevent the blade to get out of place. Open the ball fixation screw (10) on the ball joint (9) and turn the drill
machine in the way that the grinding wheel gets parallel to a tooth you can reach easily (picture 8). Fix the drill
machine in this position with the ball fixation screw (10).
Move forward again with the feeding screw (8) to the back of tooth until the tooth is sharpened correctly. Also
mark this tooth with a felt pen and sharpen analogous as described in chapter 3.1 “sharpening of inside tooth.
3.3 Sharpening of alternating saw blades
The sharpening of alternating saw blades happens in the same way as sharpening of straight teeth. Only
your grinding wheel has to be adjusted to the incline of the tooth (picture 9) and instead of sharpening each
tooth, only every second tooth has to be sharpened in this position. Then adjust the saw blade to the incline
of the following tooth and here also sharpen every second tooth until you come to the mark of the felt pen
General information about the flexibility of the KSS
Differing to the information written here, the platform allows a wide range of individual adjustments.
You may adjust e.g. as pivot the left or right stop dog. By shifting the stops, nearly each tooth angle can be adjus-
ted. This makes it easy to flexibly adjust the platform as per your own requirements and your special tools.
Version Feb. 2003, Technical changes may be done without notification
Picture 7Picture 8
Picture 9
Advise: depending on tooth size of your
saw blade, use the stronger or smaller
stop dogs as pivot.
Table of contents
Other Kaindl Power Tools manuals