KALOS KLFP211-0200 User manual

Headline
Universal Fire Pit Square 52cm
& Stone Fire Pit Square 52cm
KLFP211-0200 / KLFP211-0300 / KLFP201-0400
Assembly Instructions
Sept 2021
IMPORTANT
PLEASE KEEP THIS BOOKLET FOR FUTURE REFERENCE.
THIS IS IMPORTANT INFORMATION REGARDING THE USE AND
CARE OF GAS FIRE PIT.

HeadlineIndex
WARNING
This appliance is intended for decorative purposes.
For Outdoor use only.
Keep the instructions for future reference.
Read the instructions before installation and use.
For gas adjustment refer to Appliance Marking.
This manual book is for 30mbar version,
Maximum gas bottle size including regulator: 390mm
Index
Safety Warnings 3 - 10
Gas (LPG) Warnings 7
Technical data 11
Exploded View 11
Installation 13
Instruction for connecting gas circuit to LPG cylinder 14-15
Operating Instructions 16
Leakage Testing 16
Maintenance and Cleaning 17
Troubleshooting 18-19
Storage (after use) 20

Safety Warnings
Warning
• Do not modify the appliance
• Do not move the appliance during use
• Turn o the gas supply at the gas container after every use
• Accessible parts may be very hot. Keep young children away
• The appliance should not be used in basements or below ground level
• The appliance must only be used for space heating
Warning
THIS APPLIANCE HAS A NAKED FLAME; A SUITABLE GUARD
SHOULD BE USED FOR THE PROTECTION OF YOUNG CHILDREN,
THE ELDERLY AND THE INFIRM.
ATTENTION: This appliance is tted with exible gas rubber pipe and clamps that must
be used; never use a dierent kind and always according to the National Rules in force
of the country of destination.These components should be periodically substituted,
according to the date reported on the body of each of them, or according to the
National Rules in force of the country of destination.
DANGER
CARBON MONOXIDE HAZARD
This appliance can produce carbon
monoxide which has no odor.
Using it in an enclosed space can kill you.
Never use this appliance in an enclosed
space such as a camper, tent or home.

Safety Warnings
WARNING
Failure to heed the Dangers, Warnings and Cautions contained in
this Owner’s Manual may results in a serious explosion causing
damage to property, bodily injury.
GENERAL WARNINGS
FOR OUTDOOR USE ONLY
DO NOT SIT OR STAND ON TABLE
WARNING - For your safety
If the information in this manual is not
followed exactly, a re or explosion may result
causing property damage, personal injury or
loss of life.
IMPORTANT NOTICE: read and understand all
warnings and precautions prior to assembly
and use for your replace table.
DANGER:Failure to follow the dangers,
warning and cautions in this manual may
cause a re or explosion causing damage to
property, serious bodily injury or death.
• Read the instructions before using this
appliance. The appliance must be installed
in accordance with the instructions and
localregulations.
• Minimum Clearance From Unit To
Combustible Material: 72”(182.9cm) from
the top; 36” (91.5cm) from all sides and back.
• Do not locate this appliance under over-
head unprotected combustible surfaces.
IF YOU SMELL GAS:
1. Shut o gas supply to the replace table.
2. Extinguish any open ame.
3. Do not try lighting any appliance.
4. Do not touch any electrical switch nor use
any phone in the area.
5. Immediately call your gas supplier from a
neighbor’s phone.
6. Follow the gas supplier’s instructions.
7. If you cannot reach your gas supplier, call
the re department.
• Improper installation, adjustment, alteration,
service or maintenance can cause injury
or property damage. Read the installation,
operation and maintenance instructions
thoroughly before installing or servicing
thisequipment.
• Keep these instructions for future reference.
If you are assembling this unit for someone
else, give this manual to them to read and
keep for future reference.
• This gas replace should ONLY be used
outdoors in a well-ventilated space and
should NOT be used inside a building,
garage, or any other enclosed area.

Safety Warnings
• DO NOT use this outdoor gas replace for
indoor heating. TOXIC carbon monoxide
fumes can accumulate and cause
asphyxiation.
• NEVER leave this gas replace unattended
when in use.
• Children and adults should be alerted to
the hazards of high surface temperatures
and kept at a safe distance while replace is
inuse.
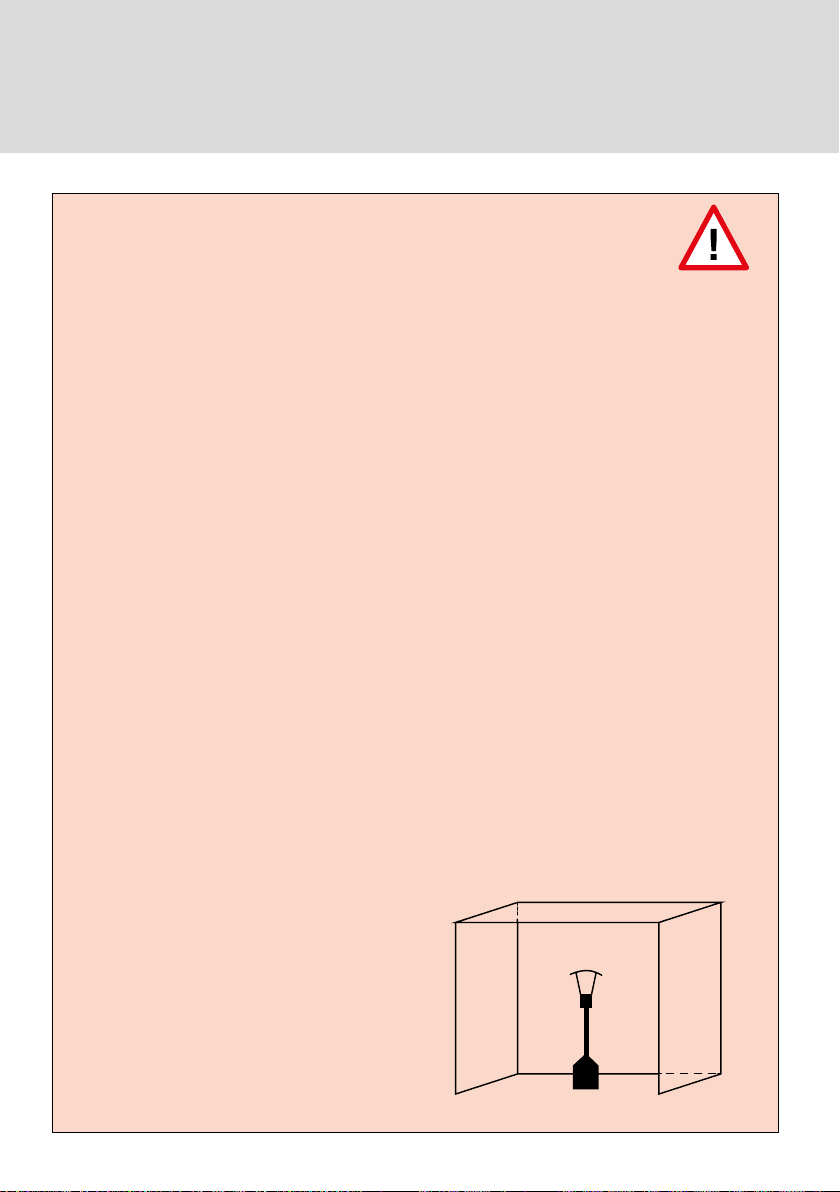
• DO NOT operate light or use this replace
table within 8 feet of walls, structures or
building.
• Storage of this replace table indoors is
permissible only if it has been disconnected
from its fuelsupply (LP gas cylinder).
• Gloves are highly recommended to be used
while moving this appliance, to protect
yourhands.
• Any sealed parts by manufacturer or agent
cannot be altered by the user
• DO NOT store or use gasoline or other
ammable vapors and liquids within 25 feet
(7.62m) of this or any other appliance.
• DO NOT store any combustible materials in
the base enclosure.
• The use of alcohol, prescription or non-
prescription drugs may impair an individual’s
ability to properly assemble or safely operate
this replace table.
• DO NOT use in an explosive atmosphere.
Keep gas replace table area clear and free
from combustible materials, gasoline and
other ammable vapors and liquids.
• This outdoor replace table is NOT to be
operated by children. Young children should
be closely supervised when in the vicinity of
this outdoor replace.
• Always use in accordance with all applicable
UK Regulations. Contact your local re
department for details on outdoor res.
• Use the same precautions you would
with any open re with this outdoor
replacetable
• DO NOT BURN SOLID FUELS such as:
wood, charcoal briquettes, lump charcoal,
manufactured logs,driftwood, trash, leaves,
paper, cardboard, plywood, painted or
stained or pressure treated wood inthis
outdoor replace table.
• DO NOT alter this outdoor replace in
anymanner.
• DO NOT use this outdoor replace table
until it is COMPLETELY assembled and all
parts are securely fastened and tightened.
• DO NOT store another LP gas tank within 10
feet (3.05 m) of this outdoor replace table
while it is inoperation.
• DO NOT use this outdoor replace table
near automobiles, trucks, vans boats or
recreational vehicles.
•DO NOT use this outdoor replace table
under any overhead or near any unprotected
combustible materials. Avoid using near or
under overhanging trees and shrubs.
• Always use this outdoor replace table on
a hard, level, non-combustible surface such
a concrete, rock or stone. An asphalt or
blacktop surface may not be acceptable for

Safety Warnings
this purpose.
• DO NOT use this outdoor replace table if
any part has been under water. Immediately
call a qualied service technician to inspect
the replace table and to replace any part
or control system and any gas control which
has been under water.
• DO NOT wear ammable or loose clothing
when operating this outdoor replace table.
• DO NOT use in windy conditions.
• Keep all electrical cords away from a hot
outdoor replace table.
• Certain areas of this outdoor replace table
will become too hot to touch during and
after use. Do not touch hot surfaces until
the unit has cooled unless you are wearing
protective gear such as insulated pot
holders or heat resistant gloves or mittens to
avoidburns.
• Children and adults should be alerted to
the hazards of high surface temperatures
and should stayaway to avoid burns or
clothingignition.
• DO NOT hang or place clothing or other
ammable materials on or near the gas
replace table.
• Any guard or other protective device
removed for servicing the replace table
must be re-placed prior to operation.
• DO NOT attempt to move or store this
outdoor replace table until all parts
are cool.
• DO NOT lean over this outdoor replace
table when lighting or when in use.
• Use only the regulator and hose assembly
provided. Use only replacement regulator
and hose assemblies specied by
themanufacturer.
• Storage of this outdoor replace table
indoors is permissible only if the tank is
disconnected, removed from the outdoor
replace and properly stored outdoors.
• DO NOT attempt to disconnect the gas
regulator from the tank or any gas tting
while the outdoor replace table is in use.
• Always shut o gas supply at the tank valve
and disconnect regulator from the tank
when the replacetable is not in use.
• DO NOT sit on the table when the unit is
inoperation.
• DO NOT throw anything onto the re when
the unit is in operation.
• Lava rocks are very hot and can expolde;
please keep children or pets away at a
safedistance.
• It is essential to keep the outdoor replace
table valve compartment, burners, and
circulating air passages clean. Inspect
outdoor replace table for debris before
each use.
• Prior to each gas replace table operation,
check the hose for evidence of excessive
abrasion or wearby looking through the
visual check hole. If the hose is damaged, cut
or cracked, it must be replaced before using
the gas replace table. The hose assembly
can only be replaced by a hose assembly
specied by the manufacturer.

Safety Warnings
• Before each use, remove the lava rocks.
Examine the burner and its components.
If dirty, clean with a soft brush and soapy
water solution. Also examine the area
around the burner. Any dirt or foreign
material, such as spider webs or nests in
this area should be removed. If it is evident
that the burner is damaged, it must be
replaced before the gas replace table
isused.
• The burner assembly can only be replaced
by a burner specied by the manufacturer.
Place the hose out of the pathways where
people may trip over it.
• DO NOT cross the hose between outdoor
replace table and the propane tank.
• Close the valve of the gas cylinder and the
regulator after use.
• The use of this appliance in enclosed areas
can be dangerous and is PROHIBITED.
• Change the gas cylinder in an amply
ventilated area, away from any ignition
source (candle, cigarettes, other ame
producing appliances).
GAS (LPG) WARNINGS
• LP gas is ammable and hazardous
if handled improperly. Please review
the characteristics before using any LP
gasproduct.
Propane Characteristics:
• Flammable, explosive under pressure,
heavier than air, and settles in pools in low
areas. In its natural state, propane has no
odour. For your safety, an odorant is typically
added. Contact with propane could burn
theskin.
• Propane is extremely ammable and
hazardous if handled improperly.
LP GAS WARNINGS:
• Cylinders must be stored outdoors in a well-
ventilated area out of reach of children.
• Disconnected cylinders must have threaded
valve plugs tightly installed and must
not be in a building, garage or any other
enclosedarea.
• Dented or rusted propane cylinders may be
hazardous and should be checked by your
propane gas supplier.
• LP gas tank must be arranged for
vapourwithdrawal.
• The LP gas tank must have a tank collar to
protect the tank valve.

Safety Warnings
• NEVER use an LP gas tank with a damaged
body, valve, collar, or footing. Dented or
rusted LP gas tanks may be hazardous and
should be checked by your LP gas supplier
prior to use.
• The LP gas tank should not be dropped or
handled roughly.
• Tanks must be stored outdoors out of the
reach of children. Do NOT store in a building,
garage, or any other enclosed area.
• Never store your LP gas tank where
temperatures can reach over 125°F.
• DO NOT store the LP gas cylinder in
direct sunlight or near a source of heat
orcombustion.
• Never keep a lled LP gas tank in a hot car
or car boot. Heat will cause the gas pressure
to increase, which may open the relief valve
and allow gas to escape.
• Place dust cap on valve outlet whenever the
LP gas tank is not in use. Only install the type
of dust cap on the LP gas tank valve outlet
that is provided with the LP gas tank valve.
Other types of caps or plugs may result in
leakage of propane.
• DO NOT store a spare LP gas cylinder under
or near this appliance.
• Never ll the LP gas cylinder beyond
80%full.
• If the information in this booklet is not
followed exactly, a re causing death or
serious injury may occur.
• LP gas cylinders should be lled only by a
certied LP gas dealer.
• the pressure regulator is set for 28-30mbar
or50mbar.
• Regulator outlet pressure is 28~30mbar
or50mbar.
• Never attempt to attach this appliance to the
self-contained LP gas system of a camper
trailer, motorhome or house.
• Always use the pressure regulator and hose
assembly provided with the appliance to
connect to a LP gas cylinder. Never connect
to an unregulated LP gas supply.
• Contact your retailer’s customer service
department for replacement parts.
• Hand turn the manual gas control valve.
Never use tools. If the valve will not turn by
hand, do not try to repair it. Call a certied
gas technician. The use of force or any
self-attempted repair may result in a re
orexplosion.
• Use only the type of gas and the type of LPG
cylinder specied by the manufacturer.
• Appliance is tted with gas regulator, exible
gas rubber pipe and clamps according to
the National Rules in force of the country
ofdestination.
• Appliance must use an approved gas
regulator (approved for a working
temperature not lower than 50˚C) according
to the EN Standard (see minimum, nominal
and maximum pressure - gas regulator
inletand outlet connection according to the
National Rules in force) and exible gas hose
according to ENStandard (with proper inner
diameter according to gas inlet connection
and National Rules in force)with a length

Safety Warnings
not over 1.5 m and approved for a working
temperature not lower than 60 ˚C. When
substitution will be necessary, you have to
purchase suitable gas regulator, exible gas
rubber pipe and clamps from your local gas
dealer; gas regulator should be substituted
not over 10 years.
• Avoid twists and kinks in the exible
gas rubber pipe. Never use a damaged
gasregulator.
• Never connect this appliance to an
unregulated LPG source (gas regulator is
mandatory to be used).
• When the appliance is not in use, turn the
LPG cylinder in “OFF”position.
• Gas rubber pipe must be located in the
LPG compartment carefully, avoiding
anytwisting.
• Never use a damaged gas regulator.
• The regulator should comply with EN 16129,
and the hose should comply with EN 16436.
• Always perform a leakage test on gas
connections whenever a LPG cylinder is
connected. If bubbles form in the leakage
test solution, do not use it. Never use a ame
to test for leakages. It is strictly forbidden
and dangerous!

Safety Warnings
1. Do not obstruct the ventilation holes
of the cylinder housing;
2. Close the gas supply at the valve of the
gas cylinder or the regulator after use;
3. In the event of gas leakage, the
appliance shall not be used or if alight,
the gas supply shall be shut o and
the appliance shall be investigated
and rectied before it is used again;
4. Checking the tubing or the exible
hose (at least once per month and
each time the cylinder is changed).
If it shows signs of cracking, splitting
or other deterioration it shall be
exchanged for new hose of the same
length and of the equivalent quality;
5. This appliance must be installed and
the gas cylinder stored in accordance
with the regulations in force;
6. Do not move the appliance when
inoperation;
7. Shut o the valve at the gas cylinder
or the regulator before moving
theappliance;
8. The tubing or the exible hose must
be changed within the prescribed
intervals;
9. Use only the type of gas and the
type of cylinder specied by the
manufacturer;
10. In case of violent wind particular
attention must be taken against tilting
of the appliance;
This appliance should be used ONLY
outdoors in a well- ventilated space and
should NOT be used inside a building,
garage, or any other enclosed area.
1) For use outdoors or in amply
ventilated areas.
2) An amply ventilated area must
have a minimum of 25% of the surface
areaopen.
3) The surface area is the sum of the
walls surface.
Warning

Technical Data
KLFP201, KLFP212 , KLFP211, KLFP213

Technical Diagram - KLFP211-0200 / KLFP211-0300 / KLFP201-0400
10” Single Ring Burner
Orice Connector & Orice
Back up Plate for Burner
16” Rectangular Fire Pan
Control Panel
Electric Igniter
Flex Line
Control Knob
Firepit Table
HES Cross Screw & Nut
Burner Bae
Ignition Needle
Thermocouple
Safety Valve
Regulator

InstallationTechnical Diagram - KLFP211-0200 / KLFP211-0300 / KLFP201-0400
1. This Gas Fire Pit must be installed on at,
stable surface, away from any combustible
materials or construction.
2. Remove the re pit and cylinder from the
carton. Place them on any level, non-
combustiblesurface.
3. Place the pumice beads on the burner and
around the burner evenly.
(see Fig 1)
Fig 1
4. Unscrew the button cap of igniter, insert
AAA battery into igniter compartment with
anode outward, then screw the button cap
back in place (see Fig 2)
Fig 2
5. Open the door and take down the lid of
cylinder cargo carefully and put it in the
center of the tank bracket.
(See g 6-7)
6. Locate the hose out of the pathways
where people may trip over it or in areas
where the hose may be subjected to
accidentaldamage.
CAUTION: Do not kink the exible gas hose. If
it is kinked, a gas leak could occur.

Instruction for connecting gas circuit
to LPG cylinder
Keep at hand suitable crossed screwdriver,
adjustable spanners, pliers and wrenches.
Before assembly, make sure all protection
packing material has been removed. Flexible
gas hose(1763-1) and clamps (if necessary)
are supplied with this appliance and must
be used, in accordance with regulations.
The gas regulator has to be set according
to specic gas category (see on page 2) and
proper gas consumption (g/h) specication.
The LPG cylinder should be standard one.
Recommend to use 5 kg . Replacement must
be that specied in “Gas Requirements”section
of this Instruction Manual. Be careful: do not
kink exible gas rubber pipe of gas circuit. If
pipe holder should not be provided, thread
of the gas inlet connection will be in line with
Standards ISO 7-1 or ISO 228-1, according
to National Rules in force of the country of
destination.
1. Make sure appliance gas knob is turned
“OFF”(full disk) before assembling (Fig 3).
Fig 3
2. Put the LPG cylinder inside of the tank
bracket,and tight the screw (see Fig 4)
Fig 4

Instruction for connecting gas circuit
to LPG cylinder
3. Connect the regulator to LPG cylinder by
hand. Push down until you hear a click.
(see Fig 5)
Fig 5
4. Connect the hose to the appliance and the
regulator. Tighten the screw of the hose
clamp with a screwdriver (seeFig 6). Check
that the regulator seal is correctly tted and
able to full its function.
Fig 6
Note: For model KLFP213-0200. The hose
must be xed by the hose xation clamp.

Operating Instructions
Lighting
1. Make sure the replace table is stable and
in solid state.
2. Remove the protective cover.
3. Press the control button fully until you
hear a slight ticking sound (this is the piezo
ignition). If you hear nothing when pressing
the ignition button, then you probably
need to replace the battery.
Hold the control knob pushed in when you
open the gas supply.
Turn the control knob to the right for gas
supply.
The burner should now ignite within 15
seconds.
Once fully lit you can release the control knob
and the re pit table is ready for use.
If the burner does not light, wait 5 minutes
and repeat above proceedure. If the burner
partially lights, extinguish the ames, wait 5
minutes and try again but holding down the
button for longer.
Leakage Testing
Never check for gas leakages with a
ame or whilst smoking.
This appliance needs to be periodically
checked for leakages and an immediate check
is required if the smell of gas is detected.
• Make a soap solution using 1 part of liquid
dish-washing soap to 3 parts water. The
soap solution can be applied with a soap
bottle, brush, or rag to the leakage tested
points shown in the below diagram (Fig 7)
Fig 7
• The valve of the LPG cylinder should be
in the “OFF” position at this point of the
leakage test. Once the soapy solution is
applied to the gas connections, the valve of
the LPG cylinder needs to be turned to the
“ON” position.
• Soap bubbles will begin to form in the
soapy solution if any leakage is present.
• In the event of gas leakage, the appliance
shall not be used or if alight, the gas supply
shall be shut-o and the appliance shall be
investigated and rectied before it is used
again. Tighten any leaking ttings, then
turn on gas supply and recheck.
• If necessary, substitute gasket (according
to EN 549 Class B2) or material used to
guarantee tightness (according to EN 751-1
Class I).
4
3
Leakage Test
Points 1, 2, 3, 4
2
1

Maintenance & Cleaning
To enjoy years of outstanding performance
from your appliance, regular service of the
appliance is mandatory as follows:
• The appliance should be inspected at
least one time a year by a qualied service
engineer only. More frequent cleaning
may be required according to the use of
theappliance.
• Any guard or other protective device
removed for servicing the appliance must
be replaced before operating it.
• Keep exterior surfaces clean, free and clear
from combustible materials.
• Use warm soapy water for cleaning. Never
use ammable or corrosive cleaning
agents.
• While washing your unit makes sure
to keep the area around the burner
assembly dry at all times. If the gas control
is exposed to water in any way, DO NOT
try to use it. It must be replaced.
• Burner and LPG compartment circulating
air passageways of the appliance must be
kept clean.
• Airow must be unobstructed. Keep
controls, burner and circulation air
passageways clean. Signs of possible
blockage include:
• If the ame is uneven, making poping
noises or is burning yellow there is not
ample oxygen getting to the ame.
Extinguish the ames and ensure the
burners or ventilation are not blocked and
are free from dust or debris.
• Spiders and insects can nest in burner
or orices. This dangerous condition can
damage the appliance and render it unsafe
for use. Clean burner holes by using a
heavy duty pipe cleaner. Compressed air
may help clear away smaller particles.
• Carbon deposits may create a re hazard. If
any carbon deposits develop, clean re pan
with warm soapy water.
• After the burner and lava rocks are
completely cooled down, remove it from
the bowl and use a soft brush to remove
any marks, loose dirt. Wipe with a soft cloth.
• Clean the bowl and afterward put lava
rocks again in proper position.
• For proper cleaning, a vacuum cleaner can
be used.
Note: In a salt-air environment (such as
near the sea), corrosion occurs more quickly
than normal. Frequently check the corroded
areas and repair them promptly. Stubborn
stains, discoloration and possibly rust pitting
can occur from exposure to harsh outdoor
conditions. Be careful not to let any powder
or solvent come in contact with painted or
plastic components as damage may occur.
After long use, some discoloration can come
up and it screen is normal.
Make sure both gas supplies are in the o
position before changing the battery. Please
refer to the process of assembling battery.
Please contact the Manufacturer or dealer for
information regarding replacement hoses,
thermocouples, igniters, lava rocks, etc.
Attention: Never use unauthorized parts or
component for this appliance.
Use only original equipment replacement
spare parts and components.
Failure to comply with the above may result
in hazardous conditions and your warranty
being void.

Troubleshooting
Problem: Condition: Solution suggested:
Burner won’t light
Control knob is not in
Maximum position (big ame).
Turn the control knob to the maximum position
(big ame).
LPG cylinder valve is closed /
Empty.
Open the valve / Replace LPG cylinder with a new
one.
Blockage in the injector. Clean or replace injector.
Air in the gas circuit. Open gas line and bleed it (pressing control knob
in) for not over 1 minute or until you smell gas.
Low gas pressure. Replace LPG cylinder with a new one.
Igniter fails. Use match to light burner; change battery or
obtain new ignite and replace it.
Burner won’t
stay lit
Dirt build up around burner. Clean dirt around the burner.
Low ames or not full running
around the burner.
Flame spreader holes partially closed; clean the
burner.
Thermocouple is not
operating correctly. Replace thermocouple (FSD).
Low Gas pressure. Replace LPG cylinder with a new one.
Burner ame is low
Note: Do not
operate appliance
below 5 ˚C
Outdoor temperature is
greater than 5 ˚C and LPG
cylinder is less than 25 % full.
Replace LPG cylinder with a new one.
Gas pipe is bent or kinked. Straighten hose and perform leakage test on gas
pipe.
Control knob is fully Maximum
position (big ame).
Turn control knob to”OFF”position (full disk), let
cool to room temperature and check burner and
orices for blockage.

Troubleshooting / Storage
If you can not solve the trouble according to one of the mentioned solutions, please contact
us via our website: www.kettler.co.uk or contact your dealer or Distributor.
Storage
• Turn control knob to “OFF”position (full disk).
• Turn LPG cylinder to “OFF” position.
• Store the appliance in a cool dry place away from direct sunlight; store it upright in an area
sheltered from direct contact with inclement weather (such as rain, sleet, hail, snow, dust and
debris). If desired, cover to protect exterior surfaces and to prevent build up in air passages.
• During periods of extended inactivity or when transporting: ensure the control knob is turned
to the “o” position. Disconnect LPG cylinder and move to a secure, well ventilated location
outdoors. DO NOT store above 50 °C.
• Note: Ensure the appliance is cool before covering.
Problem: Condition: Solution suggested:
Carbon build-up Dirty or lm on burner. Clean burner.
Flash back (ame
inside burner) Burner ports are blocked.
Switch OFF the appliance. Close LPG cylinder
valve. Wait 2 minutes, following the ignition
procedure. Ignite burner. If problem continuous,
switch-o. Contact your dealer
Thick black smoke Blockage in the burner.
Turn control knob to “OFF”position, let the
appliance to cool at room temperature and
remove blockage and clean burner inside and
outside.

Headline
www.kettler.co.uk
Warranty For Home Use
This product is covered by a 12 month
warranty against manufacturing faults.
This warranty applies to domestic use
only. It does not cover commercial use,
mis-use or accidental damage.
To validate your warranty, register
at www.kettler.co.uk and quote
the product code from the front of
this booklet.
12Mth
Warranty
This manual suits for next models
2
Table of contents
Popular Fireplace Accessories manuals by other brands

IHP
IHP H5872 installation instructions

Costway
Costway JV11174 manual

FireplaceXtrordinair
FireplaceXtrordinair CoolSmart TV manual

Lennox
Lennox TRAD-FPK-BG-LG installation instructions

Enclume
Enclume COUNTRY HOME FIREPLACE TOOL STAND FPTS2 Assembly and installation instructions

Gimeg
Gimeg Cosi Round Glasset L Installation instruction

Heat-N-Glo
Heat-N-Glo SL-550TR-CE-C Installer's guide

Majestic fireplaces
Majestic fireplaces TQS36 installation instructions

Valor
Valor 590FVK2 installation manual

Petromax
Petromax cshov40 user manual

SHM
SHM SVFM18NG OWNER'S OPERATION AND INSTALLATION MANUAL

Napoleon
Napoleon GD861KT installation instructions