Kanto OASIS User manual

User Manual
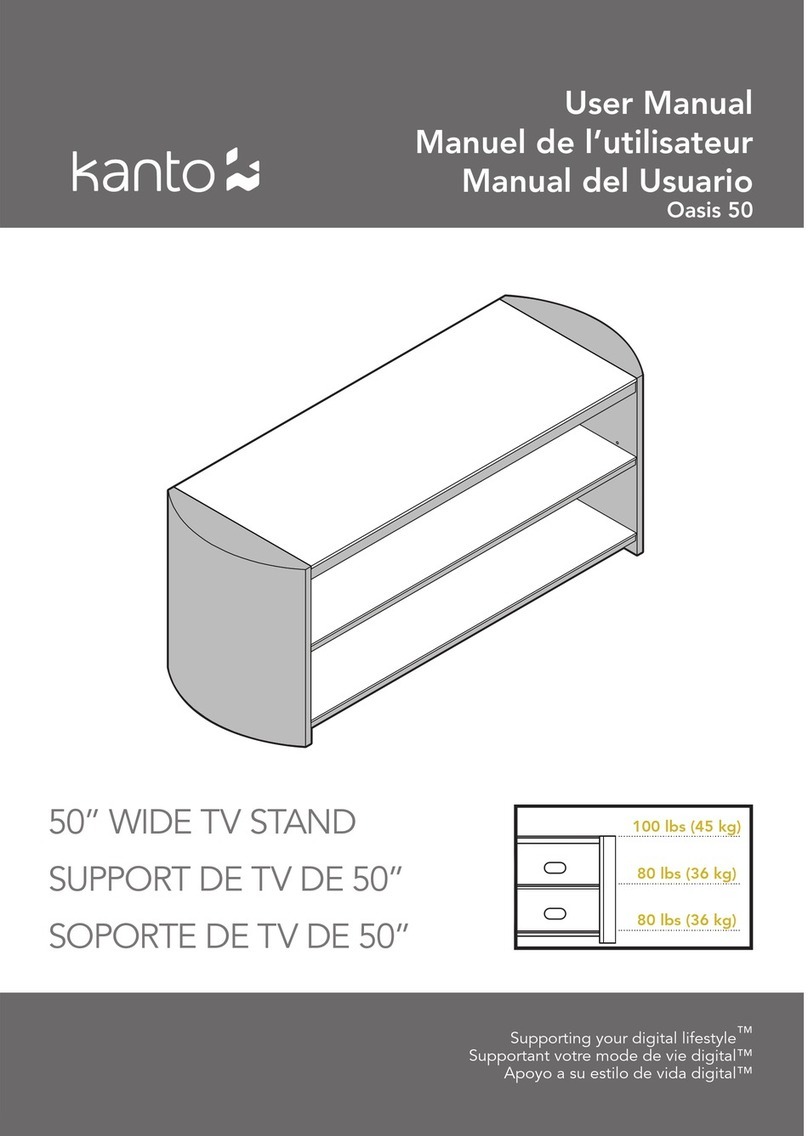
OASIS 50” TV Stand
Supporting your digital lifestyle™
50” TV STAND FOR
37” TO 60” TELEVISIONS
English
37” - 60” 260 lbs
(118 kg)

Introduction
Table of Contents
Table of Contents / Introduction . . . . . . . . . . . . . 2
Supplied Parts & Hardware ..................3
Setup - Step 1............................4
Setup - Step 2............................5
Setup - Step 3............................6
Setup - Steps 4 to 5 .......................7
Other Kanto Products ......................8
Warranty ................................8
2
Thank you for choosing a Kanto AV Systems TV stand. The Oasis 50” TV Stand will support 260 pounds (118 kg). It can be
used for any size TV, but is ideal for TVs from 37” to 60”. Easy to assemble, it features a vertically adjustable middle shelf
to accommodate AV components of different heights. Combine with a Kanto Stand Mount to mount your television and
gain flexibility and space.
Read these instructions fully before assembly of this stand. If you do not understand these directions, or have any doubts
about the safety of the installation, please contact Kanto AV Systems. Make sure there are no defective or missing parts.
Do not use defective parts. If you are uncertain whether the part is defective call Kanto AV Systems directly at 1-888-848-
2643 or email support@kantoav.com. Kanto AV Systems cannot be liable for property damage or injury caused by incor-
rect mounting, incorrect assembly, lifting or incorrect use of this product.
CAUTION
The maximum total loading weight is 260 lbs (118 kg). This TV stand is intended for use up to the maximum
weights indicated. Use with products heavier than the maximum weights indicated may result in instability causing
possible injury. Recommended TV Size: 37 inch to 60 inch.
See installation video online at:
www.kantoav.com/pages/video-oasis

Supporting your digital lifestyle™
Supplied Parts and Hardware
3
• Phillips screwdriver
Required Tools
L: Middle and Bottom Glass (6mm)
H: Top Frame
D: 4mm Allen
Key
K: Top Glass (8mm)
E: Rounded
Wood Ends
F: Backing Board G: Rear Support
Frame
x2
x2
A: M6 x 32mm
Hex Head Bolt
x18
B: M4 x 15mm
Bolt
x6
C: 12mm
Rubber Bumper
x18
J: Bottom FrameI: Middle Frame
front view rear view

4
Step 1: Attach Metal Frames to Wood Ends
Step 1.1 Attach Bottom Frame Loosely
Stand the wooden ends up, and position the bottom
frame (J) to align the holes with the inset nuts on one
wooden end (E). Insert two M6 x 32mm bolts (A) through
the frame’s holes and tighten approximately halfway.
Repeat for the other wooden end (E).
Step 1.2 Attach Middle Frame Loosely
Choose the location of your middle shelf based on your
AV components. Position the middle frame (I) to align
the holes with one of the three sets of inset nuts on one
wooden end (E). Insert two M6 x 32mm bolts (A) through
the frame’s holes and tighten approximately halfway.
Repeat at the same height for the other wooden end (E).
Step 1.3 Attach Top Frame Loosely
Position the top frame (H) to align the holes with the inset
nuts on one wooden end (E). Insert two M6 x 32mm bolts
(A) through the frame’s holes and tighten approximately
halfway. Repeat for the other wooden end (E).
Step 1.4 Tighten the Bolts
Use the Allen Key (D) to tighten all 12 bolts.
Diagram A
Assemble the Oasis structure using the three metal frames, two wooden ends and 12 M6 bolts, as shown in Diagram A.
Ensure that you orient the angled braces and the two holes on each frame towards the back of your Oasis.
A
(x12)
J
I
H
E
E

Supporting your digital lifestyle™Supporting your digital lifestyle™
5
Step 2: Attach Backing Board to Frames
Step 2.1 Position Backing Board.
Position the Backing Board (F) against the back of the
Oasis TV Stand, oriented as shown in Diagram B.
Step 2.2 Start All Six Bolts.
Starting with the top set, start the left and right M4 x
15mm bolts (B). Choose the correct set of holes on the
Backing Board to align to your chosen frame height, and
start those bolts. Finally, start the two bottom bolts.
Step 2.3 Align Top Center Hole.
To help your alignment when it’s time to attach the Back
Frame in Step 3, insert an M6 x 32 mm Bolt (A) through
one of the two top center holes of the Backing Board
and into the Top Frame (H).
Step 2.4 Tighten the Bolts.
Using a Philips screwdriver, tighten all six screws. You can
now remove the M6 x 32 mm Bolt (A) used for alignment.
The Backing Board (F) is a black painted solid MDF board that can be attached with either side facing forward. You will
be able to route your cables through the cable management holes for a clean finished look.
Diagram B
A
(insert
temporarily)
B
(x6)

6
Step 3: Attach Rear Support Frame and Rubber Bumpers
Step 3.1 Position Rear Support Frame.
The Rear Support Frame (G) has five sets of captive nuts
on the front, and only two sets of captive nuts on the rear,
as shown in Diagram C. Position the Rear Support Frame
(G) facing front, as shown in Diagram D. A Kanto Stand
Mount, if you have purchased one, can attach to the rear
of the Rear Support Frame.
Step 3.2 Start Six Bolts.
Manually start six M6 x 32 mm bolts (A) into the six captive
nuts, tightening them each approximately halfway, as
shown in Diagram D.
Step 3.3 Tighten the Bolts.
Tighten the six M6 x 32 mm bolts (A) using the Allen Key
(D) provided.
Step 3.4 Place Rubber Bumpers.
Place six rubber bumpers (C) on the top of each frame,
positioned near each end and the middle, as shown for the
top shelf in Diagram D. Bumpers are only shown for the
front rail of the middle and bottom frames.
Diagram D
The Rear Support Frame provides added strength to the Oasis stand, and will allow you to attach a Kanto Stand
Mount (packaged separately) if you have purchased an Oasis Plus model, or added the Stand Mount later.
front viewrear view
Diagram C
C
(x18)
A
(x6)
G

7
Step 4: Place the Glass
Diagram E
Supporting your digital lifestyle™
To complete the assembly of your Oasis Stand, simply place the three pieces of glass on the frames from the front,
as shown in Diagram E. The top glass (K) is 8mm thick, and the other two pieces (L) are 6mm thick. Your stand is now
complete. Position it as desired, add your components and television, and enjoy.
Step 5: Add Optional Mount to Your Stand
If you purchased an Oasis Plus Stand with Integrated TV Mount, please follow the instructions in the mount’s package.
Combine OASIS with a
mount for OASIS Plus
+ =

www.kantoav.com hello@kantoav.com
Tel 604.231.9574 Fax 604.231.9535
Limited Warranty To Original Purchaser
Kanto AV Systems (Kanto) warrants the equipment it manufactures to be free from defects in material and workmanship for the
following limited warranty period of:
24 months parts and labour
If equipment fails because of such defects and Kanto or an authorized dealer is notified within 24 months from the date of
shipment with proof of original invoice. Kanto will, at its option, repair or replace the equipment, provided that the equipment
has not been subjected to mechanical, electrical, or other abuse or modifications. Equipment that fails under conditions other
than those covered will be repaired at the current price of parts and labor in effect at the repair. Such repairs are warranted for
90 days from the day of reshipment to the original purchaser. This warranty is in lieu of all other warranties expressed or implied,
including without limitation, any implied warranty or merchantability or fitness for any particular purpose, all of which are expressly
disclaimed.
The information in the owner’s manual has been carefully checked and is believed to be accurate. However, Kanto assumes
no responsibility for any inaccuracies that may be contained in the manual. In no event will Kanto, be liable for direct, indirect,
special, incidental, or consequential damages resulting from any defect or omission in this manual, even if advised of the
possibility of such damages.
Warranty
For more TV and desktop mounts, along with our other
products, please visit kantoav.com.
“LIKE” Kanto on Facebook to receive upcoming news
and special product offers.
• 5” passive 4Ω coaxial speakers with 1” tweeter
• 50 Watt per side power handling capability
• Inset M8 threaded nut for mounting with SWB100
• Available in a stunning array of mix and match colors
• Compatible with YARO Amp for your digital media
Kanto BEN Speakers
• 3D and 1080p HD Full Colour Capabilities
• 24 kt gold plated contacts
• HDMI Ethernet Channel
Kanto Infinity Series Cables
• Metal head connectors with flex relief and grip
• Visit kantospeakers.com for more!
12-11
Table of contents
Other Kanto Indoor Furnishing manuals
Popular Indoor Furnishing manuals by other brands

Regency
Regency LWMS3015 Assembly instructions

Furniture of America
Furniture of America CM7751C Assembly instructions

Safavieh Furniture
Safavieh Furniture Estella CNS5731 manual

PLACES OF STYLE
PLACES OF STYLE Ovalfuss Assembly instruction

Trasman
Trasman 1138 Bo1 Assembly manual

Costway
Costway JV10856 manual