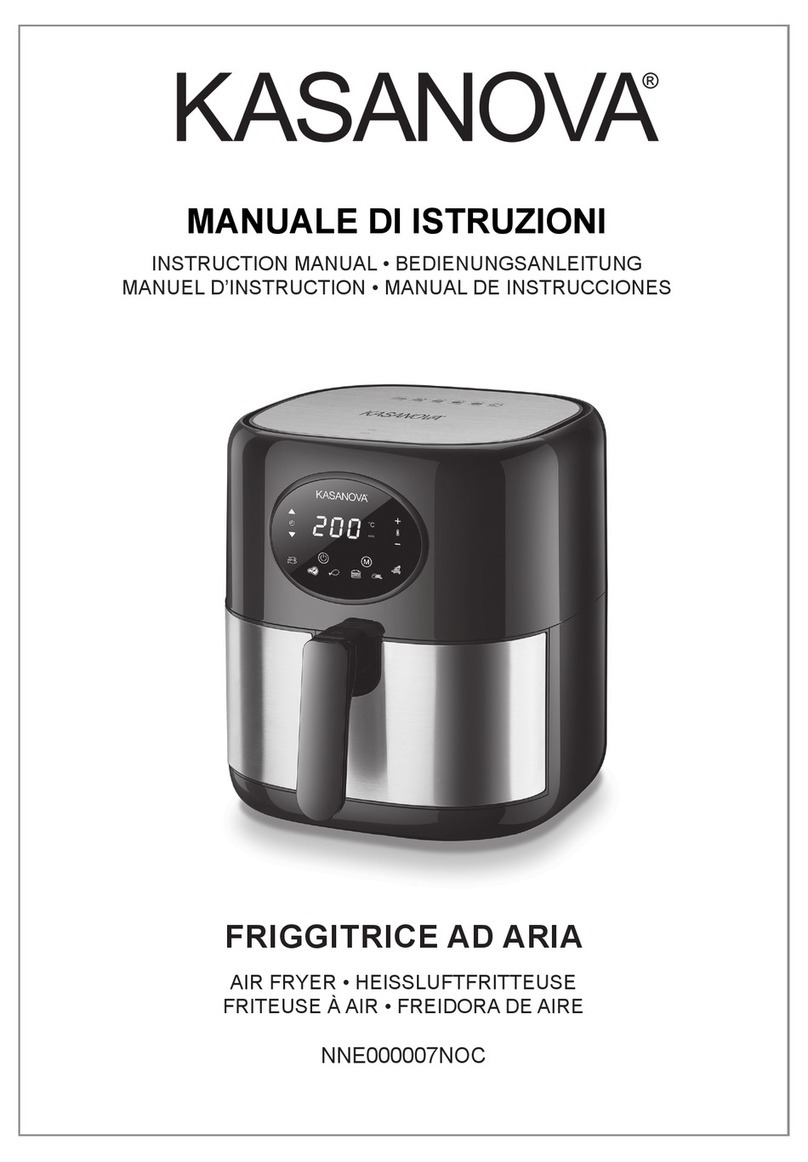
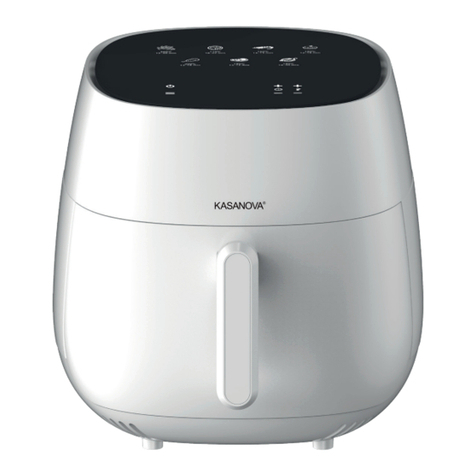
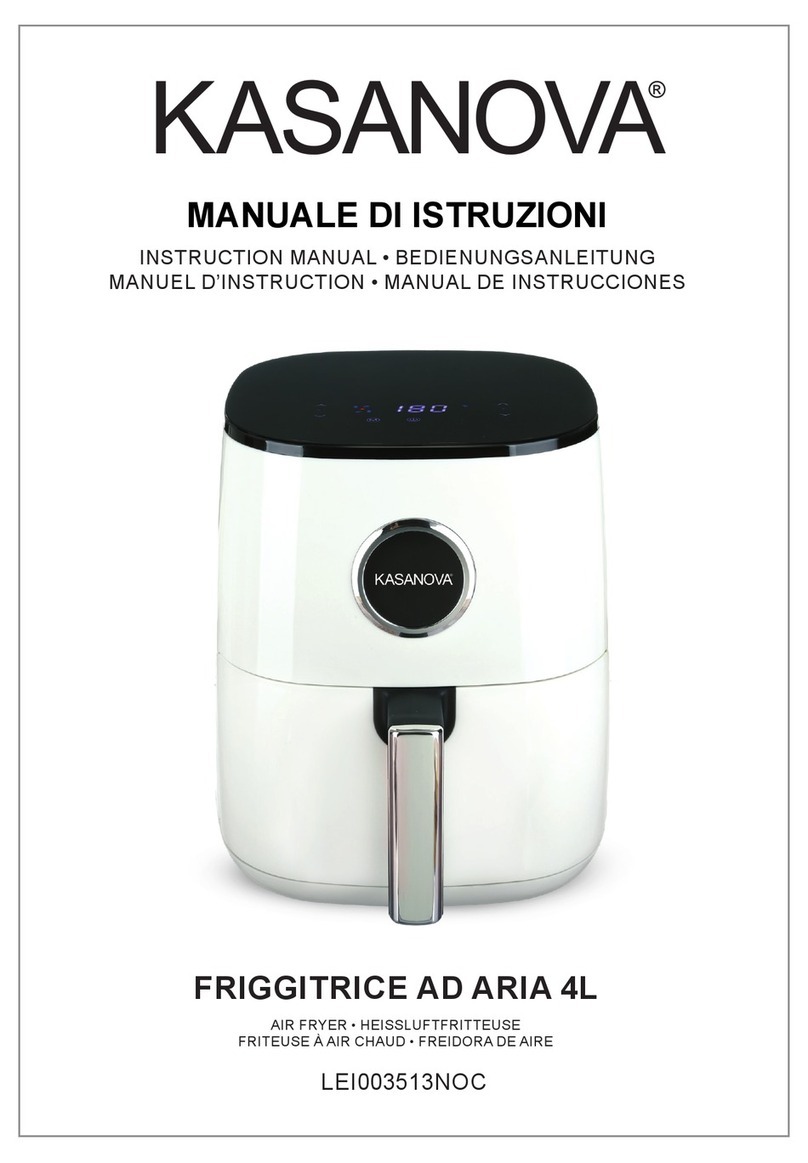
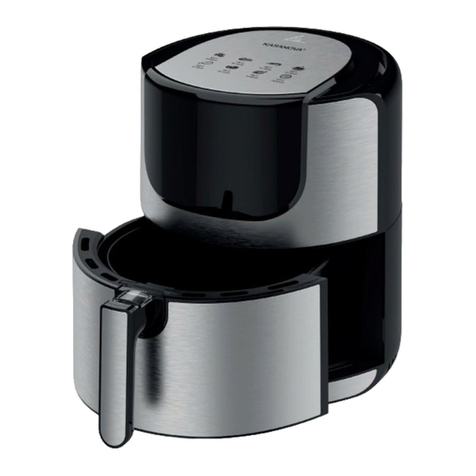
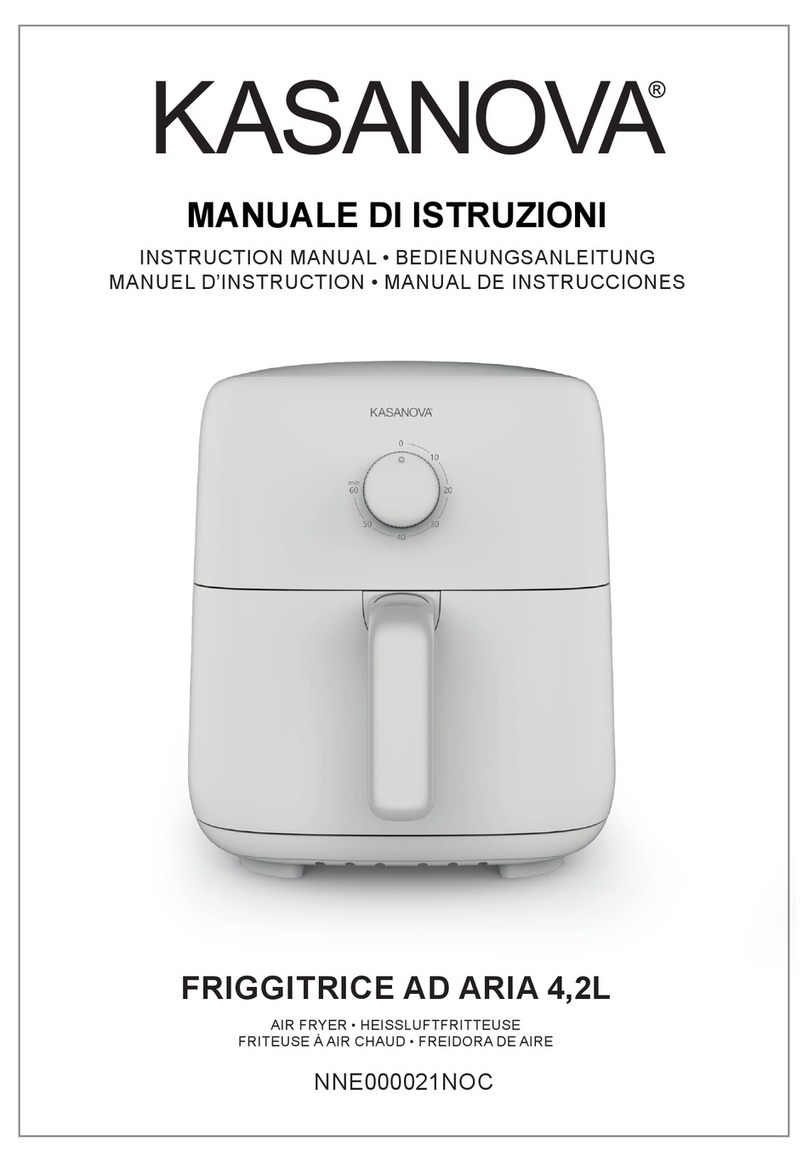
Kasanova LEI003005NOC User manual

INSTRUCTION MANUAL • BEDIENUNGSANLEITUNG
MANUEL D’INSTRUCTION • MANUAL DE INSTRUCCIONES
MANUALE DI ISTRUZIONI
FRIGGITRICE AD ARIA
AIR FRYER • HEISSLUFTFRITTEUSE
FRITEUSE À AIR • FREIDORA
LEI003005NOC

2FIGGITRICE AD ARIA
LEGGERE ATTENTAMENTE IL MANUALE PRIMA DELL’USO E CONSERVARLO PER
EVENTUALI CONSULTAZIONI FUTURE.
Descrizione generale
1. Ingresso dell’aria
2. Spia di riscaldamento
3. Manopola di regolazione
della temperatura
4. Spia di alimentazione
5. Timer
6. Piatto per friggere
7. Padella antiaderente
8. Manico
Pericolo
- Non immergere il corpo principale in acqua o altri liquidi e non lavarlo sotto il rubinetto, perché
contiene parti elettriche e resistenze.
- Evitare che qualsiasi superficie dell’apparecchio entri in contatto con acqua o altri liquidi per
evitare il rischio di folgorazione o corto circuito.
- Aggiungere gli ingredienti da friggere sempre e solo all’interno del cestello in modo da evitare
che entrino in contatto con le resistenze.
- Non coprire le aperture di circolazione dell'aria mentre l'apparecchio è in funzione.
- Non riempire il recipiente di olio per evitare il pericolo di incendio.
- Non toccare la superficie interna dell’apparecchio mentre è in funzione.
Avvertenze
- Prima di collegare l'apparecchio, verificare che la tensione riportata sulla spina corrisponda alla
tensione di rete disponibile.
- Non usare I’ apparecchio se la spina, il cavo di alimentazione o I’ apparecchio stesso sono
danneggiati.
- Questo apparecchio non è destinato all’uso da parte di persone (inclusi i bambini) con ridotte
capacità fisiche, sensoriali o mentali, o con mancanza di esperienza e conoscenza, a meno
che non siano sorvegliate o non ricevano istruzioni relative all’uso sicuro dell’apparecchio da
parte di una persona responsabile della loro sicurezza.
- Assicurarsi che i bambini non giochino con l’apparecchio.
- Durante il funzionamento o il raffreddamento, tenere l’apparecchio e il relativo cavo di
alimentazione fuori dalla portata dei bambini di età inferiore agli 8 anni.
- Tenere il cavo di alimentazione lontano da superfici incandescenti.
- Non collegare la spina alla presa di corrente e non toccare il pannello di controllo con le mani
bagnate.
- Collegare l'apparecchio esclusivamente a una presa dotata di messa a terra. Accertarsi sempre
che la spina sia correttamente inserita nella presa di corrente.
- Questo apparecchio non è progettato per essere messo in funzione tramite timer esterni o
telecomandi.

3
FIGGITRICE AD ARIA
- Non posizionare l’apparecchio sopra o vicino a materiali infiammabili, come tovaglie o tende.
- Non collocare l'apparecchio contro una parete o un altro apparecchio. Lasciare almeno 10 cm di
spazio libero sul retro e i lati e 10 cm di spazio
sopra l'apparecchio. Non posizionare alcun oggetto sopra l'apparecchio.
- Non usare l'apparecchio per scopi diversi da quelli descritti nel presente manuale.
- Non lasciare l’apparecchio incustodito mentre è in funzione.
- Durante la frittura ad aria calda, dalle aperture di circolazione dell'aria fuoriesce vapore ad
alta temperatura. Tenere le mani e il viso a distanza di sicurezza dal vapore e dalle aperture
di circolazione dell'aria. Fare attenzione al vapore e all'aria calda anche quando si rimuove il
recipiente dall'apparecchio.
- Durante I’uso, le superfici accessibili potrebbero diventare molto calde.
- Staccare immediatamente il cavo dalla presa di corrente se dall’apparecchio fuoriesce
del fumo scuro. Attendere finché non fuoriesca più fumo prima di rimuovere il recipiente.
Attenzione
- Posizionare l'apparecchio su una superficie piana, stabile e orizzontale.
- Questo apparecchio è stato progettato per il normale uso domestico. Non è progettato per l'uso
in ambienti quali zone dedicate alla cucina all'interno di negozi, uffici, agriturismi e altri ambienti
di lavoro. Non è ideato per essere utilizzato dagli ospiti di alberghi, motel, bed and breakfast e
in altri ambienti residenziali.
- In caso di danni dovuti a un utilizzo non conforme alle istruzioni o a un uso dell’apparecchio per
scopi professionali o semi-professionali, la garanzia perde validità.
- Per eventuali controlli o riparazioni, rivolgersi sempre al servizio di assistenza. Non tentare di
riparare autonomamente I’ apparecchio, altrimenti la garanzia perde validità.
- Dopo l’uso, ricordarsi di scollegare sempre l’apparecchio.
- Prima di spostare o pulire I’ apparecchio, lasciarlo raffreddare per circa 30 minuti.
- Durante la cottura di alimenti acidi aventi un pH inferiore a 5 (come aceto, succo di limone e
altre salse), avvolgerli nella carta stagnola.
Spegnimento automatico
L'apparecchio dispone di un timer integrato. Scaduto il tempo impostato, l'apparecchio emette
un segnale acustico e si spegne automaticamente. Per spegnere l'apparecchio manualmente,
ruotare la manopola del timer in senso antiorario fino a "0".
La vostra friggitrice ad aria utilizza la tecnologia di circolazione dell'aria a 360 ° per cucinare con
poco o senza olio, per cibi veloci, croccanti e deliziosi. Con controlli a tocco singolo intuitivi e un
design chiaro e sicuro, la friggitrice ad aria è la stella della vostra cucina.
Prima del primo utilizzo
Rimuovere tutti i materiali di imballaggio ed eventuali adesivi o etichette.
Pulire a fondo il cestello e il recipiente con acqua calda, detersivo liquido per i piatti e una spugna
non abrasiva.
Pulire la parte interna ed esterna dell’apparecchio con un panno umido.
Questa friggitrice funziona ad aria calda. Non aggiungere nel recipiente grassi di cottura quali olio
per friggere.
Preparazione all’uso
Posizionare I’ apparecchio su una superficie stabile, piana e orizzontale. Posizionarlo
esclusivamente su superfici resistenti al calore.
Inserire il cestello all’interno del recipiente.
Non riempire il contenitore con oli di cottura o altri liquidi.
Non posizionare alcun oggetto al di sopra dell’ apparecchio: questo interromperebbe la
circolazione dell’aria compromettendo i risultati della frittura.

4FIGGITRICE AD ARIA
Modalità d’utilizzo
1. Collegare l'apparecchio a una presa dotata di messa a terra.
2. Rimuovere il recipiente dalla friggitrice ad aria.
3. Aggiungere gli ingredienti nel cestello.
4. Reinserire il cestello nella friggitrice.
5. Ruotare la manopola di regolazione della temperatura fino a impostare la temperatura
desiderata.
6. Impostare il tempo di cottura necessario a seconda degli ingredienti da preparare.
7. Per accendere la friggitrice, ruotare la manopola del timer fino a impostare il tempo di cottura
desiderato.
* La spia di riscaldamento si accende.
* II timer inizia il conto alla rovescia del tempo di cottura impostato.
* Durante la frittura ad aria calda, la spia luminosa si accende e si spegne in modo
intermittente, il che significa che la resistenza si accende e si spegne per mantenere la
temperatura impostata.
* L’olio in eccesso prodotto dagli ingredienti si raccoglie sul fondo del contenitore.
A volte è necessario scuotere alcuni ingredienti a metà cottura. Per farlo, estrarre il recipiente
tirandolo dalla maniglia e scuoterlo. Poi, reinserirlo nella friggitrice. Quando si sente il segnale
acustico, significa che il tempo di cottura è terminato. Estrarre il recipiente dalla friggitrice e
appoggiarlo su una superficie resistente al calore.
Nota: É possibile spegnere l’apparecchio manualmente. Per farlo, ruotare la manopola di
regolazione della temperatura fino a 0.
8. Assicurarsi che gli ingredienti siano pronti. Se non sono ancora pronti, reinserire il recipiente
nella friggitrice e aggiungere qualche altro minuto di cottura.
9. Svuotare il cestello in una ciotola o in un piatto.
10.Una volta terminata la cottura ed estratti gli alimenti, la friggitrice è subito pronta per
ricominciare a friggere.
Ingredienti Temperatura Tempo Quantità/Peso
Patatine fritte Surgelate 200°C 15-20 min Max. 400 g
Fresche 200°C 20-25 min Max. 200 g
Ali e cosce di pollo 200°C 12-18 min 8 pezzi
Gamberetti 180°C 10-15 min 750 g
Costine di maiale 200°C 20-25 min 450 g
Consigli:
1. È necessario scongelare gli ingredienti surgelati prima di cuocerli nell'apparecchio. Temperatura
consigliata: 80°C. Tempo: 8-12 minuti.
2. In alcuni casi (es. durante la preparazione delle patatine fritte), è necessario scuotere o
capovolgere gli ingredienti a metà cottura.
3. Prima della cottura, tagliare a pezzi le verdure più grandi come le zucchine e le melanzane.
4. Per la preparazione di ingredienti non elencati, regolare la temperatura e il tempo di cottura a
seconda delle dimensioni e della quantità.
5. È preferibile cuocere gli ingredienti stendendo uno strato per volta, senza impilarli uno sull’altro.
Se impilati, aumentare il tempo di cottura e ricordarsi di scuotere il cestello a metà cottura.

5
FIGGITRICE AD ARIA
Problema Possibile causa Soluzione
La friggitrice
non si accende.
L’apparecchio non è collegato
alla presa di corrente.
Collegare l'apparecchio esclusivamente
a una presa dotata di messa a terra.
Il timer non è stato impostato.
Ruotare la manopola del timer e impostare il
tempo di cottura desiderato.
A questo punto accendere l’apparecchio.
Gli ingredienti
non friggono.
La quantità di ingredienti all’interno
del cestello è eccessiva.
Inserire una minore quantità di
ingredienti all’interno del cestello per friggerli
in modo più uniforme.
La temperatura impostata
è troppo bassa.
Ruotare la manopola di regolazione della
temperatura e impostare la temperatura
desiderata.
I tempi di cottura impostati
sono troppo brevi.
Ruotare la manopola del timer e impostare
i tempi di cottura desiderati.
Gli ingredienti non
friggono in modo
uniforme.
A volte è necessario scuotere alcuni
ingredienti a metà cottura.
Per gli ingredienti che tendono ad
accumularsi uno sopra l’altro all’interno
del cestello (come le patatine fritte),
è necessario scuoterli a metà cottura.
Gli alimenti fritti non risultano
croccanti dopo la cottura.
Sono stati usati degli ingredienti
che dovrebbero essere fritti usando
una friggitrice tradizionale e non
ad aria calda.
Usare ingredienti che possono essere cotti al
forno; altrimenti spennellare la supercie degli
ingredienti con dell’olio per ottenere un risultato
più croccante.
Il recipiente non scorre
all’interno dell’apparecchio.
Il cestello non è posizionato
correttamente all’interno del recipiente.
Inserire il cestello correttamente evitando di
riempire eccessivamente il recipiente.
C’è qualcosa che ostruisce il recipiente.
La quantità di ingredienti all’interno
del cestello è eccessiva.
Pulizia
- Pulire l’apparecchio dopo ogni uso.
- La padella e il piatto per friggere presentano un rivestimento antiaderente. Non usare utensili da
cucina in metallo o detergenti abrasivi per evitare di danneggiare il rivestimento antiaderente.
- Scollegare l’apparecchio e lasciarlo raffreddare.
- Pulire la parte esterna dell’apparecchio con un panno umido.
- Pulire la padella e il piatto per friggere con acqua calda, detersivo liquido per i piatti e una
spugna non abrasiva.
RISOLUZIONE PROBLEMI

6FIGGITRICE AD ARIA
TRATTAMENTO DEL DISPOSITIVO ELETTRICO ED
ELETTRONICO A FINE VITA
Informazione agli utenti per il corretto smaltimento del prodotto ai sensi della
Direttiva Europea 2002/96/CE e del D.lgs N. 151/2005
Caro consumatore,
è importante ricordarti che, come buon cittadino, avrai l’obbligo di smaltire
questo prodotto non come riuto urbano, ma di eettuare una raccolta
separata. Il simbolo sopra indicato e riportato sull’apparecchiatura indica
che il riuto deve essere oggetto di “raccolta separata”. I dispositivi elettrici
ed elettronici non devono essere considerati riuti domestici. Pertanto, il
prodotto alla ne della sua vita utile, non deve essere smaltito insieme ai riuti
urbani. L’utente dovrà conferire (o far conferire) il riuto ai centri di raccolta
dierenziata predisposti dalle amministrazioni locali, oppure consegnarlo al
rivenditore contro l’acquisto di una nuova apparecchiatura di tipo equivalente.
La raccolta dierenziata del riuto e le successive operazioni di trattamento,
recupero e smaltimento favoriscono la produzione di apparecchiature con
materiali riciclati e limitano gli eetti negativi sull’ambiente e sulla salute
eventualmente causati da una gestione impropria del riuto.
Grazie!
Dall'apparecchio fuoriesce
del fumo bianco.
Si stanno cucinando alimenti molto unti.
Durante la cottura di alimenti unti, all’interno del
recipiente si riverserà una grande quantità di olio.
Il fumo bianco è prodotto dall’olio riscaldato nel
recipiente, che potrebbe scaldarsi più del solito.
Questo non danneggerà l’apparecchio e non
comprometterà il risultato di cottura nale.
Il recipiente contiene residui grassi
degli alimenti cucinati in precedenza.
Pulire accuratamente il recipiente
e il cestello dopo ogni uso.

7
FIGGITRICE AD ARIA
NOTE

8AIR FRYER
READ THIS USER MANUAL CAREFULLY BEFORE YOU USE THE APPLIANCE AND
SAVE IT FOR FUTURE REFERENCE.
General Description
1. Air inlet
2. Heating-up light
3. Temperature control knob
4. Power light
5. Timer
6. frying plate
7. Nonstick pan
8. Handle
Danger
- Never immerse the housing, which contains electrical components and the heating elements, in
water nor rinse it under the tap.
- Do not let any water or other liquid enter the appliance to prevent electric shock.
- Always put the ingredients to be fried in the basket, to prevent it from coming into contact with
the heating elements.
- Do not cover the air inlet and the air outlet openings while the appliance is operating.
- Do not fill the pan with oil as this may cause a fire hazard.
- Never touch the inside of the appliance while it is operating.
Warning
- Check if the voltage indicated on the appliance corresponds to the local mains voltage before
you connect the appliance.
- Do not use the appliance if the plug, the mains cord or the appliance itself is damaged.
- This appliance is not intended to be used by children or by persons with reduced
physical, sensory or mental capabilities, or lack of experience and knowledge, unless they
have been given supervision or instruction concerning use of the appliance by a
person responsible for their safety.
- Children should be supervised to ensure that they do not play with the appliance.
- Keep the appliance and its mains cord out of the reach of children younger than 8 when the
appliance is switched on or is cooling down.
- Keep the mains cord away from hot surfaces.
- Do not plug in the appliance or operate the control panel with wet hands.
- Only connect the appliance to an earthed wall socket. Always make sure that the plug is
inserted into the wall socket properly.
- This appliance is not intended to be operated by means of an external timer or a separate
remote-control system.
- Do not place the appliance on or near combustible materials such as a tablecloth or curtain.
- Do not place the appliance against a wall or against other appliances. Leave at least 10cm free
space on the back and sides and 10cm free space above the appliance. Do not place anything
on top of the appliance.

9
AIR FRYER
- Do not use the appliance for any other purpose than described in this manual.
- Do not let the appliance operate unattended.
- During hot air frying, hot steam is released through the air outlet openings. Keep your hands
and face at a safe distance from the steam and from the air outlet openings. Also be careful of
hot steam and air when you remove the pan from the appliance.
- The accessible surfaces may become hot during use.
- Immediately unplug the appliance if you see dark smoke coming out of the appliance. Wait for
the smoke emission to stop before you remove the pan from the appliance.
Caution
- Place the appliance on a horizontal, even and stable surface.
- This appliance is intended for normal household use only. It is not intended for use in
environments such as staff kitchens of shops, offices, farms or other work environments. Nor
is it intended to be used by clients in hotels, motels, bed and breakfasts and other residential
environments.
- If the appliance is used improperly or for professional or semi-professional purposes or if it is not
used according to the instructions in the user manual, the guarantee becomes invalid.
- Always return the appliance to a service centre authorised for examination or repair. Do not
attempt to repair the appliance yourself, otherwise the guarantee becomes invalid.
- Always unplug the appliance after use.
- Let the appliance cool down for approx. 30 minutes before you handle or clean it.
- When cooking acidic foods with pH <5 (such as vinegar, lemon juice and other sauces), be sure
to wrap them in foil.
Automatic switch-off
This appliance is equipped with a timer. When the timer has counted down to 0, the appliance
produces a bell sound and switches off automatically. To switch off the appliance manually, turn
the timer knob anticlockwise to 0.
Before first use
Remove all packaging material.
Remove any stickers or labels from the appliance.
Thoroughly clean the basket and the pan with hot water, some washing-up liquid and a non-
abrasive sponge.
Wipe the inside and outside of the appliance with a moist cloth.
This is an air fryer that works on hot air. Do not fill the pan with oil or frying fat.
Preparing for use
Place the appliance on a stable, horizontal and level surface. Do not place the appliance on non-
heat-resistant surfaces.
Place the basket in the pan properly.
Do not fill the pan with oil or any other liquid.
Do not put anything on top of the appliance. This disrupts the airflow and affects the hot air frying
result.
How to use
1. Put the mains plug in an earthed wall socket.
2. Carefully pull the pan out of the air fryer.
3. Put the ingredients in the basket.
4. Slide the pan back into the air fryer.
5. Turn the temperature control knob to the required temperature.
6. Determine the required preparation time for the ingredient.
7. To switch on the appliance, turn the timer knob to the required preparation time.

10 AIR FRYER
* The heating-up light goes on.
* The timer starts counting down the set preparation time.
* During the hot air frying process, the heating-up light comes on and goes out from
time to time. This indicates that the heating element is switched on and off to maintain
the set temperature.
* Excess oil from the ingredients is collected on the bottom of the pan.
8. Some ingredients require shaking halfway through the preparation time. To shake the
ingredients, pull the pan out of the appliance by the handle and
shake it. Then slide the pan back into the air fryer .
9. When you hear the timer bell, the set preparation time has elapsed. Pull the pan out of
the appliance and place it on a heat-resistant surface.
Note: You can also switch off the appliance manually. To do this, turn the timer control knob to 0).
10. Check if the ingredients are ready. If the ingredients are not ready yet, simply slide
the pan back into the appliance and set the timer to a few extra minutes.
11. Empty the basket into a bowl or onto a plate.
12.When a batch of ingredients is ready, the airfryer is instantly ready for preparing another batch.
Ingredients Temperature Time Quantity/Weight
French fries Frozen 200°C 15-20min Max. 400g
Fresh-cut 200°C 20-25min Max. 200g
Chicken wings/drumsticks 200°C 12-18min 8pcs
Shrimps 180°C 10-15min 750g
Pork ribs 200°C 20-25min 450g
Tips:
1. Frozen food needs first to be defrosted. Recommended temperature: 80°C, time: 8-12 minutes.
2. Certain types of ingredients (e.g. French fries) need to be shaken/turned over halfway through
the cooking time.
3. Large vegetables like courgettes and aubergines need to be cut into pieces before cooking.
4. When cooking other ingredients not mentioned, please adjust the temperature and time
according to their size and quantity.
5. For optimal cooking, we recommend cooking one layer of ingredients at a time, without layering
them on top of each other to prevent the pieces from touching each other. If stacked, please
increase the cooking time, and shake the ingredients halfway through the preparation time.
Cleaning
- Clean the appliance after every use.
- The pan and plate have a non-stick coating. Do not use metal kitchen utensils or
abrasive cleaning materials to clean them, as this may damage the non-stick coating.
- Remove the mains plug from the wall socket and let the appliance cool down.
- Wipe the outside of the appliance with a moist cloth.
- Clean the pan and plate with hot water, some washing-up liquid and a non-abrasive sponge.

11
PROBLEM & SOLUTION
Problem Possible cause Solution
The air fryer
does not work.
The appliance is not plugged in. Put the mains plug in an earthed wall socket.
You have not set the timer. Turn the timer knob to the required preparation
time to switch on the appliance.
The fried ingredient are not done.
The amount of ingredients in the pan
is too big. Put smaller batches of ingredients in the basket.
The set temperature is too low. Turn the temperature control knob to the required
temperature setting.
The preparation time is too short. Turn the timer knob to the required
preparation time.
The ingredients are fried
unevenly.
Certain types of ingredients need to be
shaken halfway through the preparation
time.
Ingredients that lie on top of or across each other
(e.g. fries) need to be shaken halfway through the
preparation time.
Fried snacks are not crispy. You used a type of snacks meant to be
prepared in a traditional deep fryer.
Use oven snacks or lightly brush some oil onto
the snacks for a crispier result.
Cannot slide the pan into
the appliance properly.
The basket is not placed in the pan
correctly.
Correctly slide the pan into the appliance and do
not overll the basket.
There is something obstructing the pan.
There are too much ingredients in
the basket.
White smoke comes out
of the appliance.
You are preparing greasy ingredients.
When fry greasy ingredients, a large amount of oil
will leak into the pan.
The oil produces white smoke and the pan may
heat up more than usual. This does not affect
the appliance or the end result.
The pan still contains grease residues
from previous use. Make sure you clean the pan properly after each
use.
AIR FRYER

12 AIR FRYER
INFORMATION FOR USERS OF DOMESTIC APPLIANCES
This marking indicates that this product should not be disposed with other
household wastes throughout the EU. To prevent possible harm to the
environment or human health from uncontrolled waste disposal, recycle it
responsibly to promote the sustainable reuse of material resources. To return
your used device, please use the return and collection systems or contact
the retailer where the product was purchased. They can take this product for
environmental safe recycling.

13
AIR FRYER
NOTES

14 HEISSLUFTFRITTEUSE
BITTE LESEN SIE DIESE BENUTZERANLEITUNG SORGFÄLTIG DURCH, BEVOR SIE
DAS GERÄT VERWENDEN, UND BEWAHREN SIE SIE ZUM NACHSCHLAGEN AUF.
Allgemeine Beschreibung
1. Lufteinlass
2. Aufheizleuchte
3. Temperaturregler
4. Betriebsleuchte
5. Timer
6. Frittierplatte
7. Antihaftpfanne
8. Griff
Gefahr
- Das Gehäuse enthält elektrische Komponenten und Heizelemente, tauchen Sie es nie ins
Wasser und spülen Sie es nicht unter dem Wasserhahn ab.
- Um einen elektrischen Schlag zu vermeiden, lassen Sie kein Wasser oder andere Flüssigkeiten
in das Gerät eindringen.
- Geben Sie die Zutaten, die frittiert werden sollen, immer in den Korb, damit sie nicht mit den
Heizelementen in Berührung kommen.
- Decken Sie die Luftein- und Auslässe nicht ab, während das Gerät in Betrieb ist.
- Füllen Sie die Pfanne nicht mit Öl, da dies Brandgefahr verursachen kann.
- Berühren Sie niemals das Innere des Geräts, während es in Betrieb ist.
Achtung
- Prüfen Sie, ob die auf dem Gerät angegebene Betriebsspannung mit der örtlichen
Netzspannung übereinstimmt, bevor Sie das Gerät anschließen.
- Verwenden Sie das Gerät nicht, wenn der Stecker, das Netzkabel oder das Gerät selbst
beschädigt sind.
Dieses Gerät ist nicht zur Verwendung durch Kinder oder Personen mit eingeschränkten
körperlichen, sensorischen oder geistigen Fähigkeiten oder mangelnder Erfahrung und
Kenntnis bestimmt, es sei denn, sie werden von einer für ihre Sicherheit verantwortlichen
Person beaufsichtigt oder wurden von dieser in der Benutzung des Geräts angewiesen.
- Kinder sollten beaufsichtigt werden, um sicherzustellen, dass sie nicht mit dem Gerät spielen.
- Halten Sie das Gerät und das Netzkabel außerhalb der Reichweite von Kindern unter 8 Jahren,
wenn das Gerät eingeschaltet ist oder abkühlt.
- Vermeiden Sie, dass das Netzkabel heiße Oberflächen berührt.
- Achten Si darauf, dass Ihre Hände trocken sind, wenn Sie das Gerät anschließen oder das
Bedienfeld betätigen.
- Schließen Sie das Gerät nur an eine geerdete Wandsteckdose an.Achten Sie immer darauf,
dass der Stecker richtig in die Steckdose eingesteckt ist.
- Dieses Gerät ist nicht für den Betrieb mit einer externen Zeitschaltuhr oder einem getrennten
Fernbedienungssystem vorgesehen.
- Stellen Sie das Gerät nicht auf oder in der Nähe von brennbaren Materialien wie z.B. einer

15
HEISSLUFTFRITTEUSE
Tischdecke oder einem Vorhang auf.
- Stellen Sie das Gerät nicht direkt an eine Wand oder gegen andere Geräte. Lassen Sie an der
Rückseite und an den Seiten sowie über dem Gerät mindestens 10 cm Freiraum.Stellen Sie
keine Gegenstände auf das Gerät.
- Verwenden Sie das Gerät nicht für Zwecke, die nicht in dieser Anleitung beschrieben sind.
- Lassen Sie das Gerät nicht unbeaufsichtigt laufen.
- Beim Heißluftfrittieren wird heißer Dampf durch die Luftauslässe ausgestoßen.Halten Sie
Hände und Ihr Gesicht in einem sicheren Abstand zum Dampf und den Luftauslässen.Achten
Sie auch beim Herausnehmen der Pfanne aus dem Gerät auf heraustretenden heißen Dampf
und heißer Luft.
- Zugängliche Oberflächen können während des Betriebs heiß werden.
- Ziehen Sie sofort den Netzstecker, wenn dunkler Rauch aus dem Gerät kommt.Warten Sie, bis
kein Rauch mehr austritt, bevor Sie die Pfanne aus dem Gerät nehmen.
Vorsicht
- Stellen Sie das Gerät auf einer waagerechten, ebenen und stabilen Oberfläche auf.
- Dieses Gerät ist nur für den normalen Hausgebrauch bestimmt.Es ist nicht für den Einsatz
in Personalküchen von Geschäften, Büros, Bauernhöfen oder anderen Arbeitsumgebungen
vorgesehen.Es ist auch nicht für die Verwendung durch Kunden in Hotels, Motels, Pensionen
und anderen Wohnumgebungen vorgesehen.
- Die Garantie erlischt bei unsachgemäßer bzw. für gewerbliche oder halbgewerbliche Zwecke
oder nicht den Anweisungen in der Betriebsanleitung entsprechender Verwendung des Geräts.
- Das Gerät darf nur an zugelassene Dienstleister zur Überprüfung oder Reparatur abgegeben
werden.Versuchen Sie nicht das Gerät selbst zu reparieren, da ansonsten die Garantie erlischt.
- Ziehen Sie nach dem Gebrauch immer den Netzstecker.
- Lassen Sie das Gerät ca. 30 Minuten lang abkühlen, bevor Sie es handhaben oder reinigen.
- Säurehaltige Lebensmittel mit einem pH-Wert <5 (z.B. Essig, Zitronensaft und andere Saucen)
müssen vor dem Kochen in Folie eingewickelt werden.
Abschaltautomatik
Dieses Gerät ist mit einem Timer ausgestattet.Wenn der Timer auf 0 abgelaufen ist, erklingt
ein akustisches Signal und das Gerät schaltet sich automatisch aus.Um das Gerät von Hand
auszuschalten, drehen Sie den Timer-Drehknopf gegen den Uhrzeigersinn auf 0.
Vor dem ersten Gebrauch
Entfernen Sie alle Verpackungsmaterialien.
Entfernen Sie alle Aufkleber oder Etiketten vom Gerät.
Reinigen Sie den Korb und die Pfanne gründlich mit heißem Wasser, etwas Spülmittel und einem
nicht scheuernden Schwamm.
Wischen Sie das Gerät innen und außen mit einem feuchten Tuch ab.
Dies ist eine Fritteuse, die mit Heißluft funktioniert.Füllen Sie kein Öl oder Bratfett in die Pfanne.
Vorbereitung für den Gebrauch
Stellen Sie das Gerät auf eine stabile, waagerechte und ebene Arbeitsfläche. Stellen Sie das
Gerät nicht auf eine nicht hitzebeständige Oberfläche.
Setzen Sie den Korb richtig in die Pfanne ein.
Füllen Sie die Pfanne nicht mit Öl oder einer anderen Flüssigkeit.
Stellen Sie keine Gegenstände auf das Gerät.Dadurch wird der Luftstrom unterbrochen und das
Frittierergebnis beeinträchtigt.

16 HEISSLUFTFRITTEUSE
Verwendung
1. Stecken Sie den Netzstecker in eine geerdete Wandsteckdose.
2. Ziehen Sie die Pfanne vorsichtig aus der Heißluftfritteuse.
3. Geben Sie die Zutaten in den Korb.
4. Schieben Sie die Pfanne wieder in die Heißluftfritteuse.
5. Stellen Sie mit dem Temperaturregler die gewünschte Temperatur ein.
6. Legen Sie die für die Zutaten erforderliche Zubereitungszeit fest.
7. Um das Gerät einzuschalten, stellen Sie mit dem Timer die gewünschte Zubereitungszeit ein.
* Die Aufheizleuchte geht an.
* Der Timer zeigt die ablaufende Zubereitungszeit an.
* Beim Heißluftfrittieren geht die Aufheizleuchte von Zeit zu Zeit an und aus.Dies bedeutet,
dass das Heizelement ein- und ausgeschaltet wird, um die eingestellte Temperatur zu halten.
* Überschüssiges Öl aus den Zutaten sammelt sich im Boden der Pfanne.
8. Einige Zutaten müssen nach der Hälfte der Zubereitungszeit geschüttelt werden.Um die
Zutaten zu schütteln, ziehen Sie die Pfanne am Griff aus dem Gerät und schütteln Sie sie.
Schieben Sie danach die Pfanne wieder in die Heißluftfritteuse.
9. Wenn der Timer läutet, ist die eingestellte Zubereitungszeit abgelaufen.Ziehen Sie die Pfanne
aus dem Gerät und stellen Sie sie auf eine hitzebeständige Unterlage.
Hinweis: Sie können das Gerät auch von Hand ausschalten.Drehen Sie dazu den Timer-
Einstellknopf auf 0.
10.Prüfen Sie, ob die Zutaten gar sind.Wenn die Zutaten noch nicht gar sind, schieben Sie die
Pfanne einfach wieder in das Gerät und stellen Sie mit dem Timer ein paar zusätzliche
Minuten ein.
11.Leeren Sie den Korb in eine Schüssel oder auf einen Teller.
12.Wenn eine Portion Zutaten gar ist, können Sie mit der Heißluftfritteuse sofort eine weitere
Portion zubereiten.
Zutaten Temperatur Kochzeit Menge/Gewicht
Pommes frites Tiefgefroren 200°C 15-20 Minuten Max. 400g
Frisch 200°C 20-25 Minuten Max. 200g
Hähnchenügel und Hähnchens-
chenkel 200°C 12-18 Minuten 8 Stück
Garnelen 180°C 10-15 Minuten 750g
Spareribs 200°C 20-25 Minuten 450g
Tipps:
1. Die tiefgefrorenen Zutaten müssen aufgetaut werden, bevor sie in dem Gerät gekocht werden.
Empfohlene Temperatur: 80°C. Dauer: 8-12 Minuten
2. In einigen Fällen (z. B. während der Zubereitung der Pommes frites) ist es notwendig, die
Zutaten nach der Hälfte der Kochzeit zu schütteln oder umzudrehen.
3. Vor dem Kochen größeres Gemüse wie Zucchini oder Auberginen in Stücke schneiden.
4. Für die Zubereitung von nicht angeführten Zutaten die Temperatur und die Kochzeit je nach
Größe und Menge regulieren.
5. Es empfiehlt sich, die Zutaten jeweils in einer Schicht zu kochen, ohne sie
übereinanderzulegen. Wenn die Zutaten übereinandergelegt werden, muss die Kochzeit
verlängert und der Frittierkorb nach der Hälfte der Kochzeit geschüttelt werden.
Reinigung
- Reinigen Sie das Gerät nach jedem Gebrauch.
- Die Pfanne und die Platte sind mit einer Antihaftbeschichtung versehen.Verwenden

17
HEISSLUFTFRITTEUSE
Sie zur Reinigung keine Küchenutensilien aus Metall oder Scheuermittel, da dadurch die
Antihaftbeschichtung beschädigt werden kann.
- Ziehen Sie den Netzstecker aus der Steckdose und lassen Sie das Gerät abkühlen.
- Wischen Sie das Gerät außen mit einem feuchten Tuch ab.
- Reinigen Sie die Pfanne und die Platte mit heißem Wasser, etwas Spülmittel und einem nicht
scheuernden Schwamm.
STÖRUNGEN & LÖSUNG
Störung Mögliche Ursache Lösung
Die Heißluftfritteuse
funktioniert nicht.
Das Gerät ist nicht angeschlossen. Stecken Sie den Netzstecker in eine geerdete
Wandsteckdose.
Sie haben den Timer nicht eingestellt. Um das Gerät einzuschalten, stellen Sie mit dem
Timer die gewünschte Zubereitungszeit ein.
Die frittierten Zutaten
sind nicht gar.
Sie haben zu viele Zutaten in
die Pfanne gefüllt. Geben Sie kleinere Portionen in den Korb.
Die eingestellte Temperatur
ist zu niedrig.
Stellen Sie mit dem Temperaturregler
die nötige Temperatur ein.
Die Zubereitungszeit ist zu kurz. Stellen Sie mit dem Timer die nötige
Zubereitungszeit ein.
Die Zutaten sind ungleichmäßig
frittiert.
Einige Zutaten müssen nach der Hälfte
der Zubereitungszeit geschüttelt werden.
Zutaten, die quer übereinander liegen
(z.B. Pommes), müssen nach der Hälfte der
Zubereitungszeit geschüttelt werden.
Frittierte Snacks sind nicht
knusprig.
Sie haben Snacks verwendet, die für
eine herkömmliche Fritteuse vorgesehen
sind.
Verwenden Sie Ofen-Snacks oder bestreichen
Sie die Snacks mit etwas Öl, damit sie knuspriger
werden.
Ich kann die Pfanne nicht richtig
in das Gerät schieben.
Sie haben den Korb nicht richtig
in die Pfanne gesetzt.
Setzen sie die Pfanne richtig in das Gerät und
überfüllen Sie die Pfanne nicht.
Irgendetwas blockiert die Pfanne.
Es sind zu viele Zutaten im Korb.

18 HEISSLUFTFRITTEUSE
INFORMATION FÜR BENUTZER VON
HAUSHALTSGERÄTEN
Dieses Symbol auf dem Produkt oder seiner Verpackung weist darauf hin, dass dieses
Produkt nicht als normaler Haushaltsabfall zu behandeln ist. Stattdessen wird es der
entsprechenden Sammelstelle für das Recycling von Elektro- und Elektronikgeräten
übergeben. Indem Sie sicherstellen, dass dieses Produkt ordnungsgemäß entsorgt
wird, tragen Sie dazu bei, mögliche negative Auswirkungen auf die Umwelt und
die menschliche Gesundheit zu vermeiden, die ansonsten durch unsachgemäße
Handhabung des Produkts verursacht werden könnten. Das Recycling von Materialien
wird dazu beitragen, natürliche Ressourcen zu schonen. Für detailliertere Informationen
zum Recycling dieses Produkts wenden Sie sich bitte an Ihre örtliche Stadtverwaltung,
an Ihren Hausmüll-Entsorgungsdienst oder an das Geschäft, in dem Sie das Produkt
gekauft haben.
Aus dem Gerät tritt weißer Rauch
aus.
Sie bereiten fettige Zutaten zu.
Wenn Sie fettige Zutaten frittieren, gelangt eine
große Menge Öl in die Pfanne.
Das Öl erzeugt weißen Rauch und die Pfanne
heizt sich stärker als gewöhnlich auf.Dies wirkt
sich nicht auf das Gerät oder das Endergebnis
aus.
In der Pfanne benden sich Fettrücks-
tände von einem früheren Gebrauch. Denken Sie daran, die Pfanne nach jedem
Gebrauch sorgfältig zu reinigen.

19
HEISSLUFTFRITTEUSE
NOTIZIEN

20 FRITEUSE À AIR
VEUILLEZ LIRE ATTENTIVEMENT CE MANUEL AVANT TOUTE UTILISATION ET
CONSERVER CES INSTRUCTIONS POUR TOUTE RÉFÉRENCE ULTÉRIEURE.
Description générale
1. Entrée d’air
2. Voyant de chauffe
3. Thermostat réglable
4. Voyant d’alimentation
5. Minuteur
6. Plaque de friture
7. Cuve antiadhésive
8. Manche
Danger
- Ne plongez jamais l’appareil dans l’eau ou tout autre liquide et ne le rincez pas sous l’eau car il
contient des pièces électriques et des résistances.
- Évitez toute infiltration de liquide dans l'appareil afin d'éviter tout risque de choc électrique ou
de court-circuit.
- Ajoutez toujours les ingrédients à frire dans le panier afin d’éviter qu’ils entrent en contact avec
les résistances.
- Ne couvrez pas les entrées et les sorties d'air pendant que l'appareil est en marche.
- Ne remplissez pas la cuve d’huile afin d’éviter tout risque d’incendie.
- Ne touchez pas l’intérieur de l’appareil lorsqu’il est en marche.
Mise en garde
- Avant de brancher l’appareil, vérifiez que la tension indiquée sur l’appareil corresponde à la
tension supportée par le secteur local.
- N'utilisez jamais l'appareil si la prise, le cordon d'alimentation ou l'appareil lui-même sont
endommagés.
- Cet appareil n’est pas destiné à être utilisé par des personnes (y compris les enfants) ayant
des capacités physiques, sensorielles ou mentales réduites, ou manquant d’expérience et
de connaissances, à moins qu’elles aient reçu une supervision ou une instruction concernant
l’utilisation sûre de l’appareil par une personne responsable de leur sécurité.
- Assurez-vous que les enfants ne jouent pas avec l’appareil.
- Lors du fonctionnement et du refroidissement, gardez l'appareil et son cordon d'alimentation
hors de la portée des enfants âgés de moins de 8 ans.
- Gardez le cordon d'alimentation à l'écart des surfaces chaudes.
- Ne branchez pas l’appareil et ne touchez pas le panneau de contrôle avec les mains mouillées.
- Ne branchez l’appareil que sur une prise murale avec mise à la terre. Assurez-vous toujours
que la fiche est correctement insérée dans la prise murale.
- Cet appareil n'est pas destiné à être utilisé avec un minuteur externe ou un système de contrôle
séparé.
- Ne placez pas l'appareil sur ou à proximité de matériaux combustibles tels qu'une nappe ou des
Table of contents
Languages:
Other Kasanova Fryer manuals

Kasanova
Kasanova LEI003503NOC User manual

Kasanova
Kasanova NNE000011NOC User manual

Kasanova
Kasanova LEI003106NOC User manual

Kasanova
Kasanova LEI003032NOC User manual

Kasanova
Kasanova AEO000006NOC User manual

Kasanova
Kasanova NNE000007NOC User manual

Kasanova
Kasanova NEL000001NOC User manual

Kasanova
Kasanova LKP000002 User manual

Kasanova
Kasanova AEO000013NOC User manual

Kasanova
Kasanova NNE000014NOC User manual