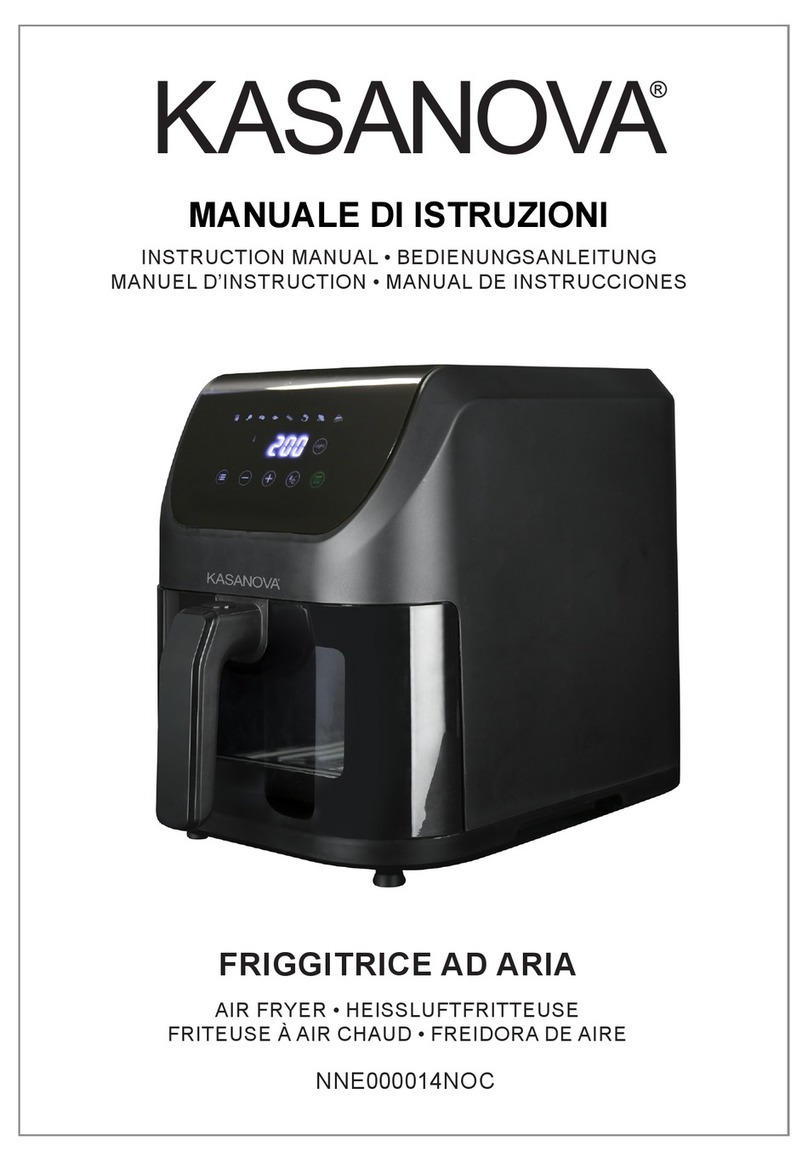
Kasanova NNE000011NOC User manual

FRIGGITRICE AD ARIA
AIR FRYER •HEIꞵLUFTFRITTEUSE
FRITEUSE À AIR CHAUD •FREIDORA DE AIRE
INSTRUCTIONS MANUAL • BEDIENUNGSANLEITUNG •
MANUEL D’INSTRUCTION • MANUAL DE INSTRUCCIONES
MANUALE DI ISTRUZIONI
NNE000011NOC

2FRIGGITRICE AD ARIA
Leggere attentamente tutte le istruzioni e conservarle per riferimento futuro.
ISTRUZIONI DI SICUREZZA
• Quando si utilizzano apparecchi elettrici, è
necessario seguire sempre le precauzioni di
sicurezza di base.
• Prima di collegare l’apparecchio all’alimentazione
di rete, vericare che la tensione indicata sulla
targhetta corrisponda a quella della rete locale.
• L’apparecchio non è destinato all’uso da parte di
persone con ridotte capacità siche, sensoriali o
mentali, o prive di esperienza e conoscenza, a meno
che non siano state supervisionate o istruite sull’uso
dell’apparecchio da una persona responsabile della
loro sicurezza.
• I bambini devono essere monitorati per assicurarsi
che non giochino con l’apparecchio.
• I bambini non devono eseguire la pulizia o la
manutenzione dell’apparecchio.
• Questo prodotto non è un giocattolo.
• Questo apparecchio non contiene parti riparabili
dall’utente. Se il cavo di alimentazione, la spina
o qualsiasi parte dell’apparecchio non funziona
correttamente o se è caduto o danneggiato, solo un
elettricista qualicato deve eseguire le riparazioni.
Riparazioni improprie possono esporre l’utente al
rischio di danni.
• Tenere l’apparecchio e il relativo cavo di
alimentazione fuori dalla portata dei bambini.
• Tenere l’apparecchio e il suo cavo di alimentazione

3
FRIGGITRICE AD ARIA
lontano da fonti di calore o spigoli vivi che potrebbero
causare danni.
• Tenere il cavo di alimentazione lontano da qualsiasi
parte dell’apparecchio che possa surriscaldarsi
durante l’uso.
• Tenere l’apparecchio lontano da altri apparecchi
che emettono calore. Tenere le mani, le dita, i
capelli e gli indumenti lontani dagli strumenti rotanti
dell’apparecchio.
• Non immergere l’apparecchio in acqua o altri liquidi.
• Non utilizzare l’apparecchio con le mani bagnate.
• Non lasciare l’apparecchio incustodito mentre è
collegato alla rete elettrica.
• Non rimuovere l’apparecchio dalla rete elettrica
tirando il cavo; spegnerlo e staccare la spina
manualmente.
• Non utilizzare l’apparecchio per scopi diversi da
quelli previsti. Non utilizzare accessori diversi da
quelli in dotazione.
• Non utilizzare questo apparecchio all’aperto.
• Non conservare l’apparecchio alla luce diretta del
sole o in condizioni di elevata umidità.
• Non spostare l’apparecchio mentre è in uso.
• Non toccate le parti dell’apparecchio che potrebbero
surriscaldarsi o i componenti riscaldanti per evitare di
ferirsi.
• Non utilizzare oggetti appuntiti o abrasivi con questo
apparecchio; utilizzare solo spatole in plastica o
legno resistenti al calore per evitare di danneggiare
la supercie antiaderente.
• Scollegare sempre l’apparecchio dopo l’uso e

4FRIGGITRICE AD ARIA
prima di qualsiasi pulizia o manutenzione da parte
dell’utente.
• Assicurarsi sempre che l’apparecchio si sia
rareddato completamente dopo l’uso prima di
eseguire qualsiasi pulizia o manutenzione o di
riporlo. Utilizzare sempre l’apparecchio su una
supercie stabile e resistente al calore, ad un’altezza
confortevole per l’utente.
• Questo apparecchio è destinato esclusivamente
all’uso domestico. Non deve essere utilizzato per
scopi commerciali.
• La supercie esterna dell’apparecchio potrebbe
surriscaldarsi durante il funzionamento.
Attenzione: Supercie calda - non toccare
la sezione calda o i componenti riscaldanti
dell’apparecchio.
Fare attenzione a non versare acqua sulla resistenza.
Avvertenza: Tenere l’apparecchio lontano da materiali
inammabili.
SPEGNIMENTO AUTOMATICO
La friggitrice ad aria è dotata di spegnimento automatico.
Questo può attivarsi se:
1. Il tempo di cottura impostato è scaduto. Il timer suonerà e lo spegnimento
automatico si attiverà, spegnendo la friggitrice ad aria.
2. Il cestello viene estratto dalla friggitrice ad aria durante la cottura. Una volta
reinserito il cestello, il timer continuerà il conto alla rovescia no allo scadere
del tempo di cottura.
Nota: Se è necessario spegnere la friggitrice ad aria prima che sia trascorso il
tempo di cottura impostato, spegnerla e scollegarla dalla rete elettrica.

5
FRIGGITRICE AD ARIA
COSE DA FARE E DA NON FARE
Da fare:
Prima dell’uso, controllare che il cestello di cottura antiaderente sia ben
inserito. In caso contrario, la friggitrice ad aria non funzionerà.
Prendere il vano di cottura solo dalla maniglia del cestello di cottura.
Prestare attenzione durante la rimozione del cestello di cottura antiaderente,
poiché potrebbe essere emesso vapore.
Da non fare:
Capovolgere il cestello antiaderente con il cibo ancora inserito, poiché l’olio in
eccesso potrebbe accumularsi sul fondo del cestello.
Coprire la friggitrice ad aria o i relativi ingressi d’aria, poiché ciò potrebbe
interrompere il usso d’aria e compromettere i risultati della cottura.
Riempire l’interno della friggitrice con olio o qualsiasi altro liquido.
Toccare l’interno della friggitrice durante o subito dopo l’uso, poiché diventa
molto caldo; prendere il cestello solo per la maniglia.
CURA E MANUTENZIONE
Prima di tentare qualsiasi operazione di pulizia o manutenzione, spegnere
e scollegare la friggitrice ad aria dalla rete elettrica e lasciarla rareddare
completamente.
PASSO 1: Pulire l’unità principale della friggitrice ad aria con un panno
morbido e umido e asciugare accuratamente.
PASSO 2: Pulire il cestello di cottura antiaderente a mano in acqua calda e
sapone, quindi risciacquare e asciugare accuratamente.
Non immergere l’unità principale della friggitrice ad aria in acqua o altri liquidi.
Non utilizzare mai detergenti o pagliette detergenti aggressivi o abrasivi per
pulire la friggitrice ad aria o i suoi accessori, poiché ciò potrebbe causare
danni.
Nota: La friggitrice ad aria deve essere pulita dopo ogni utilizzo.
Per iniziare
Rimuovere l’apparecchio dalla scatola.
Rimuovere eventuali imballaggi dall’apparecchio.
Collocare l’imballaggio all’interno della scatola e conservare o smaltire in
modo sicuro.

6FRIGGITRICE AD ARIA
Contenuto della scatola
Unità principale della friggitrice ad aria da 6,5 litri
Vano di cottura
Piatto di cottura rimovibile con rivestimento antiaderente
Manuale di istruzioni
Caratteristiche
220-240V~50Hz, 1600-1800W di potenza
Capacità 6,5 litri
Piatto di cottura rimovibile con rivestimento antiaderente
Impostazione della temperatura 80-200°C
60 minuti di cottura con timer
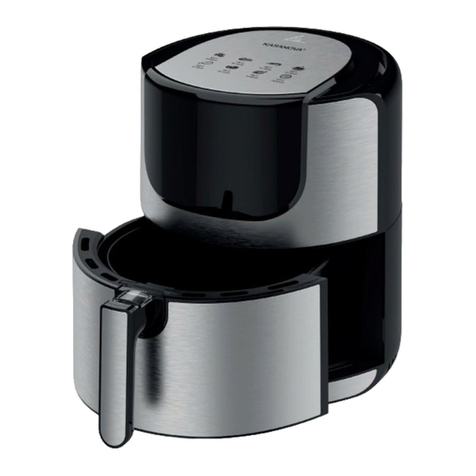
DESCRIZIONE DELLE PARTI
Pannello di
controllo
Unità principale
della friggitrice
ad aria calda
Cestello di
cottura
Maniglia del
cestello di
cottura
ISTRUZIONI PER L’USO
Introduzione
La friggitrice ad aria è un elettrodomestico che permette di cucinare in modo
più sano e di friggere senza perdere alcun sapore; estremamente versatile, è

7
FRIGGITRICE AD ARIA
perfetta per cucinare a basso contenuto di grassi. Grazie all’aria calda, cuoce
i cibi utilizzando poco o niente olio, il che signica che viene conservato tutto il
sapore dei piatti, ma con una cottura più sana.
Prima del primo utilizzo
PASSO 1: Vericare che la friggitrice ad aria sia spenta e scollegata dalla rete
elettrica.
PASSO 2: Pulire l’unità principale della friggitrice ad aria con un panno
morbido e umido e asciugare accuratamente.
PASSO 3: Pulire il cestello di cottura antiaderente a mano in acqua calda e
sapone, quindi risciacquarlo e asciugarlo accuratamente.
Non immergere l’unità principale della friggitrice ad aria in acqua o altri liquidi.
Non utilizzare mai detergenti o pagliette detergenti aggressivi o abrasivi per
pulire la friggitrice ad aria o i suoi accessori, poiché ciò potrebbe causare
danni.
PASSO 4: Posizionare l’unità principale della friggitrice ad aria su una
supercie stabile e resistente al calore, ad un’altezza confortevole per l’utente.
Nota: Quando si utilizza la friggitrice ad aria per la prima volta, è possibile che
venga emesso un leggero odore o fumo. Ciò è normale e non durerà molto.
Consentire una ventilazione suciente intorno alla friggitrice ad aria durante
l’uso. Si consiglia di far funzionare la friggitrice ad aria senza cibo per circa
10 minuti prima del primo utilizzo; questo eviterà che il fumo o l’odore iniziale
inuiscano sul gusto del cibo.
Assemblaggio della friggitrice ad aria
PASSO 1: Inserite il cestello di cottura antiaderente nel vano di cottura.
PASSO 2: Far scorrere il cestello nell’unità principale della friggitrice ad aria
per chiuderla.
Nota: La friggitrice ad aria viene fornita preassemblata. Il cestello deve essere
chiuso saldamente prima dell’uso, poiché in caso contrario il dispositivo non
funzionerà.
Utilizzo della friggitrice ad aria
PASSO 1: Collegare e accendere la friggitrice ad aria all’alimentazione di rete.
PASSO 2: Preriscaldare la friggitrice ad aria per circa 5 minuti toccando il
pulsante di accensione. La spia dell’indicatore di calore si illuminerà, per
indicare che la friggitrice ad aria si sta riscaldando. Una volta raggiunta la
temperatura desiderata, la spia di riscaldamento si spegne automaticamente.
PASSO 3: Rimuovere il cestello estraendolo dalla friggitrice ad aria utilizzando
la maniglia. Posizionare il cestello su una supercie piana stabile e resistente
al calore.
PASSO 4: Posizionare gli ingredienti nel cestello di cottura antiaderente,

8FRIGGITRICE AD ARIA
quindi far scorrere nuovamente il cestello nel corpo principale della friggitrice
ad aria per chiuderla.
PASSO 5: Impostare la temperatura di cottura richiesta per gli ingredienti,
aggiungere o diminuire la temperatura di cottura di 5°C alla volta. Tenere
premuto il pulsante per modicare rapidamente la temperatura. Intervallo di
controllo della temperatura: 80°C– 200°C.
PASSO 6: Impostare il tempo di cottura richiesto per gli ingredienti, aggiungere
o diminuire il tempo di cottura, un minuto alla volta. Tenere premuto il pulsante
per modicare rapidamente il tempo.
PASSO 7: Alcuni ingredienti potrebbero richiedere un mescolamento a metà
cottura. Rimuovere il cestello prendendo la maniglia dalla friggitrice ad aria.
Agitare delicatamente il cestello, quindi farlo scorrere nuovamente nell’unità
principale della friggitrice ad aria per chiuderla e continuare la cottura.
PASSO 8: Una volta completata la cottura e trascorso il tempo preimpostato,
controllare che gli ingredienti siano pronti aprendo con cautela il cestello.
Se gli ingredienti non sono cotti, chiudere il cestello e aumentare il tempo di
cottura utilizzando il timer. Se gli alimenti sono cotti, rimuovere il cestello di
cottura antiaderente e versare il contenuto in un recipiente o su un piatto. Se
gli alimenti sono grandi o fragili, utilizzare un paio di pinze resistenti al calore
(non incluse).
Nota: Preriscaldare sempre la friggitrice ad aria prima di iniziare la cottura
o in alternativa aggiungere circa 3-5 minuti al tempo di cottura. Se è
necessario modicare il tempo di cottura o la temperatura durante l’uso, è
suciente utilizzare il pannello di controllo per impostarli come desiderato e
la friggitrice ad aria regolerà automaticamente le impostazioni. Durante l’uso,
la spia dell’indicatore di calore si accende e si spegne per segnalare che sta
mantenendo la temperatura selezionata.
Attenzione: Non versare gli alimenti direttamente in un recipiente o su un
piatto, poiché l’olio in eccesso potrebbe accumularsi sul fondo del cestello e
venire versato sugli alimenti.
Avvertenza: La tensione è ancora presente anche quando il termostato è
ruotato in posizione o. Per spegnere in modo permanente la friggitrice ad
aria, scollegarla dall’alimentazione di rete.
Controllare che la friggitrice ad aria sia pulita e asciutta prima di riporla in un
luogo fresco e asciutto. Non avvolgere mai il cavo attorno alla friggitrice ad
aria; avvolgere il cavo senza stringerlo per evitare di danneggiarlo.
9
FRIGGITRICE AD ARIA
Menù Temperatura Tempo Pre-Riscalda-
mento
5 min
Avviso per
mescolare il
cibo
Pre-im-
postata Manuale Pre-im-
postato Manuale Pre-im-
postato
Pre-im-
postato
200℃ 80-200℃
15 minuti
1-60 minuti SI SI
200℃ 80-200℃ 25 minuti 1-60 minuti SI SI
190℃ 80-200℃ 6 minuti 1-60 minuti NO NO
190℃ 80-200℃ 10 minuti 1-60 minuti SI SI
200℃ 80-200℃ 20 minuti 1-60 minuti SI SI
160℃ 80-200℃
25 minuti 1 minuti-2
ore NO NO
200℃ 80-200℃
25 minuti 1 minuti-2
ore SI SI
200℃ 200℃ 12 minuti 1-60 minuti SI SI
70℃ 35-60℃ 8 ore
30 minu-
ti-24 ore NO NO
150℃ 80-200℃ 15 minuti 1-60 minuti NO NO
100℃ 65-100℃
30 minuti 1 minuti-8
ore NO NO

10 FRIGGITRICE AD ARIA
NOTE

11
FRIGGITRICE AD ARIA
TRATTAMENTO DEL DISPOSITIVO ELETTRICO ED
ELETTRONICO A FINE VITA
Il simbolo del cestino barrato riportato sull’apparecchio indica che il prodotto,
alla ne della propria vita utile, dovendo essere trattato separatamente dai
riuti domestici, deve essere conferito in un centro di raccolta dierenziata per
apparecchiature elettriche ed elettroniche oppure riconsegnato al rivenditore al
momento dell’acquisto di una nuova apparecchiatura equivalente. L’adeguata
raccolta dierenziata per l’avvio successivo dell’apparecchio al riciclaggio, al
trattamento e allo smaltimento ambientale compatibile contribuisce ad evitare
possibili eetti negativi sull’ambiente e sulla salute e favorisce il recupero dei
materiali di cui è composto.
L’utente è responsabile del conferimento dell’apparecchio a ne vita alle
appropriate strutture di raccolta. Per informazioni più dettagliate inerenti i
sistemi di raccolta disponibili, rivolgersi al servizio locale di smaltimento riuti,
o al negozio dove è stato eettuato l’acquisto.
Chiunque abbandona o cestina questo apparecchio e non lo riporta in un
centro di raccolta dierenziata per riuti elettrici - elettronici è punito con la
sanzione amministrativa pecuniaria prevista dalla normativa vigente in materia
di smaltimento abusivo di riuti.
Il presente manuale è disponibile in formato digitale richiedendolo al servizio
clienti al numero verde 800 015 748, attivo da lunedì a venerdì dalle 9 alle 18.

12 AIR FRYER
Please read all the instructions carefully and retain for future reference.
SAFETY INSTRUCTIONS
• When using electrical appliances, basic safety
precautions should always be followed.
• Check that the voltage indicated on the rating plate
corresponds with that of the local network before
connecting the appliance to the mains power supply.
• This appliance is not intended for use by persons
with reduced physical, sensory or mental capabilities,
or lack of experience and knowledge, unless
they have been given supervision or instruction
concerning use of the appliance by a person
responsible for their safety.
• Children should be supervised to ensure that they do
not play with the appliance.
• Children should not perform cleaning or user
maintenance.
• This appliance is not a toy.
• This appliance does not contain user serviceable
parts. If the power supply cord, plug or any part
of the appliance is malfunctioning or if it has been
dropped or damaged, only a qualied electrician
should carry out repairs. Improper repairs may place
the user at risk of harm.
• Keep the appliance and its power supply cord out of
the reach of children.
• Keep the appliance and its power supply cord away
from heat or sharp edges that could cause damage.
• Keep the power supply cord away from any parts of

13
AIR FRYER
the appliance that may become hot during use.
• Keep the appliance away from other heat emitting
appliances. Keep hands, ngers, hair and any
loose clothing away from the rotating tools of the
appliance.
• Do not immerse the appliance in water or any other
liquid.
• Do not operate the appliance with wet hands.
• Do not leave the appliance unattended whilst
connected to the mains power supply.
• Do not remove the appliance from the mains power
supply by pulling the cord; switch it o and remove
the plug by hand.
• Do not use the appliance for anything other than its
intended use. Do not use any accessories other than
those supplied.
• Do not use this appliance outdoors.
• Do not store the appliance in direct sunlight or in high
humidity conditions.
• Do not move the appliance whilst it is in use.
• Do not touch any sections of the appliance that
may become hot or the heating components of the
appliance, as this could cause injury.
• Do not use sharp or abrasive items with this
appliance; use only heat-resistant plastic or wooden
spatulas to avoid damaging the non-stick surface.
• Always unplug the appliance after use and before
any cleaning or user maintenance.
• Always ensure that the appliance has cooled
fully after use before performing any cleaning
or maintenance or storing away. Always use the

14 AIR FRYER
appliance on a stable, heat-resistant surface, at a
height that is comfortable for the user.
• This appliance is intended for domestic use only. It
should not be used for commercial purposes.
• The outer surface of the appliance may get hot
during operation.
Caution: Hot surface - do not touch the hot section
or heating components of the appliance.
Take care not to pour water on the heating element.
Warning: Keep the appliance away from ammable
materials.
AUTOMATIC SWITCH-OFF
The air fryer is tted with an automatic switch-o.
This may activate if:
1, The set cooking time has elapsed. The timer will sound and the automatic
switch-o will activate, turning o the air fryer.
2, The basket is pulled out from the air fryer during cooking. Once reinserted
the basket, the timer will continue to count down until the cooking time has
elapsed.
Note: If the air fryer needs to be turned o before the set cooking time has
elapsed, switch o and unplug it from the mains power supply.
DO’S AND DON’TS
Do:
Check that the non-stick coated cooking basket is securely tted before use.
Otherwise, the air fryer will not work.
Only hold the cooking compartment by the basket handle.
Take care when removing the non-stick coated cooking basket, as steam may
be emitted.
Do not:
Overturn the non-stick cooking basket with food inside, as excess oil may
collect at the bottom of the basket.

15
AIR FRYER
Cover the air fryer or its air inlets, as this will disrupt the airow and could
aect the cooking results.
Fill the inside of the air fryer with oil or any other liquid.
Touch the inside of the air fryer during or straight after use, as it gets very hot;
only hold the basket by the handle.
CARE AND MAINTENANCE
Before attempting any cleaning or maintenance, switch o and unplug the air
fryer from the mains power supply and allow it to fully cool.
STEP 1: Wipe the air fryer main unit with a soft, damp cloth and dry
thoroughly.
STEP 2: Clean the non-stick cooking basket in warm, soapy water, then rinse
and dry thoroughly.
Do not immerse the air fryer main unit in water or any other liquid.
Never use harsh or abrasive cleaning detergents or scourers to clean the air
fryer or its accessories, as this could cause damage.
Note: The air fryer should be cleaned after each use.
GETTING STARTED
Remove the appliance from the box.
Remove any packaging from the appliance.
Place the packaging inside the box and either store or dispose of safely.
IN THE BOX
6.5 Liter Air Fryer main unit
Cooking compartment
Removable non-stick coated cooking pan
Instruction manual
FEATURES
220-240V~50Hz, 1600-1800W power
6.5 liter capacity
Removable non-stick coated cooking pan
80-200°C temperature setting
60-minute timer cooking

16 AIR FRYER
DESCRIPTION OF PARTS
Control
panel Air fryer
main unit
Cooking
basket
Cooking
basket
handle
INSTRUCTIONS FOR USE
Introduction
Air fryer represents a healthier way to cook and to fry without losing any of the
avors; it is extremely versatile and is perfect for low fat cooking. Using hot air,
it cooks food using little or no oil, meaning that the taste is preserved, even
whilst maintaining a healthier lifestyle.
Before First Use
STEP 1: Check that the air fryer is switched o and unplugged from the mains
power supply.
STEP 2: Wipe the air fryer main unit with a soft, damp cloth and dry
thoroughly.
STEP 3: Clean the non-stick coated cooking basket in warm, soapy water,
then rinse and dry thoroughly.
Do not immerse the air fryer main unit in water or any other liquid.
Never use harsh or abrasive cleaning detergents or scourers to clean the air
fryer or its accessories, as this could cause damage.
STEP 4: Place the air fryer main unit onto a stable, heat-resistant surface, at a

17
AIR FRYER
height that is comfortable for the user.
Note: When using the air fryer for the rst time, a slight smoke or odor may be
emitted. This is normal and will soon subside. Allow for sucient ventilation
around the air fryer during use. It is advised to run the air fryer without food for
approx. 10 minutes before rst use; this will prevent the initial smoke or odor
from aecting the taste of the food.
Assembling the Air Fryer
STEP 1: Fit the non-stick coated cooking basket into the cooking
compartment.
STEP 2: Slide the cooking basket into the air fryer main unit to close it.
Note: The air fryer comes preassembled. The basket should be closed
securely before use, as not doing so will prevent it from working.
Using the Air Fryer
STEP 1: Plug in and switch on the air fryer at the mains power supply.
STEP 2: Preheat the air fryer for approx. 5 minutes by touching the power
button. The heat indicator light will illuminate, signaling that the air fryer is
heating up. Once it has reached the required temperature, the heat indicator
light will automatically turn o.
STEP 3: Remove the basket by pulling it out of the air fryer using the handle.
Place the basket onto a at stable, heat-resistant surface.
STEP 4: Place the ingredients into the non-stick coated cooking basket and
then slide the cooking basket back into the air fryer main body to close it.
STEP 5: Setting the cooking temperature required for the ingredients, add or
decrease cooking temperature 5°C at a time. Keeping the button held down
will rapidly change the temperature. Temperature control range: 80°C – 200°C.
STEP 6: Setting the cooking time required for the ingredients, add or decrease
cooking time, one minute at a time. Keeping the button held down will rapidly
change the time.
STEP 7: Some ingredients may require shaking halfway through the cooking
time. Remove the basket by pulling the handle out of air fryer. Shake the
basket gently and then slide it back into the air fryer main unit to close it and
continue to cook.
STEP 8: Once cooking is complete and the preset time has elapsed, check
whether the ingredients are ready by carefully opening the basket. If the
ingredients are not cooked, close the basket and use the timer to increase the
cooking time. If the food is cooked, remove the non-stick coated basket and
then pour the contents into a bowl or onto a plate. Use a pair of heat-resistant
tongs (not included) if the food is large or fragile.
Note: Always preheat the air fryer before starting to cook or alternatively add

18 AIR FRYER
approx. 3-5 minutes onto the cooking time. If the cooking time or temperature
setting needs to be changed during use, simply use the control panel to set it
as required and the air fryer will automatically adjust the settings. During use,
the heat indicator light will cycle on and o to signal that it is maintaining the
selected temperature.
Caution: Do not tip the food directly into a bowl or onto a plate, as excess oil
may collect at the bottom of the basket and leak onto ingredients.
Warning: Voltage is still present even when the thermostat is turned to the o
position. To permanently switch o the air fryer, turn it o at the mains power
supply.
Check that the air fryer is cool clean and dry before storing in a cool, dry
place. Never wrap the cord tightly around the air fryer; wrap it loosely to avoid
causing damage.
Menu Temperature Time
Pre-Hea-
ting
5 mins
Notice
for
mixing
food
Pre-Set Manual Pre-Set Manual Pre-Set Pre-Set
200℃ 80-200℃
15
mins 1-60 mins YES YES
200℃ 80-200℃ 25
mins 1-60 mins YES YES
190℃ 80-200℃ 6 mins 1-60 mins NO NO
190℃ 80-200℃ 10
mins 1-60 mins YES YES
200℃ 80-200℃ 20
mins 1-60 mins YES YES

19
AIR FRYER
160℃ 80-200℃
25
mins 1 min-2
hoursNO NO
200℃ 80-200℃
25
mins 1 min-2
hours YES YES
200℃ 200℃ 12
mins 1-60 mins YES YES
70℃ 35-60℃ 8 hours
30 mins-24
hours NO NO
150℃ 80-200℃ 15
mins 1-60 mins NO NO
100℃ 65-100℃
30
mins
1 min-8
hours NO NO
INFORMATION FOR USERS OF DOMESTIC APPLIANCES
This marking indicates that this product should not be disposed with other
household wastes throughout the EU. To prevent possible harm to the
environment or human health from uncontrolled waste disposal, recycle it
responsibly to promote the sustainable reuse of material resources. To return
your used device, please use the return and collection systems or contact
the retailer where the product was purchased. They can take this product for
environmental safe recycling.
This manual is available in digital format upon request to Customer Service by
calling the toll free number 800 015 748, available from Monday to Friday,
9.00 – 18.00.

20 HEIꞴLUFTFRITTEUSE
Bitte lesen Sie alle Anweisungen sorgfältig durch und bewahren Sie sie zum
späteren Nachschlagen auf.
SICHERHEITSHINWEISE
• Bei der Verwendung von Elektrogeräten sollten
immer grundlegende Sicherheitsmaßnahmen
beachtet werden.
• Vergewissern Sie sich, dass die auf dem Typenschild
angegebene Spannung mit der Spannung des
örtlichen Netzes übereinstimmt, bevor Sie das Gerät
an die Netzversorgung anschließen.
• Das Gerät darf nicht von Personen mit
eingeschränkten körperlichen, sensorischen oder
geistigen Fähigkeiten oder mangelnder Erfahrung
und Kenntnis verwendet werden, es sei denn, diese
werden von einer für ihre Sicherheit verantwortlichen
Person beaufsichtigt oder wurden von letzterer
angewiesen. Kinder sollten beaufsichtigt werden, um
sicherzustellen, dass sie nicht mit dem Gerät spielen.
• Kinder sollten keine Reinigungs- oder
Benutzerwartungsarbeiten durchführen.
• Dieses Gerät ist kein Spielzeug.
• Dieses Gerät enthält keine vom Benutzer zu
wartenden Teile. Wenn das Stromkabel, der
Stecker oder irgendein Teil des Geräts nicht
richtig funktioniert oder wenn es heruntergefallen
oder beschädigt worden ist, sollte nur ein
qualizierter Elektriker die Reparatur durchführen.
Unsachgemäße Reparaturen können den Benutzer
in Gefahr bringen.
• Halten Sie das Gerät und sein Stromkabel außerhalb
Table of contents
Languages:
Other Kasanova Fryer manuals

Kasanova
Kasanova LEI003005NOC User manual

Kasanova
Kasanova LKP000002 User manual

Kasanova
Kasanova NNE000021NOC User manual

Kasanova
Kasanova LEI003106NOC User manual

Kasanova
Kasanova AEO000006NOC User manual

Kasanova
Kasanova NNE000014NOC User manual

Kasanova
Kasanova FRIGGITRICE AD ARIA 4L User manual

Kasanova
Kasanova LEI003503NOC User manual

Kasanova
Kasanova da Benedetta NNE000024NOC User manual

Kasanova
Kasanova NEL000001NOC User manual