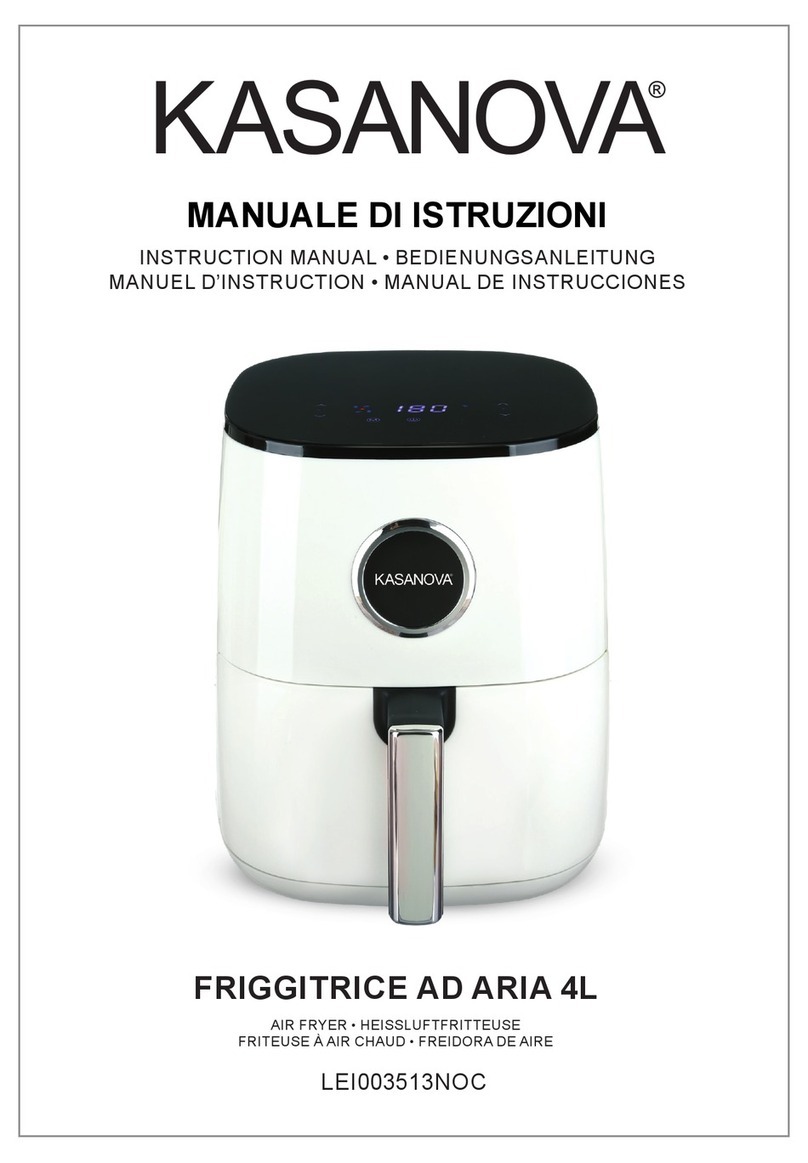
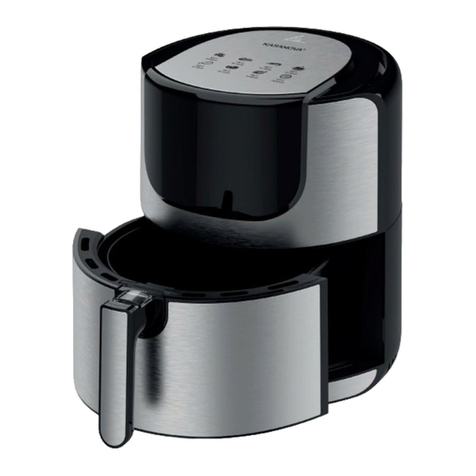
Kasanova LEI003503NOC User manual

FRIGGITRICE AD ARIA 4L
AIR FRYER • HEISSLUFTFRITTEUSE
FRITEUSE À AIR CHAUD • FREIDORA DE AIRE
INSTRUCTION MANUAL • BEDIENUNGSANLEITUNG
MANUEL D’INSTRUCTION • MANUAL DE INSTRUCCIONES
MANUALE DI ISTRUZIONI
LEI003503NOC

2FRIGGITRICE AD ARIA 4L
Leggere attentamente le istruzioni prima dell’uso. Conservare il manuale per eventuali
consultazioni future.
STRUTTURA DEL PRODOTTO:
1. Cover
2. Pannello
3. Aumento temperatura
4. Riduzione temperatura
5. Menu
6. Tasto ON/OFF
7. Mantenimento calore
8. Aumento tempo
9. Riduzione tempo
10. Uscita dell’aria
11. Cavo di alimentazione
12. Griglia
13. Cestello
AVVERTENZE:
-Leggere attentamente le istruzioni prima di usare il prodotto.
Conservare il manuale per eventuali consultazioni future.
- Non riempire il cestello con olio per evitare il rischio di incen-
dio;
- L’apparecchio contiene componenti elettronici e resistenze.
Non immergerlo in acqua o altri liquidi;
- Non coprire l’entrata e l’uscita dell’aria durante il funzio-
namento. Non toccare l’interno dell’apparecchio per evitare
bruciature;
- Le superci potrebbero diventare calde durante l’uso. Non
toccarle, aerrare sempre il manico per rimuovere il cestello.
- Durante la frittura ad aria calda, dall’uscita dell’aria potrebbe
fuoriuscire del vapore caldo. Tenere le mani e il viso a debita
distanza dal vapore e dall’uscita dell’aria. Prestare attenzione
al vapore caldo quando si rimuove il cestello dal prodotto.
AVVERTENZE DI SICUREZZA:
- Tenere la spina pulita per evitare danni a persone e cose;
- Non trascinare, premere o lasciar pendere il cavo lungo

3
FRIGGITRICE AD ARIA 4L
bordi taglienti e tenerlo lontano da fonti di calore e umidità; non
inserire corpi estranei metallici all’interno dell’unità per evitare
danni. Se il cavo è danneggiato, farlo sostituire dal produttore,
il reparto manutenzione o da altri tecnici qualicati.
- Non staccare la spina con le mani bagnate per evitare il ri-
schio di scosse elettriche;
- Collegare l’apparecchio correttamente per evitare il rischio di
scosse elettriche, cortocircuiti e altri pericoli;
- Non immergere l’apparecchio, il cavo o la spina in acqua o
altri liquidi per evitare malfunzionamenti.
- Non posizionare l’apparecchio vicino a gas esplosivi e/o in-
ammabili.
- Non posizionare l’apparecchio vicino a materiale inammabi-
le, come tovaglie, tende e altro per evitare il rischio di incendio;
- Durante il funzionamento, posizionare la friggitrice ad aria su
un piano e lasciare almeno 30 cm di spazio attorno, mantenen-
do una certa distanza dalla parete, dagli armadi e da materiali
inammabili.
-Questo apparecchio non può essere azionato tramite timer
esterno o un sistema di controllo remoto indipendente.
- Non usare l’apparecchio all’esterno.
- Questo apparecchio non è destinato all’uso da parte di per-
sone (bambini inclusi) con ridotte capacità siche, sensoriali o
mentali, o con scarsa esperienza e conoscenza, a meno che
non siano sorvegliate o istruite sull’uso dell’apparecchio da
una persona responsabile della loro sicurezza.
- Sorvegliare i bambini per assicurarsi che non giochino con
l’apparecchio.
- Tenere l’apparecchio fuori dalla portata dei bambini per evita-
re lesioni; è necessaria una stretta sorveglianza quando l’ap-
parecchio è usato vicino a bambini;
- Questo apparecchio è da intendersi solo per uso domestico.

4FRIGGITRICE AD ARIA 4L
PRIMA DELL’USO
- Rimuovere tutti i materiali di imballaggio.
- Rimuovere eventuali etichette dall’apparecchio.
- Pulire accuratamente il cestello con acqua calda, sapone liquido per piatti e una spu-
gna non abrasiva.
- Pulire l’interno e l’esterno dell’apparecchio con un panno umido.
- Posizionare l’apparecchio su una supercie piana, stabile e resistente al calore.
- Posizionare correttamente il cestello all’interno della friggitrice nché non si sente un
clic.
- Questo apparecchio funziona ad aria calda. Non riempire il cestello con olio.
- Non coprire l’apparecchio per non interrompere il usso d’aria e non inuire sul risulta-
to di cottura.
UTILIZZO
1. Collegare l’apparecchio a una presa dotata di messa a terra.
2. Premere il pulsante di accensione per accendere il prodotto.
3. Premere i pulsanti o per regolare la temperatura.
4. Premere il pulsante per impostare il tempo di preriscaldamento per 5 minuti.
Premere il pulsante per iniziare il preriscaldamento.
5. Una volta terminato il preriscaldamento, rimuovere il cestello dall’apparecchio. Inseri-
re il cibo nel cestello. Riposizionare il cestello nella friggitrice.
a) Non usare il prodotto senza il cestello.
b) Non toccare il cestello dopo l’uso perché potrebbe essere molto caldo. Toccare il
pannello di controllo e aerrare il manico per rimuovere il cestello.
6. Premere il pulsante per selezionare il programma di cottura desiderato. Re-
golare la temperatura, premendo i tasti o , rispettivamente per aumentare o
diminuire la temperatura; impostare il tempo di cottura, premendo i tasti o ,
rispettivamente per aumentare o diminuire il tempo.
7. Premere ancora per avviare il prodotto.
8. Trascorso il tempo di cottura, si sentono 5 “bip”. Rimuovere il cestello e posizionarlo
su una supercie piana resistente al calore.
9. Controllare che il cibo sia cotto. Se non lo è, reinserire il cestello nell’apparecchio e
farlo andare per qualche altro minuto.
Nota: Se si rimuove il cestello durante la cottura e si riposiziona all’interno dell’apparec-
chio, l’apparecchio riparte automaticamente dalla modalità prestabilita per terminare la
cottura.
10. Se il cibo è cotto, rimuovere il cestello. Spingere in avanti il coperchio protettivo, pre-
mere il pulsante di rilascio e rimuovere il cestello. Non inclinare o rovesciare il cestello
per evitare che gli olii raccolti sul fondo deuiscano verso il cibo.
11. Versare il cibo nel piatto. Una volta terminata la cottura, il prodotto è subito pronto
per un altro ciclo di cottura.

5
FRIGGITRICE AD ARIA 4L
CONSIGLI:
- Aggiungere un po’ d’olio per un risultato più croccante.
- Scuotere il cestello a metà cottura per ottenere una cottura più omogenea. Per farlo,
rimuovere il cestello aerrandolo per il manico e scuoterlo. Quindi reinserire il cestello
nell’apparecchio. Non premere il pulsante di rilascio del cestello durante quest’opera-
zione.
FUNZIONAMENTO DEL PANNELLO DI CONTROLLO
1. Accensione/spegnimento
Premere il pulsante ON/OFF per avviare o spegnere l’apparecchio.
2. Selezione del programma di cottura
Premere il pulsante per scegliere tra i 7 programmi preimpostati.
3. Funzione “mantenimento calore” no a 2 ore
Dopo la cottura, premere il pulsante per mantenere il cibo al caldo no a due ore.
4. Aumento del tempo o della temperatura di cottura
Premere il pulsante per regolare il timer no a 60 minuti. Ogni volta che si preme il
pulsante, il tempo aumenta di 1 minuto alla volta.
5. Riduzione del tempo o della temperatura di cottura
Premere il pulsante per regolare il timer no a 60 minuti. Ogni volta che si preme il
pulsante, il tempo diminuisce di 1 minuto alla volta.
6. Icona temperatura
7. Icona tempo
8. Indicatore di funzionamento

6FRIGGITRICE AD ARIA 4L
9. Visualizzazione tempo e temperatura
Il display visualizzerà o il tempo o la temperatura.
10.
TABELLA DI COTTURA:
7 programmi preimpostati, tempo e temperatura preimpostati
Program-
ma di
cottura
Valore
predenito
Patatine
fritte
Costolette Gambe-
retti
Torta Cosce di
pollo
Carne Pesce
Tempo in
minuti
15 20 15 20 40 25 20 20
Tempera-
tura °C
180 200 180 160 160 180 160 180
CONSIGLI
I tempi di cottura sono solo indicativi. È possibile regolare il tempo e la temperatura di
cottura in base alla quantità di cibo.
PULIZIA E MANUTENZIONE
1. Prima della pulizia, scollegare l’apparecchio e aspettare che si rareddi. Non toccare
la supercie nché non si è rareddata.
2. Non immergere l’apparecchio in acqua o altri liquidi.
3. Pulire la supercie del cestello e della griglia con acqua calda, detersivo liquido per
piatti e una spugna non abrasiva. Se dello sporco resta attaccato al cestello o al fondo
della friggitrice, riempire il cestello con acqua calda e un po’ di detersivo per i piatti.
Inserire la griglia nel cestello e lasciarli in ammollo per circa 10 minuti.
4. Utilizzare un panno umido per pulire la supercie della friggitrice. Non utilizzare
detergenti aggressivi e abrasivi, pagliette o spugne abrasive che potrebbero
danneggiare l’apparecchio.
5. Se non si usa il prodotto per un tempo prolungato, pulirlo e riporlo in un luogo fresco
e asciutto.
DATI TECNICI
1. Tensione nominale: 220V-240V~
2. Frequenza nominale: 50-60Hz
3. Potenza nominale: 1250W
4. Capacità del cestello: 4.0L
5. Peso netto: 3.4KG
6. Dimensioni del prodotto:250*330*300mm

7
FRIGGITRICE AD ARIA 4L
RISOLUZIONE PROBLEMI
Problema Causa possibile Soluzione
L’apparecchio non funziona L’apparecchio non è stato collegato corretta-
mente.
Collegare l’apparecchio a una presa dotata di
messa a terra.
Non è stato selezionato nessun programma di
cottura.
Selezionare il programma di cottura desiderato,
poi premere il pulsante ON/OFF.
Non è stato premuto il pulsante ON/OFF dopo
aver selezionato il programma di cottura.
Premere il pulsante ON/OFF.
Il cibo non è cotto al termine
della cottura
C’è troppo cibo all’interno del cestello. Dividere gli ingredienti in più porzioni.
La temperatura selezionata è troppo bassa. Aumentare la temperatura e continuare la
cottura.
Il tempo di cottura selezionato non è sufciente. Aumentare il tempo e continuare la cottura.
Il cibo non viene cotto
uniformemente
Per alcuni ingredienti è necessario scuotere il
cestello a metà cottura.
A metà cottura, rimuovere il cestello e scuoterlo.
Riposizionarlo nella friggitrice ad aria.
Il cibo cotto non risulta
croccante
Alcuni cibi potrebbero aver bisogno dell’aggiunta
di olio.
Aggiungere un po’ di olio al cibo.
Il cestello non entra facil-
mente nella friggitrice
Il cestello è troppo pesante perché troppo pieno
di cibo.
Il cibo all’interno del cestello non deve superare
la capacità massima.
Il cestello non è posizionato correttamente
all’interno del recipiente.
Spingere il cestello all’interno del recipiente.
Il manico è bloccato. Posizionare il manico in posizione orizzontale.
Dall’apparecchio fuoriesce
del fumo
Si sta friggendo cibo oleoso. È normale.
Il recipiente contiene residui grassi degli alimenti
cucinati in precedenza.
Pulire il cestello e il recipiente dopo l’uso.
Il presente manuale è disponibile in formato digitale richiedendolo al servizio clienti al numero verde 800 015 748,
attivo da lunedì a venerdì dalle 9 alle 18.
TRATTAMENTO DEL DISPOSITIVO ELETTRICO ED ELETTRONICO A FINE VITA
Informazione agli utenti per il corretto smaltimento del prodotto ai sensi della Direttiva Europea 2002/96/CE e del D.lgs N.
151/2005
Caro consumatore,
è importante ricordarti che, come buon cittadino, avrai l’obbligo di smaltire questo prodotto non come riuto urbano, ma
di eettuare una raccolta separata. Il simbolo sopra indicato e riportato sull’apparecchiatura indica che il riuto deve essere
oggetto di “raccolta separata”. I dispositivi elettrici ed elettronici non devono essere considerati riuti domestici. Pertanto,
il prodotto alla ne della sua vita utile, non deve essere smaltito insieme ai riuti urbani. L’utente dovrà conferire (o far
conferire) il riuto ai centri di raccolta dierenziata predisposti dalle amministrazioni locali, oppure consegnarlo al rivenditore
contro l’acquisto di una nuova apparecchiatura di tipo equivalente. La raccolta dierenziata del riuto e le successive
operazioni di trattamento, recupero e smaltimento favoriscono la produzione di apparecchiature con materiali riciclati e
limitano gli eetti negativi sull’ambiente e sulla salute eventualmente causati da una gestione impropria del riuto.
Grazie!
8AIR FRYER
Please carefully read the instruction manual, before using the appliance. Keep the ma-
nual for reference in future.
PRODUCT STRUCTURE DIAGRAM:
1. Top cap
2. Upper shell
3. Temperature increase
4. Temperature decrease
5. Menu
6. Power ON/OFF
7. Keep warm
8. Time increase
9. Time decrease
10. Air outlet
11. Power cable
12. Fry tray
13. Fry pot
CAUTIONS:
- Please carefully ready the instruction manual, before using
the appliance. Keep the manual for reference in future;
- Never ll the pot with oil, or it may cause a re hazard;
- The appliance contains electronic elements and heating
elements. Do not put it in water or wash by water;
- Do not cover the air inlet and outlet on the operating pro-
cess. Do not touch the inside of the appliance to avoid burns
and scalding;
- The surfaces are liable to get hot during use. Do not touch
the hot surfaces. Use handle or knob.
- High temperature air will ow out through the outlet with
the appliance is in use. Please keep a safe distance. Do not
touch the hot surfaces, Do not close to the air outlet. When
pulling out the pot, please be careful of high temperature air.
SECURITY WARNING:
- Please keep the plug clean to avoid disaster;
- Do not damage, strongly pull or twist the power cord, use it

9
AIR FRYER
carry heavy loads, or transform it, let cord hang over edge of
table of counter, or touch hot surfaces, to avoid electric shock,
re and other accidents. Damaged power cord must be repla-
ced by the manufacturer, its service agent or similarly qualied
persons in order to avoid a hazard.
- Please do not plug and unplug with wet hands, otherwise it
may cause electric shock;
- Plug tightly, otherwise, it may cause electric shock, short cir-
cuit, smoking, sparking and other dangers;
- Do not immerse the appliance, body, cord or plug in water or
other liquid, to protect against electrical shock and aecting the
function.
- Do not place the appliance in the presence of explosive and /
or ammable fumes.
- Do not place the appliance in the presence of explosive and /
or ammable fumes.
- Do not place the appliance on or near the ammable ma-
terial, such as tablecloths, curtains and others, to avoid re
hazard;
- Be sure to use on a heat resistant and even surface, keep the
appliance at least 30cm away the wall, furniture or other am-
mables;
-The appliances are not intended to be operated by means of
an external timer or separate remote-control system.
- Do not use the appliance for other than intended use;
- This appliance is not intended for use by persons (including
children) with reduced physical, sensory or mental capabilities,
or lack of experience and knowledge, unless they have been
given supervision or instruction concerning use of the applian-
ce by a person responsible for their safety.
- Children being supervised not to play with the appliance.
- Keep the appliance away from children to avoid scalding,

10 AIR FRYER
electric shock and/or other injuries; close supervision is ne-
cessary when the appliance is used by or near children;
- This appliances is intended for Household Use Only.
BEFORE THE FIRST USE
- Remove all packaging material.
- Remove an stickers or labels from the appliance
- Thoroughly clean the basket and the pan with hot water, some washing-up liquid and a
non-abrasive sponge.
- Wipe the inside and outside of the appliance with a moist cloth.
- Place the appliance on a stable, horizontal and level surface. Do not place the applian-
ce on non-heat-resistant surface. The appliance with good air circulation and away from
hot surface, and any combustible materials.
- Place the basket in the pan properly, you hear the sound signal “tang”. Slide the pan
back to the appliance.
- This is an appliance that works on hot air. Don not ll the pan with oil or frying fat.
- Do not put anything on top of the appliance. This disrupts the airow and aects the
hot air frying result.
USE
1. The power plug should be plugged into a power outlet that is grounded.
2. Touch to turn on the product.
3. Touch Temperature or to set the current temperature.
4. Touch Time to set the preheating time for 5 minutes. And touch to begin
preheating. After the preheating, you can conduct the next step.
5. When the preheating time counts down to zero, take out the pan from the product.
And put the food into the frying basket
Attach the frying basket to the pan and slide the pan into the product.
a) Do not use the product without the frying basket inside.
b) Do not touch the pot during and shortly after the use because the pot will
become very hot. Touch the control panel or grasp the handle instead.
6. Touch to select an appropriate cooking mode. Set the temperature via the
Temperature or ; Set the time via the Time or
7. Touch again to start the product.
8. When 5 times sounds “didi”, the set time has elapsed. Take out the pot and put it
on a heat-resistant at.
9. Check whether the food is done. |f the food hasn’t been prepared, slide the pot
into the product and set few more minutes for the timer.
Note: Pull out the pot and then into the pot during cook, it auto-rerunning before mode to

11
AIR FRYER
continue the remains time till nish.
10. If the food is prepared, pull out the pot. Push forward the protective cover, press the
release button and lift the frying basket from the pan. Do not tilt or turn the product
upside down, because in this way the collected oils at the bottom may ow to the
food.
11. Place the food in a frying basket onto a bowl or plate. When a batch of food is
done, the product is instantly ready for preparing another batch.
TIPS:
- Add some oil on the ingredients for a crispy result..
- Shaking ingredients halfway during the preparation time optimize the end result and can
help prevent unevenly fried ingredients. To shake the ingredients, pull the pan out of the
appliance by the handle and shake it. Then slide the pan back into the appliance. Do not
press the basket release button during shaking.
DETAILED CONTROL PANEL OPERATION
1. Power /start control
Touch it to control power ON/OFF or Start and Cancel cooking
2. Menu choose control
Touch it to choose dierent pre-set 7 quick menu
3. 2 Hours keep warm function
Touch it during cooking, after cooking over, it’ll auto-into keep warm function with 2 hours
4. Time or Temperature increase control
Touch it to control time from 0 to 60mins. 1min/step
5. Time or Temperature increase control
Touch it to control time from 0 to 60mins.1min/step
6. Temperature mark
7. Time mark

12 AIR FRYER
8. Working Indicater mark
9. Time and temperature show screen mark
Time and temperature will beshow only one and change around 5s
10.
PRE-SET 1 COOKING DEFAULT:
7 quick cooking menu with recommend time and temperature below
Menu Default Fries Ribs Shrimp Cake Drumstick Meat Fish
Time
min
15 20 15 20 40 25 20 20
Tempera-
ture °C
180 200 180 160 160 180 160 180
TIPS
Recommend time only for reference. Actually cooking need adjust the time or
temperature based on food quantity.
CARE AND MAINTENANCE
1. Before cleaning, turn the timer to 0, unplug the appliance and waiting for the
appliance to cool down. Don’t touch the surface before cooling.
2. Never immerse the device in water or any other liquid. The device is not dishwasher
proof.
3. Clean the surface of the fryer pot and tray with with hot water, some washing-up liquid
and a non-abrasive sponge. If dirt is stuck to the basket or the bottom of the pan, ll the
pan with hot water with some washing-up liquid. Put the tray in the pot and let the pot
and tray soak for about 10 minutes.
4. Used damp cloth to wipe the surface of the fryer. Never use harsh and abrasive
cleaners, souring pad or steel wool, which damages the device.
5. If you do not use the appliance for a long time, please clean it, and store it in a cool
and dry place.
TECHNICAL SPECIFICATIONS:
1. Rated Voltage: 220V-240V~
2. Rated frequency: 50-60Hz
3. Rated power: 1250W
4. Fry basket capacity: 4.0L
5. Net weight: 3.4KG
6. Product Size:250*330*300mm

13
AIR FRYER
TECHNICAL SPECIFICATIONS
Problem Possible Cause Solution
Does not work Power cord has not been inserted into the power
socket
Closely insert the power cord into the grounded
power socket.
Did not set the cook model Click the model selection button to select appre-
ciate cook model, then click the ON/OFF button
Didn’t click the ON/OFF button after select cook
model.
Click the ON/OFF button
Food is rare when time out Too much food in the basket Fry food in turns
Temperature set is too low Set to an appropriate temperature, re-fry food.
Cooking time is short Set an appropriate cooking time, re-fry food.
Did not fry food evenly Certain foods need to be shaken in the middle
of cooking.
In the middle of cooking process, pull the pot out
and shake it to separate the overlapped food
material, then push the pot back to continue.
Fried food is not crisp Some food materials have to be fried with oil Plush a thin layer of oil on the surface of the food
rst, then start to fry them.
Can not smoothly push the
pot back to appliance
The pot with too many food materials is too
heavy
The food material in the basket can not exceed
the max. line.
The basket is not correctly placed in the pot. Press the basket into the pot.
Handle bar stuck Place the handle bar in horizontal position.
Smoking Frying oily food Normal phenomenon.
Fryer contain oil from last use Please clean the pot and basket after use.
This manual is available in digital format upon request to Customer Service by calling the toll free number 800
015 748, available from Monday to Friday, 9.00 – 18.00.
INFORMATION FOR USERS OF DOMESTIC APPLIANCES
This marking indicates that this product should not be disposed with other household wastes throughout the
EU. To prevent possible harm to the environment or human health from uncontrolled waste disposal, recycle
it responsibly to promote the sustainable reuse of material resources. To return your used device, please use
the return and collection systems or contact the retailer where the product was purchased. They can take this
product for environmental safe recycling.

14 HEISSLUFTFRITTEUSE
Bitte lesen Sie die Bedienungsanleitung aufmerksam durch, bevor Sie das Produkt
verwenden. Bewahren Sie die Anleitung zum späteren Nachschlagen auf.
KOMPONENTEN DES GERÄTS:
1. Obere Abdeckung
2. Gehäuse
3. Temperaturerhöhung
4. Temperaturverminderung
5. Programm
6. EIN/AUS-Taste
7. Warmhaltetaste
8. Zeitverlängerung
9. Zeitverkürzung
10. Luftauslass
11. Stromkabel
12. Frittierrost
13. Garfach
VORSICHT:
- Bitte lesen Sie die Bedienungsanleitung aufmerksam
durch, bevor Sie das Produkt verwenden. Bewahren Sie die
Anleitung zum späteren Nachschlagen auf.
- Das Garfach niemals mit Öl befüllen: es besteht Brandge-
fahr.
- Das Gerät enthält elektronische Komponenten und Heize-
lemente. Nicht in Wasser tauchen oder mit Wasser abwa-
schen.
- Luftein- und Luftauslassönung während des Betriebs
immer frei halten. Die Innenseiten des Geräts während des
Betriebs nicht berühren.
- Die Oberächen können während des Gebrauchs sehr
heiß werden. Heiße Oberächen nicht berühren. Gri oder
Knauf verwenden.
- Wenn das Gerät in Betrieb ist, strömt heiße Luft aus den
Luftauslassönungen. Bitte Sicherheitsabstand einhalten.
Berühren Sie die heißen Oberächen nicht und halten Sie
sich von den Luftauslassönungen fern. Achten Sie beim
Herausziehen des Garfachs auf die austretende Heißluft.

15
HEISSLUFTFRITTEUSE
SICHERHEITSHINWEISE:
Bitte den Stecker sauber halten, um Schäden zu vermeiden.
Das Netzkabel nicht beschädigen, nicht daran ziehen, nicht
verdrehen, keine Lasten darauf stellen, nicht verändern.
Lassen Sie das Kabel nicht über Tischkanten hängen und
halten Sie es fern von heißen Oberächen; es besteht die
Gefahr von Stromschlag, Brand und anderen Unfällen.
Beschädigte Netzkabel sind, um Gefahren zu vermeiden,
vom Hersteller, dessen Kundendienst oder einer Person mit
ähnlicher Qualikation zu ersetzen.
- Bitte verwenden Sie den Stecker nicht mit nassen Händen,
es besteht die Gefahr eines Stromschlags.
- Stecker korrekt in die Steckdose einführen; es besteht die
Gefahr von Stromschlägen, Kurzschlüssen, Rauchentwi-
cklung, Funkenbildung und anderen Gefahren.
- Tauchen Sie Gerät, Gehäuse, Kabel oder Stecker nicht in
Wasser oder andere Flüssigkeiten; es besteht die Gefahr
von Stromschlägen und Funktionsstörungen.
- Gerät fern von explosiven und/oder brennbaren Dämpfen
aufstellen.
- Gerät fern von explosiven und/oder brennbaren Dämpfen
aufstellen.
- Gerät fern von brennbaren Gegenständen wie Tisch-
decken, Vorhängen und Ähnlichem aufstellen; es besteht
Brandgefahr.
- Stellen Sie das Gerät auf einer hitzebeständigen und
ebenen Fläche auf und halten Sie einen Abstand von min-
destens 30 cm zu Wänden, Möbeln und anderen brennba-
renGegenständen ein.
- Dieses Gerät ist nicht für den Betrieb mit einer externen
Zeitschaltuhr oder einer separaten Fernbedienung vorge-
sehen.

16 HEISSLUFTFRITTEUSE
- Verwenden Sie das Gerät nur für den vorgesehenen
Zweck.
- Dieses Gerät ist nicht zur Verwendung durch Personen
(einschließlich Kinder) mit eingeschränkten körperlichen,
sensorischen oder geistigen Fähigkeiten oder mangelnder
Erfahrung und Kenntnis bestimmt, es sei denn, sie werden
von einer für ihre Sicherheit verantwortlichen Person beauf-
sichtigt oder wurden von letzterer angewiesen.
- Beaufsichtigen Sie Kinder: das Gerät ist kein Spielzeug.
- Bitte halten Sie das Gerät von Kindern fern und beauf-
sichtigen Sie Kinder bei der Verwendung des Geräts; es
besteht die Gefahr von Verbrennungen, Stromschlägen und/
oder anderen Verletzungen.
- Dieses Gerät ist nur für den normalen Hausgebrauch be-
stimmt.
VOR DEM ERSTEN GEBRAUCH
- Entfernen Sie alle Verpackungsmaterialien.
- Entfernen Sie alle Aufkleber oder Etiketten vom Gerät.
- Reinigen Sie Korb und Garfach gründlich mit einem mit heißem Wasser und etwas
Spülmittel angefeuchteten nicht scheuernden Schwamm.
- Wischen Sie das Gerät innen und außen mit einem feuchten Tuch ab.
- Stellen Sie das Gerät auf eine stabile, waagerechte und ebene Arbeitsplatte. Stellen
Sie das Gerät auf einer hitzebeständigen Oberäche auf. Stellen Sie das Gerät fern
von heißen Oberächen und brennbaren Materialien so auf, dass eine gute Luftzirkula-
tion gewährleistet ist.
- Setzen Sie den Korb richtig in das Garfach ein, es muss ein entsprechendes Geräus-
ch zu hören sein. Schieben Sie das Garfach wieder in das Gerät.
- Dies ist ein Gerät, das mit Heißluft gart. Füllen Sie kein Öl oder Bratfett in das Garfa-
ch.
- Stellen Sie keine Gegenstände auf das Gerät. Dadurch wird der Luftstrom unterbro-
chen und das Garergebnis beeinträchtigt.
ZUBEHÖR
1. Netzstecker an eine geerdete Steckdose anschließen.
2. Auf tippen, um das Gerät einzuschalten.
3. Auf die Pfeiltasten der Temperatur oder tippen, um die gewünschte Tem-
peratur einzustellen.

17
HEISSLUFTFRITTEUSE
4. Auf die Pfeiltaste der Zeiteinstellung tippen, um die Zeit zum Vorheizen auf 5
Minuten einzustellen. Tippen Sie auf daraufhin startet das Vorheizen. Nach dem
Vorheizen können Sie den nächsten Schritt durchführen.
5. Wenn der Timer der Vorheizzeit Null erreicht, Garfach aus dem Gerät ziehen.
Speisen in den Frittierkorb geben.
Frittierkorb in das Garfach einsetzen und das Garfach ins Gerät schieben.
a) Benutzen Sie das Produkt nicht ohne den Frittierkorb im Garfach.
b) Garfach während und kurz nach dem Gebrauch nicht berühren, da es
sehr heiß wird. Berühren Sie stattdessen das Bedienfeld oder verwenden Sie den Gri.
6. Tippen Sie auf um das geeignete Garprogramm auszuwählen. Temperatur mit
den Pfeiltasten Temperatur oder einstellen; Uhrzeit mit den Pfeiltasten Zeit
oder einstellen.
7. Erneut auf tippen, um das Gerät zu starten.
8. Fünf Pieptöne signalisieren, dass die eingestellte Zeit abgelaufen ist. Nehmen Sie
das Garfach heraus und stellen Sie es
auf eine hitzebeständige Unterlage.
9. Prüfen, ob die Speisen gar sind. Ist dies nicht der Fall, so schieben Sie das Garfach
wieder
in das Gerät und stellen Sie einige weitere Minuten mit dem Timer ein.
Hinweis: Wenn man das Garfach während des Garens aus dem Gerät zieht und wieder
hineinschiebt, bleibt das Garprogramm erhalten und das Garen wird für die restliche
Zeit fortgesetzt.
10. Wenn die Speise gar ist, Garfach herausziehen. Schutzabdeckung nach vorne
schieben, auf die
Entriegelungstaste drücken und den Korb aus dem Garfach nehmen. Kippen Sie das
Garfach nicht und kehren Sie es nicht
um; dadurch wird verhindert, dass das Öl, das sich auf dem Boden angesammelt hat,
über die
Speisen ießt.
11. Geben Sie die Speisen in einen Fritterkorb, eine Schüssel oder auf einen Teller.
Wenn eine Portion der Speisen gar
ist, kann das Gerät sofort für den nächsten Durchgang verwendet werden.
TIPPS
- Für knusprige Speisen vor dem Garen etwas Öl darüber geben.
- Schütteln sie die Zutaten nach der halben Garzeit, um zu verhindern dass die
Speisen ungleichmäßig garen. Um die Zutaten zu schütteln, Garfach am Gri aus
dem Gerät ziehen und schütteln. Garfach anschließend wieder in das Gerät schieben.
Während des Schüttelns nicht auf die Korbentriegelungstaste drücken.

18 HEISSLUFTFRITTEUSE
ANLEITUNG ZUR VERWENDUNG DES BEDIENFELDS
1. Einschalt-/Starttaste
Antippen, um das Gerät ein-/auszuschalten oder den Garvorgang zu starten oder zu
stoppen
2. Programmwahltaste
Antippen, um die sieben voreingestellten Schnellprogramme abzurufen
3. 2 Stunden Warmhaltefunktion
Während des Garens antippen, um die Warmhaltefunktion für 2 Stunden nach Ende
der Garzeit einzustellen.
4. Tasten zum Erhöhen der Temperatur oder Verlängern der Zeit
Antippen, um die Zeit zwischen 0 bis 60 Minuten einzustellen. 1 Minute pro
Tastendruck
5. Tasten zum Verringern der Temperatur oder Verkürzen der Zeit
Antippen, um die Zeit zwischen 0 bis 60 Minuten einzustellen. 1 Minute pro
Tastendruck
6. Temperatursymbol
7. Zeitsymbol
8. Betriebsanzeige
9. Zeit und Temperaturanzeige auf dem Bildschirm
Zeit und Temperatur werden abwechselnd alle 5 Sekunden angezeigt.
10.

19
HEISSLUFTFRITTEUSE
Normalgarprogramm oder eines der 7 Schnellprogramme mit Zeit- und
Temperatureinstellung wählen, siehe Tabelle unten.
Programm Normal Pommes
frites
Rippchen Garnelen Kuchen Hähnc-
hens-
chenkel
Fleisch Fisch
Zeit
Min.
15 20 15 20 40 25 20 20
Tempera-
tur °C
180 200 180 160 160 180 160 180
TIPPS
Die Zeitangaben sind lediglich Richtwerte. Tatsächlich müssen Zeit oder Temperatur je
nach Menge und Größe der Speisen angepasst werden.
REINIGUNG UND WARTUNG
1. Stellen Sie den Timer vor der Reinigung auf 0, ziehen Sie den Netzstecker und
warten Sie, bis sich das Gerät abgekühlt hat. Berühren Sie die heißen Oberächen
nicht.
2. Tauchen Sie das Gerät niemals in Wasser oder andere Flüssigkeiten. Das Gerät ist
nicht spülmaschinenfest.
3. Reinigen Sie die Oberächen des Garfachs gründlich mit einem mit heißem Wasser
und etwas Spülmittel angefeuchteten nicht scheuernden Schwamm.
Wenn Speisereste am Korb oder am Boden des Garfachs haften bleibt, füllen Sie das
Garfach mit heißem Wasser und etwas Spülmittel. Legen Sie den Rost in das Garfach
und lassen Sie beides etwa 10 Minuten lang einweichen.
4. Wischen Sie die Oberächen der Heißluftfritteuse mit einem feuchten Tuch
ab. Verwenden Sie niemals aggressive oder scheuernde Reinigungsmittel,
Scheuerschwämme oder Stahlwolle, da diese das Gerät beschädigen.
5. Wenn Sie das Gerät für längere Zeit nicht benutzen, reinigen Sie es bitte und
bewahren Sie es an einem kühlen und trockenen Ort auf.
TECHNISCHE DATEN
1. Nennspannung (≥220–240 V)
2. Nennfrequenz 50/60 Hz
3. Nennleistung: 1250 W
4. Fassungsvermögen Garfach: 4,0 l
5. Nettogewicht: 3,4 kg
6. Produktmaße: 250*330*300 mm

20 HEISSLUFTFRITTEUSE
Störung Mögliche Ursache Abhilfe
Das Gerät funktioniert nicht. Netzkabel nicht an die Steckdose ange-
schlossen.
Netzstecker korrekt in die geerdete
Steckdose einführen.
Es wurde kein Garprogramm eingestellt Programmwahltaste antippen, um das gewüns-
chte Garprogramm auszuwählen, dann auf die
EIN-/AUS-Taste tippen.
Nach Auswahl des Garprogramms wurde die
EIN/AUS-Taste nicht betätigt.
Ein-/Aus-Taste antippen.
Die Speise ist nach Ablauf der
Zeit noch roh
Der Korb ist zu voll Speisen in mehreren Durchgängen garen
Die eingestellte Temperatur ist zu niedrig Geeignete Temperatur einstellen und Speisen
erneut garen.
Die Kochzeit ist zu kurz Geeignete Garzeit einstellen und Speisen erneut
garen.
Die Speisen sind ungleichmäßig
gegart.
Einige Speisen müssen nach der halben
Garzeit durchgeschüttelt werden.
Garfach nach der halben Garzeit herausziehen
und schütteln, um das übereinander liegende
Gargut umzuschichten, dann Garfach wieder
hineinschieben und weiter garen.
Die frittierten Speisen sind nicht
knusprig
Einige Speisen müssen mit Öl gegart
werden
Geben Sie vor dem Garen ein wenig Öl auf die
Oberäche der Speisen.
Das Garfach gleitet nicht
reibungslos in das Gerät
Das Garfach ist zu voll und daher zu schwer Die Menge der Speisen im Fach darf die markier-
te Linie nicht überschreiten.
Der Korb sitzt nicht richtig im Garfach. Drücken Sie den Korb in das Garfach.
Der Griff klemmt Stellen Sie den Griff waagerecht.
Rauchentwicklung Es werden fettige Speisen gegart Normales Ereignis.
In der Heißluftfritteuse ist Öl vom letzten
Gebrauch geblieben.
Bitte reinigen Sie Garfach und Korb nach dem
Gebrauch.
Dieses Handbuch ist in digitaler Form erhältlich auf Anfrage beim Kundendienst unter der gebührenfreien
Nummer 800 015 748 erhältlich, erreichbar von Montag bis Freitag, 9.00 – 18.00 Uhr.
FEHLERBEHEBUNG
INFORMATION FÜR BENUTZER VON HAUSHALTSGERÄTEN
Dieses Symbol auf dem Produkt oder seiner Verpackung weist darauf hin, dass dieses Produkt nicht als
normaler Haushaltsabfall zu behandeln ist. Stattdessen wird es der entsprechenden Sammelstelle für das
Recycling von Elektro- und Elektronikgeräten übergeben. Indem Sie sicherstellen, dass dieses Produkt
ordnungsgemäß entsorgt wird, tragen Sie dazu bei, mögliche negative Auswirkungen auf die Umwelt und
die menschliche Gesundheit zu vermeiden, die ansonsten durch unsachgemäße Handhabung des Produkts
verursacht werden könnten. Das Recycling von Materialien wird dazu beitragen, natürliche Ressourcen zu
schonen. Für detailliertere Informationen zum Recycling dieses Produkts wenden Sie sich bitte an Ihre örtliche
Stadtverwaltung, an Ihren Hausmüll-Entsorgungsdienst oder an das Geschäft, in dem Sie das Produkt gekauft
haben.
Table of contents
Languages:
Other Kasanova Fryer manuals

Kasanova
Kasanova da Benedetta NNE000024NOC User manual

Kasanova
Kasanova LEI003005NOC User manual

Kasanova
Kasanova NNE000011NOC User manual

Kasanova
Kasanova LEI003106NOC User manual

Kasanova
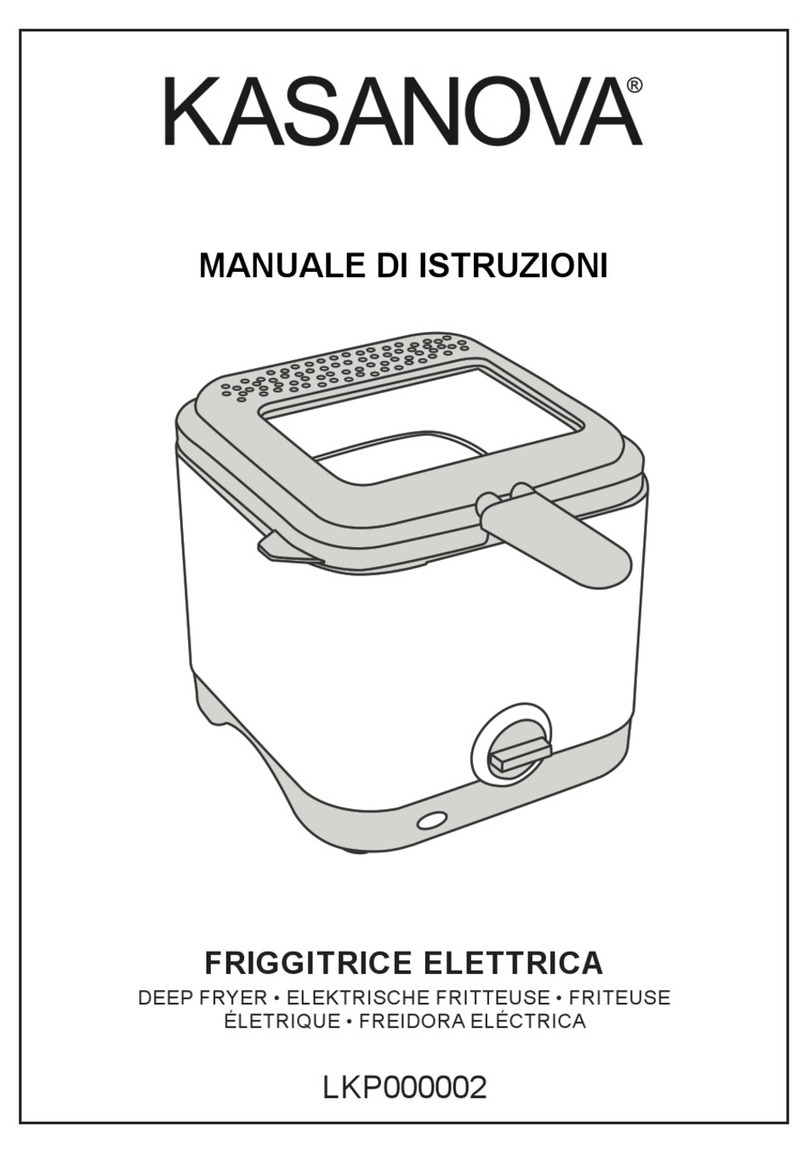
Kasanova LKP000002 User manual

Kasanova
Kasanova AEO000013NOC User manual

Kasanova
Kasanova NNE000021NOC User manual

Kasanova
Kasanova NEL000001NOC User manual

Kasanova
Kasanova NNE000014NOC User manual

Kasanova
Kasanova AEO000006NOC User manual