Kasda KS6311 User manual

KS6311 WiFi Smart TV Box
User Manual
Kasda Digital Technology Co., Ltd.
www.kasda.cn

NOTICE
This document contains proprietary information protected by copyright, and this Manual and all the
accompanying hardware, software, and documentation are copyrighted. All rights are reserved. No part of this
document may be photocopied or reproduced by mechanical, electronic, or other means in any form.
The manufacturer does not warrant that the hardware will work properly in all environments and applications,
and makes no warranty or representation, either expressed or implied, with respect to the quality, performance,
merchantability, or fitness for a particular purpose of the software or documentation. The manufacturer
reserves the right to make changes to the hardware, software, and documentation without obligation to notify
any person or organization of the revision or change.
All brand and product names are the trademarks of their respective owners.
© Copyright 2012
All rights reserved

Content
1. INTRODUCTION...................................................................................................4
1.1 Main Features................................................................................................4
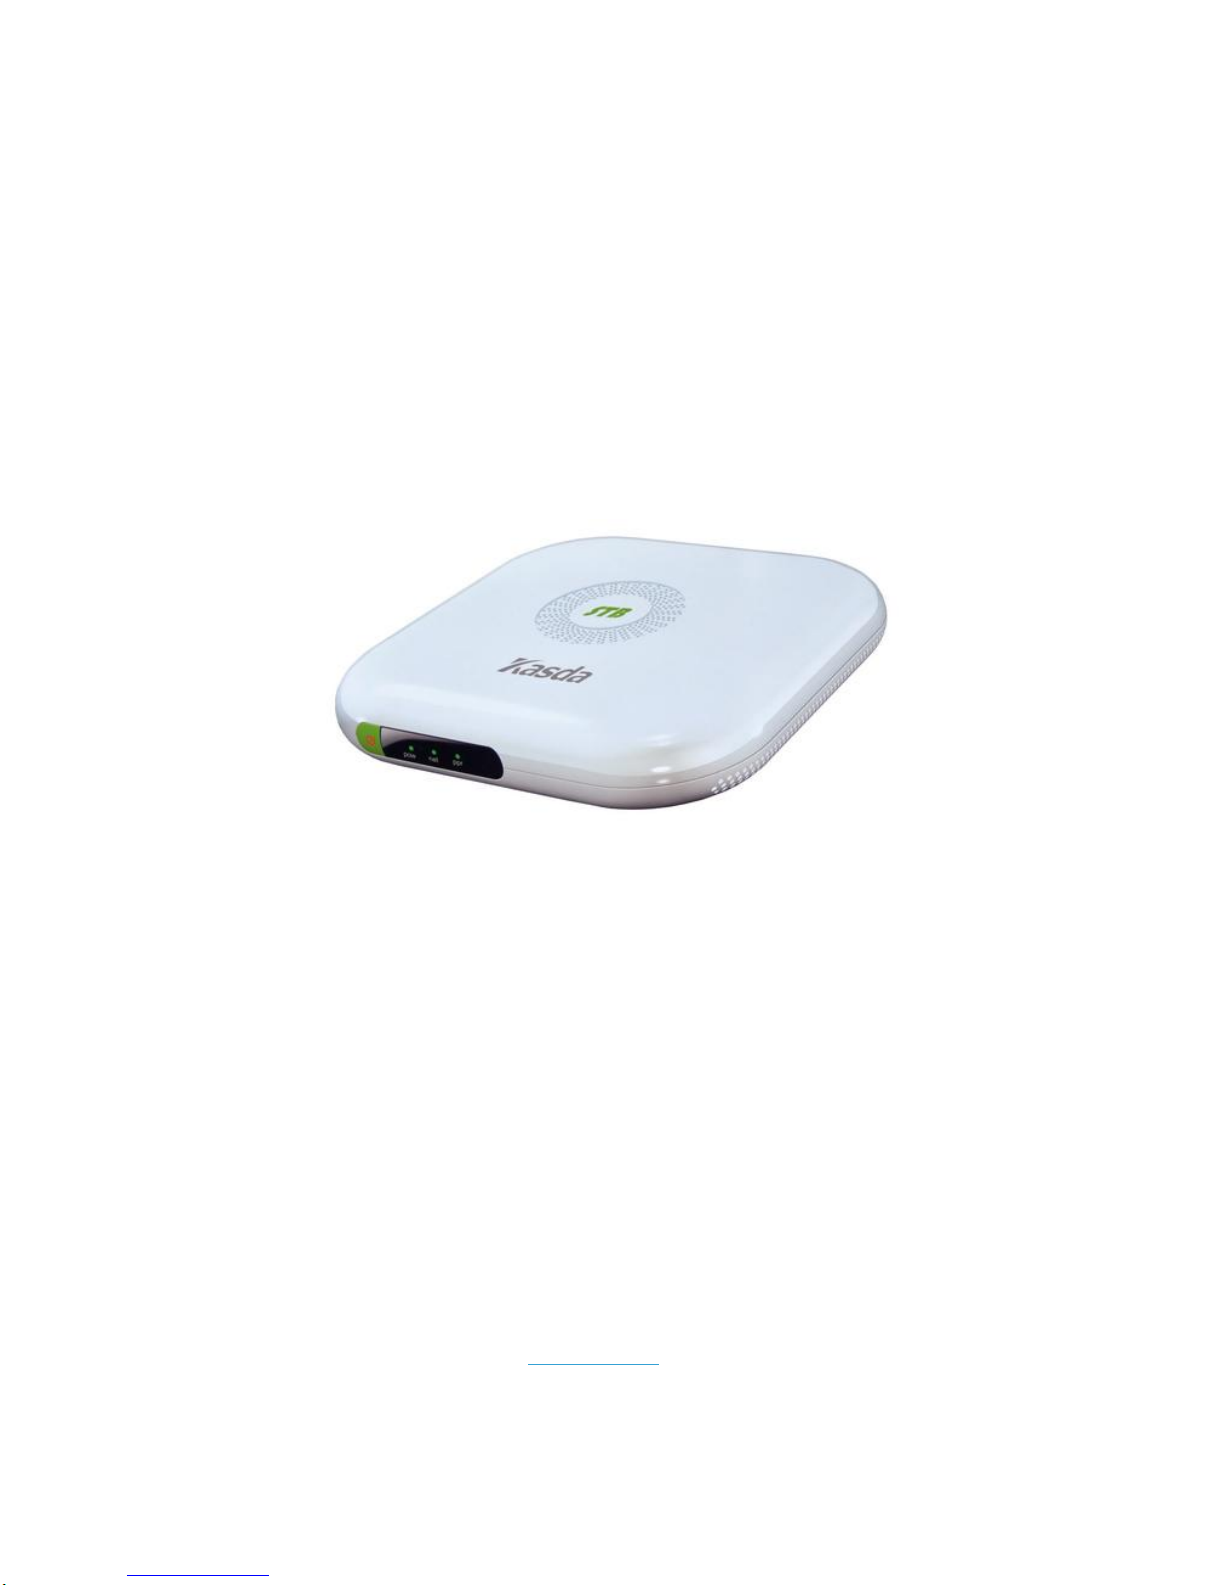
1.2 Physical User Interface ..................................................................................5
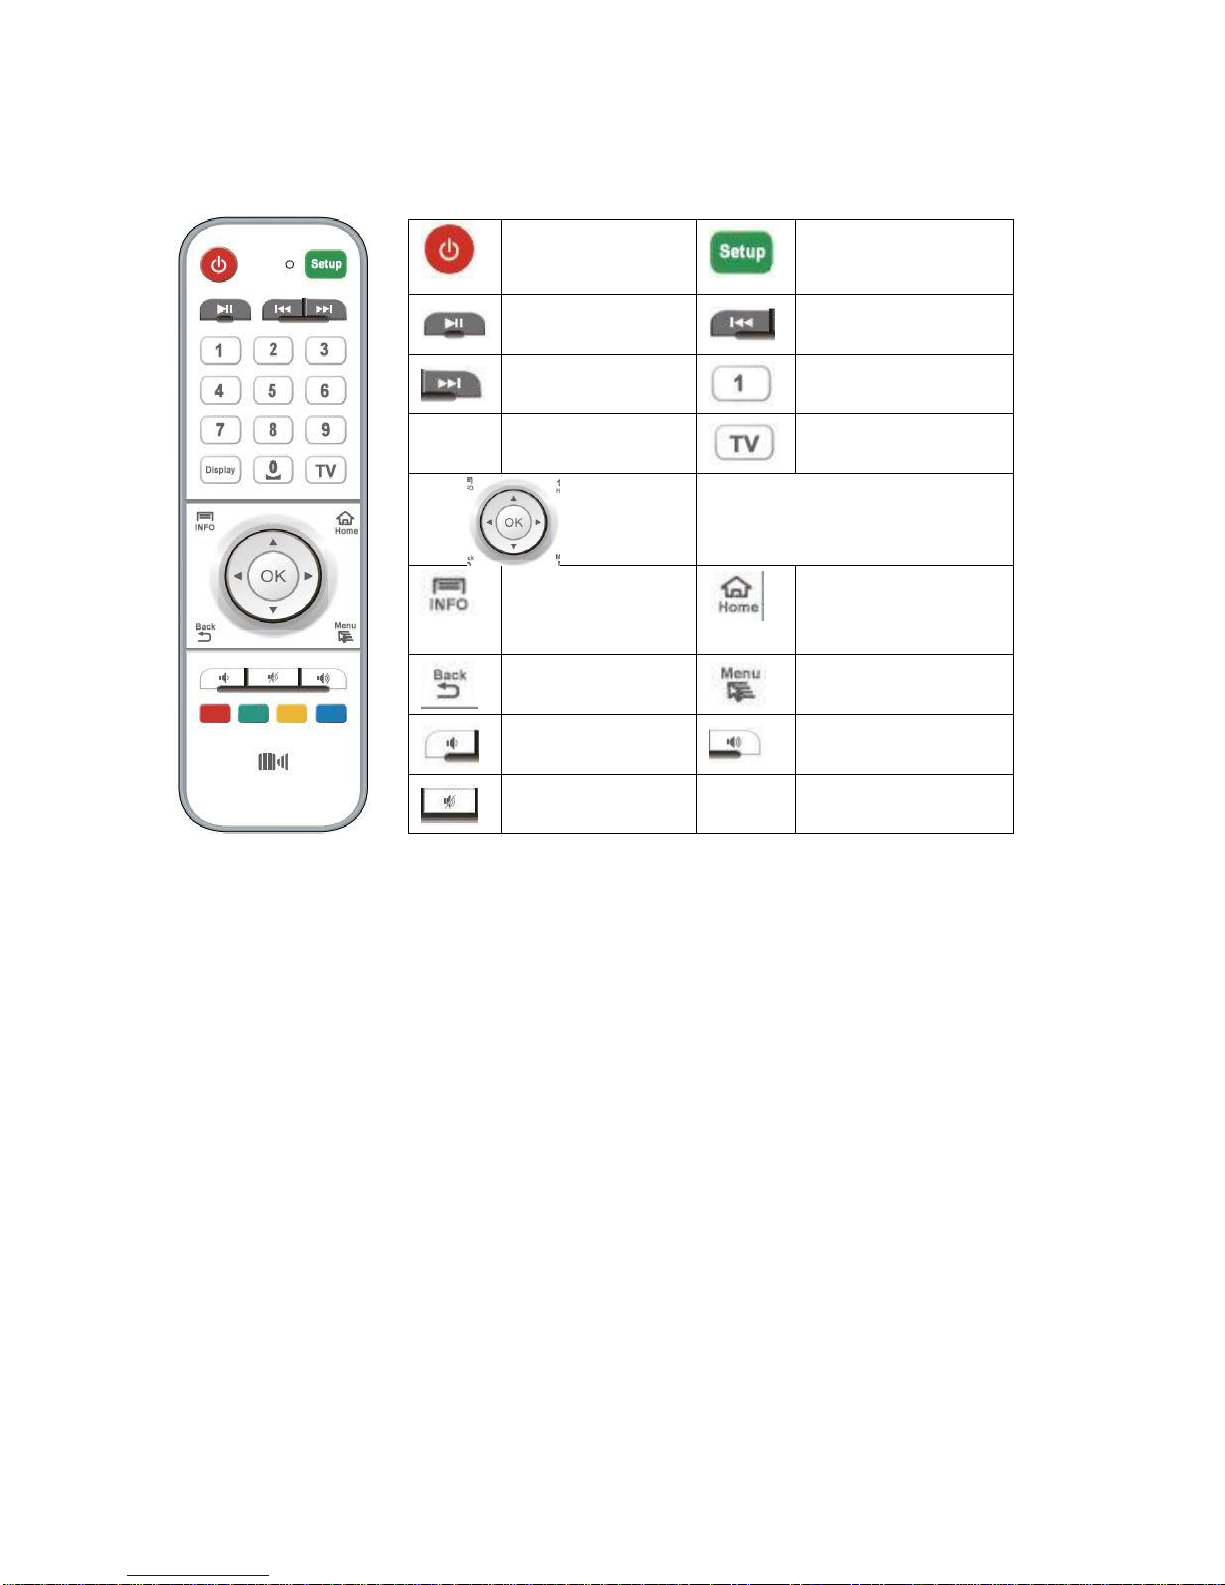
1.3 Remote Control .............................................................................................6
2. CONNECTING STB-TOP BOX...........................................................7
2.1 Connecting to TV ...........................................................................................7
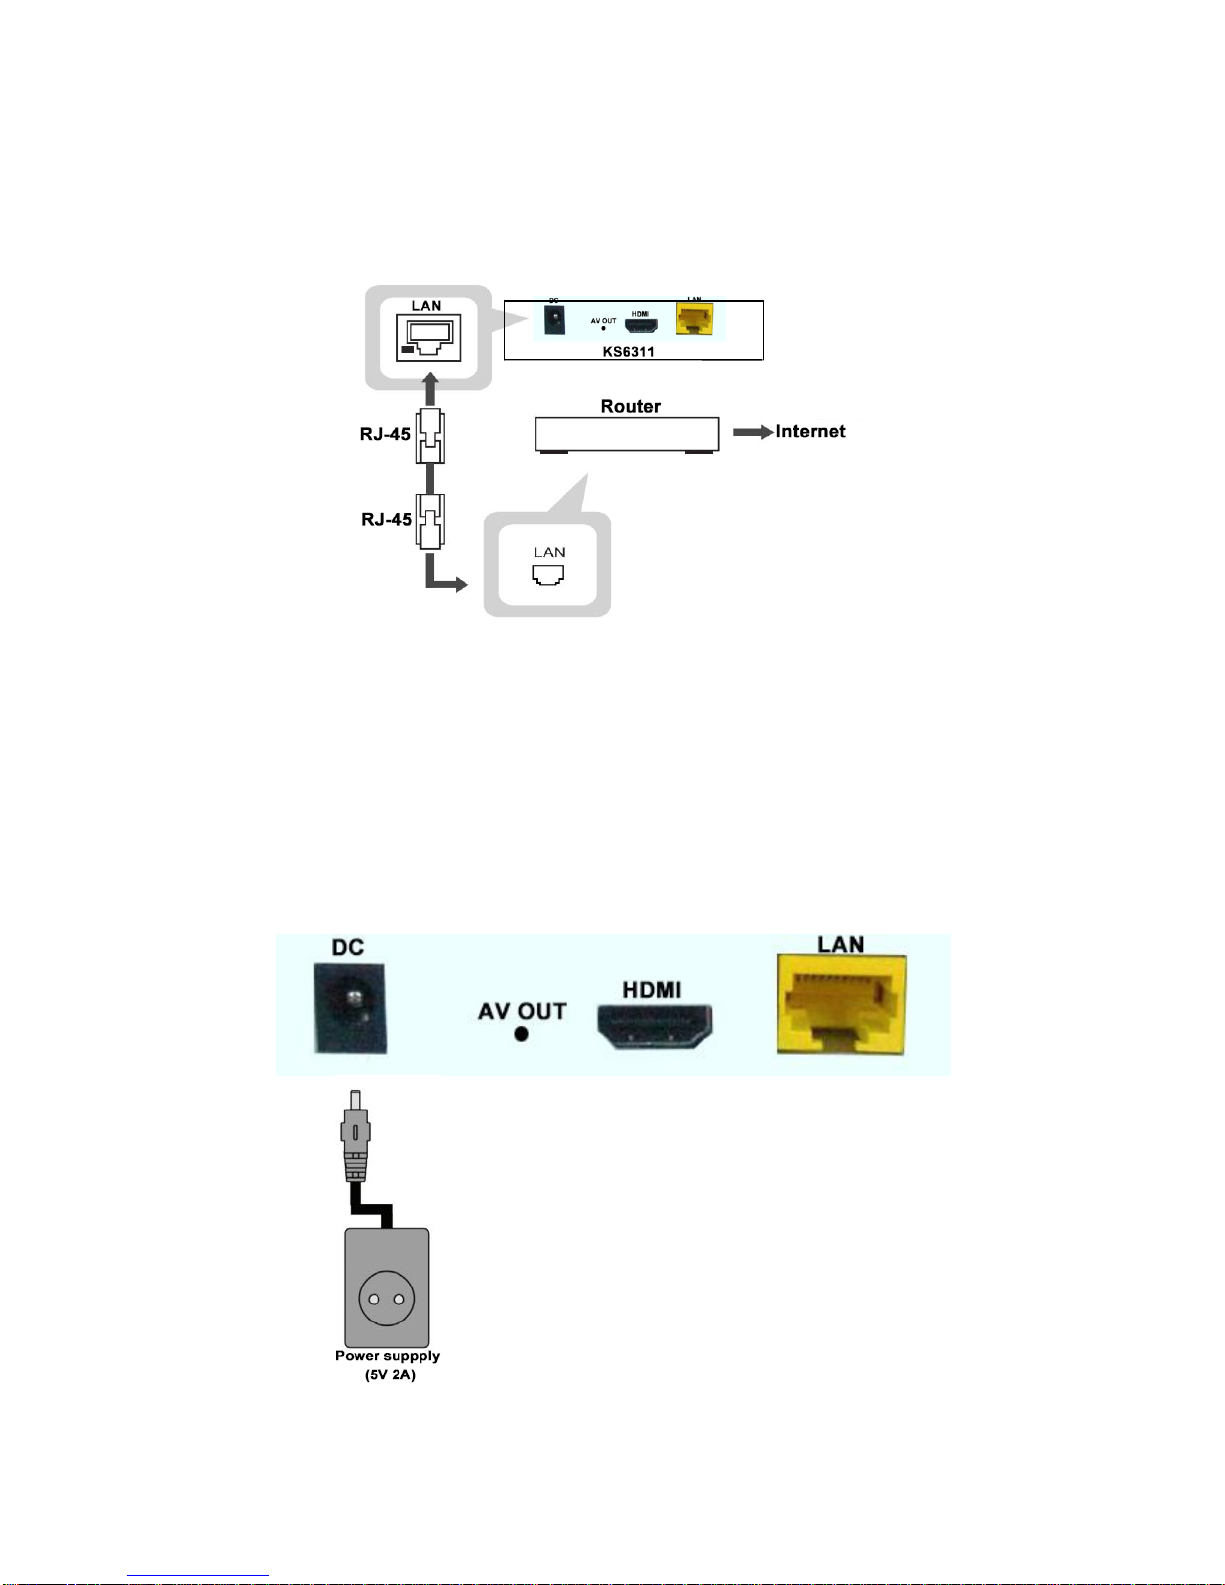
2.2 Connecting to Internet ..................................................................................8
2.3 Connecting to DC Power Adaptor..................................................................8
3. NETWORK SETUP..............................................................................................9
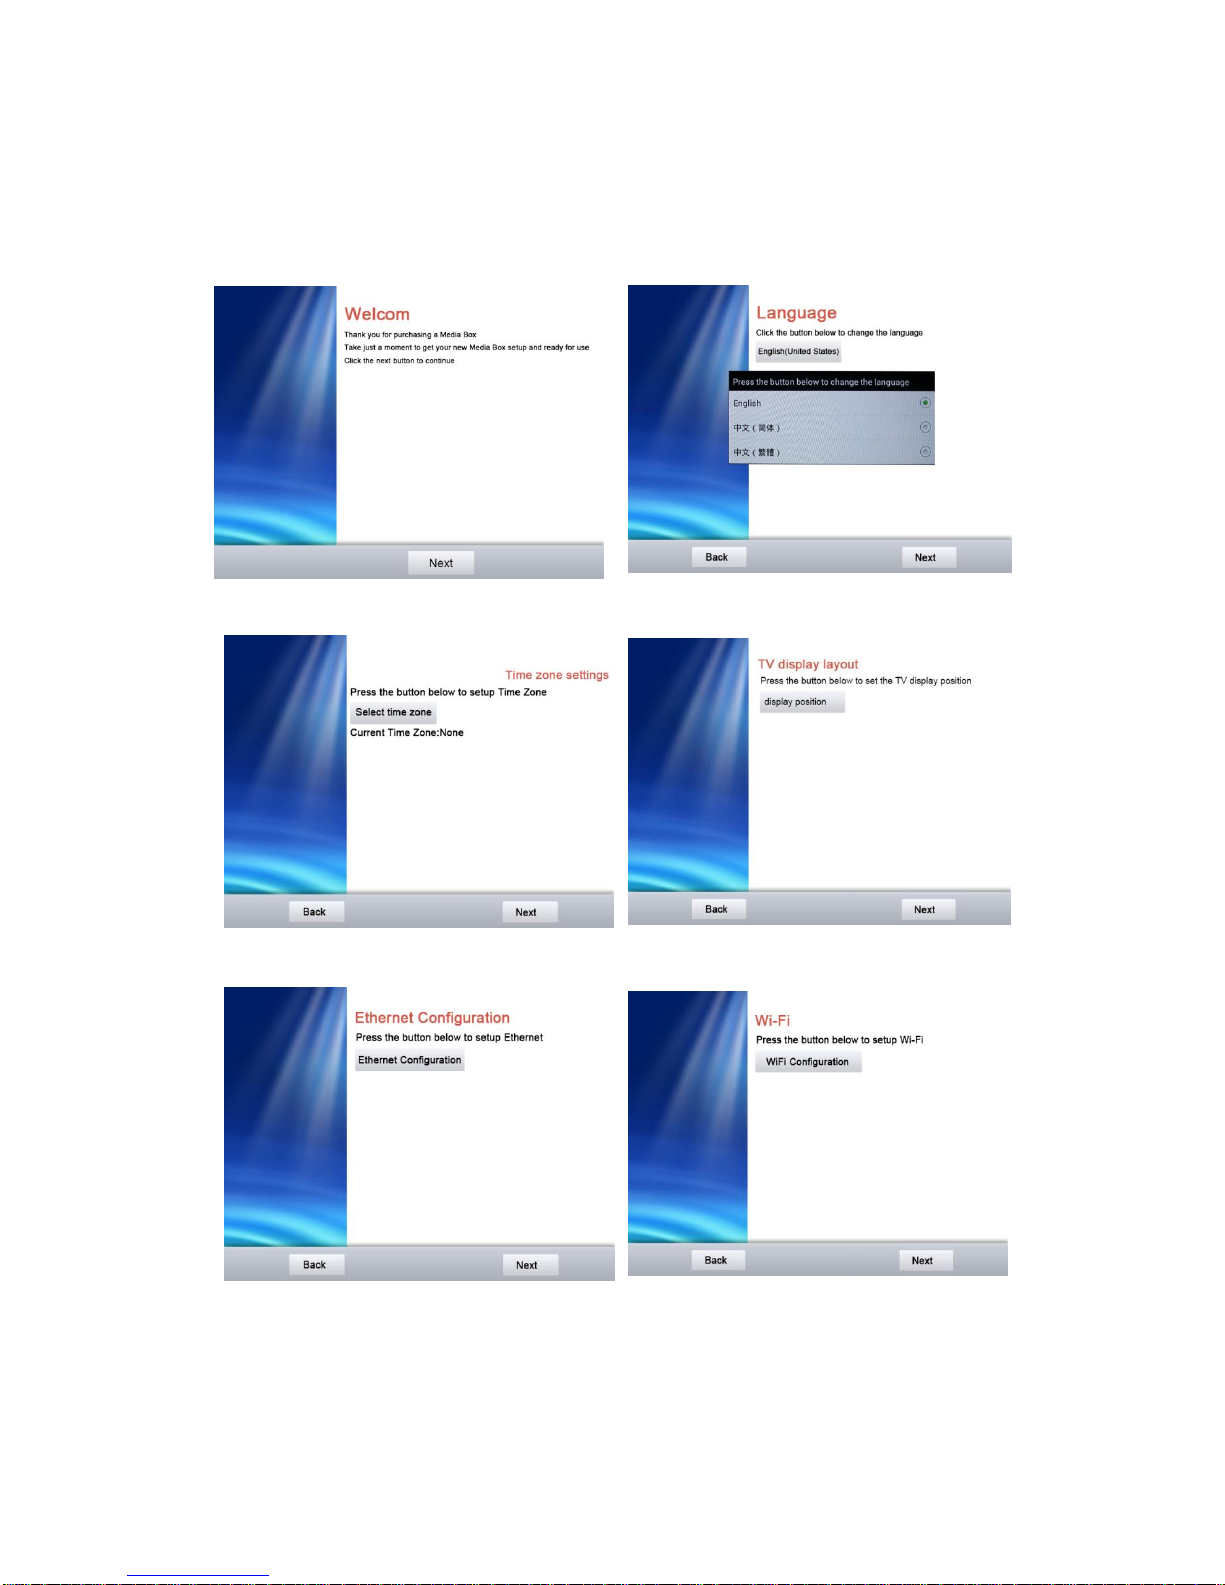
3.1 First-time Start-up Setup ...............................................................................9
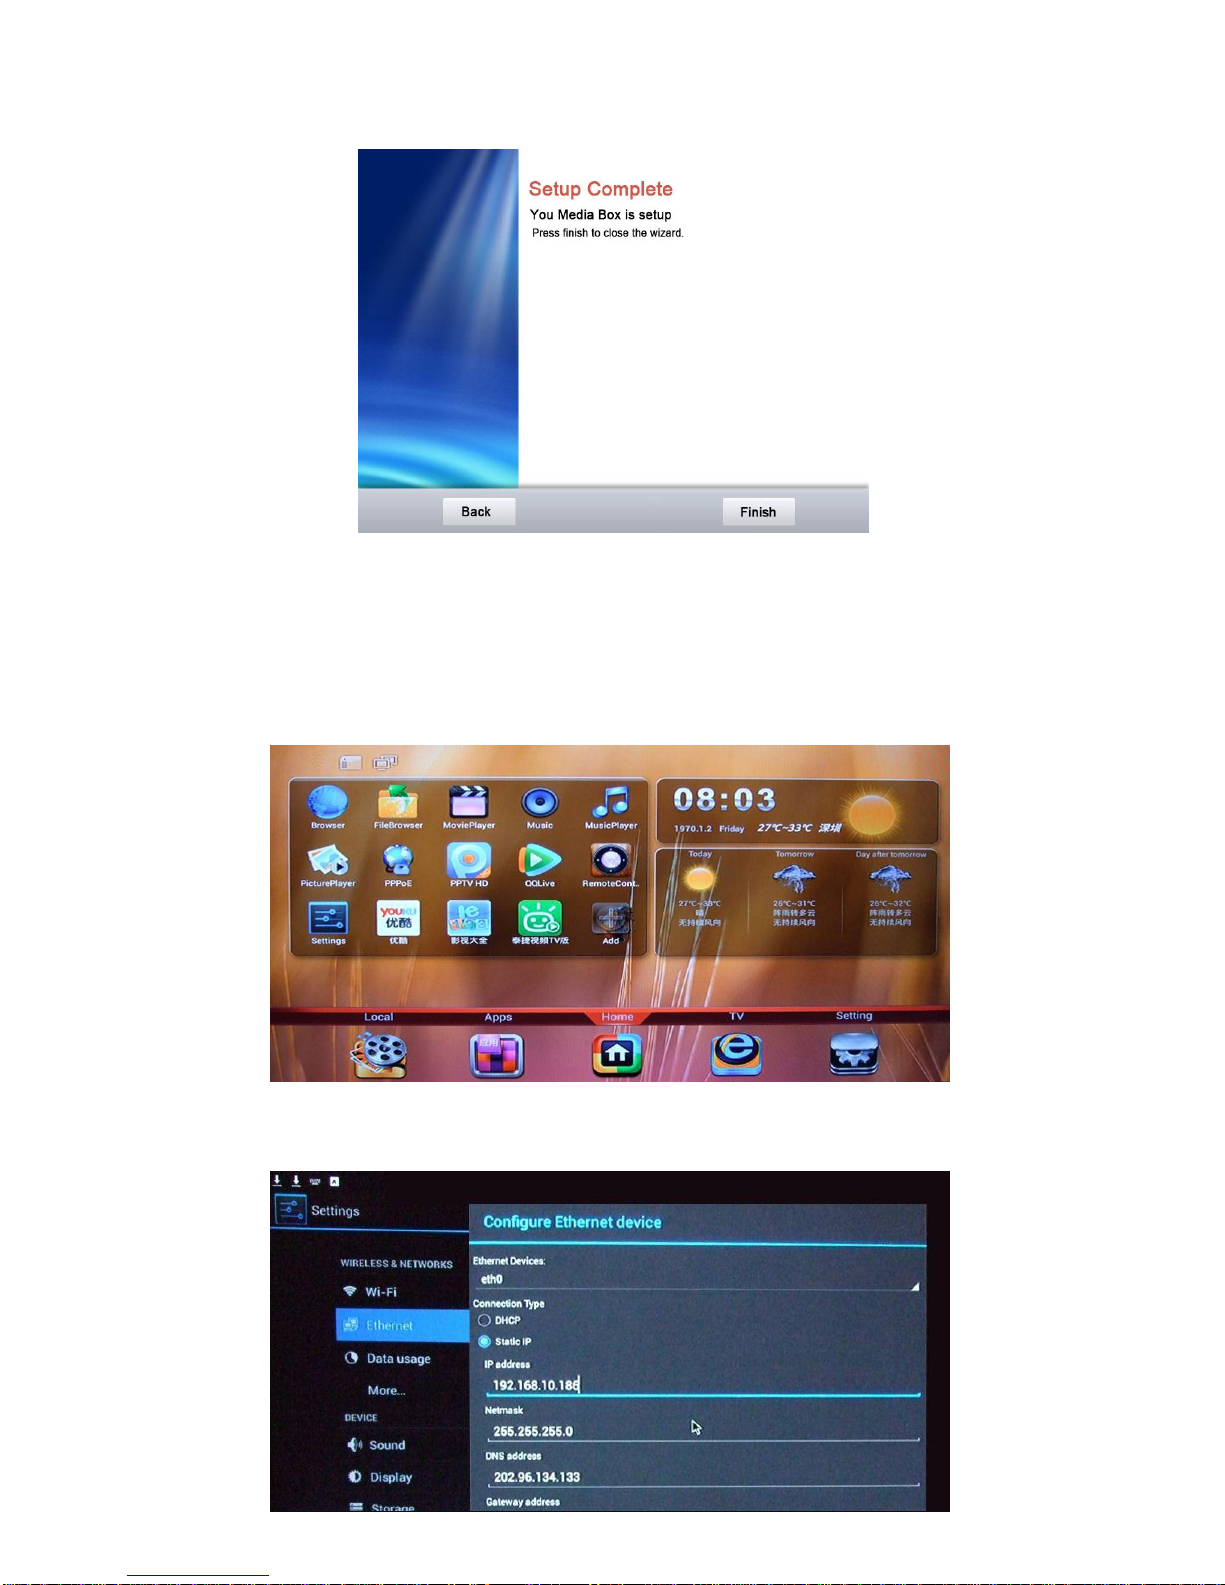
3.2 Wired Access Setup .....................................................................................10
3.3 Wireless Access Setup .................................................................................11
4. OTHER FUNCTIONS.......................................................................................12
4.1 Download & Install Applications................................................................12
4.2 Uninstall Applications.................................................................................13
4.3 Delete Downloaded APK Applications.......................................................14
4.4 Local Media Playback.................................................................................14

1. INTRODUCTION
1.1 Main Features
HD (High Definition)
Powered by Android 4.2.2
Dual Core Amlogic AML8726-MX CPU up to 1.5GHz
Resolution:1920*1080P
MPEG2 MP@HL
H.264/AVC main and high profile to level 4.1
VC-1 advanced profile @ level 3 (Option)
VC-1 simple and main profile (Option)
Video decode: MPEG-4, AVI, MKV, RMVB, TP, TS, WMV, DAT, FLV, MOV, MPG, VOB
Audio decode: MP3, AAC, APE, FLAC, WAV, WMA
HDMI 1.2/DVI 1.0 with HDCP 1.1
Supports different Middleware and Conditional Access vendors
Audio outputs:
Stereo Audio
Digital Audio surround via S/P-DIF (coaxial and optical)
Video outputs
SD: Composite, S-Video
HD: Component, HDMI/HDCP
SD: PAL, NTSC and SECAM
HD: 720p, 1080i, 1080p
Full screen 4:3 and 16:9 format
Independent simultaneous dual output HD/SD
IR remote controller
10/100 BaseT Ethernet
UDP multicast streaming
Video on demand
Conditional Access smartcard-less - OTP for storage of secure information and
customer configurations.

1.2 Physical User Interface
Front panel
Name
Color
Mode
Status
POWER
Green
ON
Power well connected
OFF
Power off or disconnected
Red
ON
Standby mode
NET
Green
Blinking
IP connected and IP traffic is passing through the
device
OFF
STB power off or Ethernet Cable is disconnected
Rear Panel
Name
Function
DC
Power Interface
AV OUT
Video & Audio Signals Output for Common TV via AV
Cable
HDMI
HDMI Port for HD TV Connection via HDMI Cable
LAN
Connect to Internet via Ethernet Cable
Side Panel
Name
Function
SD
SD Card Slot (Connect to SD Storage Card)
USB
USB2.0 Ports (Connect to USB Storage Disk, USB
Mouse or Keyboard)

1.3 Remote Control
Standby
System setup
Play/Suspend
Fast Rewind/
Previous track
Fast forward
/Next track
Number button
Television button
Direction button:
Up, Down, Left,Right
OK: Confirmation
Go to Info panel
Go to home page
Return button
Go to main menu
Decrease volume
Increase volume
Mute
1.4 Accessories
The packing contents are as the following:
KS6311 Set-Top Box
AV Cable
Universal DC Adapter
User Manual
IR Remote Control
HDMI Cable (Optional)
Remark: HDMI Cable is not a standard accessory in the package, but it is optional
base on specific demand from clients.

2. CONNECTING STB-TOP BOX
2.1 Connecting to TV
Connect KS6311 to your TV according to one of the following schemes:
a. Connection via HDMI Port:
HDMI High definition:1080p,
1080i, 720p
Remark: If your TV has an HDMI connector, it is recommended to connect a TV
with HDMI interface, which can make the video achieve best Visual effects, both
video and audio can be output to the TV via this interface.
b. Connection via AV-Out Port:
AV-OUT
Remark: The Y Pb Pr provide component video, the most widely supported TV
connection. If your TV only has Y Pb Pr inputs, use these connectors.

2.2 Connecting to Internet
2.2.1 Connect the LAN Port of KS6311 to an Internet router via an Ethernet Cable.
2.2.2 Connecting KS6311 to your Internet Router via Wi-Fi.
2.3 Connecting to DC Power Adaptor
Step 1: Plug the power adaptor into the DC connector on the rear side of the set-top
box.
Step 2: Connect the power cord to the DC adapter and then to a power outlet.

3. NETWORK SETUP
3.1 First-time Start-up Setup
3.1.1 Click “Next”
3.1.2 Click “English(United States)”to
configure language,then click “Next”
3.1.3 Click “Slect time zone”to
configure time zone,then click “Next”
3.1.4 Click “display posision”to adjust
the screen position,then click “Next”
3.1.5 Click “Ethernet Configuration”to
configure ethernet network,then click
“Next”
3.1.6 Click “Wi-Fi Configuration”to
configure WiFi network,then click
“Next”

3.1.7 Click “Finish”Complete the wizard!
Remark: You only need to do initial setup in this way for first-time start-up of
KS6311, and you will go to home page directly when you reboot it later.
3.2 Wired Access Setup
Select “Setting”icon on the home page above, you can see below network setting page.
Then select “Ethernet”in the Menu, you will see below interface:

Item
Description
DHCP
This is the commonly used network type, when your Internet
Router is with DHCP Enabled on LAN side or your ISP
provided you dynamic IP for Internet Access, you could select
this mode to have TV Box obtain IP address automatically.
Static IP
When your ISP provided you Static IP or your Internet Router
with DHCP Disabled on its LAN side, then you could select this
mode and configure detailed IP address.
DNS address
When you are selecting Static IP mode, then you need to input
the DNS address, you could use the same DNS address on your
Internet Router, or you could inquire your local ISP to get it.
3.3 Wireless Access Setup
3.2.1 Select “Setting” on the home page, then select “Wi-Fi”in the left Menu, you will
see a list of SSID in your local network.
Select the correct SSID available to you, then you will see below window, input WiFi
password and select “Connect”, then your wireless network is connected.

4. OTHER FUNCTIONS
4.1 Download & Install Applications
4.1.1 Download directly from Internet
a. Find specific application from internet and download it to your TV Box.
b. Select ”Apps”in the home page and find “Downloads” icon.
c. Select “Downloads”, you will see the list of applications you downloaded, select
the application you want to install, then select “Install”button.
d. After the application is installed successfully, you can select “Open”to run it, or
you could find its icon in the “Apps”page to run it.

4.1.2 Download to USB Disk or SD Card
a. Download specific APK application to your USB Disk or SD Card.
b. Insert USB Disk or SD Card to TV Box, then go to “Apps”page and select
“Appinstaller”icon.
c. Find the downloaded APK application, select it to install to TV Box.
4.2 Uninstall Applications
Select “Settings”in the home page, then select “Apps”in the left Menu, you will see
the Applications installed, select the one you want to uninstall, you will see below
page, select “Uninstall”button (if the application is running, first select “Force
Stop”, then select “Uninstall”).

4.3 Delete Downloaded APK Applications
You need to use a USB Mouse to realize this function:
a. Select “Apps”in the home page, then select “Downloads”icon, you will see the list
of downloaded APK applications.
b. Select the one you want to delete, clicking the file you want to delete for a few
seconds, then click the recycle bin( ) icon on the top right corner of the screen to
delete it from TV Box.
4.4 Local Media Playback
Insert USB Disk or SD Card to TV Box, then select “Local”icon in the home page,
then select the Picture, Audio or Video files to playback.
Remark: Currently you could only play Pictures, Audio and Video files in the
external storage devices, if you want to run APK application file, please refer to 4.1.2
above.
Table of contents