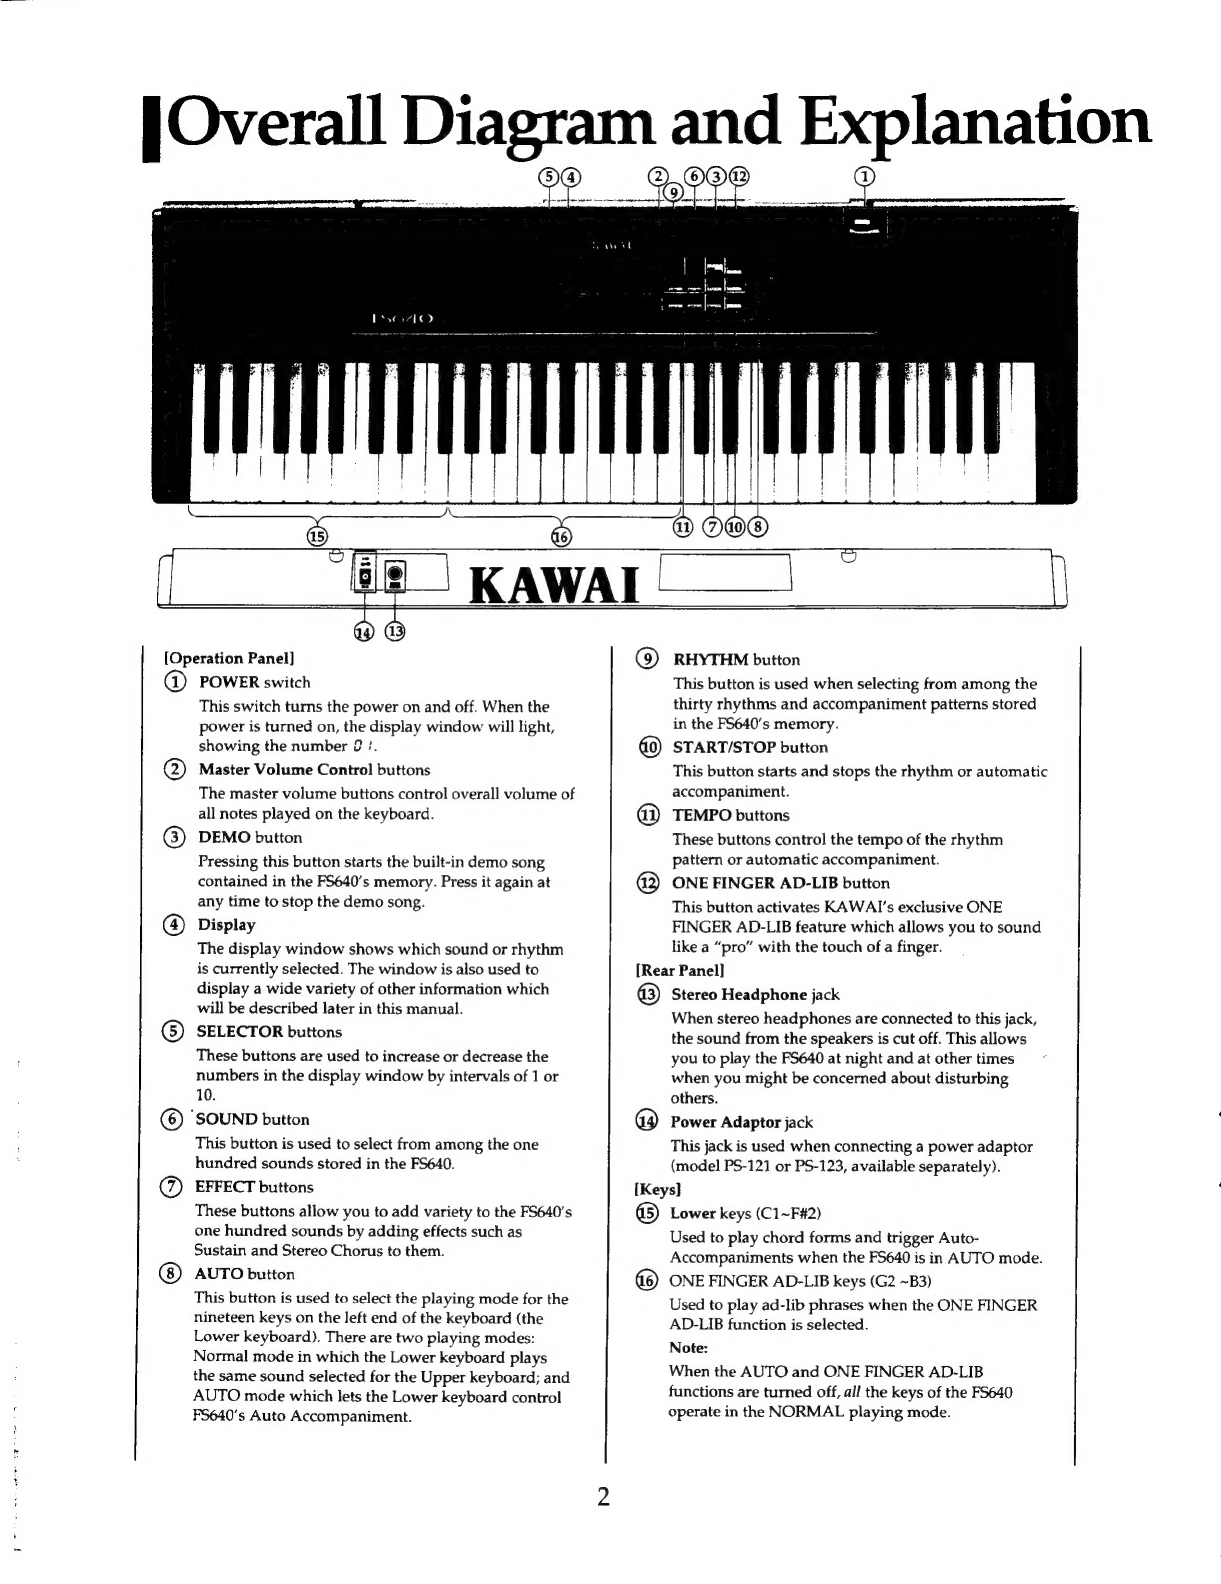
KAWAI
PERSONAL
HEYBORAD
FSG40O
Owner’s
Manual
Thank
you
for
your
purchase
of
the
KAWAI
FS640
Personal
Keyboard.
Congratulations
on
your
purchase
of
one
of
the
most
exciting
keyboards
available
today!
KAWAI’s
FS640
is
superbly
engineered
musical
instrument
designed
to
bring
you
fun
and
enjoyment
--no
matter
what
your
level
of
musical
experience
may
be.
You'll
have
fun
as
this
manual
helps
you
explore
the
powerful
and
exciting
features
of
the
F5640--particularly
our
exclusive
ONE
FINGER
AD-LIB™
So,
enjoy!
And
again,
thank
you
for
choosing
KAWAI!
@
Table
of
Contents:
W@
Overall
Diagrany
and
Explanation
oc
seccerccsi
inc
fs
sais
Bale
incvsrscstletsediuSicxadasieiondunbsti
heestecbesipietcsoaent
2
MB
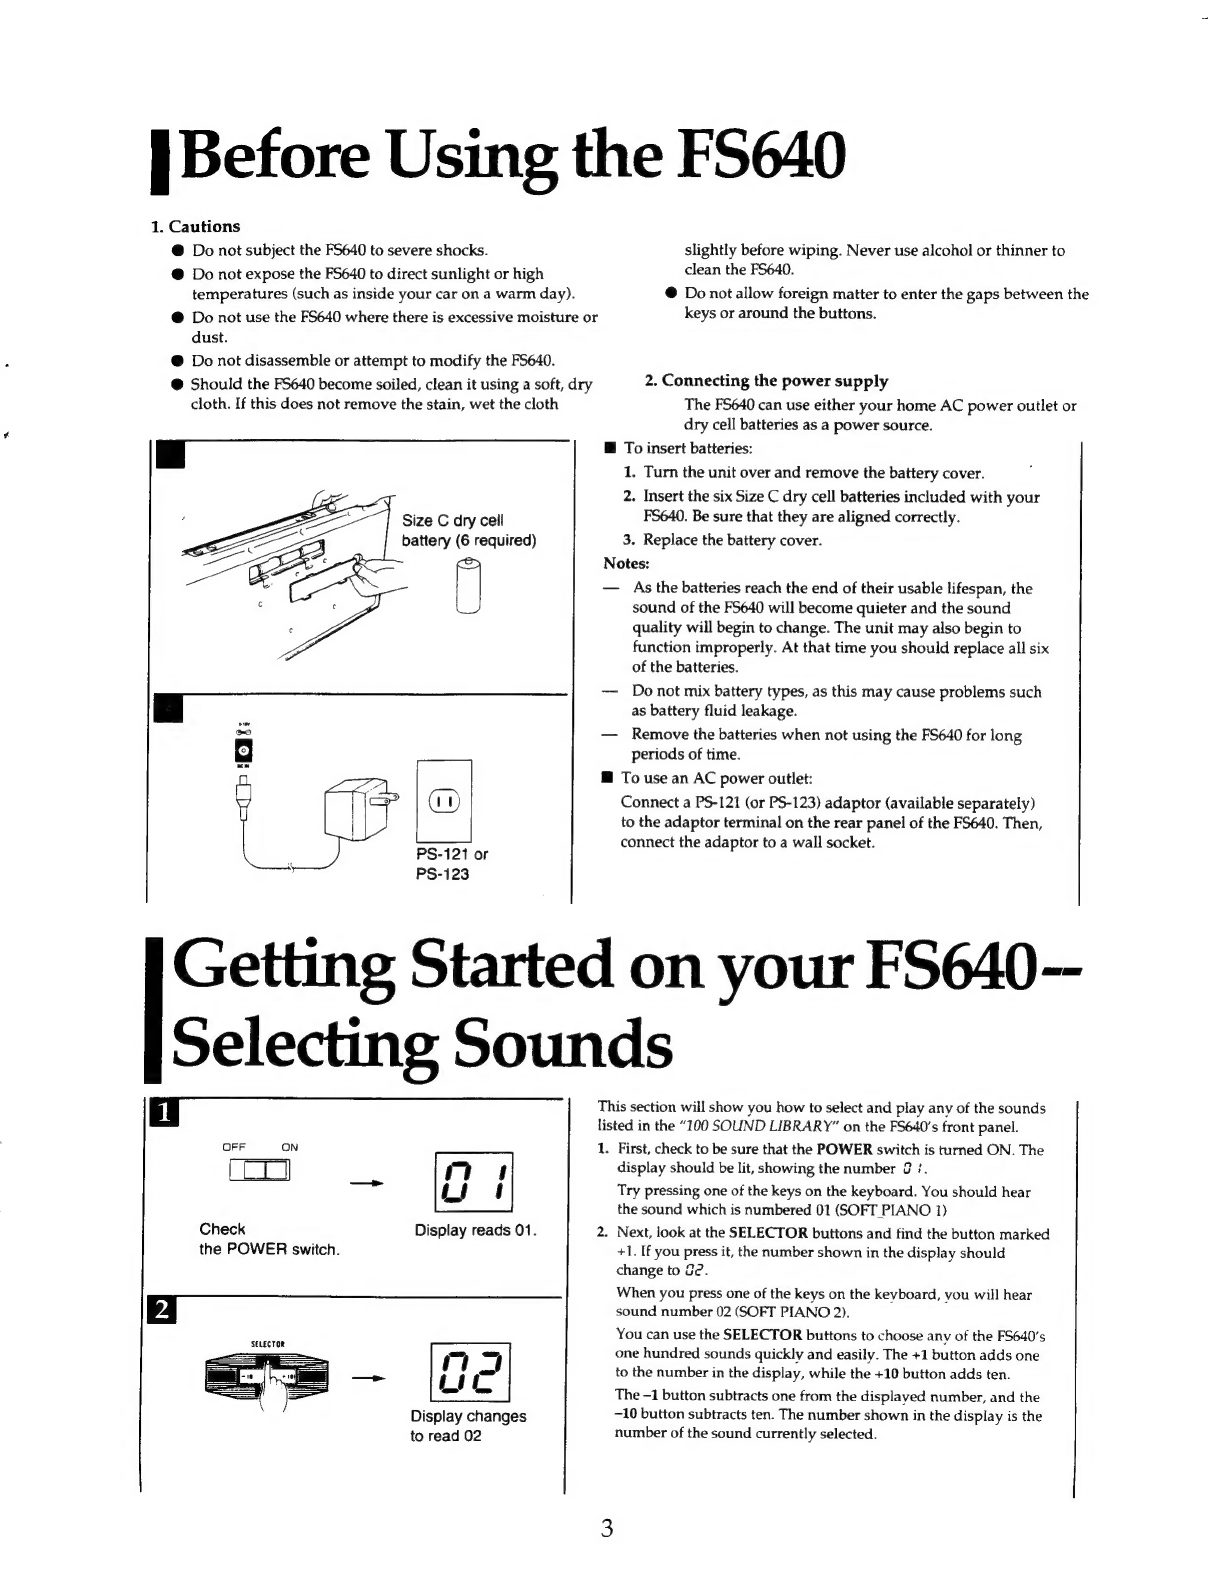
Before:
Using
te
S640)
bisa
o3
ih
S
hliSS
cy
creat
sacle
ced
eset
tet
ded,
aguante
tc
setae
3
M@
Getting
Started
on
your
FS640
Selecting
SounS
.......csssessscssssssessssssssecsssssessstsesssssssssssssssessssssssessesses
3
M@
Adding
Effects
and
Using
Hand
Percussion........ssssscssssssssssssssessesssssessssseessssesssersnseessssssiessarsseesessees
4
BB
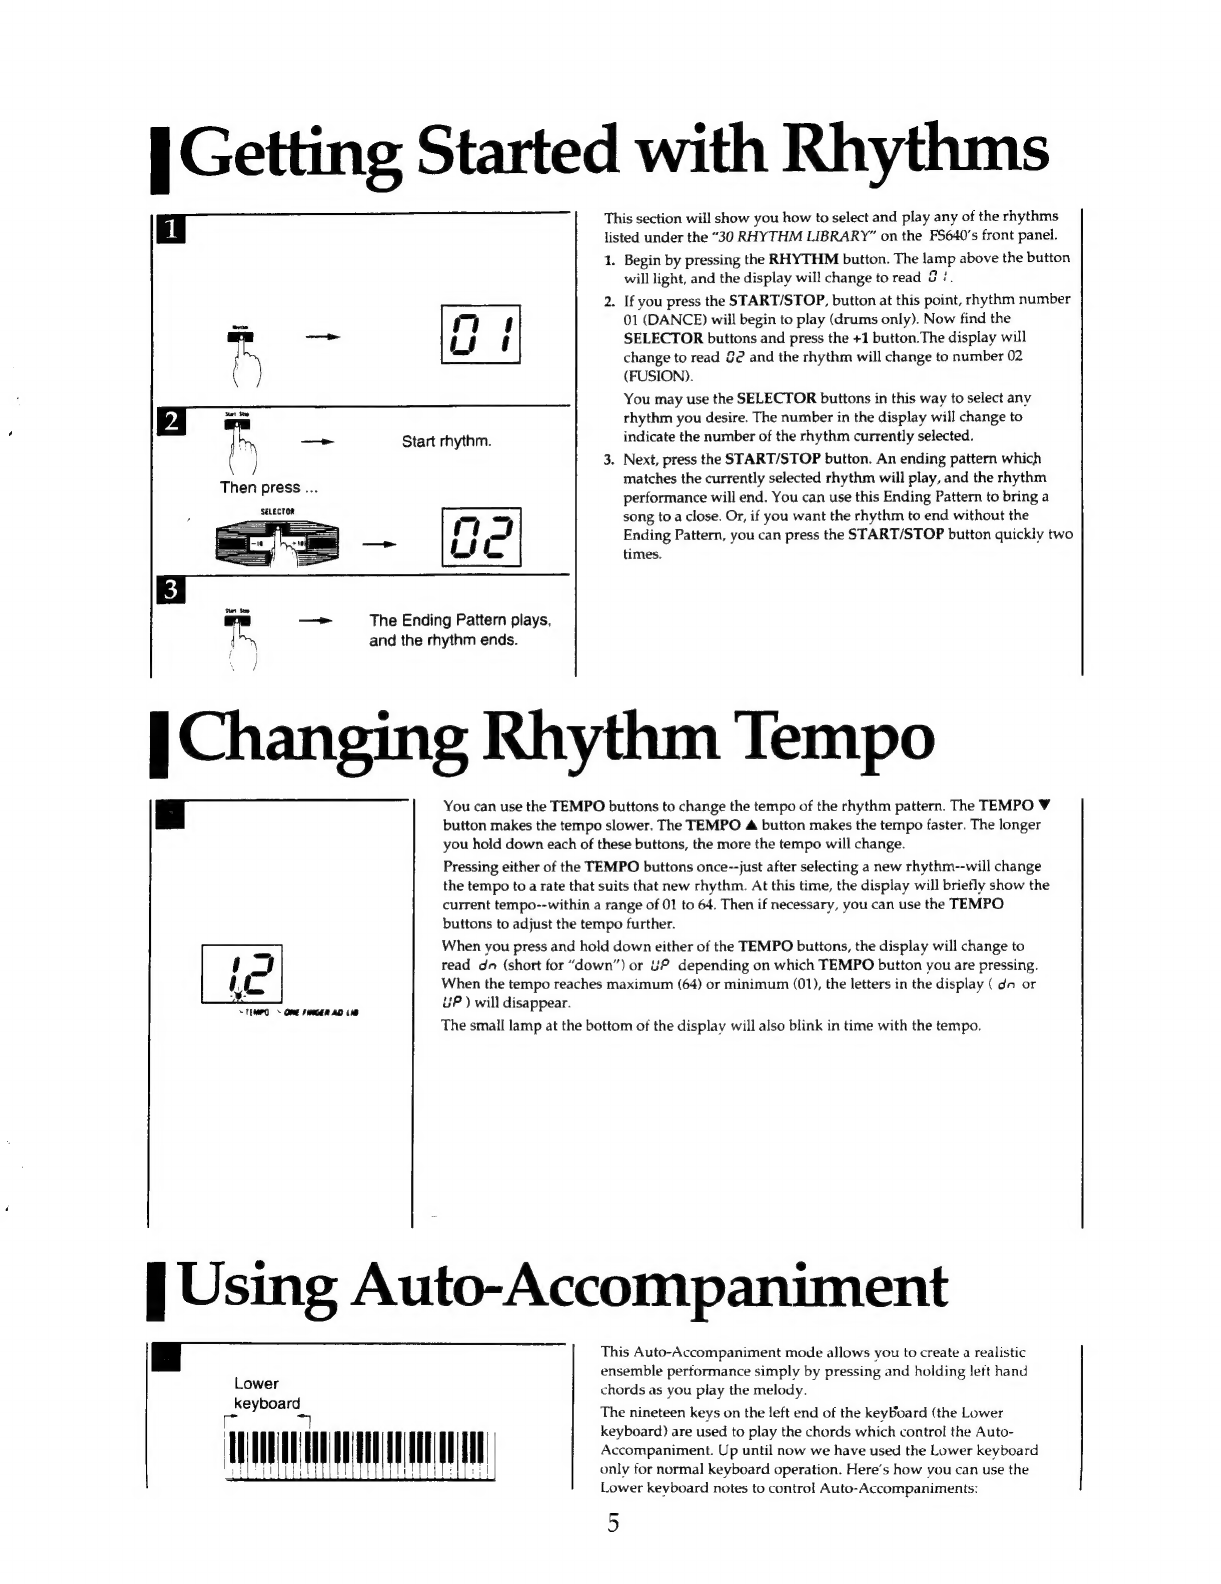
Getting
ter
teed
wid
cha
Day
City
ist
Sec
sal
Pane
Deane
ncaa
eee
enc
init
a
nee
Vedat
5
@
Changing
Rhy
thin
Pemrpos
seis
cieciteseia
sre
adisecs
cote
Sciweeaiahl
GliMhearutienesmedahoainahek
ten
5
WB)
Osinip
AUtO-A
COOMIpANTIEIeN
Es.
eos
Suxcucataivegbes
uot,
ciel
ScetsnealBaBisEN
GaSe
yb
Rah
Gee
Ad
ties
Mach
eseitecd
5
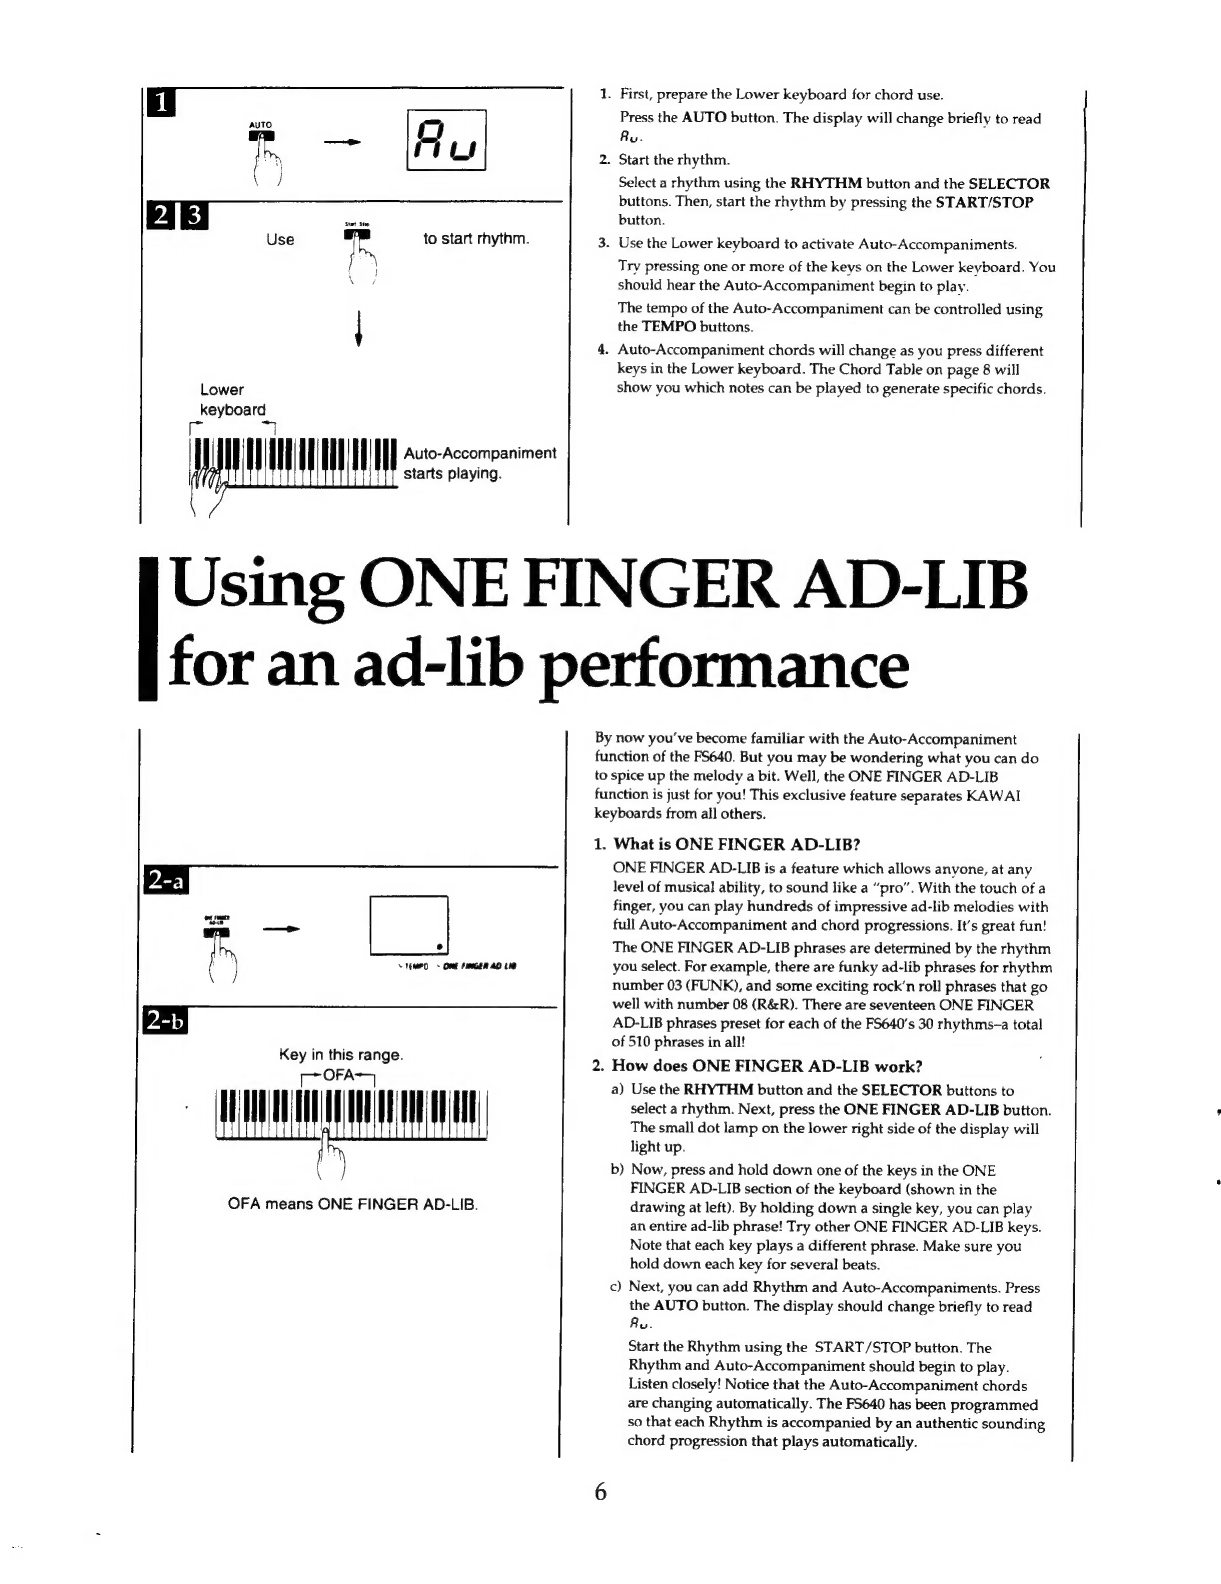
@
Using
ONE
FINGER
AD-LIB
for
an
ad-lib
performance
....c.cccsssssssssssessssecessesessseesssessssssisesssssecessees
6
ME
Using
HG
SYST
EME
Francs
cays
paciss
is
tactentn
tease
ad
ay
lessees
tsetse
een
edtdansnagiak
Nice
ieiackss
7
Me
Ea
Ne
tsa
ee
liens
cpap
ae
es
alas
tal
dlnvay
MONG
Saab
cto
avenstads
neta
ee
tealamiicighha
teens
8
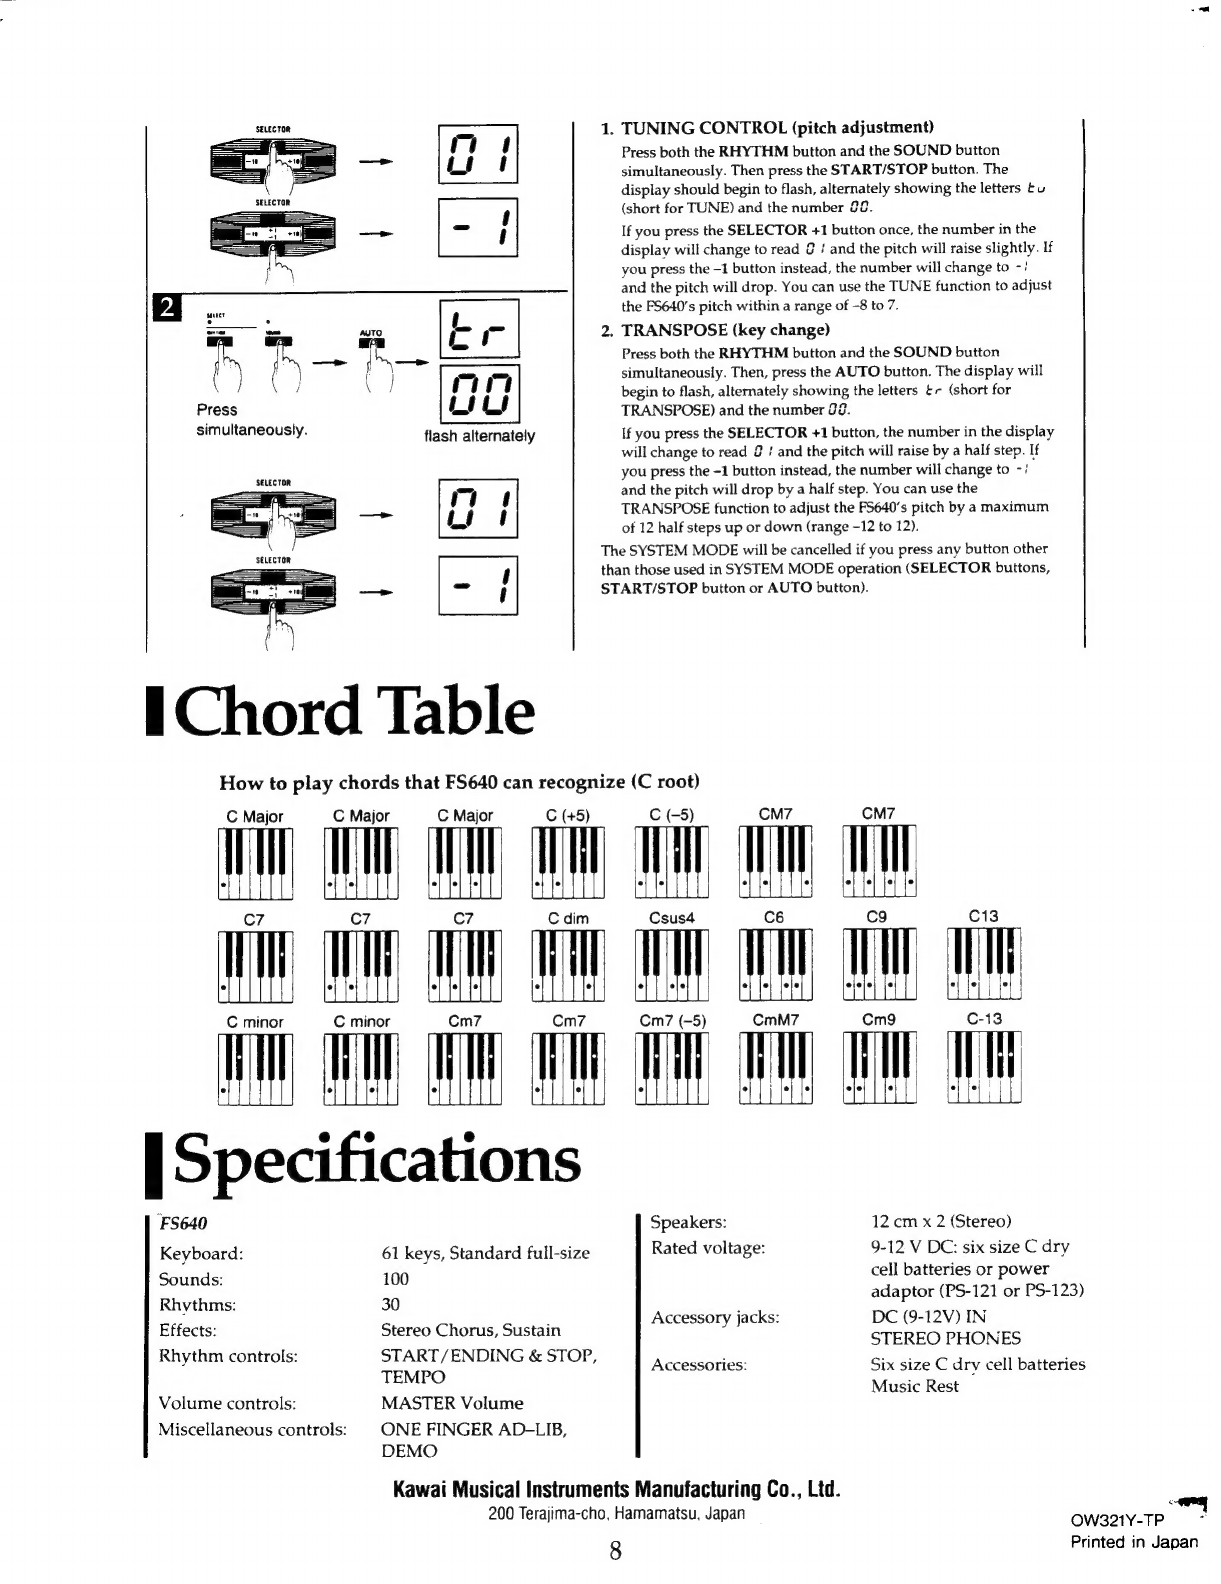
ies)
ool
13
(0)
|
ne
eneMrnee
se
Oc
nero
tye
en
ne?
ROL
Rene
me
ee
ee
8
@
NOTES:
This
equipment
has
been
tested
and
found
to
comply
with
the
limits
for
a
Class
B
digital
device,
pursuant
to
Part
15
of
the
FCC
Rules.
These
limits
are
designed
to
provide
reasonable
protection
against
harmful
interference
in
a
residential
installation.
This
equipment
generates,
uses
and
can
radiate
radio
frequency
energy
and,
if
not
installed
and
used
in
accordance
with
the
instruction,
may
cause
harmful
interference
to
radio
communications.
However,
there
is
no
guarantee
that
interference
will
not
occur
in
a
particular
installation.
If
this
equipment
does
cause
harmful
interference
to
radio
or
television
reception,
which
can
be
determined
by
turning
the
equipment
off
and
on,
the
user
is
encouraged
to
try
to
correct
the
interference
by
one
or
more
of
the
following
measures:
—
Reorient
or
relocate
the
receiving
antenna.
——
Increase
the
separation
between
the
equipment
and
receiver.
—
Connect
the
equipment
into
an
outlet
on
a
circuit
different
from
that
to
which
the
receiver
is
connected.
—
Consult
the
dealer
or
an
experienced
radio/TV
technician
for
help.
@
This
instrument
complies
with
the
limits
for
class
B
digital
apparatus,
pursuant
to
the
Radio
Interference
Regulations,
C_R.C.,
c.
1374.