M@
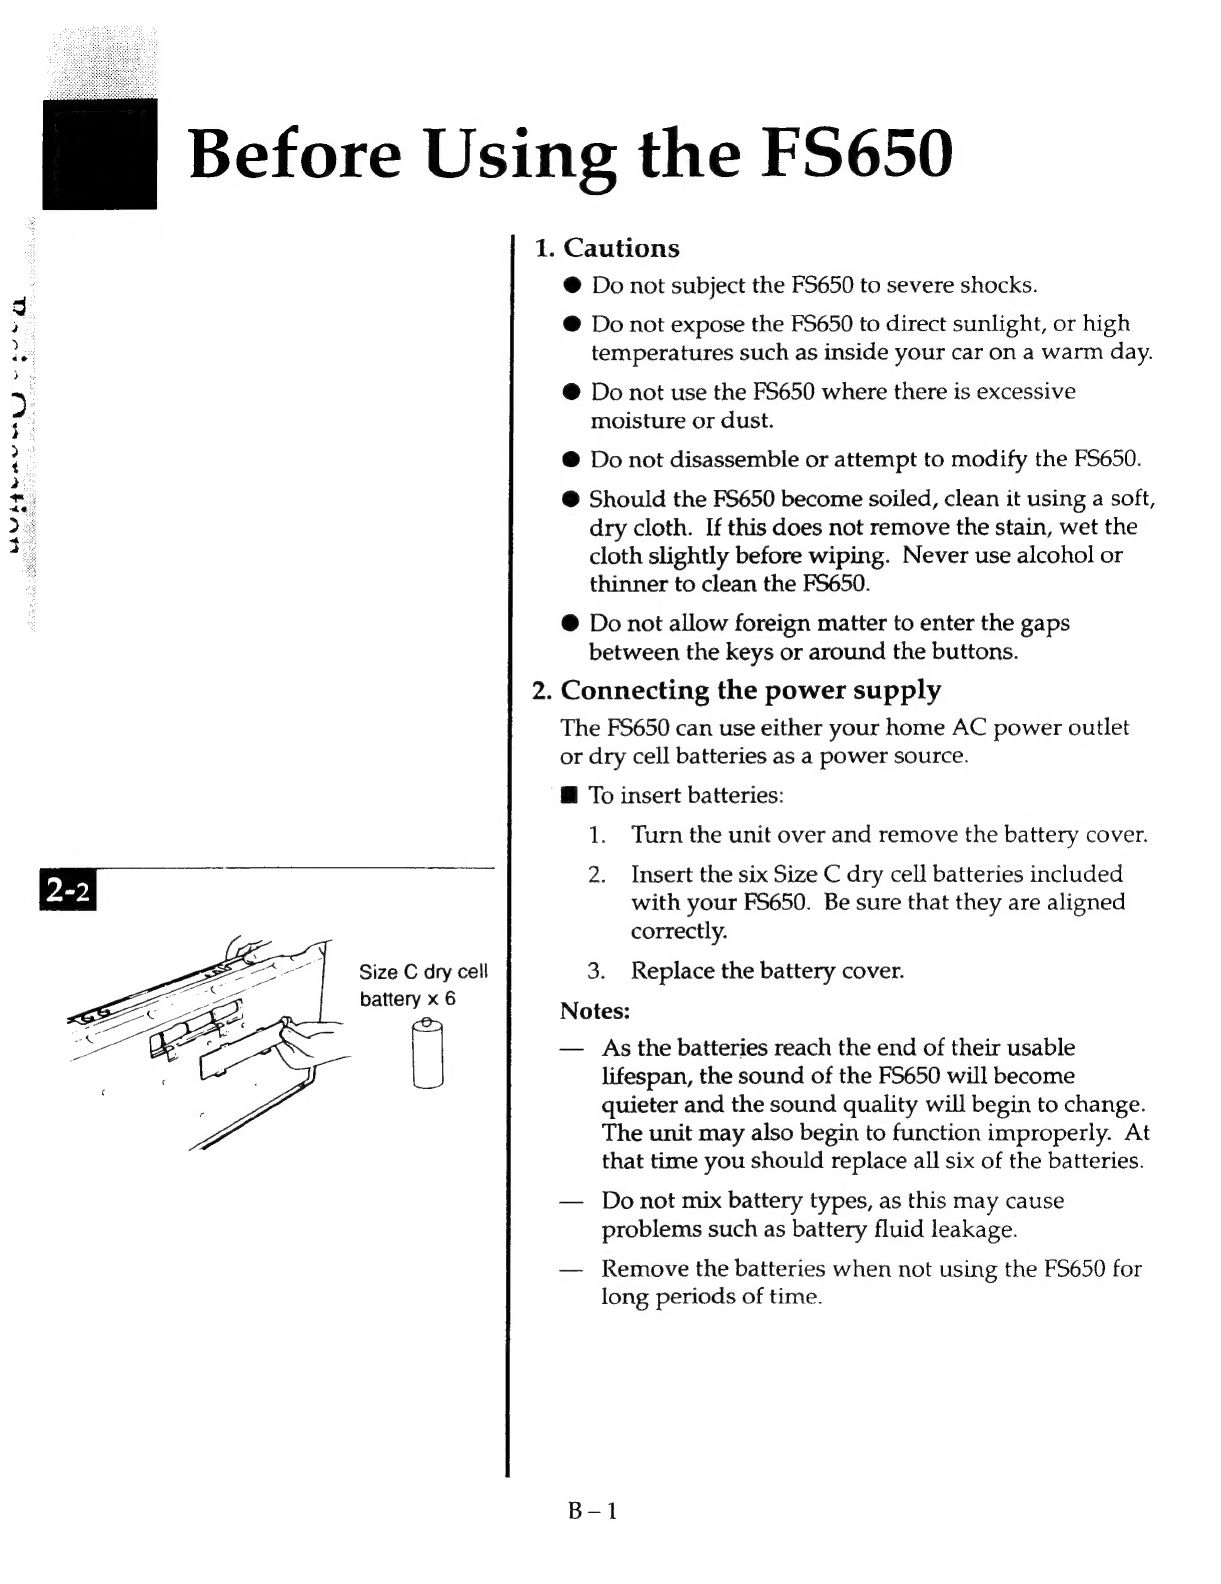
Before
Using
the
FS650.......0.0000c
B-1
@
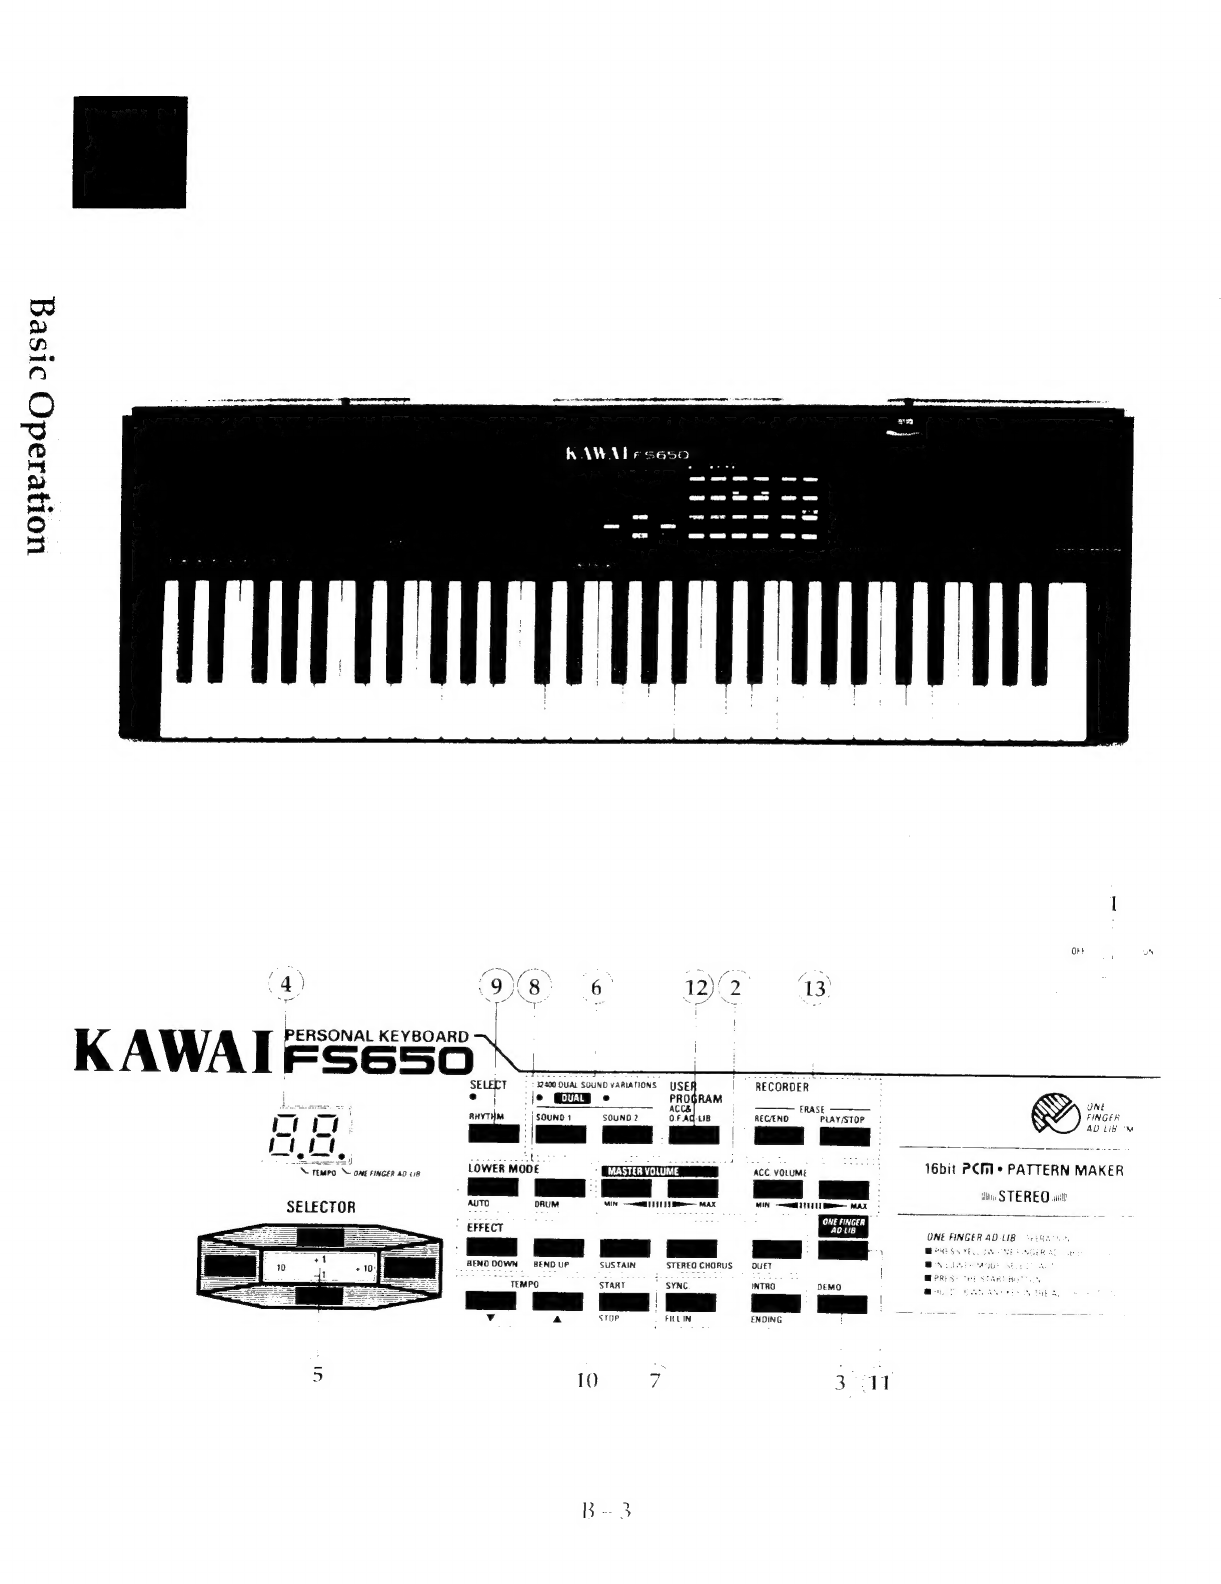
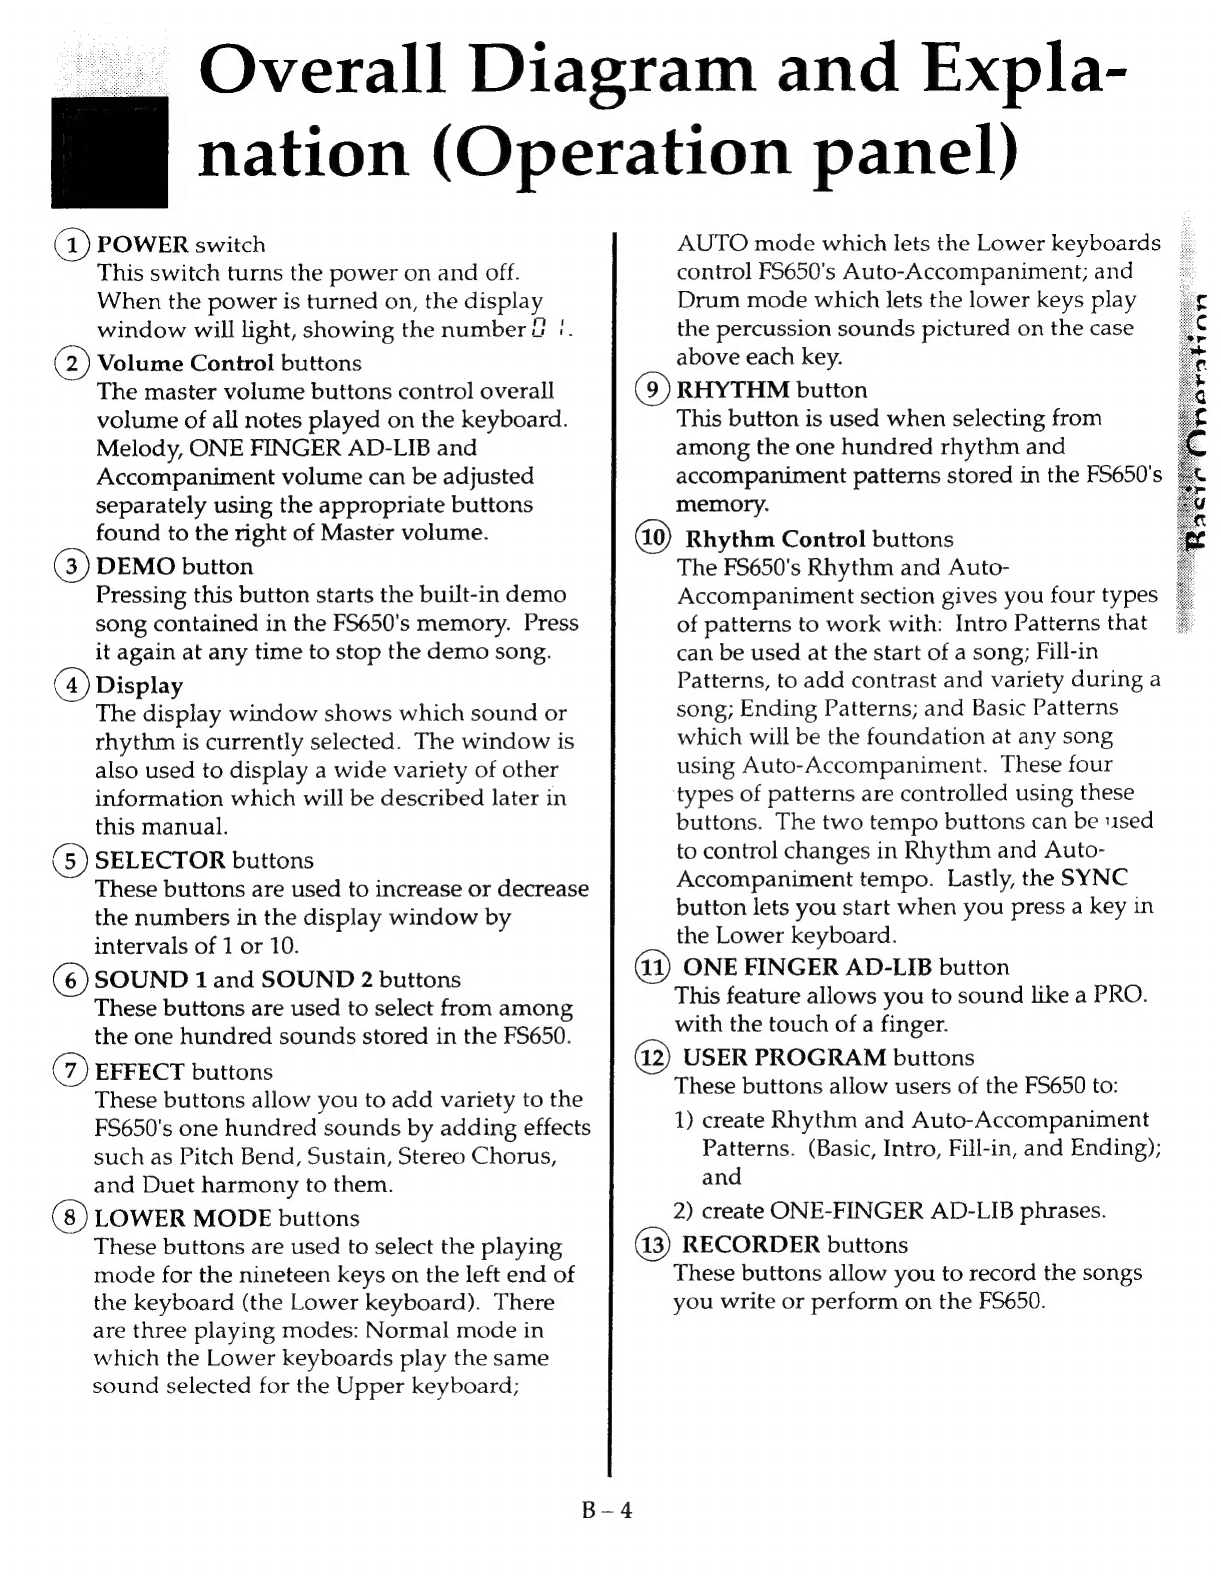
Overall
Diagram
and
Explanation
(Operation
panel)
«0...
ccseseccsseseeseseees
B-4
M@
Overall
Diagram
and
Explanation
(Rear
panel
and
KeyS)..........ccccccccecese
B-6
M@
Getting
Started
on
your
FS650
Selecting
SoundsS...0......esesesesesseseseseees
B-7
M@
Getting
Started
with
Rhythm................
B-8
@
Other
Important
Rhythm
Functions....B
-
9
@
Changing
Rhythm
Tempo............0..00..
B-10
@
Using
Auto-Accompaniment
for
easy
ensemble
play
.........0...0.000000--
B-11
M@
Using
Auto-Accompaniment
Section:
TON
ces
ireenictsned
astern
Searels
eet:
B-12
m@
Using
ONE
FINGER
AD-LIB
for
an
ad-lib
performance
..........0.......
B-13
M@
The
Mixer
Section...
B-16
@
Advanced
Use
of
Sounds:
..........00000000.
A-1
@
Combing
Two
Sounds..........0.c.c...
A-1
@
Adding
Effects...
cece
A-2
@
Advanced
Use
of
Auto-
Accompaniment
Section:
.........cccee
A-3
@
Explanation
of
the
AUTO
2.0.0.0...
A-4
@
Explanation
of
the
AUTO
3.............
A-6
@
Explanation
of
the
AUTO
4.............
A=7
@
[ntroducing
Accompaniment
TOG
ce
tgaitctatnyceiatta
ce
cine
h
ete,
A-8
Table
of
Contents
@
Creating
Rhythm
and
Auto-
Accompaniment
Patterns:
.......0.......
A-10
@
Creating
Basic
Patterns...................
A=
@
Creating
Fill
in
and
Intro/Ending
Patterns....................
A-12
@
Storing
the
Newly
Created
Patterns
set
tex
erate
aist
esate
cuaseces.
A-13
@
Programmable
ONE
FINGER
AD-LIB:
........ccccceeees
A-15
@
Creating
Phrase
00.0.0...
A-15
@
Storing
Phrase
00...
eeseeeseeees
A-17
@
Using
the
SYSTEM
Functions............
A-19
@
Tuning
Control
00.0.0.
eee:
A-19
@
Transpose
and
Accompaniment
TANG
Pedal
hc
essiacesseticwdarteachcalseists
A
-
20
Appendixes
Mi
Appendixes
sc2iix,
Sick
Scie:
dct
Ap-1
M
Specifications
0.0.0...
Ap-2