Kawai Concert Performer CP3 User manual

1
Part Names
& Functions
2
Listening to
the Piano
3
Playing the Piano
(Basic Controls)
4
Recording a Song
5
Using a Style
6
Music Menu
7
Settings Menu
8
Virtual
Technician
9
Using USB
Memory
10
Appendices
Owner’s Manual

All descriptions and specifications in this manual are subject to change without notice.

Page
3
Thank you for purchasing this KAWAI Concert Performer (CP) Series Ensemble Digital Piano.
The CP Series piano has been designed to provide you with the ultimate musical experience, no matter your skill level.
Featuring superbly realistic instrument tones and the most finely crafted keyboard in its class, the CP is a unique musical
instrument resulting from the combination of KAWAI’s eighty-five-plus years experience in making acoustic pianos, along
with cutting-edge digital music technologies.
With over 1000 different instrument and drum sounds at your disposal, you will have the flexibility to perform any kind of
music ranging from traditional to contemporary.The Auto-Accompaniment Styles provide the enjoyment of playing rich, fully
orchestrated music in hundreds of musical genres. Thanks to the Song Stylist feature, you will never have to worry about
finding the best sounds and style to perform a particular song.
The Concert Performer incorporates many professional features, such as a 16-track Recorder, Microphone Input, USB to
Device functionality and MP3 recording/playback. For the non-player, KAWAI’s unique Concert Magic feature creates the
thrill of being a performing musician simply by tapping any key on the keyboard.
The Concert Performer offers tremendous opportunities for anyone who is interested in learning, playing, and listening
to music. Please read this manual thoroughly and keep it handy as a reference so that you can get the most out of this
incredible instrument.
We hope you enjoy every moment that you spend with your Concert Performer.

Page
4
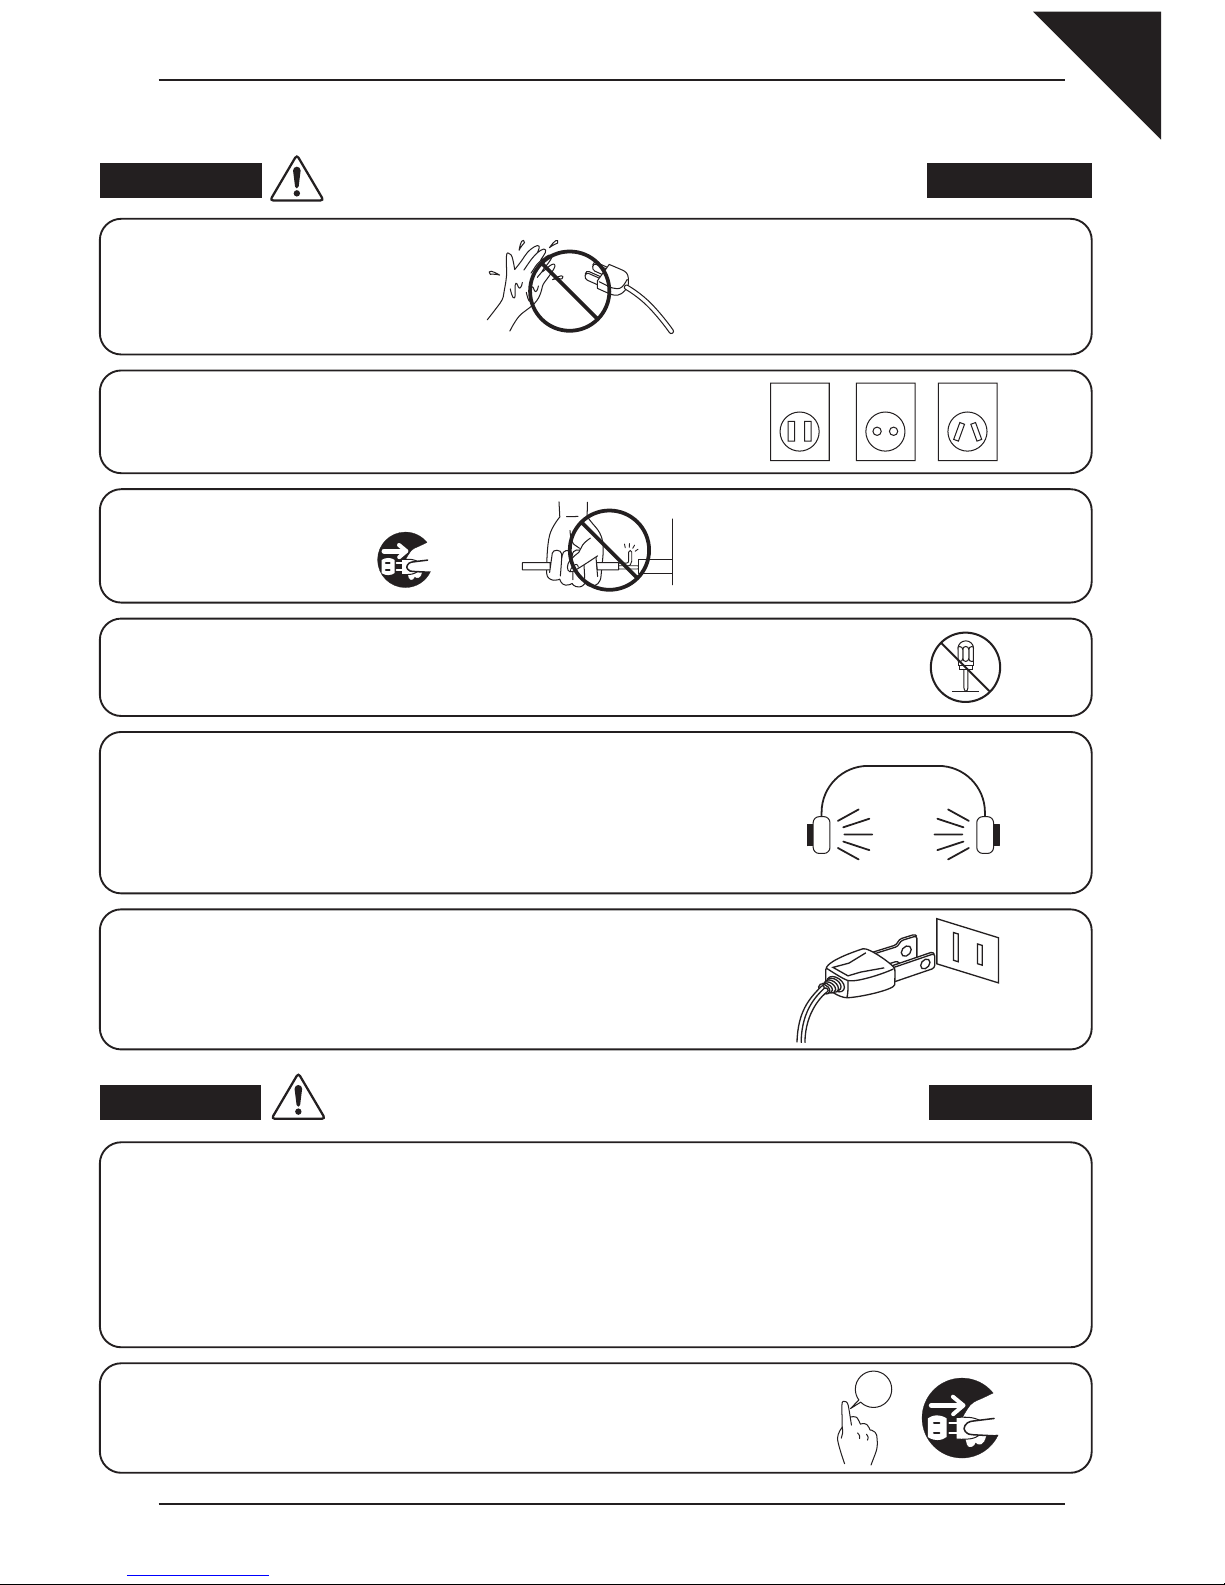
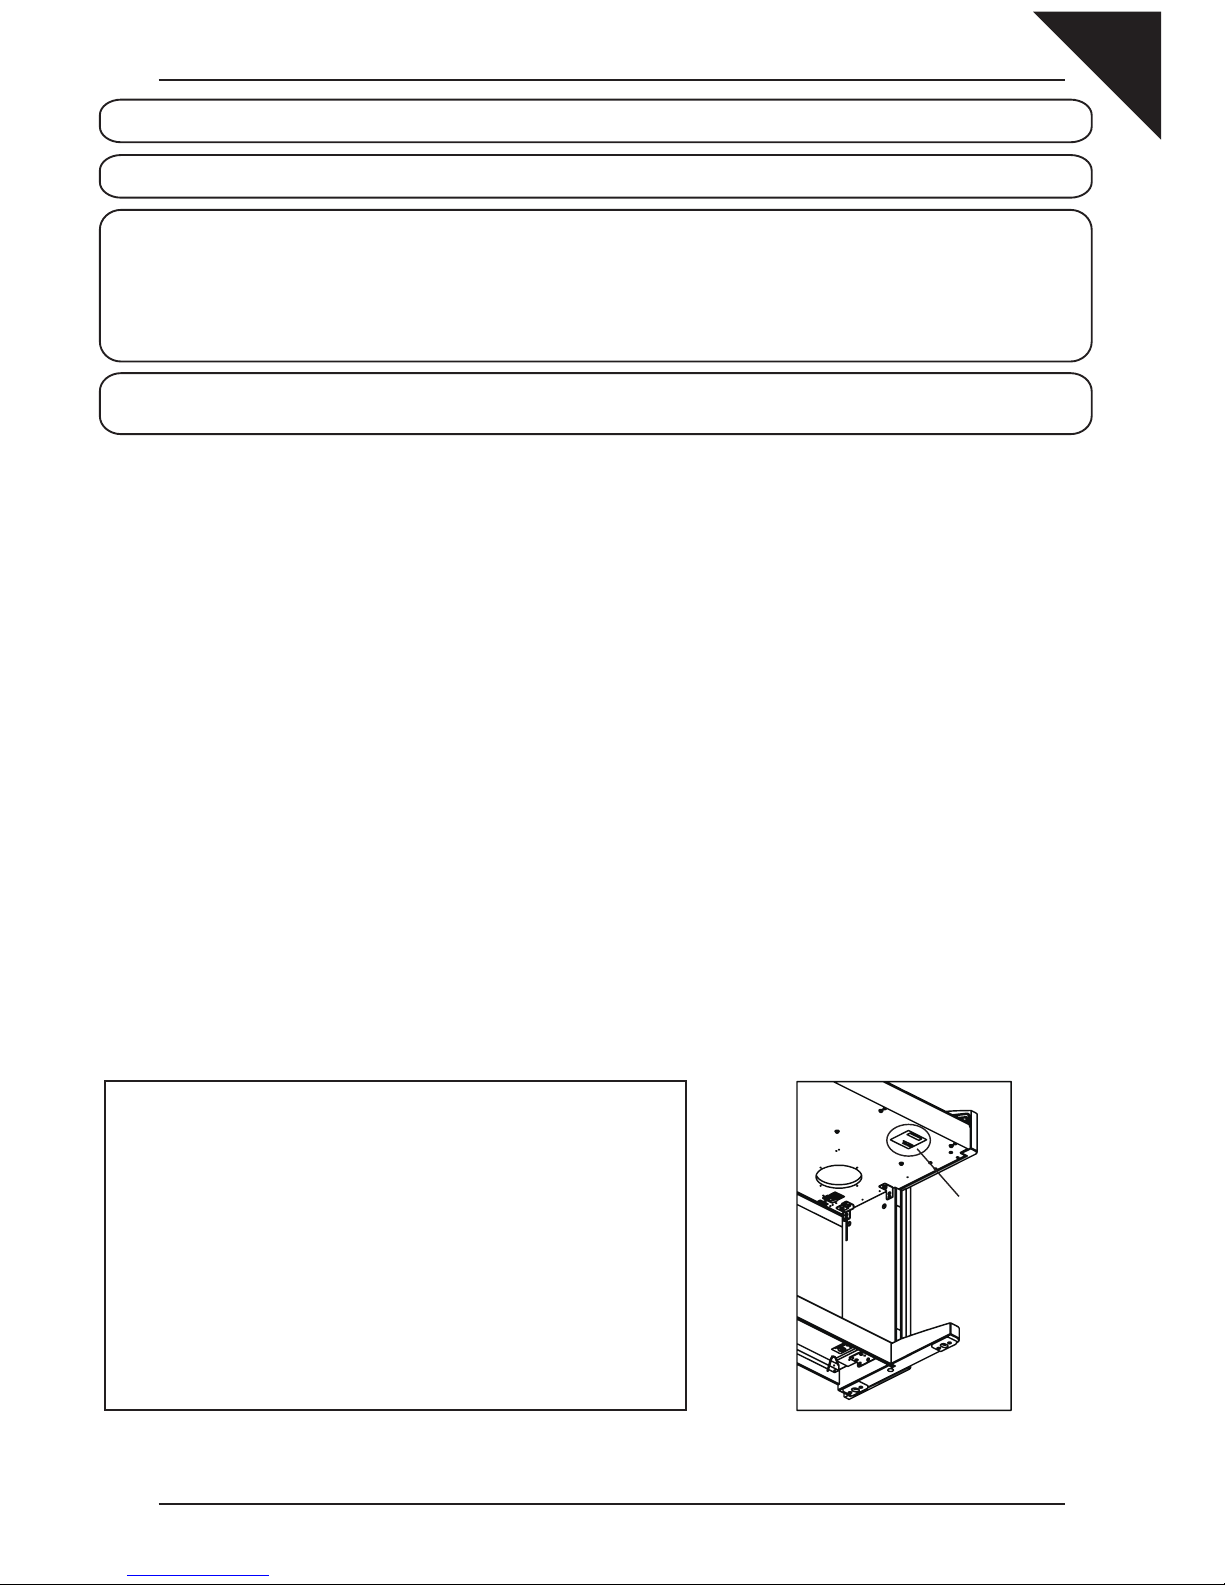
¡Important Safety Instructions..............6
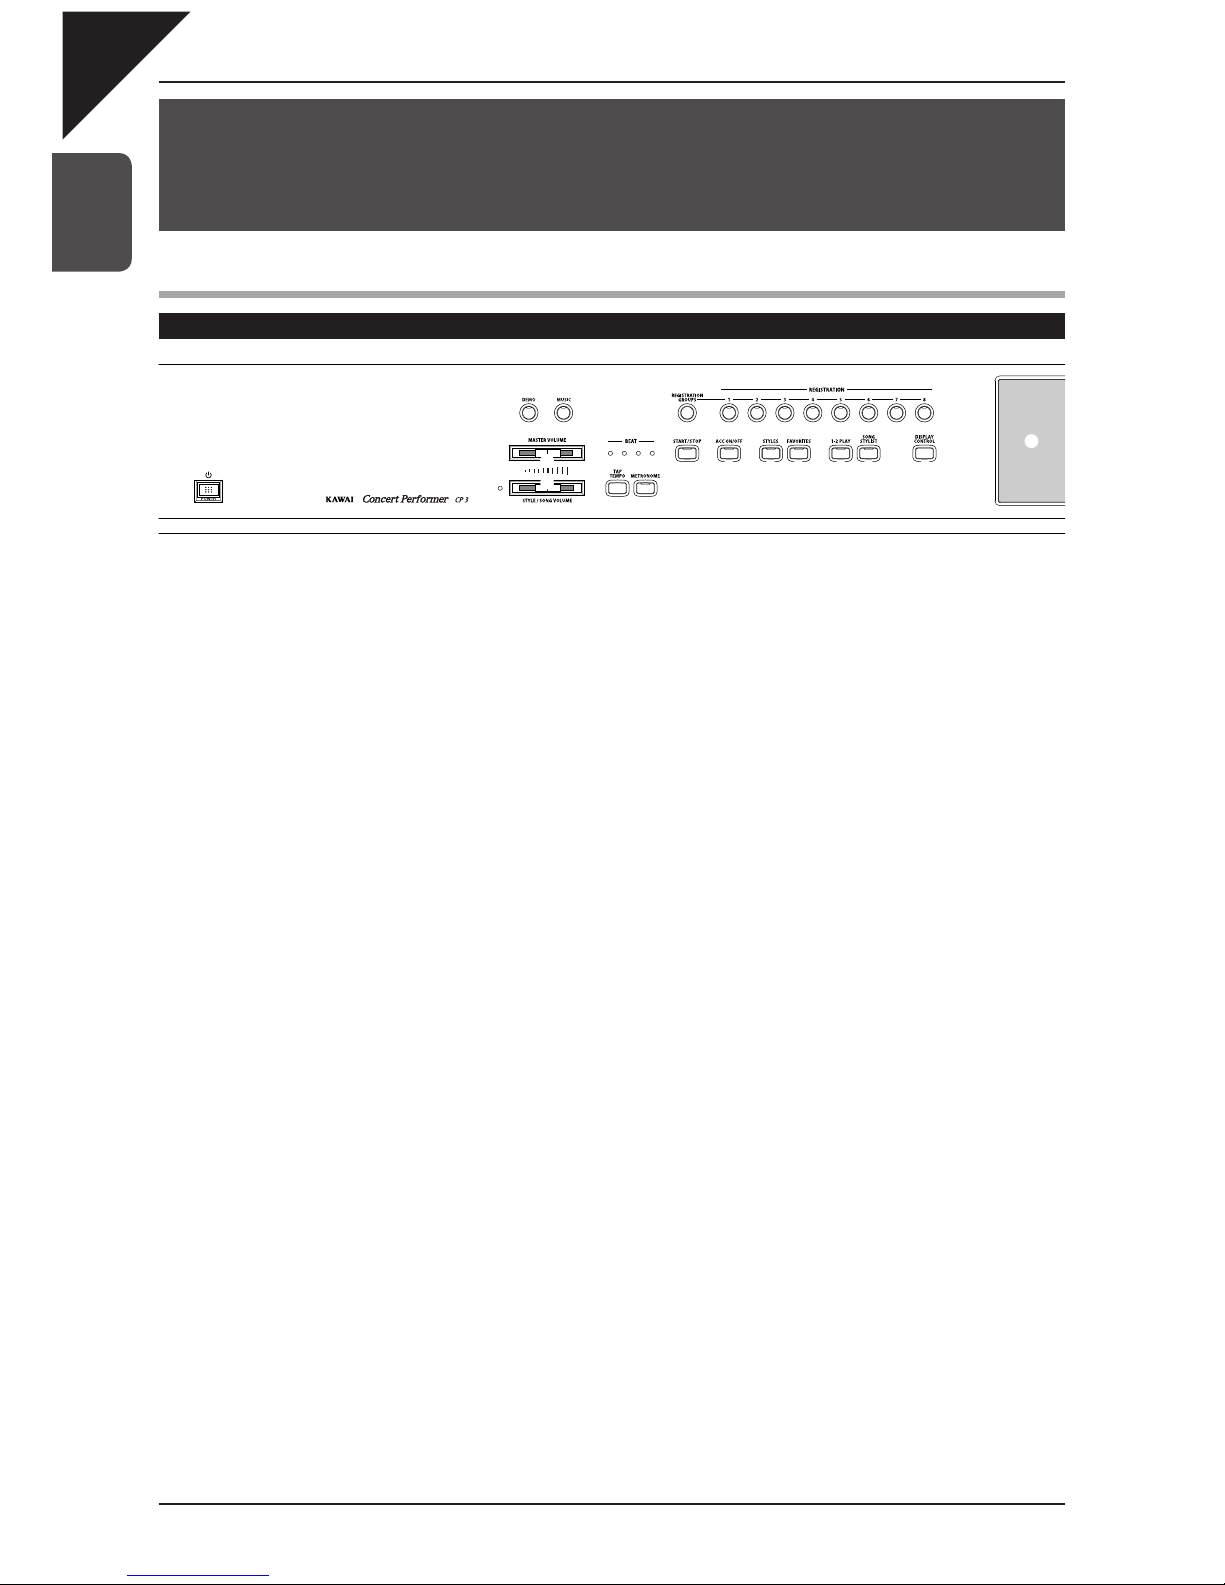
1. Part Names and Functions ...............10
1) Parts and Names............................................................ 10
Pedals ........................................................................ 12
Front Terminals........................................................... 12
Rear Terminals........................................................... 12
2) Overview of Controls ...................................................... 13
2. Listening to the Piano .......................15
1) Demonstrations .............................................................. 15
3. Playing the Piano (Basic Controls) ...........16
1) Selecting a Part to Play .................................................. 16
Splitting the keyboard................................................. 17
2) Selecting Sounds............................................................ 18
Favorite Sounds. ........................................................ 19
3) Mixer............................................................................... 20
4) Effects............................................................................. 22
Adding Reverb ........................................................... 22
Adding Chorus ........................................................... 23
Adding an Effect......................................................... 24
Effect Priority Guidelines............................................ 25
5) Transpose and Octave Shift............................................ 27
6) Metronome ..................................................................... 28
7) Piano Only...................................................................... 29
8) KBD Settings Button....................................................... 30
LEFT PEDAL and CENTER PEDAL Override ........... 30
KBD SETTINGS BUTTON ASSIGN (Portamento, Panel Lock)
......... 31
LEFT MODE .............................................................. 32
4. Recording a Song .............................33
1) Easy Recording .............................................................. 34
Re-recording or adding another Part ......................... 35
Storing the song in Internal Memory.......................... 36
Erasing the song........................................................ 36
Easy Loop.................................................................. 37
Display of a Score...................................................... 37
2) Advanced Recording ...................................................... 39
Real-time Recording .................................................. 39
Mixer .......................................................................... 41
Track Settings............................................................. 42
Loop Settings............................................................. 43
Style Paste................................................................. 44
Punch-In Recording ................................................... 45
Step Recording .......................................................... 46
Song Edit ................................................................... 48
Bar Editing ................................................................. 49
Event Edit................................................................... 55
Style Maker ................................................................ 56
5. Using a Style.....................................57
1) Selecting and Playing a Style......................................... 57
Intro/Ending................................................................ 59
Fill-In and Variation .................................................... 59
Favorites Button ......................................................... 59
2) Auto Accompaniment System ........................................ 60
3) 1-2 Play .......................................................................... 62
4) Registration .................................................................... 63
5) Song Stylist..................................................................... 66
6) Keyboard Harmony......................................................... 69
7) Creating Your Own Styles............................................... 70
8) Conductor....................................................................... 71
Easy Edit.................................................................... 71
Style Effect................................................................. 72
9) Making a Style with Get Phrase from Recorder ............. 73
Auto-accompaniment System .................................... 75
10) Making a Style with Phrase Combination.............................77
11) Editing Sounds ............................................................. 79
Editing the Preset Effect Settings............................... 79
Making a User Sound ................................................ 80
6. Music Menu.......................................82
1) Concert Magic ................................................................ 82
Selecting a Concert Magic Song................................ 82
Performing a Concert Magic Song............................. 84
Concert Magic Song Arrangements........................... 86
Steady Beat Play........................................................ 87
Creating a Concert Magic Song................................. 87
2) Lesson Function ............................................................. 88
Selecting a Lesson Book/Song.................................. 88
Listening to the selected Lesson Song ...................... 89
Repeating a passage of the selected Lesson Song... 89
Adjusting the Left/Right hand volume balance........... 90
Adjusting the playback tempo .................................... 90
Recording a Lesson Song practise............................ 90
Finger Exercises ........................................................ 91
3) My Songs........................................................................ 92
7. Settings Menu...................................93
1) Tuning ............................................................................. 93
2) Concert Magic Sound..................................................... 94
3) Pedal Assign................................................................... 95
4) Fill-in Mode..................................................................... 97
5) Effect for Sound.............................................................. 98
6) Sound Select Mode ........................................................ 99
7) Style Select Mode......................................................... 100
8) MIDI Menu.................................................................... 101
MIDI Settings ........................................................... 101
Transmit MIDI Data .................................................. 102
Channel Receive On/Off.......................................... 102
MIDI Accordion ........................................................ 103
MIDI Sound Settings................................................ 103
9) Power Up Settings........................................................ 104
10) Registration Filter ....................................................... 105
11) Soft Reset................................................................... 106
12) Software Version......................................................... 107
Display Control ................................................................. 108
Table of Contents

Page
5
8. Virtual Technician............................109
1) Touch Curve.................................................................. 110
User Touch Curve .................................................... 110
2) Voicing .......................................................................... 111
3) Resonance ................................................................... 112
4) Noise Settings .............................................................. 112
5) Pedal Settings............................................................... 113
6) Temperament................................................................ 113
Brief Explanation of Temperaments ......................... 114
7) Stretch .......................................................................... 115
8) 88 Key Volume.............................................................. 116
9) Hammer Delay.............................................................. 117
10) Top Board ................................................................... 117
11) Decay Time................................................................. 118
12) Minimum Touch........................................................... 118
9. Using USB Memory ........................119
USB Menu ........................................................................ 119
Saving Data to USB Memory............................................ 119
Loading Data from USB Memory...................................... 121
Erasing Data from USB Memory ...................................... 123
Formatting a USB Memory Device ................................... 124
Play MIDI Song................................................................. 125
Controlling Song Playback................................................ 126
Playing MP3/WAV Audio................................................... 128
Recording MP3/WAV Audio.............................................. 130
Recording with additional sound sources ......................... 131
10. Appendices ...................................133
1) Connection Examples................................................... 133
2) USB MIDI Information................................................... 135
3) Assembly Instructions................................................... 136
4) Preset Styles ................................................................ 138
5) Song Stylists................................................................. 140
6) Concert Magic Songs................................................... 143
7) Lesson Songs............................................................... 145
8) Accompaniment Chord Types....................................... 149
9) Program Change Numbers........................................... 150
10) Drum & SFX Kit Mapping ........................................... 152
11) Specifications ............................................................. 154
12) MIDI Implementation Chart ........................................ 155
User Notes........................................................................ 156

Page
6
Important Safety Instructions
denotes that care should be taken.
The example instructs the user to take care not to allow fingers to be trapped.
denotes a prohibited operation.
The example instructs that disassembly of the product is prohibited.
denotes an operation that should be carried out.
The example instructs the user to remove the power cord plug from the AC outlet.
Examples of Picture Symbols
Read all the instructions before using the product.
CAUTION
RISK OF ELECTRIC SHOCK
DO NOT OPEN
AVIS : RISQUE DE CHOC ELECTRIQUE - NE PAS OUVRIR.
TO REDUCE THE RISK OF ELECTRIC SHOCK, DO NOT REMOVE COVER (OR BACK).
NO USER-SERVICEABLE PARTS INSIDE. REFER SERVICING TO QUALIFIED SERVICE PERSONNEL.
The lighting flash with arrowhead symbol, within an
equilateral triangle, is intended to alert the user to
the presence of uninsulated "dangerous voltage"
within the product's enclosure that may be of
sufficient magnitude to constitute a risk of electric
shock to persons.
The exclamation point within an equilateral triangle
is intended to alert the user to the presence of
important operating and maintenance (servicing)
instructions in the leterature accompanying the
product.
WARNING
TO REDUCE THE RISK OF
FIRE OR ELECTRIC
SHOCK, DO NOT EXPOSE
THIS PRODUCT TO RAIN
OR MOISTURE.
INSTRUCTIONS PERTAINING TO A RISK OF FIRE, ELECTRIC SHOCK, OR INJURY TO PERSONS
SAVE THESE INSTRUCTIONS
1) Read these instructions.
2) Keep these instructions.
3) Heed all warnings.
4) Follow all instructions.
5) Do not use this apparatus near water.
6) Clean only with dry cloth.
7) Do not block any ventilation openings. Install in
accordance with the manufacturer's
instructions.
8) Do not install near any heat sources such as
radiators, heat registers, stoves, or other
apparatus (including amplifiers) that produce
heat.
9) Do not defeat the safety purpose of the
polarized or grounding-type plug. A polarized
plug has two blades with one wider than the
other. A grounding type plug has two blades
and a third grounding prong. The wide blade or
the third prongs are provided for your safety. If
the provided plug does not fit into your outlet,
consult an electrician for replacement of the
obsolete outlet.
10) Protect the power cord from being walked on
or pinched particularly at plugs, convenience
receptacles, and the point where they exit from
the apparatus.
11) Only use attachments/accessories specified by
the manufacturer.
12) Use only with the cart, stand, tripod, bracket, or
table specified by the manufacturer, or
sold with the apparatus. When a cart is used,
use caution when moving the cart/apparatus
combination to avoid injury from tip-over.
13) Unplug this apparatus during lightning storms
or when unused for long periods of time.
14) Refer all servicing to qualified service
personnel. Servicing is required when the
apparatus has been damaged in any way, such
as power-supply cord or plug is damaged,
liquid has been spilled or object have fallen
into the apparatus, the apparatus has been
exposed to rain or moisture, does not operate
normally, or has been dropped.

Page
7
WARNING Indicates a potential hazard that could result in death
or serious injury if the product is handled incorrectly.
WARNING - When using electric products, basic precautions should always be followed,
including the following.
Do not use this product near water -
for example, near a bathtub,
washbowl, kitchen sink, in a wet
basement, or near a swimming
pool, or the like.
Do not touch the power plug with wet hands.
There is a risk of electrical shock. Treat the
power cord with care as well.
Stepping on or tripping over it can break or
short-circuit the wire inside.
Pulling the AC power cord itself may damage
the cord, causing a fire, electric shock or
short-circuit.
The product should be connected to a power supply only of the
type described in the operatiing instructions or as marked on
the product.
120V 230V 240V
When disconnecting the AC power cord's
plug, always hold the plug
and pull it to remove it.
Do not attempt to service the product beyond that described in the user-maintenance
instructions. All other servicing should be reffered to qualified service personnel.
This product in combination with an amplifier and headphones or
speakers, may be capable or producing sound level that could cause
permanent hearing loss. Do not operate for a long period of time at a
high volume level or at a level that is uncomfortable. If you experience
any hearing loss or ringing in the ear, you should consult an
audiologist.
This product may be equipped with a polarized line plug (one blade
wider than the other). This is a safety feature.
If you are unable to insert the plug into the outlet, contact an electrician
to replace your obsolete outlet.
Do not defeat the safety purpose of the plug.
Using the product in such areas may result in
product breakdown.
CAUTION Indicates a potential hazard that could result in injury
or damage to the product or other property if the
product is handled incorrectly.
Do not use the product in the following areas.
Areas, such as those near windows, where the product is
exposed to direct sunlight.
Extremely hot areas, or close to heat sources such as
radiators, heat registers, or other products that produce heat.
Extremely cold areas, such as outside.
Extremely humid areas.
Areas where a large amount of sand or dust is present.
Areas where the product is exposed to excessive vibrations.
Always turn the power off when the instrument is not in use. The product
is not completely disconnected from the power supply even when the
power switch is turned off. The power supply cord of the product should
be unplugged from the outlet when left unused for a long period of time.
OFF

Page
8
It is a good practice to have the instrument near the AC outlet and the power cord plug in a position so
that it can readily be disconnected in an emergency.
The product should be located so that its location or position does not interfere with its proper ventilation.
OFF Failure to do so may cause breakdown of this
product and other devices.
Before connecting cords, make sure
that the power to this product
and other devices is turned OFF.
Failure to do so may damage them, resulting in
fire, electric shock or short-circuit.
When connecting the AC power cord
and other cords, take care not to get
them tangled.
Keep the instrument away from electrical motors, neon signs,
fluorescent light fixture, and other sources of electrical
noises.
Care should be taken so that objects do not fall and liquids are not spilled
into the enclosure through openings.
The product shall not be exposed to dripping or splashing. No objects filled
with liquids, such as vases, shall be placed on the product.
Take care not to drop the product.
Please note that the product is heavy and must be handled by more than
one person. Dropping the product may result in breakdown.
Do not lean against the product.
Doing so may cause the product to move unexpectedly, resulting in
injury.
Do not stand on the product or exert excessive force.
Doing so may cause the product to become deformed or fall over, resulting in
breakdown or injury.
Do not wipe the product with benzene or thinner.
Doing so may result in discoloration or deformation of the product.
When cleaning the product, put a soft cloth in lukewarm water, squeeze it well, then
wipe the product.

Page
9
To reduce the risk of injury, close supervision is necessary when a product is used near children.
This product should be used only with the stand that is provided by the manufacturer.
CAUTION:
To prevent electric shock, match wide blade of plug to wide slot, fully insert.
ATTENTION:
Pour éviter les chocs électriques, introduire la lame la plus large de la fiche dans la borne correspondante de la
prise et pousser jusqu'au fond.
FCC Information
This equipment has been tested and found to comply with the limits for a Class B digital device, pursuant to Part 15 of
the FCC Rules. These limits are designed to provide reasonable protection against harmful interference in a residential
installation. This equipment generates, uses and can radiate radio frequency energy and, if not installed and used in
accordance with the instructions, may cause harmful interference to radio communications.
If this equipment does cause harmful interference to radio or television reception, which can be determined by turning
the equipment off and on, the user is encouraged to try to correct the interference by one or more of the following
measures:
•Reorient or relocate the receiving antenna.
•Increase the separation between the equipment and receiver.
•Connect the equipment into an outlet on a different electrical circuit from the receiver.
•Consult the dealer or an experienced radio/TV technician for help.
The product should be serviced by qualified service personnel when:
The power supply cord or the plug has been damaged.
Objects have fallen, or liquid has been spilled into the product.
The product has been exposed to rain.
The product does not appear to operate normally or exhibits a marked change in performance.
The product has been dropped, or the enclosure damaged.
Should an abnormality occur in the product, immediately turn the power OFF, disconnect the power cord plug, and
then contact the shop from which the product was purchased.
Declaration of Conformity
Products : Electronic Piano
Model Number : CP3
Responsible Party Name : Kawai America Corporation
Address : 2055 East University Drive Rancho
Dominguez, CA 90220
Telephone : 310-631-1771
This device complies with Part 15 of the FCC Rules.
Operation is subject to the following two conditions:
(1) this device may not cause harmful interference, and
(2) this device must accept any interference received,
including interference that may cause undesired operation.
This applies only to products distributed by Kawai America Corporation.
Nameplate
CP3

Page
10
1
Part Names
& Functions
1.
Part Names & Functions
1) Parts and Names
Control Panel
a
de f g
hi
jn plk
c
bm o
q
aPOWER
Turns the instrument on/off.
bMASTER VOLUME
This slider is used to adjust the overall volume level of
the instrument.
cSTYLE / SONG VOLUME
This slider is used to adjust the volume level of the Auto
Accompaniment Styles.Also used to adjust the volume
level of a MIDI song played from the CP’s Internal
Recorder or directly from USB memory.This slider does
not affect the Master Volume Slider setting.
dDEMO (page 15)
This button is used to select the built-in demo songs.
eMUSIC (page 82)
This button is used to show the Music Menu, used
to select the CP’s Concert Magic, Piano Music, and
Lesson Function features.
fREGISTRATION GROUPS (page 63)
This button is used to select one of the 10 groups of
preset and user registrations.
gREGISTRATIONS (page 63)
These buttons are used to recall one of the eight panel
settings available in the currently selected Registration
group.
hTAP TEMPO (page 28)
This button is used to tap in the desired tempo for a
song or Style.
iMETRONOME (page 28)
This button is used to turn the Metronome on/off.
jSTART / STOP (page 57)
This button is used to start and stop the accompaniment
style.
kACC ON/OFF (page 60)
This button is used to turn the Auto-Accompaniment
function on/off.
lSTYLES (page 57)
This button is used show the Styles interface in the
LCD display.
mFAVORITES (page 59)
This button is used to show the Style Favorites screen.
n1-2 PLAY (page 62)
This button is used to automatically choose an
appropriate sound and setup for the selected style.
oSONG STYLIST (page 66)
This button is used to select the Song Stylist
Registrations.
pDISPLAY CONTROL (page 108)
This button is used to access and adjust settings for
the LCD screen.
qLCD TOUCH SCREEN
Displays information about the CP’s current sound
selections, options, and settings, etc., while also
controlling many aspects of the CP.

Page
11
1
Part Names
& Functions
rTEMPO / VALUE Dial
This Dial is used to adjust tempo, scroll through different
selections, and adjust data values for items on the
LCD screen.
sEXIT
This button is used to back up to the next-higher screen
level. Keep pressing the Exit button from any screen
on the CP will bring you back to the CP’s main play
screen.
tTRANSPOSE (page 27)
These buttons are used to change the overall pitch of
the CP in half-note steps.
uOCTAVE SHIFT (page 27)
These buttons are used to change the pitch of the
selected part in octave steps.
vSOUND (page 18)
These buttons are used to select the desired sound
category. Touch the sound name as shown on the
LCD display, or rotate the Dial to select a sound within
the category.
wPIANO ONLY (page 29)
This button is used to automatically assign the
Concert Grand sound to the RIGHT1 part. Press and
hold this button to reset all sounds and styles to the
Start Up settings.
xPART (page 16)
Selects which of the three parts (LEFT/SPLIT,
RIGHT1, RIGHT2) are active and ready to be played
with the sounds assigned to them.
yREVERB (page 22)
This button turns on/off the Reverb. Press and hold
the button to select the Reverb settings menu.
zEFFECTS (page 23)
This button is used to select the Effects and Chorus
settings menu.
AKBD HARMONY (page 69)
This button turns on/off the Harmony for instrument
sounds. Press and hold this button to access the
Harmony Select screen.
BKBD SETTINGS (page 30)
This button shows the Keyboard Settings screen.
Press and hold this button to access settings for
the LEFT/SPLIT part as well as the left and Center
pedals.
CUSB (page 119)
This button is used to access the USB memory and
MP3/WAV play back/record functions.
DSETTINGS (page 93)
This button is used to access the system settings
menu.
ERECORDER (page 33)
These buttons are used to record and play back a
MIDI song stored in internal memory or on a USB
device.
FUSB PORT (page 119)
This jack is used to connect a standard USB memory
device to read and write user data and record/play
MP3/WAV audio files etc.
r
s
tx
v w
u
A Bz
C D
E
F
y
q

Page
12
1
Part Names
& Functions
Pedals
JSoft Pedal
Depressing this pedal softens the sound and reduces its volume.
This pedal can also be assigned to control other functions.
(See page 95)
KSostenuto Pedal
Depressing this pedal after playing the keyboard and before
releasing the keys sustains the sound of only the keys just
played. This pedal can also be assigned to control other
functions. (See page 95)
LDamper Pedal
Sustains the sound after lifting your hands from the keyboard.
The damper pedal is capable of responding to half pedaling.
Front Terminals
MHeadphone Jacks
These jacks are used to connect up to two headphones to the
CP piano.
Rear Terminals
KJLKJL
MM
NLine Out Jacks
These jacks are used to provide stereo output of the
CP’s sound to amplifiers, tape recorders or similar
equipment. The audio signal coming through the LINE
IN jacks is also routed to these jacks.
OLine In Jacks
These jacks are used to connect stereo outputs from
other audio equipment or electronic instruments to the
CP’s speakers.The audio signal coming through these
jacks bypasses the CP’s volume control.
PMIDI Jacks
These jacks are used to connect external MIDI devices
to the CP.
QUSB Jack
This jack is used to connect a personal computer to
the CP.
NO PQ

Page
13
1
Part Names
& Functions
2) Overview of Controls
This manual provides you with all the information you will need in order to take full advantage of the Concert
Performer’s potential. Before you begin learning how to use the specific features, it is important to understand
some of the basic ideas behind the instrument’s design.
The Concert Performer has been designed to have an easy and intuitive user interface. However, the instrument
has so many features that it is simply impractical to have a dedicated button for every single one. As a result, many
features and functions are selected by choosing them from lists, or “menus”, that are presented to you on the CP’s
large display screen. Often times selecting an item from a menu may access another “sub-menu” of options specific
to that item. This system of menus and sub-menus keeps everything logical and straightforward and becoming
familiar with how to make your way through them is very easy.
¡Panel Buttons
Most of the buttons on the front panel are used to directly select a function on the CP that you would like to work
with. In most cases, the specific function name is printed on the front panel directly above the button. For example,
there are buttons labeled START/STOP, STYLES, and so on.In this manual, references to these buttons are always
printed in capital letters for clarity. Most of these buttons have an LED Indicator (small light) on them.This Indicator
will be turned ON when a function is in use so that you can quickly see if that function is active.
¡LCD Touch Screen
The LCD Touch Screen is the window through which the Concert Performer communicates with you. The large
display size allows many items to be clearly displayed at the same time, allowing for not only words but graphics
to be shown as well.
As well as providing information about the current sound and style selections, and other important settings, the
LCD display can also be used to control numerous functions of the CP3. Simply touch the part of the screen that
corresponds to the function you wish to control or adjust. Below is an example of the default MAIN screen that
appears when the instrument is first turned on.
RIGHT1 part: Concert Grand
selected and currently active
RIGHT2 part: Beautiful Strings
selected but currently inactive
STYLE: Show STYLE screen
RECORDER: Show
RECORDER screen
LEFT part: Pop Ensemble
selected, but currently inactive
MIXER: Show MIXER screen
SETTINGS: Show
SETTINGS screen
MUSIC: Show MUSIC screen
RIGHT1 part: Concert Grand
selected and currently active
In some cases when you touch an item displayed on the screen, that item will become highlighted (shown in
reverse color) to indicate you it has been selected. However, in other cases a submenu screen relating to that
item will be displayed, presenting you with further options.
To exit a screen, press the EXIT button, or touch the X icon (when visible) positioned in the top right corner of
the screen.

Page
14
1
Part Names
& Functions
Note that in order to avoid possible confusion within this owner’s manual, operating instructions related to the touch
screen will use the verb
touch
, while instructions related to the button panel will use the verb
press
.
E.g.:
Touch
the PAGE Xbutton on the LCD display.
Press
the RIGHT1 panel button.
If no panel buttons are pressed, and the LCD display is not touched while showing different screen menus (such
as the sound or style category lists), the LCD display will automatically return to the MAIN screen after a period
of 20 seconds. To adjust this waiting period, or to prevent the MAIN screen from returning automatically, please
refer to the Display Control instructions on page 108 of this owner's manual.
¡Dial
The Dial is used to change data values and scroll through options that are displayed on the
LCD screen.
When you turn the Dial, you will notice that whatever item on the LCD screen is currently
selected (highlighted) will be affected. For example, when a Part is selected, turning the Dial
will change the sound of that Part, while if the mixer screen is shown, turning the Dial will
increase/decrease the level of the selected part.
Alternatively, when the screen presents you with a list of choices, turning the Dial will allow you
to quickly scroll through the list until you arrive at your choice.

Page
15
2
Listening to
the Piano
2. Listening to the Piano
1) Demonstrations
The Concert Performer features a variety of built-in Demonstration songs that really show off the musical potential
of the instrument. These songs were composed by some of the top musicians in the music industry, and will
undoubtedly impress and inspire you. There are two types of Demonstrations programmed in the CP piano.
Sound Category Demos
Each Sound category has a song, or songs, that demonstrate the sound choices and capabilities found in the category.
Style Category Demos
Each Style category has a song, or songs, that demonstrate how the Auto-Accompaniment Styles can be used.
To listen to a Guided Tour/Sound/Style Demo
Step 1
Press the DEMO button.
A Sound or Style demonstration will be selected at random and begin to play.
The name of the Sound/Style demonstration will be shown in the LCD display.
SKIP : Skip to the next demonstration song in the category.
Step 2
Select your preferred Demo.
Press a SOUND category button to select a SOUND category demo.
Press the STYLES button, then touch a STYLE category to select a STYLE category demo.
SOUND or STYLE categories may play more than one demo song in sequence.
Step 3
To exit, press the EXIT, PLAY/STOP or the DEMO button.
When a selected Demo song ends, another song of the same type will be randomly chosen from another category and
played.You can select another demo song at any time by pressing the appropriate button.
The SOUND category buttons are used to select
the demo for that Sound category.

Page
16
3
Playing the Piano
(Basic Controls)
3.
Playing the Piano (Basic Controls)
This chapter discusses the basic operations that are used to play the Concert Performer, such as sound selection,
Part configuration and effect settings.
1) Selecting a Part to Play
When the CP’s main play screen is displayed (For example, when the CP is first turned on), you are presented with
three sound Parts that can be played from the keyboard.These three Parts are named LEFT/SPLIT, RIGHT1, and
RIGHT2, and each one has an instrument sound assigned to it.You can selectively turn on/off any combination of
these three Parts, allowing you to have up to three different sounds at the same time across the keyboard.
Sound assigned to Parts RIGHT1 and RIGHT2 will be layered on top of each other when both parts are active at
the same time.
Activating the LEFT/SPLIT Part automatically splits the keyboard so that the sound assigned to the LEFT/SPLIT Part
is only heard when you play below a specified key (split point). Each Part has a dedicated button on the front panel
that selects and turns on/off that Part. You can also select a Part by touching the appropriate area of the screen.
¡Selecting a Part is easy:
Step 1
Press the PART button for the Part you wish to activate.
The PART button LED will light.
Step 2
Press the PART button again to turn that Part off.
If the LCD screen is currently showing the main play screen, you can tell which Parts are active by looking at the name
of the sound assigned to it. If the name of a sound is in a large typeface, then the Part it is assigned to is active. If the
sound name is displayed in a small typeface, then the Part is not active.
LEFT is currently inactive
This example indicates:
RIGHT1 is currently active
RIGHT2 is currently inactive

Page
17
3
Playing the Piano
(Basic Controls)
Splitting the keyboard
When the LEFT/SPLIT Part is activated, the CP automatically splits the keyboard and only the sound assigned to
the LEFT/SPLIT Part will be heard when you play below a specified key (split point) on the keyboard. The default
split point is between F3 and F#3 but you can freely change the split point to any key on the keyboard.
To change the split point:
Step 1
Press the LEFT/SPLIT button to activate the LEFT/SPLIT Part.
The LEFT/SPLIT button LED will light.
Step 2
Press and hold the LEFT/SPLIT button, then press the desired key on the keyboard that you want to serve
as the split point.
The key you press will become the lowest note the Right hand Parts will play (RIGHT1, and RIGHT2). The LEFT/
SPLIT sound will be heard when keys below the split point are played.
Step 3
The split point for the LEFT/SPLIT part can also be set from the KBD SETTINGS button menu.
Moving the split point completely to the LEFT end of the keyboard will allow the LEFT/SPLIT Part to function as a layer
with the three right hand Parts. In this manner you can create a three part layer across the entire keyboard.

Page
18
3
Playing the Piano
(Basic Controls)
2) Selecting Sounds
The Concert Performer has over 700 instrument and drum sounds available from the front panel. You can freely
assign any of these sounds to the three Parts. Remember that there is always a sound assigned to each of the
Parts, even if some of the Parts are not currently active.
The sounds span a tremendous variety of instruments, ranging from traditional acoustic sounds to modern electronic
tones. To help you quickly find the sound that you want, the sounds have been organized into 8 categories, each
with a dedicated Sound Selection button on the front panel.
Pressing the OTHERS button will display a separate menu, with an extra 9 sub-categories of additional sounds to be
selected. Within the OTHERS display, the USER category provides convenient access to User edited sounds.
Finally, the FAVORITES button allows up to 20 of your favorites sounds to be stored and recalled simply and
conveniently.
¡To select a Sound:
Step 1
In the main play screen, touch the Part to which you wish to assign a new sound.
The selected Part will become highlighted.
Step 2
Press the SOUND button for the sound category that you are interested in.
Sounds from the first page of the Master tab will be displayed. The Master tab lists all available instruments from the
chosen category, and typically spans several pages. It is also possible to display only the instruments of a particular
sub-category by touching the relevant tab. For example to display drawbar organ sounds only, first press the ORGAN
button, then touch the Drawbar tab. Remember that each tab can list several pages of instrument sounds.
Step 3
Select a sound by touching the displayed name.
PAGE : Selects the different pages of Sounds within a
category.
SOUND EDIT : Takes you to the Sound Edit menu. (See
"Editing Sounds" on page 86.)
Step 4
Touch the PAGE buttons to show the Sounds on the other pages for the same category.
Step 5
You can also use the Dial to scroll through all of the categories and sounds one by one.

Page
19
3
Playing the Piano
(Basic Controls)
Favorite Sounds
Because of the sheer number of sounds available, it can take a while to scroll through the various categories,
sub-category tabs, and pages in order to find a particular sound. Fortunately, the Favorites category allows you
to store your favorite sounds on a separate button menu for easy selection.
¡To create a Favorite sound:
Step 1
Press the FAVORITES sound button.
The FAVORITES screen will be shown, with a list of predefined Favorite sounds.
PAGE: Selects the different pages
SOUND SELECT: Chose the sound for the selected
Favorite position.
Step 2
Touch one of the Favorite sound names.
That entry will become selected.
Step 3
Touch the SOUND SELECT button.
The Favorites screen will enter EDIT mode.
SAVE: Save the favourites list to memory
LIST: Return to LIST mode.
Step 4
Press one of the SOUND category buttons, then select the desired sound.
The selected sound will become a Favorite sound.
Step 5
Press the EXIT button or touch the LIST button to return to the FAVOURITES screen.
Step 6
Touch the SAVE button.
The Favorites list will be saved to the internal memory.
If the Favorites list is not saved, the list will return to the default setting when the power is turned off, and any stored
Favorites will be lost.

Page
20
3
Playing the Piano
(Basic Controls)
3) Mixer
This Mixer screen allows you to change the volume, panning, reverb and chorus levels, as well as turn the effect
on/off for each Part.
¡To use the Mixer:
Step 1
Touch the MIXER button while on the main play screen.
The Mixer screen will be shown.
STYLE MIXER : Show the Style Mixer screen.
PART BUTTONS : Selects the part to adjust.
HARMONY : Show the Harmony screen.
Step 2
Touch the buttons at the bottom of the screen to select the Part to be adjusted.
Step 3
Touch the slider that you wish to adjust.
A larger version of the selected slider will be shown.
BACK : Return to the main Mixer screen.
PART BUTTONS : Selects the part to adjust.
HARMONY : Show the Harmony screen.
Step 4
Use the Dial or touch and drag the slider to adjust the value.
Volume level can be also adjusted from the main play screen, using the VOLUME buttons, then using the Dial.
Other manuals for Concert Performer CP3
1
Table of contents
Other Kawai Musical Instrument manuals