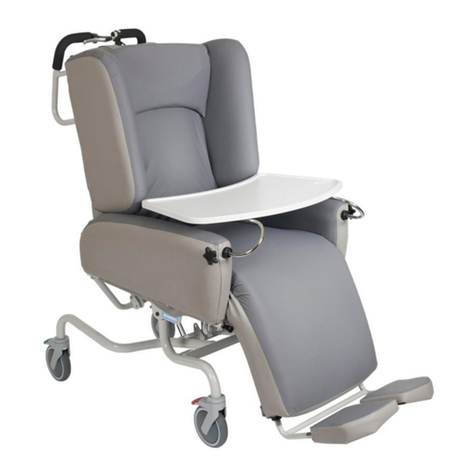
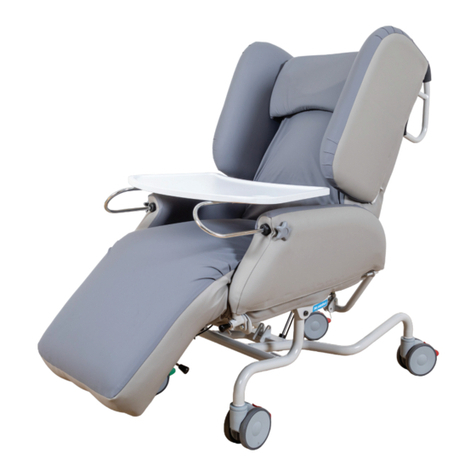
KCare KA551 User manual

KA551-KA556
Alivio Lift Chair Range
Instruction Manual

2
NOTE: When placing the furniture on non-carpeted flooring, K Care Healthcare
Solutions recommend the use of floor protection such as an area rug or furniture pads.
Area rugs and padding not included with purchase.
K Care Healthcare Solutions recommends stain resistant treatment before use.
NOTE: This device complies with part 15 of the FCC rules. Operation is subject to the
following two conditions: (1) this device may not cause interference, and (2) this device
must accept any interference, including interference that may cause undesired
operation of the device. Modifications not approved by the party responsible for
compliance could void user’s authority to operate the equipment.
Table of Contents
Important Safety Instructions............................................................................................................................3
Warranty........................................................................................................................................................................4
Assembly of your Lift Chair
Cord and Transformer Connections...............................................................................................................6
Chair Assembly...........................................................................................................................................................7
Operating Your Lift Chair......................................................................................................................................8
Installing Back-Up Batteries...............................................................................................................................9
Lithium-Ion Battery Pack Back-Up System..............................................................................................10
Troubleshooting........................................................................................................................................................11

3
Important Safety Instructions
READ ALL INSTRUCTIONS BEFORE USING.
WARNING: To reduce the risk of burns, fire, electric shock, or injury to persons:
DANGER: To reduce the risk of electric shock, always unplug this furnishing from the
electrical outlet before cleaning.
Unplug from outlet before putting on or taking o parts.
Close supervision is necessary when used by (or near) children and disabled people.
Use this furnishing only for its intended use (as described in these instructions). Do not
use attachments not recommended by the manufacturer.
Never operate this furnishing if it has a damaged cord or plug, if it is not working
properly, if it has been dropped/damaged, or dropped into water.
Keep the cord away from heated surfaces.
Never drop or insert any object into any opening.
Do not use outdoors. Just for household, indoor use only.
Do not operate where aerosol (spray) products are being used, or where oxygen is
being administered.
To disconnect, turn all controls to the o position, then remove plug from outlet.
WARNING: Risk of injury - keep children away from extended foot support.
WARNING: Risk of injury to persons - do not use this furnishing to support video
equipment, such as televisions or computer monitors.
When not in use, it is recommended the wand be stored securely in the pocket on the
outside of the arm.
SAVE THESE INSTRUCTIONS
SERVICING OF DOUBLE-INSULATED PRODUCTS:
In a double-insulated product, two systems of insulation are provided instead of
grounding. No grounding means is provided on a double-insulated product, nor is a
means for grounding to be added to the product. Servicing a double-insulated
product requires extreme care and knowledge of the system, and is to be done only by
qualified service personnel. Replacement parts for a double-insulated product must be
identical to the parts they replace.

4
WARRANTY
WARRANTY AGAINST DEFECTS IN GOODS
1. K Care Healthcare Solutions provides consumers with the following warranty in relation to this Product,
in addition to complying with the requirements of any relevant legislation, including the Competition and
Consumer Act 2010 (Cth) in Australia and the Consumer Gu arantees Act 1993 in New Zealand (the Acts),
except where a New Zealand consumer acquires the Product for the purposes of a business. The benets
to the consumer given by this warranty are in addition to other rights and remedies of the consumer under
the applicable Act.
2. In this warranty, we have used the following denitions:
(a) Form means a Warranty Claim Form issued by K Care Healthcare Solutions in respect of Products.
(b) K Care Healthcare Solutions or our means K Care Healthcare Solutions Pty Ltd, ABN 47 159 431 099
of 836A Fifteenth Street, Mildura, VIC, 3500.
(c) Product means this Picasso, Leonardo, Michelangelo or Donatello lift chair manufactured by K Care
Healthcare Solutions (including where manufactured by its contract manufacturers);
(d) Material means a material or component used by K Care Healthcare Solutions in the manufacture of the
Product;
(e) Retailer means the authorised dealer of Products from whom the Product was purchased;
(f) Warranty Period means the period within which a defect must appear as set out in the table
above, commencing from the date of purchase of the relevant Product. If the Product or part
(as the case may be) is repaired or replaced, there will be no extension to the original warranty
period; and
(g) Workmanship means the handling, assembly and manufacturing processes performed by or on
behalf of K Care Healthcare Solutions in order to manufacture the Product.
3. K Care Healthcare Solutions warrants that for the duration of the Warranty Period, all Products will be free
PRODUCT PART WARRANTY PERIOD
Steel Frame Five (5) Years
Motor Five (5) Years
Electronics Two (2) Years
Handset & Cable Two (2) Years
Scissor Mechanisms Five (5) Years
Steel Lift Mechanism Five (5) Years
Fabric Two (2) Years

5
of faults arising from defects in Workmanship or Materials, on the terms and conditions set out in this
warranty.
4. K Care Healthcare Solutions undertakes that if during the Warranty Period any Product, or any part of
a Product, has failed to operate correctly due to faulty Workmanship or defective Material, it will repair
or replace the Product or part (as the case may be) free of charge (excluding freight fees if applicable)
provided that the following procedure is met:
(a) The consumer must contact the Retailer or K Care Healthcare Solutions upon becoming aware of
any defect to a Product. The consumer will then be provided with a Form, which must be completed
by the consumer and returned to K Care Healthcare Solutions at the address, facsimile number or
email address stated below together with satisfactory proof of purchase.
(b) K Care Healthcare Solutions will review the completed Form to determine whether there is a
defect, and if so K Care Healthcare Solutions agrees to (at its option) repair, replace or supply
equivalent goods, or pay the cost of any of those remedies to the consumer. To the extent that
the issue raised on the completed Form relates to the fabric, K Care Healthcare Solutions will
conduct an evaluation of the fabric before determining whether there is a defect.
(c) If K Care Healthcare Solutions requests the return of the applicable Product or part, the consumer
will be responsible for the collection and freight costs of returning that Product or part to K Care
Healthcare Solutions.
(d) The consumer acknowledges that it is also responsible for the freight costs to deliver any new Product
or replacement part to it.
5. To the extent that the supply of Products is a supply to a consumer within the meaning of the
applicable Act, the consumer is entitled to consumer guarantees under the applicable Act which
K Care Healthcare Solutions does not exclude, restrict or modify. In all other respects, and to the
extent permitted by law, K Care Healthcare Solutions:
(a) Limits its liability for any non-excludable condition or warranty to rectifying any defect at its option, as
set out in paragraph 4(b); and
(b) Excludes liability (whether express or implied) of any nature whatsoever for any consequential loss,
damage or injury arising as a result of any fault in the Products.
6. This warranty does not extend to damage to a Product which occurs during transit or transportation, or
which is caused by any abuse, accident or improper installation, connection, use, adjustment or repair or
use of goods otherwise than in accordance with instructions issued by K Care Healthcare Solutions.
7. The warranty on Products is waived if any addition or attachment to the Product does not have K Care
Healthcare Solutions approval or are not sold as K Care Healthcare Solutions products. The Product is
designed to perform specic tasks under established test loads and unauthorised attachments may produce
stresses for which the design is not appropriate.
8. The following applies to consumers who purchased a relevant Product in Australia:
Our goods come with guarantees that cannot be excluded under the Australian Consumer Law. You are
entitled to a replacement or refund for a major failure and compensation for any other reasonably foreseeable
loss or damage. You are also entitled to have the goods repaired or replaced if the goods fail to be of
acceptable quality and the failure does not amount to a major failure.
Contact information
K Care Healthcare Solutions
836A Fifteenth Street
Mildura VIC 3500
Telephone 1300 783 783
Facsimile 1300 784 784
Email [email protected]

6
CORD AND TRANSFORMER
CONNECTIONS
Once the box has been removed from around the chair, you'll notice the back is resting
on top of the seat. There are a couple of items to remove from the seat portion of the
chair first.
Follow the steps below:
1. Remove the zip tie holding the plastic bag with the Power Transformer, hand wand and
its cord on the left.
2. Remove the hand wand from the plastic bag and connect it to the female plug located
in the left side pocket on the outside of the chair's arm.
3. Connect the Power Transformer to the plug coming from the chair.
4. Connect the Power Cord into the Power Transformer.
5. Connect the Power Cord into an electrical outlet, near where the chair will be
positioned.
Hand Wand

7
CHAIR ASSEMBLY:
ATTACHING THE CHAIR BACK TO THE CHAIR BASE
CAUTION: PLEASE READ ALL INSTRUCTIONS CAREFULLY BEFORE STARTING ASSEMBLY
PROCESS. IT IS RECOMMENDED TO USE TWO PEOPLE WHEN ASSEMBLING AND
REMOVING THE INSIDE BACKS TO AND FROM THE BASE OF THE FURNITURE.
1. Slide inside back receivers onto the steel mechanism posts in the base of the
chair (Figure A).
2. Press both sides of the back firmly into place until the back automatically locks
into place.
3. To remove the back from the base, use a screwdriver pressing outward on the
black tab in the metal receivers on both sides of the chair back and lift the back
from the base of the chair (Figure B).
4. Connect the Headrest and Lumbar cable plugs (Figure C). Headrest-only models
feature one less set of cables.

8
CHAIR ASSEMBLY:
ATTACHING THE CHAIR WINGS TO THE CHAIR BACK
1. Slide the metal inserts on the chair’s
wings into the metal sleeves on the
side of the chair back.
2. Slide the wings down until they are
completely set on the back's metal
sleeves.
OPERATING YOUR LIFT CHAIR
Headrest
Lumbar
Back
Legrest
Headrest Down Headrest Up
Lumbar In
Close All and Lift
Lumbar Out
Lower lift Chair
Raise the Back
Low the Footrest
Recline the Back
Raise the Footrest
USB
Lower the lift Chair

9
INSTALLATION OF
BACK-UP BATTERIES
2 - 9 Volt back-up batteries will lift the chair from the reclined position to the seating
position one cycle in case of a power failure. If a power failure occurs and the chair is
cycled, the 2-9 Volt batteries will need to be replaced.
2 - 9 Volt back-up baeries will li the chair from the reclined posion to the seang posion
in case of a power failure. If a power failure occurs and the chair is cycled, the 2-9 Volt
baeries will need to be replaced.
1. Removed the sliding door on the side of the transformer to locate the 2 - 9 Volt baeries.
2. Pull out the 2- 9 Volt batteries
and replace with new batteries.
3. Replace door on the transformer.
4. Batteries not included.
The chair doesn’t recline or li The transformer may not be
connected well
Check the power supply has
been correctly connected to
the socket and conrm the
wire from chair to transformer
is rmly connected
The headrest or lumbar doesn’t
work
The headrest or lumbar motor
may not be connected well
Check the headrest and
lumbar motor has been
correctly connected to the
socket
The headrest and lumbar work
oppositely
The headrest and lumbar motor
plug
Check the headrest and
lumbar motor has been
correctly connected to the
socket
The hand wand doesn’t work The hand wand may not be
connected well
Check the hand wand cord has
been correctly connected to
the socket
BATTERY DOOR 2 - 9 VOLT BATTERIES (Not Included)
P
O
W
ER
TRA
N
S
F
OR
M
ER
9
1. Remove the sliding door on the side of
the transformer to locate the 2 - 9 Volt
batteries.
2. Pull out the 2- 9 Volt batteries and
replace with new batteries.
3. Replace door on the transformer.
4. Batteries not included.

10
Figure B Lithium-Ion Battery Replacement
Figure A Chair Battery Back-upLocation
POWER CORD
LITHIUM-ION
BATTERY PACK
LITHIUM-ION BATTERY PACK
BACK-UP SYSTEM
If your chair is equipped with an external transformer with a lithium-ion battery pack,
your chair may be operated without being plugged into an electrical outlet for up to 48
hours.
Follow these steps to replace the lithium-ion
battery pack batteries:
1. Unplug the external transformer power cord
from the electrical outlet.
2. Position the external transformer so that the
lithium-ion battery is facing upward (Figure
A).
3. Gently bump with your hand the end of the
lithium-ion battery pack to dislodge it from
external transformer.
4. Slide the lithium-ion battery until it stops
and then lift the lithium-ion battery o of the
external transformer.
5. Place the new lithium-ion battery on
top of the external transformer with the
securement grooves toward the external
transformer. (Figure B).
6. Slide the new lithium-ion battery onto the
external transformer until it clicks into place.
NOTE:
Remove the lithium-ion battery
from the battery pack when your
chair isn’t being used for an extended
period of time. The chair will draw
power from the battery even when it is
not in use.

11
TROUBLESHOOTING
PROBLEM POSSIBLE FACTORS SOLUTIONS
The chair doesn’t recline or lift The transformer may not be
connected well
Check the power supply has
been correctly connected to the
socket and confirm the wire from
chair to transformer is firmly
connected
The headrest or lumbar doesn’t
work
The headrest or lumbar motor
may not be connected well
Check the headrest and lumbar
motor has been correctly
connected to the socket
The headrest and lumbar work
oppositely
The headrest and lumbar motor
plug
Check the headrest and lumbar
motor has been correctly
connected to the socket
The hand wand doesn’t work The hand wand may not be
connected well
Check the hand wand cord has
been correctly connected to the
socket

12
Notes

13
Notes

14
Notes

15
All information is considered to be true and correct at the date of publication.
Changes in circumstances after the time of publication may impact on the accuracy
of the information.
202002_1.2

Improving your
life everyday™
At Your Service
Sales, administration
and general enquiries
National 1300 783 783
Your Customer Service Team
customerservice@kcare.com.au
kcare.com.au
This manual suits for next models
1
Table of contents
Other KCare Indoor Furnishing manuals
Popular Indoor Furnishing manuals by other brands

Teknik
Teknik 5427413 Instruction booklet

Furniture of America
Furniture of America Meagan CM3152BN Assembly instructions

Home affaire
Home affaire Rauna 60956905 Assembly instructions

System Build
System Build 7532396COM manual

FMD Furniture
FMD Furniture HALLO 2 210-002 Assembly instructions

Arrow
Arrow 3531 Assembly instructions