●
●
●
●
●
●
●
●
●
●
●
●
●
●
●
●
●
●
12
13
13
13
14
15
15
15
16
16
16
19
19
19
20
20
21
21
●
●
●
●
17
17
18
18
●
●
●
●
●
●
●
4
8
10
10
10
11
11
●
●
●
●
●
《
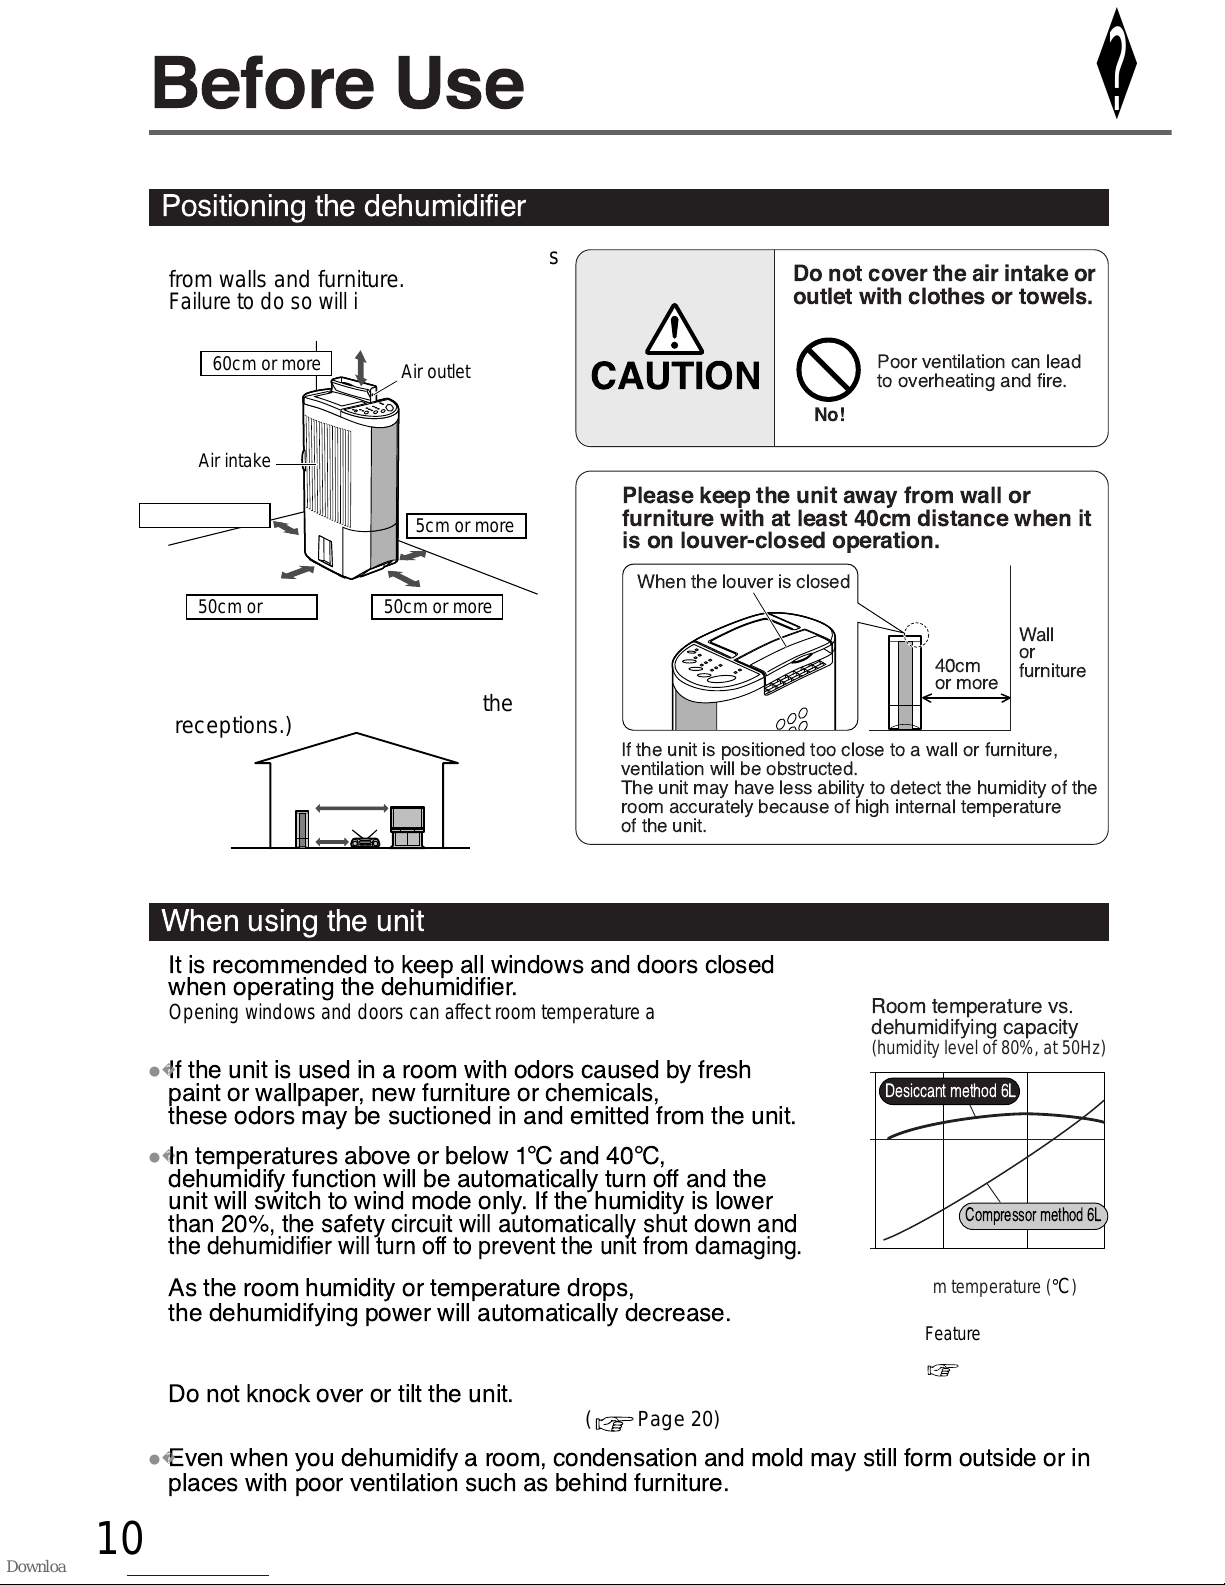
Features of the Desiccant Method
》
In consideration of the global environment,In consideration of the global environment,
no refrigerants (chlorofluorocarbons) areno refrigerants (chlorofluorocarbons) are
used in this dehumidifierused in this dehumidifier.
In consideration of the global environment,
no refrigerants (chlorofluorocarbons) are
used in this dehumidifier.
Content
Before Use
How to Use
Troubleshooting
It is normal that room temperature will beIt is normal that room temperature will be
increased while the dehumidifier operates.increased while the dehumidifier operates.
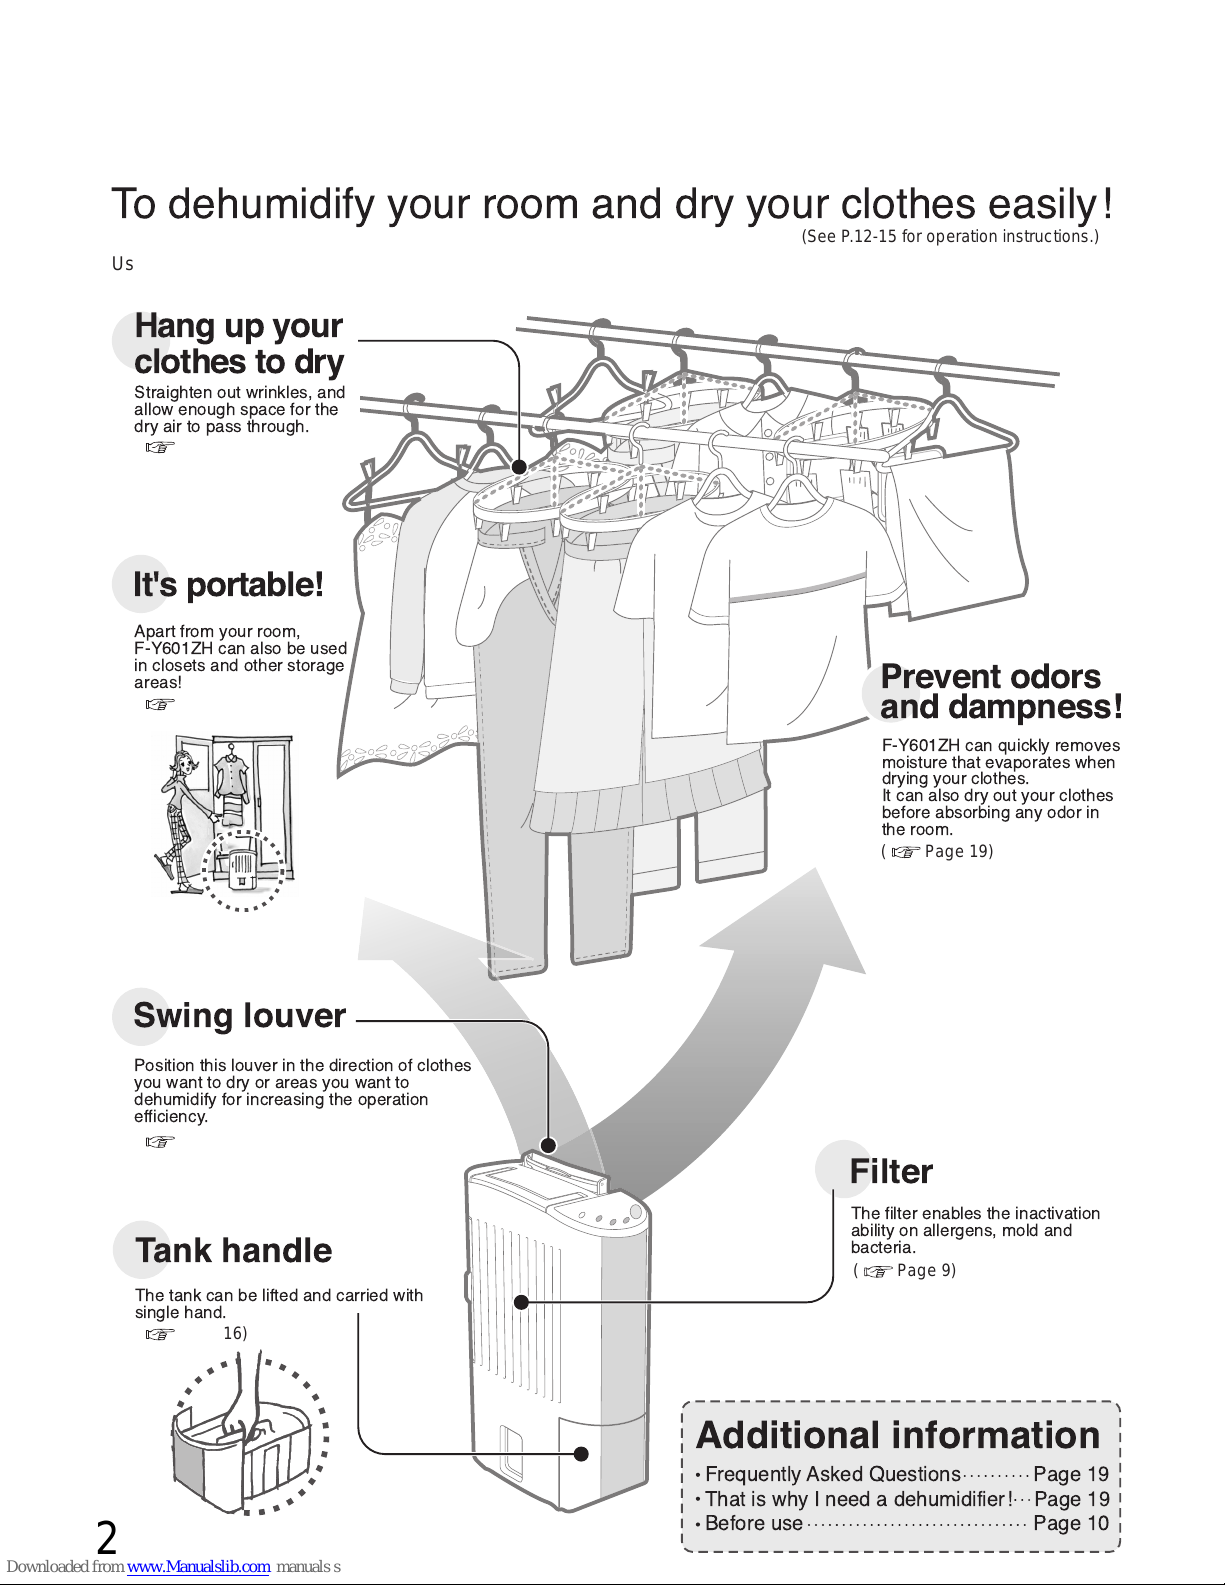
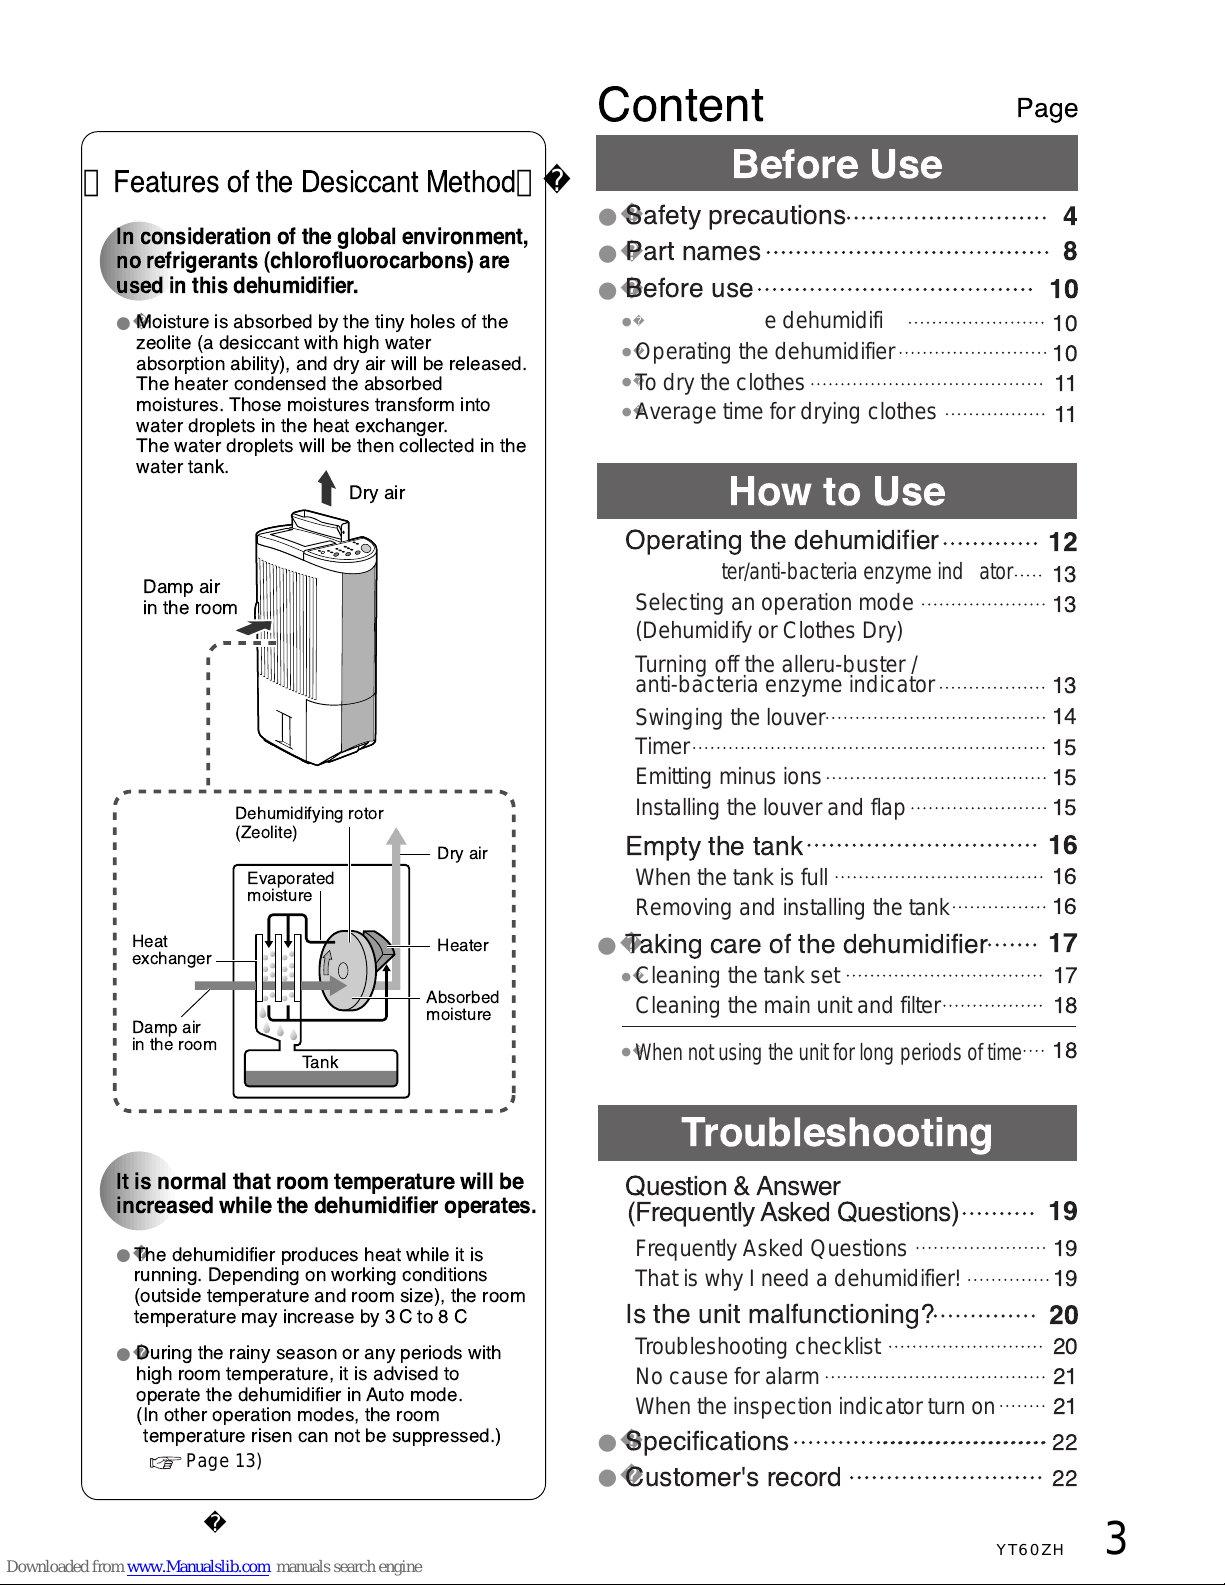
Moisture is absorbed by the tiny holes of the
zeolite (a desiccant with high water
absorption ability), and dry air will be released.
The heater condensed the absorbed
moistures. Those moistures transform into
water droplets in the heat exchanger.
The water droplets will be then collected in the
water tank.
The dehumidifier produces heat while it is
running. Depending on working conditions
(outside temperature and room size), the room
temperature may increase by 3
°
C
to 8
°
C
.
During the rainy season or any periods with
high room temperature, it is advised to
operate the dehumidifier in Auto mode.
(In other operation modes, the room
temperature risen can not be suppressed.)
Dry air
Dry air
Damp air
in the room
Dehumidifying rotor
(Zeolite)
Evaporated
moisture
Heat
exchanger Heater
Damp air
in the room
Absorbed
moisture
Tank
( Page 13)
Page
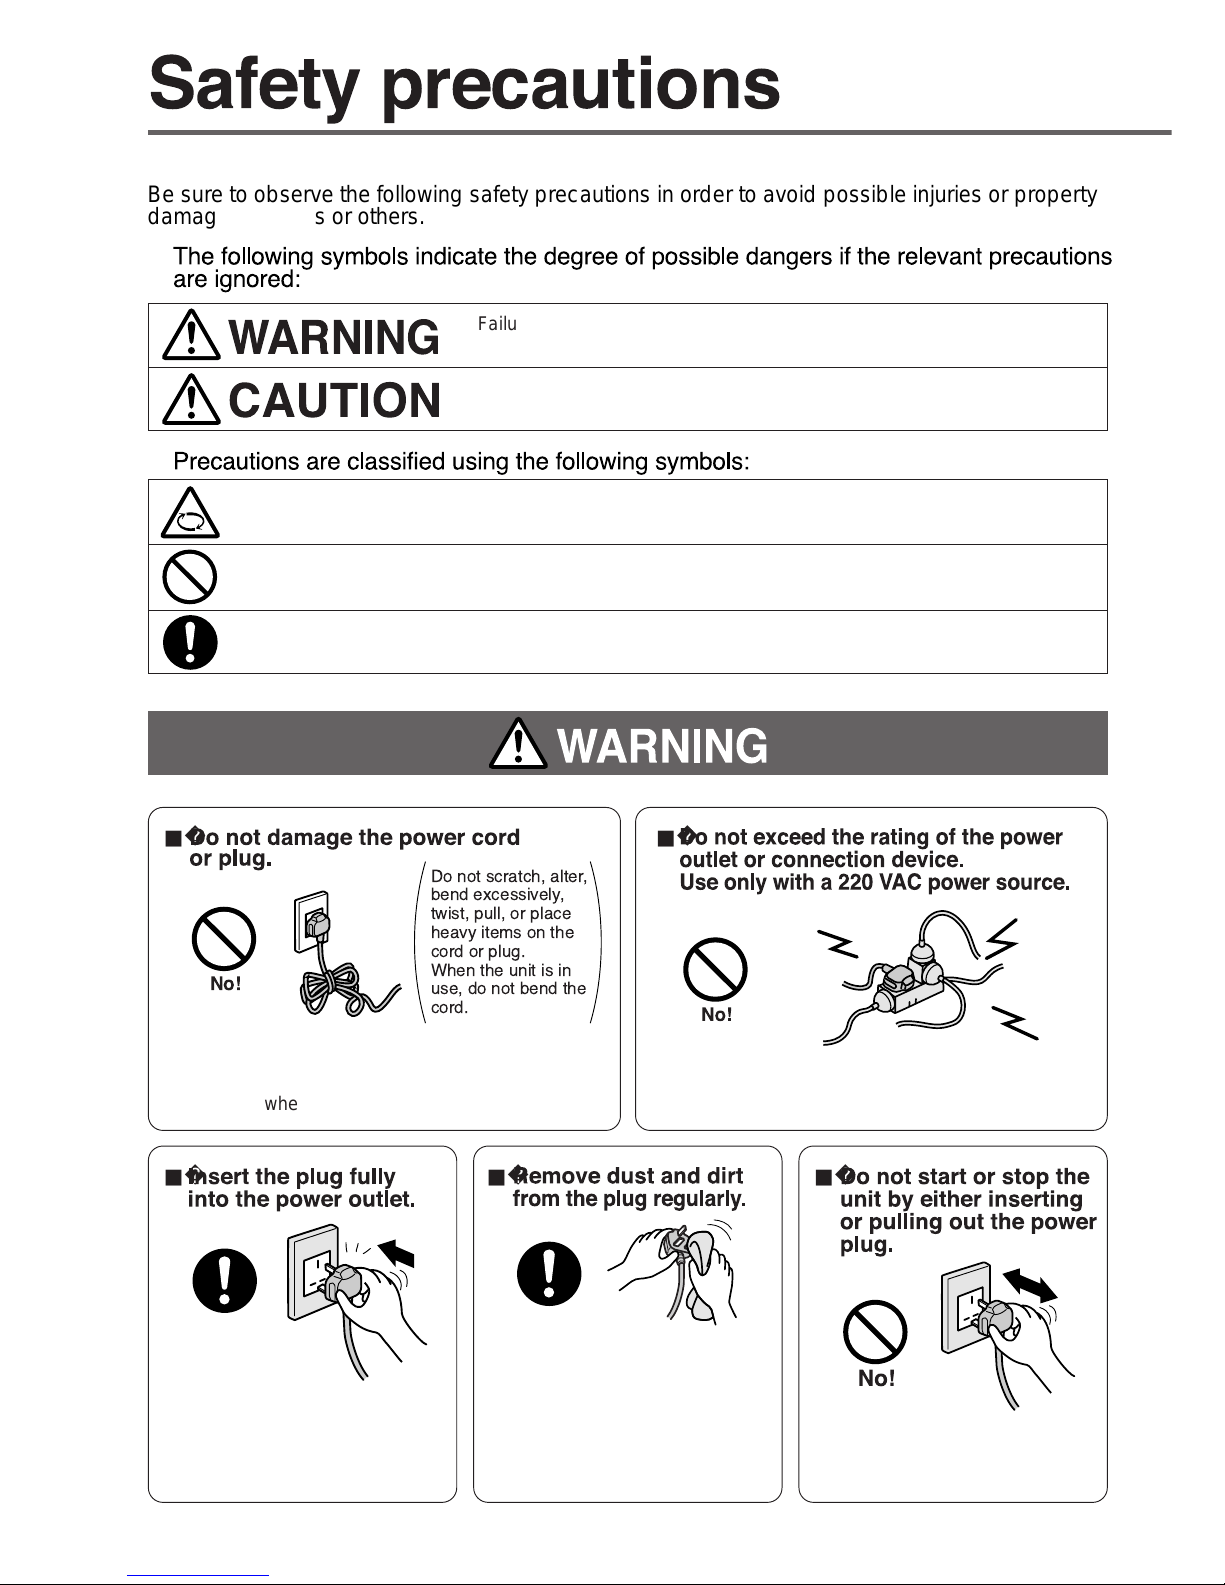
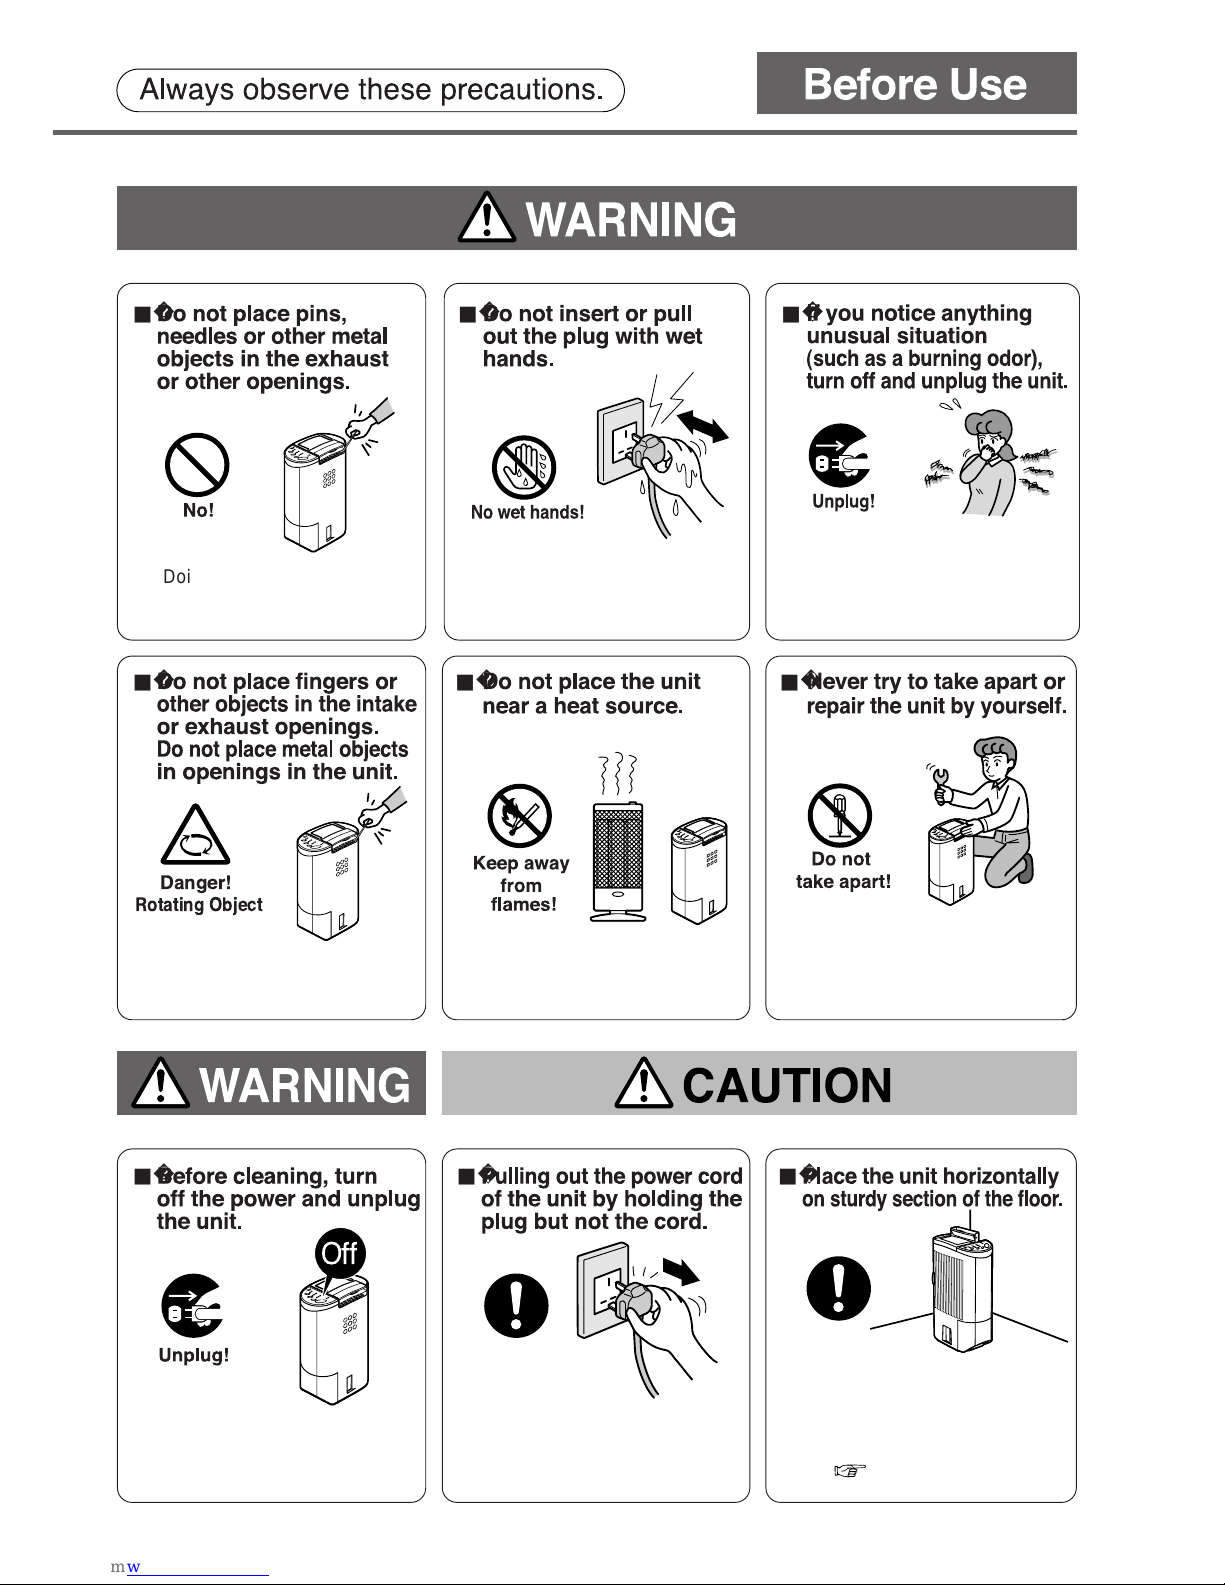
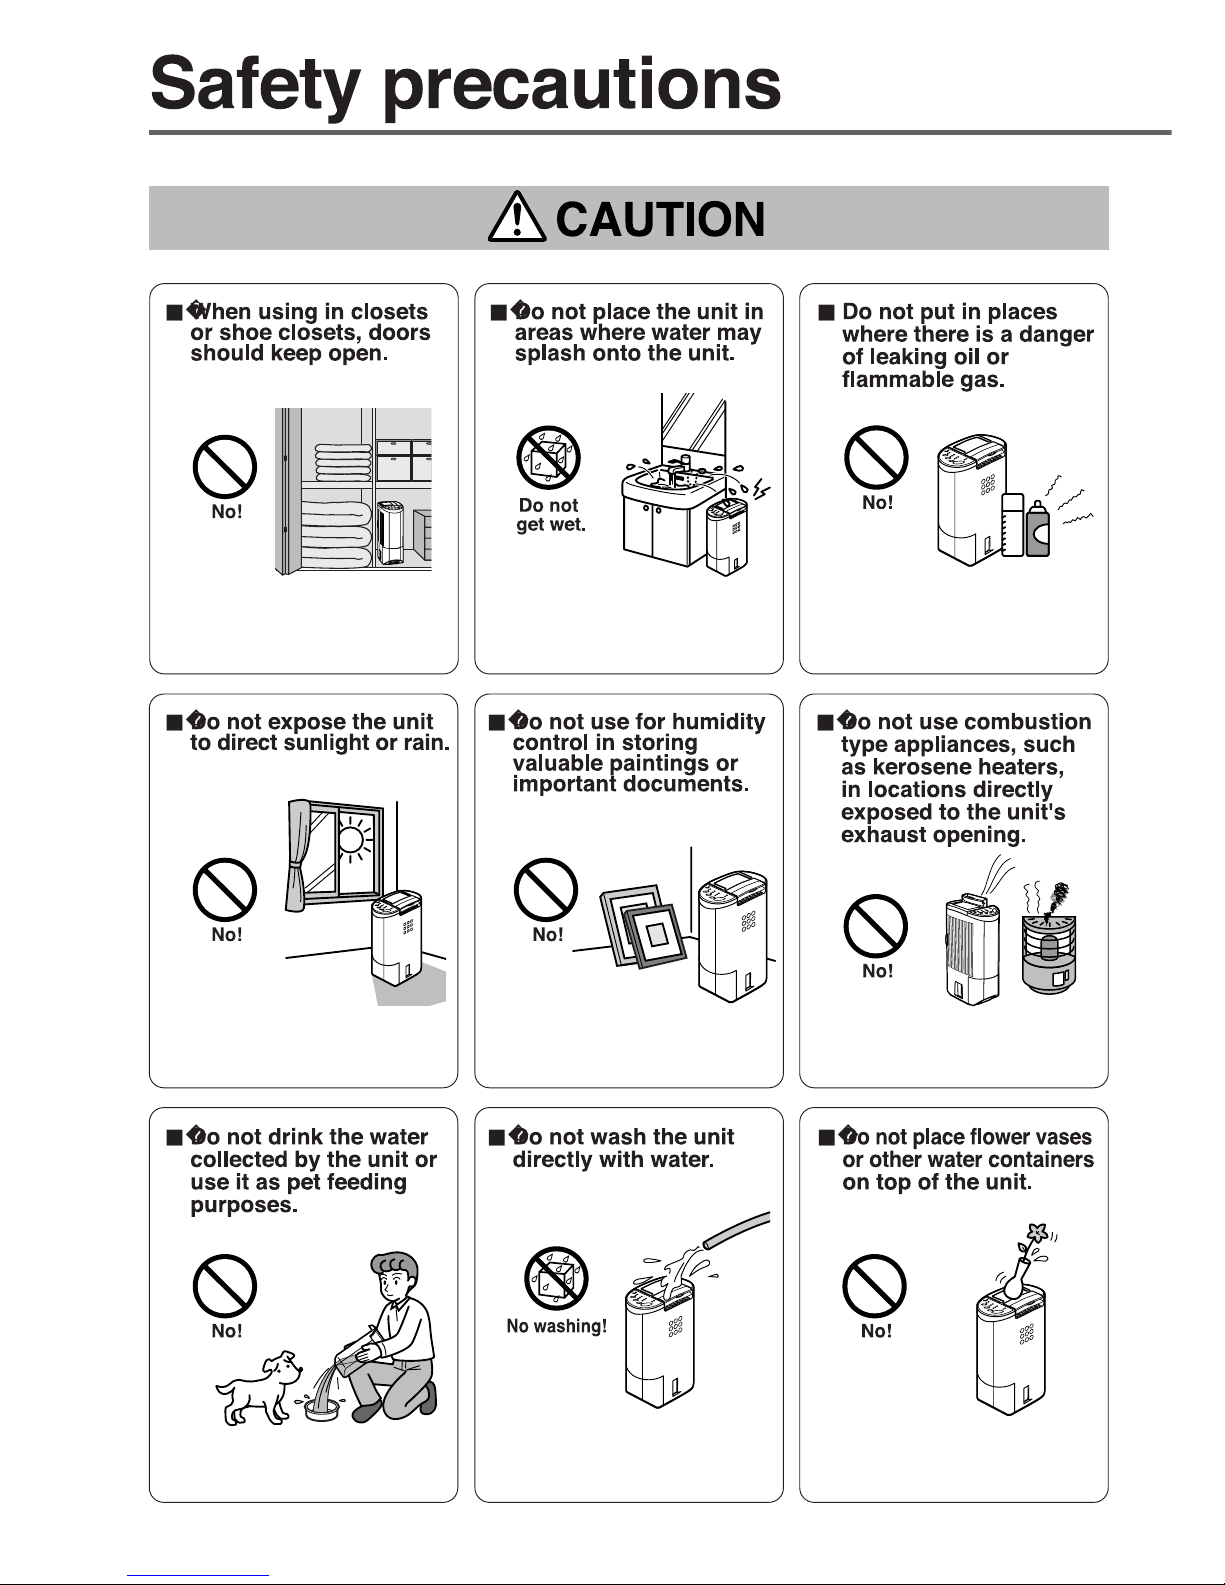
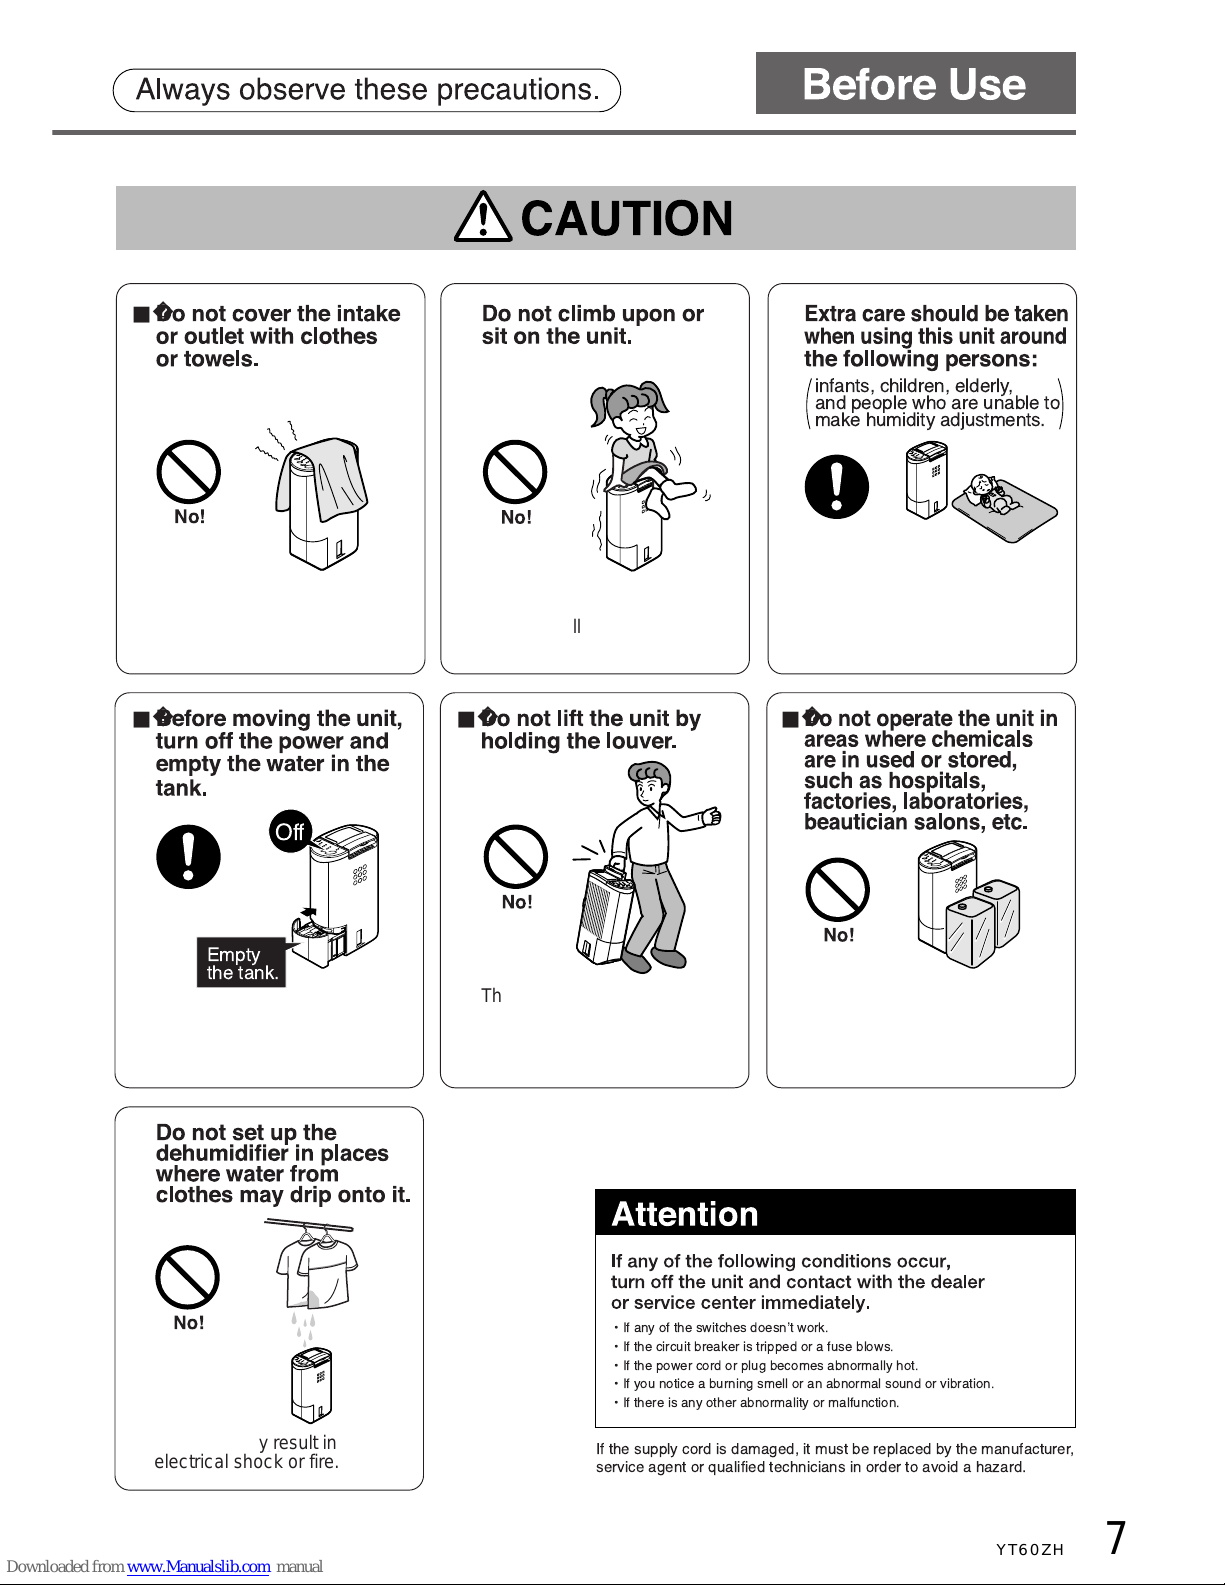
Safety precautions
Operating the dehumidifier
Empty the tank
Is the unit malfunctioning?
Specifications 22
Customer's record 22
Question & Answer
Taking care of the dehumidifier
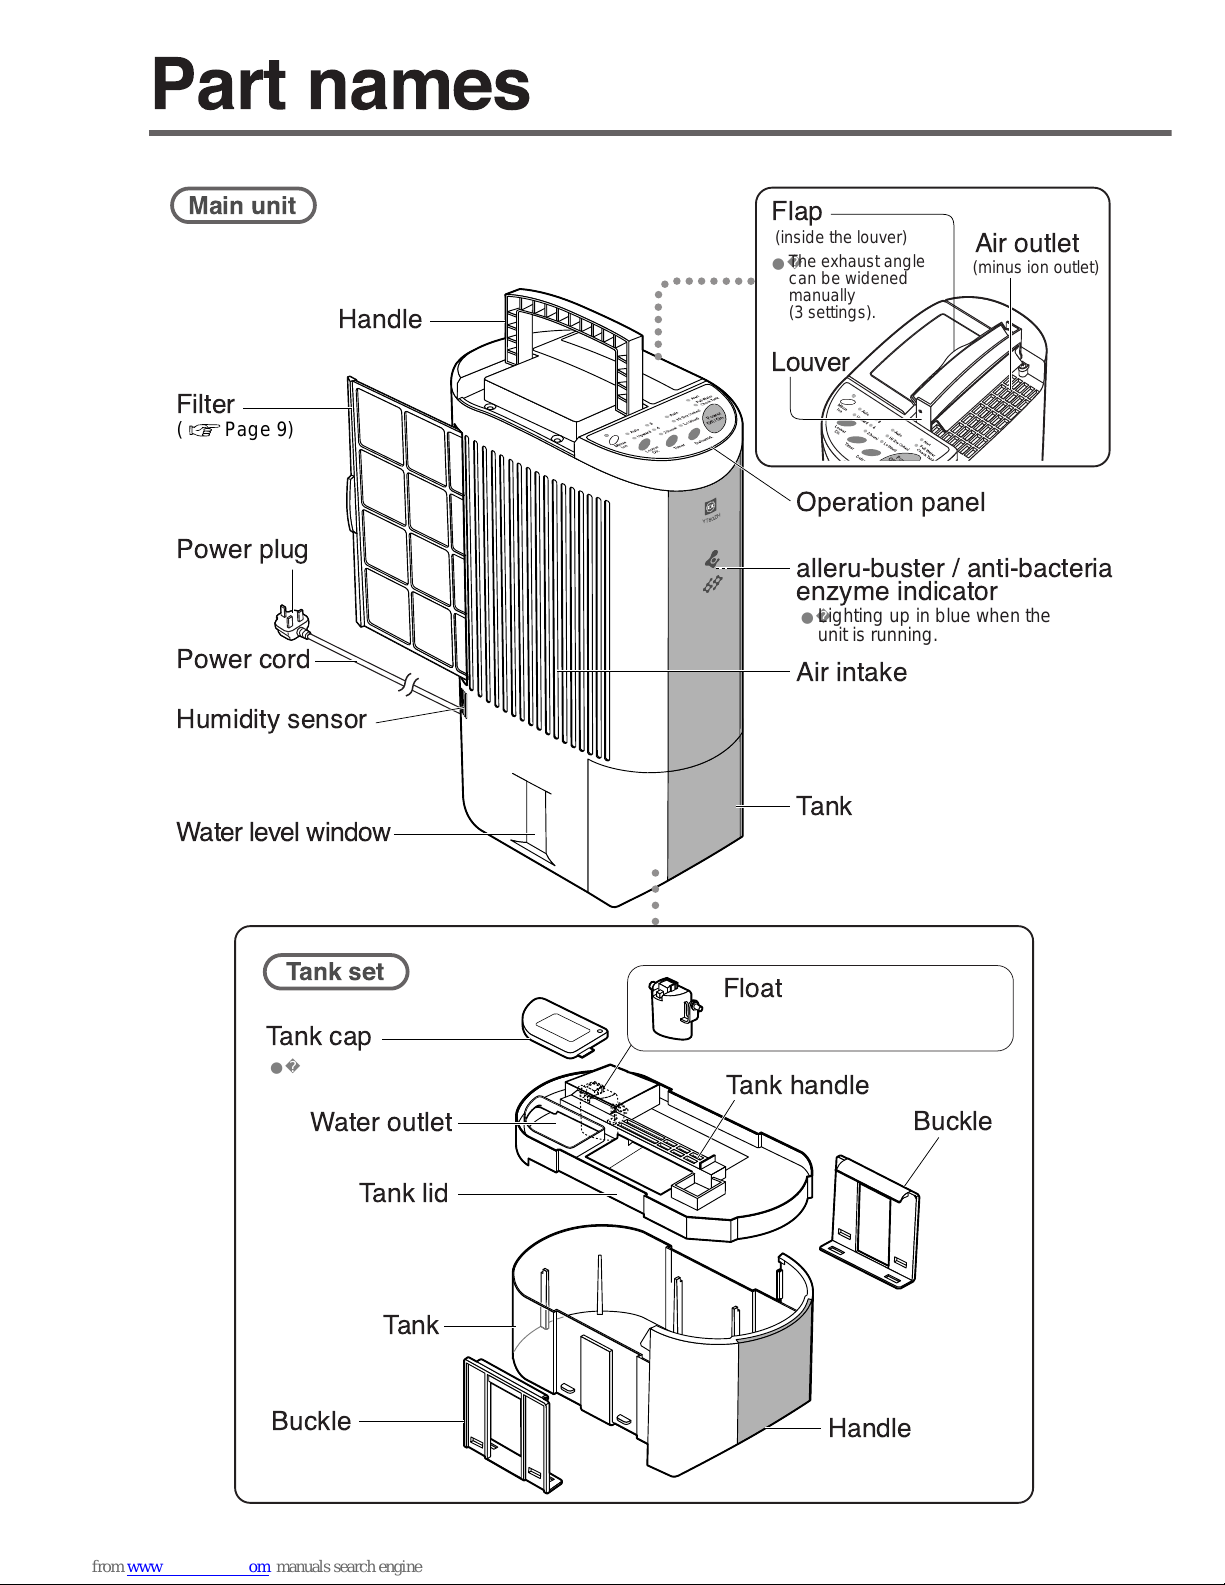
Part names
Before use
Positioning the dehumidifier
alleru-buster/anti-bacteria enzyme indicator
Selecting an operation mode
Swinging the louver
Emitting minus ions
When the tank is full
Cleaning the tank set
Frequently Asked Questions
Troubleshooting checklist
No cause for alarm
When the inspection indicator turn on
That is why I need a dehumidifier!
When not using the unit for long periods of time
Cleaning the main unit and filter
Removing and installing the tank
Installing the louver and flap
Timer
Turning off the alleru-buster /
anti-bacteria enzyme indicator
(Dehumidify or Clothes Dry)
Operating the dehumidifier
To dry the clothes
Average time for drying clothes
(Frequently Asked Questions)
It is normal that room temperature will be
increased while the dehumidifier operates.