kommt, schaltet die Marderscheuche ein.
GB
Use as directed:
To chase away martens and other wild animals from the engine compart-
ment of vehicles and buildings, by means of electric shock and aggressive
and pulsating ultrasonic frequencies.
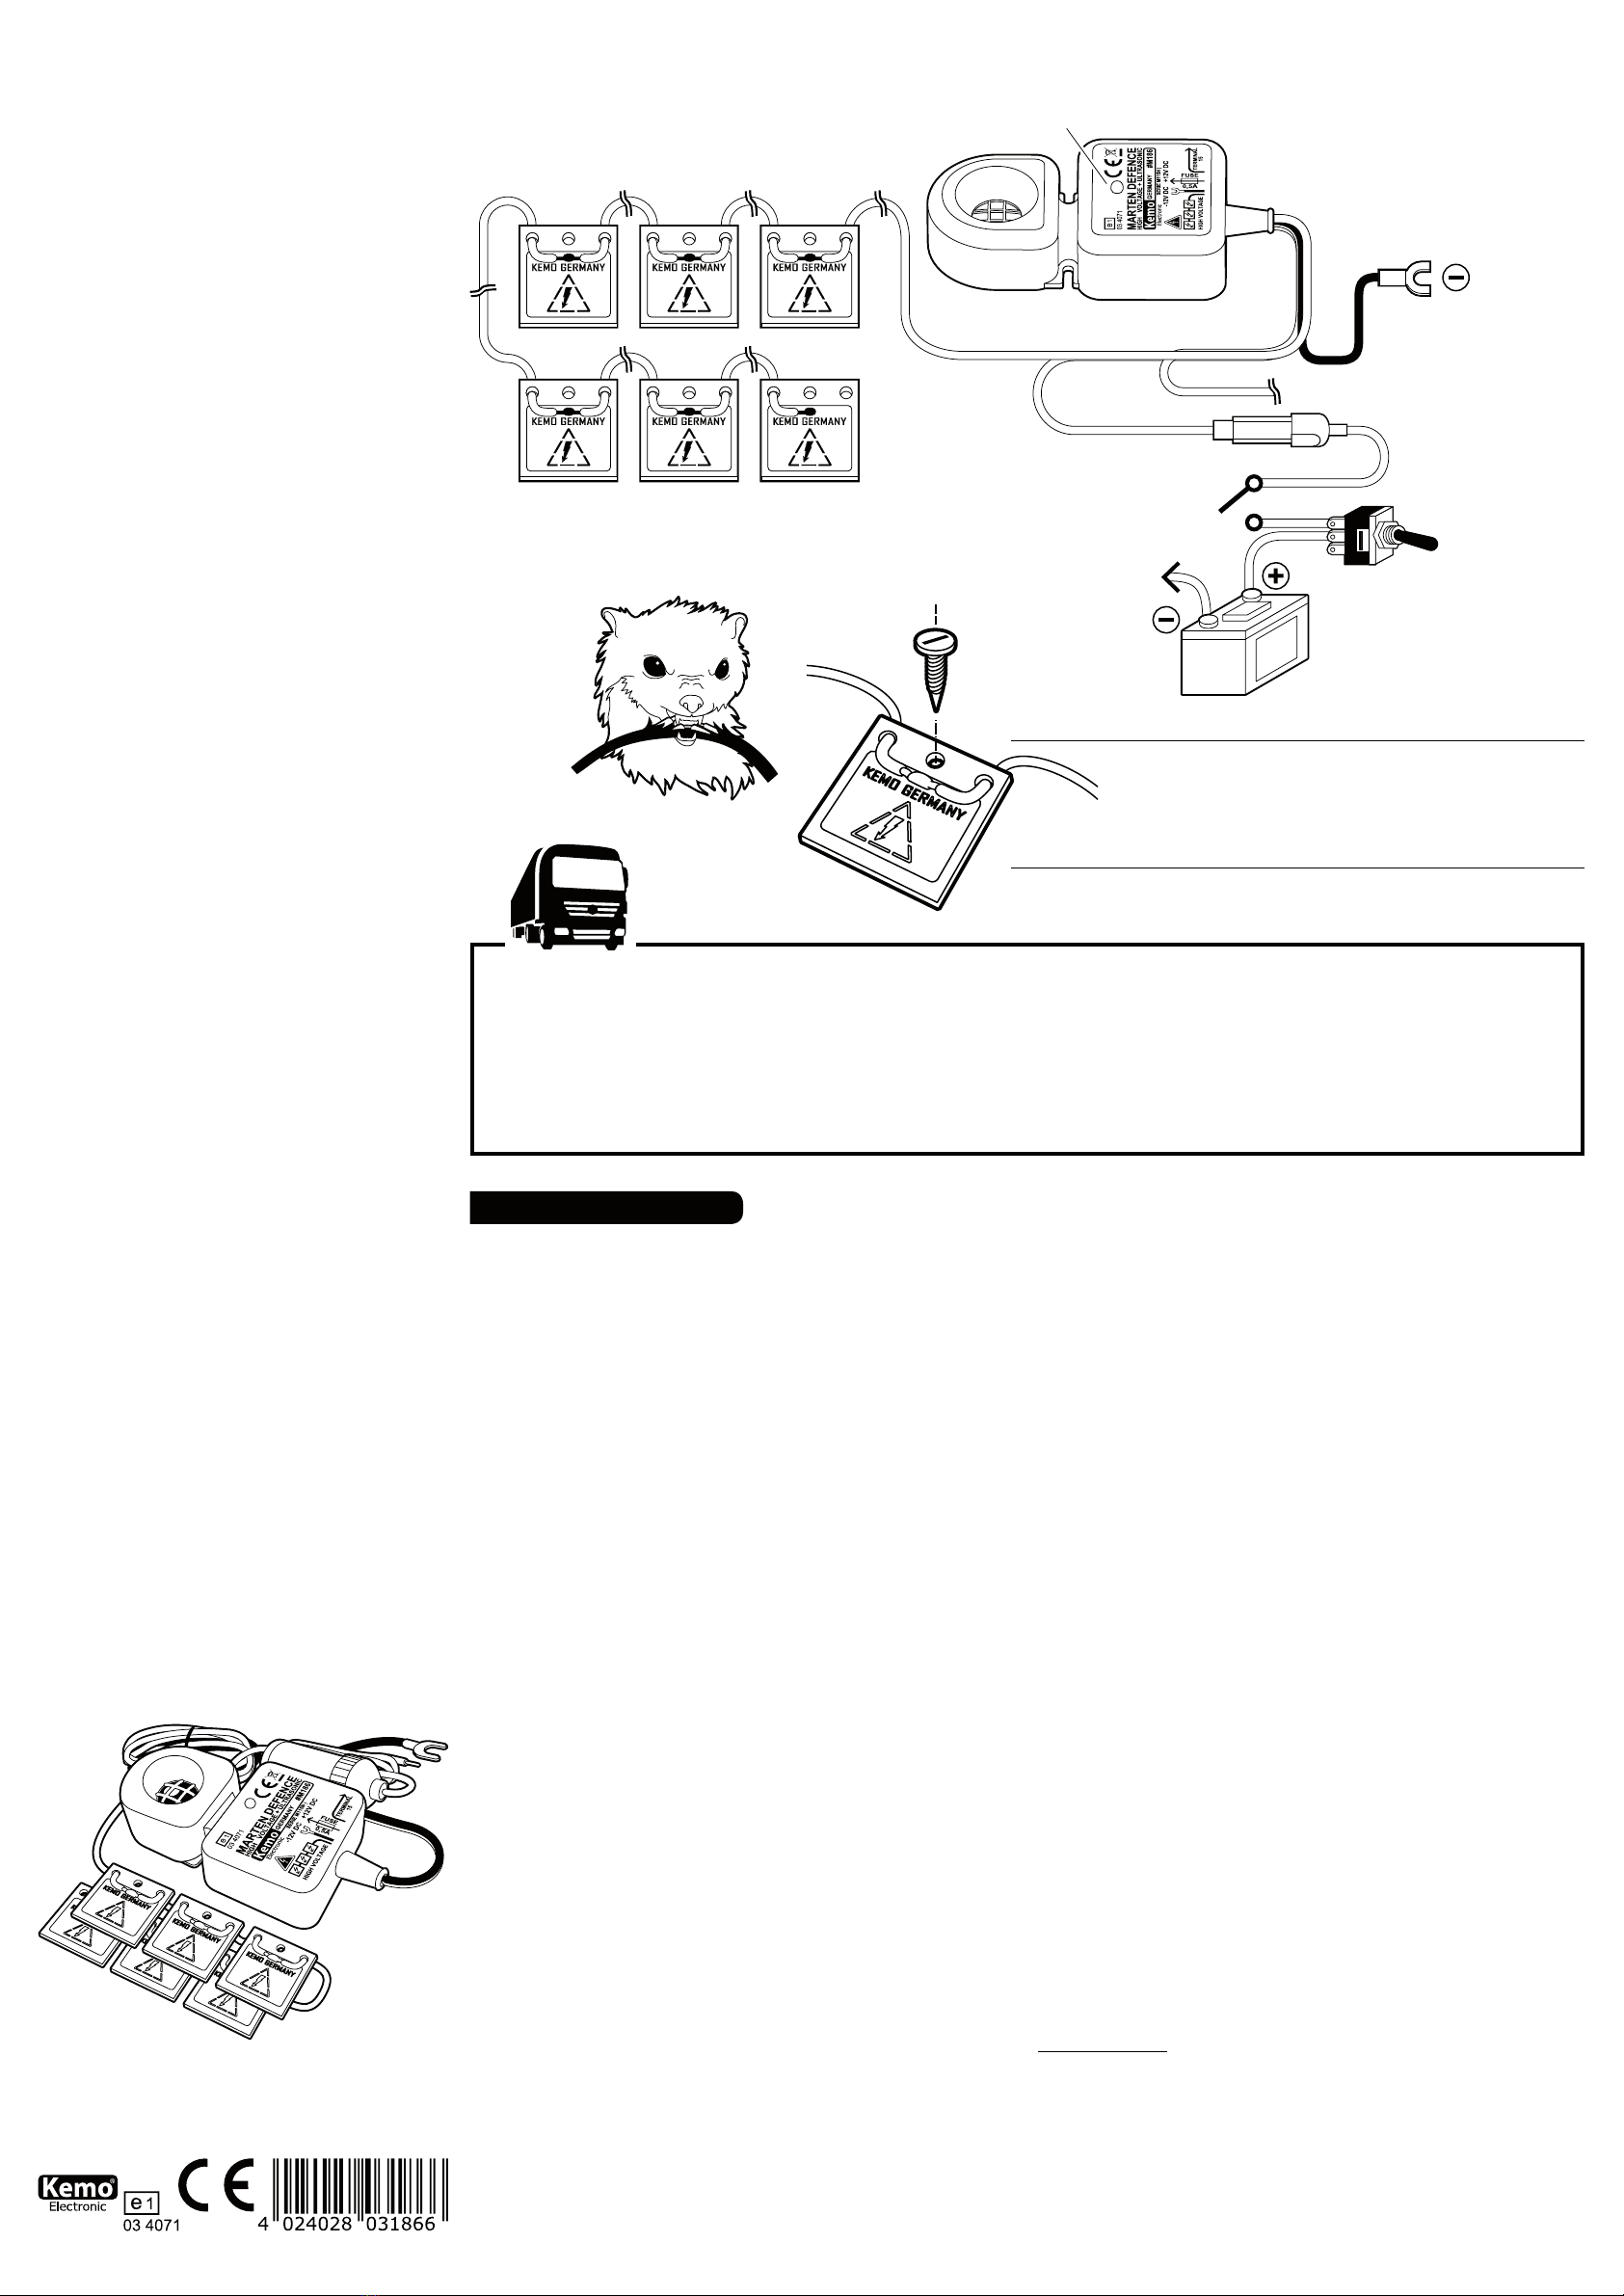
Assembly instructions: Please take the fuse of the device out of the fuse
holder during assembly. The basic instrument has to be mounted at a dry
spot in the car where it will not get too hot (not directly near to the exhaust
manifold or other especially hot places) and from where the ultrasonic
sounds may spread well in the engine compartment. The positive cable
with built-in fuse holder has to be connected to “+ 12 V”. The earth cable
is to be connected with the vehicle earth or “- 12 V”. The cable towards
“terminal 15” should be connected to “terminal 15” of the electrical sys-
tem. This terminal can usually either be found at the ignition lock or at the
Euro plug of the car radio. If the cable “terminal 15” is properly connected,
the marten defence is only switched on if the motor is not running (the car
is being parked). If you cannot nd “terminal 15”, please choose another
contact at the ignition lock which is switched off when the car is being
parked, and is switched to “positive” when the motor is running. At some
cars it can be also the cigarette lighter. The connection of the cable to
“terminal 15” ensures that the marten defence is only switched on when
the car is being parked (there is no risk that the marten will get into the
car when the car is running).
Installation into buildings: In order for the marten to get an electric
shock, he has to touch one of the high-voltage plates and “earth” at the
same time. In the car the connection to earth is everywhere (chassis, mo-
tor, etc.). Therefore, in buildings it is necessary to afx our earth mat Z115
(not enclosed) at the entry hole and to connect the cable of the earth mat
with the marten defence at “earth” (negative-battery). Then the self-ad-
hesive earth mat and the high-voltage plates have to be xed at the entry
hole in such a manner that the marten touches the metallized earth mat
with the paws and one of the high-voltage plates with the mouth. The mar-
ten then gets an electric shock.
Note: If you do not connect the cable at the module “to terminal 15” at all,
the marten defence is switched on constantly.
Ultrasonic sounds spread as light, there are “shadows” behind obstacles
(no ultrasonic sounds). That’s why the loudspeaker in the device should
radiate to the spots which are at risk of being bitten (within the cone of
radiation of approx. 150 degrees).
The high-voltage cable has to be laid in the engine compartment in such
a manner that the contact plates can be mounted at spots which are at
risk of being bitten. The high-voltage cable should not directly run along
very hot parts of the motor (e.g. exhaust manifold) (the cable insulation
might melt).
The high-voltage plates are either xed with a screw in the engine com-
partment of the car or with binders at the cable harnesses or tubes of
the car.
The high-voltage contact plates are fastened in the motor room with
a sheet metal screw. The screw head must not get in contact with the
high-voltage metal surface on the plates.
Important: The high-voltage contact plates have to be mounted in such a
manner that the bare contact plates are > 10 mm away from other alive
contacts in the car. Furthermore, the bare contact surface of the contact
plates should neither touch any other parts of the car (risk of short cir-
cuits). Explanation: Plastics (e.g. tubes) consisting of an electrically con-
ductive plastic are often used in cars for shielding reasons. These plastics
would then short-circuit the high-voltage of the contact plates against
earth. When xing the small contact plates with a metal screw, please
make sure that the screw head does not touch the high-voltage metallic
surface on the contact plates (risk of short circuit). It is also important that
the contact plates will not get wet. A water lm between the vehicle earth
and contact plates will also cause a shortcircuit.
Please stick the enclosed yellow warning sticker “Warning! High- Voltage!”
in a well visible place close to the high-voltage plates (e.g. on the air lter).
Setting into operation: The fuse that was removed from the fuse hol-
der before assembly is mounted again. If everything has been properly
connected and the vehicle is in parking position, the high-voltage at the
contact plates builds up and the small light-emitting diode at the module
starts ashing (approx. every 5 - 12 sec.). When setting into operation for
the rst time, it may take up to 5 minutes until the LED starts ashing
after switching on.
Check list for trouble shooting:
1) Measuring again: is the operating voltage 12 V (DC voltage, car battery)
between the connections + 12 V and earth (- 12 V)?
2) Measuring again: isn’t there either any voltage against earth or is there
a connection to earth (negative) at the cable to “terminal 15”? The device
will not work if there is a positive voltage (measured against vehicle earth)
at the cable to “terminal 15”.
3) If the LED still does not ash after 5 minutes although the operating
voltage is fed and the cable towards terminal 15 does not receive any
positive (+) signal, there may be a short-circuit at the high-voltage plates.
One or several plates come into contact with the metal surface with ve-
hicle “earth” and the high-voltage discharges (short-circuit). This may also
happen if there is a water lm between the metal surface on the high-vol-
tage plates and the vehicle chassis.
4) The contact plates must be mounted freely and may not have any
connection with other parts of the vehicle (risk of short circuits).
Warning concerning maintenance work: After disconnecting the de-
vice, the high-voltage may still be present at the contact plates for max. 3
min. The built-in charging capacitor needs this time to discharge. Before
carrying out any maintenance work, please wait for this time after dis-
connecting (remove the fuse).
If you don’t want to wait, you may induce a short circuit after disconnecting
through a short term cable coupling (approx. 1 - 3 sec.) between one of the
high-voltage plates and the vehicle earth which discharges the high-vol-
tage charging capacitor immediately and makes the plates voltage-free.
The high-voltage is not dangerous to men (merely a very weak current
ows). If, however, one is very jumpy or particularly at risk of going into
shock, there is a certain risk.
Please switch off the marten defence (remove the fuse from the fuse hol-
der) when performing electric welding on the car, reloading the battery
from the outside using a rapid charger or giving jump start with a jumper
cable. High overvoltage pulses may reach the car electrical system during
these processes.
General information: Before installing the marten defence, please clean
the engine compartment of your vehicle as well as the paving where you
park your car regularly (e.g. carport) thoroughly. Martens mark their ter-
Wichtiger Hinweis:
Alle Geräte werden während und am Ende der Produktion sorgfältig
geprüft. Bitte wiederholen Sie diese Prüfung vor dem Einbau: Ver-
binden Sie das Massekabel mit dem Minuspol der Autobatterie und
das Pluskabel mit der eingebauten Sicherung mit dem Pluspol der
Autobatterie. Das „Klemme 15-Kabel“ wird nicht angeschlossen. Die
Hochspannungsplatten sollten auf einer isolierenden Unterlage liegen
(Pappe, Holz). Nach spätestens 5 Minuten sollte die im Modul einge-
baute Leuchtdiode im Abstand von 5 - 12 Sekunden kurz aufblinken.
Dann ist die Marderscheuche in Ordnung und kann eingebaut werden.
Achtung! Nach dem Abschalten können die Hochspannungsplatten
noch bis zu max. 3 Minuten aufgeladen bleiben. Vor dem Einbau bitte
erst entladen (siehe Betriebsanleitung bei „Wartungsarbeiten“). Beim
Prüfen bitte darauf achten, dass die Hochspannungsplatten nicht be-
rührt werden! Wenn das Gerät trotz positivem Test vor dem Einbau
nicht funktioniert, liegt eindeutig ein Montagefehler vor (siehe Einbau-
anleitung).
Wir leisten Gewährleistung auf das Gerät nach dem Gesetz, keine
Übernahme von Montage- und Demontagekosten.
ritory with scent marks and may get very aggressive if they smell scent
marks from another marten in their territory.
Our marten defences with high-voltage contact plates and aggressive ul-
trasonic sounds are very effective for beating back martens. Neverthe-
less, we do not guarantee that the martens will actually be chased away
in 100% of all cases!
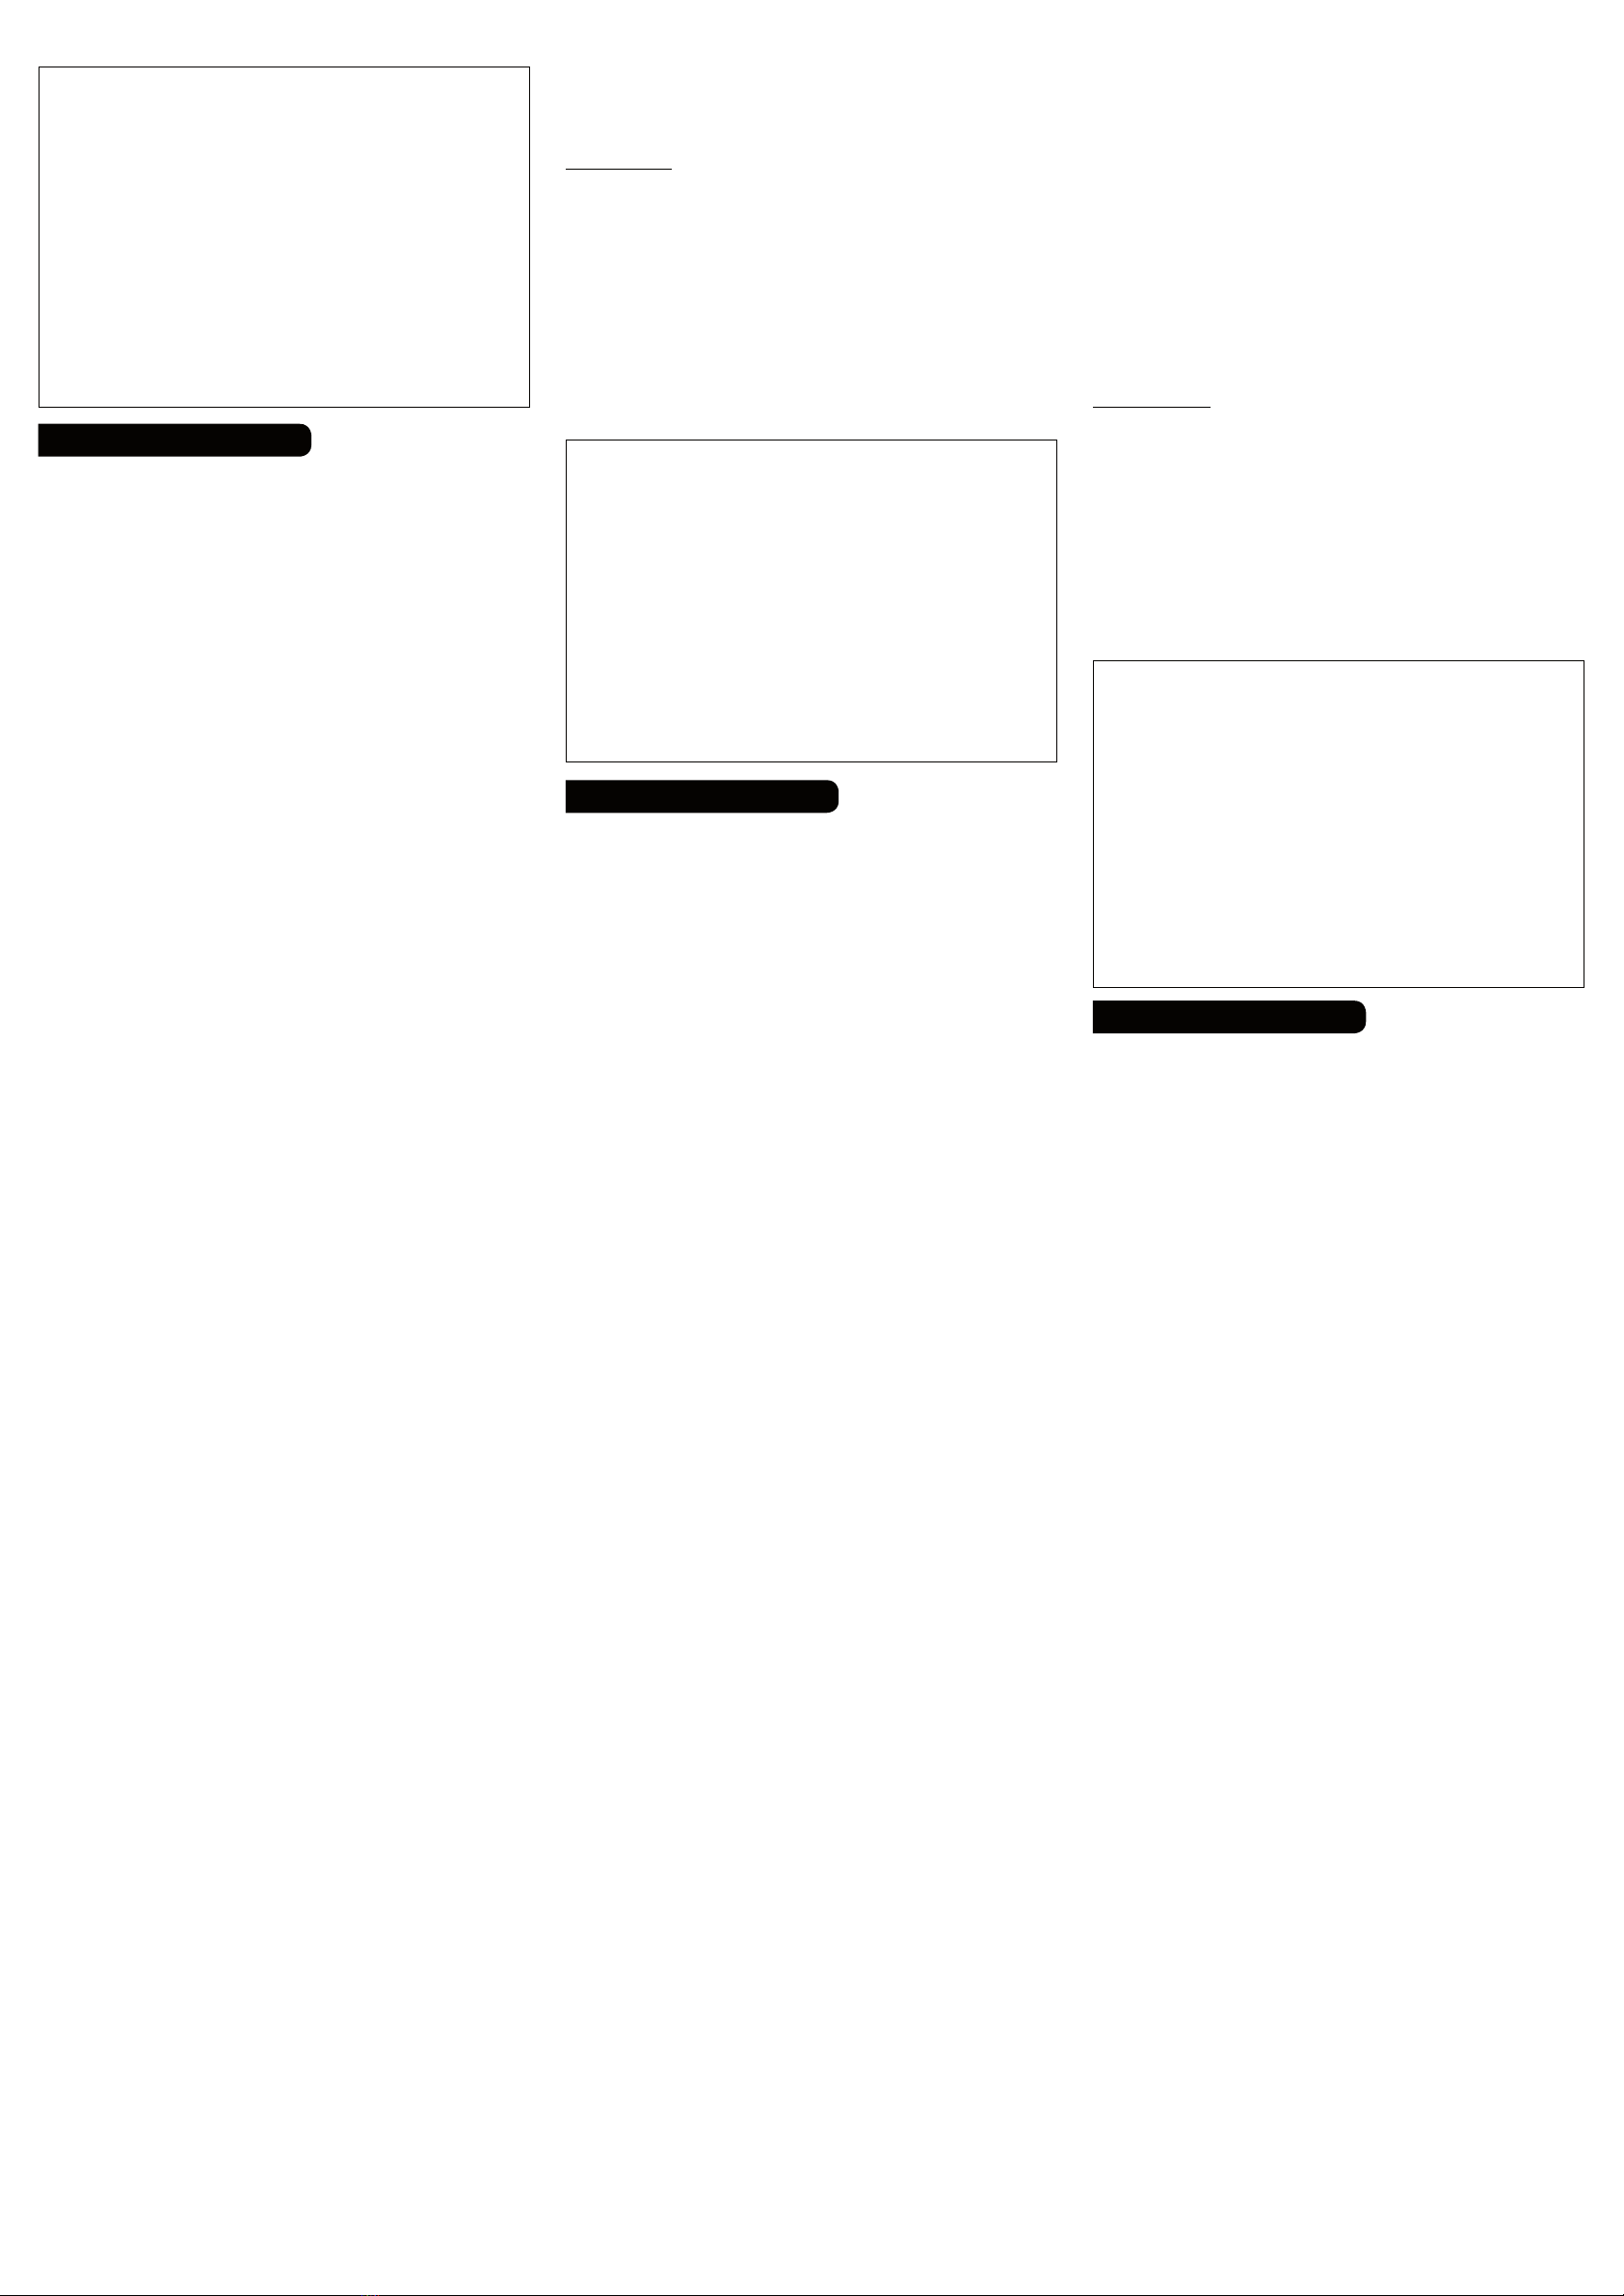
Technical data:
Operating voltage: 12 - 15 V/DC (car battery) | Average power consump-
tion: < 5 mA | Automatic shutoff: if the battery voltage decreases to <
11,5 V (± 5%) | Output voltage: approx. 200 - 300 V/DC | Ultrasonic fre-
quency: approx. 22 kHz ± 10% | Acoustic pressure: max. approx. 100 dB
± 15% | Angle of radiation ultrasonics: approx. 150 degree | Loudspe-
aker: Special piezoceramic speakers with aluminium dome membrane |
Temperature range: approx. - 25 to + 80 degree C | Functional display:
ashing LED (approx. every 5 - 12 sec.) | Cable length high-voltage cab-
le: 1 x approx. 4 m (± 10%) | Fuse in the fuse holder: 500 mA | High-volta-
ge contact plates: 6 pieces, approx. 40 x 40 x 1,5 mm each | Dimensions
basic instrument: approx. 125 x 70 x 31 mm (H x W x D, without cable
entry point). Suitable for vehicles with Can Bus. | Cable for terminal 15: If
this cable is connected with “positive”, the marten defence disconnects.
The marten defence switches on if it is connected with “negative” or does
not receive any signal.
CZ
Předpokládané používání:
Vyhánění kun a dalších divokých zvířat z motorového prostoru motorových
vozidel a budov, prostřednictvím elektrošoku a agresivních pulzujících ul-
trazvukových frekvencí.
Pokyn k montáži: Prosíme, během montáže vyjměte pojistku přístroje
z pojistkového držáku. Základní přístroj se namontuje na suché místo v
autě, kde není příliš horko (prosím nikoli do bezprostřední blízkosti výfuku
nebo jiných obzvláště horkých míst), a odkud se ultrazvuk může dobře šířit
po motorovém prostoru. Plusovýkabel s namontovaným jisticím držákem
připojte na „+ 12 V“. Zemnící kabel připojte na konstrukci vozidla nebo na
„- 12 V“. Kabel ke „svorce 15“ by měl být připojen do „svorky 15“ palubní
sítě. Tato svorka je většinou na zámku zapalování nebo na eurozástrčce
autorádia. Je-li kabel „Svorka 15“ správně zasunut, je odpuzovač kun v
provozu pouze tehdy, když neběží motor (auto parkuje). Pokud byste „svor-
ku 15“ nenašli, pak nejprve na zámku zapalování vyhledejte jiný kontakt,
který je při parkování zapojen na vypnut a při běžícím motoru je zapojen
na „plus“, nebo je bez napětí. U některých vozů může být i zapalovač.
Připojením kabelu na „svorku 15“ je zaručeno, že odpuzovač kun je v pro-
vozu jen při parkování (při jízdě nevzniká nebezpečí, že by kuna vlezla do
vozidla).
Montáž v budovách: aby kuna dostala elektrický úder, musí se současně
dotýkat vysokonapěťové desky a uzemnění. V automobilu je uzemněný
bod všude (kostra, motor atd.). Při montáži v budovách je nutné kovovou
desku (podložku) Z115 (spolu s modulem sa nedodáva) přilepit do nory a
kabel kovové základny připevnit na kostru modulu (minusový pól baterie).
Samolepící kovová deska a vykonapěťová deska se musí do nory insta-
lovat tak, aby se kuna mohla dotknout nohou kovové desky a současně
čenichem (hlavou) vysokonapěťové desky. V takovém případě dostane
elektrický úder.
Upozornění: Není-li kabel na modulu „svorky 15“ zapojen vůbec, je odpu-
zovač kun neustále v provozu.
Ultrazvukové tóny se šíří jako světlo, za překážkami vzniká „stín“ (prostor
bez ultrazvuku). Reproduktory v přístroji by proto měly směřovat na místa
ohrožená okusem (uvnitř vyzařovacího kuželu cca 150 stupňů).
Vysokonapěťový kabel je nutno položit v motorovém prostoru tak, aby kon-
taktní destičky mohly být namontovány na místa ohrožená okusem. Vyso-
konapěťový kabel by neměl být veden přímo kolem velmi horkých částí
motoru (např. výfuku izolace kabelu by se mohla roztavit).
Vysokonapěťové destičky jsou buď v motorovém prostoru auta upevňová-
ny pomocí šroubů anebo kabelovými spojkami na kabelové svazky nebo
hadice auta.
Vysokonapěťovou destičku upevnit pomocí kovového šroubu do motoro-
vého prostoru. Hlava šroubu se nesmí dotýkat vysokonapětové kovové
plochy na destičce.
Důležité: Vysokonapěťové kontaktní destičky musí být namontovány tak,
aby byly umístěny ve vzdálenosti více než 10 mm od jiných napěťových
kontaktů v autě. Kromě toho by se kontaktní plocha kontaktních destiček
neměla dotýkat jiných součástí auta (nebezpečí zkratu). Zdůvodnění: Z
důvodu odstínění jsou v autech také hojně používány umělé hmoty (např.
hadice), zhotovené z elektricky vodivých materiálů. Tyto umělé hmoty by
pak zkratovaly vysoké napětí kontaktních destiček vůči konstrukci vozidla.
Je-li kontaktní destička upevněna kovovým šroubem, dbejte prosím na to,
aby se hlava šroubu nedotýkala vysokonapěťové kovové plochy na kon-
taktních destičkách (nebezpečí zkratu).
Je také důležité, aby kontaktní destičky nebyly mokré. Vodní lm mezi
hmotou vozidla a kontaktními destičkami vede rovněž ke zkratu.
Prosím nalepte přiložené žluté varovné nálepky „Warning! High- Voltage!“
(Pozor! Vysoké napětí !) na dobře viditelné místo v blízkosti vysokonapěťo-
vých destiček (např. na vzduchový ltr).
Uvedení do provozu: Pojistka, kterou jste před montáží vyndali z držáku,
musí být opět nasazena. Je-li vše správně zapojeno a vozidlo se nachází v
parkovací pozici, začne se tvořit na kontaktních destičkách vysoké napětí
a malá světelná dioda na modulu začne blikat (cca každých 5…12 se-
kund). Při prvním uvedení do provozu může trvat až 5 minut, než začne po
zapojení LED dioda blikat.
Seznam pro hledání závad:
1) Proměření: Je mezi přípojkami + 12 V a konstrukcí (- 12 V) provozní
napětí 12 V (stejnosměrné, autobaterie)?
2) Proměření: Je v kabelu ke „svorce 15“ nulové napětí vůči konstrukci
nebo jiné spojení na konstrukci (mínus)? Přístroj nefunguje, pokud je na
kabelu ke „svorce 15“ plusové napětí (měřeno proti konstrukci vozidla).
3) V případě, když LED ani po 5 minutách nezasvítí, ačkoliv pracovní
napětí je připojené a přes kabel připojený ke svorce 15 se nepřenáší
žádný pozitivní (+) signál, je pravděpodobně skrat ve vysokonapěťové de-
sce. Jedna, nebo více desek mohou příjít do styku s kovovým povrchem
automobilu a tak nastane skrat vysokého napětí. To se taky může stát v
případě, když se dostane mezi kovovou plochu vysokonapěťové desky a
kostru automobilu voda.
4) Kontaktní destičky musí být volně namontovány a nesmějí mít kontakt
s dalšími částmi vozidla (nebezpečí zkratu).
Poučení o nebezpečí při údržbě: Po odpojení přístroje může v kontaktních
destičkách ještě max. 3 minut setrvávat vysoké napětí. Tuto dobu potře-
buje vestavěný kondenzátor k vybití. Prosím vyčkejte před údržbou tuto
dobu od odpojení přístroje (odstraněním pojistky).
Nechcete-li čekat, pak můžete po odpojení přístroje krátkodobým při-
Important information:
All devices are tested thoroughly during and at the end of production.
Please repeat this test before installation: Connect the earth cable
with the negative pole of the car battery and the positive cable with
the builtin fuse with the positive pole of the car battery. The “terminal
15-cable” is not connected. The high-voltage plates should lie on an
insulated base (cardboard, wood). After 5 minutes at the latest the
light-emitting diode mounted in the module should ash shortly at an
interval of 5 - 12 seconds. Then the marten defence is all right and
can be installed. Attention! After disconnection the high-voltage plates
may still be charged up to max. 3 minutes. Please discharge rst befo-
re installation (see operating instructions under “maintenance work”).
When testing please see to it that the high-voltage plates will not be
touched! If the device does not work despite a positive test before
installation, this is clearly due to an installation error (see assembly
instructions).
Our guarantee on this device is according to law. We do not assume
any costs for assembly and disassembly.
ložením kabelu (1-3 sekundy) mezi vysokonapěťové destičky a konstrukci
vozidla vyvolat zkrat, který vysokonapěťový kondenzátor okamžitě vybije a
zbaví destičky napětí.
Toto vysoké napětí není pro lidi nebezpečné (protéká jen nepatrný proud).
Je-li ale člověk lekavý nebo může-li šok vyvolat zhoršení jeho zdravotního
stavu, poté již představuje „šok“ nebezpečí.
Vypněte prosím odpuzovač kun (vyjměte pojistku z jejího držáku), pokud
provádíte svářečské práce na elektroinstalaci auta, zvenku dobíjíte ba-
terii rychlodobíječkou anebo startujete pomocí propojovacího kabelu. Při
těchto postupech se mohou do elektroinstalace auta dostat velké impulsy
přepětí.
Všeobecný pokyn: Prosíme, před montáží odpuzovače kun důkladně
vyčistěte motorový prostor Vašeho vozidla a také povrch komunikace, na
němž Vaše auto pravidelně stojí (např. podlahu garáže). Kuny značkují
svůj revír pachovými značkami a mohou se stát velmi agresivními, objeví-li
ve svém revíru pachové značky jiné kuny.
Naše odpuzovače kun s vysokonapěťovými kontaktními destičkami a
agresivním ultrazvukem jsou nanejvýše účinné při odpuzování kun. Přesto
nepřebíráme žádnou záruku na to, že ve 100% případů budou kuny sku-
tečně vypuzeny!
Technické údaje:
Provozní napětí: 12 - 15 V/DC (autobaterie) | Průměrný odběr proudu: <
5 mA | Automatické odpojení: klesne-li napětí baterie pod 11,5 V (± 5%)
| Výstupní napětí: Cca 200 - 300 V/DC | Frekvence ultrazvuku: cca 22
kHz ± 10% | Akustický tlak: max. cca 100 dB ± 15% | Vyzařovací úhel
ultrazvuku: cca 150 stupňů | Reproduktor: Speciální piezokeramický re-
produktor s alukalotovou membránou | Teplotní oblast: cca –25 až +
80°C | Ukazatel chodu: blikající LED dioda (cca každých 5 - 12 sekund)
| Délka kabelu vysokého napětí: 1 x cca 4 m (± 10%) | Pojistka v pojist-
kovém držáku: 500 mA | Vysokonapěťové kontaktní destičky: 6 kusů,
po cca 40 x 40 x 1,5 mm | Míry základního přístroje: Cca 125 x 70 x 31
mm / V x Š x H, bez kabloveho přívodu / Vhodné pro vozidla s CAN BUS. |
Kabel ke svorce 15: když je tento kabel připojený k pólu „plus“, přístroj na
plašení kun se vypne. V případě přípojení tohto kabelu k „minusu“, nebo
když nepříchází žádný signál, přístroj se zapne.
FR
Conditions prévues d’utilisation:
L’appareil est destiné à repousser les rongeurs et tout autre animal sauva-
ge hors des compartiments moteur et des bâtiments, au moyen de chocs
électriques et de fréquences ultrasons agressives émises en pulsation.
Indications de montage: Veillez ôter le fusible du porte-fusible de l‘appa-
reil avant de commencer le montage. L’appareil de base s’installe dans la
voiture, dans un endroit sec et non exposé à de fortes chaleurs (ne pas le
monter à proximité directe du coude d’échappement ni dans des zones
particulièrement chaudes). Veillez à ce que sa disposition permette une
répartition équilibrée des ultrasons dans le compartiment moteur. Le câb-
le positif connecté au porte-fusible doit être relié à la borne positive « + 12
V », le câble de mise à la masse est quant à lui relié à la masse du véhicule
ou à la borne négative « - 12 V ». Le câble prévu à cet effet doit être relié à
la « borne 15 » du réseau électrique de votre véhicule. Cette borne se situe
en général sur la prise de contact ou sur la prise européenne de l‘autora-
dio. Si le câble de la « borne 15 » est relié correctement, l’appareil anti-ron-
geurs se met en marche uniquement lorsque le moteur ne tourne pas
(stationnement). Si vous ne trouviez pas la « borne 15 », veuillez chercher
sur la serrure de contact un autre contact se positionnant éteint lorsque
la voiture est en stationnement et se positionnant sur « positif » lorsque le
moteur tourne. À certaines voitures il peut être aussi l‘allume-cigare. La
connexion du « câble borne 15 » garantit que le dispositif anti-rongeurs
fonctionne uniquement lorsque le véhicule est en stationnement (aucun
risque de présence de rongeurs lorsque la voiture roule).
Montage dans des bâtiments: An que la martre reçoive un coup élec-
trique, il doit toucher une des plaques de haute tension et « masse » en
même temps. Le raccord de masse est partout dans la voiture (châssis,
moteur, etc.). Ainsi, dans les bâtiments il faut coller notre natte de masse
Z115 (pas inclus) au trou d’entrée et il faut connecter le câble de la natte
de masse avec l’anti-martre à « masse » (négatif-batterie). Alors, il faut
xer la natte de masse autoadhésive et les plaques de haute tension au
trou d’entrée de façon que la martre touche la natte de masse métallisé
avec les pattes et une des plaques de haute tension avec le groin. Ensuite
il reçoit un coup électrique.
Remarque: Si le câble n‘est pas connecté au module de la borne 15, le
dispositif antirongeurs est constamment en fonctionnement.
La propagation des ondes ultrasons est semblable à la diffusion de la
lumière – les obstacles entraînent la présence « d’ombres » (aucun ul-
trason perceptible). Il est donc nécessaire que les ultrasons émis par les
haut-parleurs de l‘appareil atteignent les zones menacées de morsures
(dans un angle de rayonnement d’env. 150 degrés).
Le câble haute tension est placé dans le compartiment moteur de telle
manière que les plaques de contact puissent être montées au niveau des
zones menacées par les rongeurs. Il ne doit en aucun cas se trouver à
proximité directe des pièces très chaudes du moteur (par ex. du coude
d’échappement); si c‘est le cas, la gaine isolante du câble risque de fond-
re.
Les plaques à haute tension peuvent être vissées dans le compartiment
moteur ou xées aux faisceaux de câbles ou aux durits à l’aide de -
xes-câbles.
Les plaquettes de haute tension sont xées dans le compartiment pour
le moteur avec un vis Parker. La tête de vis ne doit pas toucher la surface
métallique de haute tension sur les plaquettes.
Important: Les plaques à haute tension doivent être montées de telle
façon que les plaques porte-contact dénudées se trouvent à plus de 10
mm des autres points de contact sous tension présents dans la voiture.
De même, ces surfaces dénudées ne doivent pas non plus entrer en con-
tact avec d’autres pièces de la voiture (risque de court-circuit). Motif: an
de permettre l’évacuation de l’électricité statique de la voiture, des pièces
plastiques (par ex. des durits) fabriquées en matière synthétique conduc-
trice sont fréquemment utilisées. Si elles touchent les plaques de contact,
ces pièces entraînent le courtcircuit de la haute tension avec la masse.
Les plaquettes de haute tension sont xées dans le compartiment pour
le moteur avec un vis Parker. La tête de vis ne doit pas toucher la surface
métallique de haute tension sur les plaquettes (risque de court-circuit).
Les plaques de contact ne doivent en aucun cas être mouillées ou humidi-
ées. La présence d’une pellicule d’eau entre la masse du véhicule et les
plaques de contact entraîne également un court-circuit.
Veuillez coller l’autocollant « Warning! High-Voltage!» (Attention! Haute ten-
sion!) livré avec l’appareil de façon visible à proximité des plaques à haute
Důležité instrukce:
Všechny přístroje jsou v průběhu výroby a taky i na konci výrobního
procesu starostlivě odskoušeny. Prosíme zopakovat tyto skoušky před
montáží: Spojte zemnící kabel s minusovým pólem autobaterie a plu-
sový kabel se zabudovanou pojistkou s plusovým pólem autobaterie.
„Svorka 15-kabel“ nebude připojená. Vysokonapěťová destička by
měla být položená na nevodivé podložce (lepenka, dřevo). Po nejvíce
5 minutách by měla v modulu zabudovaná LED dioda s odstupem 5
- 12 sek začít blikat. V takovém případe je přístroj na plašení kun v
pořádku a může být instalován. Pozor! Po vypnutí přístroje může zůstat
vysokonapěťová destička do max. 3 min. ještě nabita. Před montáží je
třeba nejprve destičku vybít (viď návod na použití-údržba). Při skoušce
dávejte pozor na to, aby ste se nedotkli vysokonapěťové destičky! V
případě, že přístroj přes pozitivní test vykonaný před montáží nefun-
guje, jednoznačně je chyba v samotné montáži přístroje (viď instrukce
pro montáž).
My poskytujeme záruku na přístroj podle zákona, a nepřebírame žád-
né náklady na montáž a demontáž.
P / Module / M186 / Beschreibung / 22038SE / KV060 / Einl. Ver. 003 2/4