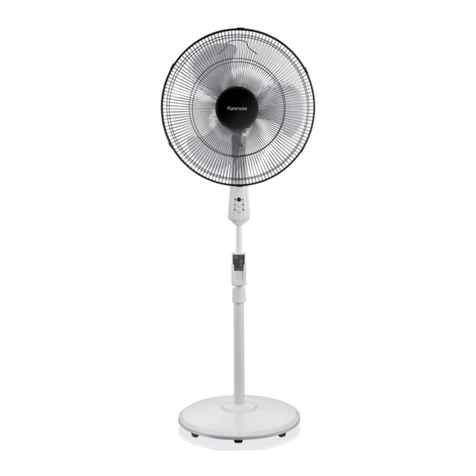
Kenmore 27.32600310 User manual

Use & Care Guide
Manual de Uso y Cuidado
English/Español
Kenmore
®
Stand fan
3-speed switch, adjustable height and vertical tilt
Ventilador de pedestal
Boton de 3 velocidades, ajustable en altura e inclinación vertical
Model/Modelo: 127. 32600310
Customer Assistance /Asistencia al Cliente
1-886-877-1889
P/N 13477900B (0807)
Sears Brands Management Corporation
Hoffman Estates, IL 60179 U.S.A.
www.kenmore.com
www.sears.com
www.kmart.com

- 2 -
IMPORTANT INSTRUCTIONS:
WARNING: When using electrical appliances, basic precautions should always be followed to
reduce risk of fire, electric shock, and injury to persons, including the following:
Read all instructions before using this product.
Use this product only as described in this manual. Any other use not recommended by the
manufacturer may cause fire, electrical shock or injury, and may void the warranty.
Do not plug the AC cord into the outlet until the product has been completely assembled.
Use power source of the product according to the rating label.
Never operate the fan with a cracked or damaged fan blade or fan housing.
Always unplug unit before assembly, disassembly, cleaning, moving or when not in use.
To disconnect the product, turn the unit OFF, grip the plug and pull it from the wall outlet.
Never pull the plug by the cord
The use of attachments not recommended or sold by the manufacturer may cause injury.
Avoid contact with moving parts.
DO NOT operate the product with a damaged cord or plug. Discard the product after a
malfunction or after being dropped or damaged in any manner.
Do not hang or mount the product on a wall or ceiling.
Do not operate the product in the presence of explosive and/or flammable fumes.
Do not place the product or any parts near an open flame, cooking or other heating
appliances.
To avoid electric shock, do not immerse cord, plug or any parts of the product in water or
spray with liquids.
This product is not intended for use by persons (including children) with reduced physical,
sensory or mental capabilities, or lack of experience or knowledge, unless they have been
given supervision or instruction concerning the use of the product by a person responsible
for their safety.
Children should be supervised to ensure that they do not play with the product.
This product is intended for household use only and not for commercial or industrial use.
Do not use outdoors.
Always use on a dry level surface.
Do not operate if the product housing is removed or damaged.
A loose fit between the AC outlet and plug may cause the plug to overheat. Have a
qualified electrician replace the outlet. .
This product is equipped with a polarized alternating current line plug (a plug having one
blade wider than the other). This plug fits into the power outlet only one way. This is a
safety feature. If you are unable to insert the plug fully into the outlet, try reversing the
plug. If the plug should still fail to fit, contact an electrician to replace the outlet. Do not
defeat the safety purpose of the polarized plug.
NEVER connect the product to any power sources other than a 120 volt alternating current
polarized outlet.
Do not run cord under carpeting. Do not cover cord with throw rugs, runners, or similar
coverings. Do not route cord under furniture or appliances. Arrange cord away from
traffic areas where it might be tripped over.
WARNING:
To reduce the risk of fire or electric shock, DO NOT use this product with any solid-state
speed control device.
DO NOT insert finger or any object into grill.
TO PREVENT ELECTRIC SHOCK, MATCH WIDE BLADE OF PLUG TO WIDE SLOT, AND

- 3 -
FULLY INSERT THE BLADES.
UNPLUG THIS PRODUCT FROM THE POWER SUPPLY BEFORE SERVICE.
IF THE POWER CORD IS DAMAGED, IT SHOULD BE REPLACED BY THE MANUFACTURER,
ITS AGENT LICENSED OR QUALIFIED FOR SERVICE TO AVOID A HAZARD.
SAVE THESE INSTRUCTIONS
USER SERVICING INSTRUCTIONS:
This product employs overload protection (fuse). A blown fuse indicates an overload or short-
circuit situation. If the fuse blows, unplug the product from the outlet. Replace the fuse by
following the servicing instructions below (follow product marking for proper fuse rating). If the
replacement fuse also blows, a short-circuit may be present and the product should be
discarded, or call the following customer assistance number to arrange for possible product
repair: 1-886-877-1889.
Grasp plug and remove it from the receptacle or other outlet device. Do not unplug by
pulling on cord.
Select a suitable tool such as a small flat screwdriver.
Open the fuse access cover by sliding or prying it open.
Carefully remove the fuse by prying it out from one end
or by turning the fuse holder over.
Risk of fire. Replace fuse only with 2.5 Amp, 125 Volt
fuse. Gently press the new fuse into the slot at both ends.
Do not press on the glass tube.
Close the access cover until it is flush with the plug face.
Do not replace the plug. It contains safety devices (fuse, AFCI, LCDI) that should not be
removed. Discard the product if the plug is damaged.
Tips:
Do not overexert when replacing the fuse or damage may occur.
If it’s hard to close the access cover, make sure the fuse is fully inserted.
CLEANING AND MAINTENANCE INSTRUCTIONS:
During Season Care:
Before cleaning, be sure to turn off and unplug the fan.
Keep fan clean. Carefully wipe the unit with a soft, damp cloth.
DO NOT immerse the fan in water and never allow water to drip into the motor housing.
Please be very careful when cleaning near the fan motor.
Never use gasoline, benzene or thinner. This will damage the surface of the fan.
After cleaning, be sure to dry the fan completely with a cloth or towel.
After Season Care:
Before putting the fan in storage, clean thoroughly, cover with a plastic bag and store it in
a cool and dry place. We recommend using the original or a properly sized box.
Maintenance:
Do not attempt to repair or adjust any electrical or mechanical functions of this unit. Doing

- 4 -
so will may cause damage to the fan or personal injury.
If the power cord is damaged, the unit must be discarded to avoid a hazard.
This product must be disposed of properly according to local authority. By recycling, you
help save the environment.
ASSEMBLY INSTRUCTIONS
1. Front Grille
2. Blade Cap
3. Blade
4. Mounting Nut
5. Rear Grille
6. Motor Shaft
7. Oscillating Knob
8. Motor Housing
9. Neck Screw
10. Switch Panel
11. Set Screw
12. Inner Tube
13. Height Adjustment Collar
14. Outer Tube
15. Base Decorative Cap
16. Crass bar Screws (4pcs)
17. Cross bar A
18. Cross bar B
19. Nut and bolt
Loosen and remove the four screws from the bars. Then interlock bar A and bar B.
Be sure to align the four holes in the bars with those on the flange of the Outer Tube.
Secure the flange to the bars with the four cross bar screws.
Loosen and remove the Height Adjustment Collar from the top of the Inner Tube. Slide the
Base Decorative Cap down over the assembled cross bars.
Replace the Height Adjustment Collar on top of the Inner Tube. Pull the Inner Tube out
from the Outer Tube to adjust the tube to the desired height and tighten the collar.
If necessary, slightly loosen the Set Screw by turning it counterclockwise. Slide the Switch
Panel down over the Inner Tube and tighten the Set Screw. Make sure the Set Screw is
tightly secured.
Unscrew the plastic mounting nut from the front of the motor housing by rotating it
counterclockwise.
Position the rear grille against the front of the motor housing with the handle uppermost,
ensuring that the locating pegs on the motor housing are engaged correctly in the holes of
the rear grille.
Tighten the Rear Grille Mounting Nut clockwise. DO NOT OVERTIGHTEN IT.
Push the fan blade onto the motor shaft, locating the slot at the back of the blade on the
drive pin that passes through the motor shaft.
Tighten the blade cap by turning it counterclockwise.
Position the front grille against the rear grille so that the holes in the rims that accept the

- 5 -
small nut and bolt are in line. Insert the bolt through the holes and screw on the nut. Do not
fully tighten at this stage.
Push the grille retaining clips into position ensuring that they engage correctly on the rim
of the grille.
Fully tighten the small nut and bolt that passes through the rim of the grille.
OPERATION INSTRUCTIONS
Place your fan on a level and dry surface.
Plug the power cord into a standard 120V AC, 60HZ outlet. Please make sure the
Selector (Speed Control) is in the OFF position. Select the desired speed setting. There are
4 settings –0 (off), 1 (low), 2 (medium) and 3 (high).
The fan can be set to oscillate by pushing Oscillating Knob downwards. To stop the
oscillating feature, pull up the Oscillation Knob.
To adjust the tilt angle of fan head, loosen the neck screw, swivel the fan to the desired
angle and then re-tighten the screw.
CAUTION: The fan should always be switched off when making this adjustment.
USE & CARE ASSISTANCE
If you have safety, operation or maintenance questions concerning the use of this product, call
the following customer assistance number: 1-886-877-1889, or send an email to the following
address: Service@collinsinternational.com.

- 6 -
INSTRUCCIONES IMPORTANTES
CUANDO SE UTILIZAN APARATOS ELÉCTRICOS, CIERTAS PRECAUCIONES BÁSICAS SIEMPRE
SE DEBEN DE SEGUIR PARA REDUCIR EL RIESGO DE INCENDIOS, DESCARGAS ELÉCTRICAS Y
DAÑ OS A PERSONAS, ENTRE ELLAS LAS SIGUIENTES:
Lea todas las instrucciones antes de usar este producto.
Utilice este ventilador sólo como se describe en este manual. Cualquier otro uso no
recomendado por el fabricante puede provocar incendios, descargas eléctricas o lesiones
y podría anular la garantía.
Siempre desconecte la unidad antes de ensamblarla, desensamblarla o limpiarla.
Siempre desconecte la unidad cuando no esté en uso o cuando lo mueva desde una
ubicación a otra.
Para desconectar, agarre el enchufe y tire de él desde el enchufe de la pared. Nunca
jale el cable.
El uso de partes no recomiendas o vendidas por el fabricante del dispositivo puede
causar riesgos.
Evitar el contacto con las partes que se mueven.
NO opere este ventilador con un cable o el enchufe dañado, después de un mal
funcionamiento, o si se calló o dañó de cualquier manera. Devuelva la unidad a Optimus
Enterprise, Inc. para examinar, hacer ajustes eléctricos o mecánicos, o reparaciones.
NO opere este ventilador en presencia de vapores inflamables o explosivos.
NO coloque el ventilador o cualquier parte cerca de una flama abierta, la cocina u otro
aparato de calefacción.
Extrema precaución es necesaria cuando el ventilador es utilizado por o cerca de los
niños o inválidos y siempre que el ventilador se deje operando y desatendido.
Este producto está diseñado para uso doméstico solamente y no para uso comercial o
industrial. NO se debe usar al aire libre.
Utilizar siempre sobre una superficie nivelada y seca.
NO opere este ventilador si la cubierta del ventilador es removida o dañada.
Un ajuste inadecuado entre el tomacorriente y enchufe puede causar la sobre calefacción
del enchufe. Pida a un electricista calificado que reemplace el tomacorriente.
NO coloque el cable bajo la alfombra. No cubra el cable con tapetes, corredores o
similares. Coloque el cable fuera del área de tráfico y de donde puedan tropezarse con
el.
Este ventilador está equipado con un enchufe de línea polarizada de corriente alterna (un
enchufe de que tiene una clavija más ancha que la otra). Este enchufe encaja en el toma
de corriente sólo de una forma. Se trata de una característica de seguridad. Si usted no
puede insertar el enchufe completamente en el toma corriente, intente revertir el enchufe.
Si el enchufe todavía no encajar, póngase en contacto con un electricista para
reemplazar el tomacorriente obsoleto. NO interfiera con el propósito de seguridad del
enchufe polarizado.
Este producto emplea una protección de sobrecarga (fusibles). Un fusible fundido indica
una sobrecarga o cortocircuito. Si el fusible se funde, desenchufe el producto del toma
corriente. Cambie el fusible según las instrucciones de mantenimiento (siga las indicaciones
del producto para el fusible adecuado). Si se funde el fusible de reemplazo, un
cortocircuito puede estar presente y el producto debe ser desechado o regresado a
Optimus Enterprise, Inc. para ser examinado o reparado.
NUNCA conecte el ventilador a cualquier fuente de alimentación distinta de una toma de
corriente alterna polarizada de 120 voltios.
ADVERTENCIA: para reducir el riesgo de descarga eléctrica. NO utilice este ventilador con


- 7 -
cualquier control de velocidad estático y NO inserte los dedos o cualquier objeto en la parrilla.
SI EL CORDON DE ALIMENTACION ES DAÑ ADO, ESTE DEBE DE SUSTITUIRSE POR EL
FABRICANTE, POR SU AGENTE DE SERVICIO AUTORIZADO O POR PERSONAL CALIFICADO
CON EL FIN DE EVITAR UN PELIGRO.
GUARDE ESTAS INSTRUCCIONES
USER SERVICIO INSTRUCCIONES:
Este producto emplea una protección de sobrecarga (fusibles). Un fusible fundido indica una
sobrecarga o cortocircuito. Si el fusible se funde, desenchufe el producto del toma corriente.
Cambie el fusible según las instrucciones de mantenimiento (siga las indicaciones del producto
para el fusible adecuado). Si se funde el fusible de reemplazo, un cortocircuito puede estar
presente y el producto debe ser desechado o llame al número de asistencia al cliente
siguientes para gestionar la reparación posible del producto: 1-886-877-1889.
Agarre el enchufe y desconéctelo del toma corriente u
otro dispositivo de salida. No jale el cordón para
desconectarlo..
Seleccione la herramienta adecuada (la parte superior
de la herramienta debe ser cónicos y planos, como un
destornillador plano pequeño, etc),.
Abra la tapa de acceso al fusible por deslizamiento o
curiosos abrirlo..
Inserte la punta de la herramienta en la ranura de
fusible (cerca de la terminal), y luego saque el fusible poco a poco y lentamente. Si se
siente apretado, usted puede intentarlo varias veces y saque el fusible poco a poco.
Riesgo de incendio. Reemplace el fusible únicamente con 2.5 amperios, 125 voltios
fusible. Ponga un fusible en la ranura, y luego utilizar su herramienta para presionar el
fusible en la ranura, no se debe presionar el tubo de vidrio de la mecha, pero la tapa de
cobre en ambos extremos con cuidado o el fusible se romperá.
Cierre la tapa de acceso hasta que quede al ras con la cara del enchufe.
No coloque el tapón. Que contiene los dispositivos de seguridad (fusible, AFCI, LCDI) que
no se debe quitar. Desechar el producto si el enchufe está dañado
Puntas:
Al sustituir el fusible, por favor, no lo arregle pronto o más o menos, o el producto se
avería o accidente causa.
Cuando sientes que es difícil de reemplazar, por favor asegúrese de que usted tiene el
fusible de la manera correcta.
INSTRUCCIONES DE LIMIEZA/MANTENIMIENTO:
Cuidado durante temporada de uso:
Antes de limpiar, asegúrese de apagar y desconectar el enchufe de la unidad.
Mantener el ventilador limpio. Limpie cuidadosamente la unidad con un paño suave y
húmedo. Por favor, sea muy cauteloso cerca del motor.
NO sumergir el ventilador en agua y nunca permitir que gotee agua en la cubierta del
motor.
NUNCA use gasolina, benceno o thinner. Esto producirá daños en la superficie de la
unidad.

- 8 -
Tras la limpieza, asegúrese de secar completamente la unidad con un paño o una toalla.
Cuidado después de la temporada de uso:
Guarde el ventilador en su caja original, Almacénelo en un sitio fresco.
INSTRUCTIONS DE SERVICIO:
No intente abrir el caparazón del motor usted mismo; de lo contrario se puede invalidar
la garantía y ocasionar daños al ventilador o lesiones personales.
Si el cable eléctrico está dañado, la unidad debe ser desechado para evitar riesgos.
Este producto debe desecharse de acuerdo con la autoridad local. De esta manera usted
ayudar a salvar el medio ambiente.
INSTRUCCIONES DE ENSAMBLAR
1. Parrilla delantera
2. Tapa de las aspas
3. Aspas
4. Rondana para sujetar
5. Parrilla trasera
6. Perno del motor
7. Botón de oscilación
8. Estructura del motor
9. Tornillo de ajuste
10. Caja de interruptores
11. Tornillo
12. Tubo interno
13. Rondana para ajustar altura
14. Tubo externo
15. Tapa de base decorativa
16. Tornillos de base (4pcs)
17. Barra A
18. Barra B
19. Tornillos
Quite los cuatro tornillos que se encuentran en las barras. Después coloque la barra A y
la barra B de manera que queden en cruz y se unan por el centro.
Asegúrese de alinear los cuatro orificios de las barras para asegurarlas con los tornillos
que removió en un principio.
Afloje y remueva la rondana para ajustar la altura del tubo interno. Deslice la base
decorativa sobre el tubo hasta que quede sobre las barras ensambladas.
Vuelva a ajustar la altura con la rondana sobre el tubo interno. Saque el tubo interno
hasta dejarlo en la altura deseada y apriete la rondana.
De ser necesario, afloje el tornillo de ajuste en sentido contrario de las manecillas del
reloj. Deslice la caja de interruptores por encima del tubo interno y asegúrese de volver a
apretar firmemente.
Desatornille la montura de plastico que se encuentra en frente del motor rotandola en
sentido contrario de las manecillas del reloj.
Coloque la parrilla trasera sobre la caja del motor asegurandose que los agujeros de la
parrilla entren en los de la caja del motor.
Ajuste la rondana de plastic en sentido de las manecillas del reloj para sujetar la parrilla
trasera. NO LO AJUSTE DE MAS.

- 9 -
Inserte las aspas en el perno del motor colocando el agujero localizado detrás de las
aspas dentro del perno.
Ajuste las aspas colocando la tapa y girándola en sentido contrario de las manecillas del
reloj..
Coloque la parilla delantera sobre la trasera alineando los sujetadores y el agujero
pequeño en donde se coloca un tornillo con su rondana. Inserte el tornillo y asegúrelo con
la rondana.
Presione los sujetadores para juntar las parrillas.
Una vez que se se encuentren fijas y sujetas firmemente, apriete por complete la tuerca
del tornillo.
INSTRUCCIONES DE USO:
Coloque el ventiladore en una superficie plana y nivelada.
Coloque el enchufe dentro de una toma de corriente de 120V, 60 HZ. Antes de
conectarlo asegurese de que el interruptor del ventiladore se encuentre en la posición de
OFF. Seleccione la velocidad deseada. Hay 4 niveles- 0 apagado, 1 bajo, 2 medio, 3
alto.
El abanico se puede colocar en la modalidad de oscilacion. Y para lograr esto presione
el perno que se encuentra en la caja del motor. Para desactivar jale el perno.
Para acomodar el ángulo solo mueva la caja del motor, desenroque un poco el tornillo
que se encuentra en la base del motor y vuelva a ajustar ya que tenga colocado el
ángulo deseado.
Precaucion: El abanico debe de estar apagado siempre que haga el ajuste.
ASISTENCIA PARA EL USO Y CUIDADO
Si tiene preguntas relacionadas con la seguridad, operación o mantenimiento con respecto al
uso de este producto, puede contactar al servicio de asistencia al cliente al número siguiente:
1-886-877-1889 o la dirección de correo electrónico: Service@collinsinternational.com.

KENMORE ONE YEAR LIMITED WARRANTY
If this product fails due to a defect in material or workmanship
within one year from the date of purchase, return it with proof
of purchase to any Sears store or other Kenmore outlet in the
United States for free replacement.
This warranty is void if this product is ever used for other
than private household purposes.
This warranty gives you specific legal rights, and you may
also have other rights which vary from state to state.
Sears Brands Management Corporation,
Hoffman Estates, IL 60179
KENMORE GARANTÍA LÍMITADA DE UN AÑ O
Si este producto falla debido a un defecto en material o a la
ejecución en el plazo de un año a partire de la fecha de la
compra, deveulvalo con comprobante de compra a cualquier
tienda Sears o un otro Kenmore outlet en los Estados Unidos
para el reemplazo gratis.
Esta guarantía es invalido si este producto se utiliza para con
excepción de los propósitos privados de casa.
Esta guarantía le da los derechos legales especificos, y usted
puede también tener otros derechos que varían de estado a
estado.
Sears Brands Management Corporation,
Hoffman Estates, IL 6017
This manual suits for next models
1
Table of contents
Languages:
Other Kenmore Fan manuals

Kenmore
Kenmore 258.32002310 User manual

Kenmore
Kenmore 405.35090510 User manual

Kenmore
Kenmore 405.35040510 User manual

Kenmore
Kenmore 127. 32217310 User manual

Kenmore
Kenmore 405.34030310 User manual

Kenmore
Kenmore 405.34036310 User manual

Kenmore
Kenmore 405.35162510 User manual

Kenmore
Kenmore 405.34012310 User manual

Kenmore
Kenmore 405.35182510 User manual

Kenmore
Kenmore 127. 32682310 User manual