manuals.online logo
Brands
  1. Home
  2. •
  3. Brands
  4. •
  5. Kenmore
  6. •
  7. Grill
  8. •
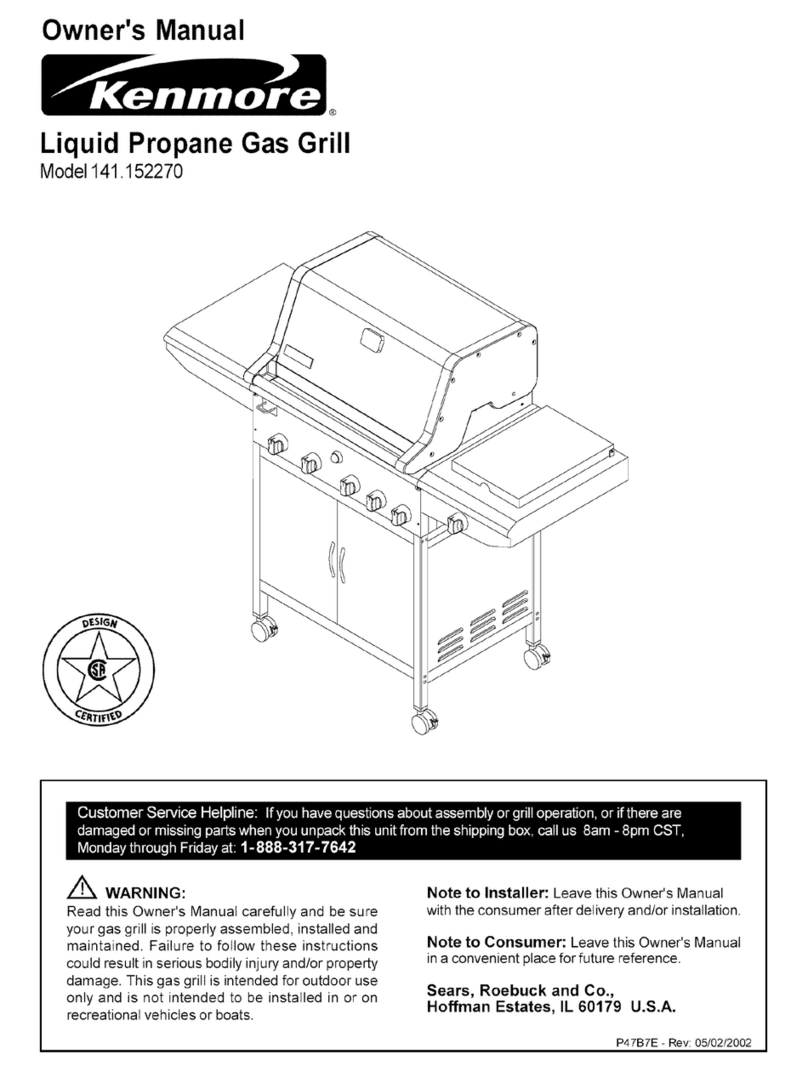
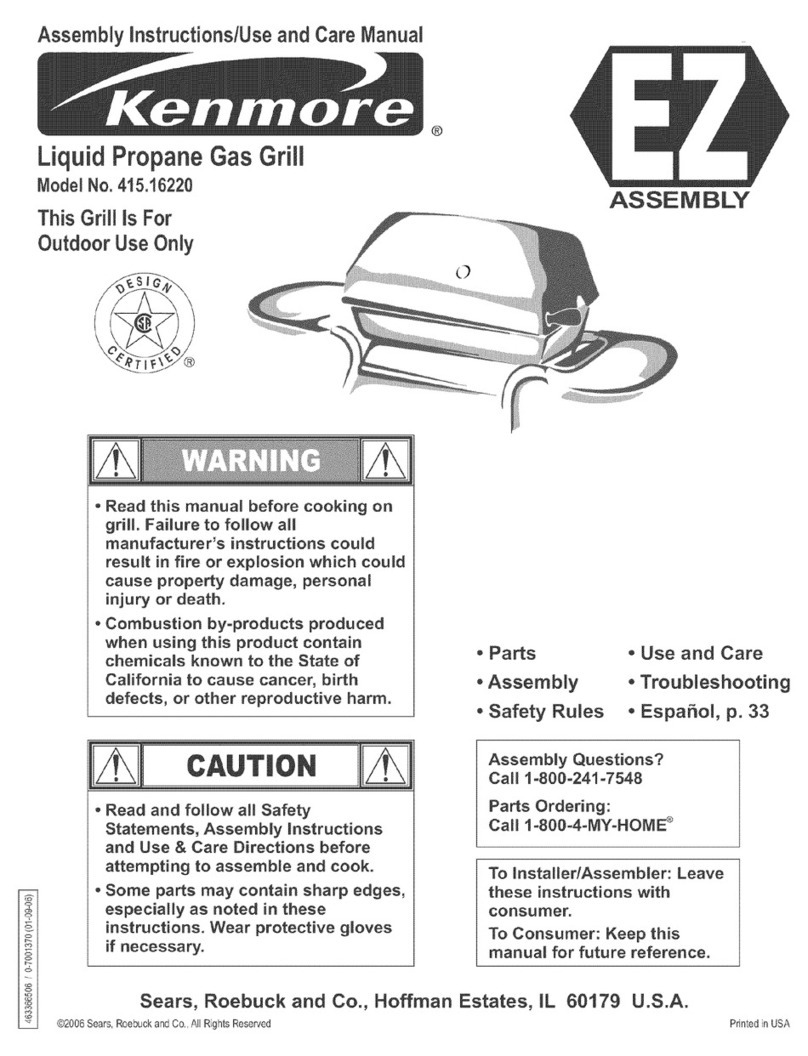
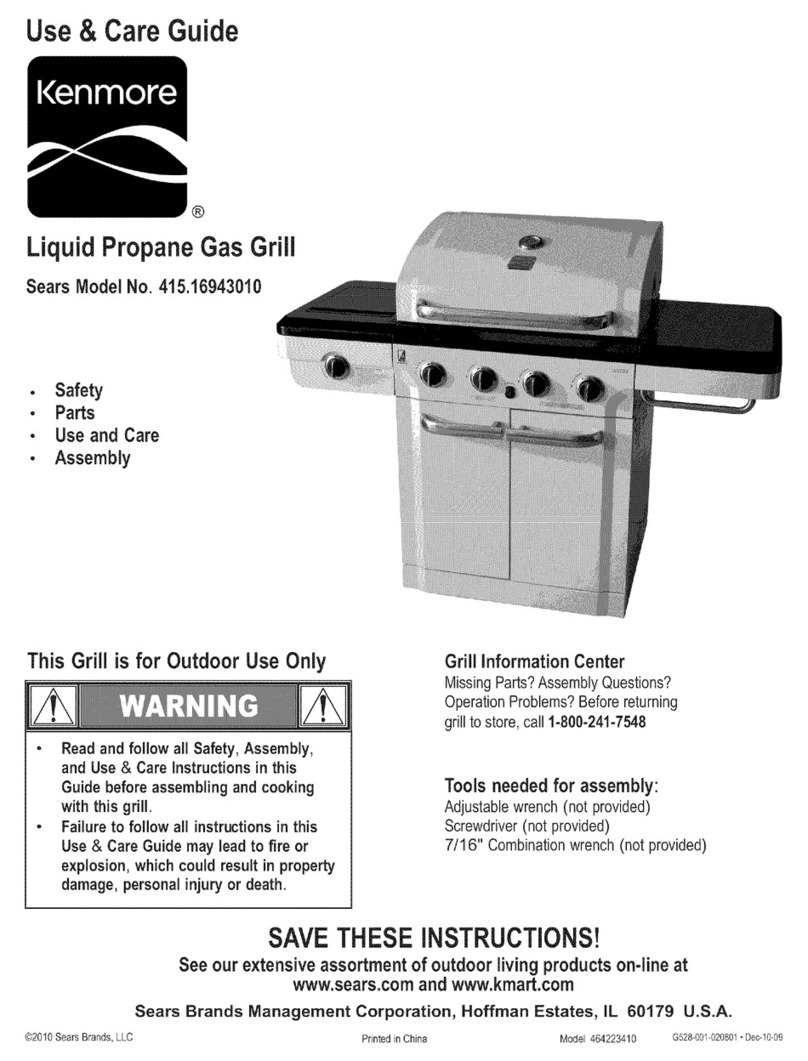
  9. Kenmore 148.16656011 User manual

Kenmore 148.16656011 User manual

Use & Care Guide
Manual de Uso y Cuidado
English /Espafiol
Modeis/Modelos: 148.16656011
I(enmore0
÷ @
Parilla propa liqu"
PiN L3018S-l-Manual
Sears Brands Management Corporation
Hoffman Estates, IL 60179 U.S.A.
www.kenmore.com
www;seors.com
if you smell gas:
1. Shut off gas to the appliance.
2. Extinguish any open flame.
3. Open lid.
4. If odor continues, keep away from the
appliance and immediately call your gas
supplier or your fire department.
1. Do not store or use gasoline or other
flammable liquids or vapors in the vicinity
ofthis or any other appliance.
2. An LP cylinder not connected for use shall
not be stored in the vicinity of this or any
Installation SafetyPrecautions
• Usegrill,as purchased,onlywith LP(propane)gasand the
regulator/valveassemblysupplied.A conversionkit must
be purchasedfor usewithnaturalgas.
• Grill installationmustconformwith localcodes,or intheir
absenceof localcodes,with eithertheNationalFuelGas
Code,ANSI Z223.1/NFPA 54,NaturalGasandPropane
InstallationCode,CSAB149.1,or PropaneStorageand
HandlingCode,B149.2,or the StandardforRecreational
Vehicles,ANSI A 119.2/NFPA1192,and CSAZ240RV
Series,RecreationalVehicleCode,asapplicable.
•AHelectricalaccessories(suchas rotisserie)mustbe
electricallygroundedin accordancewith localcodes,or
NationalElectricalCode,ANSI/ NFPA70or Canadian
ElectricalCode,CSAC22.1.Keepanyelectricalcords
and/orfuel supplyhosesawayfrom anyhot surfaces.
•Thisgrill issafetycertifiedforusein the UnitedStates
and/orCanadaonly.Do notmodifyfor use inanyother
location.Modificationwillresultin a safetyhazard.
Call Grill Service Center For Help And Parts
If you have questions or need assistance during assembly,
please call 1-800-482-0131. You will be speaking to a
representative of the grill manufacturer and not a Sears
employee. To order new parts call Sears at
Thesymbolsandboxesshownbelowexplainwhateach
headingmeans,Readand followall ofthe messagesfound
throughoutthemanual
Product Record
IMPORTANT: Fill out the product record information
below. DANGER:Indicatesan imminentlyhazardous
situationwhich,if notavoided,will resultindeathor
seriousinjury.
Model Number
Serial Number
See rating label on grill for serial humor.
Date Purchased
................CAUT,O..............
For residential use only. Do not use for
commercial cooking.
WARNING:Indicatesan potentiallyhazardous
situationwhich,if notavoided,couldresultin death
orserious injury.
........................................CAUTION .........
CAUTION:indicatesa potentiallyhazardous
situationor unsafepracticewhich,ifnotavoided,
may resultin minoror moderateinjury.
ForYourSafety.................................. 2
ForSea_ professionalinstallationof homeappliances,garage
dooropeners,water heaters,andothermajorhomeitems,in
theU.S.A.call 1.800-4.MY-HOME¢
Grill ServiceCenter............................... 2
ProductRecordInformation........................ 2
SafetySymbols.................................. 2
InstallationSafetyPrecautions....................... 2
KenmoreGrillWarranty........................... 3
Useand Care................................ 4-10
NaturalGasConversionBox...................... 11
Notes.......................................... 11
PartsList ...................................... 13
PartsDiagram................................... 14
Assembly.................................... 15-25
Troubleshooting............................... 26-27
RepairProtectionAgreements
Congratulationsonmakingasmartpurchase.'four new
Kenmore®productisdesignedand manufacturedfor yearsof
dependableoperation.Butlikeall products,it mayrequire
repairfrom timeto time.That'swhenhavingaRepair
ProtectionAgreementcansaveyou moneyandaggravation.
Purchasea RepairProtectionAgreementnowandprotect
yourselffromunexpectedhassleand expense.
Here'swhattheRepairProtectionAgreementincludes:
[] Expert service byour 10,000professionalrepair
specialists
[] Unlimited service and no chargefor partsand laboron
all coveredrepairs
[] Product replacement upto $1500 ifyourcovered
productcan'tbe fixed
[] Discount of 10%from regularpriceofserviceand
relatedinstalledpartsnotcoveredbythe agreement;also,
10%offregular priceofpreventivemaintenancecheck
[] Fast help by phone- wecall it RapidResolution-
phonesupportfroma Searsrepresentative.Think ofus
as a "talkingowner'smanual."
Onceyou purchasetheRepairProtectionAgreement,a simple
phonecallis all that ittakesforyou to scheduleservice.You
cancallanytimedayor night,or schedulea service
appointmentonline.
TheRepairProtectionAgreementisa risk4reepurchase.If you
cancelfor anyreasonduringthe productwarrantyperiod,we
willprovidea full refund.Or,a proratedrefundanytimeafter
theproductwarrantyperiodexpires.PurchaseyourRepair
ProtectionAgreementtoday!
Somelimitations and exclusions apply.
For prices and additional informationcall 1-800.827-6655.
SearsInstallation Service
Kenmore Full Warranty
If this grillfailsdue toa defectin materialor workmanship
withinone yearfrom thedateof purchase,call 1-800-4-MY-
HOME®to arrangeforfree repair(or replacementifrepair
provesimpossble).
Limited Warranty on Burners
Fortenyearsfromthe datedpurchase,anystainlesssteel
burnerthat ruststhroughwill be replacedfreeof charge.After
thefirstyearfromthedateof purchase,you payfor laborif
youwishto haveitinstalled.
All warrantycoverageexcludesignitorbatteriesandgrill part
paintloss,discolorationor rusting,whichareeither
expendablepartsthat canwearoutfromnormalusewithin
thewarrantyperiod,or are conditionsthat canbe theresult
of normaluse,accidentor impropermaintenance.
All warrantycoverageisvoid ifthisgrill is everusedfor
commercialor rentalpurposes.
Al!warrantycoverageappliesonlyif thisgrill is usedin the
UnitedStates.
Thiswarrantygivesyouspecificlegal rights,andyou may
alsohaveotherrightswhich varyfrom stateto state.
SearsBrandsManagementCorporation,
Hoffman Estates,IL 60179
•NEVERstoreaspareLPcylinderunderornear
thegrillapplianceorinanenclosedarea.
•Neverfillacylinderbeyond80%full.
• Ifthe information in the two points above is not
followed exactly, a fire causing death or serious
inju_ may occur.
° An over filled or improperly stored cylinder is a
hazard due to possible gas release from the
safety relief valve. This could cause an
fire with risk of property damage, serious injury
or death.
° If you see, smell or hear gas escaping,
immediately get away from the LP cylinder and
grill appliance and call your fire department.
LP Tank Removal, Transport And Storage
• TurnOFFall controlknobsand LPtank valve.Turncoupling
nutcounterclockwiseby handonly- do notusetoolsto
disconnect.LiftLP tankwireupwardoff of LPtankcollar, then
lift LPtank up andoff ofsupportbracket,lnstallsafetycap
ontoLPtank valve.Alwaysusecapandstrap suppliedwith
valve.
Failureto usesafetycapasdirectedmayresultin
seriouspersonalinjuryand/orpropertydamage.
LPTankVal_
SafetyCap
RetainerStrap
• A disconnectedLPtank instorageor beingtransportedmust
havea safetycapinstalled(as shown).Donotstorean LP
tank inenclosedspacessuch asa carport,garage,porch,
coveredpatioor otherbuilding.Neverleavean LPtank inside
a vehiclewhichmay becomeoverheatedbythesun.
• Do notstore an LPtank in anarea wherechildrenplay.
LPCylinder
• The LP cylinderusedwithyour grillmustmeetthe
following requirements:
°Use LPcylindersonlywiththese requiredmeasurements:12"
(30.5cm)(diameter)x 18"(45.7cm) (tall)with 20 lb.(9 kg.)
capacitymaximum.
• LP cylindersmustbeconstructedand markedinaccordance
withspecificationsfor LP cylindersdtheU.S.Departmentd
Transportation(DOT)orfor Canada,CAN/CSA-B339,
cylinders,spheresandtubesfortransportationddangerous
goods.TransportCanada(TO).See LPcylindercollarfor
marking.
,LP cylindervalve musthave:
• Type 1outlet compatiblewith
regulatororgrill.
•Safetyrelid valve.
•ULlistedOverfillProtection OPDHandWheel
Device(OPD).ThisOPDsafety
featureisidentifiedbya uniquetriangularhandwheel.Use
onlyLPcylindersequippedwith thistypeofvalve.
• LP cylindermustbearrangedforvaporwithdrawaland
includecollarto protectLPcylindervalve.AlwayskeepLP
cylindersin uprightpositionduring use,transitor storage.
m{m{m{m{m{
LPcylinderin uprightpositionforvaporwithdrawal
LP (Liquefied Petroleum Gas)
• LP gasisnontoxic,odorlessand colorlesswhenproduced.
For Your Safety, LPgas hasbeengivenan odor (similarto
rottencabbage)sothat itcanbe smelled.
°LP gasishighlyflammableand mayigniteunexpectedly
whenmixedwith air.
LP Cylinder Filling
,Useonly licensedandexperienceddealers.
°LP dealermustpurgenewcylinderbeforefilling.
• DealershouldNEVERfill LPcylindermorethan80% dLP
cylindervolume.Volumedpropanein cylinderwillvary by
temperature.
°A frostyregulatorindicatesgasoverfill.Immediatelyclose LP
cylindervalve andcalllocal LPgasdealerforassistance.
°Donot releaseliquidpropane(LP) gasintotheatmosphere.
Thisis a hazardouspractice.
• To removegasfromLP cylinder,contactan LPdealeror call
a localfire departmentforassistance.Checkthe telephone
directoryunder"GasCompanies"for nearestcertifiedLP
dealers.
LP Tank Exchange
•Manyretailersthat sellgrillsofferyoutheoptionof replacing
youremptyLPtank throughanexchangeservice.Use only
thosereputableexchangecompaniesthat inspect,precision
fill, testandcertifytheircylinders,Exchangeyour tank only
for anOPDsafetyfeature.equipped tank as described in
the "LP Tank" sectionof this manual.
•AlwayskeepnewandexchangedLP tanksin uprightposition
duringuse,transitorstorage.
•Leaktest newand exchangedLPtanksBEFORE
connectingto grill.
LP Tank Leak Test
,Leaktest mustberepeatedeachtime LPtank isexchanged
or refilled.
•Donotsmokeduringleaktest.
•Donotusean openflameto checkfor gasleaks.
•Grillmustbe leaktestedoutdoorsina well-ventilatedarea,
awayfrom ignitionsourcessuchasgasfiredor electrical
appliances.Duringleaktest, keepgrillawayfrom open
flamesor sparks.
•Usea cleanpaintbrushanda 50/50mildsoapandwater
solution.Brushsoapy solutionontoareasindicatedbyarrows
in figurebelow.Leaksare indicatedbygrowingbubbles.
If"growing" bubblesappeardo notuseor movethe LP
tank.Contactan LP gassupplieror yourfire department!
Connecting Regulator To The LP Tank
1.LP tank mustbe properlysecuredontogrill.(Referto
assemblysection.)
2.Turnall controlknobsto the OFFposition,
3.Turn LPtank OFF byturningOPDhandwheelclockwiseto
a full stop.
4.Removethe protectivecapfrom LPtank valve,Alwaysuse
capandstrap suppliedwithvalve,
OPDHandWheel
Type1outletwith
threadonoutside
/
StrapandCap
Donot insert a POLtransportplug
(plastic partwithexternalthreads)
intothe Type1tankvalveoutlet. It
will defeattheSafetyReliefValve
feature.
ADonot usehouseholdcleaningagents.Damagetogas
traincomponents(valve/hose/regulator)can result, 5.Hold regulatorand insertnippleintoLPtank valve.
Hand-tightenthecouplingnut, holdingregulatorin a straight
linewith LPtank valveso asnotto crossthreadthe
connection.
into the LP tank valve.
Holdcouplingnutandregulator
asshownfor properconnection
toLPtankvalve.
6.Turnthecouplingnutclockwiseandtightento afull stop.
Theregulatorwillsealonthe back-checkfeatureinthe LP
tankvaive,resultinginsome resistance.An addiUonal
one-halfto three-quartersturn isrequiredto complete
theconnection.Tightenbyhandonly- do notusetools.
Leak Testing Valves, Hose and Regulator
1.Turn allgrillcontrolknobsto OFF,
2.Be sureregulatoristightlyconnectedto LPtank.
.Completelyopen LPtankvalve byturningOPDhandwheel
counterclockwise,ifyou heara rushingsound,turngasoff
immediately.Thereisa majorleakattheconnection,
Correct before proceeding bycallingSearsfor
replacementpartsat 1.800.4.MY.HOME®.
4.Brushsoapysolutionontoareaswherebubblesare shown
inpicturebelow:
&Neverremovethreaded
orificeatendofvalve.
NOTE:
if youcannotcompletethe connection,disconnectregulator
and repeatsteps5 and 6. Ifyou arestill unableto completethe
connedion, do not use this regulator! Call 1.800.482.0131
for assistance.
•Do not inse_ any tool or foreign object into the valve
outlet or safe_ relief valve. You may damage the valve
and cause aleak. Leaking propane may result in
explosion, fire, severe personal injury, or death.
• Outdoor gas appliance is not intended to be installed
inor on a boat.
• Outdoor gas appliance is not intended to be installed
inor on an RV.
• Neverattempt to attach this grill to the self-contained
LP gas system of a camper trailer or motor home.
• Do not use grill until leak-tested.
• If a leak is detected at any time, STOP and call the
fire department.
• If you cannot stop a gas leak, immediately close
LPcylinder valve and call LP gas supplier or your fire
department!
5. If "growing" bubblesappear,there isa leak.Close LPtank
valveimmediatelyand retightenconnections,If leaks
cannotbe stoppeddo not try to repair. CallSearsfor
replacementpartsat 1.800.4-MY.HOME®,
6.Alwaysclose LPtankvalve after performingleaktestby
turninghandwheelclockwise.
For Safe Use of Your Grill and to Avoid Serious
injury:
•Do not let children operate or play near grill.
, Keep grill area clear and free from materials that
burn,
, Do not block holes in sides or back of grill.
•Check burner flames regularly.
, Use grill only in well-ventilated space, NEVER use in
enclosed space such as carpo_, garage, porch,
covered patio, or under an overhead structure of any
kind,
. Do not use charcoal or ceramic briquets in a gas grill,
(Unless briquets are supplied withyour grill,)
• Use grill at least 3 ft, from any wall or surface.
Maintain 10 _. clearance to objects that can catch fire
or sources of ignition such as pilot lights on water
heaters, live electrical appliances, etc.
°Apartment Dwellers:
Check with management to learn the requirements
and fire codes for using an LP gas grill in your
apa_ment complex, if allowed, use outside on the
ground floor with a three (3) foot clearance from walls
or rails, Do not use on or under balconies,
° NEVER attempt to light burner with lid closed. A
buildup of non-ignit_ gas inside aclosed grill is
•Never operate grill with LP cylinder out of correct
position specified in assembly instructions.
•Always close LP cylinder valve and remove
coupling nut before moving LP cylinder from
specified operation position,
Safety Tips
,k Beforeopening LPcylindervalve,checkthe couplingnut
fortightness.
'& Whengrillis notin use,turnoff all controlknobsand LP
cylindervalve.
A Nevermovegrill whileinoperationor still hot.
A Uselong-handledbarbecueutensilsand ovenmittsto
avoidburnsandsplatters.
A Maximumloadfor sideburnerand sidesheafis10 Ibs.
A Thegreasetray mustbe insertedintogrill andemptied
after eachuse. Donotremovegreasetray untilgrill has
completelycooled.
A Cleangrilloften,preferablyaftereachcookout,if a bristle
brushisusedtocleananyofthe grillcookingsurfaces,
ensureno loosebristlesremainon cookingsurfacesprior
togrilling,it is notrecommendedtocleancookingsurfaces
whilegrill ishot.
A ifyou noticegreaseor other hotmaterialdrippingfrom grill
ontovalve,hoseor regulator,turnoff gassupplyat once.
Determinethe cause,correctit,then cleanand inspect
valve,hoseandregulatorbeforecontinuing.Performa
leaktest.
,A, Keepventilationopeningsin cylinderenclosure(grillcart)
freeand clear ofdebris.
,k Donotstore objectsor materialsinsidethe grillcart
enclosurethat wouldblocktheflow ofcombustionairtothe
undersideofeitherthecontrolpanelorthe fireboxbowl.
A Theregulatormay makea hummingor whistlingnoise
duringoperation.This willnotaffectsafetyor useofgrill.
A Ifyou havea grill problemseethe"Troubleshooting
Section"i
A ifthe regulatorfrosts,turnoff grill and LPcylindervalve
immediately.This indicatesa problemwiththecylinderand
itshouldnotbe usedon anyproduct.Returntosupplied
° Puttingout greasefires by closingthelid is not
possible.Grillsarewell ventilatedfor safetyreasons.
• Do notusewateron a greasefire. Personalinjurymay
result.If a greasefire develops,turn knobsandLP
cylinderoff.
• Do notleavegrillunattendedwhilepreheatingor
burningofffood residueonHI. Ifgrillhasnot been
regularlycleaned,a greasefire canoccurthat may
damagethe product,
Ignitor Lightingthe Grill
1.Readinstructionsbeforelightingyourgrill.
2.Openlid during lighting.
3.OpenLP cylinderor naturalgasvalve.
4. Pushanyburner_ntrol knobinandturn theknobtothe left
to "HI"position.Keeppressingthe knobuntilthe burneris
lit.

5.Ifignitiondoesnotoccurin5seconds,turntheburner
controloff,wait5minutesforgastoclearaway,andrepeat
thelightingprocedure.
6.Tolightotherburners,repeatstep4.
NOTE:Ifignitordoesnotwork,followMatchLighting
instructions.
Turn controls and gas source or tank OFF when
not in use.
If ignition doesnot occurin 5 seconds,turntheburner
controloff, wait5 minutes,and repeatthe lighting
procedure.Ifthe burner does not ignite with
the valve open, gas will continue to flow out of the
burner and could accidently ignite with risk of
injury.
ADonot leanovergrillwhilelighting.
1. Open lidduringlighting.
2. Placematchintomatchholder(hangingfrom sideof _rt).
Lightmatch,placeintothefirebox.
3. Pushin andturn rightknobto HIGHposition.Be sureburner
lightsand stayslit,
4. Lightotherburnersbypushingknobin andturningtoHI
position.
Sideburner Match Lighting
1. Opensideburnerlid.Turnon gasatLP cylinder.
2. Placelit matchnearburner.
3.Turnsideburnerknobto HI.Besureburnerlightsand
stays lit.
Burner Flame Check
•Removecookinggratesand heatdiffusers.Lightburners,
rotateknobsfromHIGHto LOW.You shouldseea smaller
flame inLOWpositionthanseenon HIGH.Performburner
flame checkon sideburner,also.Alwayscheckflame priorto
eachuse.
Turning Grill Off
•Turnall knobsto position.Turn LPcylinderoff byturning
hand-wheelclockwiseto a full stop.
,Turngasoffat LPcylinder.Pushthecontrol knobinand
turntheknobto the leftto"HI"position?Click"shouldbe
heardandsparkseeneachtime betweencolledor boxor
burnerandelectrode.See "Troubleshooting"ifno clickor
spark.
Valve Check
•Important: Makesuregasis off at LP cylinderbefore
checkingvalves.Knobslock in OFFposition.Tocheck
valves,first pushinknobsandrelease,knobsshouldspring
back.If knobsdo notspringback,replacevalveassembly
beforeusinggrill.TurnknobstoLOW positionthen turnback
to OFFposition.Valvesshouldturnsmoothly.
Hose Check
•Beforeeachuse,checktoseeif hosesarecut or worn.
Replacedamagedhosesbeforeusinggrill.Useonly identical
replacementpartvalve/hose/regulatoras specifiedinthe
PartsListof this Useand CareGuide.
General Grill Cleaning
•Donotmistakebrownor blackaccumulationof greaseand
smokefor paint.Interiorsofgasgrillsare notpaintedatthe
factory(and shouldnever be painted). Applya strong
solutionof detergentand _,ateror usea grill cleanerwith
scrubbrushon insidesofgrill tid and bottom.Rinseand allow
tocompletelyair dry. Do not applya causticgrill/oven
cleanerto painted surfaces.
• Plastic parts: Wash withwarmsoapywater andwipedry.
Donotusecitrisol,abrasivecleaners,degreasersora
concentratedgrillcleaneronplasticparts.Damagetoand
failuredpartscanresult.
•Porcelain surfaces: Becausedglass-likecomposition,most
residuecanbe wipedawaywithbakingsoda/watersolutionor
speciallyformulatedcleaner.Usenonabrasivescouring
powderfor stubbornstains.
•Painted surfaces: Washwith milddetergentor nonabrasive
cleanerand warmsoapywater.Wipedrywith a soft
nonabrasivecloth.
.Stainless steelsurfaces:To maintainyourgrill's highquality
appearance,washwith milddetergentand warmsoapywater
andwipedry with a softclothafter eachuse. Baked-on
greasedepositsmayrequirethe useofan abrasiveplastic
cleaningpad.Useonly indirectionofbrushedfinishtoavoid
damage,Donotuseabrasivepad onareaswithgraphics.
*Cooking surfaces:If a bristlebrushisusedto cleanany of
thegrill cookingsurfaces,ensureno loosebristlesremainon
cookingsurfacespriorto grilling.Itis notrecommendedto
cleancookingsurfaceswhilegrill is hot,
Storing Your Grill
•Cleancookinggrates.
•Storeindry location.
•WhenLP cylinderisconnectedto grill,storeoutdoorsin a
wellventilatedspaceand outof reachofchildren.
•Covergrill ifstoredoutdoors.Choosefroma varietyofgrill
coversofferedby manufacturer.
•Storegrill indoorsONLYifLP cylinderisturnedoff and
disconnected,removedfromgrill andstoredoutdoors.
•Whenremovinggrillfromstorage,follow"C,/eaningtheBurner
Assembt¢'instructionsbeforestartinggrill.
Cleaning the Burner Assembly
Followthese instructionstocleanandlor replacepartsof
burnerassemblyor ifyou havetroubleignitinggrill.
1.Turn gasoff at controlknobsand LPcylinder.
2.Removecookinggratesandheatdiffusers.
3.RemoveR pinsfrom rearof burners.
4. Carefullylift eachburnerupand awayfrom valve openings,
SPIDER ALERT!
Ifyou notice thatyour grill isgetting hard to light or that the
it shouldbe, take thetimetocheck
and dean the burner tubes,
Spidersor smallinsectshave beenknownto create "flashback"
problems.The spidersspinwebs,build nestsand lay eggs in the
grilrs burnertubesobstructingthe flow of gastothe burner.The
backed-upgas canignite in the burnertube beNndthe control
panel.This is knownas a flashbackand it candamageyourgrill
andeven causeinjury.
To preventflashbacksand ensuregood performancethe burner
and burnertube assemblyshouldbe removedfrom the grill and
cleanedbeforeuse wheneverthe grill hasbeenidle for an
extendedperiod.
Wesuggestthreewaysto cleanthe burnertubes.Usetheone
easiestforyou.
(A) Benda stiff wire(a lightweight coathangerworks,well)
intoa smallhook. Runthe hookthrougheach burner
tubeseveraltimes.
(B) Usea narrowbottlebrushwitha flexiblehandle(do not
usea brasswire brush),run thebrushthrougheach
burnertube severaltimes.
(C)Weareye protection:Usean air hosetoforce air into
theburnertube andoutthe burnerports.Checkeach
portto makesureair comesouteachhole.
5.Wirebrushentireoutersurfacedburnerto removefood
residueand dirt.
6.Cleananyblockedportswitha stiff wiresuchasan open
paperclip.
7.Checkburnerfor damage,dueto normalwearand corrosion
some holesmay becomeenlarged.Ifany largecracksor
holesarefoundreplaceburner.
VERYIMPORTANT:Burnertubesmustreengagevalve
Correct burner-to-valve engagement
Poultryand largecutsdmeatcookslowlyto perfectiononthe
grill byindirectheat.Placefoodoverunlitburner(s);theheat
from lit burnerscirculatesgentlythroughoutthegrill,cooking
meator poultrywithoutthetouchda directflame.
Thismethodgreatlyreducesflare-upswhencookingextrafatty
cutsbecausethereis nodirectflameto ignitethefats and
juices thatdrip duringcooking.
1BurnerCooking
Cookwithdirector indirectheat.
Bestfor smallermealsor foods.
Consumeslessfuel.
IndirectCooking Instructions
oAlwayscook withthelid closed.
• Duetoweatherconditions,cookingtimesmayvary.
Duringcoldand windyconditionsthetemperaturesetting
may needto be increasedto insuresufficientcooking
temperatures.
• Placefoodoverunlitburner(s)
2 BurnerCooking
Greatindirectcookingon low.
Producesslow,evenheating.
Idealfor slowroastingandbaking.
Food Safety
Foodsafety isa very importantpartofenjoyingthe outdoor
cookingexperience.To keepfoodsafe fromharmfulbacteria,
follow thesefourbasicsteps:
Clean: Washhands,utensils,and surfaceswith hotsoapy
waterbeforeandafter handlingrawmeatandpoultry.
Separate: Separaterawmeatsand poultryfrom ready-to-eat
foods toavoidcrosscontamination.Usea cleanplatterand
utensilswhenremovingcookedfoods.
Cook: Cook meatandpoultrythoroughlyto kil!bacteria.Usea
thermometertoensureproperinternalfood temperatures.
Chill: Refrigeratepreparedfoodsand leftoverspromptly.
For moreinformation call: USDAMeatand PoultryHotline
at 1-800-535-4555(InWashington,DC(202)720-3333,10:00
am.4:00pmEST).
How To Tell if Meat Is Grilled Thoroughly
• Meatand poultrycookedon a grill oftenbrownsveryfaston
theoutside.Use a meatthermometerto be surefood has
reacheda safe internaltemperature,and cut intofoodto
checkforvisualsigns ofdoneness.
• Wholepoultryshouldreach180° F; breasts,170° F. Juices
shouldrun clearandfleshshouldnotbe pink.
•Hamburgersmadeof anygroundmeator poultryshould
reacht60°F, and be brownin themiddlewith no pinkjuices.
Beef,vealand lambsteaks,roastsandchopscan becooked
to 145°F.All cutsof porkshouldreach160° F.
•NEVERpartiallygrill meator poultryandfinishcooking later.
Cookfoodcompletelytodestroyharmfulbacteria.
• Whenreheatingtakeoutfoods orfully cookedmeatslike hot
dogs,grillto 165° F,or untilsteaminghot.
WARNING:To ensurethat itissafeto eat,food mustbe
cookedto theminimuminternaltemperatureslistedinthetable
below.
USDA*SafeMinimum Internal Temperatures
Fish
Pork
EggDishes
Steaksand RoastsofBeef,
'vealor Lamb
GroundBeeflVealor Lamb
WholePoultry(Turkey,
Chicken,Duck,etc.)
Groundor PiecesPoultry
(ChickenBreast,etc.)
*UnitedStatesDepartmentdAgriculture
145°F
160°F
160°F
145°F
160°F
165°F
165°F
lO
To purchase Natural Gas Conversion Parts call Sears at For Natural Gas Connection
Natural gas conversion kit
Kenmore Model #10478
(Manufacturer Part No.: L3018S-KIT or S3218A-KIT)
'/our grill can be converted to natural gas with this
conversion kit by a qualified gas technician only, In order
to convert this grill, the technidan will need this
conversion kit.
The L3018S-KIT is designed specifically for this grill and
contains all components required for the conversion.
The 10478 kitcontains orifices for various grill models.
Please select the orifices as listed below and discard the
rest. Follow the conversion instruction provided with the
kit.
Model Main burner
¢1,37 Sear burner
¢1.44 Side burner
¢1.31
[-1
1
[-]
148.16656011 3 1
12 ft. extension hose with 3/8 in. ID (inner diameter)
if converting the grill to natural gas, the technician in most
cases _l] need this 12' extension hose with 3/8" ID (inner
diameter), which is included in the natural gas conversion
kit,
1. Turn off gas supply, and then remove cap on gas
supply side.
2. Recommended: Install a shut-off valve on gas supply
side before installing the socket.
3. Socket should be installed by an authorized
technician in accordance with the national fuel gas
code (NFPA 54/ANSI223.!).
4. Before inserting plug, turn on gas supply and leak
test all connections including the stem of the shut-off
valve and the opening of the socket. For best results,
use an ammonia-free soap & water solution.
Operating Instructions:
1 Toconnect, push back socket sleeve,
Socket Sleeve _ Plug
2. Insert plug and release sleeve.
3. Push plug until sleeve snaps forward. (Gas will flow
automatically. Failure to connect plug properly to socket
will inhibit gas flow to the appliance.)
To disconnect
1. Pull Sleeve back. Pull plug out of socket. (Gas is
automatically shut off.)
2, Close shut-off valve and replace dust caps on socket
and plug,
tl
Gas Requirements
LP Gas
If your grill is for LP Gas, the regulator supplied isset for
an 11-in. water column (WC) and is for use with LP gas
only. The factory-supplied regulator and hose must be
used with a 20-lb. LP gas tank.
Natural Gas
If your grill is for Natural Gas, it is set for a 7-in. water
column (WC) and is for use with Natural Gas only. Gas
pressure is affected by gas line size and the length dgas
line run from house gas line. Follow the recommendations
in the chart below.
From House to Grill
Distance Tubing Size
Upto 25 ft. 3/8 in. diameter
26-50 ft. 1/2 in. diameter
2/3 of the run: 3/4 in. diameter
51-100 ft. 1/3 of the run :1/2 in. diameter
Over 101 ft. 3/4 in. diameter
Excess Flow Control and Low Heat
The propane regulator assembly incorporates an excess
flow device designed to supply the grill with sufficient gas
flow under normal conditions yet control excess gas flow.
Rapid changes in pressure can trigger the excess flow
device providing a lowflame and low temperature. If the
tank valve is turned open to allow gas flow while a burner
valve is open, the surge of pressure will cause the device
to activate. The device will remain closed until the
pressure is equalized. This should occur within 5
seconds.
Toensure this does not cause d_culty in lighting the grill,
follow these instructions:
1. Make sure all burner valves are "OFF".
2. Open the tank valve and wait 5 seconds.
3. Light the burners one at a time following the lighting
instructions.
Helpful Care and Maintenance Hints
Before grilling, pre-heat grill for 15 minutes on "HI" with
hood down. To avoid uncontrolled flare-ups or grease fires,
grill meats with hood o_n. Close hood if meats are thick
or weather iscold, or ifyou are using a rotisserie or
indirect cooking.
Always protect your hand with a pot holder or cooking
glove when coming into contact with a hot surface.
Hood up when grilling meats, especially chicken. Hood
down when indirect or rotisserie cooking.
NEVER leave your grill unattended while cooking.
After use, close hood, turn burners to HI for 15 min. for
self-cleaning, grease burn off.
Care and Maintenance Time Table Chart
GrillItem FrequencyBased CleaningMethod
onNormalUse
Paintedsurface Twiceyearly Carwax
Stainlesssurface Twiceyearly Stainlesscleaner
Allgrates Aftereachuse Bumoff andwipe
Wirebrush/
Stainlessgrates 15days Dishwashersafe
Scrubpadsoapywater
Porcelaingrates 15days /Dishwashersafe
Burnerheattents 30days Wirebrush
Burners 90days Wirebrush
Burnerbox Interiorgrillcleaning
interior 120days products(availableat
sears)
12
Key Qty,
1 1 HOOD HANDLE(LEFT )
2 4 HANDLE BASE
3 1 LEFT HOOD
4 t TEMPERATURE GAUGE
5 1 WASHER
6 1 RIGHTHOOD
7 2 COOKING GRID ( MAiN BURNER )
8 1 LEFT WARMINGRACK
9 t R_GHTWARMING RACK
10 1 COOKING GRID ( SEAR BURNER)
11 3 HEAT DIFFUSER
12 1 SEAR BURNER
13 1 IGNITIONPIN ( SEARBURNER )
14 t IGNITION PIN ( MAIN BURNER )
15 1 IGNITION PiN ( MAIN BURNER )
16 1 IGNITION PIN( MAiN BURNER)
17 3 MAIN BURNER
18 3 R-PIN
19 t HOOD HANDLE (RIGHT)
20 1 DRAWER HEAD
2I 1 DRAWER BODY
22 1 SiDE SHE_
23 2 HOOD SLEEVE
24 1 BURNER BOX
25 1 SIDE BURNER GRID
26 1 SIDE BURNER HOOD
27 1 SIDE BURNER SHAFT
28 1 COLLECT BOX
29 1 SIDE BURNER SHELF
30 1 IGNiTiON PIN( SiDE BURNER)
3I 1 SIDE BURNER
32 1 BOTTLE OPENER
33 1 SIDE BURNER VALVE
34 5 BEZEL
35 5 KNOB
36-1 1 MAIN BURNERHOSE
37 1 LP GAS PRESSURE REGULATOR
38 1 MANIFOLD
39 1 CONTROL BOX
Manufacturer
Part#
L3018S,804140
L3018S-004102
L3018S-00-4110
E3518-00,8002
E35!8-004009
L3018S-00-4210
L3018S-00-2001
L3018S-00-2020
L30!8So00_2030
L3018S-00_2002
L3018S-00-2007
SH3118B,8002
L3018S-00-8006
L3018S-00,8003
L3018S-00,8602
L3018S-00-800t
L3018S-00-2700
R-PIN
L3018S-00-4240
L3018S-00-52!0
L3018S-00-5220
L3018S-00-5100
E3518-00_0001
L3018S-OOo2000
L3018S-004201
E3518-00-6001
E3518-00-6002
E3518-00_5002
L3018S_00,8100
L3018S-00,8005
SH3118B-8030
SH3118B-5010
_018S-00,8600
E3518-00-3002
E35!8-00-3001
L3018S-00-8009
P3018-00-8017
_018S4_0-3200
L3018S_00o3101
Key
40
41_1
42
43
44
454
464
47
48
49
504
51
52-1
53-1
54
55
56
57
58
59
60
6!
62
Qty. Description
1 ELECTRICAL IGNITOR
1 LEFT PANEL
1 BEAM
2 MAGNET
1 DRIP TRAY
1 DRIP TRAYSUPPORT
1 REAR PANEL TOP
1 TANKRING _ACKET
1 TANK RiNG
1 REAR PANEL BOTTOM
1 RIGHT PANEL
2 LOCKING CASTER
1 BOTTOM PANEL
4 RUBBER PLUG
1 SIDE PANEL BRACKET (RIGHT)
2 CASTER
1 HAND IGNITOR
1 RIGHT DOOR
1 SIDE P,_4EL B_CKET (LEF)
1 LEFT DOOR
2 DOOR HANDLE
1 iGNITIONWIRE(MAiN BURNER )
1 IGNITIONWIRE( SiDE BURNER )
I HARDWAREPACK
PRODUCTMANUAL
Manufacturer
Part#
L3018S_00,8007
L3018S-01-1700
L30t8S-00-1300
L3018S-00-1310
P30!8..004002
L30t8S_00.-t900
L3018So01-1500
E3518-00-1202
P3018-00-1203
L3018S-O0q200
L3018S_01-t800
L3218_00_8013
L30t8S-01-t1!0
3219B-8082
L3018S-O0q020
L3218-00-80t2
3019L-1710
L30t8S-00-1600
L3018S-00-1010
L3018S_00-!400
L36t8S-00o1416
L3018S40-8004
P301840-8002-A
L3018Sq-
HARDWARE
L3018S=l-
MANUAL
If you are missing hardwareor have
damagedparts after unpackinggrill, call
1-800-482-0131for replacement.
To order replacementparts after using grill,
call 1-800-4-MY-HOME®
13
\® ®
®
®
®
@ © ®®® @ © @®
®®
®
®
@
.®
®
@@
14
UNPACKING
After removing all parts from the top of the shipping box, and when the only part showing is the grill head, use a
knife to slice down the sides of the box. Be careful of staples along shipping box edges.
Remove styrofoam packing to gain access to the grill head.
Open grill lids and remove all packaged parts and packing material.
WARNING: Assemble and place the grill on a fiat level surface. Compare the parts and hardware with the
list and diagrams. Do not attempt assembly if any part is missing or damaged.
Attach the casters to the bottom panel with 4 screws each as shown. Attach the two locking casters
at the back of the grill. After attaching all casters, turn the bottom panel over.
Bottom Panel Locking Caster @_
1/4-20x 5/8" Screw
Qty.16
Cas_r
Attach the door magnet to the holes inthe front of the bottom panel with 2 screws. Do not fully tighten
at this time.
Bottom Panel
5/32-32x1/2" Screw
Qty.2
Door Magnet
15
Attach Rear Panel to Bottom Panel with 4 screws as shown.
Rear Panel Bottom 1/'4-20x5/8_ Screw
Qty.4
Bottom Panel
Attach side panels to bottom panel as shown. For each side panel, there are two screws for the rear
panel and three for the bottom panel. Insert the three bottom panel screws first.
Right Panel
Left Panel
1/'4-20x5/8_'Screw
Qty.10
Rear Panel Bottom
16
Attach the side panel brackets to the side panels and bottom panel with 3 scre_ each as shown.
Left Panel
1/4-20x 5/8" Screw
Qty, 6
Side Panel Bracket
Right Panel
17
Attach the rear panel top to the side panels with 2 screws each as shown.
Right Panel
Left Panel
Rear Panel Top
1/4-20x5/8" Screw
Qty.4
Slide the tank ring bracket onto the end of the tank ring as shown. Attach the bracket to the rear panel
top with 2 screws as shown.
Tank Ring Tank Ring Bracket
Rear Panel Top 1/4-20x518" Screw
Qty.2
18
Attach front beam to side panels with 2 screws each as shown.
Left Panel
Front Beam
114-20x 5/8" Screw
Qty.4
Right Panel
Attach the drip tray support to the front beam and rear panel top with 4 screws as shown.
NOTE: Drip tray tabs connect to outside of front beam.
Drip Tray Support Rear Panel Top
1t4-20x 5/8" Screw
Qty.4
Front Beam
19
Slide the ddp tray through the rear panel top and into the drip tray support as shown.
DripTray Support
Drip Tray
For each door, attach washer onto hinge pin,then insert bottom hinge pin into hole on bottom panel.
Push down on top hinge pin to insert into hole in tab at top of side panel.
Adjust magnets on the base panel and front beam to align the magnets with doors, then tighten
magnets screws.
Left Door
Washer 5
Qty. 2
Washer 5 Right Door
2O

Other manuals for 148.16656011

2

Other Kenmore Grill manuals

Kenmore 148.23683310 User manual

Kenmore

Kenmore 148.23683310 User manual

Kenmore PG-40405S0L User manual

Kenmore

Kenmore PG-40405S0L User manual

Kenmore 122.16129800 User manual

Kenmore

Kenmore 122.16129800 User manual

Kenmore 415.1610711 User manual

Kenmore

Kenmore 415.1610711 User manual

Kenmore 415.16128010 User manual

Kenmore

Kenmore 415.16128010 User manual

Kenmore 146.16132110 User manual

Kenmore

Kenmore 146.16132110 User manual

Kenmore 146. 34436410 User manual

Kenmore

Kenmore 146. 34436410 User manual

Kenmore 4t5.t6657900 User manual

Kenmore

Kenmore 4t5.t6657900 User manual

Kenmore 122.166419 User manual

Kenmore

Kenmore 122.166419 User manual

Kenmore Sears 119.16670010 User manual

Kenmore

Kenmore Sears 119.16670010 User manual

Kenmore 415.16106210 User manual

Kenmore

Kenmore 415.16106210 User manual

Kenmore 122.16134110 User manual

Kenmore

Kenmore 122.16134110 User manual

Kenmore 122.16654900 User manual

Kenmore

Kenmore 122.16654900 User manual

Kenmore PG-40409S0LB User manual

Kenmore

Kenmore PG-40409S0LB User manual

Kenmore 415.1613911 User manual

Kenmore

Kenmore 415.1613911 User manual

Kenmore 122.16501010 User manual

Kenmore

Kenmore 122.16501010 User manual

Kenmore 259.162190 Installation instructions

Kenmore

Kenmore 259.162190 Installation instructions

Kenmore Gas smoker 125.15884800 User manual

Kenmore

Kenmore Gas smoker 125.15884800 User manual

Kenmore 141.157941 User manual

Kenmore

Kenmore 141.157941 User manual

Kenmore 415.t62130 User manual

Kenmore

Kenmore 415.t62130 User manual

Kenmore 415.152080 User manual

Kenmore

Kenmore 415.152080 User manual

Kenmore 148.34176410 User manual

Kenmore

Kenmore 148.34176410 User manual

Kenmore 415.162060 User manual

Kenmore

Kenmore 415.162060 User manual

Kenmore 720-0679R - Gas Grill With Side Burner User manual

Kenmore

Kenmore 720-0679R - Gas Grill With Side Burner User manual

Popular Grill manuals by other brands

Char-Broil PROFESSIONAL PRO Series operating instructions

Char-Broil

Char-Broil PROFESSIONAL PRO Series operating instructions

Four Seasons FSISLP use and care manual

Four Seasons

Four Seasons FSISLP use and care manual

Hamilton Beach 840058500 Use and care

Hamilton Beach

Hamilton Beach 840058500 Use and care

SEVERIN PG 8510 Instructions for use

SEVERIN

SEVERIN PG 8510 Instructions for use

TEFAL GC205012 manual

TEFAL

TEFAL GC205012 manual

Cecilware TSG-1G Operation manual

Cecilware

Cecilware TSG-1G Operation manual

Livoo DOC172 instruction manual

Livoo

Livoo DOC172 instruction manual

Jamie Oliver Classic 3S manual

Jamie Oliver

Jamie Oliver Classic 3S manual

Nexgrill NEEVO 720-1055 owner's guide

Nexgrill

Nexgrill NEEVO 720-1055 owner's guide

Tecnoinox GD4FG9 manual

Tecnoinox

Tecnoinox GD4FG9 manual

Weber Genesis Silver A LP 55274 owner's manual

Weber

Weber Genesis Silver A LP 55274 owner's manual

Coleman RoadTrip 9928-A50 Assembly and use manual

Coleman

Coleman RoadTrip 9928-A50 Assembly and use manual

BLUE EMBER GRILLS FG50069 Assembly manual and use and care

BLUE EMBER GRILLS

BLUE EMBER GRILLS FG50069 Assembly manual and use and care

Huntington 6962-64C Assembly manual & parts list

Huntington

Huntington 6962-64C Assembly manual & parts list

George Foreman GR70CAN owner's manual

George Foreman

George Foreman GR70CAN owner's manual

Waring CIG100 instructions

Waring

Waring CIG100 instructions

Napoleon ROGUE R525-1 manual

Napoleon

Napoleon ROGUE R525-1 manual

BBQ BQGL-113 Use and care guide

BBQ

BBQ BQGL-113 Use and care guide

manuals.online logo
manuals.online logoBrands
  • About & Mission
  • Contact us
  • Privacy Policy
  • Terms and Conditions

Copyright 2025 Manuals.Online. All Rights Reserved.