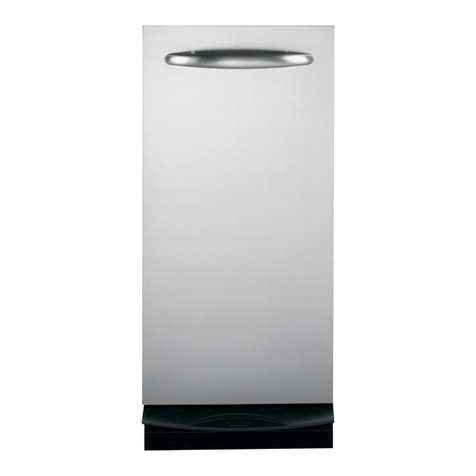
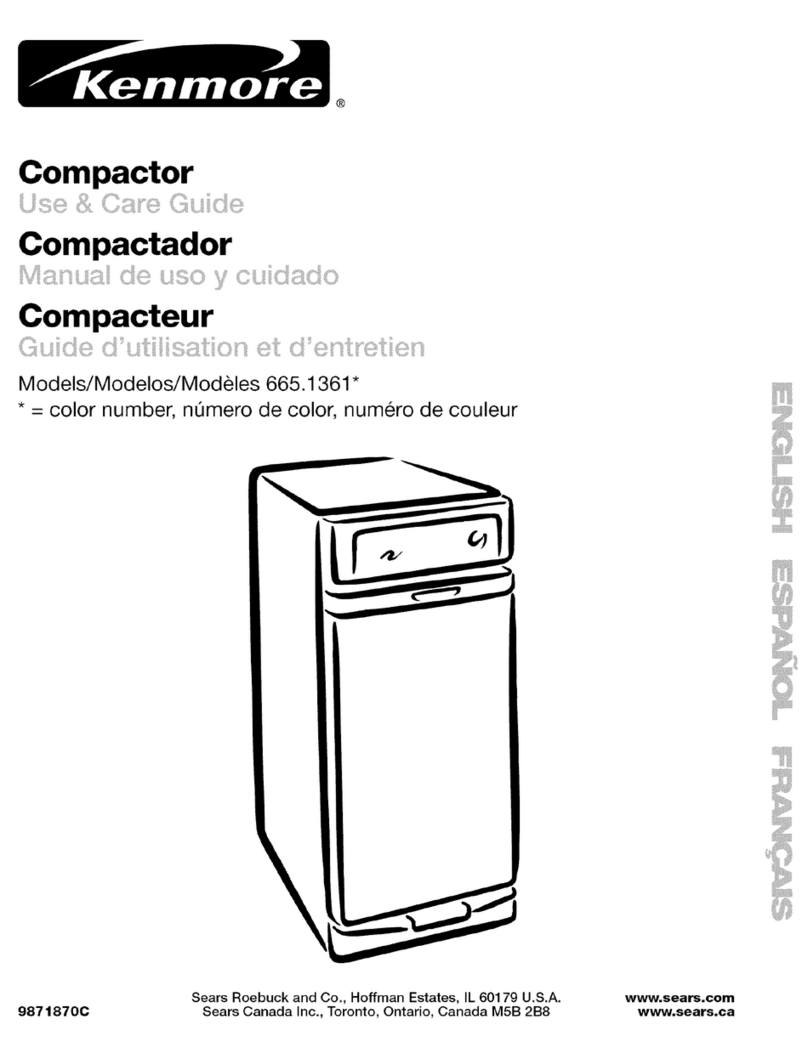
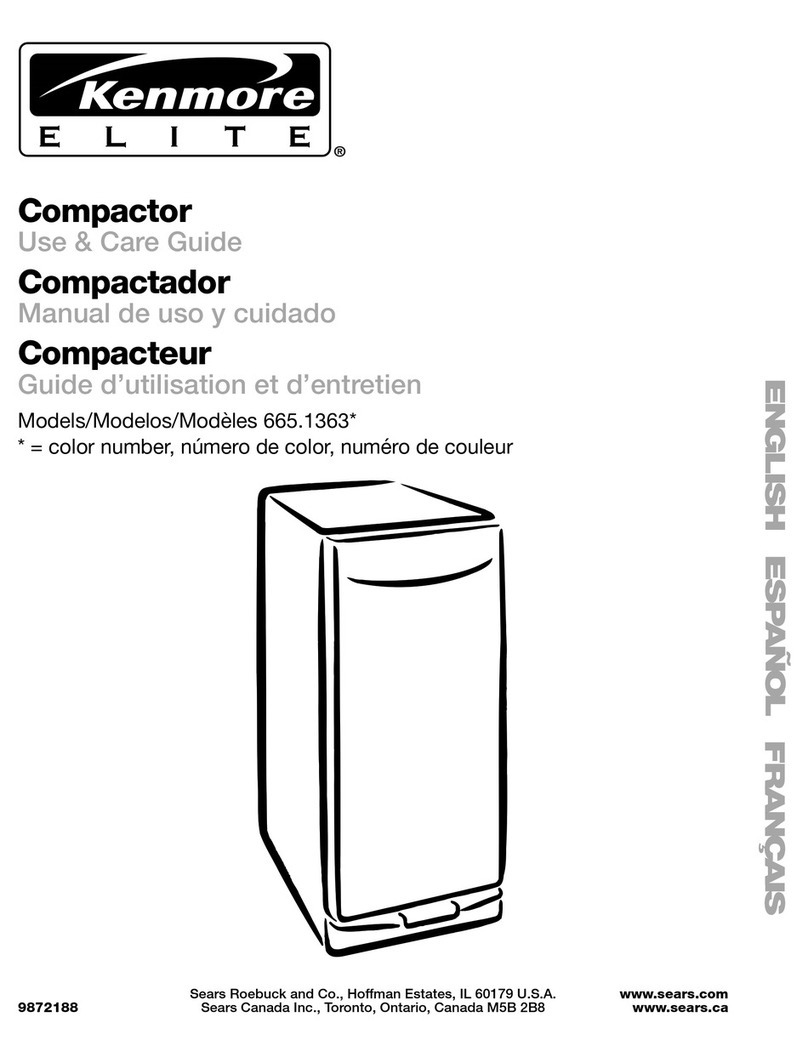
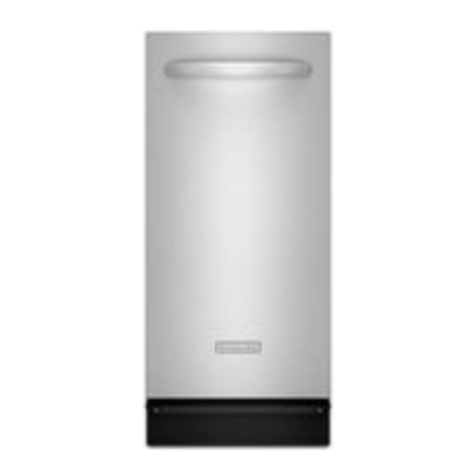
Kenmore 665.1363 User manual

EL I T E®
Compactor
Use & Care Guide
Compactador
Manual de uso y cuidado
Compacteur
Guide d'utilisation et d'entretien
Models/Modelos/Mod_les 665.1363"
*= color number, nL_merode color, num6ro de couleur
m
F
Sears Roebuck and Co., Hoffman Estates, IL 60179 U.S.A. www.sears.com
9872188 Sears Canada Inc., Toronto, Ontario, Canada M5B 2B8 www.sears.ca

TABLEOF CONTENTS
PROTECTION AGREEMENTS ...................................................... .2
In the U.S.A................................................................................... 2
In Canada ..................................................................................... 3
Ascessorias.................................................................................. 3
WARRANTY ..................................................................................... 3
COMPACTOR SAFETY ................................................................. .4
INSTALLATION INSTRUCTIONS ................................................. .5
Unpacking .................................................................................... 5
Location Requirements................................................................ 5
ElectricalRequirements................................................................ 6
Underceunter Installation............................................................. 6
COMPACTOR USE........................................................................ .5
How Your Compactor Works....................................................... 8
Loading......................................................................................... 8
Starting Your Compactor ............................................................. 9
EXTRA PACTM Cycle ...................................................................... 9
Air Freshener................................................................................ 9
Removinga FilledBag ................................................................. 9
Installinga New Bag .................................................................. 10
COMPACTOR CARE ................................................................... 11
Clasning..................................................................................... 11
TROUBLESHOOTING .................................................................. 12
SERVICE NUMBERS ............................................... BACK COVER
PROTECTION AGREEMENTS
Master Protection Agreements
Congratulations on making a smart purchase. Your new
Kenmore°product is designed and manufactured foryams of
dependable operation. But likeall products, it may require
preventive maintenance or repair from time to time. That's when
having a Master ProtectionAgreement can save you money and
aggravation.
Purchase a Master ProtecUon Agreement now and pro_ct
yoursefffrom unexpected hassleand expense.
The Master ProtectionAgreement also helps extend the lifeof
your new product. HeR's what's included inthe Agreement:
_' Expert service by our 12,000 professional repair specialists
=/Unlimited service and no charge for parts and labor on all
covered repairs
_/=No-lemon" guarantee - replacement of your covered
product if four or more product failures occur within twelve
months
v' Product replacement if your covered product can't be fixed
_/Annual Preventive Maintenance Check at your request- no
extra charge
=/Fast help by phone -phone support from a Sears technician
on products requiringin-home repair, plusconvenient repair
scheduling
v' Power surge protection against electrical damage due to
power fluctuations
v' Rental reimbursement if repairof your covered product takes
longerthan promised
Once you purchasethe Agreement, asimple phone call is all that
if takes for you to schedule service. You can call anytime day or
night, or schedule a service appointment online.
Sears hasover 12,000 pmfassional repair specialists,who have
access to over 4.5 millionquality partsand accessories. That's
the kind of professionalismyou can count on to helpprolongthe
lifeofyour new purchase for years to come. Purchaseyour
Master ProtectionAgreement today!
Some limitations and exclusions apply. For prices and
additional information, call 1-800-827-6655.
Sears Installation Sen,ice
For Sears professional installationof home appliances, garage
dooropeners, water heaters, and other major home items, inthe
U.S.A. call 1-800-4-MY-HOME =.
2

Maintenance Agreements
Your purchase has added value because you can depend on
Sears HomeCantraP for service. With over 2,400 Service
Technicians and mornthan a millionparts and accessories, we
have the tools, parts, knowledge and skillsto back our pledge:
We ServiceWhat We Sell,
Your Kenmore®product isdesigned, manufactured and tested to
provide years of dependable operation, But like all products, it
may requireservice from time to time. The Sears Maintenance
Agreement offers you an outstanding service program, affordably
priced.
TheSearsMaintenanceAgreement
• Isyour way to buy tomorrow's service at today's price
• Eliminates repair billsresultingfrom normal wear and tear
a Provides phone support from a Sears technician on products
requiringin-home repair
•Even ifyou don't need repairs, provides an annual Preventive
Maintenance Check, st your request, to ensure that your
product is in properrunning condition.
Some limitations apply. For more information about Sears
Canada Maintenance Agreements, call 1-800-361-6665.
Toensure proper functioning ofyour compactor, useSears
replacement parts only.To order replacement parts or
accessories, cell 1-800-4-MY-HOME =and ask for the
appropriate part number or contact your authorized Kanmore
dealer.
WARRANTY
ONE-YEAR FULL WARRANTY ON COMPACTOR
For one year from the first day of use in your home, Sears will
repair,free of charge, defects in materialsor workmanship.
If the compactor is subjected to otherthan private family use,the
above warranty coverage is effective for only ninety days.
WARRANTY SERVICE
WARRANTY SERVICE ISAVAILABLEBY CONTACTING THE
NEAREST SEARS SERVICE CENTER IN THE UNITED STATES
OR CANADA. This warranty applies only whilethe product is in
use in the United States or Canada.
Thiswarranty gives you specific legal rights and you may also
have other rights which vary from state to state or province to
province.
Warrantyterms may vary in Canada.
For Sears warranty information inthe United States or Canada,
please referencethe service numbers located on the back page
ofthis manual.
Sears, Roebuck and Co.
D/81"i_/A, HoffTnan Estates, IL 60179
Sears Canada Inc.
Toronto, Ontario, Canada M5B 2B8
PRODUCT RECORD
In the space below, recordyour complete model number,sedai
number,and pumhase date. Youcan find this information on the
model and serial number label, located as shown in the Parts and
Features section of this book. Have this informationavailable to
helpyou quickly obtain assistance or service when you contact
Sears concerning your appliance.
Model number 665.
Serial number
Purchase date
F
Save these instructions and your sales receipt for future
reference.

COMPACTOR SAFETY
Your safety and the safety of others are very important.
We have provided manyimportantsafety messages in this manualand on yourappliance. Always read and obey all
safety messages,
This isthe safety alert symbol.
This symbolalerts you to potentialhazards that can killor hurtyou and others.
All safety messages willfollowthe safety alert symboland eitherthe word=DANGER" or
=WARNING." These words mean:
You can be killed or seriously injured if you don't
immediately follow instructions.
You can be killed or seriously injured if you don't
follow instructions.
Allsafety messages willtell you what the potential hazard is, tell you how to reducethe chance of injury,and tell you
what can happen if the instructions are not followed.
IMPORTANT SAFETY INSTRUCTIONS
WARNING: When using an electrical appliance, basic precautions should always be followed, includingthe
following:
• Read all instructionsbefore usingthe compactor. •
• Close supervisionis necessary when used by or
near children. Do not allow to be used as a toy, or
to run unattended at any time. Lock Key Switch
when not in use and store key out of reach of
children.
•Do not touch moving parts.
Do not operate with a damaged cord set, plug,
motor, or after damage in any manner. Have the
compactor examined, repaired or adjusted by an
authorized serviceperson.
Use onlyfor intended use as described in this
manual. Do not use otherthan manufacturer's
recommended attachments.
Do not compact toxic or volatile flammable material
such as oily rags and insect sprays. Do not compact
lightedcigarettes, cigars, or other hot or burning
items. Do not overloadthe compactor.
Do not take apart the compactor, incorrect
reassembly can cause electric shock when
subsequently used.
Handle aloaded trash bag with care. Sharp objects
can pierce the bag and cause injury. Do not
overloadtrash bag with heavymaterial such as
glass.
=This compactor isintended for household use only.
SAVETHESE INSTRUCTIONS
4

INSTALLATIONINSTRUCTIONS
Installer:. Leave Use and Care Guide with the homeowner.
Homeowner:. Keep Use and Care Guide forfuture referenceand
for local electrical inspector's use, if required.
4. Place the other 2 comer posts on the floor to the side of the
compactor, Grasp the sides ofthe compactor cabinet and put
compactor on its side ontop of the corner posts. Remove the
shipping base fromthe bottom of the compactor,
Excessive Weight Hazard
IMPORTANT: Begin in the room where the compactor will be
located.
1. Remove compactor from shipping carton. Remove all
protective packaging materials such as tape and shipping
pads. Use a mild detergent and warm water to remove waxy
residue caused by protective shipping material. Dry
thoroughly with a soft cloth. For more information, sea
=Cleaning."
2. Check to be sum the power cord isattached to the cord clip
on the rear of the compactor.
-4
A. Cordclip
3. Place the 2corner posts from the carton on the floornear the
compactor. Pressthe foot pedal to open the compactor
drawer and removeany shipping materials or other items
from the drawer. Do not remove the compactor beg. Grasp
sides of drawer and liftdrawer out of compactor. Place the
drawer on the 2 corner posts.
,4.Levelinglegs
B.Shipping base
L ion Requir m
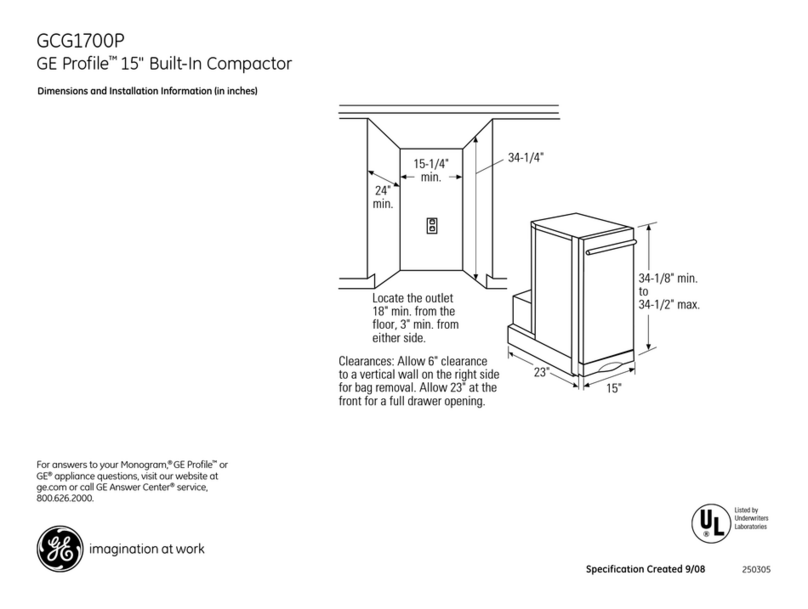
Product dimensions
341,_•
(86.7cm)
15"
(38.1 cm) (61 cm)
i

Cutout dimensions
\
A
24" rain.
(61 cm)
Electrical Shock Hazard
Plug into a grounded 3 prong outlet.
Do not remove ground prong.
Do not use an adapter.
Do not use an extension cord.
Failure to follow these instructions can result in
death, fire, or electrical shock.
A, GreundBd electriceJ_Jt]et must be a minimum of 3" (7.6 cm) away
from surrounding cabinets ornearby wshs as shown. It can be
placed either to the left or the fight side of the product.
Clearerme dimer_ons
,4.Leave 6" (15.2 cm) of clearance space to the fight side of the
compactor in order to remove the compactor begs.
B. Leave 23" (58.4 cm) of clearance in front of the compactor in order
to fully open or remove the compactor drawe_.
Recommended Grounding Method
Thiscompactor is for useon asinglephase, 115-volt, 60 Hz, AC
only 15- or 20-amp fused and propedy grounded circuitand is
equipped with agroundingplug as shown below. It is
recommended that a separate circuit serving onlythis appliance
be provided.
This compactor must be grounded while in useto reduce the risk
of electric shock. The compactor is equipped with a three-
conductor cord and 3 pronggrounding-type plugto fit the proper
grounding-type receptacle. The green (orgreen and yellow)
conductor in the cord isthe groundingwire. Do not connectthe
green (orgreen and yellow) wireto a liveterminal.
U c ounter In [ on
NOTE: Properinstallation is your responsibility.Make sureyou
have everything necessaryfor correct installaLion.It isthe
personal responsibilityand obligation of the customer to contact
a qualifiedinstaller to aseum that electrical installationmeets all
nationaland local codes and ordinances.
Tools needed
Gather the required tools and parts before starting installation.
• Level • _/_6"hex-head socket
• PhillipsNo. 2screwdriver wrench
•Tape measure • Scissors
•Flat-blade screwdriver •Utilityknife
•Pliers
IMPORTANT:
•Slide compactor onto cardboard or hardboard before moving
compactor across floorto avoid floor covering damage.
•Do notallow the rear frame of the compactor to touch the
floor covering when liftingor moving compactor.

Installing
1. Measuretheheightofyourkitchencabinetopening.Thetop
ofthecompactorshouldbeaminimumofYs" (3 ram) from
the top ofthe kitchen cabinet opening.
The rear wheels are preset for a kitchen cabinet opening
height of 341/4. (87 cm) (position1).
To adjustfor other kitchen cabinet opening heights:
•Loosenself-tapping screw justenough to clear studfrom
hole in position 1,
•Move the rear wheel and stud to position2 or 3 as
needed for your kitchen cabinet opening measurement:
Position2: 34_/_"to 34%6"(87 to 87.5 cm)
Position3:347/_8"to 34%" (87.5 to 88 cm)
NOTE: To levelthe unit in position 3, you may need to
add shims under the front leveling legs.
• Tighten screw. Repeat for other rear wheel.
D
Whsel bracket asssmbly
B. Compactor cabinet
C. Locating stud
D. Serf-tapping screw (pivo_
2. Use pliersto lower front leveling legs away from compactor
cabinet. Adjust legs so there willbe a _" (3 mm) to 1/4"
(6,4 mm) space between the top of the compactor and the
top of the kitchen cabinet opening. Stand the compactor
upright.
3. Move the compactor close to its final position,
4. To installhandle:
•Insert screws intothe holes from the inside of the drawer.
•Place handle on the front of the drawer and align handle
screw holes with screw ends. (The handle should appear
as a%mile" when installed.)
•Tighten screws snugly.
•*-...._.-_75 7A
A. 2 screws inserted into holes from inside of drawer
B. Topof drawer
C,Handle installed on drawer front
5. Plug intoa grounded 3 prong outlet.
6. Determine whether you want the compaetor cabinet or
drawer frontflush with the kitchen cabinet face.
Using 2 -#8 -18 x _6" mounting screws (provided), attach
the retainingbrackets to the compactor cabinet top as
needed.
•Ifthe compacter cabinet face is to be flush with the
kitchencabinet face, place retaining bracket mounting
screwsthrough "1."
•Ifthe compactor drawer front is to be flushwith the
k3tchencabinet face, place retaining bracket mounting
screws through "3."
•Ifthe compactor isto be midway between Ul" and "3,"
placethe retainingbracket mounting screws through =2."
\
A. Countertop
B. Retainingbracket
7. Slowly liftthe front slightlyand rellcompaetor intothe kitcben
cabinet opening.
8. Using 2 -#8 -18 x _h"mounting screws (provided), fasten the
retainingbrackets to the countertop with the mounting
screWS.
Countertop mounting
A. Countertop
B. Retaining bracket
C. Mounting screw (orevide_
NOTE: If retaining brackets cannot be attached to the
underside of countertop, attach mountingclips (provided)to
retainingbrackets. Fasten compactor to kitchencabinet face
with mountingscrews through the mounting clips.
F

Cabinet-face mounting
A
9. Grasp sides of compactor drawer and place bottom of
drawer intotracks. Liftat the handle so drawer will go over
drawer stops. Close drawer. Check to see whether drawer
opensfreely. Ifthe toe plate rubsagainstfloor, see "Adjusting
the Toe Plate" for further instructions.
A. Mountin 9 clip (provided)
B. Kitchen cabinet
C. Retaining bracket
D. Mounting screw (provided)
Adjusting the Toe Plate
Ifthe toe plate rubs the floor covering, the ton plate clearance
may be changed asfollows:
1. Mark on each side of the toe plate the amount of ton plate
that rubs the floorcovering.
2. Remove the drawer from the unit. See Step 3 in the
"Unpacking" section.
3. Use a ruler and a pencil or chalk to draw a linebetween the
marks on each side of ton plate.
4. Use scissorsor utility knifeto cut ton plate along line.
5. Replace drawer. If toe plate still rubs floor covering, repeat
steps 1-4.
COMPACTOR USE
The compacting ram isthe part of the compactor which
compresses the trash. The compacting ramdons not go to the
bottom of the drawer. Youwill notsee compacting oftrash the
firstfew times you load the compactor.
NOTE: The compactor drawer should be morethan Y2full before
the compactor can begin to compress the load.
You may hear a noisewhen glass breaks. Strongglass bottles
may not break at all. The trash in a full compactor beg will be
about _/4the size of its originalbulk.
I I J I , 1
I I I I I I
1 ' i I I I
I I
Load bulkytrash, bottles, and cans in the center of the drawer.
Bottles or cans not placed in the center may become caught
between the ram and the drawer. The Drawer Monitor Switch
then senses a=misload" and causes the ramto return tothe "up"
positionwithout compacting.
IMPORTANT: Do not push items down intocompactor with
hands or feet.
1. Liftand pull the handle or press the foot pedal to open the
compactor drawer.
NOTE: Pressingthe foot pedal opens the container only3" to
6" (7.6 cm to 15.2 cm), depending on the load. Use the
handleto completely pull out the compactor drawer.
2. Place trash in compactor.
•Wrap or cover wet or messytrash.
•Do not compact items that may develop offensiveodors
such as raw meat, fish, c)rapefruit rinds, disposable
diapers, or personal hygiene items.
•Load bottles or cans on their sides in the center of the
drawer.Do notload bottles in an uprightposition.
3. Close the drawer.

1. Uft and pull the handle or prosethe foot pedal to open the
compactor drawer. Load trash.
2. Keep Key-Knob (located on the control panel)in the =ON"
position.
.4.Control panel
3. Set Cycle switch to Normal Pac.
-Extra Pac
_Normal Pac
4. Close compactor.
oN
OFF
J
5. Uft foot pedal upto startthe compacting cycle.
NOTE: When the compacting cycle iscompleted, open the
drawer and turn the Key-Knob to =OFF."Remove the Key-Knob
and store it out of children's reach.
3. Set Cycle switch to Extra Pan.
4. Close compactor.
5. Liftfoot pedal upto start the compacting cycle.
6. Duringthe compacting cycle, the compactor remainslocked
untilyou liftup on the foot pedal.
NOTE: When the compacting cycle isdone, open the drawer
and turn the Key-Knob to =OFF."Remove the Key-Knob and
storeit out of children's reach.
The solidair fmshener system isdesigned to help controlodom
that mightdevelop inthe trash. An air freshener disc can be
purchased in department stores (notsold with compactor). Place
the disk-shaped solidair freshener intothe airfresheaer
compartment. The airfreshener should last4 to 6 weeks. It is
used more rapidly when the tamperetum ishigh orthe air isvery
dry.
The EXTRA PACTM cycle extends the useof a bag by putting
constant pressure onthe trash to keep it from springingback.
Regular use of the EXTRA PAC" cycle can increase bag capacity
up to 25%.
During the EXTRA PAC" cycle, the ram willstay inthe down
position for extra compacting. The drawer is locked and cannot
be opened when the ram isdown. For best results, usethe
EXTRA PAC" cycle for at least 30 minutes at a time.
To use EXTRA PAC" cycle
1. Lift and pull the handle or pressthe foot pedal to open the
compactor drawer. Load trash.
2. Keep Key-Knob (located on the control panel) in the "ON"
position.
The compactor bag should be removed whentrash iscompacted
almost to the top of the drawer. If bag is tee heavywhen full,
remove bag when weight is easier to lift and carry.
IMPORTANT: Do not push items down into compactor with
hands orfeet.
NOTE: Use paper or plastic bags made for use in acompactor.
These bags are designed to resistcuts, tears and leaks.
Compactor bags sized tofit compactor drawer make managing
compacted trash easier. Compactor bags ate availablefrom your
Sears store or servicecenter.
To remove a filled bag
1. Liftand pull the handleor press the foot pedal to open the
compactor drawer completely.
.4.Contr_pane/
9

2. You may almedy have a paper or plastic bag in place. Please
refer to appropriate instructionsfor your bag.
•Ifyou have a paper bag, liftand fold up the top folded
edges of the bag. Foldends in and bring side flaps
together. Fold flapsto close bag.
Liftandfolduptopbagedges. Foldendstoclosebag.
• Ifyou have a plastic bag, remove top of bag from bag
retainer buttons. Close bag with a twist tie.
Remove bag from retainer buttons. Close bag with twist tie.
3. Release drawer side latch. _lt right drawer side down. This
willmake removing the full bag easier.
4. Lift bag by bag caddy handles. Remove _ash bag from
compactor and dispose properly.
NOTE: Fully compacted trash bags will be heavy. Handle with
care,
A. Liftingbag caddybyhandles
Do notuse any kind of bag other than those designed especially
for use in yourcompactor. Order replacement compactor bags
through your localdealer. See "Accessories."
IMPORTANT:
Before installinga new bag, be sure:
•The drawer side is securelylocked.
•The container is clean and free of debris.
To install a new bag
1. Close drawer side. Lockdrawer side latch.
2. Put bag caddy into drawer.
A.Bagcaddyinsidedrawer
3. Place either a plastic or paper bag intothe drawer.
•If using a paper bag, open bag and pull top edges over
the drawer top. Slide front edge of bag over front edge of
drawer.Slide rear edge over rear of drawer.
•If using plastic bag, open bag and pull top edges over
drawer top. Lock bag into place by pullingthe
4 prepunched holes over the bag retainer buttons. Holes
willexpand over buttons without harming bag.
Installingpaperbag Installingplasticbag
4. Pmas inside ofbag against the drawer bottom, sides and
corners for asmooth fit.
10

COMPACTOR CARE
Your new compactor is designed to give you many years ofdependable service. However,thereare a few thingsyou are expected to do
in orderto propedy maintain your compactor. This section will tell you how to clean and care for your compactor.
Cl ing
Before cleaning the compactor, turn the Key-Knob (orKey-
Switch)to the OFF & LOCK position end remove it.
NOTE: Any services other than those outlined in this section
should be performed by a designated service representative.
Cleaning Exterior Surfaces
1. Wash extedor surfaces 0ncludingstainlesssteel) with aclean
sponge or soft cloth end a mild detergent in warm water. Do
not use abrasive or harshcleaneR. Rinseand dry thoroughly
with a soft cloth.
2. Wipe up spills rightaway. Some foods can damage the finish
if left on the compactor surface,
Cleaning Inside the Drawer
NOTE: You may want to wear protective glovessince there may
be bits of glass in the drawer.
1. Remove the bag. Son the "Removing a Filled Bag."
2. Press down on the lever-action look(orSide-Lock latch).
Cleaning In,de the Cabinet
NOTE; You may want to wear protective gloves since there may
be bits of glass inthe cabinet.
1. Pullthe drawer out until if stops.
NOTE; Lookto see howthe drawer rollersmove inthe tracks.
It willbe easier to replace the drawer after you have finished
cleaning.
2. Liftthe front ofthe drawer to clearthe stops.
3. Grasp the drawer on the sidesand pull it outthe restof the
way. Set the drawer down gently.
3. Holdthe lever-action lock down and tilt the side of the drawer
out untilthe lock clears the drawer front.
NOTE; If dasired, the drawer side can be removed by tilting it
up, than liftir_ itout.
4. Vacuum the insideof the cabinet. Uquid spillsor wst trash
should be cleaned up by hand, or by usinga vacuum
designed to i_ck up liquids.
===m_=
4. Wash the intedorof the drawer with a clean sponge or soft
cloth and a mild detergent in warm water, Rinseand dry
thoroughly with a soft cloth.
5. if the drawer side was removed, slide it back intothe tilted
position.
6. Pressthe lever-action lock (or Side-Lock Latch) down while
pushingthe drawer side to the upright position.
7. Latch the drawer side by pushing up the lever-action look(or
Side-Lock Latch).
5. Wash the inside of the cabinet with aclean sponge or soft
cloth end a mild detergent inwarm water. Rinse and dry
thoroughlywith a soft cloth.
6. Toreplace the drawer, grasp it by the sides and insertthe
rollersonto the tracks.
7. Liftthe front of the drawer and push it in fuel,/pastthe stops.
Cleaning the Ram
NOTE: You may want to wear protective g|oves since there may
be bits ofglass onthe ram cover.
1. Wipe glass particles off ofthe ram cover with a clothor paper
towels.
11

2. Remove foods with aclean sponge or soft cloth and a mild
detergent in warm water. Rinseand drythoroughlywith a soft
cloth. Cleaning Before a Vacation
If you will be away for more than a couple of days, remove the
compactor bag. Remove the Key-Knob (orKey-Switch) and store
it outof children's reach.
TROUBLESHOOTING
Trythe soludionssuggested herefirst in orderto avoidthe cost of an unnecessary service call.
Trash is not compacting
=Is the drawer less than half full? Drawer must be morethan
half fullbefore trash iscompacted.
Your compactor will not operate
=Is the power supply cord unplugged?. Plug into a grounded
3 prongoutlet.
•Has a household fuse blown, or has a circuit breaker
tidpped? Replace the fuse or reset the circuit breaker. If the
problem continues, call an elactrician.
• Is the drawer completely closed? Close the drawer firmly
and start the compactor again.
m Is the Key-Knob tumed all the way to ON? Turnthe Key-
Knob (Key-Switch) fullyto ON. See =Starting Your
Compactor."
"llm drawer will not open
m Did you lift up on the handle to pull drawer out or press
foot pedal? Drawer is designed to slightlyopen untilyou lift
up on the handleto pull drawer out or press on the foot
pedal.
= Is the ram all the way up? Drawer willopen onlywhen ram is
fullyraised,
To raise the ram, lift up on the foot pedal. Sea =Starting
Your Compactor."
m Is the EXTRA PACTM cycle selected? Drawer remains
locked untilyou reset it by liftingup on the foot pedal. Sea
=Starting Your Compactor."
There is not enough compac'don or force
I DOyOUuse the compacting cycle frequently enough?
Compacting works best when only a few items are leaded.
Bottles do not break
• How often do you notice this? Bottles will notbreak every
time. The thickness of the bottle'sglass and the content of
the trash load below it may keep the bottle from breaking.
12

|NDICE
CONTRATOS DE PROTECCI(_N ................................................ 13
En losEE.UU.............................................................................. 13
En Canada. ................................................................................. 14
Accesorios ................................................................................. 14
GARANTiA .................................................................................... 14
SEGURIDAD DEL COMPACTADOR .......................................... 15
INSTRUCCIONES DE INSTALACI6N ......................................... 16
Desempaque.............................................................................. 16
Requisitos de ubicacibn ............................................................ 16
Requisitosel_-'tricos .................................................................. 17
Instalacibn debajo del mostrador .............................................. 18
USO DEL COMPACTADOR ................................................. ...... 19
Cbmo funciona su compactador ............................................... 19
Cbmo cargar .............................................................................. 20
Puesta en marcha de su compactador ..................................... 20
Ciclo EXTRAPAC". .................................................................... 20
Desodorante ambiental .............................................................. 21
Eliminacibn de bolsas Ilenas...................................................... 21
Instalacibn de una bolsa nueva................................................. 22
CUlDADO DEL COMPACTADOR ............................................... 22
Umpieza ..................................................................................... 22
SOLUCI(_N DE PROBLEMAS ..................................................... 24
NUMEROS DE SERVICIO .............................. CONTRAPORTADA
CONTRATOS DE
PROTECCION
Conlrat_ Maesbos cle Protecd6n
iFelicitaciones por su inteligente adquisicibn!Su nuevo producto
Kenmore®ha sido disetfadoyfabdcado para bdndarle a_os de
funcionamiento confiable. Pero al igualque todos los productos,
puede necesitar mantenimiento preventivo o reparacibnde vez
en cuando. Es alli donde el Contrato Maestro de Proteccibn
puede ahorrarle dinero e inconvenientes.
Adquiera unContrato Maestro de Protecci6n hoy y prot_jase
contramolestias y gastosinesperados.
El Contrato Maestro de Proteccibn tambi6n ayuda a prolongar la
vida de su nuevo producto. He aqu| Io que se incluyeen el
Conttato:
v' Servicio experto por nuestros12.000 especialistas en
reparaci6ncompetentes
v' Servicio ilimitado y gratuito para repuestos y mano de obra
en todas las reparaciones protegidas por el contrato
v' Garanffa "sin disgustos _-reemplazo de su producto
protegido siocurrencuatro o m&sfallasdel producto en el
transcurso de doce meses
v' Reemplazo del producto sisu producto protegido no puede
ser reparado
VRevisi6n Anual de Mantenimiento Prevent_vo a solicitud
suya - sin costo adicional
VAyuda r_pida por tel_ono - asistencia portel6fono a cargo
de unt6cnico de Seats para productos que deban ser
reparadosen su hogar, adem&sde unhorado de reparaci6n
conveniente
v" Protecci6n de sobrevoltaje contra da_os elL_tdcos debido a
fluctuaciones de electricidad
_/Reembolso de la renta si la reparacibn desu producto
protegidotarda m_tsde 1oprometJdo
Una vez adquirido elContrato, tan sblo tiene que Ilamar papafljar
lavisita de serviciot6cnico. Usted puede Ilamara cualquierhora,
de dia o de noche, o fijar una visitatL=cnicaen internet.
Sears cuenta con unequipo de m_s de 12.000 especialistasen
reparacibncompetentes, quienes tienen a disposicibn m&s de
4,5 millones de piezas yaccesorios de calidad. I_sees el tJpode
profesionalismocon el que ustedpuede contar papaayudade a
prolongar lavida de su nuevo artefacto pot muchos ar3osm_s.
iAdquiera hoy su Conttato Maestro de Proteccibn[
Se aplican algunas limitaciones y exclusione$. Para obtener
precios e informaci6n adicional, Ilame al 1-800-827-6655.
Servicio de Instalaci6n de Seam
Para lainstalacibn profesionalde Sears de artefactos
electrodom_ticos, abridores de puertas de garaje, calentadores
de agua yotros articulos importantes de la casa, en los EE.UU.
Ilame al 1-800-4-MY-HOME •.
13

Co_ de mantenimiento
Su compra adquiere un nuevovalor ya que usted puede conflar
en Sears HomeCentral®para obtener earvicio de mparacibn. Con
m_s de 2.400 especialistas capacitados ea repamciones y
acceao a rodsde unmillbnde piezas y accesoriea, contamos con
las herramientas, piezas, conocimiento y la destreza para
asegurarnos de respaldar nueatra promesa de que: Reparamos
Io que vendemos.
Su producto Kenmore®est_ dise_ado, fabricado ysometido a
prueba para proporcionarle a_os de funcionamiento confiable.
Noobstante, cualquier producto puede necesitar serviciot6cnico
de vez en cuando. Elcontrato de mantenimiento Sears leofrece
unprograma de earvicio excepcional, aun precio accesible.
[] contrato de mantenimiento Sears
• Es la manera de cornprar el serviciot_cnico del mEL6anaa
precios de hoy
•Eliminalas facturas de reparacibn producidas por el uso
normaly el desgaste
•Ofrece apoyo pot tel6fono a cargo de unt_cnico de Sears
para los productos que deban ear reparados en el hogar
A,',nsi usted no necesita reparaciones, proporcionauna
revisibnanual de mantenimiento preventivoa solicitudsuya,
para asegurarse de que su producto est_ en condiciones
apropiadas de funcionamiento.
Se aplican ciertas ms'ericciones. Pars obtener m_ts
informaci6n referonte a los Conb'atos de mantenimiento de
Sears Canada, Ilame al 1-800-361-6665.
_r_os
Para asegurar el funcionamiento adecuado de su compactador,
use Onicamente lan piezas de repueato de Seam. Para pedir
piezas de repuesto o acceearios, Ilame al 1-800-4-MY-HOMI_ y
soliciteel n_mero de pieza apropiado que se detalla a
conUnuacibn o pbngase en contacto con su distdbuidor
autodzado de Keamore.
GARAmtA
GARANTiA COMPLETA POR UN AI_IODEL COMPACTADOR
Par un ariodesde lafecha en que ea use por primera vez en su
hogar,Sears reparard, gratuitamente, defectos an los matedales
o en la fabricacibn.
Si se somete el compactador a otro oso que no sea elfamiliar
privado, lacobertura de la garantia arriba mencionada sar_
efectiva por s61onovanta alias.
SERVlClO DE REPARACI(_N DE LA GARAN_
EL SERVIClO DE LA GARAN'I_. ESTA DISPONIBLE LLAMANDO
AL CENTRO DE SERVICIO SEARS M/t,S CERCANO EN LOS
ESTADOS UNIDOS O CANADA. Esta garantrase aplica sblo
mientras el producto se usa en los Estados Unidos o en Canad_L
Esta garant|a Jeda derechos legalesespecrficos y Ud. tambi6n
puede tenet otros derechos que varlan de estado aestado o de
pmvincia a pmvincia.
Los t6rminos de la garantla pueden variaren Canad&.
Para informacibnacerca de la garantia Sears en Canad8 o en los
Estados Unidos, sirvase tomar como referencia los n,',merosde
servicio tdcnico ubicados en lacontraportada del manual.
Sears, Roebuck and Co.
D/817WA, Hoffman Estates, IL 60179
Sears Canada Inc.
Toronto, Ontario, Canada M5B 2138
REGIS'rRO DEL PRODUCTO
En el espacio de abajo, anote su n_maro completo de modelo y
serie asf como la fecha de compra. Usted puede eacontrar esta
informacibnen laetiqueta del nOmem de modelo y sefie, ubicada
segl_nse mueatra en la secci6n de Partes y Caracterfsticasde
este libro.Tengaesta informaci6n disponible para facilitade la
obtencibn de asistenciao servicio con prontitud siempre que
flame a Sears con respecto a su electrodom_stico.
Ndrnero de modelo
N,',rnero de sede
Fecha de compra
Guarde estas instrucciones y su comprobanta de compra
papa referoncia futura.
14

SEGURIDAD DEL COMPACTADOR
Su seguridad y la seguridad de los demos es muy importante.
Hemos incluidomuchos meneajes importantesde seguridaden este manualyen suelectrodom6stico.
Lea y obedezca siempre todoslos mensajes de seguddad,
Este es el s[mbelode advertencia de seguridad.
Este sfmbolo le llama la atenci6nsobre peligrospotencialesque pueden ocasionarla muerte o una
lesi6na ustedy a losdemds.
Todos los mensajes de seguridad irdna continuaci6ndel simbolode advertenciade seguddad
y de la palabra =PELIGRO" o=ADVERTENCiA", Estas palabras significan:
Si no sigue las instrucciones de inmediato, usted
puede morir o sufrir una lesi6n grave.
Si no sigue las instrucciones, usted puede morir
o sufrir una lesi6n grave.
Todos losmensajes de seguridad le dirdn el peligro potencial, le dirdn c6mo reducir lasposibilidades de sufrir
una lesi6n y Io que puede suceder ei no se siguen las instrucciones.
INSTRUCCIONES IMPORTANTES DE SEGURIDAD
ADVERTENClA: _J usar artefactos el_tricos, se deben seguir siempre precauciones b_sicas, incluyendo
las siguientes:
• Lea todas las instruccionesantesde user el
compactador.
• Siempre que los nifiosusen o est_ncerca del aparato
es neceseriovigilados.No permitaque se usecomo
juguete yen ning,',nmomento Io deje funcionando
solo. Bloqueeel interruptorIlave cuando no estd en
usey guarde la Ilavefuera del alcance de los niSos.
• No toque las piezas mientras est_n en movimiento.
• No ponga a funcionar el aparato sitiene el cable
el_ctrico, el enchufeo el motordafiado, o si ha
sufridoalg_ntipo de averia. Contrate untL_cnicoen
reparacionesautorizado para que revise,repareo
reguleel compactador.
• Use el aparatos61opara losfines que se describen en
este manual. No useotrosaccesoriosque no seanlos
recomendados por elfabricante.
No comprima materialtbxico o inflamabley vol&til
como par3osgrasosose insecticidasen aerosol.No
comprimacigarrillosencendidos,habanos u otros
artfculoscalientesoencenclidos.No sobrecargueel
compactador.
• No desarme el compactador. El reensamblaje
incorrectopuede ocasionarcheque el6ctrico cuando
Io usepostedormente.
Manipule con cuidado las bolsasIlenasde basura.
Losobjetos puntiagudos pueden perforarla boisey
ocasionarlesiones.No sobrecarguela bolsade
basuracon materialpesedo como viddos.
• Este compactador est& destinado solo para use
dom_&.stico.
GUARDE ESTAS INSTRUCCIONES
15

INSTRUCCIONES DE INSTALACION
Instalador(a): Deje el Manual de uso ycuidado con el(la)
dueSo(a) de casa.
Due_o(a) de casa: Guarde el Manual de uso y cuidado para
consulta futuray para el uso del inspectorde electricidad local si
Io requiem.
4. Colocluelos otros 2 esquinales en el piso al costado del
compactador. Sujete ambos lados del gabinete del
compactador y recueste elcompactador sobre los
esquinales.Quite la base de embalaje del fondo del
compactador.
Desempaque
IMPORTANTE: Comience en el cuarto donde va a permanecer el
compactador.
1. Saque elcompactador de su cartbn de embalaje. Saque
todos los rnaterialesprotectores de embalaje como lacinta
adhesiva y los re,enos de embalaje. Use un detergonte y
agua tibia para quitar el residuoceroso ocasionado por el
material protector de embalaje. Seque meticulosamente con
un paso suave. Para obtener mds informacibn, vea
=Limpieza".
2, Cercibrese de que el cable elL,ctrico est6 fijo a laabmTadera
del cable en a la parte posteriordel compactador.
A.Abrazaderade/cab/e
A. Paras niveladoras
B.Base de transporte
Requisitos de ubicaci6n
Dimensiones del producto
34_"
(ee,7=111)
15"
(38,1 cm) (61 cm)
3. Coloque los 2 asquinales del cartbn en el piso cerca del
compactador. Oprima el pedal para abrir la abra gaveta del
compactador y saque redo materialde embalaje uotro
articulo que se encuentre en la gaveta. No saque la bolsa del
compactador. Sujete ambos ledos de la gaveta y levante la
gaveta fuem del compactador. Coloque la gaveta sobre los
2esquinales.
16

Dim_lsioses del oorte
,4.Bcontacto e/(=ctricoconectado a Uerra debe estar a una distancia
m(nima de 3" (7,6 crn) de los gabinetes drcundantes o paredes
cercanas, ta! como se ilustra. Puede colocarse tanto a la izquierda
como a la derecha de/producto.
Dime_sionse del espacio libre
BJ
,4.Deje 6" (15,2 cm) de espacio libreal lado derecho de/compactadcr
para poder sacar las bolsas c/elcompactado_
B.Deje 23" {58,4 cm) de espacio /ibre adfrente de/compactador para
poder ab_r o sacar lagaveta de/compactador comp/etamente.
Peligro de Choque Eldctrico
Conecte a un contacto de pared de conexi6n a
tierra de 3 terminales.
No quite el terminal de conexi6n a tierra.
No use un adaptador.
No use un cable el6ctrico de extensi6n.
No seguir estas instrucciones puede ocasionar
la muerte, incendio o choque el6ctrico.
M6todo recomendado de co_ a t_rra
Este compactador emplea un suministroeldctdco monof_sico,
debidamente conectado a tierra, de 115 voltios, 60 Hz, CA
solamente, de 15 620 ampedos, protegido con fusibles, y estd
equipado con un enchufe de tierra tal como se ilustm a
continuacibn.Asimisrnose recomienda el empleo de un circuito
exclusivopara este aparato.
Este compactador debe mantenerse conectado a tierra mientms
est6 en uso para reducirel riesgode choque el_-'tdco. El
compactador viene equipado con un cable el_'trico de tres
conductores y un enchufede tres terminales del tipo conectado
a tierra para que pueda encajar en el tomacorriente conectado a
fierra apropiado. El conductor verde (o verde y amarillo)del cable
ek_mtdcoes el alambm de conexibn a tierra. No conecte el
alambre verde (o verde y amarillo) a un terminal con corriente.
17

Inst Jacibn debajo del moP.or
NOTA: La instala'cibnapmpiada es responsabilidad suya.
Aseg_resede contar con todo Io necesario para realizar una
instalacibn correcta. Es la responsabilidad y obligaci6n personal
dal cliente contratar un instalador competente para asegurarse
de que la instalaci6n el6ctrica cumpla con todos losc6digos y
omienanzaslocales y nacionales.
Henmmientas necesa_as
ReOnalas herramiantas ypiezas necesarias antes de comenzar
la instalaci6n.
•Nivel
•Destomillador Phillips
No. 2
• Cinta para medir
• Desternillador de
hoja plana
• Uave de cubo de
cabeza hexagonal
de _"
• 33jeras
• Cuchillo para
uso general
•Alicates
IMPORTANTE:
•Desliceel compactador hacia un cartbno untablero antes de
despl_7ado por el piso para evitar que e! revestimiento dal
piso se dar_e.
• AI levantar o mover el compactador no deje que el marco
posterior del compactador toque el revestimiento del piso.
Instalaci6n
1. Mida la altura de la abertura del arrnario de lacocina. La
parte superiordel compactador deber_ estar por Io manes a
1,_.(3 mm)de distanciade laparte superior de laabertura del
armario de la cocina.
Las ruedas posteriores estdn prefijadas para una altura de
34Y4"(87 cm) de abertura del armario de la cocina
(posicibn 1).
Para regularla altura de la abertura del armario de la cocina:
Afloje eltomillo autorroscante Io suficiente para quitar el
perno del orificioen la posicibn 1.
Mueva la rueda posteriory elpemo a la posicibn 2 b
3 seg,',nIo requiem la medida de laabertura dal gabinete:
Posici6n 2: de 341/4. a 347/_6"(87 a 87,5 cm)
Posici6n 3: de 347/_"a 34%" (87,5 a 88 cm)
NOTA; Para nivelarel aparato en la posici6n3, quizbs
necesite agregar calzas debajo de las pates niveladoras
delanteras.
•Aprlete eltornillo, Repita el procedimiento para la otra
rueclaposterior.
,4, Conjunto de soporte de la rusda
B. Gabinete del compactador
C.Pemo de IocaJi_aci6n
D. TomUloautorroscante (pivote)
2. Use alicates para bajar las patas niveladoras dal gabinete del
compactador. Regale las patas de modo que quede un
espacio de 1/8"(3 mm) a 1/4"(6,4 mm) enbe la parte superior
del compactader y la parle superior de la abertura dal
ermerio de la cocina. Coloque el compactador de pie.
3. Mueva el compactador cema de su pesicibn final.
4. Para instalarla manija:
•Inserte lostornillosan losorfficiosdescleel interiordel
cajbn.
•Coloque la manija en la perte frontal dal cajbny alines los
orificiosde los tornillosde la manija con los extremes de
lostornilles. (La manija deber_ tener la apariencia de una
=sondsa" cuando est6 instalada.)
• Apriete firmemente los ternillos.
•_7A
,4.2 torn#losinsertados en los odficiosdesde el
interior de/ca]6n
B.Parte superior de/cajdn
C,Manija instatada en el frente de/caj6n
5. Conecte a uncontacto de pared de conexibn atJerrade
3 terminales.
18

6. Decida sidasea elgabinete del compactador o el frente de la
gaveta nivelado con el frente del armario de la cocina.
Usando 2 tornillosde montaje #8 -18 x _6" (provistos),
instale los soportas de retencibn en la parte superior del
gabinete seg_n sea necesario.
•Si el frente del gabinete del compactador va a quedar
nivelado con el frente del armario de la cocina, coloque
lostomillos de montaje del soporte de retencibna trav(_s
de =1".
•Si el frente de la gaveta del compactador va a quedar
niveladocon el frente del armado de la cocina, coloque
lostornillosde montaje del soporte de retencibna trav_s
de =3".
•Siel compactador vaa estar en posicibn intermedia entre
"1" y=3", coloque lostornillos delsoporte de retencibn
de montaje a trav6s de =2".
A. Mostrador
B.Soporte de retenci6n
7. Levante lentay ligeramente el frente y haga rodar el
compactador haelala abertura del gabinete de lacocina.
8. Usando dos tornillos de montaje #8 -18 x _" (provistos),
sujete los soportes de retencibn al mostrador con lostornillos
de montaje.
Montaje sobre el mostrador
C
/L Mostrador
B. Soporte de retencl6n
C. Tomillo de montaje (orovisto)
NOTA: Si no se pueden fijarlos soportes a la parte inferior
del mostrador,fije las abrazaderas de montaje (provistas)a
lossoportes de retencibn. Sujete el compactador el frente del
armario de la cocina utilizando lostomillos de montaje a
trav_s de las abrazaderas de montaje.
Montaje en el f_=nte del armario de la cocina
A............._"_ .,_ _ ..............C
,4-Abrazadera de montaje (provista)
B.Arma#o de la cocina
C. Soporte de retencic)n
D. Tornillode montaje (provisto)
9. Sujete ambos lados de la gaveta del compactador y coloque
elfondo de la gaveta en losdeles. Lev_ltela en la parte de la
manija de modo que pase los topes de la gaveta. Cierre la
gaveta. F_asesi la gaveta seabre con facilidad. Si laplaca de
base rozael piso vea =Ajuste de la placa de base" para
obtener instruccionesadicionales.
Ajuste de la placa de base
Si la placa de base roza el revestimientodel piso, elaspacio libre
de la placa de base puede cambiarse como sigue:
1. Marque a cada lado de la placa de base la cantidad de la
placa de base que roza el revestimientodel piso.
2. Saque lagaveta del aparato. Vea el paso 3 en la seccibn
"Desempaque'.
3. Use una regla y un I_oizo una tiza para tTazar una linea entre
las marcas laterales de laplaca de base.
4. Uselas tijeraso elcuchillo de usogeneral para cortarla placa
de base aIo largode la I(nea.
5. Vuelva a colocar lagaveta. Si la placa de base todavfa roza el
revastimientodel piso, repita los pasos del 1 el 4.
USO DEL COMPACTADOR
El pisbn de compresibn es la parte del compactador que
comprime labasura. El pisbn de comprealbn no llega hasta el
fondo de la gaveta. Las primerasvecas que usted cargos el
compactador no ver_ la compactacibn de labasura.
NOTA: La gaveta del compactador deber_tIlenarse m_tsde la
mitad para que el compactador comience a comprimir la carga.
AI romperse losvidrios podr_ oir ruidos. Lasbotellas de viddo
malstente quiz_s no se rompan en absoluto. La basura en una
boise de compactador Ilena tendrd 1Adel tamaSo de su volumen
original.
i ( ,i I 'I I I
I i I I I I
I i I I I I
I I I
I I I
I
19

Ubique la basura voluminosa, botellas y latas en el centro de la
gaveta, t_s botellas o latas que no se coloquen en el centro
pueden quedar atascadas entre el pisbn y lagaveta. El
Interruptor de control de la gaveta luego detecta una carga mal
colocada y hace que el pisbn regresaa su posicibnde arriba sin
compactar.
1. Levante yjale la manija o presione el pedal para abrir la
gaveta. Cargue la basura.
2. Mantenga la pedlla liave(ubicada an el panelde control)en la
posicibnde =ON" (Encendido).
IMPORTANTE: No empuje los artfculos hacia abajo en el
compaetador con losmanos ni con los pies.
1. Levante y jale la manija o presione el pedal para abrir la
gaveta.
NOTA: AI presionarel pedal, el recipiente se abre solarnente
de 3" a 6" (7,6 cm a 15,2 cm) sagt_n la carga. Usa lamanija
para sacar la gaveta del compactador por completo.
2. Coloque la basura en el compactador.
•Envuelva o tape la basura mojada o desarreglada.
•No ponga en el compactador artfculosque puedan
desarrollar olores ofensivoscomo la came cruda,
pescado, c_scaras de toronjas, pa_ales desachables o
artfculosde higiene personal.
•Recueste las botellas o latas en elcentrode lagaveta. No
ponga las botellas en pie.
3. Cierre la gaveta.
A. Pane/de contr_
3. Fije el interruptorde eiclo a Normal Pac (Compactacibn
normal). repro Pac ON
OFF
©
4. Cierre el compactador.
5. Levante el pedal para iniciar el ciclo de compactacibn.
NOTA: Una vez concluido eleiclo de compactacibn, abra la
gaveta y gire la perilla,ave a "OFF" (Apagado). Retirela perilla
Ilavey gu_rdela fuera del alcance de los nitros.
Cicio PACTM
Elciclo EXTRA PAC" prolongael uso de la balsaal poner presibn
constante sobre la basura pare evitar que 6sta sa expanda
nuevamente. El uso regular del cielo EXTRA PAC" puede
aumentar la capacidad de labolsa hanta un25%.
Durante el ciclo de EXTRA PAC', el pisbn permanecer_ en la
posicibn de abajo pare Iograr una compactacibn extra. La gaveta
sa traba y no puede abrirsecuando el pisbn est_ abajo. Para
Iograr bptimos resultados,useel ciclo EXTRA PAC"por Io menos
30 minutos ala vez.
Para usar el cido EXTRA PAC"
1. Levante yjale la manija o presione el pedal para abrir la
gaveta. Cargue la basum.
2. Mantenga la pedlla ,ave (ubicada en el panel de control) en la
posicibn de "ON" (Encandido).
A. Pane/de contm/
2O
Other manuals for 665.1363
1
This manual suits for next models
1
Table of contents
Languages:
Other Kenmore Trash Compactor manuals