Kenmore 665.1472 Series User manual

Use & Care Guide
Manual de uso y cuidado
Guide d'utilisation et d'entretien
English /Espafiol /Fran_ais
Models/Modelos/Mod_les: 665.1472 _
I<enmore
= color numbe_, n¢_merode colo_, num@o de couleu_
P/N W10318836A
Sears Brands Management Corporation
Hoffman Estates, IL 60179 U.S.A.
www.kenmore.com
www.sears.com
Sears Canada Inc.
Toronto, Ontario, Canada M5B 2B8
www.sears.ca

TABLE OF CONTENTS
PROTECTION AGREEMENTS........................................................ 2
Accessories ............................................................................................... 2
WARRANTY .................................................................................. 3
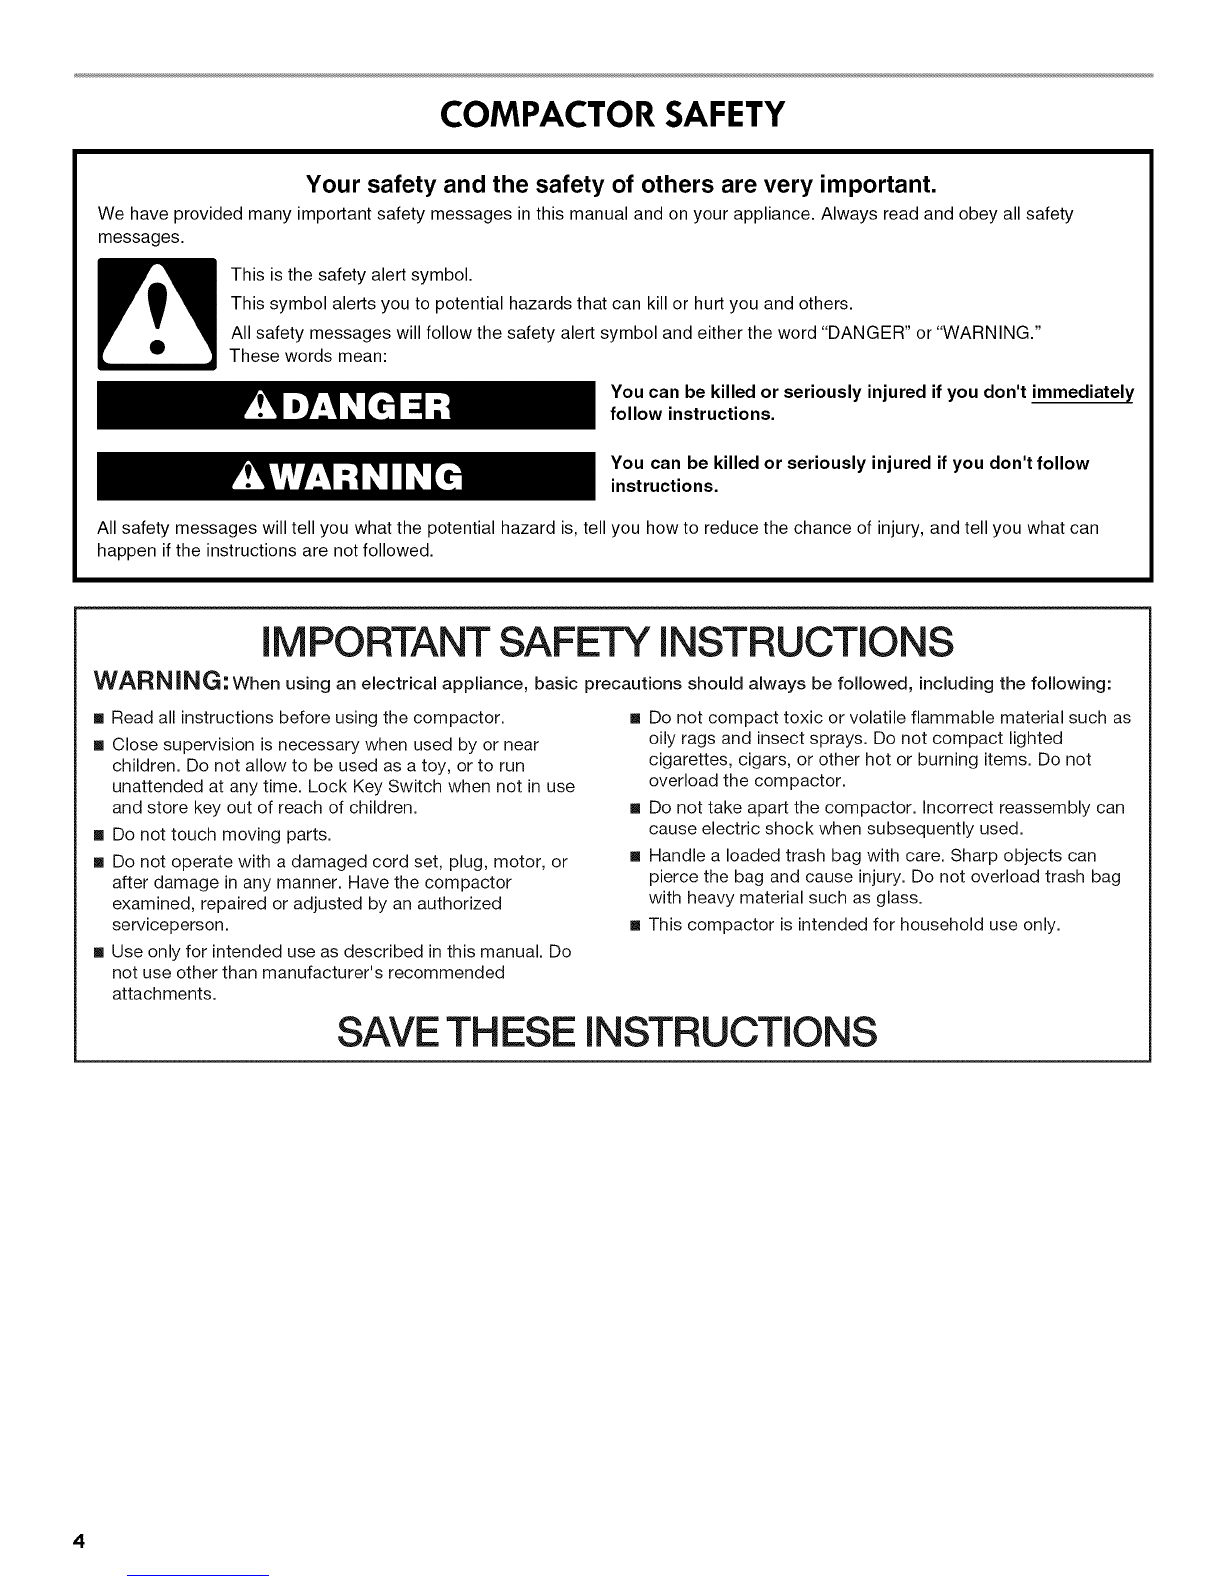
COMPACTOR SAFETY.................................................................. 4
INSTALLATION INSTRUCTIONS ................................................... 5
Unpacking ................................................................................................ 5
Location Requirements ........................................................................... 6
Electrical Requirements .........................................................................6
Freestanding and Undercounter Installation.....................................7
Changing the Decorative Panel ...........................................................9
COMPACTOR USE ....................................................................... 10
How Your Compactor Works ............................................................. 10
Loading ................................................................................................... 10
Starting the Compactor ........................................................................ 11
Removing a Filled Bag .......................................................................... 11
Installing a New Bag ............................................................................. 12
COMPACTOR CARE ..................................................................... 12
Cleaning ................................................................................................... 1:2
TROUBLESHOOTING .................................................................. 14
SERVICE NUMBERS .................................................. BACK COVER
PROTECTION AGREEMENTS
Master Protection Agreements
Congratu/afions on making asmart purchase. Your new
I<enmore ®product is designed and manufactured for years
of dependable operation. But like all products, it may require
preventive maintenance or repair from time to time. That's
when having a Master Protection Agreement can save you
money and aggravation.
The Master Protection Agreement also helps extend the life
of your new product. Here's what the Agreement _includes:
I/Parts and labor needed to help keep products operating
properly under normal use, not just defects. Our coverage goes
well beyond the product warranty. No deductibles, no
functional failure excluded from coverage-- real protection.
I/Expert service by a force of more than 10,000 authorized Sears
service technicians, which means someone you can trust will be
working on your product.
I/Unlimited service calls and nationwide service, as often as you
want us,whenever you want us.
I/"No-lemon" guarantee - replacement of your covered product
if four or more product failures occur within twelve months.
I/Product replacement if your covered product can't be fixed.
I/Annual Preventive Maintenance Check at your request - no
extra charge.
I/Fast help by phone - we call it Rapid Resolution - phone
support from a Sears representative on all products. Think of us
as a "talking owner's manual."
I/Power surge protection against electrical damage due to power
fluctuations.
I/$250 Food Loss Protection annually for any food spoilage that
is the result of mechanical failure of any covered refrigerator or
freezer.
V' Rental reimbursement if repair of your covered product takes
longer than promised.
I/10% discount off the regular price of any non-covered repair
service and related installed parts.
Once you purchase the Agreemenh a simple phone call is all
that it takes for you to schedule service. You can call anytime
day or night, or schedule a service appointment online.
The Master Protection Agreement is a risk free purchase. If
you cancel for any reason during the product warranty
period, we will provide a full refund. Or, a prorated refund
anytime after the product warranty period expires. Purchase
your Master Protection Agreement today!
Some limitations and exclusions apply. Far prices and
additional information in the U.S.A. call 1-800-827-6655.
*Coverage in Canada varies on some items. For full details
call Sears Canada at 1-800-361-6665.
Sears Installation Service
For Sears professional installation of home appliances,
garage door openers, water heaters, and other major home
items, in the U.S.A. or Canada call 1-800-4-MY-HOME ®.
To ensure proper functioning of your compactor, use Sears
replacement parts only. To order replacement parts or
accessories, call 1-800-4-MY-HOME ® and ask for the
appropriate part number listed below or contact your
authorized I<enmore dealer.
Replacement Parts
Replacement Bags--Call for Part Number.
Custom Front Panels
See section "Changing the Decorative Panel" for custom
panel dimensions.
Installation Hardware for conversion kit_Order Part
Number 9870118.
2

I(ENMORE APPLIANCE WARRANTY
ONE YEAR LIMITED WARRANTY
When installed, operated and maintained according to all
instructions supplied with the product, if this appliance fails
due to a defect in material or workmanship within one year
from the date of purchase, call 1-800-4-MY-HOME ®to
arrange for free repair.
This warranty applies for only 90 days from the date of
purchase if this appliance is ever used for other than private
family purposes.
THIS WARRANTY COVERS ONLY DEFECTS IN MATERIAL
AND WORKMANSHIP. SEARS WILL NOT PAY FOR:
1. Expendable items that can wear out from normal use,
including but not limited to filters, belts, light bulbs, and
bags.
2. A service technician to instruct the user in correct product
installation, operation or maintenance.
3. A service technician to clean or maintain this product.
4. Damage to or failure of this product if it is not installed,
operated or maintained according to all instructions
supplied with the product.
5. Damage to or failure of this product resulting from
accident, abuse, misuse or use for other than its intended
purpose.
6. Damage to or failure of this product caused by the use of
detergents, cleaners, chemicals or utensils other than
those recommended in all instructions supplied with the
product.
Z Damage to or failure of parts or systems resulting from
unauthorized modifications made to this product.
DISCLAIMER OF IMPLIED WARRANTIES; LIMITATION OF
REMEDIES
Customer's sole and exclusive remedy under this limited
warranty shall be product repair as provided herein. Implied
warranties, including warranties of merchantability or fitness
for a particular purpose, are limited to one year or the
shortest period allowed by law. Sears shall not be liable for
incidental or consequential damages. Some states and
provinces do not allow the exclusion or limitation of
incidental or consequential damages, or limitations on the
duration of implied warranties of merchantability or fitness,
so these exclusions or limitations may not apply to you.
This warranty applies only while this appliance is used in the
United States or Canada.
This warranty gives you specific legal rights, and you may
also have other rights which vary from state to state.
SearsBrands Management Corporation
Haffman Estates,IL 60179
SearsCanada Inc.
Toronto, Ontario, Canada M5B 2C3
PRODUCT RECORD
Record your complete model number, serial number, and
purchase date. You can find this information on the model
and serial number label located on the product.
Have this information available to help you obtain assistance
or service more quickly whenever you contact Sears
concerning your appliance.
Model number
Serial number
Purchase date
Save these instructions and your sales receipt for future
reference.

COMPACTOR SAFETY
Your safety and the safety of others are very important.
We have provided many important safety messages in this manual and on your appliance. Always read and obey all safety
messages.
This is the safety alert symbol.
This symbol alerts you to potential hazards that can kill or hurt you and others.
All safety messages will follow the safety alert symbol and either the word "DANGER" or "WARNING."
These words mean:
You can be killed or seriously injured if you don't immediately
follow instructions.
You can be killed or seriously injured if you don't follow
instructions.
All safety messages will tell you what the potential hazard is, tell you how to reduce the chance of injury, and tell you what can
happen if the instructions are not followed.
IMPORTANT SAFETY INSTRUCTIONS
WARNING: When using an electrical appliance, basic precautions should always be followed, including the following:
I Read all instructions before using the compactor.
m Close supervision is necessary when used by or near
children. Do not allow to be used as a toy, or to run
unattended at any time. Lock Key Switch when not in use
and store key out of reach of children.
m Do not touch moving parts.
m Do not operate with a damaged cord set, plug, motor, or
after damage in any manner. Have the compactor
examined, repaired or adjusted by an authorized
serviceperson.
m Use only for intended use as described in this manual. Do
not use other than manufacturer's recommended
attachments.
m Do not compact toxic or volatile flammable material such as
oily rags and insect sprays. Do not compact lighted
cigarettes, cigars, or other hot or burning items. Do not
overload the compactor.
m Do not take apart the compactor. Incorrect reassembly can
cause electric shock when subsequently used.
m Handle a loaded trash bag with care. Sharp objects can
pierce the bag and cause injury. Do not overload trash bag
with heavy material such as glass.
m This compactor is intended for household use only.
SAVE THESE INSTRUCTIONS
4

INSTALLATION INSTRUCTIONS
Installer: Leave Use and Care Guide with the homeowner.
Homeowner: Keep Use and Care Guide for future reference
and for local electrical inspector's use, if required.
Excessive Weight Hazard
Use two or more people to move and install compactor.
Failure to do so can result in back or other injury.
IMPORTANT:
• Do not grasp console to move compactor.
• Begin in the room where the compactor will be located.
1. Remove compactor from shipping carton. Remove all
packaging materials such as tape and shipping pads. Use
a mild detergent and warm water to remove waxy
residue caused by shipping material. Dry thoroughly with
a soft cloth. For more information, see "Cleaning."
2. Be sure the power cord is attached to the cord clip on the
rear of the compactor.
A. Cord clip
.Place the 2 corner posts from the carton on the floor near
the compactor. Open the compactor drawer and remove
any shipping materials or other items from the drawer. Do
not remove the compactor bag. Grasp the handle and
raise the front of drawer until it clears the drawer stops.
Grasp sides of drawer and lift drawer out of compactor.
Place the drawer on the 2 corner posts.
4. Place the other 2 corner posts on the floor to the side of
the compactor. Grasp the sides of the compactor cabinet
and put compactor on its side on top of the corner posts.
Remove the shipping base from the bottom of the
compactor.
B
A. Leve/ing /egs
B. Shipping base

Product dimensions
Clearance dimensions
341/8''
(86.7 cm)
'\24"
15"
(36.1 cm) (61 cm)
Cutoutdimensions
o
B 1
i
I 'l
A. Leave 6 "(/5.2 cm) of clearance space to the right side of the
compactor in order to remove the compactor bags.
B. Leave 23"(58.4 cm) of clearance in front of the compactor in
order to fully open or remove the compactor drawer.
6
\
3" min.
(7.6 cm)--_
24" min.
(61cm)
18,,iin.
(45.7 cm)
151/4" rnin.
(36.7 crn)
341/4''rnin.
(87 cm)
A. Grounded electrical outlet must be a minimum of 3" (7.6 cm)
away from surrounding cabinets or nearby walls as shown, it
can be placed either to the left or the right side of the
product.
I'_ 6 ,!I,,,>,< £ ......... "+'I,,.,s= ...... _.,,,,=_ _ ;_}
Electrical Shock Hazard
Plug into a grounded 3 prong outlet.
Do not remove ground prong.
Do not use an adapter.
Do not use an extension cord.
Failure to follow these instructions can result in death,
fire, or electrical shock.
Recommended Grounding Method
This compactor is for use on a single phase, 115-volt, 60 Hz,
AC only, 15- or 20-amp fused and properly grounded circuit
and is equipped with a grounding plug as shown below. It is
recommended that a separate circuit serving only this
appliance be provided.
This compactor must be grounded while in use to reduce the
risk of electric shock. The compactor is equipped with a
three-conductor cord and 3 prong grounding-type plug to fit
the proper grounding-type receptacle. The green (or green
and yellow) conductor in the cord is the grounding wire. Do
not connect the green (or green and yellow) wire to a live
terminal.

NOTE:Properinstallationisyourresponsibility.Makesure
youhaveeverythingnecessaryforcorrectinstallation.Itis
thepersonalresponsibilityandobligationofthecustomerto
contactaqualifiedinstallertoassurethatelectrical
installationmeetsallnationalandlocalcodesand
ordinances.
Tools needed
Gather the required tools and parts before starting
installation.
• Level • Pliers
• Phillips No. 2 • s/_d' Box-end wrench
screwdriver • Scissors
• Tape measure • Utility knife
• Flat-blade screwdriver
IMPORTANT:
• Do not grasp control panel to move compactor.
• Slide compactor onto cardboard or hardboard before
moving compactor across floor to avoid floor covering
damage.
• Do not allow the rear frame of the compactor to touch
the floor covering when lifting or moving compactor.
Freestanding Installation
1. Use pliers to lower leveling legs away from cabinet. With
the drawer still removed from the compactor cabinet,
place level inside on the floor of the cabinet. Check that
the compactor is level from front to back and side to side.
Adjust the leveling legs until the compactor is level.
2. Move the compactor close to its final location.
3. Plug into a grounded 3 prong outlet.
4. Slowly move compactor into its final location. Check that
compactor is still level. Repeat Step 1 if necessary.
5. Grasp sides of compactor drawer and place bottom of
drawer into tracks. Lift at the handle so drawer will go
over drawer stops. Close drawer. Check to see whether
drawer opens freely. If the toe plate rubs against floor,
see "Adjusting the Toe Plate" for further instructions.
Undercounter Installation
NOTE: Installation hardware is not provided. See
"Accessories" for ordering conversion kit.
1. Measure the height of your kitchen cabinet opening. The
top of the compactor should be at least//8" (3 mm) from
the top of the kitchen cabinet opening.
The rear wheels are preset for a kitchen cabinet opening
height of 341/4'' (87 cm) (position 1).
To adjust for other kitchen cabinet opening heights:
• Loosen self-tapping screw enough to clear stud from
hole in position 1.
• Move the rear wheel and stud to position 2 or 3 as
needed for your kitchen cabinet opening
measurement:
Position 2:341/4 '' to 347/ld ' (87 to 87.5 cm)
Position 3: 347Ad ' to 345/8'' (87.5 to 88 cm)
NOTE: To level the unit in position 3, you may need to
add shims under the front leveling legs.
Tighten screw. Repeat for other rear wheel.
D
A. Wheel bracket assembly
B. Compactor cabinet
C. Locating stud
D. Self-tapping screw (pivot)
2. Use pliers to lower leveling legs away from compactor
cabinet. Adjust legs so there will be a//8" (3 mm) to 1/4"
(6.4 mm) space between the top of the compactor and
the top of the kitchen cabinet opening. Stand the
compactor upright.
3. Remove the plastic plugs from the compactor cabinet
top.
4. Move the compactor close to its final position.
5. Plug into a grounded 3 prong outlet.
6. Determine whether you want the compactor cabinet or
drawer front flush with the kitchen cabinet face.
Using 2 - #8 - 18 x 5/ld' mounting screws (provided in
conversion kit), attach the retaining brackets (provided in
conversion kit) to the compactor cabinet top as needed.
See "Accessories."
NOTE: Installation hardware is not provided with full
cabinet models. See "Accessories" for ordering
conversion kit.

• Ifthecompactorcabinetfaceistobeflushwiththe
kitchencabinetface,placeretainingBracket
mountingscrewsthrough"1."
• Ifthecompactordrawerfrontistobeflushwiththe
kitchencabinetface,placeretainingBracket
mountingscrewsthrough"3."
• IfthecompactoristobemidwayBetween"1"ancl
"3,"placetheretainingBracketmountingscrews
through"2."
""'" ° /l
"-..-" t
j
/4.Countertop
B.Retaining bracket {provided in
conversion kit)
7. Slowly lift the front slightly ancl roll compactor into the
kitchen cabinet opening.
8. Using 2 - #8 - 18 x 1/2" mounting screws (provided in
conversion kit), fasten the retaining Brackets (provided in
conversion kit) to the countertop with the mounting
screws.
Countertop mounting
A. Countertop
B. Retaining bracket {provided in conversion kit}
C. Mounting screw {provided in conversion kit}
NOTE: If retaining brackets cannot be attached to the
underside of countertop, attach mounting clips (provided
in conversion kit) to retaining brackets. Fasten compactor
to kitchen cabinet face with mounting screws through the
mounting clips.
Cabinet-face mounting
D
A. Mounting clip {provided in conversion kit)
B.Kitchen cabinet
C. Retaining bracket {provided in conversion
kit)
D. Mounting screw (provided in conversion kit)
9. Grasp sides of compactor drawer and place bottom of
drawer into tracks. Lift at the handle so drawer will go
over drawer stops. Close drawer. Check to see whether
drawer opens freely. If the toe plate rubs against floor,
see "Adjusting the Toe Plate" for further instructions.
Adjusting the Toe Plate
If the toe plate rubs the floor covering, the toe plate
clearance may be changed as follows:
1. Mark on each side of the toe plate the amount of toe
plate that rubs the floor covering.
2. Remove the drawer from the unit. See Step 3 in the
"Unpacking" section.
3. Use a ruler and a pencil or chalk to draw a line between
the marks on each side of toe plate.
4. Use scissors or utility knife to cut toe plate along line.
5. Replace drawer. If toe plate still rubs floor covering,
repeat steps 1-4.

6. Reinstallthetoeguardusingtheexistingmountingscrews
TrimlessPanelwithHandle and I/2" washer. Then, reinstall the foot pedal.
Dimensions
Use these dimensions drawings to create a custom panel for
use without a trim kit. The panel should be 1/2" to 5/8" (13 mm
to 16 mm) thick.
NOTE: A thicker panel may need rounded front corners and
a cutout for access to the handle.
A
C
2313/16''
(60.5 turn)
(38115mmr--*
Installation
1. Remove the mounting screws attaching the foot pedal to
the compactor. Remove foot pedal.
B
E
F
A. Handle
B. Custom panel
C. Panel screw locations
D. Toe guard
E _4/asher
EToe guard mounting screw
Trimless Panel without Handle
Dimensions
Use these dimension drawings to create a custom panel for
use without a trim kit. The panel should be 1/2" (13 ram) rain.
thick.
A. Mounting screws
B. Foot pedal
2. Remove mounting screws attaching the toe guard to the
compactor. Remove toe guard.
3. Remove the mounting screws attaching the decorative
panel to the compactor. Remove decorative panel and
discard mounting screws.
4. Align the top of the custom panel with the bottom of the
handle.
5. Secure the custom panel from the back using 4 - #8 x 1"
wood screws as shown. ___ 15" ___
(38.1 crn)

Installation
1. Remove the mounting screws attaching the foot pedal to
the compactor. Remove foot pedal.
A
A. Mounting screws
B.Foot pedal
2. Remove mounting screws attaching the toe guard to the
compactor. Remove toe guard.
3. Remove the mounting screws attaching the decorative
panel to the compactor. Remove decorative panel and
discard mounting screws.
4. Align the bottom of the custom panel with the bottom of
the drawer front.
5. Secure the custom panel from the back using 4 - #8 x 1"
wood screws as shown.
6. Attach a 15" (38.1 cm) x 1/2" (13 mm) quarter-round filler
along the top of the drawer front using glue or screws.
7. Reinstall the toe guard using the existing mounting screws
and 1/2"washer. Then, reinstall the foot pedal.
A
A. Custom panel
B. 15" (38.1 cm) x _"(13 cm) quarter-round
C. Pane/screw/ocations
D. Toe guard
E. Washer
F. Toe guard mounting screw
COMPACTOR USE
The compacting ram is the part of the compactor which
compresses the trash. The compacting ram does not go to the
bottom of the drawer. You will not see compacting of trash
the first few times you load the compactor.
NOTE: The compactor drawer should be more than 1/2full
before the compactor can begin to compress the load.
You may hear a noise when glass breaks. Strong glass bottles
may not break at all. The trash in a full compactor bag will
be about 1/4the size of its original bulk.
I I
Load bulky trash, bottles, and cans in the center of the
drawer. Bottles or cans not placed in the center may become
caught between the ram and the drawer. The Drawer
Monitor Switch then senses a "misload" and causes the ram
to return to the "up" position without compacting.
IMPORTANT: Do not push items down into compactor with
hands or feet.
NOTE: You will not see compacting of trash the first few
times you load the compactor. The compactor drawer should
be about 1/2full before the compactor can begin to compress
the load.
Open the drawer. Lift and pull the handle or press the
foot pedal to open the drawer.
NOTE: Pressing the foot pedal opens the container only
3" to 6" (7.6 cm to 15.2 cm), depending on the load.
2. Place trash in compactor.
10

• Wrap or cover wet or messy trash.
• Do not compact items that may develop offensive
odors such as raw meat, fish, grapefruit rinds,
disposable diapers, or personal hygiene items.
• Load bottles or cans on their sides in the center of the
drawer. Do not load bottles in an upright position.
3. Close the drawer.
To start and stop the compactor
1. To start the compactor:
• Turn the Key-Switch to ON.
• Press ON.
• Press START. The compactor will automatically stop at
the end of the cycle.
2. To stop the compactor during a cycle:
• Press OFF.
• Press ON. The compacting ram will rise. When the
ram stops rising, you can open the drawer.
To remove the Key-Switch
1. Turn the Key-Switch to the OFF/LOCI< position.
2. Remove and store key out of children's reach.
The compactor bag should be removed when trash is
compacted almost to the top of the drawer. If bag is too
heavy when full, remove bag when weight is easier to lift and
carry.
IMPORTANT: Do not push items down into compactor with
hands or feet.
NOTE: Use paper or plastic bags made for use in a
compactor. These bags are designed to resist cuts, tears and
leaks. Compactor bags sized to fit compactor drawer make
managing compacted trash easier. Compactor bags are
available from your Sears store or service center.
To remove a filled bag
1. Pull the drawer completely open.
2. You may already have a paper or plastic bag in place.
Please refer to appropriate instructions for your bag.
• If you have a paper bag, lift and fold up the top
folded edges of the bag. Fold ends in and bring side
flaps together. Fold flaps to close bag.
/
Lift and fold up top bag
edges. Fold ends to close bag.
• If you have a plastic bag, remove top of bag from
bag retainer buttons. Close bag with a twist tie.
Remove bag from retainer
buttons. Close bag with twist tie.
3. Release drawer side latch. Tilt right drawer side down.
This will make removing the full bag easier.
11

.Lift bag by bag caddy handles. Remove trash bag from
compactor and dispose properly.
NOTE: Fully compacted trash bags will be heavy. Handle
with care.
..... A
A. Lifting bag caddy by
handles
Do not use any kind of bag other than those designed
especially for use in your compactor. Order replacement
compactor bags through your local dealer. See
"Accessories."
IMPORTANT:
Before installing a new bag, be sure:
• The drawer side is securely locked.
• The container is clean and free of debris.
To install anew bag
1. Close drawer side. Lock drawer side latch.
.
If using plastic bag, open bag and pull top edges over
drawer top. Lock bag into place by pulling the
4 prepunched holes over the bag retainer buttons.
Holes will expand over buttons without harming bag.
Installing paper bag Installing plastic bag
Press inside of bag against the drawer bottom, sides and
corners for a smooth fit.
COMPACTOR CARE
Your new compactor is designed to give you many years of
dependable service. However, there are a few things you are
expected to do in order to properly maintain your
compactor. This section will tell you how to clean and care
for your compactor.
.
.
Put bag caddy into drawer.
_s
A. Bag caddy inside
drawer
Place either a plastic or paper bag into the drawer.
• If using a paper bag, open bag and pull top edges
over the drawer top. Slide front edge of bag over
front edge of drawer. Slide rear edge over rear of
drawer.
Before cleaning the compactor r turn the Key-Knob (or Key-
Switch) to the OFF & LOCI< position and remove it.
NOTE: Any services other than those outlined in this section
should be performed by a designated service representative.
Cleaning Exterior Surfaces
1. Wash exterior surfaces (including stainless steel) with a
clean sponge or soft cloth and a mild detergent in warm
water. Do not use abrasive or harsh cleaners. Rinse and
dry thoroughly with a soft cloth.
2. Wipe up spills right away. Some foods can damage the
finish if left on the compactor surface.
12

Cleaning Inside the Drawer
NOTE: You may want to wear gloves since there may be bits
of glass in the drawer.
1. Remove the bag. See the "Removing aFilled Bag."
2. Press down on the lever-action lock (or Side-Lock latch).
.Hold the lever-action lock down and tilt the side of the
drawer out until the lock clears the drawer front.
NOTE: If desired, the drawer side can be removed by
tilting it up, then lifting it out.
4. Wash the interior of the drawer with a clean sponge or
soft cloth and a mild detergent in warm water. Rinse and
dry thoroughly with a soft cloth.
5. If the drawer side was removed, slide it back into the
tilted position.
6. Press the lever-action lock (or Side-Lock Latch) down
while pushing the drawer side to the upright position.
7. Latch the drawer side by pushing up the lever-action lock
(or Side-Lock Latch).
Cleaning Inside the Cabinet
NOTE: You may want to wear gloves since there may be bits
of glass in the cabinet.
1. Pull the drawer out until it stops.
NOTE: Look to see how the drawer rollers move in the
tracks. It will be easier to replace the drawer after you
have finished cleaning.
.Grasp the drawer on the sides and pull it out the rest of
the way. Set the drawer down gently.
.Vacuum the inside of the cabinet. Liquid spills or wet trash
should be cleaned up by hand, or by using a vacuum
designed to pick up liquids.
o
°
7.
Wash the inside of the cabinet with a clean sponge or
soft cloth and a mild detergent in warm water. Rinse and
dry thoroughly with a soft cloth.
To replace the drawer, grasp it by the sides and insert the
rollers onto the tracks.
Lift the front of the drawer and push it in fully past the
stops.
Cleaning the Ram
NOTE: You may want to wear gloves since there may be bits
of glass on the ram cover.
1. Wipe glass particles off of the ram cover with a cloth or
paper towels.
2. Remove foods with a clean sponge or soft cloth and a
mild detergent in warm water. Rinse and dry thoroughly
with a soft cloth.
2. Lift the front of the drawer to clear the stops.
Cleaning Before a Vacation
If you will be away for more than a couple of days, remove
the compactor bag. Remove the Key-Knob (or Key-Switch)
and store it out of children's reach.
13

TROUBLESHOOTING
Try the solutions suggested here first in order to avoid the cost of an unnecessary service call.
Trash is not compacting
•Is the drawer less than half-full? Drawer must be more
than half full before trash is compacted.
Your compactor won't operate
• Is the power supply cord unplugged? Plug into a
grounded 3 prong outlet.
Has a household fuse blown, or has a circuit breaker
tripped? Replace the fuse or reset the circuit breaker. If
the problem continues, call an electrician.
Is the drawer completely closed? Close the drawer firmly
and start the compactor again.
Is the Key-Knob turned all the way to START? Turn the
Key-Knob (Key-Switch) fully to START and release (on
some models). See "Starting the Compactor."
Did you press ON before pressing START? Press ON
before pressing START (on some models). See "Starting
the Compactor."
The drawer won't open
Is the ram all the way up? Drawer will open only when
ram is fully raised.
To raise the ram on models with a Key-Knob (or Key-
Switch): Turn the Key-Knob (Key-Switch) to START and
release. See "Starting the Compactor."
To raise the ram on models with push button controls:
Press OFF, and then press ON. See "Starting the
Compactor."
There is not enough compaction or force
•Do you use the compacting cycle frequently enough?
Compacting works best when only a few items are
loaded.
Bottles don't break
•How often do you notice this? Bottles will not break every
time. The thickness of the bottle's glass and the content of
the trash load below it may keep the bottle from
breaking.
14

JNDICE
CONTRATOS DE PROTECCION .................................................. 15
Accesorios ............................................................................................... 15
GARAN'rJA .................................................................................. 16
SEGURIDAD DEL COMPACTADOR ............................................. 17
INSTRUCCIONES DE INSTALACI6N ........................................... 18
Desempaque del compactador .......................................................... 18
Requisitos de ubicaci6n ........................................................................ 19
Requisitos el_ctricos .............................................................................. 19
Instalaci6n independiente y debaio del mostrador ....................... 20
Cambio del panel decorativo ............................................................ 22
USO DEL COMPACTADOR ......................................................... 23
C6mo funciona su compactador ....................................................... 23
C6mo ¢argar ......................................................................................... 24
Puesta en marcha del compactador ................................................. 24
Eliminaci6n de bolsas Ilenas ............................................................... 24
Instalaci6n de una bolsa nueva ......................................................... 25
CUIDADO DEL COMPACTADOR ................................................ 26
Limpieza ................................................................................................. 26
SOLUCION DE PROBLEMAS ....................................................... 28
NUMEROS DE SERVICIO ................................. CONTRAPORTADA
CONTRATOS DE PROTECCION
Contratos maestros de protecci6n
iFelicifaciones por su inte/igente adquisicidn! Su nuevo
producto Kenmore ® est6 dise_ado y fabricado para
proporcionarle a_os de funcionamiento confiable. Pero al
icjual que todos los productos, puede necesitar
mantenimiento preventivo o reparaci6n de vez en cuando. Es
alff donde el Contrato maestro de protecci6n puede
ahorrarle dinero e inconvenientes.
El Contrato maestro de protecci6n tambi_n ayuda a
proloncjar la vida de su nuevo producto. He aqu( Io que se
incluye en el Contrato_:
I/Piezas ymano de obra necesarias para ayudar a mantener los
productos funcionando correctamente bajo uso normal, no s61o
en caso de defectos. Nuestra cobertura va mucho m6s all6 de
la cjaranfia del producto. No existen deducibles ni fallas de
funcionamiento que est_n excluidas de la cobertura --
protecci6n verdadera.
I/Servicio experto a cargo de un personal de m6s de 10.000
t&cnicos de servicio autorizados pot Sears, Io que sicjnifica que
su producto ser6 reparado por alcjuien en quien usted puede
confiar.
I/Llamadas de servicio ilimitado yservicio en todo el pa_s, con la
frecuencia que usted desee, cuando usted desee.
I/Garanfia "sin discjustos" - reemplazo de su producto protecjido
si ocurren cuatro fallas o m6s del producto en el transcurso de
doce meses.
I/Reemplazo del producto si su producto protegido no puede ser
reparado.
I/Revisi6n anual de mantenimiento preventivo a solicitud suya -
sin costo adicional.
I/Ayuda r6pida por tel&fono - Io que nosotros Ilamamos Soluci6n
r6pida - apoyo pot tel_fono a cargo de un representante de
Sears para todos los productos. Piense en nosotros como si
fu_ramos un "manual parlante para el propietario'.
I/Protecci6n de sobrevoltaje contra da_os el_ctricos debido a
fluctuaciones de electricidad.
I/Protecci6n por p&rdida de comida, por un valor anual de $250,
por cualquier p_rdida de comida que sea como resultado de
fallas mec6nicas de cualquier refricjerador o concjelador
cubierto bajo la garanfia.
I/Reembolso de la renta si la reparaci6n de su producto
protecjido tarda m6s de Io prometido.
I/10% de descuento sobre el precio com6n por el servicio de
reparaci6n que no est_ ba]o protecci6n, asf como tambi_n las
piezas relacionadas con el mismo que se hayan instalado.
Una vez adquirido el Contrato, tan s61o tiene que Ilamar
para fijar la visita de servicio t6cnico. Usted puede Ilamar a
cualquier hora, de d_a o de noche, o fijar una visita t6cnica
en Internet.
El Contrato maestro de protecci6n es una compra sin riesgo.
Si por alg6n motivo usted Io cancela durante el periodo de la
garanfia del producto, le proveeremos un reembolso total. O
un reembolso proporcional en cualquier momento posterior a
la expiraci6n del per_odo de la garanfia, iAdquiera hoy su
Contrato maestro de protecci6n!
Se aplican algunas lirnitaciones yexclusiones. Para obtener
precios e informaci6n adicional en EE.UU., Ilame al
1-800-827-6655.
*La cobertura en Canad6 varfa en alcjunos arffculos. Para
obtener los detalles completos, Ilame a Sears Canada al
1-800-361-6665.
Servicio de instalaci6n de Sears
Para la instalaci6n profesional de Sears de aparatos
electrodom6sticos, abridores de puertas de garaje,
calentadores de agua y otros arficulos principales del hogar,
en los EE.UU. o en Canad6 Ilame al 1-800-4-MY-HOME _.
Para asegurar el funcionamiento adecuado de su
compactador, use 6nicamente las piezas de repuesto de
Sears. Para pedir piezas de repuesto o accesorios, Ilame al
1-800-4-MY-HOME ®y solicite el n6mero de pieza apropiado
que se detalla a continuaci6n o p6ncjase en contacto con su
distribuidor autorizado de Kenmore.
Piezas de repuesto
Bolsas de repuesto--Llame ysolicite el n6mero de pieza.
Juego de adornos para paneles frontales personalizados
Vea la secci6n "Cambio del panel decorativo" para obtener
las dimensiones de los paneles personalizados.
Herramientas para la instalaci6n del juego de conversi6n--
Pida la pieza n° 9870118
15

GARANTJA DE LOS ELECTRODOMESTICOS KENMORE
GARANTJA LIMITADA DE UN AI_IO
Cuando este electrodom6stico haya sido instalado, operado
y mantenido seg6n las instrucciones provistas con el
producto, si este electrodom_stico falla por defectos de
material o de mano de obra dentro de un a_o a partir de la
fecha de compra, Ilame al 1-800-4-MY-HOME ® para
gestionar la reparaci6n libre de cargo.
Esta garanfia s61otiene vigencia durante 90 dfas a partir de
la fecha de compra si este aparato se ha usado alguna vez
para fines diferentes de los privados de una familia.
ESTA GARANT|A CUBRE SOLAMENTE LOS DEFECTOS DE
MATERIAL Y MANO DE OBRA. SEARS NO PAGARA POR
LO SIGUIENTE:
1. Los arficulos no reutilizables que pueden gastarse por el
uso normal, incluyendo, pero sin limitaci6n, filtros,
correas, focos y bolsas.
2. Un t6cnico de servicio para ense_arle al usuario c6mo
instalar, operar o mantener el producto adecuadamente.
3. Un t_cnico de servicio para limpiar o mantener este
producto.
4. Da_os a este producto o fallas del mismo en caso de no
ser instalado, operado o mantenido conforme a todas las
instrucciones provistas con el producto.
5. Da_os a este producto o fallas del mismo como resultado
de accidente, abuso, uso indebido o un uso diferente de
aquel para el cual fue creado.
6. Da_os a este producto o fallas del mismo causados por el
uso de detergentes, limpiadores, productos qu_micos o
utensilios diferentes de los recomendados en todas las
instrucciones provistas con el producto.
7. Da_os a piezas o sistemas o fallas de los mismos como
resultado de modificaciones no autorizadas que se hayan
efectuado en este producto.
EXCLUSION DEGARANTJAS IMPLJCITAS;LIMITACION DE
RECURSOS
El 6nico y exclusivo recurso del cliente seg6n los t_rminos de
esta garanfia limitada ser6 el de reparar el producto seg6n
se estipula en la presente. Las garanfias impffcitas,
incluyendo las garanfias de comerciabilidad o de capacidad
para un prop6sito particular, ser6n limitadas a un a_o o al
per_odo m6s corto permitido por ley. Sears no se har6
responsable por da_os incidentales o consecuentes. Algunos
estados y provincias no permiten la exclusi6n o limitaci6n de
da_os incidentales o consecuentes, o limitaciones acerca de
cu6nto debe durar una garanfia impffcita de
comerciabilidad o capacidad, de modo que las limitaciones
o exclusiones arriba mencionadas pueden no aplicarse en su
caso.
Esta garanfia se aplica s61o mientras este electrodom6stico
se usa en los Estados Unidos o Canad6.
Esta garanfia le otorga derechos legales especfficos, yes
posible que usted tenga tambi6n otros derechos, los cuales
var_an de un estado a otro.
Sears Brands Management Corporation
Hoffman Estates, IL 60179
Sears Canada Inc.
Toronto, Ontario, Canada M5B 2C3
REGISTRO DEL PRODUCTO
Anote el n6mero completo de modelo y serie as[ como la
fecha de compra. Usted puede encontrar esta informaci6n
en la etiqueta con el n6mero de modelo y de serie ubicada
en el producto.
Tenga esta informaci6n disponible para facilitarle la
obtenci6n de asistencia o servicio con prontitud siempre que
Ilame a Sears con respecto a su electrodom6stico.
N0mero de modelo
N0mero de serie
Fecha de compra
Guarde estas instrucciones y su comprobante de compra
para referencia futura.
16

SEGURIDAD DELCOMPACTADOR
Su seguridad y la seguridad de los dem&s es muy importante.
Hemos incluido muchos mensajes importantes de seguridad en este manual y en su electrodomestico. Lea y obedezca siempre
todos los mensajes de seguridad.
Este es el simbolo de advertencia de seguridad.
Este simbolo le llama la atenci6n sobre peligros potenciales que pueden ocasionar la muerte o una lesi6n a
usted y a los demas.
Todos los mensajes de seguridad iran a continuaci6n del simbolo de advertencia de seguridad y de la palabra
"PELIGRO" o "ADVERTENCIA". Estas palabras significan:
Si no sigue las instrucciones de inmediato, usted puede
morir o sufrir una lesibn grave.
Si no sigue las instrucciones, usted puede morir o sufrir
una lesibn grave.
Todos los mensajes de seguridad le diran el peligro potencial, le diran c6mo reducir las posibilidades de sufrir una lesi6n y Io que
puede suceder si no se siguen las instrucciones.
INSTRUCCIONES IMPORTANTES DE SEGURIDAD
ADVERTENCIA: AI usar artefactos el6ctricos, se deben seguir siempre precauciones b_.sicas, incluyendo
las siguientes:
m Lea todas las instrucciones antes de usar el compactador.
m Siempre que los nidos usen o esten cerca del aparato es
necesario vigilarlos. No permita que se use como juguete y
en ningQn momento Io deje funcionando solo. Bloquee el
interruptor Ilave cuando no este en uso y guarde la Ilave
fuera del alcance de los nidos.
m No toque las piezas mientras esten en movimiento.
m No ponga a funcionar el aparato si tiene el cable electrico,
el enchufe o el motor dadado, o si ha sufrido algQn tipo de
averia. Contrate un tecnico en reparaciones autorizado
para que revise, repare o regule el compactador.
m Use el aparato s61opara los fines que se describen en este
manual. No use otros accesorios que no sean los
recomendados por el fabricante.
GUARDE ESTAS
m No comprima material t6xico o inflamable y volatil como
pados grasosos e insecticidas en aerosol. No comprima
cigarrillos encendidos, habanos u otros articulos calientes o
encendidos. No sobrecargue el compactador.
m No desarme el compactador. El reensamblaje incorrecto
puede ocasionar choque electrico cuando Io use
posteriormente.
m Manipule con cuidado las bolsas Ilenas de basura. Los
objetos puntiagudos pueden perforar la bolsa y ocasionar
lesiones. No sobrecargue la bolsa de basura con material
pesado como vidrios.
m Este compactador esta destinado s61o para uso domestico.
INSTRUCCIONES
17

INSTRUCCIONES DE INSTALACION
Instalador(a): Deie el Manual de uso y cuidado con el(la)
due_o(a) de casa.
Due_o(a) de casa: Guarde el Manual de uso y cuidado para
consulta futura y para el uso del inspector de electricidad
local si Io requiere.
De_esapc_q_,_e de _om_c_cksi_}_
Peligro de Peso Excesivo
Use dos o m_s personas para mover einstalar el
compactador.
No seguir esta instrucci6n puede ocasionar una
lesi6n en la espalda uotto tipo de lesiones.
IMPORTANTE:
• Para mover el compactador no Io sujete por la consola.
• Comience en el cuarto donde va a permanecer el
compactador.
1. Saque el compactador de su cart6n de embalaje. Saque
todos los materiales protectores de embalaje como la
cinta adhesiva y los rellenos de embalaje. Use un
detergente suave y agua tibia para quitar el residuo
ceroso ocasionado por el material protector de embalaje.
Seque meticulosamente con un pa_o suave. Para obtener
m6s informaci6n, vea "Limpieza".
2. Cerci6rese de que el cable el_ctrico est6 fiio a la
abrazadera del cable en a la parte posterior del
compactador.
.Coloque los 2 esquinales del cart6n en el piso cerca del
compactador. Abra la gaveta del compactador y saque
todo material de embalaje u otro art_culo que se
encuentre en la gaveta. No saque la bolsa del
compactador. Sujete la maniia y levante el frente de la
gaveta hasta que pase los topes de la gaveta. Sujete
ambos lados de la gaveta y levante la gaveta fuera del
compactador. Coloque la gaveta sobre los 2 esquinales.
°Coloque los otros 2 esquinales en el piso al costado del
compactador. Sujete ambos lados de la carcasa del
compactador y recueste el compactador sobre los
esquinales. Quite la base de embalaje del fondo del
compactador.
A. Paras nive/adoras
B.Base de embalaje
A. Abrazadera de/cable
18

Dimensiones del producto
Dimensiones del espacio libre
341/8''
(86,7 cm)
1[_ II
(38,1 cm) (61 cm)
Dimensiones del corte
A
\
3" min.
(7,6 cm)--_
,?
24" min.
(61cm)
18"iin.
(45,7 cm)
151/4'' rain.
(38,7 cm)
3M/4' rain.
(87 cm)
/4. El confacto e/_ctrico conecfado a Herra debe estar a una
c/isfancia mfnima de 3" (7t6 cm) de los armarios circunc/anfes
o paredes cercana Gfa/como se//usfra. Puede co/ocarse
tanfo a/a/zqu/erc/a como a/a c/erecha de/proc/ucto.
S_
/4. Deje 6 "(I_2 cm) de esDacio /ibre a/ /ado derecho de/
compacfador para poder sacar /as bo/sas de/compacfador.
B. Deje 23" (58,4t cm) de esDacio /ibre c// frenfe de/
compacfador para poder abrir o sacar /a gavefa de/
compacfador comp/efamenfe.
(÷qu s os e/6c os
PelJgro de Choque EI6ctrico
Conecte a un contacto de pared de conexi6n a tierra de
3terminales.
No quite la terminal de conexi6n a tierra.
No use un adaptador.
No use un cable el_ctrico de extensi6n.
No seguir estas instrucciones puede ocasionar
la muerte, incendio o choque el6ctrico.
M_todo recomendado de conexi6n a tierra
Este compactador emplea un suministro el6ctrico
monof6sico, debidamente conectado a tierra, de 115 voltios,
60 Hz, CA solamente, de 15 6 20 amperios, protecjido con
fusibles, y est6 equipado con un enchufe de tierra tal como
se ilustra a continuaci6n. Asimismo se recomienda el empleo
de un circuito exclusivo para este aparato.
19

Este compactador debe mantenerse conectado a tierra
mientras est6 en uso para reducir el riescjo de choque
el6ctrico. El compactador viene equipado con un cable
el6ctrico de tres conductores y un enchufe de tres terminales
del tipo conectado a tierra para que pueda encajar en el
tomacorriente conectado a tierra apropiado. El conductor
verde (o verde y amarillo} del cable el6ctrico es el alambre
de conexi6n a tierra. No conecte el alambre verde (o verde y
amarillo} a un terminal con corriente.
/ I I/_1 -.2/t f i//1_//%_ t
NOTA: La instalaci6n apropiada es responsabilidad suya.
Asecj6rese de contar con todo Io necesario para realizar una
instalaci6n correcta. Es la responsabilidad y oblicjaci6n
personal del cliente contratar un instalador competente para
asecjurarse de que la instalaci6n el6ctrica cumpla con todos
los c6dicjos y ordenanzas locales y nacionales.
Herramlentas necesarlas
Re6na las herramientas y piezas necesarias antes de
comenzar la instalaci6n.
• Nivel • Alicates
• Destornillador Phillips • Llave cerrada de 5/16"
No. 2 • Tijeras
• Cinta para medir • Cuchillo para
• Destornillador de uso cjeneral
hoja plana
IMPORTANTE:
• Para mover el compactador no Io sujete por el tablero de
control.
• Deslice el compactador hacia un cart6n o un tablero
antes de desplazarlo por el piso para evitar que el
revestimiento del piso se da_e.
• AI levantar o mover el compactador no deje que el
marco posterior del compactador toque el revestimiento
del piso.
Instalaci6n independiente
Use alicates para bajar las paras niveladoras de la
carcasa. Con la cjaveta a6n quitada de la carcasa del
compactador, coloque el nivel en el piso interior de la
misma. Verifique que el compactador est6 nivelado de
adelante hacia atr6s y de lado a lado. Recjule las paras
niveladoras hasta que el compactador est6 nivelado.
J
2. Mueva el compactador cerca de su ubicaci6n final.
3. Conecte a un contacto de pared de conexi6n a tierra de
3 terminales.
.
.
Mueva lentamente el compactador a su ubicaci6n final.
Verifique que el compactador todav_a est6 nivelado.
Repita el paso 1 si fuera necesario.
Sujete los lados de la cjaveta del compactador y coloque
el fondo de la cjaveta en los rieles. Lev6ntela en la parte
de la manija de modo que la cjaveta pase los topes.
Cierre la cjaveta. Ffjese si la cjaveta se abre con facilidad.
Si la placa de base roza el piso, vea "Ajuste de la placa
de base" para obtener instrucciones adicionales.
Instalaci6n debajo del mostrador
NOTA: No vienen equipados con piezas de instalaci6n. Vea
"Accesorios" para pedir el juecjo de conversi6n.
1. Mida la altura de la abertura del armario de la cocina.
La parte superior del compactador deber6 estar por Io
menos a 1/8" (3 mm) de distancia de la parte superior de
la abertura del armario de la cocina.
Las ruedas posteriores est6n prefijadas para una altura
de 341/4" (87 cm) de abertura del armario de la cocina
(posici6n 1).
Para recjular la altura de la abertura del armario de la
cocina:
• Afloje el tornillo autorroscante Io suficiente para
quitar el perno del orificio en la posici6n 1.
• Mueva la rueda posterior y el perno a la posici6n 2 6
3 secj6n Io requiera la medida de la abertura del
armario:
Posici6n 2: de 341/4" a 347A6'' (87 a 87,5 cm)
Posici6n 3: de 347A6'' a 345/8'' (87,5 a 88 cm)
NOTA: Para nivelar el aparato en la posici6n 3,
quiz6s necesite acjrecjar calzas debajo de las paras
niveladoras delanteras.
Apriete el tornillo. Repita el procedimiento para la
otra rueda posterior.
A
D
A. Conjunfo de soporfe de/a rueda
B. Carcasa de/compacfador
C, Perno de Iocalizaci6n
D. TornHIo autorroscclnfe (pivote,)
2O
Other manuals for 665.1472 Series
1
Table of contents
Languages:
Other Kenmore Trash Compactor manuals
Popular Trash Compactor manuals by other brands

Viking Range
Viking Range Designer Series Use & care manual

Electrolux
Electrolux ETC15TKH installation guide

Viking
Viking Designer DUC180 installation instructions

homelabs
homelabs HME010231N manual

AmazonBasics
AmazonBasics B091TZJG1L manual

Z.I.P.P.ER MASCHINEN
Z.I.P.P.ER MASCHINEN ZI-RPE120GYN user manual