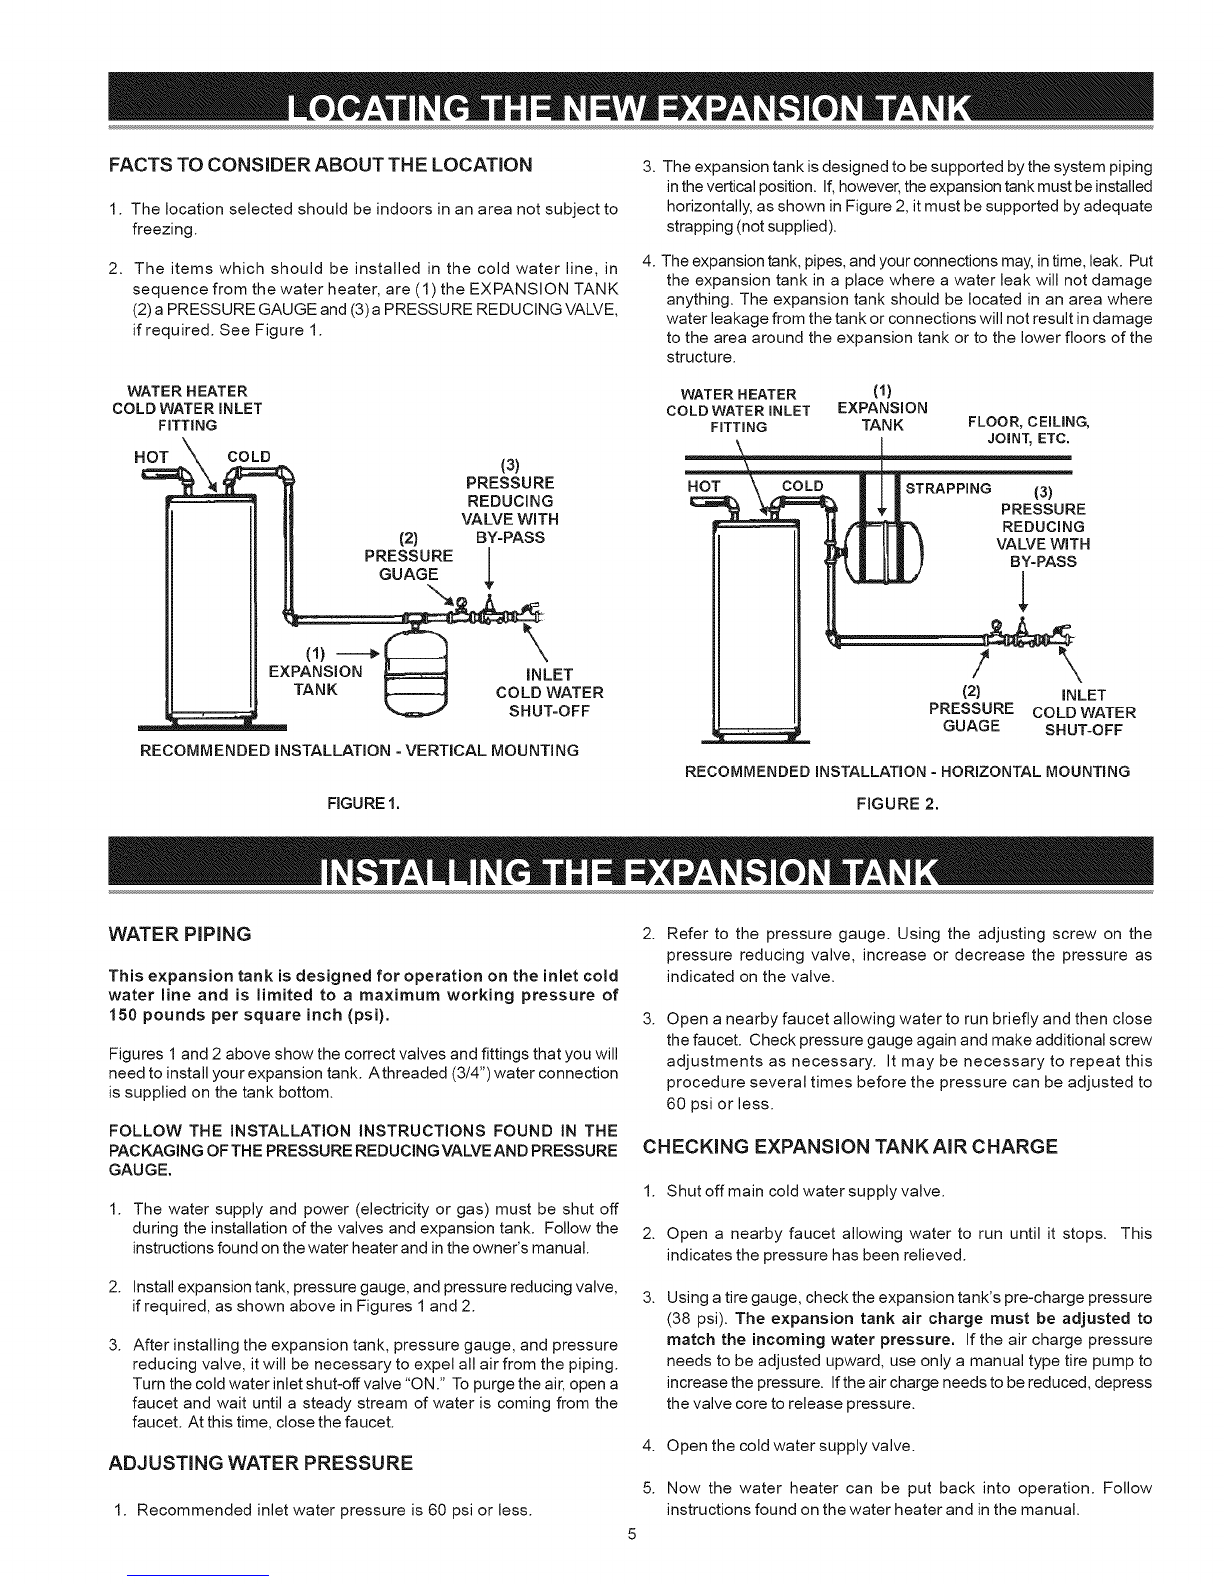
FACTS TO CONSIDER ABOUT THE LOCATION
1. The location selected should be indoors in an area not subject to
freezing.
2. The items which should be installed in the cold water line, in
sequence from the water heater, are (1) the EXPANSION TANK
(2) a PRESSURE GAUGE and (3)a PRESSURE REDUCING VALVE,
if required. See Figure 1.
WATER HEATER
COLD WATER iNLET
FITTING
HOT COLD
12)
PRESSURE
GUAGE
3.
(1)
EXPANSION
TANK
4.
The expansion tank is designed to be supported by the system piping
in the vertical position. If, however, the expansion tank must be installed
horizontally, as shown in Figure 2, it must be supported by adequate
strapping (not supplied).
The expansion tank, pipes, and your connections may, in time, leak. Put
the expansion tank in a place where a water leak will not damage
anything. The expansion tank should be located in an area where
water leakage from the tank or connections will not result in damage
to the area around the expansion tank or to the lower floors of the
structure.
WATER HEATER (I)
COLD WATER INLET EXPANSION
FITTING TANK FLOOR, CEILING,
JOINT, ETC.
13) I
PRESSURE HOT COLD STRAPPING 13)
REDUCING PRESSURE
VALVE WiTH REDUCING
BY-PASS VALVE WITH
BY-PASS
1 1
iNLET
COLD WATER 12} iNLET
SHUT=OFF PRESSURE COLD WATER
GUAGE SHUT-OFF
RECOMMENDED INSTALLATION -VERTICAL MOUNTING RECOMMENDED INSTALLATION - HORIZONTAL MOUNTING
FIGURE 1. FIGURE 2.
WATER PiPiNG
This expansion tank is designed for operation on the inlet cold
water line and is limited to a maximum working pressure of
150 pounds per square inch (psi).
Figures 1 and 2 above show the correct valves and fittings that you will
need to install your expansion tank. A threaded (3/4")water connection
is supplied on the tank bottom.
FOLLOW THE INSTALLATION INSTRUCTIONS FOUND iN THE
PACKAGING OF THE PRESSURE REDUCING VALVE AND PRESSURE
GAUGE.
1. The water supply and power (electricity or gas) must be shut off
during the installation of the valves and expansion tank. Follow the
instructions found on the water heater and in the owner's manual.
2. Install expansion tank, pressure gauge, and pressure reducing valve,
if required, as shown above in Figures 1and 2.
3. After installing the expansion tank, pressure gauge, and pressure
reducing valve, it will be necessary to expel all air from the piping.
Turn the cold water inlet shut-off valve "ON." To purge the air, open a
faucet and wait until a steady stream of water is coming from the
faucet. At this time, close the faucet.
ADJUSTING WATER PRESSURE
1. Recommended inlet water pressure is 60 psi or less.
2. Refer to the pressure gauge. Using the adjusting screw on the
pressure reducing valve, increase or decrease the pressure as
indicated on the valve.
3. Open a nearby faucet allowing water to run briefly and then close
the faucet. Check pressure gauge again and make additional screw
adjustments as necessary. It may be necessary to repeat this
procedure several times before the pressure can be adjusted to
60 psi or less.
CHECKING EXPANSION TANK AiR CHARGE
1. Shut off main cold water supply valve.
2. Open a nearby faucet allowing water to run until it stops. This
indicates the pressure has been relieved.
3. Using a tire gauge, check the expansion tank's pre-charge pressure
(38 psi). The expansion tank air charge must be adjusted to
match the incoming water pressure. If the air charge pressure
needs to be adjusted upward, use only a manual type tire pump to
increase the pressure. If the air charge needs to be reduced, depress
the valve core to release pressure.
4. Open the cold water supply valve.
5. Now the water heater can be put back into operation. Follow
instructions found on the water heater and in the manual.
5