manuals.online logo
Brands
  1. Home
  2. •
  3. Brands
  4. •
  5. Kenwood
  6. •
  7. Automobile Accessories
  8. •
  9. Kenwood CAW 2300-06 User manual

Kenwood CAW 2300-06 User manual

2
3
1
4
Compatible with these Kenwood double DIN devices
Kenwood Navigation
Installation Manual
Double DIN Kit
Standard: CAW 2300-06
Rubber-Touch: CAW 2300-06-RT
• Toyota Avensis (T25) 2003->
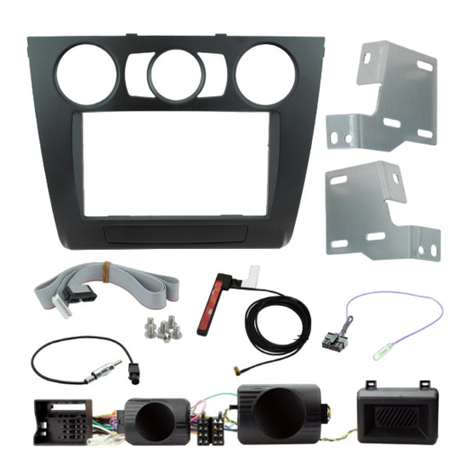
Double DIN Set contents
• (1) Metal Frame
• (2) Installation Kit
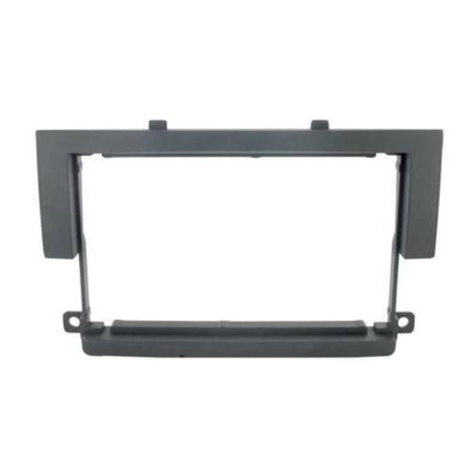
• (3) Mounting frame
• (4) Facia Plate
© 12/2008 ALL RIGHTS RESERVED. Technical changes possible. No liability for misprints.
Avensis (T25) TOYOTA GENUINE AUDIO
Avensis (LHD) - 6
10-02
3. EINBAU DES 6 CD-WECHSLERS IM ARMATURENBRETT
IN-DASH 6 CD-CHANGER INSTALLATION
INSTALLATION DU CHANGEUR 6 CD MONTE DANS LE TABLEAU DE BORD
Abb. 1 - Fig. 1
Abb. 2 - Fig. 2
1. Schalthebelknauf
und Schaltungs-
abdeckung mit einem Nylonhebel-
werkzeug entfernen.
: Clip (4x)
:
Nagel
(4x)
1. Remove the shift knob and shift
cover using a nylon pry tool.
: Clip (4x)
: Nail (4x)
1. Déposez la rotule du levier de vitesses
et sa garniture à l’aide d’un levier
en nylon.
: Clip (4x)
:
Clou
(4x)
2
1
21
21
3. Das Schutzklebeband anbringen .
3. Attach the protection tape .
3. Fixez le ruban de protection .
4
4
4
Abb. 3 - Fig. 3
2. Die Verkleidung entfernen .
: Clip (5x)
2. Remove the panel .
: Clip (5x)
2. Déposez le panneau
.
: Clip (5x)
3
3
3
1
2
3
4
4
ab
Avensis (T25) TOYOTA GENUINE AUDIO
Avensis (LHD) - 6
10-02
3. EINBAU DES 6 CD-WECHSLERS IM ARMATURENBRETT
IN-DASH 6 CD-CHANGER INSTALLATION
INSTALLATION DU CHANGEUR 6 CD MONTE DANS LE TABLEAU DE BORD
Abb. 1 - Fig. 1
Abb. 2 - Fig. 2
1. Schalthebelknauf
und Schaltungs-
abdeckung mit einem Nylonhebel-
werkzeug entfernen.
: Clip (4x)
:
Nagel
(4x)
1. Remove the shift knob and shift
cover using a nylon pry tool.
: Clip (4x)
: Nail (4x)
1. Déposez la rotule du levier de vitesses
et sa garniture à l’aide d’un levier
en nylon.
: Clip (4x)
:
Clou
(4x)
2
1
21
21
3. Das Schutzklebeband anbringen .
3. Attach the protection tape .
3. Fixez le ruban de protection .
4
4
4
Abb. 3 - Fig. 3
2. Die Verkleidung entfernen .
: Clip (5x)
2. Remove the panel .
: Clip (5x)
2. Déposez le panneau
.
: Clip (5x)
3
3
3
1
2
3
4
4
a
b
Avensis (T25) TOYOTA GENUINE AUDIO
Avensis (LHD) - 710-02
4.
Die Audioeinheit ausbauen
.
: Bolzen (4x)
4. Remove the audio unit .
: Bolt (4x)
4.
Déposez l’unité audio .
: Boulon (4x)
101
5
101
5
101
5
Abb. 4 - Fig. 4
6.
a) Den Schalter ausbauen .
b) Die Glühlampe entfernen.
c)
Den Stecker zum Entfernen nach
oben bewegen.
6.
a) Remove the switch .
b) Remove the bulb .
c) Remove the connector by moving it
upward.
6.
a) Déposez le commutateur .
b) Déposez l’ampoule .
c)
Déposez le connecteur en le dépla-
çant vers le haut
.
27
20
26
27
20
26
27
20
26
Abb. 5 - Fig. 5
Abb. 6 - Fig. 6
5.
Das Handschuhfach ausbauen.
a)
Die Haken entfernen
.
: Haken (2x)
b)
Die Anschläge durch Ziehen nach
innen entfernen.
5. Remove the glove compartment .
a) Remove the hooks .
: Hook (2x)
b) Remove the stoppers by pulling
them inside.
5. Enlevez la boîte à gants .
a)
Déposez les crochets
.
: Crochet (2x)
b)
Déposez les butées en les tirant vers
l’intérieur.
28
102
104
6
28
104
104
6
28
102
104
6
6
104
26
27
28
101
5
20
b
a
a
Installation Manual Double DIN Kit CAW 2300-03 / CAW 2300-03-RT
3. Remove side panels left (a)
and right (b).
All installation work must be performed by a qualified professional installer only.
The manufacturer / dealer is not liable for any kind of incidential or indirect damages.
1. Remove the shift knob (a) and
shift cover panel (b).
5. Place the facia plate on the
dashboard. Push the metal
frame into the facia plate
Connect all required circuit
points and push the double
DIN head unit in the metal
frame until it snaps in.
Place the trim frame.
Reinstall everything in reverse
order to finish installation.
2. Remove dashboard panel (a)
4. Remove the 4 screws (a)
Remove the OEM head unit (b)
Mount the metal brackets with
the double DIN head unit
The position of the copper
coloured holder can be adjusted
to your needs for perfect fit.
(see sample)
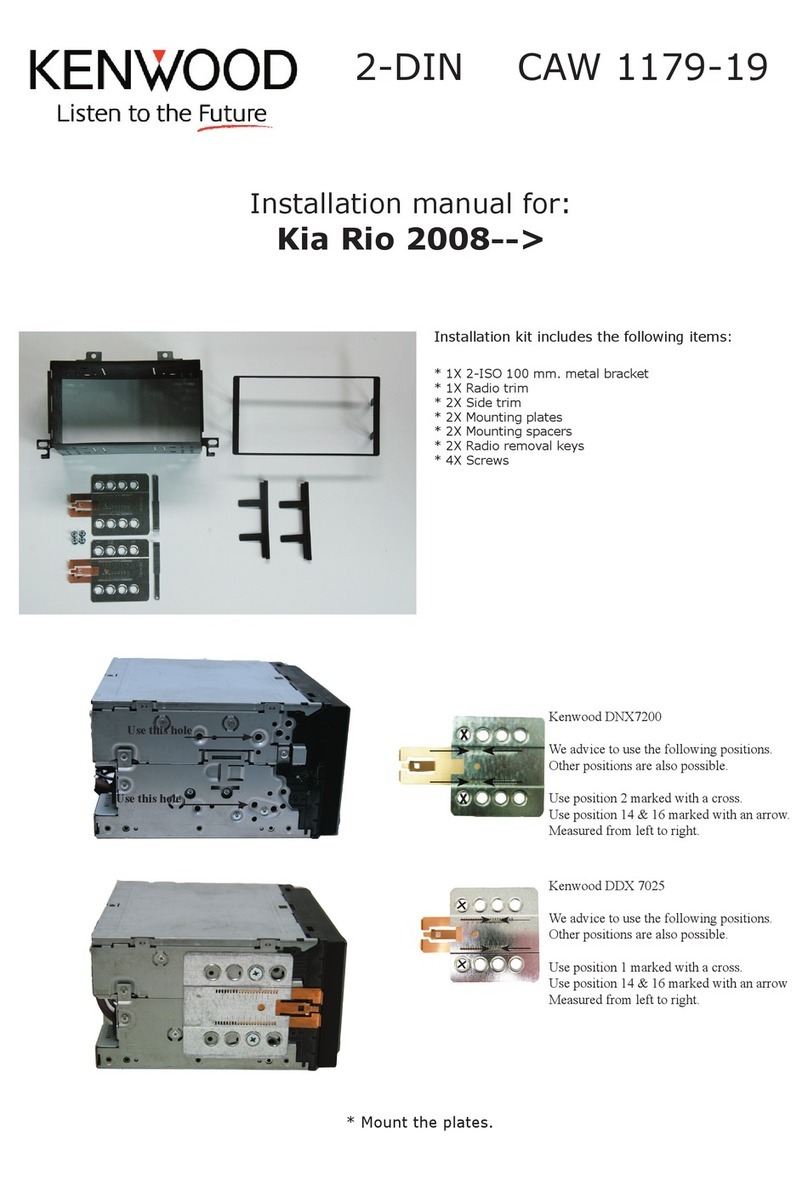
This manual suits for next models

1

Other Kenwood Automobile Accessories manuals

Kenwood CAW-ANT450 User manual

Kenwood

Kenwood CAW-ANT450 User manual

Kenwood KCA-BT200 User manual

Kenwood

Kenwood KCA-BT200 User manual

Kenwood CMOS-320 User manual

Kenwood

Kenwood CMOS-320 User manual

Kenwood KCA-BT200 User manual

Kenwood

Kenwood KCA-BT200 User manual

Kenwood KCA-RC700A User manual

Kenwood

Kenwood KCA-RC700A User manual

Kenwood KCA-HF521 User manual

Kenwood

Kenwood KCA-HF521 User manual

Kenwood KCA-BT100 User manual

Kenwood

Kenwood KCA-BT100 User manual

Kenwood KEC-301 User manual

Kenwood

Kenwood KEC-301 User manual

Kenwood KCA-R100 User manual

Kenwood

Kenwood KCA-R100 User manual

Kenwood KPA-H2EC User manual

Kenwood

Kenwood KPA-H2EC User manual

Kenwood SIRIUS KPA-H2C User manual

Kenwood

Kenwood SIRIUS KPA-H2C User manual

Kenwood KCA-BT100 User manual

Kenwood

Kenwood KCA-BT100 User manual

Kenwood KCA-BT100 User manual

Kenwood

Kenwood KCA-BT100 User manual

Kenwood KWBMW2 User manual

Kenwood

Kenwood KWBMW2 User manual

Kenwood CAW 1179-19 User manual

Kenwood

Kenwood CAW 1179-19 User manual

Kenwood KCA-BT200 User manual

Kenwood

Kenwood KCA-BT200 User manual

Kenwood CMOS-320 User manual

Kenwood

Kenwood CMOS-320 User manual

Kenwood KCA-BT300 User manual

Kenwood

Kenwood KCA-BT300 User manual

Kenwood KCA-R200 User manual

Kenwood

Kenwood KCA-R200 User manual

Kenwood KNA-PG100 User manual

Kenwood

Kenwood KNA-PG100 User manual

Kenwood CAW-1201-05 User manual

Kenwood

Kenwood CAW-1201-05 User manual

Kenwood KPA-H2CFM User manual

Kenwood

Kenwood KPA-H2CFM User manual

Kenwood CAW 2320-13 User manual

Kenwood

Kenwood CAW 2320-13 User manual

Kenwood CAX-HL10QI User manual

Kenwood

Kenwood CAX-HL10QI User manual

Popular Automobile Accessories manuals by other brands

Witter Towbar Systems ZEKAD001CN Fitting instructions

Witter Towbar Systems

Witter Towbar Systems ZEKAD001CN Fitting instructions

Arkon GPS-MV2503G3 quick guide

Arkon

Arkon GPS-MV2503G3 quick guide

Paulchen System First Class manual

Paulchen System

Paulchen System First Class manual

Zorg 3305 user manual

Zorg

Zorg 3305 user manual

BMW 01290015988 manual

BMW

BMW 01290015988 manual

Parkmate PM-81HYR user manual

Parkmate

Parkmate PM-81HYR user manual

AL-KO AKS 1300 operating instructions

AL-KO

AL-KO AKS 1300 operating instructions

PDE AXC Assembly instructions

PDE

PDE AXC Assembly instructions

JARD Savage 25 Operator's instruction manual

JARD

JARD Savage 25 Operator's instruction manual

Haibang HA998 Series installation instructions

Haibang

Haibang HA998 Series installation instructions

travall TDG 1304 FITTING INSTRUCTION

travall

travall TDG 1304 FITTING INSTRUCTION

Emtron EVO 4-8 user manual

Emtron

Emtron EVO 4-8 user manual

Hollywood Racks Sportrider HR1500 Assembly and installation instructions

Hollywood Racks

Hollywood Racks Sportrider HR1500 Assembly and installation instructions

Polaris 2880056 manual

Polaris

Polaris 2880056 manual

Yakima MegaJoe quick start guide

Yakima

Yakima MegaJoe quick start guide

Whispbar K570W Fitting instructions

Whispbar

Whispbar K570W Fitting instructions

STO N SHO SNS 59 Installation procedures

STO N SHO

STO N SHO SNS 59 Installation procedures

Whispbar K592W Fitting instructions

Whispbar

Whispbar K592W Fitting instructions

manuals.online logo
manuals.online logoBrands
  • About & Mission
  • Contact us
  • Privacy Policy
  • Terms and Conditions

Copyright 2025 Manuals.Online. All Rights Reserved.