manuals.online logo
Brands
  1. Home
  2. •
  3. Brands
  4. •
  5. Kenwood
  6. •
  7. Monitor
  8. •
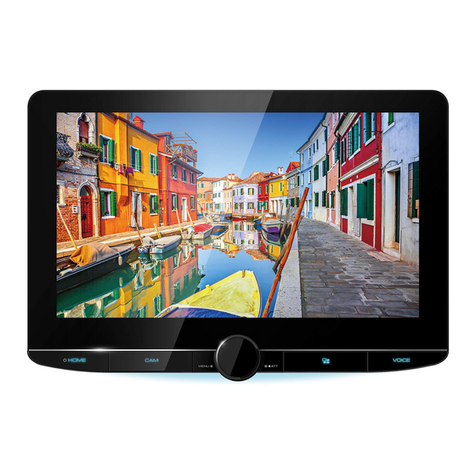
  9. Kenwood KOS-L432 User manual

Kenwood KOS-L432 User manual

@
AE86
KOS-L432
WIDE TOUCH SCREEN MONITOR
~
page 2-9
INSTRUCTION MANUAL
MONITEUR ECRAN LARGE TACTILE
~
page 10-17
MODE D'EMPLOI
WIDE TOUCH SCREEN MONITOR
~
Seite 18-25
BEDIENUNGSANLEITUNG
BREEDBEELD MONITOR MET AANRAAKSCHERM
~
biz
26-33
GEBRUIKSAANWIJZING
MONITOR TOUCH SCREEN PANORAMICO
~
pagina 34-41
ISTRUZIONI
PER
L'USO
MONITOR DE
PANTALLA
TAcTIL PANORAMICA
~
pagina 42-49
MANUAL
DE
INSTRUCCIONES
MONITOR DE ECRA LARGO DE TOQUE
~
pagina 50-57
-
MANUAL
DE
INSTRUCOES
Mm~U!llt~1ID./J'~
~
58-65m
i£mijtHn~
Kenwood Corporation
Take the time to read through this instruction manual.
Familiarity with installation and operation procedures will help you obtain the best
performance from your new monitor.
For your records
Record the
serial
number, found on the back
of
the unit, in the spaces designated on the
warranty
card,
and
in
the space provided below.
Refer
to the model and serial numbers
whenever you
call
upon your Kenwood dealer for information or service on the
product
Model
KOS-L432
Serial
number
_
US
R·d
0I
Register
Online
Register
your
Kenwood
product
at
www.Kenwoodusa.com
©864-4168-00/01 (W)
Safetyprecautions
AWARNING
To
prevent injury or fire, take
the
following precautions:
•Do not watch or fix your
eyes
on the unit's display
when you
are
driving for any extended period.
ACAUTION
To
prevent damage
to
the machine, take
the
following precautions:
•
You
cannot view video pictures whilst the vehicle
is
moving.
To
enjoy video pictures, find a
safe
place
to
park and engage the parking brake.
Ifyou experience problems during installation,
consult your Kenwood dealer.
·When you purchase optional accessories, check
with
your Kenwood dealer to make sure that they
work
with
your model and
in
your
area.
•Ifthe unit fails
to
operate properly,
press
the
Reset
button.
~
ll:::::::=1
=======KEr.'-"O===='
00
=====::.-1
J
[;J~
Reset
button
•The illustrations
of
the display and the panel
appearing
in
this manual
are
examples used
to
explain more clearly
how
the controls
are
used.
Therefore, what appears on the display
in
the
illustrations may differ from what appears on
the display on the actual equipment, and some
of
the illustrations on the display may represent
something impossible
in
actual operation.
Cleaning the Unit
Ifthe faceplate
of
this unit
is
stained, wipe it
with
a
dry soft cloth such
as
asilicon cloth
Ifthe faceplate
is
stained badly, wipe the stain
off
with acloth moistened
with
neutral cleaner, then
Wipe it again with aclean soft dry cloth.
~
Applying
spray cleaner directly
to
the
unit
may affect its
mechanical parts. Wiping
the
faceplate
with
ahard cloth
or using avolatile liquid such
as
thinner
or alcohol may
scratch the surface or erases characters
2I
English
IScreen brightness during low
temperatures
When the temperature
of
the unit
falls
such
as
during winter, the liquid crystal panel's screen will
become darker than
usual.
Normal brightness will
return after using the monitor for awhile.
AIV
controller you
can
control from the
KOS-L432
(As
of
December, 2007):
KOS-V500,
KOS-Vl
000
Information on Disposal
of
Old Electrical
and Electronic Equipment (applicable for
EU
countries
that
have adopted separate
waste collection systems)
It
Products
with
the symbol (crossed-out
wheeled bin) cannot be disposed
as
household waste.
•Old electrical and electronic
equipment
•••
should
be
recycled at afacility capable
of
handling these items and their
waste byproducts. Contact your local
authority for details in locating a
recycle facility nearest
to
you. Proper
recycling and waste disposal will help
conserve resources whilst preventing
detrimental effects on our health and the
environment.
CE
Declaration
of
Conformity with regard
to
the
EMC
Directive
2004/1
08/EC
Manufacturer:
Kenwood Corporation
2967-3 Ishikawa-machi, Hachioji-shi, Tokyo, 192-8525 Japan
EU
Representative's:
Kenwood Electronics Europe
BV
Amsterdamseweg
37,
1422
AC
UITHOORN, The Netherlands
Operations
§'tAuto
Dimmer
sensor
~SR(
~V.SEl
KOS
L432
'§
eFNC
<!J
~
_OF;:
o
KENWOOD
Q
~
Controlling
of
optional
AN
controllers
is
possible by
touching the screen
of
this unit.
Functions which can be controlled vary depending
on the
AN
controllers.
Refer
to
the instruction
manual
of
the connected
AN
controller for more
information.
Switches
the
video source
Press
the
[V.SELl
button.
Each
time the
button
is
pressed, the video source
is
changed.
b\
~
•
Refer
to <Switches the video source>
of
<Basic
Operations> ofthe
AN
controller's manual.
Power
Turning
ON
the
Power
Press
the
[SRCl
button.
Turning OFF
the
Power
Press
the
[SRCl
button
for
at
least 1second.
Switches
the
audio
source
Switches
the
function screen
Switches
to
the
control
screens
such
as
Source
Control
Screen.
Press
the
[V.SELl
button
for
at
least 1second.
Each
time the button
is
pressed for at least 1
second, the function control screen
is
changed.
Setting
Picture
&
Easy
Control
Panel
Press
the
[SRCl
button.
Each
time the button
is
pressed, the audio source
is
changed.
Q
~
•
Refer
to <Switches the audio source>
of
<Basic
Operations> of the
AN
controller's manual.
Source
Control
Screen
Picture
Panel
(OFF)
b\
~
•
Refer
to <Switches the function screen> of
<Basic
Operations> of the
AN
controller's manual.
English
I3
Accessories
CD
®
®
4I
English
..........
1
..........
1
..........
1
..........
1
..........
1
Installation Procedure
1.
To
prevent short circuits, remove the
key
from
the ignition and disconnect the 8terminal
of
the battery.
2.
Make the proper
input
and
output
cable
connections for each unit.
3.
Connect the wiring harness connector
to
the
unit.
4.
Install the unit in your
car.
5.
Reconnect the 8terminal
of
the battery.
6.
Press
the reset button. (page
2)
.A.
WARNING
To
prevent shorting, disconnect the battery cable from
the negative terminal
of
the battery during installation.
Be
sure
to firmly stabilise this product. Do not install it
in
alocation which
is
not
stable.
Follow the installation and wiring procedures described
in this manual. Improper wiring or modified installation
can
not
only result
in
malfunction or damage to the unit
but may also result
in
an
accident.
Do not install the unit
in
the following locations.
•A location which interferes with the operation
of
the air
bag system.
• A location which
is
not
made
of
plastic.
...
Installing on leather, wood or cloth may damage the
surface.
•A location subject
to
direct sunlight, subject
to
the air
from the air conditioner, or subject
to
moisture or high
temperature.
...
This
may
cause
deformation ofthe monitor unit.
Ifyou
are
not
going to install the unit using the supplied
monitor stand, be
sure
to
use
acommercially available
monitor stand. (Mounting holes for such astand
are
located on the
bottom
of
the monitor unit.)
~
Mounting and wiring this product requires skills and
experience.
For
safety's
sake,
leave the mounting and
wiring work to professionals.
Do
not
install the unit in aspot exposed
to
direct
sunlight or excessive heat or humidity.
Also
avoid places
with
too
much dust or the possibility
of
water splashing.
Do
not
use
your
own
screws.
Use
only the screws
provided. Ifyou
use
the wrong
screws,
you could
damage the unit.
Ifthe fuse blows, first make
sure
that the wires have not
caused ashort circuit, then replace the old fuse with one
with the
same
rating.
Do
not
let unconnected wires or terminals touch metal
on the
car
or anything
else
conducting electricity.
To
prevent short circuits do
not
remove the
caps
from
unused terminals or from the ends
of
the unconnected
wires.
After the unit
is
installed, check whether the brake lamps,
blinkers, wipers, etc. on
the
car
are
working properly.
insulate unconnected wires
with
vinyl tape or other
similar material.
Thoroughly wipe away oil and other
dirt
from the
installation surface.
Please
avoid installation on uneven surfaces.
English
I5

Other manuals for KOS-L432

2

Other Kenwood Monitor manuals

Kenwood DMX8021DABS User manual

Kenwood

Kenwood DMX8021DABS User manual

Kenwood DMX709S User manual

Kenwood

Kenwood DMX709S User manual

Kenwood DDX6039 User manual

Kenwood

Kenwood DDX6039 User manual

Kenwood DMX125DAB User manual

Kenwood

Kenwood DMX125DAB User manual

Kenwood DMX4707S User manual

Kenwood

Kenwood DMX4707S User manual

Kenwood KVX-5 User manual

Kenwood

Kenwood KVX-5 User manual

Kenwood DMX7520DABS User manual

Kenwood

Kenwood DMX7520DABS User manual

Kenwood DDX9017DABS User manual

Kenwood

Kenwood DDX9017DABS User manual

Kenwood DMX7522S User manual

Kenwood

Kenwood DMX7522S User manual

Kenwood DDX3028 User manual

Kenwood

Kenwood DDX3028 User manual

Kenwood DMX820WXS User manual

Kenwood

Kenwood DMX820WXS User manual

Kenwood LZ-702W User manual

Kenwood

Kenwood LZ-702W User manual

Kenwood DDX7050BT User manual

Kenwood

Kenwood DDX7050BT User manual

Kenwood DMX4707S User manual

Kenwood

Kenwood DMX4707S User manual

Kenwood DMX120BT User manual

Kenwood

Kenwood DMX120BT User manual

Kenwood LZ-651W User manual

Kenwood

Kenwood LZ-651W User manual

Kenwood DDX7015BT User manual

Kenwood

Kenwood DDX7015BT User manual

Kenwood KVT-514DVD User manual

Kenwood

Kenwood KVT-514DVD User manual

Kenwood DDX4038BT User manual

Kenwood

Kenwood DDX4038BT User manual

Kenwood KVT-7012BT User manual

Kenwood

Kenwood KVT-7012BT User manual

Kenwood DMX129DAB User manual

Kenwood

Kenwood DMX129DAB User manual

Kenwood DMX6018BT User manual

Kenwood

Kenwood DMX6018BT User manual

Kenwood KW-M150BT User manual

Kenwood

Kenwood KW-M150BT User manual

Kenwood KVT-M700 User manual

Kenwood

Kenwood KVT-M700 User manual

Popular Monitor manuals by other brands

Samsung ME32C user manual

Samsung

Samsung ME32C user manual

ViewSonic VA926-LED user guide

ViewSonic

ViewSonic VA926-LED user guide

Furuno Mu 120c Operator's manual

Furuno

Furuno Mu 120c Operator's manual

Asus VB171D - 17" LCD Monitor Service manual

Asus

Asus VB171D - 17" LCD Monitor Service manual

AOC 9GLR Technical specifications

AOC

AOC 9GLR Technical specifications

DMG RAFFAELLO manual

DMG

DMG RAFFAELLO manual

AOC LM720 - 17" Technical specifications

AOC

AOC LM720 - 17" Technical specifications

Sony Trinitron GDM-F500 Service manual

Sony

Sony Trinitron GDM-F500 Service manual

Memorex MT1701 user guide

Memorex

Memorex MT1701 user guide

ViewSonic VE510s-4 Service manual

ViewSonic

ViewSonic VE510s-4 Service manual

Farenheit T-1503CM instruction manual

Farenheit

Farenheit T-1503CM instruction manual

Ditel DINOS DN129/AT Quick installation guide

Ditel

Ditel DINOS DN129/AT Quick installation guide

Sony SDM-S51 Specifications

Sony

Sony SDM-S51 Specifications

Dell S2409WFP user guide

Dell

Dell S2409WFP user guide

EverFocus EN-7517E instruction manual

EverFocus

EverFocus EN-7517E instruction manual

Dell P3222QE user guide

Dell

Dell P3222QE user guide

Panasonic TH152UX1 - 152" PLASMA TV Service manual

Panasonic

Panasonic TH152UX1 - 152" PLASMA TV Service manual

LG 50PM1M -  - 50" Plasma Panel Service manual

LG

LG 50PM1M - - 50" Plasma Panel Service manual

manuals.online logo
manuals.online logoBrands
  • About & Mission
  • Contact us
  • Privacy Policy
  • Terms and Conditions

Copyright 2025 Manuals.Online. All Rights Reserved.