manuals.online logo
Brands
  1. Home
  2. •
  3. Brands
  4. •
  5. Kenwood
  6. •
  7. Recording Equipment
  8. •
  9. Kenwood KE-894 User manual

Kenwood KE-894 User manual

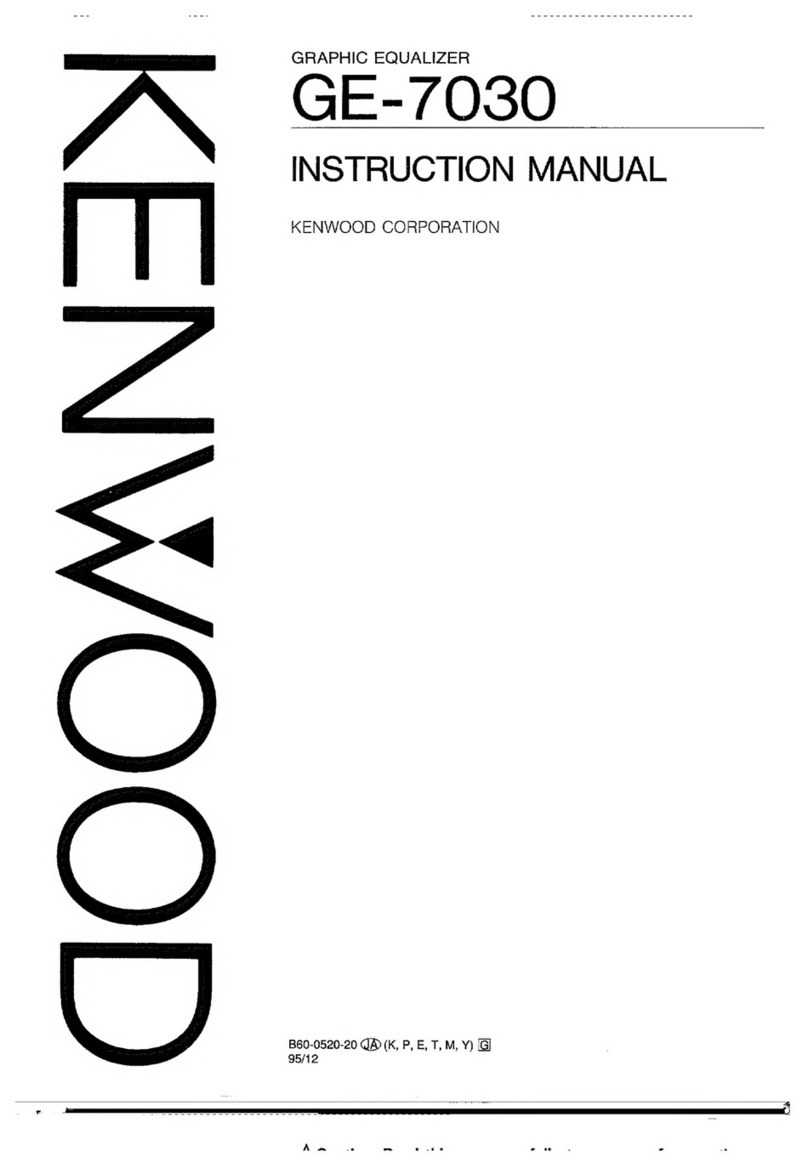
CGOO/AN>DI
GRAPHIC
EQUALIZER
KE-894
KE-2060
INSTRUCTION
MANUAL
KENWOOD
CORPORATION
|
This
manual
contains
instructions
for
two
models.
Introduction
erence
tT
yOu
are
&
Gevotee
Your
cnoice
o*
this
eroduct
-ndicates
to
excellence
in
sounc
reoroduciion
We
appreciate
your
patronage
anc
take
orige
.n
the
long
traqi-
ton
of
quality
components
that
our
company
represents
So
that
you
can
get
the
Most
out
of
your
unit,
we
suggest
that
you
take
tne
time
to
read
through
this
manual
before
you
nook
up
and
operate
your
system
This
will
acquaint
you
with
oper-
ating
features
and
system-connectior
considerations
so
that
your
listening
pleasure
w:
Il
be
enhanceag
rght
trom
the
start
You
wilt
nonce
that
in
all
aspects
of
pianning,
engineering,
styling,
operating
convenience
and
adaptability
we
have
sought
to
anticipate
your
needs
and
desires
Keep
this
manual
handy
for
future
reference.
For
your
records
Record
the
seriai
number,
found
on
the
bac«
of
the
unit,
in
the
spaces
aesignated
on
the
warranty
card,
and
in
the
space
proviced
oeiow
Refer
to
the
model
and
serial
numbers
wnenever
you
Cali
upes
your
aealer
for
intormaton
or
service
on
this
proguct
Model
Serial
Number
Unpacking
Unpack
the
unit
carefully
and
make
sure
that
all
accessones
are
put
aside
so
they
wil
not
be
lost
Examine
the
ucit
for
any
possibility
of
shipping
damage
lt
your
unit
-§
camaged
or
fails
to
operate,
notify
your
deaier
immediately.
«¢
your
unit
was
shipped
to
you
directly,
notfy
the
snipping
company
witnout
deiay.
Only
ine
consignee
(the
person
orcompany
receiving
the
uniti
can
file
acclaim
against
the
carrier
for
shipping
damage
We
recommend
that
you
retain
the
origina!
carton
and
pack-
ng
materials
for
use
should
you
transport
or
ship
the
un.t
in
the
future
'
Accessories
Audio
cord
......
bees
cee
2
Contents
Introduction
&
Before
applying
power
{Safety
precautions
beens
ES,
IMPORTANT
SAFEGUARDS
o
System
connections.
Controls
and
indicators
OMRhwWAN
Li
Caution:
Read
the
pages
marked
/°
A
carefully
to
ensure
safe
operation.
Operating
instructions.......
lettre
O
Using
the
equalizer
effect...
vocettttteteee
OF
Equalizer
pattern
list
......
boctetetetessreereee
10
Storing
your
own
patterns
..
12
How
to
play
tape
with
equalizer
effect
bee
213
In
case
of
difficulty
Specifications
..
Before
applying
power
\
Caution:
Read
this
page
carefully
to
ensure
safe
operation.
For
the
U.S.A,
Mexico
and
Canada
For
Australia
and
Europe
.
-.
|
Important!
|
:
Important!
Units
shipped
to
the
U.S.A..Mexico
and
Canada
are
designes
;
|
UNIS
s™ipped
tc
Australia
ave
Ges
gnec
fer
coerst
on
o-
240
Vorts
1
for
operation
on
120
volts
AC
only
|}
AC
only
|
!
Units
snipped
to
Europe
ave
cesigned
for
operaro7
om
230
.ots
AC!
|
|
ony
i
—
For
the
United
Kingdom
For
other
countries
important!
i
important!
Units
shipped
to
the
U.K
are
ces:gned
tor
Operation
on
240°:
|
Units
shinpedtocourtnes
ot.
Tar
tng
above
co.
volts
AC
only
i
with
an
AC
veitage
seiect
vtch
on
the
rear
|
|
foliow:ng
paragrach
for
the
proper
SeiINg
OT
Iris
Swwitc
!
AC
voltage
selection
-
|
This
unt
operates
on
110
-
120
voits
cr
220
-
240
voits
:
|
voltage
Serector
Switch
on
tne
rear
pane’
1s
$@:
to
tne
Prevar's
in
tne
an
ownich
>
the
dower
cord
to
your
AC
outlet,
Take
sure
tnat
tn
of
ths
switch
matches
vour
ine
ve
tage.
if
¢
c
|
|
vOllage
in
accoraance
witn
the
following
air
The
mains
plug
contains
a
fuse
Forreo'acement.
use
only
a3-Amo
|
i
~ ~
H
ASTA-aporoved
(BS1362i
fuse
Factory
fitted
moulded
mains
plug
AC
voltage
selector
swicth
2.
The
fuse
cover
must
be
refitted
wher
rep.acing
moulded
piug
w&
Do
not
cut
off
tne
mains
plug
trom
this
equemert.
!f
the
Biug
fitted
!
IS
not
Surtabie
#or
the
power
points
-nycurnome,
or
the
cane
stoo
|
short
to
reach
a
power
point,
tnen
cbtain
a>
agoropriate
satety
:
approved
extension
iead
or
aaapto’,
o
ASult
your
gealer
:
If
nonetheless
tne
mains
plug
is
cut
off,
remove
the
tuse
and
|
dispose
cf
the
plug
:mmediately,
to
avoid
a
possible
shock
nazard
|
by
inadvertent
connection
to
the
mains
supply
:
1
aL
Move
switch
lever
to
match
your
line
voltage
with
|
jy
a
small
screwdriver
or
other
pointed
tool.
Note
Cur
warrarty
does
sot
cover
damage
caused
by
excessive
tine
veltage
due
to
1
oropes
setting
of
the
AC
voltage
selector
Santen.
|
Safety
precautions
WARNING
:
TO
PREVENT
FIRE
OR
ELECTRIC
SHOCK,
DO
NOT
EXPOSE
THIS
APPLIANCE
TO
RAIN
OR
MOISTURE.
00
NOT
OPEN
WiCNG
TC
QUALFIED
SERVICE
PERSONNEL
CAUTION
i
:
CAUTION:
“O
REDUCE
Tai
R
SK
OF
ELECTRIC
SHOCK,
DG
NOT
REMOVE
RISK
OF
ELECTRIC
SHOCK
|
COVER
(OR
BACK).
NG
US=
VICEABLE
PARTS
INSIDE,
REZER
SER-
|
THE
-IGHTNING
FLASH
WITH
ARROW-EAD
SYMBOL,
WITHIN
AN
EQUILATERAL
TRIANGLE,
IS
INTENDED
TO
4_ERT
THE
USER
~O
Ti
RESENCE
OF
UNINSULATED
“CANGERSOUS
VOL-
TAGE”
WITKIN
THE
PACDUCT’S
ENCLOSURE
THAT
MAY
SE
OS
SUFFICIENT
MAGNITUDE
UTE
A
RISK
OF
ELECTRIC
SHOCK
~O
PERSONS
'
THE
EXCLAMATION
PGINT
WITHIN
AN
EQUILATERAL
TRIANGLE
|S
INTENDED
TO
ALERT
THE
|
USER
TG
THE
PRE
Ce
OF
IMPORTANT
GPERATING
AND
MAINTENANCE
ISERVICING:
IN-
STRUCTIONS
IN
THE
LITERATURE
ACCOMPANYING
THE
APPLIANCE
IMPORTANT
SAFEG
UARDS
&
Caution:
Read
this
page
carefully
to
ensure
safe
operation.
ase
read
al!
of
the
safety
and
operating
:nstructions
6.
Temperature
-
The
appliance
may
not
apc
Aghere
to
ai
warnings
on
properly
:f
used
at
extremely
iow.
oF
instruguen
manual.
Fobow
ali
the
temperatures.
The
ideal
ambient
temperature
instructions.
These
safety
and
above
+5°C
(41°Fi
ions
should
be
retained
for
future
7.
Heat
-
The
appliance
should
be
situated
away
from
heat
sources
SUCH
a8
raciaters,
heat
registers,
Staves
4.
Power
sources
-
The
appliance
snouid
be
connectec
to
or
other
appiances
iincluding
ampiitiers)
that
procuce
2
of
the
type
descrived
in
the
instruction
heat
don
the
appliance.
If
you
are
not
sure
power
supply
[to
yo
home,
consult
your
8.
Electric
shock
—
Care
shouid
be
taken
so
that
objects
ler
or
.ocal
power
company
ppliances
do
not
fall
and
liquid
is
not
spilled
into
the
enciosure
intended
to
operate
from
battery
ower,
or
other
sources,
through
openings.
If
a
metal
objects,
such
as
a
hair
reter
to
i
structicn
manual
pin
ora
needle,
comes
into
contact
with
the
inside
of
this
appliance,
a
dangerous
electnic
shock
may
result
2.
Power-cord
protection
~
ower
supply
cords
should
For
families
with
children,
never
permit
chitdren
to
pe
rqulea
so
thai
they
are
not
tkely
to
be
walked
on
put
anything,
especially
metai,
inside
this
appuance
or
pinched
by
items
placed
upon
or
against
them,
paying
particular
attenuon
to
cords
at
plugs.
convenience
receptacles,
and
the
point
where
they
exit
from
the
appiiance
Never
pull
or
stretch
9.
Enclosure
remova!
~
Never
remove
the
enclosure
It
the
internal
parts
are
touched
accidentally,
a
serious
electric
shock
might
occu
3.
CAUTION
~
Polarization
—
This
appliance
may
be
equipped
with
a
pola
t
alternatin
rrent
line
plug
la
slug
having
one
blade
wider
than
the
other!
This
pug
wii
fit
into
the
power
outiet
oniy
one
way.
This
1s
a
saiety
feature.
li
you
are
unabie
to
insert
the
plug
fully
inte
the
outlet,
try
reversing
the
plug.
if
the
piug
should
still
fail
to
fit,
contact
your
electrician
to
replace
your
obsolete
outlet
Do
not
defeat
the
safety
purpose
of
the
poianzed
plug
10.Magnetic
fields
-
Keep
the
appliance
away
from
sources
of
magnetic
fields
such
as
TV
sets,
speaker
systems,
radios,
motorized
toys
or
magnetized
objects
4.
Ventilation
-
Slots
and
openings
in
the
cabinet
are
proviceo
tor
ventkation
and
to
ensure
relianle
operation
ot
the
appliance
and
to
provect
it
fram
overheaiing,
and
these
operings
must
not
be
blockec
or
covered
The
appliance
should
be
situated
sc
that
its
iocation
or
position
does
not
interfere
with
its
proper
ventuation
To
maintain
good
vertitation,
do
not
pLi
records
or
a
table-
s:otn
on
the
appilance.
Piace
tne
appliance
at
least
70
cm
away
from
tne
wails
De
not
use
the
appliance
on
a
bed,
sofa,
rug
or
similar
surface
tna:
may
bleck
tne
ventiiation
openings.
This
appliance
shouid
not
be
placea
ina
builtin
installation
such
as
abcokcase
or
rack
unless
groper
ventilation
Is
provided
or
the
manufacturer's
instructions
have
beer
adhered
to
11.Cleaning
-—
Unplug
this
appliance
from
the
wall
outlet
before
cleaning.
Do
not
use
volatile
soivents
such
as
alcohol,
paint
thinner,
gasoline,
of
benzine,
etc.
to
clean
the
cabinet.
Use
a
clean
dry
cloth
12.
Accessories
-
Do
not
place
this
appliance
on
an
unstable
cart,
stand,
tripod,
bracket,
or
table.
The
appliance
may
fall,
causing
serious
injury
to
a
child
or
adult,
and
serious
damage
to
the
appliance.
Use
only
with
a
cart,
stand,
tripod,
bracket,
or
table
recommended
by
the
manufacturer,
or
sold
with
the
appliance.
Any
mounting
of
the
appliance
should
follow
the
manufacturer’s
instructions,
and
should
use
4
mounting
accessory
recommended
by
the
manufacturer,
An
appliance
and
cart
combination
should
be
moved
with
care.
Quick
stops,
excessive
force.
and
uneven
surfaces
may
cause
the
appliance
and
cart
combination
to
overturn
usec
ar
water
-
for
examole,
near
a
bathtub,
e
wasnbow!,
kitchen
sink,
laundry
tub,
in
a
wet
basement,
or
near
a
swimming
pocl,
etc
‘\
Caution
:
Read
this
page
carefully
to
ensure
safe
operation.
43.
Lightning
—
For
added
protection
for
this
appliance
during
a
lightning
storm,
or
when
it
is
left
unattended
and
unused
for
long
periods
of
time,
unplug
it
from
the
wall
outlet
and
disconnect
the
antenna
or
cabie
system.
This
will
prevent
damage
to
the
appliance
due
to
lightning
and
power-line
surges
14.Abnormai
smell
—
|f
an
abnormal
smell
or
smoke
Is
detected,
immediately
turn
the
power
OFF
and
unplug
the
appliance
from
the
wall
outlet.
Contact
your
dealer
or
nearest
service
center
POWER
OFF!
ee
15.Damage
requiring
service
—-
The
appliance
should
be
serviced
by
qualified
service
personnel
when
A.
The
power-supply
cord
or
the
plug
has
been
damaged
B.
Objects
have
fallen,
or
liquid
has
been
spilled
into
the
apptiance
C.
The
appliance
has
been
exposed
to
rain
or
water
D.
Tne
appliance
does
not
appear
to
operate
normaily
by
following
the
instruction
manual.
Adjust
only
those
controis
that
are
covered
by
the
instruction
manual
as
an
improper
adjustment
of
other
controls
may
result
in
damage
and
will
often
require
extensive
work
by
a
qualified
technician
to
restore
tne
appliance
to
its
normal
operation
E.
The
appliance
has
been
dropped,
or
the
enciosure
damaged
F,
Theappliance
exhibits
amarked
change
in
performance.
16.Servicing
~
The
user
should
not
attempt
to
service
the
appliance
beyond
that
described
in
the
instruction
manual.
All
other
servicing
should
be
referred
to
qualified
service
personnel
17.Outdoor
antenna
grounding
-
If
an
outside
antenna
is
connected
to
the
appliance,
be
sure
the
antenna
system
is
grounded
so as
to
provide
some
protection
against
voltage
surges
and
built
up
static
charges
Article
810
of
the
National
Electrical
Code
=
ANSI/
NFPA
70,
provides
information
with
respect
to
proper
grounding
of
the
mast
and
supporting
structure,
grounding
of
the
lead-in
wire
to
an
antenna
discharge
unit,
size
of
grounding
conductors,
location
of
antenna
discharge
unit,
connection
to
grounding
electrodes,
and
requirements
for
the
grounding
electrode.
See
Figure
EXAMPLE
OF
ANTENNA
GROUNDING
AS
PER
NATIONAL
ELECTRICAL
CODE
—
ANTENNA
LEAD
IN
WIRE
ANTENNA
DISCHARGE
UNIT
eectaic
(NEC
SECTION
810-20)
SERVICE
~
EQUIPMENT
—
><
GROUNDING
CONDUCTORS
z
(NEC
SECTION
810-21)
ore
GROUND
CLAMP
ve
POWER
SERVICE
GROUNDING
ELECTRODE
SYSTEM
(NEC
ART
250,
PART
Hi
NEC
-
NATIONAL
ELECTRICAL
CODE
18.Power
lines
—
An
outside
antenna
system
should
not
be
located
in
the
vicinity
of
overhead
power
lines
cr
other
electric
light
or
power
circuits,
or
where
it
car
fall
into
such
power
lines
or
circuits.
When
installing
an
outside
antenna
system,
extreme
care
should
be
taken
to
keep
from
touching
such
power
lines
or
circuits
as
contact
with
them
might
be
fatai
19.AC
outlets
-
Do
not
connect
other
audio
equipment
with
a
power
consumption
larger
than
that
specified
to
the
AC
outlet
on
the
rear
panel.
Never
connect
other
electrical
appliances.
such
as
an
tron
or
toaster,
to
it
to
prevent
fire
or
electric
shock
20.
Overloading
-
Do
not
overload
wall
outlets,
extension
cords,
or
integrai
convenience
receptacles
as
this
can
result
in
a
risk
of
fire
or
electric
shock
21.
Attachment
-
Do
not
use
attachments
not
recommended
by
the
appliance
manufacturer
as
they
may
cause
hazards
22.
Replacement
parts—Vhen
replacement
parts
are
required,
be
sure
the
service
technician
has
used
replacement
parts
specified
by
the
manufacturer
or
have
the
same
characteristics
as
the
original
parts.
Unauthorized
substitutions
may
result
in
fire,
electric
shock,
or
other
hazards.
23.
Safety
check
—
Upon
completion
of
any
service
or
repairs
to
this
appliance,
ask
the
service
technician
to
perform
safety
checks
to
determine
that
the
appliance
is
in
proper
operating
condition
Notes:
1.
Item
3
is
not
required
except
for
grounded
or
polarized
equipment.
2.
Item
17
and
18
are
not
required
except
for
units
provided
with
antenna
terminals.
3.
ltem
17
complies
with
UL
in
the
U.S.A
KE-894
/20601En)
5
System
connections
nel
Make
connections
as
shown
below.
When
connecting
the
related
system
components,
refer
also
to
the
instruction
manuals
of
the
related
components.
Do
not
plug
in
the
power
lead
until
all
connections
are
completed.
@
Connecting
to
amplifier
or
receiver
Amplifier
or
receiver
with
the
age
7
.
TAP
i
Amplifier
with
the
ADAPTOR
jacks
MONITOR
switch
connect
to
the
TASE
jacks
=
(TAPE
MON:TOR?
|
(Set
the
TAPE
MONITOS
switch
to
the
mon.toring
position.)
|,
Unp.ug
the
from
tre
APTOR
jacks
he
compo-
S
INeSe
1acksS
System
control
cord
a
AC
OUTLET
Audio
cord
a,
fl
T
To
AC
Unit
destination
Shape
of
the
outlet
AC
outlet
USA.
Mexics
anc
Canaca
U.S.
Mirtary
|
UK
|
KE-894
SOW
0.25A
MAX.
|
KE-2060
|
200W
1.6A
MAX:
Austraia
Notes
Connect
ali
cores
frm
If
connections
are
loose
there
could
de
oss
of
sound
or
noise
produced
2.
Wren
plugging
and
unplugging
connect
on
cords,
be
sure
to
fist
“emove
*he
power
cord
from
the
AC
outlet.
Plugging/unplugging
Is
Wwnout
"emovai
of
the
Bower
cord
can
Cause
1
ns
or
damage
to
tne
unit
ot
up
a
power
source
which
18
varger
than
tnat
nic
@
socket
at
ihe
rear
of
the
unit
H@
Connecting
to
cassette
deck
Rear
panel
Cassette
deck
System
control
connection
When
connected
to
an
amplifier
or
receiver
having
KENVWOOD
SYSTEM
CONTROL
terminais,
system
operation
such
as
remote
control
is
mace
dessibie.
For
details,
refer
to
the
instruction
manua
of
the
amplifier
or
receiver.
If
your
ampiiiier
or
receiver
is
not
equipped
with
the
SYSTEM
CONTROL
terminals,
do
not
connect
anytning
to
any
SYSTEM
CONTROL
terminai
Do
not
connect
the
unit
:n
any
system
configuration
other
tian
soecified
OL
@
Be
sure
to
insert
the
systern
control
cord
plugs
fully
into
tne
SYSTEM
CONTROL
terminals
@
=
|Ftne
system
contro:
cord
and
audio
cords
are
not
connected
properly,
the
automatic
system
governing
remote
control
and
system
functions
will
not
operate
KE-g94
/20601En)
7
Controls
and
indicators
lam
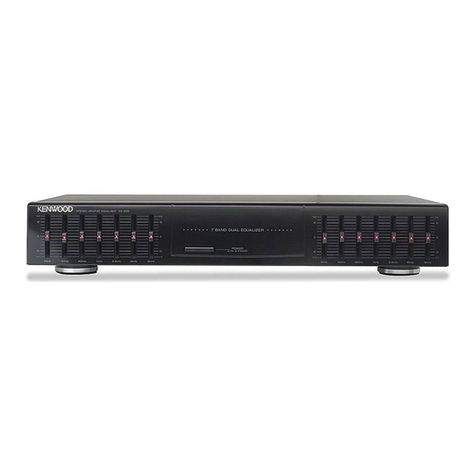
Graphic
equalizer
display,
spectrum
analyzer
display
Mode
indicator
lay
INPUT
SELECTOR
key
i
EQ.
CONTROL
keys
|
T
|
]
{
l l
i
i
(en
rn
|
|
Numeric
keys
(1~5)
:
|
i
POWER
switch
Reference/Manual
key
|
EFFECT
key
MEMORY
key
\.
8
e894
/
2060
(Em
Operating
instructions
@
Using
the
equalizer
effect
r
Preparation:
INPUT
SELECTOR
Key
if
|
!
Numeric
keys
(1-5)
|
i
RM
key
Set
the
TAPE
MONITORS
switch
of
the
armolifrer
or
|
£Q.
CONTROL
keys
receiver
connected
to
this
unit.
EFFECT
key
POWER
switch
f-
a
1
Press
the
POWER
swich
of
this
unit
to
ON.
2
Set
the
INPUT
SELECTOR
to
LINE.
INPUT
SELECTOR
ararq
foune
3
Press
the
EFFECT
key.
\
+
Lights
up
L_]
Esther
marcator
ghts
ua
4
Recall
the
equalizer
patterns.
}—-
Either
inaicator
lights
up.
|
Reference
mode:
Tne
REFERENCE
indicator
lights
up
Manual
mode.
The
MANUAL.
indicator
lights
up
Select
from
R1
to
R5
(REFERENCE
MEMO
ij
Select
from
Mt
to
M5
(MANUAL
MEMO.)
(See
the
sist
of
equalizer
patterns
on
aage
10.)
iSee
the
list
of
equalizer
patterns
on
page
10.)
Cc
it
Tt
i i
i
id
i
i i
ai
Numenc
<eys
11-5)
Numenc
keys
(1-5)
«In
this
mode,
desired
patterns
can
be
created
{See
“Storing
Your
Own
Patterns®
on
page
12.}
J
NV.
f-
To
cancel
equalizer
effect
*
The
pattern
shown
in
the
display
does
not
change
\.
Equalizer
—
Cmanvan
TEs
t—
Goes
of
KE-894
/2080
(En)
9
a
@
Equalizer
pattern
list
MANUAL
MEMO.
(M1
to
M5)
Presetting
1s
possinle
ir.
ths
mode
REFERENCE
MEMO.
(R11
to
R5)
Ri:
For
recording
sound
source
Dy
enhancing
sound
cuality
for
nead-
phone
stereo
M1:
To
reduce
very
iow
noise
oF
scratcn
noise
during
piay-
pack
of
anaiog
records
R2.
For
secarding
sound
source
By
ennancirg
sound
Guaiity
for
ca:
stereo
!
M2:
To
enjoy
the
atmosphere
=
fF
of
old
jazz
in
tne
1950's
:
R3.
To
procuce
powertu
music
such
as
rock
0”
fusion
with
more
iive-
ness
M3:
For
listening
to
music
fora
jong
time
or
playing
background
™usic
!
R4
Toempnasize
vocals.
For
any
™usical
category
1
MA:
To
listen
carefully
to
the
detailed
sound
accerding
to
the
source
R5:
To
produce
soft
sound
by
recucing
stimulative
mid-
range
and
treble
M5:
To
produce
exciting
sound
by
emphasizing
the
very
iow
range
Display
SPECTRUM
ANALYZER
display
Normaliy
dispiays
the
spectrum
anaiyzer
Lisniays
the
frequency
distribution
of
the
music
source
being
olayed
back.
Peax
hold
SPECTRUM
ANALYZER
display
“GRAPHIC
EQUALIZER
display
Displays
now
each
frequency
is
compensated
The
GRAPHIC
EQUALIZER
will
be
displayed
for
approximate:
5
seconds
upon
the
follow:ng
operations
while
the
SPECTRUM
ANALYZER
1s
being
displayed
1.
When
the
power
is
switched
ON
Hl
|
2.
When
a
key
related
to
operation
of
the
equalize:
is
pressed
i
GRAPHIC
EQUALIZER
display
0
.
150
.
00
.
™
.
eae
:
ee
-
a
10
k&-894
/
2680
1€-
Mi
Functions
of
graphic
equalizer
Orgina',
or
ideal,
speaker
Scurd
speaker
Actual
sound
reaching
the
listener
Compensation
for
the
audio
characteristics
of
listen-
ing
room
The
listening
room
may
contain
several
objects
Some
of
them
|
reflect
sound
and
some
absorb
sound,
tnus
the
sound
reacning
your
ears
is
considerably
affected
by
tnese
objects.
In
such
cases,
the
graphic
equalizer
can
be
usec
to
adjust
the
frequency
response
of
the
room
for
a
frat
response
from
tow
to
high
fre-
quencies
@
Low
frequencies
are
absorbed
by
beds,
cnairs.
etc
@
High
frequencies
are
absorbed
py
curtains,
screens,
ete
@
The
room
structure
can
cause
the
low
freauenc:es
to
be
unclear,
or
the
sound
level
to
increase
or
decrease
depending
on
tne
tre-
quency.
Adjustment
of
sound
to
your
individual
taste
When
the
reproduced
sound
contains
several
musical
instru-
ments
and
vorces,
the
grapnic
equalizer
allaws
you
to
enhance
or
attenuate
the
sound
of
snecific
‘nstruments
or
voices
Sound
equalization
Super
bass
range
(60
Hz)
When
this
contro:
is
movec
up,
tne
dass
-nstrument
(double
bass,
bass
drums,
o”
ppe
orgar.,
ec.)
sound
's
increased
When
the
super
pass
sound
:s
boomy,
move
tnis
contro!
down.
Bass
range
(150
Hz)
Usually,
the
listening
room
resonance
frequency
1S
in
this
range
To
eliminate
bass
resonance,
move
this
control
dawn
Mid-bass
range
(400
Hz)
This
range
is
the
basis
of
music.
Whetner
the
sound
is
rich
or
not,
depends
on
this
range.
When
the
piayoack
sound's
not
so
good,
Move
th:s
control
up
Mid
range
(1
kHz}
When
this
control
is
moved
up
o”
down,
the
baritone
or
soprano
voice
is
emphasizec/de-emonasized.
This
range
Is
related
to
the
“presence”
of
music
Mid-high
range
(2.4
kHz}
This
range
is
related
to
stimulus
and
metallic
sound
When
this
range
1s
weli
compensated,
vivid
sound
can
be
optained
High
range
(6
kHz)
This
frequency
range
is
related
to
the
hardness
of
the
sound
When
tnis
control
is
moved
up,
strings
or
brass
instruments,
such
as
flutes
or
piccolos,
are
emphasized.
When
the
control
is
moved
down,
the
sound
will
become
more
smoothing
Super
high
range
(15
kHz}
This
frequency
range
is
related
to
the
details
of
the
music.
When
this
control
is
moved
up,
super
high
frequency
instruments,
such
as
triangles
or
cymbais,
are
emphasized,
resulting
in
wide
sound
and
echoes
KE-894
/
2060
(Eni
11
Operating
instructions
se
@
Storing
your
own
patterns(M1~M5)
INPUT
SELECTOR
key
EFFECT
key
|
Numeric
keys
(1-5}
i
MEMORY
key
R/Mkey
EQ.
CONTROL
keys
ro
1
Create
a
desired
equalizer
pattern.
@
Set
the
INPUT
SELECTOR
to
LINE.
@
Press
the
EFFECT
key.
Lights
up
|
®
Select
the
frequency
band
to
be
adjusted.
Lpcroro.
To
increase
reanenc
|
freanescv
To
decrease
frequency
&
Adjust
its
level.
To
increase
evel
To
decrease
levei
&
For
each
frequency
band
to
be
adjusted,
repeat
steps
3
and
4
above.
NN
~
2
Store
the
equalizer
pattern.
@
Select
MANUAL
mode.
@
Press
the
MEMORY
key.
&
Press
a
numeric
key
(1
to
5).
Sress
a
number
key
witnin
5
seconds
after
pressing
the
MEMORY
key
To
store
data
to
M3,
press
3.
*
Your
equaiizer
pattern
will
be
stored
to
the
numeric
key
(1
to
5}
you
have
pressec.
©
in
tre
same
manner,
up
to
five
patterns
can
be
stored
*
If
a
dig:t
key
{1
to
5}
aireagy
has
Deen
assigned
with
equalizer
pattern
data,
the
od
data
wili
be
repiaced
by
the
new
date.
_/
12.
ké-894
/
2060
1En:
H@
How
to
play
tape
with
equalizer
effect
preparation:
Before
proceeding
to
the
foliwing,
connect
a
cassette
deck
as
shown
on
page
7
~\
To
initialize
the
setting
patterns(
MANUAL
MEMO.
M1
to
M5
on
page
10)after
storing
your
own
pattern:
@
Select
MANUAL
mode.
@
press
the
desired
numeric
key
(1
to
5)
more
than
5
seconds.
\
(4
Set
the
INPUT
SELECTOR
to
TAPE.
—_
P|
eouauge
INPUT
SELECTOR
—T
banca
saracd
[Rune
o
)
Tea
2
Create
a
desired
equalizer
pattern.
{See
pages
9
to
*3
for
now
to
create
equalizer
patterns.)
3
Start
playing
the
cassette
deck.
e
/
In
case
of
difficulty
Caution:
Read
this
page
carefully
to
ensure
safe
operation.
What
appears
to
be
a
malfunction
may
not
atways
be
serious.
If
your
unit
does
not
perform
as
expected,
consult
the
table
below
to
see
if
the
problem
can
be
corrected
before
seeking
help
from
your
dealer
or
service
representaive.
Symptom
:
Cause
:
Remedy
“Connection”
07
page
6
No
equalizer
effect
i
¢
The
EFFECT
key
has
not
been
set
to
ON
*
Set
the
EFFECT
key
to
ON
i
|
No
sound
after
switching
the
power
ON.|
¢
The
cables
are
not
correctly
plugged
In
*
Connect
correctly
by
‘eferring
to
j
|
|
|
Notes.
1.
This
system
1s
microprocessor-controlied,
so
malfunction
may
occur
due
to
external
noise
or
interference
noise.
In
such
a
case,
unpiug
the
powe*
cord,
plug
st
and
turn
power
on
again
2.
Donotuse
contact
cleaners
because
it
could
cause
a
malfunction.
Be
specially
careful
against
contact
cleaners
containng
ou,
for
they
may
deform
the
plastic
components
Specfications
Performance
Equalizer
characteristics
variable
range
individual
channel
adjust
(Hz)
..
Total
harmonic
distortion
(at
i
kHz,
Flat)
Gain
..
Frequency
response
(at
flat)
.
Signal
to
noise
ratio
(IHF'66)
Input
impedance...
Maximum
output
voltage
‘at
0.01
%
T.H.D.}
Output
impedance
.....
=10
dB
/=2
dB
0,
150,
400,
1k,
2.4k,
6k,
15k
General
Power
consumption
...
AC
outlet
UNSWITCHED
..
130W
0.254
MAX.)
(KE-894
For
U.S.A.
and
Mexico
only)
1(30W
MAX.}
{KE-894
For
other
countries)
1(200W
1.64
MAX.)
(KE-2060
For
U.S.A.
and
Mexico
onty)
1(200W
MAX.)
(KE-2060
For
other
countries)
W:
440
mm
(17-5/16")
H:
89mm
(
3-1/2")
D:
250
mm
(9-13/16")
2.9
kg
(6.4
ib}
DIMENSIONS
.........cccececeenceseeneteteesesceceecantenenene
cee
tasnenetesseas
Weight
(Net)
.....
Note
KENWOOD
‘o.ows
a
policy
of
cor
UOuS
acvancements
.-
deveiopment
tnis
reason
specif.cations
may
be
changed
without
notice
For
the
U.S.A.
FCC
WARNING:
This
equ:ar
|
tne
mocitications
are
expressly
approvea
in
the
‘nstructian
manua:
The
user
could
iose
me
authority
to
operate
this
equipment
if
an
unautharized
|
charge
or
rod'ticatio:
|
NOTE:
|
This
equisment
has
beer
tested
and
found
to
comply
with
limits
tor
a
Ciass
B
digital
device,
pursuant
to
Par.
15
of
the
FCC
Rules.
These
limits
are
|
Ges:gred
to
provide
-easorabie
protection
againsinarmiui
interference
:n
a
resigential
installation.
This
equipment
may
cause
harmful
interference
|
io
racio
communicazons,
if
it is
nov
instalied
ana
used
in
eccoreance
with
the
instructions.
However,
there
Is
no
guarantee
that
interference
will
|
|
I
|
generate
or
use
radio
frequency
energy.
Changes
or
modifications
to
this
equ:pment
may
cause
harmful
interference
unless
Atma’
1s
made
notoceur.n
2
particwiar
instaliation.
if
ths
equipment
cose
cause
harmiu!
interference
to
raaio
or
television
reception,
wich
can
be
determined
it
off
and
on,
the
user
is
encourages
to
try
to
correct
the
interference
oy
one
or
More
of
the
following
measures
~-
-
Reorens
or
relocate
tne
receiving
antenra
— ~
increase
Ine
sedsretion
betweer
th:
UIPMent
anc
receiver
—
—
Connect
tre
equipment
into
an
outles
a
circuit
different
from
tft
to
which
the
receiver
is
connectec
— —
Consult
the
gealer
or
an
experienced
vadio/T¥
tecnnician
for
help
by
turning
the
equipme
KE-€94/
2060
(Eni
15

Other manuals for KE-894

2

This manual suits for next models

1

Other Kenwood Recording Equipment manuals
Kenwood KGC-6042 User manual

Kenwood

Kenwood KGC-6042 User manual

Kenwood Nexedge KTI-3 User manual

Kenwood

Kenwood Nexedge KTI-3 User manual

Kenwood GE-940 User manual

Kenwood

Kenwood GE-940 User manual

Kenwood KE-294 User manual

Kenwood

Kenwood KE-294 User manual

Kenwood GE-970 User manual

Kenwood

Kenwood GE-970 User manual

Kenwood MGR-A7-B User manual

Kenwood

Kenwood MGR-A7-B User manual

Kenwood DSP-100 User manual

Kenwood

Kenwood DSP-100 User manual

Kenwood KRF-V6200D User manual

Kenwood

Kenwood KRF-V6200D User manual

Kenwood MGR-A7 User manual

Kenwood

Kenwood MGR-A7 User manual
Kenwood TK-930 User manual

Kenwood

Kenwood TK-930 User manual

Kenwood KE-205 User manual

Kenwood

Kenwood KE-205 User manual

Kenwood KE-2060 User manual

Kenwood

Kenwood KE-2060 User manual

Kenwood MGR-A7 Instruction manual

Kenwood

Kenwood MGR-A7 Instruction manual

Kenwood KRK-18H User manual

Kenwood

Kenwood KRK-18H User manual

Kenwood GE-940 User manual

Kenwood

Kenwood GE-940 User manual

Kenwood KRK-11 User manual

Kenwood

Kenwood KRK-11 User manual

Kenwood GE-7030 User manual

Kenwood

Kenwood GE-7030 User manual

Kenwood KGC-9400 User manual

Kenwood

Kenwood KGC-9400 User manual

Kenwood DX-7 User manual

Kenwood

Kenwood DX-7 User manual

Kenwood MGR-E8 User manual

Kenwood

Kenwood MGR-E8 User manual

Kenwood KGC-6042A User manual

Kenwood

Kenwood KGC-6042A User manual

Kenwood KE-7090 User manual

Kenwood

Kenwood KE-7090 User manual

Kenwood GE-4030 User manual

Kenwood

Kenwood GE-4030 User manual

Kenwood 4042A - KGC Equalizer / Crossover User manual
Kenwood

Kenwood 4042A - KGC Equalizer / Crossover User manual

Popular Recording Equipment manuals by other brands

Power Dynamics PDX22 instruction manual

Power Dynamics

Power Dynamics PDX22 instruction manual

Vais Technology GSR Generation 2 owner's manual

Vais Technology

Vais Technology GSR Generation 2 owner's manual

HMS Networks Intesis INBACPAN001I000 quick start guide

HMS Networks

HMS Networks Intesis INBACPAN001I000 quick start guide

Befaco MIDI THING user manual

Befaco

Befaco MIDI THING user manual

Amperes ZS5062 instruction manual

Amperes

Amperes ZS5062 instruction manual

Akai ME20A Operator's manual

Akai

Akai ME20A Operator's manual

Nanoloop 2.3 user manual

Nanoloop

Nanoloop 2.3 user manual

Briteq VP-P37.5 Preliminary Setup Instructions

Briteq

Briteq VP-P37.5 Preliminary Setup Instructions

Aphex EXCITER owner's manual

Aphex

Aphex EXCITER owner's manual

Roland SDE-1000 Service notes

Roland

Roland SDE-1000 Service notes

Korg PA4X quick start guide

Korg

Korg PA4X quick start guide

Roland AR-3000 reference guide

Roland

Roland AR-3000 reference guide

MAM SQ16 owner's manual

MAM

MAM SQ16 owner's manual

Rolls DB225 - 7-09 manual

Rolls

Rolls DB225 - 7-09 manual

National Geographic NG3800 instruction manual

National Geographic

National Geographic NG3800 instruction manual

Extron electronics SSP 7.1 user guide

Extron electronics

Extron electronics SSP 7.1 user guide

Freeview T2400 Important information

Freeview

Freeview T2400 Important information

Linear LTC2937 manual

Linear

Linear LTC2937 manual

manuals.online logo
manuals.online logoBrands
  • About & Mission
  • Contact us
  • Privacy Policy
  • Terms and Conditions

Copyright 2025 Manuals.Online. All Rights Reserved.