Kenwood GE-90 User manual

STEREO
GRAPHIC
EQUALIZER
INSTRUCTION
MANUAL
@KENWOOD
—
oo
DEAR
AUDIO
FAN
The
purpose
of
this
manual
is
to
acquaint
you
with
the
operating
features
of
your
new
equalizer.
You
will
notice
that
in
every
detail
of
planing,
engineering,
styling,
operating
con-
venience,
and
adaptability,
we
have
sought
to
anticipate
your
needs
and
desires.
We
suggest
that
you
read
this
manual!
carefully.
Knowing
how
to
set
up
your
equalizer
to
the
best
advantage
will
enhance
your
{listening
pleasure
right
from
the
start.
You
will
also
become
aware
of
the
ease
with
which
you
can
adjust
your
equalizer
to
meet
your
special
requirements.
FOR
YOUR
RECORDS
Record
the
serial
number,
found
on
the
back
of
the
unit,
in
the
spaces
designated
on
the
warranty
card,
and
in
the
space
provided
below.
Refer
to
the
model
and
serial
numbers
whenever
you
call
upon
your
Kenwood
dealer
for
information
or
service
on
this
product.
Model
GE-90
Serial
number
AFTER
UNPACKING
After
unpacking,
we
recommend
that
you
inspect
the
unit
for
any
possible
shipping
damage.
If
your
unit
is
damaged
or
fails
to
operate,
notify
your
dealer
immediately.
If
your
unit
was
shipped
to
you
directly,
notify
the
shipping
company
without
delay.
Only
the
consignee
(the
person
or
company
receiving
the
unit)
can
file
a
claim
against
the
carrier
for
ship-
ping
damage.
We
recommend
that
you
retain
the
original
carton
and
packing
materiais
to
prevent
any
damage
should
you
transport
or
ship
your
unit
in
the
future.
INSTALLATION
PRECAUTIONS
a)
Avoid
locations
subject
to
direct
sunlight.
b}
Avoid
high
or
low
temperature
extremes.
c}
Keep
the
unit
away
from
heat
radiating
sources.
d)
Choose
a
location
that
is
relatively
free
of
vibration
or
ex-
cessive
dust.
e)
Make
sure
power
is
off
before
making
any
system
ccnnec-
tions.
SAFETY
PRECAUTIONS
CLEANING
Do
not
use
volatile
solvents
such
as
alcohol,
paint
thinner,
gasoline,
benzine,
etc.
to
clean
the
cabinet.
Use
a
silicone
cloth
or
a
clean
dry
cloth.
SERVICE
OR
MODIFICATIONS
Do
not
remove
the
cabinet
or
touch
internal
parts.
Refer
all
service
to
qualified
service
personnel.
Unauthorized
modifications
can
result
in
a
dangerous
shock
hazard
and
can
void
the
warranty.
IMPORTANT!
U.S.A.
AND
CANADA
Units
shipped
to
the
U.S.A.
and
Canada
are
design-
ed
for
operation
on
120
volts
AC
only.
These
units
are
not
equipped
with
an
AC
Voltage
Selector
switch
and
the
discussion
of
such
a
switch
that
follows
should
be
disregarded.
ALL
OTHER
COUNTRIES
Units
shipped
to
countries
other
than
the
U.S.A.
and
Canada
are
equipped
with
an
AC
Voltage
Selector
switch
on
the
rear
panel.
Refer
to
the
following
paragraph
for
the
proper
setting
|
of
this
switch.
AC
VOLTAGE
SELECTION
This
unit
operates
on
110-120
volts
or
220-240
voits
AC.The
AC
Voltage
Selector
Switch
on
the
rear
panel
is
set
to
the
voltage
that
prevails
in
the
area
to
which
the
unit
is
ship-
ped.
Before
connecting
the
power
cord
to
your
AC
outlet,
make
sure
that
the
setting
position
of
this
switch
matches
your
line
voltage.
If
not,
it
must
be
set
to
your
voltage
in
ac-
cordance
with
the
following
direction.
Note:
Our
warranty
does
not
cover
damage
caused
by
excessive
line
voltage
due
to
improper
setting
of
the
AC
Voltage
Selector
Switch.
110-120V~
<
»
220-240V~
110-1
20V~
<m
220-240V~
Switch
lever
met)
This
shows
switch
lever
is
locked
in
110-120V~position.
This
shows
switch
lever
is
locked
in
220-240V~position.
Move
switch
lever
to
match
your
line
voltage
with
a
small
screw
driver
or
other
pointed
tool.
AC
VOLTAGE
SELECTOR
SWITCH
WARNING:
TO
PREVENT
FIRE
OR
SHOCK
HAZARD,
DO
NOT
EXPOSE
THIS
APPLIANCE
TO
RAIN
OR
MOISTURE.
PRINTED
IN
JAPAN
B50-3354-00
(KPUMHUEX)
(T}
567890N/152
D12345/252
67890N:253

SYSTEM
CONNECTIONS
SPEAKER
SYSTEM
Sd
TURNTABLE
TUNER
GE-90
REAR
PANEL
TO
AC
OUTLET
TAPE
DECK
Precautions
1.
Each
connecting
cord
must
be
connected
securely
to
the
corresponding
terminals
(R
to
R
and
L
to
L).
Poor
connec-
tion
can
result
in
noise.
2.
Before
connecting
or
disconnecting
any
cord,
be
sure
to
turn
off
the
power
switches
of
the
GE-90
and
integrated
amplifier.
3.
Do
not
bind
the
input/output
cords
together
with
the
power
cord
and
speaker
cord.
Do
not
extend
the
input/out-
put
cords
unnecessarily
to
avoid
the
possibility
of
noise
or
deterioration
of
tone
quality.
GE-90
2

x
hn
CONTROLS
AND
INDICATORS
@
Power
Switch
@
Left
Channel
Equalizer
Controls
@
Right
Channel!
Equalizer
Controls
Flat
output
is
obtained
when
the red
LED
indicators
are
in
the
center
positions.
Tone
quality
is
adjusted
by
changing
the
out-
put
levels
of
the
separate
frequency
ranges
upward
or
downward
by
up
to
10
dB.
The
output
levels
are
adjustable
both
upwards
and
downwards
in
5
steps
of
2
dB
each.
Upward
movement:
Press
the
upper
button.
The
output
level
is
in-
creased
one
step
each
time
the
button
is
press-
ed.
Downward
movement:
Press
the
lower
button.
The
output
level
is
reduced
one
step
each
time
the
button
is
press-
ed.
Operation
is
the
same
for
both
the
right
and
left
channels.
Increasing
output
at
this
frequency
will
boost
bass
sound,
such
as
from
a
pipe
organ
or
contra-
bass,
to
provide
a
sense
of
weight
and
stability.
Decreasing
output
at
this
frequency
will
eliminate
hazy
bass
tones
to
produce
clear
sounds.
This
control
is
used
to
adjust
the
level
of
low
fre-
quency
signals.
Moving
the
control
in
upward
direction
will
help
to
increase
bass
tones
from
small
size
speakers.
This
control
is
mainly
used
to
adjust
level
of
vocal
sounds.
Move
the
control
up
and
down
to
obtain
suitable
vocal
sounds.
The
strength
or
weakness
of
a
sound
is
promi-
nent
at
this
frequency.
Increasing
output
at
this
frequency
will
effec-
tively
enhance
musical
presence.
This
frequency
is
the
most
striking
part
of
the
sound
to
listeners.
Increasing
output
at
this
fre-
quency
enhances
the
brightness,
brilliance,
crispness,
etc.
of
wind
instruments.
60
Hz:
160
Hz:
400
Hz:
1
kHz:
2.5
kHz:
OPERATING
PROCEDURE
1.
Depress
the
power
switch
to
turn
on
the
power.
2.
Set
the
amplifier
TAPE
MONITOR
switch
to
‘‘TAPE’’
or
“ON”.
3.
To
listen
to
tape,
set
the
Tape
Monitor
switch
@
to
TAPE.
To
listen
to
other
program
sources
(turntable,
FM,
etc.),
set
the
switch
to
SOURCE.
13)
0090
@
6
kHz:
Effective
for
controlling
the
brightness
of
a
sound.
Increasing
output
at
this
frequency
will
help
to
enhance
the
naturalness
of
sounds
such
as
pro-
duced
by
the
strings
of
violins,
16
kHz:
This
control
adjusts
very
high
frequency
sounds
such
as
from
cymbals.
To
eliminate
tape
hiss
noise,
move
the
control
downward.
©
Tape
Monitor
Switch
TAPE:
To
playback
a
tape
deck
connected
to
the
amplifier
or
to
monitor
the
sounds
being
recorded.
SOURCE:
—
To
listen
to
program
sources
(FM/AM,
turntable,
microphone,
etc.)
connected
to
the
amplifier.
@®
Equalizer
Switch
Turn
this
switch
to
ON
and
the
frequency
characteristic
will
be
modified
by
passing
through
the
graphic
equalizer.
In
the
OFF
position,
the
frequency
characteristic
remains
unchang-
ed.
@
Equalizer
Recording
Switch
Depress
this
switch
and
equalizer
switch®
to
ON;
signals
to
be
recorded
on
tape
will
allow
equalized.
If
you
wish
to
record
non-equalized
signals
with
the
equalizer
switch
in
the
ON
position,
turn
the
equalizer
recording
switch
to
OFF.
This
will
allow
you
to
hear
the
equalized
signals
while
recording
non-
equalized
signals.
@
Attenuator
Adjustment
range:
O
to
—
20
dB
{0
dB
in
normal
use).
This
control
supplements
the
equalizer
by
acting
to
adjust
the
out-
put
level.
@
Power
Indicator
Lights
when
the
power
switch
is
turned
on.
©
Equalizer
Recording
Indicator
Lights
when
switch@
is
set
for
equalized
recording.
4.
Set
the
EQUALIZER
switch
@
to
ON
and
adjust
the
equalizer
controls
to
suit
your
listening
preference.
5.
To
record
equalized
programs
on
tape,
follow
the
pro-
cedures
noted
in
the
above
items
1,
2,
3
and
4,
then
set
the
EQUALIZER
REC
switch
@
to
ON.
If
it
is
desired
to
record
non-equalized
programs,
simply
set
the
EQUALIZER
REC
switch
@
to
OFF.
GE-90

SAFETY
INSTRUCTIONS
1.
Read
Instructions
—
All
the
safety
and
operating
in-
9.
Power
Cord
Protection
—
Power
supply
cords
should
structions
should
be
read
before
the
appliance
is
be
routed
so
that
they
are
not
likely
to
be
walked
on
or
operated pinched
by
items
placed
upon
or
against
them,
paying
particular
attention
to
cords
at
plugs,
convenience
2.
Retain
Instructions
—
The
safety
and
operating
in-
receptacles,
and
the
point
where
they
exit
from
the
ap-
structions
should
be
retained
for
future
reference.
pliance.
sh
ales
es
3.
Heed
Warnings
—
Al!
warnings
on
the
appliance
and
in
10.
Cleaning
—
The
appliance
should
be
cleaned
only
as
the
operating
instructions
should
be
adhered
to.
recommended
by
the
manufacturer.
4.
Follow
Instructions
—
All
operating
and
use
instruc-
11.
Nonuse
Periods
—
The
power
cord
of
the
appliance
tions
should
be
followed.
should
be
unplugged
from
the
outlet
when
left
unused
for
a
long
period
of
time.
5,
Water
and
Moisture
—
The
appliance
should
not
be
used
near
water
—
for
example,
near
a
bathtub,
12.
Object
and
Liquid
Entry
—
Care
should
be
taken
so
that
washbowl,
kitchen
sink,
laundry
tub,
in
a
wet
base-
objetcts
do
not
fall
and
liquids
are
not
spilled
into
the
ment,
or
near
a
swimming
pool,
etc.
enclosure
through
openings.
6.
Ventilation
—
The
appliance
should
be
situated
so
that
13.
Damage
Requiring
Service
—
The
appliance
should
be
its
location
or
position
does
not
interfere
with
its
pro-
serviced
by
qualified
service
personnel
when:
per
ventilation.
For
example,
the
appliance
should
not
A.
The
power
supply
cord
or
the
plug
has
been
damag-
be
situated
on
a
bed,
sofa,
rug,
or
similar
surface
that
ed;
or
may
block
the
ventilation
opennings;
or,
placed
in
a
B.
Objects
have
fallen,
or
liquid
has
been
spilled
into
built-in
installation,
such
as
a
bookcase
or
cabinet
that
the
appliance;
or
may
impede
the
flow
of
air
through
the
ventilation
C.
The
appliance
has
been
exposed
to
rain;
or
openings.
D.
The
appliance
does
not
appear
to
operate
normally
or
exhibits
a
marked
change
in
performance;
or
7.
Heat
—
The
appliance
should
be
situated
away
from
E.
The
appliance
has
been
dropped,
or
the
enclosure
heat
sources
such
as
radiators,
heat
registers,
stoves
damaged.
or
other
appliances
(including
amplifiers)
that
produce
heat.
14.
Servicing
—
The
user
should
not
attempt
to
service
the
appliance
beyond
that
described
in
the
operating
in-
8.
Power
Sources
—
The
appliance
should
be
connected
structions.
All
other
servicing
should
be
referred
to
to
a
power
supply
only
of
the
type
described
in
the
qualified
service
personnel.
operating
instructions
or
as
marked
on
the
appliance.
SPECIFICATIONS
Equalizer
characteristic
Variable
range
..........0..ceceeeee
even
er
eeeeeteneeeares
+10
dB
{Ll
&
R
independently
adjustable)
2
dB
Step
Center
frequencies
.............:.ccceeeeeeeceeeereeeees
60
Hz,
160
Hz,
400
Hz,
1
kHz,
2.5
kHz,
6
kHz,
16
kHz
AtteEMUatiOn
........cccccccecneneeeneneeeeeeeeeneneaeneeeeeenes
O~
—20
dB
at
1
kHz
Frequency
reSPONSe
...........ccececeeeeeeceveeeeeeeereres
10
Hz~
60
kHz
+0
GB,
—1
dB
Harmonic
distortion............
agian
aausdausaeswagewsseee
Less
than
0.006%
(20
Hz~
20
kHz,
all
controis
flat,
output
1
V)
Maximum
output
.................cccscscsseeeeeeeeeeeeeee
eee
5
V
(1
kHz,
THD
0.01%,
R,
47
kohms)
SIN
VaUO
sovcced
ec
cnsecivdee
res
io
anesageceratiaearetanweiesscacas
110
dB
(Short-circuited
IHF-A
network)
Input
impedance
...............0.cscesee
esse
sececneneeeeeenee
47
kohms
Gan
sss
ch
ois
ciyietecsoses
caddis
het
ceastadeaciceeen
ce
seseawe
eee
O
dB+1
dB
Power
CONSUINPTION
..........:.ccceeceeeeeeeeeene
nena
teens
0.06
A
(UL,
CSA}
7
W
(IEC)
DiMeNsiONS............-..cceceeeen
cece
ee
neneneceeeeeeceaeneees
440(W)
x
5O(H)
x
148(D)
mm
Weighitsscccessiceveucctec.exsloeenstihedteni
dvastes
veces
es
2.2
kg
{net),
2.8
kg
(gross)
Note:
-
Kenwood
follows
a
policy
of
continuous
advancements
in
development.
For
this
reason
specifications
may
be
changed
without
notice.
GE-90
Other Kenwood Recording Equipment manuals

Kenwood
Kenwood KE-205 User manual

Kenwood
Kenwood KE-7090 User manual

Kenwood
Kenwood TK-930 User manual

Kenwood
Kenwood KE-2060 User manual

Kenwood
Kenwood GE-560 User manual

Kenwood
Kenwood MGR-A7 User manual

Kenwood
Kenwood KRF-V6200D User manual

Kenwood
Kenwood KE-894 User manual

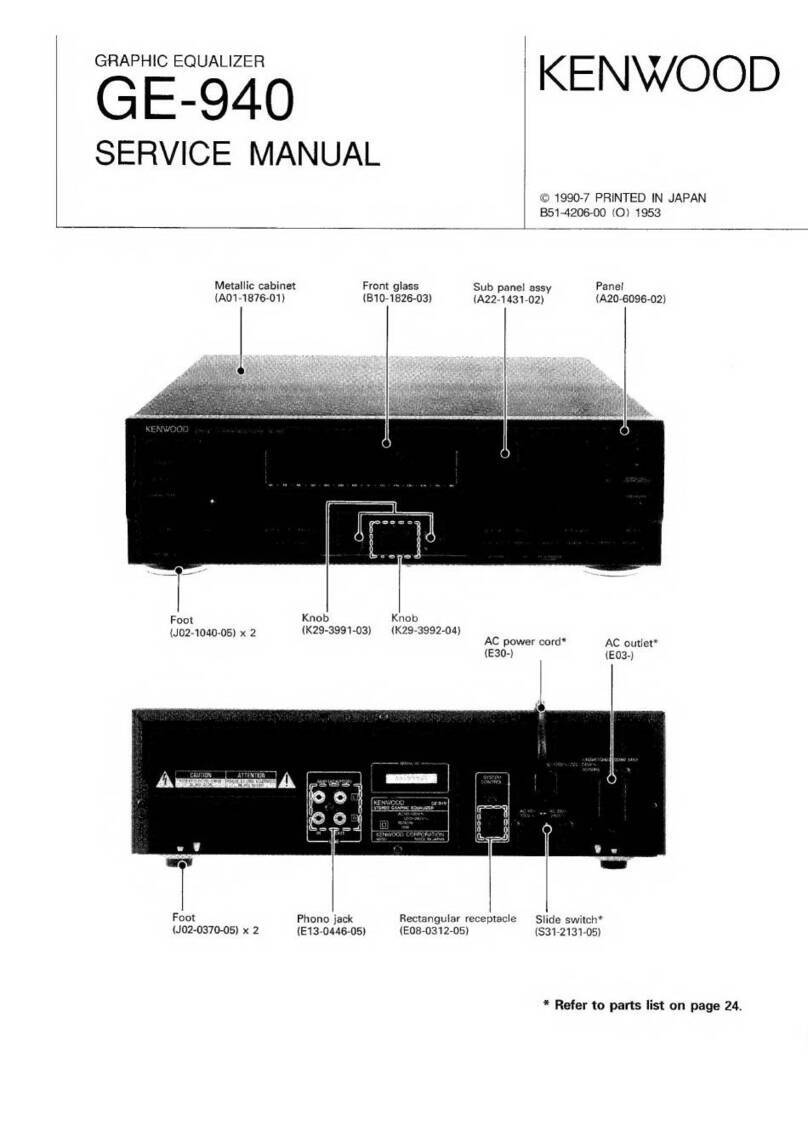
Kenwood
Kenwood GE-940 User manual

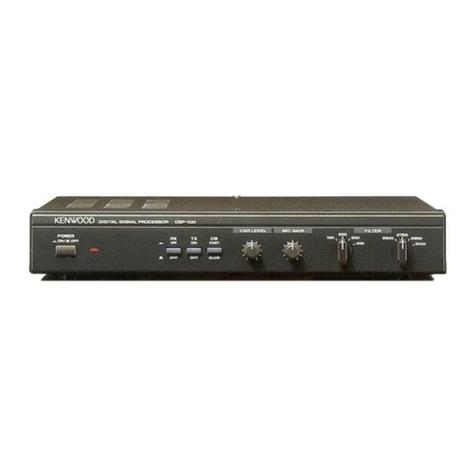
Kenwood
Kenwood DSP-100 User manual

Kenwood
Kenwood Nexedge KTI-3 User manual

Kenwood
Kenwood GE-770 User manual

Kenwood
Kenwood GE-9X User manual

Kenwood
Kenwood KRK-18H User manual

Kenwood
Kenwood MGR-A7 Instruction manual

Kenwood
Kenwood GE-970 User manual

Kenwood
Kenwood KOS-V1000 User manual

Kenwood
Kenwood KGC-6042A User manual

Kenwood
Kenwood Nexedge KTI-3 User manual

Kenwood
Kenwood GE-7030 User manual