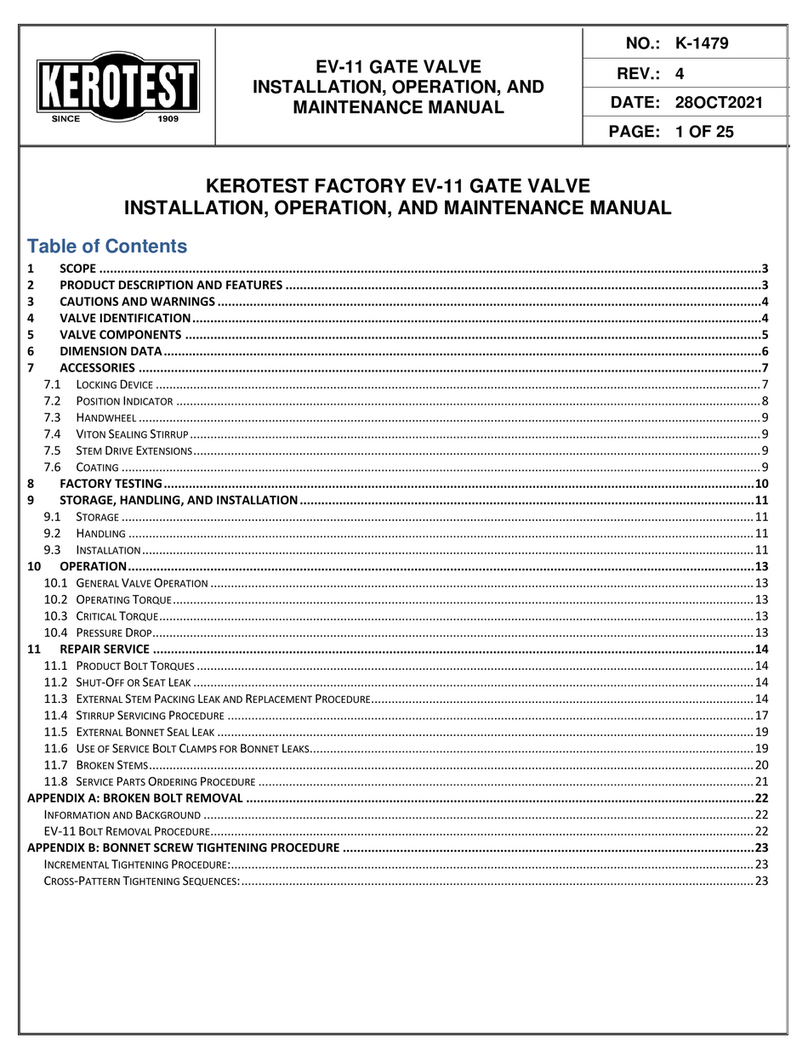
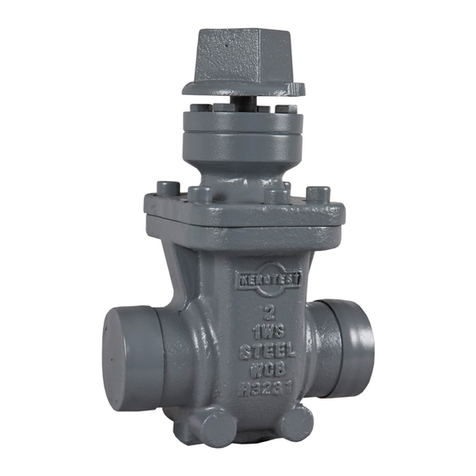
Kerotest MODEL-1 User manual

TITLE: NO.:
KEROTEST MODEL-1 REV.: 10
GATE VALVE DATE: 7/12/07
OPERATIONS MANUAL PAGE: 1 OF 35
This report is the property of Kerotest Manufacturing Corp. 5500 Second Avenue, Pittsburgh, PA 15207 and may not be
copied by any means without the expressed written consent of Kerotest. It is intended for the sole purpose of helping
Kerotest customers evaluate Kerotest products and may not be released to any third party or otherwise used in any
manner injurious to the interests of Kerotest.
KEROTEST MANUFACTURING CORP.
5500 SECOND AVENUE
PITTSBURGH, PA 15207
TELEPHONE: 412-521-7766
FAX: 412-521-7853
KEROTEST MODEL-1 GATE VALVE
OPERATIONS MANUAL
DATE OF ORIGINAL ISSUE: DECEMBER 15, 1988
WRITTEN BY:
RICHARD ADAMS
APPROVED BY:
DENNIS J. ZOLKOS
Q.A. APPROVED:
JULIAN BERARDUCCI

TITLE: NO.:
KEROTEST MODEL-1 REV.: 10
GATE VALVE DATE: 7/12/07
OPERATIONS MANUAL PAGE: 2 OF 35
This report is the property of Kerotest Manufacturing Corp. 5500 Second Avenue, Pittsburgh, PA 15207 and may not be
copied by any means without the expressed written consent of Kerotest. It is intended for the sole purpose of helping
Kerotest customers evaluate Kerotest products and may not be released to any third party or otherwise used in any
manner injurious to the interests of Kerotest.
REVISION SHEET
REVISION
DATE
DESCRIPTION OF REVISION
1
11/28/90
2
09/04/91
3
07/16/93
4
03/28/96
5
05/30/97
Added Bonnet Leak Repair, Attachment 2
6
11/21/97
Added Table 1 and reference to it and revised
Attachment 2
7
03/15/99
Retyped. Made various editorial changes such as
deleting page number references. Revised packing
temperature limitations under body/wedge seating.
Revised 1" and 1-1/4" sizes overtorque to failure.
8
11/17/99
Revised Bonnet Leak Repair Procedure, Attachment 2
9
05/22/01
Revised Bonnet Leak Repair Procedure, Attachment 2
10
07/12/07
Retyped in its entirety

TITLE: NO.:
KEROTEST MODEL-1 REV.: 10
GATE VALVE DATE: 7/12/07
OPERATIONS MANUAL PAGE: 3 OF 35
This report is the property of Kerotest Manufacturing Corp. 5500 Second Avenue, Pittsburgh, PA 15207 and may not be
copied by any means without the expressed written consent of Kerotest. It is intended for the sole purpose of helping
Kerotest customers evaluate Kerotest products and may not be released to any third party or otherwise used in any
manner injurious to the interests of Kerotest.
INTRODUCTION
The Kerotest Model-1 design employs the following features. These include:
•Maintenance Free
•No Gland Tightening
•No Lubrication (during cycling)
•Low Operating Torque
•Directional Solidification Weld Ends
•Patented Packing – No Environmental Leakage
•Field Repairable
The intent of this manual is to acquaint our customers with installation procedures and repair
techniques for Model-1 Gate valves.
Kerotest stands ready to service our valves no matter where the location. Technical personnel
or our field representatives are ready to service you on very short notice.

TITLE: NO.:
KEROTEST MODEL-1 REV.: 10
GATE VALVE DATE: 7/12/07
OPERATIONS MANUAL PAGE: 4 OF 35
This report is the property of Kerotest Manufacturing Corp. 5500 Second Avenue, Pittsburgh, PA 15207 and may not be
copied by any means without the expressed written consent of Kerotest. It is intended for the sole purpose of helping
Kerotest customers evaluate Kerotest products and may not be released to any third party or otherwise used in any
manner injurious to the interests of Kerotest.
VALVE COMPONENTS

TITLE: NO.:
KEROTEST MODEL-1 REV.: 10
GATE VALVE DATE: 7/12/07
OPERATIONS MANUAL PAGE: 5 OF 35
This report is the property of Kerotest Manufacturing Corp. 5500 Second Avenue, Pittsburgh, PA 15207 and may not be
copied by any means without the expressed written consent of Kerotest. It is intended for the sole purpose of helping
Kerotest customers evaluate Kerotest products and may not be released to any third party or otherwise used in any
manner injurious to the interests of Kerotest.

TITLE: NO.:
KEROTEST MODEL-1 REV.: 10
GATE VALVE DATE: 7/12/07
OPERATIONS MANUAL PAGE: 6 OF 35
This report is the property of Kerotest Manufacturing Corp. 5500 Second Avenue, Pittsburgh, PA 15207 and may not be
copied by any means without the expressed written consent of Kerotest. It is intended for the sole purpose of helping
Kerotest customers evaluate Kerotest products and may not be released to any third party or otherwise used in any
manner injurious to the interests of Kerotest.
TESTING
TO BE CERTAIN THAT ALL VALVES SHIPPED FROM THE FACTORY ARE BUBBLE
TIGHT, THEY ARE SUBJECTED TO THE FOLLOWING TESTS.
HYDROSTATIC SHELL TEST
SIZE
285 MOP
500 WOG
740 MOP
TIME
MINUTES
PRESSURE
(PSIG)
TIME
MINUTES
PRESSURE
(PSIG)
TIME
MINUTES
PRESSURE
(PSIG)
1" THRU 4"
2
450
2
875
2
1125
6" THRU 8"
5
450
5
875
5
1125
10"
5
450
NA
NA
5
1125
12" AND 16"
15
450
NA
NA
15
1125
HYDROSTATIC SEAT TEST
SIZE
285 MOP
500 WOG
740 MOP
TIME
MINUTES
PRESSURE
(PSIG)
TIME
MINUTES
PRESSURE
(PSIG)
TIME
MINUTES
PRESSURE
(PSIG)
2" THRU 4"
2
315
2
550
2
815
6" THRU 10"
5
315
**5
550
5
815
12" AND 16"
10
315
NA
NA
10
815
*TIME LISTED PER EACH SIDE
**10" NOT APPLICABLE
AIR SHELL TEST
SIZE
285 MOP
500 WOG
740 MOP
TIME
MINUTES
PRESSURE
(PSIG)
TIME
MINUTES
PRESSURE
(PSIG)
TIME
MINUTES
PRESSURE
(PSIG)
1" THRU 4"
2
150
2
150
2
150
6" THRU 10"
5
150
5
150
5
150
12" AND 16"
10
150
10
150
10
150
AIR SEAT TEST
SIZE
285 MOP
500 WOG
740 MOP
TIME
SECONDS
PRESSURE
(PSIG)
TIME
SECONDS
PRESSURE
(PSIG)
TIME
SECONDS
PRESSURE
(PSIG)
1" TO 8"
30
80 TO 100
30
80 TO 100
30
80 TO 100
10",12",16"
60
80 TO 100
60
80 TO 100
60
80 TO 100
*TIME LISTED PER EACH SIDE
THE ABOVE TESTS EQUAL OR EXCEED THOSE VALVE TESTS REQUIRED BY
MSS SP-70 AND API 6D
NOTE: VALVES BUILT BEFORE CHANGE TO FEDERAL CODE IN JULY 2006 WERE
RATED AS FOLLOWS:
CLASS 150 – 275 MOP
CLASS 300 – 720 MOP

TITLE: NO.:
KEROTEST MODEL-1 REV.: 10
GATE VALVE DATE: 7/12/07
OPERATIONS MANUAL PAGE: 7 OF 35
This report is the property of Kerotest Manufacturing Corp. 5500 Second Avenue, Pittsburgh, PA 15207 and may not be
copied by any means without the expressed written consent of Kerotest. It is intended for the sole purpose of helping
Kerotest customers evaluate Kerotest products and may not be released to any third party or otherwise used in any
manner injurious to the interests of Kerotest.
VALVE INSTALLATION
General Instructions
•Valves are of the wedge gate design and can be installed with either end as the inlet
side
•Valves should be installed with the wedge in the closed position
Screwed End Valves
•Valve ends have pipe threads machined per ANSI B2.1
•Apply a suitable threading compound to the threads on the pipe. The threading
compound should be applied sparingly.
•The wrench used for installing these valves should be applied to the end of the valve
next to the pipe to which it is being connected
Socket Weld End Valves
•Valve ends are machined per ANSI B16.11
•"Note" in order that the valve seats are not affected during the welding operation, the
wedge should be in the closed position
•Valves should be installed using either the electric arc or oxy-acetylene welding
methods by welders and welding procedures qualified under Section IX of the ASME
Boiler and Pressure Vessel Code or an equivalent requirement
oValve bodies are carbon steel (ASTM A216 Gr. WCB). Type 7018 Welding Rod
is suggested for welding these (WCB) valves in the pipeline.
Flanged End Valves
•End flanged dimensions conform to ANSI B16.5
•Standard end flange facing is 1/16" raised face with phonographic finish
•Bolting and gasketing practice conforming to ANSI B16.5 is suggested

TITLE: NO.:
KEROTEST MODEL-1 REV.: 10
GATE VALVE DATE: 7/12/07
OPERATIONS MANUAL PAGE: 8 OF 35
This report is the property of Kerotest Manufacturing Corp. 5500 Second Avenue, Pittsburgh, PA 15207 and may not be
copied by any means without the expressed written consent of Kerotest. It is intended for the sole purpose of helping
Kerotest customers evaluate Kerotest products and may not be released to any third party or otherwise used in any
manner injurious to the interests of Kerotest.
•End flange bolts should not be fastened in consecutive order. Each one tightened
should be 180° opposite the previous one (see sketch below). Two passes should be
made. Once pass for half tightness and final pass for full tightness.
Butt Weld End Valves
•Valve ends are machined per ANSI B16.25
•"Note" in order that the valve seats are not affected during the welding operation, the
wedge should be in the closed position
•Valves should be installed using either the electric arc or oxy-acetylene welding
methods by welders and welding procedures qualified under Section IX of the ASME
Boiler and Pressure Vessel Code or an equivalent requirement
•Valve bodies are carbon steel (ASTM A216, Gr. WCB). Type 7018 Welding Rod is
suggested for welding these valves in the pipeline.
Butt Weld End X Flange End Valves
•Refer to butt weld end valves and flanged end valve for installation

TITLE: NO.:
KEROTEST MODEL-1 REV.: 10
GATE VALVE DATE: 7/12/07
OPERATIONS MANUAL PAGE: 9 OF 35
This report is the property of Kerotest Manufacturing Corp. 5500 Second Avenue, Pittsburgh, PA 15207 and may not be
copied by any means without the expressed written consent of Kerotest. It is intended for the sole purpose of helping
Kerotest customers evaluate Kerotest products and may not be released to any third party or otherwise used in any
manner injurious to the interests of Kerotest.
TROUBLE SHOOTING
VALVE SHUT-OFF
Throttling Valve
If valves are in the open position in a pipeline for a period of time, there is a chance that
sediment or dirt may collect inside the valve. When these valves are to be closed, it should be
done slowly. The valve should not be closed completely by "throttled" slowly. The valve
should not be closed completely but "throttled" for a short time in order that the turbulence
created will flush away any sediment or dirt that might have settled in the valve.
In the event of an emergency, the above method need not be followed, as the valve should be
closed as quickly as possible.
Body and Wedge Seating
When complete shut-off is not obtained, the valve can be reseated in the following manner.
Drive wedge into seats with moderate effort, turn back one (1) or two (2) complete turns
and again drive into seats with moderate effort. Continue this procedure until shut-off is
obtained.
Repacking Valve
Possible causes for a malfunction of the packing seal could be worn packing or utilizing valve
outside of packing temperature limitations.
Temperature limits of valve packing are -30°F to 200°F
Repack valve as described in the "Primary Repacking Procedure", "Secondary
Repacking Procedure", or "Zero Pressure Repacking Procedure" (as applicable) which
follow both Early Design Valves and Late Design Valves with stem weather seal.

TITLE: NO.:
KEROTEST MODEL-1 REV.: 10
GATE VALVE DATE: 7/12/07
OPERATIONS MANUAL PAGE: 10 OF 35
This report is the property of Kerotest Manufacturing Corp. 5500 Second Avenue, Pittsburgh, PA 15207 and may not be
copied by any means without the expressed written consent of Kerotest. It is intended for the sole purpose of helping
Kerotest customers evaluate Kerotest products and may not be released to any third party or otherwise used in any
manner injurious to the interests of Kerotest.
PRIMARY REPACKING PROCEDURE – EARLY DESIGN BEFORE (1988)
CONDITION 1 – VALVE UNDER PRESSURE
(REFER TO DRAWING ON PAGE 12)
1. Open valve fully. Backseat to form a seal between lower thrust washer (12) and stem
shoulder (11).
2. Remove nut (1), and operating square (2).
3. Remove two of the cap screws (3). Replace with two all thread studs (size and length
recommended in table above). Thread all thread studs into cover until they bottom.
Install a nut on each stud and tighten. Remove all remaining cap screws (3).
4. Slowly and evenly loosen the two nuts on the all thread studs, watching that the studs
do not unthread from cover as the nuts are turned. (If gland rises as the nuts are
loosened, backseat seal has not been obtained. Retighten nuts, replace and retighten
missing bolts, and then reattempt backseat seal.) Continue to loosen nuts until the top
of the nuts are flush with the top of the safety studs.
5. Rotate stem slowly with open end wrench on stem square (10) until pressure pops
packing. Backseat immediately.
Caution: Grip end of wrench and keep fingers clear. Pressure may slam gland against
wrench when packing pops.
6. If packing does not pop out, replace gland, retighten nuts on all thread studs, and
replace and tighten remaining cap screws (3). Close valve tightly and turn to Secondary
Procedure for early design and continue with fourth step.
7. Remove nuts and gland (4). Upper thrust washer (6) may remain in gland (4) or on
stem (10).
8. Remove top packing adapter (7), v-rings (8), and lower packing adapter (9).
9. Lubricate new parts with light oil and insert in packing chamber as follows: Lower
packing adapter (9), v-rings (8), and top packing adapter (7).
Note: A slight leak in the backseat seal can cause difficulty in replacing the v-rings; a
straightened paper clip or smooth wire can be used on the side of the v-rings to allow
pressure to vent until the adapter can be quickly inserted and the gland bolted down.

TITLE: NO.:
KEROTEST MODEL-1 REV.: 10
GATE VALVE DATE: 7/12/07
OPERATIONS MANUAL PAGE: 11 OF 35
This report is the property of Kerotest Manufacturing Corp. 5500 Second Avenue, Pittsburgh, PA 15207 and may not be
copied by any means without the expressed written consent of Kerotest. It is intended for the sole purpose of helping
Kerotest customers evaluate Kerotest products and may not be released to any third party or otherwise used in any
manner injurious to the interests of Kerotest.
PRIMARY REPACKING PROCEDURE – EARLY DESIGN BEFORE (1988)
CONDITION 1 – VALVE UNDER PRESSURE
10. Place upper thrust washer (6) on stem (10) if removed. Position gasket (5) and gland
(4) on cover. Insert cap screws (3) fully and tighten to torque shown in Table I. Place
operating square (2) on stem and then secure with nut (1).
Valve is ready for service.

TITLE: NO.:
KEROTEST MODEL-1 REV.: 10
GATE VALVE DATE: 7/12/07
OPERATIONS MANUAL PAGE: 12 OF 35
This report is the property of Kerotest Manufacturing Corp. 5500 Second Avenue, Pittsburgh, PA 15207 and may not be
copied by any means without the expressed written consent of Kerotest. It is intended for the sole purpose of helping
Kerotest customers evaluate Kerotest products and may not be released to any third party or otherwise used in any
manner injurious to the interests of Kerotest.
PRIMARY REPACKING PROCEDURE – EARLY DESIGN BEFORE (1988)
CONDITION 1 – VALVE UNDER PRESSURE
VALVE
ALL THREAD
STUD AND NUT SIZE
ALL THREAD
STUD LENGTH
1-1/4"
5/16 – 18 UNC
2
2" AND 3"
3/8 – 16 UNC
2-1/2
4", 6" AND 8"
3/8 – 16 UNC
3
10" AND 12"
1/2 – 13 UNC
4-1/4
16"
3/4 – 10 UNC
6-1/4

TITLE: NO.:
KEROTEST MODEL-1 REV.: 10
GATE VALVE DATE: 7/12/07
OPERATIONS MANUAL PAGE: 13 OF 35
This report is the property of Kerotest Manufacturing Corp. 5500 Second Avenue, Pittsburgh, PA 15207 and may not be
copied by any means without the expressed written consent of Kerotest. It is intended for the sole purpose of helping
Kerotest customers evaluate Kerotest products and may not be released to any third party or otherwise used in any
manner injurious to the interests of Kerotest.
SECONDARY REPACKING PROCEDURE – EARLY DESIGN (BEFORE 1988)
CONDITION 2
VALVE UNDER PRESSURE AND PRIMARY PROCEDURE WAS UNSUCCESSFUL
(REFER TO DRAWING ON PAGE 16)
1. Close valve tightly with wrench.
2. Remove nut (1) and operating square (2).
3. Before proceeding, remember: If the valve was closed under pressure, the pressure is
trapped in the body cavity. When the stem or packing is removed, this pressure will
bleed from the body. Therefore, this procedure is not recommended for pressures in
excess of 90 PSIG. To prevent unsafe conditions, the following steps must be followed.
4. Remove two of the cap screws (3). Replace with two all thread studs (size and length
recommended in table above). Thread all thread studs into cover until they bottom.
Install a nut on each stud and tighten. Remove all remaining cap screws (3).
4.1 Slowly and evenly loosen the two nuts on the all thread studs, watching that the
studs do not unthread from cover as the nuts are turned. If gland and packing
rise as nuts are loosened, continue to slowly loosen nuts until the trapped
pressure begins to bleed. (If the bleeding pressure does not diminish, successful
seat shut-off has not been obtained.)
Using the nuts on the studs, replace the packing and the gland. Reinstall the
remaining cap screws (3) and reattempt seat shut-off.
4.1.1 When trapped pressure has been reduced to zero, remove the two
nuts, and the gland (4). Upper thrust washer (6) may remain in gland
(4) or on stem (10), top packing adapter (7), v-rings (8), and lower
packing adapter (9).
4.1.2 Lubricate new parts with light oil and insert in packing chamber as
follows: Lower packing adapter (9), v-rings (8), and top packing
adapter (7).
4.1.3 Place upper thrust washer (6) on stem (10) if removed. Position
gasket (5) and gland (4) on cover. Insert cap screws (3) fully and
tighten. Place operating square (2) on stem, secure with nut (1).

TITLE: NO.:
KEROTEST MODEL-1 REV.: 10
GATE VALVE DATE: 7/12/07
OPERATIONS MANUAL PAGE: 14 OF 35
This report is the property of Kerotest Manufacturing Corp. 5500 Second Avenue, Pittsburgh, PA 15207 and may not be
copied by any means without the expressed written consent of Kerotest. It is intended for the sole purpose of helping
Kerotest customers evaluate Kerotest products and may not be released to any third party or otherwise used in any
manner injurious to the interests of Kerotest.
SECONDARY REPACKING PROCEDURE – EARLY DESIGN (BEFORE 1988)
CONDITION 2
VALVE UNDER PRESSURE AND PRIMARY PROCEDURE WAS UNSUCCESSFUL
4.2 If gland and packing do not rise as nuts are loosened, continue to loosen nuts
until the top of the nuts are flush with the top of the all thread studs. Slowly
rotate the stem (10) in the same direction as closing the valve until the trapped
pressure begins to bleed. (If the bleeding pressure does not diminish, successful
seat shut-off has not been obtained.) Rotate stem in the direction for opening
valve until it contacts lower thrust washer.
Caution: Be careful not to break gate seal or packing will be subject of full
pressure and gas flow.
Retighten nuts on all thread studs and reinstall cap screws (3) in gland.
Reattempt seat shut off. When trapped pressure has been reduced to zero,
remove the two nuts and then gland (4). Rotate stem (10) in the same direction
as closing the valve until it is free from the wedge. Withdraw stem from valve.
(Lower thrust washer (12) may remain in the cover or on the stem (10)).
4.2.1 Remove top packing adapter (7), v-rings (8), and lower packing
adapter (9).
4.2.2 Replace lower thrust washer (12) in cover (if removed).
4.2.3 Lubricate new parts with light oil and insert in packing chamber as
follows: Lower packing adapter (9), v-rings (8), and top packing
adapter (7).
4.2.4 Insert stem (10) in cover and rotate slowly by hand in the direction for
opening the valve. Continue rotation until stem shoulder (11) contacts
lower thrust washer (12).
Caution: Additional stem rotation will unseat the wedge resulting in
full gas pressure and flow.

TITLE: NO.:
KEROTEST MODEL-1 REV.: 10
GATE VALVE DATE: 7/12/07
OPERATIONS MANUAL PAGE: 15 OF 35
This report is the property of Kerotest Manufacturing Corp. 5500 Second Avenue, Pittsburgh, PA 15207 and may not be
copied by any means without the expressed written consent of Kerotest. It is intended for the sole purpose of helping
Kerotest customers evaluate Kerotest products and may not be released to any third party or otherwise used in any
manner injurious to the interests of Kerotest.
SECONDARY REPACKING PROCEDURE – EARLY DESIGN (BEFORE 1988)
CONDITION 2
VALVE UNDER PRESSURE AND PRIMARY PROCEDURE WAS UNSUCCESSFUL
4.2.5 Check if upper thrust washer (6) is in place. Position gasket (5) and
gland (4) on cover. Insert cap screws (3) fully and tighten to torque
shown in Table I. Place operating square (2) and then secure with nut
(1).
Valve is ready for service.

TITLE: NO.:
KEROTEST MODEL-1 REV.: 10
GATE VALVE DATE: 7/12/07
OPERATIONS MANUAL PAGE: 16 OF 35
This report is the property of Kerotest Manufacturing Corp. 5500 Second Avenue, Pittsburgh, PA 15207 and may not be
copied by any means without the expressed written consent of Kerotest. It is intended for the sole purpose of helping
Kerotest customers evaluate Kerotest products and may not be released to any third party or otherwise used in any
manner injurious to the interests of Kerotest.
SECONDARY REPACKING PROCEDURE – EARLY DESIGN (BEFORE 1988)
CONDITION 2
VALVE UNDER PRESSURE AND PRIMARY PROCEDURE WAS UNSUCCESSFUL
VALVE
ALL THREAD
STUD AND NUT SIZE
ALL THREAD
STUD LENGTH
1-1/4"
5/16 – 18 UNC
2
2" AND 3"
3/8 – 16 UNC
2-1/2
4", 6" AND 8"
3/8 – 16 UNC
3
10" AND 12"
1/2 – 13 UNC
4-1/4
16"
3/4 – 10 UNC
6-1/4

TITLE: NO.:
KEROTEST MODEL-1 REV.: 10
GATE VALVE DATE: 7/12/07
OPERATIONS MANUAL PAGE: 17 OF 35
This report is the property of Kerotest Manufacturing Corp. 5500 Second Avenue, Pittsburgh, PA 15207 and may not be
copied by any means without the expressed written consent of Kerotest. It is intended for the sole purpose of helping
Kerotest customers evaluate Kerotest products and may not be released to any third party or otherwise used in any
manner injurious to the interests of Kerotest.
ZERO PRESSURE REPACKING PROCEDURE – EARLY DESIGN (BEFORE 1988)
CONDITION 3 – VALVE UNDER ZERO PRESSURE
(REFER TO DRAWING ON PAGE 18)
1. Close valve tightly with wrench.
2. Remove nut (1) and operating square (2).
3. Remove all cap screws (3) and gland (4). (Upper thrust washer (6) may remain in gland
(4) or on stem (10).)
4. Rotate stem (10) in same direction as closing the valve until it is free from the wedge.
Withdraw stem from valve. (Lower thrust washer (12) may remain in the cover or on the
stem (10).)
5. Remove top packing adapter (7), v-rings (8), and lower packing adapter (9).
6. Replace lower thrust washer (12) in cover if removed.
7. Lubricate new parts with light oil and insert in packing chamber as follows: Lower
packing adapter (9), v-rings (8), and top packing adapter (7).
8. Insert stem (10) in cover and rotate slowly by hand in the direction for opening valve.
Continue rotation until stem shoulder (11) contact lower thrust washer (12).
9. Check if upper thrust washer (6) is in place. Position gasket (5) and gland (4) on cover.
Insert cap screws (3) fully and tighten. Place operating square (2) on stem and then
secure with nut (1).
Valve is ready for service.

TITLE: NO.:
KEROTEST MODEL-1 REV.: 10
GATE VALVE DATE: 7/12/07
OPERATIONS MANUAL PAGE: 18 OF 35
This report is the property of Kerotest Manufacturing Corp. 5500 Second Avenue, Pittsburgh, PA 15207 and may not be
copied by any means without the expressed written consent of Kerotest. It is intended for the sole purpose of helping
Kerotest customers evaluate Kerotest products and may not be released to any third party or otherwise used in any
manner injurious to the interests of Kerotest.
ZERO PRESSURE REPACKING PROCEDURE – EARLY DESIGN (BEFORE 1988)
CONDITION 3 – VALVE UNDER ZERO PRESSURE

TITLE: NO.:
KEROTEST MODEL-1 REV.: 10
GATE VALVE DATE: 7/12/07
OPERATIONS MANUAL PAGE: 19 OF 35
This report is the property of Kerotest Manufacturing Corp. 5500 Second Avenue, Pittsburgh, PA 15207 and may not be
copied by any means without the expressed written consent of Kerotest. It is intended for the sole purpose of helping
Kerotest customers evaluate Kerotest products and may not be released to any third party or otherwise used in any
manner injurious to the interests of Kerotest.
PRIMARY REPACKING PROCEDURE – LATEST DESIGN
WITH STEM WEATHER SEAL (AFTER 1987)
CONDITION 1 – VALVE UNDER PRESSURE
(REFER TO DRAWING ON PAGE 21)
1. Open valve fully. Backseat to form a seal between lower thrust washer (13) and stem
shoulder (12).
2. Remove nut (1), and operating square (2).
3. Remove two of the cap screws (3). Replace with two all thread studs (size and length
recommended in table above). Thread all thread studs into cover until they bottom.
Install a nut on each stud and tighten. Remove all remaining cap screws (3).
4. Slowly and evenly loosen the two nuts on the all thread studs, watching that the studs
do not unthread from cover as the nuts are turned. (If gland rises as the nuts are
loosened, backseat seal has not been obtained. Retighten nuts, replace and retighten
missing bolts, and then reattempt backseat seal.) Continue to loosen nuts until the top
of the nuts are flush with the top of the safety studs.
5. Rotate stem slowly with open end wrench on stem square (11) until pressure pops
packing. Backseat immediately.
Caution: Grip end of wrench and keep fingers clear. Pressure may slam gland against
wrench when packing pops.
6. If packing does not pop out, replace gland, retighten nuts on all thread studs, and
replace and tighten remaining cap screws (3). Close valve tightly and turn to Secondary
Procedure for latest design and continue with fourth step.
7. Remove nuts and gland (4). Upper thrust washer (7) may remain on gland (4) or on
stem (11). Remove weather seal o-ring (5).
8. Remove top packing adapter (8), v-rings (9), and lower packing adapter (10).
9. Lubricate new parts with light oil and insert in packing chamber as follows: Lower
packing adapter (10), v-rings (9), and top packing adapter (8).

TITLE: NO.:
KEROTEST MODEL-1 REV.: 10
GATE VALVE DATE: 7/12/07
OPERATIONS MANUAL PAGE: 20 OF 35
This report is the property of Kerotest Manufacturing Corp. 5500 Second Avenue, Pittsburgh, PA 15207 and may not be
copied by any means without the expressed written consent of Kerotest. It is intended for the sole purpose of helping
Kerotest customers evaluate Kerotest products and may not be released to any third party or otherwise used in any
manner injurious to the interests of Kerotest.
PRIMARY REPACKING PROCEDURE – LATEST DESIGN
WITH STEM WEATHER SEAL (AFTER 1987)
CONDITION 1 – VALVE UNDER PRESSURE
Note: A slight leak in the backseat seal can cause difficulty in replacing the v-rings; a
straightened paper clip or smooth wire can be used on the side of the v-rings to allow
pressure to vent until the adapter can be quickly inserted and the gland bolted down.
10. Place upper thrust washer (7) on stem (11) if removed. Install weather seal o-ring (5) in
stem groove. Position gasket (6) and gland, with weather seal lead-in chamfer side
down, on cover, being careful not to cut o-ring. Insert cap screws (3) fully and tighten to
torque shown in Table I. Place operating square (2) on stem and then secure with nut
(1).
Valve is ready for service.
Other manuals for MODEL-1
1
Table of contents
Other Kerotest Control Unit manuals
Popular Control Unit manuals by other brands
Inel
Inel ST-01R Instructions for installation and use
HEPER
HEPER D-LIGHT AFX 1 Installation & maintenance instructions
Pepperl+Fuchs
Pepperl+Fuchs ICA-8DIO4M1-G20-IO manual
M-system
M-system Mini-M M2ADS instruction manual
Siemens
Siemens SINAMICS G130 operating instructions

Infranor
Infranor XtrapulsCD1-pm user manual

Cypress
Cypress EZ-BT WICED CYBT-343026-01 Getting started
Daikin
Daikin Rotex RoCon G1 Installation and operation manual
SSS Siedle
SSS Siedle ELM 611-0 manual

Viessmann
Viessmann VITOTRONIC 100 operating instructions

Bürkert
Bürkert Type 2000 operating instructions
GEM
GEM 539 eSyDrive operating instructions
