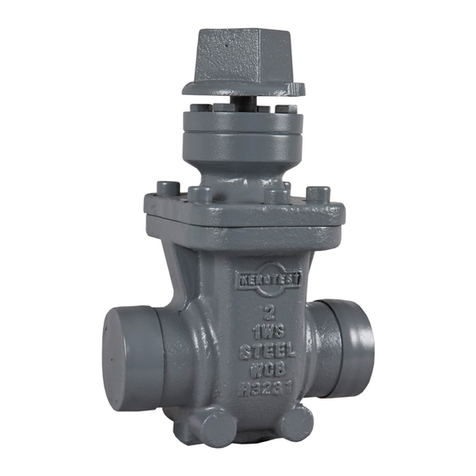
Kerotest EV-11 User manual

EV-11 GATE VALVE
INSTALLATION, OPERATION, AND
MAINTENANCE MANUAL
NO.:
K-1479
REV.:
4
DATE:
28OCT2021
PAGE:
1 OF 25
KEROTEST FACTORY EV-11 GATE VALVE
INSTALLATION, OPERATION, AND MAINTENANCE MANUAL
Table of Contents
1SCOPE .........................................................................................................................................................................................3
2PRODUCT DESCRIPTION AND FEATURES .....................................................................................................................................3
3CAUTIONS AND WARNINGS ........................................................................................................................................................4
4VALVE IDENTIFICATION...............................................................................................................................................................4
5VALVE COMPONENTS .................................................................................................................................................................5
6DIMENSION DATA.......................................................................................................................................................................6
7ACCESSORIES ..............................................................................................................................................................................7
7.1 LOCKING DEVICE .................................................................................................................................................................................7
7.2 POSITION INDICATOR ...........................................................................................................................................................................8
7.3 HANDWHEEL ......................................................................................................................................................................................9
7.4 VITON SEALING STIRRUP.......................................................................................................................................................................9
7.5 STEM DRIVE EXTENSIONS......................................................................................................................................................................9
7.6 COATING ...........................................................................................................................................................................................9
8FACTORY TESTING.....................................................................................................................................................................10
9STORAGE, HANDLING, AND INSTALLATION...............................................................................................................................11
9.1 STORAGE .........................................................................................................................................................................................11
9.2 HANDLING .......................................................................................................................................................................................11
9.3 INSTALLATION...................................................................................................................................................................................11
10 OPERATION...............................................................................................................................................................................13
10.1 GENERAL VALVE OPERATION ...............................................................................................................................................................13
10.2 OPERATING TORQUE..........................................................................................................................................................................13
10.3 CRITICAL TORQUE..............................................................................................................................................................................13
10.4 PRESSURE DROP................................................................................................................................................................................13
11 REPAIR SERVICE ........................................................................................................................................................................14
11.1 PRODUCT BOLT TORQUES ...................................................................................................................................................................14
11.2 SHUT-OFF OR SEAT LEAK ....................................................................................................................................................................14
11.3 EXTERNAL STEM PACKING LEAK AND REPLACEMENT PROCEDURE................................................................................................................14
11.4 STIRRUP SERVICING PROCEDURE ..........................................................................................................................................................17
11.5 EXTERNAL BONNET SEAL LEAK .............................................................................................................................................................19
11.6 USE OF SERVICE BOLT CLAMPS FOR BONNET LEAKS..................................................................................................................................19
11.7 BROKEN STEMS.................................................................................................................................................................................20
11.8 SERVICE PARTS ORDERING PROCEDURE .................................................................................................................................................21
APPENDIX A: BROKEN BOLT REMOVAL ..............................................................................................................................................22
INFORMATION AND BACKGROUND .................................................................................................................................................................22
EV-11 BOLT REMOVAL PROCEDURE...............................................................................................................................................................22
APPENDIX B: BONNET SCREW TIGHTENING PROCEDURE ...................................................................................................................23
INCREMENTAL TIGHTENING PROCEDURE:.........................................................................................................................................................23
CROSS-PATTERN TIGHTENING SEQUENCES:......................................................................................................................................................23

EV-11 GATE VALVE
INSTALLATION, OPERATION, AND
MAINTENANCE MANUAL
NO.:
K-1479
REV.:
4
DATE:
28OCT2021
PAGE:
2 OF 25
Table of Tables
Table 1: Material Specifications ...........................................................................................................................................................5
Table 2: Valve Dimensions and Data ....................................................................................................................................................6
Table 3: Locking Device Options...........................................................................................................................................................7
Table 4: Handwheel Options ................................................................................................................................................................9
Table 5: Operating Square Extension ...................................................................................................................................................9
Table 6: Minimum Production Test Parameters .................................................................................................................................10
Table 7: Valve Torque Values .............................................................................................................................................................13
Table 8: Pressure Drop and Cv............................................................................................................................................................13
Table 9: Assembly Torque Values.......................................................................................................................................................14
Table 10: Packing Repair Kit Part Numbers ........................................................................................................................................16
Table 11: Disc Segment and Stirrup Service Kit Part Numbers............................................................................................................17
Table 12: Bolt Replacement Support Clamps......................................................................................................................................19
Table 13: Bonnet Bolt, Stem, and Seal Part Numbers.........................................................................................................................20
Table 14: Bonnet Bolt Removal Chart.................................................................................................................................................22
Table 15: Cross-Pattern Tightening Sequences...................................................................................................................................23
Table of Figures
Figure 1: EV-11 Pressure-Temperature Chart .......................................................................................................................................4
Figure 2: Valve Components.................................................................................................................................................................5
Figure 3: Locking Device .......................................................................................................................................................................7
Figure 4: Position Indicator ..................................................................................................................................................................8
Figure 5: Bolt Torquing Pattern Examples ..........................................................................................................................................12
Figure 6: Stem Packing Diagram .........................................................................................................................................................15
Figure 7: Stirrup Servicing ..................................................................................................................................................................18
Figure 8: Support Clamp Installations.................................................................................................................................................19
Figure 9: Bonnet Broken Bolt Diagram ...............................................................................................................................................22
Figure 10: Example Pattern for 12-Bolt Tightening Sequence.............................................................................................................24

EV-11 GATE VALVE
INSTALLATION, OPERATION, AND
MAINTENANCE MANUAL
NO.:
K-1479
REV.:
4
DATE:
28OCT2021
PAGE:
3 OF 25
1 SCOPE
This installation, operation, and maintenance manual defines the procedures for proper use and
common repairs on the EV-11 line of soft seat gate valves made by Kerotest Manufacturing Corp.
This manual is only to be used by personnel familiar with this guide and operation of the EV-11.
2 PRODUCT DESCRIPTION AND FEATURES
Below are some of the features of the Kerotest EV-11 gate valves:
•Low maintenance
•No gland tightening
•No lubrication required
•Full opening and compatible for hot tapping
•Bubble tight shut-off
•Low operating torque
•Field repairable
•Soft and resilient elastomer seat
•No conventional seats to damage –a one-piece rubber seal surrounds the top and sides of
the gate
•Valve body has a smooth bottom with no cavity to accumulate debris
•Bidirectional installation and operation
The intent of this manual is to acquaint our customers with installation, operation, and
maintenance/service repair techniques for EV-11 Gate Valves. EV-11 Gate Valves are cast steel
valves with a rubber sealing seat used in natural/fuel gas distribution pipelines and are available in
NPS 2 through NPS 12, in ASME/ANSI Pressure Classes 150 and 300 and intermediate pressure
rating of 500 CWP maximum operating pressure (psi). The valve end connections are welded,
flanged, and weld-by-flange. Temperature limits of the valves are -20°F to 300°F for Viton®
1
seals
and -20°F to 200°F for Buna seals with allowable pressures as shown in Figure 1.
1
Viton®is a registered trademark of The Chemours Company

EV-11 GATE VALVE
INSTALLATION, OPERATION, AND
MAINTENANCE MANUAL
NO.:
K-1479
REV.:
4
DATE:
28OCT2021
PAGE:
4 OF 25
Figure 1: EV-11 Pressure-Temperature Chart
3 CAUTIONS AND WARNINGS
Within this document, you will see the following symbols.
•General Advisory Marking - for information or operational procedures, order of
operation, etc.
•Caution Marking –note designates an action or step that may result in personal injury
or death or equipment/property damage. Personnel performing activities should be
fully aware of the hazards and take necessary steps to prevent any injuries, damage,
or unsafe operating/repair conditions.
4 VALVE IDENTIFICATION
Each valve will have an identification nameplate attached with the following information:
•Manufacturing company
•ASME/ANSI pressure class, or intermediate pressure rating (such as 500 WOG or CWP
2
)
•Temperature and pressure ratings
•Body and stem materials
•Serial number
3
•Date of manufacture
•EV-11 (name of the product line)
2
Kerotest refers to valves marked 500 WOG (Water, Oil, Gas) and 500 CWP (Cold Working Pressure)
as equivalent terms. This rating indicates the maximum operating pressure in psi at temperatures up to
100°F.
3
Serialization marking on tags began September 2014. As of February 2018, the serial number is also
stamped directly on the body of the valve

EV-11 GATE VALVE
INSTALLATION, OPERATION, AND
MAINTENANCE MANUAL
NO.:
K-1479
REV.:
4
DATE:
28OCT2021
PAGE:
5 OF 25
5 VALVE COMPONENTS
Figure 2: Valve Components
Table 1: Material Specifications
Item
Part Name
Material
1
Body
Steel, ASTM A216, Grade WCB
2
Bonnet
Steel, ASTM A216, Grade WCB or Ductile Iron
3
Disc Segments
Ductile Iron, ASTM A536
4
Seal Member (Stirrup)
Buna-N or Viton
5
Spreader
Ductile Iron, ASTM A536
6
Gland Bushing Retainer
Steel
7
Stem
Ni. PI. Steel or 416 Stainless Steel on later valves
8
Stem Nut
Manganese Bronze
9
Gland Bushing
Bronze
10
Weather Seal O-Ring
Buna-N or Viton
11
Bonnet O-Ring
Buna-N or Viton
12
Stem Seal O-Ring
Buna-N or Viton
13
Bushing Seal O-Ring
Buna-N or Viton
14
Operating Square Cap Screw or Nut
Alloy Steel
15
Bonnet Cap Screw
Alloy Steel, ASTM A193, Grade B7
16
Operating Square
Ductile Iron, ASTM A536
17
Thrust Washer
Bronze
18
Disc Segment Cap Screw
Alloy Steel
19
Washer
Brass (8" and smaller), Stainless Steel (NPS 10 and 12)

EV-11 GATE VALVE
INSTALLATION, OPERATION, AND
MAINTENANCE MANUAL
NO.:
K-1479
REV.:
4
DATE:
28OCT2021
PAGE:
6 OF 25
6 DIMENSION DATA
All dimensions are in inches
Table 2: Valve Dimensions and Data
NPS
Size A
B +
FLG
B +
WE
B +
WE x FLG C
D
E +
Bore
G
Bolt
Hole Dia.
No. of
Bolts
Hand
Wheel OD
Wgt
FLG
Wgt
WE
Wgt
WE x FLG
TurnsTo
Close
Class 150–285 MOP (Face-to-face per ANSI B16.5 and B16.10 CL 150)
2
9.75
7.00
8.50
7.75
6.00
3.63
0.75
2
4.75
0.75
4
8
33
22
28
12
3
12.13
8.00
11.13
9.56
7.50
5.00
0.96
3
6.00
0.75
4
12
60
46
51
14.5
4
13.75
9.00
12.00
10.50
9.00
6.19
0.94
4
7.50
0.75
8
12
79
61
70
18.5
6
18.50
10.50
15.88
13.19
11.00
8.50
1.00
6
9.50
0.88
8
16
166
140
160
20.3 ^
8
22.38
11.50
16.50
14.00
13.50
10.63
1.13
8
11.75
0.88
8
16
308
278
291
25.8 ^
10
27.25
13.00
18.00
15.50
16.00
12.75
1.19
10
14.25
1.00
12
20
644
500
572
32.5
12
30.75
14.00
19.75
16.88
19.00
15.00
1.25
12
17.00
1.00
12
24
760
687
724
38.5
500 CWP / Class 300–740 psi MOP (Face-to-face per ANSI B16.5 and B16.10 CL 300)
2
9.75
8.50
8.50
8.50
6.50
3.63
0.88
2
5.00
0.75
8
8
36
23
30
12
3
12.13
11.13
11.13
11.13
8.25
5.00
1.13
3
6.63
0.88
8
12
72
47
58
14.5
4
13.75
12.00
12.00
12.00
10.00
6.19
1.25
4
7.88
0.88
8
12
99
62
79
18.5
6
18.50
15.88
15.88
15.88
12.50
8.50
1.44
6
10.63
0.88
12
16
200
143
178
20.3 ^
8
22.38
16.50
16.50
16.50
15.00
10.63
1.63
8
13.00
1.00
12
16
375
278
335
25.8 ^
10
27.25
18.00
18.00
18.00
17.50
12.75
1.88
10
15.25
1.13
16
20
689
500
599
32.5
12
30.75
19.75
19.75
19.75
20.50
15.00
2.00
12
17.75
1.25
16
24
900
687
785
38.5
+B (FLG & WE x FLG) and E dimensions include .062 (1/16) inch raised face thickness.
^ Valves produced prior to 1986 will have single ACME stem threads and the number of turns will be double.

EV-11 GATE VALVE
INSTALLATION, OPERATION, AND
MAINTENANCE MANUAL
NO.:
K-1479
REV.:
4
DATE:
28OCT2021
PAGE:
7 OF 25
7 ACCESSORIES
7.1 Locking Device
EV-11 valves can be ordered with a locking device installed or it may be installed by
customers. This locking device prevents unauthorized users from changing the valve
state (opened or closed) with a customer supplied lock. When installed, the lock and/or
the cap may turn, but no torque is applied to the stem.
Table 3: Locking Device Options
Valve
Size NPS
Valves built AFTER
9/1/1994
Valves built BEFORE
9/1/1994
2
54015672
54007513
3 –4
54015680
54008180
6 –8
54015698
54008446
10 –12
54015706
54014261
To install this device, perform the following (see Figure 3);
1. Remove nut which holds operating square in place and replace with swivel assembly
(1). Keep the lock washer (2) on the assembly.
2. Place cap (3) on swivel assembly (1).
3. Attach a padlock (not furnished) to swivel assembly to complete locking device.
Figure 3: Locking Device

EV-11 GATE VALVE
INSTALLATION, OPERATION, AND
MAINTENANCE MANUAL
NO.:
K-1479
REV.:
4
DATE:
28OCT2021
PAGE:
8 OF 25
7.2 Position Indicator
Figure 4: Position Indicator
1. Install indicator stem (1) as described in the
applicable steps in Sections 11.3 and 11.4.
2. Install gland bushing retainer (2) with
indicator plate (2A) attached.
3. Thread in gland bushing retainer studs (3)
until the bottom is in tapped bonnet hole.
Install heavy hex nuts (4) and tighten to
torque specified in Table 9.
4. Temporarily install the operating square (9)
and open valve fully. Remove operating
square.
5. Thread indicator collar (5) on indicator stem
(1) until the hole in the indicator collar aligns
with the "0" position on the indicator plate
(2A). Place indicator pin (6) through indicator
plate (2A) and drive into the hole in the
indicator collar (5) with a soft hammer.
6. Thread one jam nut (7) on each gland
bushing retainer stud (3). Place top plate (8)
over stem and gland bushing retainer studs.
Thread a second jam nut (7) on each gland
bushing retainer stud and then position the
top plate (8) over the upper stem turndown,
locking in the position with the four jam nuts
(7).
7. Place the operating square (9) on the stem
(1).
8. Thread swivel assembly (11) through washer
(10) into stem (1).
9. Place cap (12) over swivel assembly (11) and
insert locking pin (13) through hole in swivel
assembly.
10.To complete the locking device assembly,
attach a padlock (not furnished) to the locking
pin.

EV-11 GATE VALVE
INSTALLATION, OPERATION, AND
MAINTENANCE MANUAL
NO.:
K-1479
REV.:
4
DATE:
28OCT2021
PAGE:
9 OF 25
7.3 Handwheel
If required, the 2” operating square may be removed and replaced with a handwheel.
Table 4: Handwheel Options
Valve
Size
NPS
Part Numbers for Given Handwheel Diameters (inches)
9
12
14
16
18
24**
30**
2
72530140
3
72530165
4
72530165
6
72530173
8
72530181
54003314
10
72530199
54003777
12
72530199
** for valves built prior to 9/1/1994
7.4 Viton Sealing Stirrup
Class 150 and 500 CWP rated EV-11 valves come standard with Buna-N stirrup seals. If
a customer requires the performance of a Viton®stirrup, these may be ordered at the
time of valve purchase or may be installed in the field by following Section 11.4. Contact
Kerotest for further details.
7.5 Stem Drive Extensions
EV-11 valves may require a permanently mounted stem extension for ease of operation.
Kerotest offers a valve connecting coupling along with a top operator that a customer
may join with 1-1/2 pipe, cut to the required length and welded to the fittings below.
Table 5: Operating Square Extension
Catalog No
Part Number
Description
9898-35
88392311
Top Operator
9898-34
72792856
Bottom Coupling
7.6 Coating
The EV-11 valve is ordered with either a zinc chromate gray primer coating or a two-
component, high solids green epoxy coating. The gray primer will provide a limited indoor
non-exposed protection against corrosion. It is the responsibility of the customer to
provide long duration corrosion protection coverings or systems once installed per CFR
192 Subpart I.
The standard two component, high solids epoxy coating is generally applied 4 to 8 mils
dry film thickness (DFT) unless specified by the customer.
If a valve appears corroded prior to installation, particularly on the internal components,
contact Kerotest to determine if the valve can be installed.

EV-11 GATE VALVE
INSTALLATION, OPERATION, AND
MAINTENANCE MANUAL
NO.:
K-1479
REV.:
4
DATE:
28OCT2021
PAGE:
10 OF 25
8 FACTORY TESTING
To be certain that all valves shipped from the factory are bubble tight, they are subjected to the
following tests.
Table 6: Minimum Production Test Parameters
Table 6a: Hydrostatic Shell Test
Valve Size
NPS
Class 150 (285 psi MOP)
500 psi CWP
Class 300 (740 psi MOP)
Time
(minutes)
Pressure
(psig)
Time
(minutes)
Pressure
(psig)
Time
(minutes)
Pressure
(psig)
2 –4
2
450
2
875
2
1125
6 –10
5
450
5
875
5
1125
12
15
450
15
875
15
1125
Table 6b: Hydrostatic Seat Test *
Valve Size
NPS
Class 150 (285 psi MOP)
500 psi CWP
Class 300 (740 psi MOP)
Time
(minutes)
Pressure
(psig)
Time
(minutes)
Pressure
(psig)
Time
(minutes)
Pressure
(psig)
2 –4
2
315
2
550
2
815
6 –10
5
315
5
550
5
815
12
5
315
5
550
5
815
* Time Listed Per Each Side
Table 6c: Air Shell and Air Seat ** Test
Valve Size
NPS
Class 150 (285 psi MOP)
500 psi CWP
Class 300 (740 psi MOP)
Time
(minutes)
Pressure
(psig)
Time
(minutes)
Pressure
(psig)
Time
(minutes)
Pressure
(psig)
2 –4
2
80 –100
2
80 –100
2
80 –100
6 –12
5
80 –100
5
80 –100
5
80 –100
** Time Listed Per Each Side
The above tests equal or exceed those valve tests required by API 6D.
Note: valves built before changes to US CFR in July 2006 were rated and tested as follows:
Class 150 –275 psi MOP
Class 300 –720 psi MOP

EV-11 GATE VALVE
INSTALLATION, OPERATION, AND
MAINTENANCE MANUAL
NO.:
K-1479
REV.:
4
DATE:
28OCT2021
PAGE:
11 OF 25
9 STORAGE, HANDLING, AND INSTALLATION
9.1 Storage
Store the valve carefully before installation, preferably in a well-ventilated, dry place, on a
shelf or a wooden grid/pallet, preferably in the original packaging, to protect it from
ground water and moisture. Leave flange and port protectors in place to provide limited
internal corrosion and contamination protection.
Protect the valve from sand, dust, and water when storing or transporting.
When properly stored, the EV-11 has a shelf life greater than 10 years.
9.2 Handling
CAUTION: For heavy large valves, use rated lifting slings or straps. The valve or valve
assembly must not be lifted by the operating square or handwheel. Most EV-11 valves
with the operating square facing up are top-heavy and can shift or rotate in the sling.
Dropping or incorrect lifting of the valve can result in personal injury or damage to nearby
equipment or property.
If pressure testing is performed prior to pipeline installation, exercise extreme caution
with methods, tools, and procedures for capping and securing the valve.
9.3 Installation
9.3.1 General Notes on Installation
CAUTION: Incorrect installation may result in serious personal injury or damage to
nearby equipment or property. These instructions must therefore be followed
carefully when installing the valve.
Note: The valve must only be installed in intended applications. Valves should be
installed with the wedge in the closed position.
Prior to installation, remove port and flange protectors and check that the inside of
the valve is clean and free of corrosion.
For valves located at the end of a pipeline, it is recommended to install a short
pipe pup with a pressure rated cap to the valve outlet to reduce potential corrosion
issues and gas leaks caused by unintended operation. Following installation, the
pup and cap section should be pressurized to match the main pipeline.
9.3.2 Flanged End Valves
•End flanged dimensions conform to ASME B16.5.
•The length of the valve must be the same as the distance between the flanges
in the pipe line, taking into consideration the gasket.
•Standard end flange facing is .062 (1/16") raised face with phonographic finish.
Some valves may be ordered with a flat face finish. Contact Kerotest or your
distributor for further information and availability of flat face finished valves. Flat
face finished valves are slightly shorter than standard faced valves.

EV-11 GATE VALVE
INSTALLATION, OPERATION, AND
MAINTENANCE MANUAL
NO.:
K-1479
REV.:
4
DATE:
28OCT2021
PAGE:
12 OF 25
•Bolting and gasketing practice conforming to ASME B16.5 is suggested. The
bolts and gaskets used on installation must be selected to match operating
conditions, temperature, pressure and medium. Gasket dimensions must be
compatible with sealing faces of the flanges.
•End flange bolts should not be fastened in consecutive order. Each one
tightened should be 180° opposite the previous one (see Figure 5). Two
passes should be made. Once pass for half tightness and final pass for full
tightness. A confirmation pass should be performed on the bolts in a clockwise
pattern to verify that all bolts are fully tightened. ASME PCC-1 can provide
guidelines for assembly of bolted flanges. If a tightening method is not
specified, the tightening pattern described in APPENDIX B: BONNET SCREW
TIGHTENING PROCEDURE can be used.
Figure 5: Bolt Torquing Pattern Examples
9.3.3 Butt Weld End Valves
Note: In order that the elastomer sealing stirrup is not affected during the welding
operation, the valve should be in the open position. Protect the stirrup and sealing
surface from weld splatter.
•Valve ends are machined per ANSI B16.25
•Valves should be installed using either the electric arc or oxy-acetylene welding
methods by welders and procedures qualified in accordance with section 6,
section 12, Appendix A or Appendix B of API Std 1104, section IX of the ASME
Boiler and Pressure Vessel Code (ASME BPVC), or equivalent.
•Valve bodies are carbon steel (ASTM A216, GR WCB). Type 7018 Welding
Rod is suggested for welding these valves in the pipeline.
9.3.4 Butt Weld End X Flange End Valves
•Refer to Butt Weld End Valves and Flanged End Valves for installation.

EV-11 GATE VALVE
INSTALLATION, OPERATION, AND
MAINTENANCE MANUAL
NO.:
K-1479
REV.:
4
DATE:
28OCT2021
PAGE:
13 OF 25
10 OPERATION
10.1 General Valve Operation
•Standard valves are equipped with a 2” operating square and can be operated with an
adaptor tool or wrench.
•Standard valves operate clockwise to close and counterclockwise to open. See Table
2 for the number of turns to fully open/fully close. See Table 7 for full closing torque.
•If valves are in the open position in a pipeline for an extended time period, there is a
chance that sediment or dirt may collect inside the valve. When these valves are to be
closed, it should be done slowly. The valve should not be closed completely but
"throttled" for a short time in order that the turbulence created will flush away any
sediment or dirt that might have settled in the valve.
Note: In the event of an emergency, the above method need not be followed, as the
valve should be closed as quickly as possible.
10.2 Operating Torque
Valves are designed to operate at the prescribed torque values below in Table 7.
10.3 Critical Torque
Excessive or unlimited torque will ultimately cause a structural failure of the valve.
Table 7 indicates the torque value where valve failure will occur.
Table 7: Valve Torque Values
Valve Size
NPS
Maximum Operating Torque
(ft-lbs)
Overtorque Until Failure
(ft-lbs)
Min Safety
Factor**
2
50
260
5.2
3
100
350
3.5
4
100
350
3.5
6
200
590
3.0
8
200
590
3.0
10
375
1180
3.1
12
375
1180
3.1
** Minimum Safety Factor = Minimum Stem Failure Torque / Operating Torque
10.4 Pressure Drop
Valve pressure drop (equivalent length in feet of pipe) and Cv (Flow Coefficient) are
indicated below for the listed sizes.
Table 8: Pressure Drop and Cv
Valve Size
NPS
Equivalent Length
in Feet of Pipe
Cv
2
1.8
294
3
2.5
689
4
1.7
1661
6
5.7
2782

EV-11 GATE VALVE
INSTALLATION, OPERATION, AND
MAINTENANCE MANUAL
NO.:
K-1479
REV.:
4
DATE:
28OCT2021
PAGE:
14 OF 25
11 REPAIR SERVICE
Note: If the service methods described below do not solve the problem, call Customer
Service Representative at Kerotest Manufacturing at (412) 521-4200, email Sales at
[email protected], or contact your local Sales Representative.
11.1 Product Bolt Torques
The table below shows the nominal torque values for the screws used in an EV-11 valve
and are referenced in various service conditions discussed.
Table 9: Assembly Torque Values
(ft-lbs)
Valve
Size NPS
Disc Segment
Cap Screws
Bonnet Cap
Screws
Gland Bushing
Retainer Cap
Screws
Operating
Square Cap
Screw
2
10
80
80
30
3
50
80
80
30
4
50
80
80
30
6
50
80
80
30
8
70
170
80
30
10
125
280
80
30
12
225
280
80
30
11.2 Shut-Off or Seat Leak
During closing, the disc assembly is lowered into the valve body until the rubber stirrup
contacts the body surface. Further rotation of the valve stem compresses the rubber
stirrup against the body seating surface and forces the spreader to compress the rubber
stirrup outward against the body in the neck area, thus providing a bubble tight seal
around the neck and bore of the valve. If seat shut-off is unattainable within the operating
torque range indicated in Table 7, there may be some debris trapped between the body
and the rubber stirrup.
If valve shutoff does not occur using normal operation, fully open the valve, then count
the number of turns to close until it stops. If the turn count is less than the number shown
in Table 2, then there may be an obstruction.
Reopen the valve 4 to 8 turns and then retry to obtain seat shut-off. If stirrup damage is
indicated or suspected, the valve should be serviced as described in Section 11.4.
11.3 External Stem Packing Leak and Replacement Procedure
Valve leaks are generally caused by the failure of the stem packing seal, typically from
worn packing or utilizing a valve outside of packing temperature limitations.
CAUTION: These procedures may remove the Gland Bushing Retainer from the valve
while under operating pressure, exposing the operator to potential personal injury or
damage to nearby property if the steps are not followed explicitly. Only authorized service
associates should perform this repair.
Note: Repairs should only be made using Kerotest repair parts listed in Table 10 of this
document.

EV-11 GATE VALVE
INSTALLATION, OPERATION, AND
MAINTENANCE MANUAL
NO.:
K-1479
REV.:
4
DATE:
28OCT2021
PAGE:
15 OF 25
11.3.1 Condition 1: Valve Under Pressure
- Using Figure 6, open valve fully. Apply an additional opening
torque equal to the operating torque to stop gas flow between the
thrust washer (10) and the stem shoulder.
- Remove nut (1), and operating square (2). Earlier designs have a
bolt and washer in place of the nut.
- Remove all gland bushing retainer cap screws (3). (If gland
bushing retainer rises as cap screws are loosened, apply more
torque to the valve in the open direction.)
- Remove gland bushing retainer (4) and weather seal O-ring (5).
- Remove gland bushing (6).
A. Nylon gland bushing (furnished prior to 1986)
1. Drill two 0.172 (11/64) diameter holes in bushing 180° apart,
midway between ID and OD of bushing and 0.44 (7/16) inch
deep.
2. Screw in two #10 self-tapping screws (provided in service kit)
and pull the gland bushing from bonnet.
B. Bronze gland bushing
1. Screw two hex cap screws into threaded holes in top of
bushing and pull gland bushing from bonnet. (NPS 2, 3, and 4
valves use #10-24 UNC thread. NPS 6 and 8 valves use 1/4-
20 UNC thread. NPS 10 and 12 valves use 5/16-18 UNC
thread).
- Remove gland bushing O-rings (7) from the gland bushing and
the two stem seal O-rings (8) from the stem.
Figure 6: Stem Packing Diagram

EV-11 GATE VALVE
INSTALLATION, OPERATION, AND
MAINTENANCE MANUAL
NO.:
K-1479
REV.:
4
DATE:
28OCT2021
PAGE:
16 OF 25
- Lubricate new O-rings and gland bushing with a suitable valve lubricant.
- Install new gland bushing O-rings (7) on the gland bushing (6).
- Install two stem seal O-rings (8) in bottom two O-ring grooves of stem.
- Install the gland bushing, chamfered end first, over the stem and into the bonnet.
Use sufficient lubricant and care to ensure that the O-rings are not pinched or
damaged while installing the bushing. Be sure to remove both self-tapping screws
(or hex cap screws) prior to installing the gland bushing.
Note: the final portion of the gland bushing may be pressed into the bonnet with
the gland bushing retainer. Continue to follow the remaining steps.
- Install the weather seal O-ring (5) in the top O-ring groove of the stem.
- Place the gland bushing retainer (4) on the stem, being careful not to pinch or
damage the weather seal O-ring. Install the cap screws (3) and torque as specified
in Table 9.
Note: If the retainer is being used to press the gland bushing into the bonnet,
make sure that the cap screws are pulled down evenly.
- Install operating square (2) and nut (1). Earlier designs have a bolt and washer in
place of the nut.
11.3.2 Condition 2: Valve Under Zero Pressure
The steps required to replace the stem and gland bushing seal O-rings are the
same as listed in Condition 1, except that it is not necessary to fully open the
valve.
Note: It is not recommended that the stem be used to push the gland bushing
from the bonnet by rotating the stem in the closed position. If this is attempted, the
stem may be unthreaded from the stem nut, allowing the stem nut to fall from its
pocket in the disc assembly, and requiring disassembly of the valve.
Table 10: Packing Repair Kit Part
Numbers
Valve Size NPS
Part Number
2
54006721
3 & 4
54006747
6 & 8
54006762
10 & 12
54006788

EV-11 GATE VALVE
INSTALLATION, OPERATION, AND
MAINTENANCE MANUAL
NO.:
K-1479
REV.:
4
DATE:
28OCT2021
PAGE:
17 OF 25
11.4 Stirrup Servicing Procedure
1. Depressurize valve completely. Place the disc assembly in approximately the half
open position.
Note: The parts referenced in the following steps are illustrated in Figure 7.
2. Remove all bonnet hex-head cap screws (l) and remove bonnet (2) with the disc
assembly (3) through (8) from the valve body (10).
3. By turning the disc assembly, unthread assembly from valve stem. Remove stem nut
(4) from pocket in spreader (3) and place aside to prevent damage or dirt
contamination.
Note: NPS 2 valves do not utilize a stem nut. The spreader (3) is tapped and threads
directly onto the stem.
4. Remove all the hex socket head cap screws (5) and disc seal washers (6) from the
disc segments (7). Pry the bottom edges of the disc segments apart, separating the
disc segments (7), the stirrup (8), and the spreader (3).
5. Prior to reassembly, clean and inspect all parts for wear or damage. Lubricate
sparingly, all threads and all rubber parts with a suitable valve lubricant.
6. Install the stirrup (8) over the spreader (3). Insert one disc segment (7) at a time into
the stirrup. This is best done by first inserting the lip on the upper edge of the disc
segment into the stirrup (next to the spreader) and then rotating the bottom edge into
the stirrup while maintaining an upward pressure as indicated in the exploded figure. If
necessary, a dull, flat bladed screwdriver may be used to aid in assembly. Be certain
that the spreader ears are positioned in the disc segment pocket.
7. When both disc segments are in the proper position, install the disc seal washers (6)
and hex socket head cap screws (5) and tighten to the disc segment cap screw torque
specified in Table 9.
Note: Kerotest's current policy is to supply these items (stirrup, spreader, disc
segments, disc seal washers, and hex socket head cap screws) as an assembly only,
due to past cases of improper assembly and updated designs.
Table 11: Disc Segment and Stirrup Service Kit Part Numbers
Valve Size
NPS
Pressure Class
Kit PN
Material
2
CL150 / 500 CWP
54009964
BUNA
2
CL300
54006879
VITON
3
CL150 / 500 CWP
54010012
BUNA
3
CL300
54010004
VITON
4
CL150 / 500 CWP
54010061
BUNA
4
CL300
54010053
VITON
6
CL150 / 500 CWP
54005343
BUNA
6
CL300
54005426
VITON
8
CL150 / 500 CWP
54005350
BUNA
8
CL300
54005459
VITON
12
CL300
54005731
VITON

EV-11 GATE VALVE
INSTALLATION, OPERATION, AND
MAINTENANCE MANUAL
NO.:
K-1479
REV.:
4
DATE:
28OCT2021
PAGE:
18 OF 25
8. Insert the stem nut (4) into the pocket of the spreader (3) and thread the disc
assembly onto the valve stem. Position the disc assembly approximately halfway up
the stem.
9. Position the bonnet seal O-ring (9) into the machined O-ring groove. The O-ring
groove is in the valve body on NPS 2 through 8 valves and in the bonnet on NPS 10
and 12 valves. Use sufficient lubricant to hold the O-ring in position during final
assembly.
10.Guide the disc assembly into the valve body and slowly lower the bonnet onto the
valve body, being careful not to pinch or roll the bonnet seal O-ring. It is
recommended that the bonnet be lowered to within .25 (1/4) inch of contact with the
body and then install several of the hex head cap screws (1) loosely. These screws
will then act as guides to ensure that the bonnet goes on straight and contacts the
body squarely, eliminating the possibility of rolling or pinching the O-ring (9).
11.Install the remaining hex head cap screws (1) and tighten in a progressively torqued
cross pattern, as described in APPENDIX B: BONNET SCREW TIGHTENING
PROCEDURE, to the bonnet cap screw torque specified in Table 9.
Figure 7: Stirrup Servicing

EV-11 GATE VALVE
INSTALLATION, OPERATION, AND
MAINTENANCE MANUAL
NO.:
K-1479
REV.:
4
DATE:
28OCT2021
PAGE:
19 OF 25
11.5 External Bonnet Seal Leak
Another possible cause for an external leak could be a failure at the seal between the
valve bonnet and body.
Caution: When a bonnet leak is detected, do not attempt to re-tighten the existing bonnet
bolts and, do not attempt to operate the valve since loads applied could cause damaged
bolts to break.
Since the bonnet joint utilizes an O-ring as the sealing member, the seal is not dependent
upon bolt torque. If bonnet joint leakage occurs, the bonnet must be removed as
described in the first 2 steps of Section 11.4. The bonnet seal O-ring should then be
inspected for nicks, cuts or other damage and the O-ring seal areas of the bonnet and
body should be inspected for damage or dirt and then repaired or cleaned. If the O-ring is
damaged, replace it with a new O-ring using the part numbers listed in Table 13. Reinstall
the O-ring and bonnet as described in Section 11.4, starting at step 9.
11.6 Use of Service Bolt Clamps for Bonnet Leaks
Support clamps are temporary service tools used to hold the bonnet onto the valve body
during operation and installed at first indication of damaged or broken bonnet bolts. They
are not intended as a long term or permanent solution. Proper replacement of the bolts
should be scheduled at the earliest possible time.
Table 12: Bolt Replacement Support Clamps
Clamp Part Number
Compatible Valve Sizes (NPS)
72544794
2 and 3
72544802
4 and 6
72546092
8, 10, and 12 1
1This support clamp is not required for bolt replacement.
Figure 8: Support Clamp Installations

EV-11 GATE VALVE
INSTALLATION, OPERATION, AND
MAINTENANCE MANUAL
NO.:
K-1479
REV.:
4
DATE:
28OCT2021
PAGE:
20 OF 25
1. If using these clamps, initially place one in between the two bolts that are closest
to the leak location or to the broken bolt. Another clamp should be placed on a
diametrically opposite location on the bonnet. See Figure 8.
2. Replace the bolts on either side of both clamps, tightening the new bolts to the
bonnet screw torques listed in Table 9. Then move both clamps in between the
next two bolts to be replaced. Remember to always keep both clamps
diametrically opposite of each other.
Note: Kerotest part numbers for bonnet bolts are listed in Table 13.
3. After replacing all of the existing bonnet bolts, if the leakage has stopped, the
repair is complete, and the valve is ready for service.
4. If the leakage continues, refer to Section 11.5.
Table 13: Bonnet Bolt, Stem, and Seal Part Numbers
Valve
Size
NPS
Bonnet
Bolt PN
Bolt
Qty
Bolt Description
Standard
Stem PN
Bonnet
Seal PN
2
54004890
4
1/2-13X1.50,GR8 Hex Cap
54015235
54000344
3
54004890
6
1/2-13X1.50,GR8 Hex Cap
54015243
54001169
4
54004890
6
1/2-13X1.50,GR8 Hex Cap
54015250
54002217
6
54004908
8
1/2-13X1.75,GR8 Hex Cap
54015268
54002944
8
54004916
8
5/8-11X2.00,GR8 Hex Cap
54015276
54003454
10
54004924
12
3/4-10X2.75,B7 Hex Cap
54015284
54004106
12
54004924
12
3/4-10X2.75,B7 Hex Cap
54015292
54004585
11.7 Broken Stems
This can be due to one of two possibilities: External damage (i.e., backhoe, etc.) or if the
valve, when in the full open or full closed position, is over-torqued (see Table 7: Valve
Torque).
11.7.1 Valve Operation with Broken Stem
The valve stem is designed to shear at a minimum cross-sectional area at the top
of stem. This should enable you to utilize a pipe wrench on the remainder of stem
protruding above the gland. If the torque necessary for the pipe wrench exceeds
the minimum stem failure torque per Table 7, care should be taken when operating
at these levels. Follow the steps in Section 11.2 to clear any debris that may
prevent the valve from fully closing.
The applicable sections of 11.3 and 11.4 should be used to replace the broken
stem.
Table of contents
Other Kerotest Control Unit manuals
