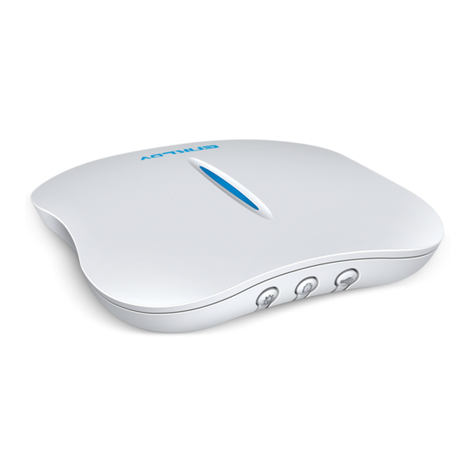
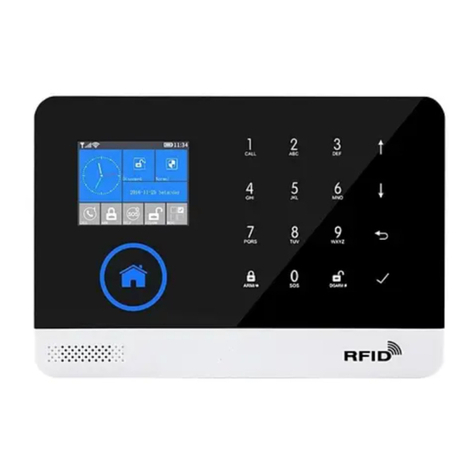
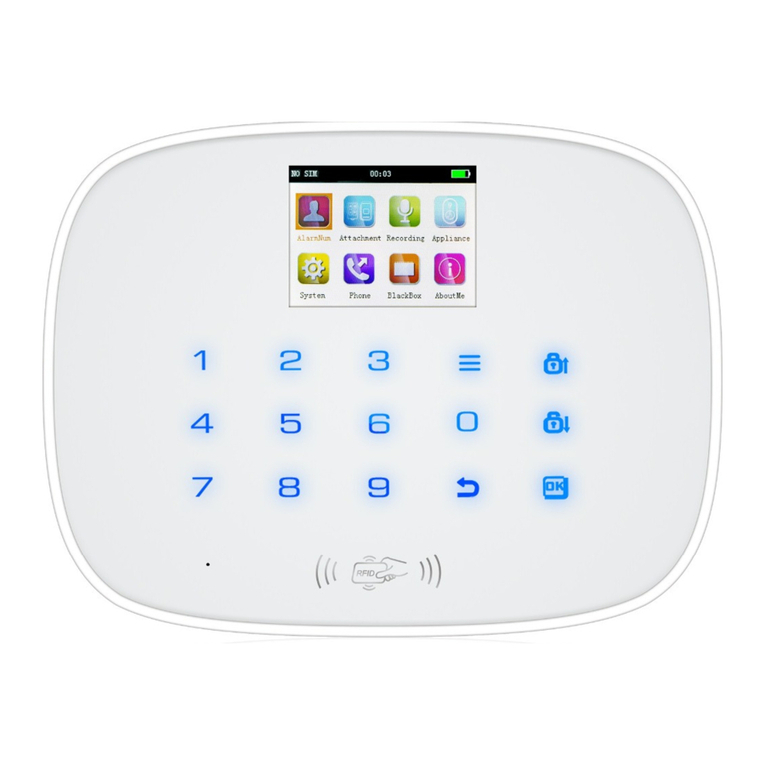
KERUI KR-K7 User manual

KR-K7
User manual
V1.0
Author: Bmol

KR-K7 User manual
2
Table of contents
System Introduction ................................................................................................................................. 5
Function Features .................................................................................................................................... 5
Host Installation ....................................................................................................................................... 6
Zones and their function .......................................................................................................................... 8
4.1 Sensor zones ................................................................................................................................... 8
4.2 Wireless smart socket zones ........................................................................................................... 8
Operation and Settings ............................................................................................................................ 9
5.1 Initial Power-on ................................................................................................................................ 9
5.2 Arm ................................................................................................................................................. 9
5.3 Disarm ............................................................................................................................................ 9
5.4 Home Arm (Stay) ............................................................................................................................. 9
5.5 Emergency Alarm ........................................................................................................................... 9
5.6 Settings ............................................................................................................................................ 9
5.7 GPRS ............................................................................................................................................. 10
5.8 Sub Zones Arm/Disarm Setting ..................................................................................................... 10
5.9 Door sensor check ..................................................................................................................... 10
5.10 Display lock ................................................................................................................................ 10
5.11 WIFI ............................................................................................................................................ 10
5.12 Charge state ................................................................................................................................. 10
Settings ...................................................................................................................................................11
6.1 Alarm Number.................................................................................................................................11
Set Alarm Numbers .................................................................................................................11
Edit/Delete Alarm Number...................................................................................................... 12
Accessory Management ........................................................................................................................ 13
7.1 Remote Controls ............................................................................................................................ 13
Program Remote Control ....................................................................................................... 13
Delete Remote Control........................................................................................................... 14
Remote Control SND Sound .................................................................................................. 14
7.2 Sensors .......................................................................................................................................... 14
Add Sensors........................................................................................................................... 14
Delete Sensors....................................................................................................................... 15

KR-K7 User manual
3
7.3 Zone Attribute................................................................................................................................. 15
Zone attribute list.................................................................................................................... 16
7.4Network Event Code...................................................................................................................... 17
7.5 Wireless Siren................................................................................................................................ 17
Programming the wireless siren............................................................................................. 18
Wireless Siren Alarm settings ................................................................................................ 18
7.6 Program Wireless Smart Socket.................................................................................................... 18
7.7 Alarm Linkage wireless smart socket ............................................................................................ 19
Appliance ............................................................................................................................................... 20
8.1 Outlet list ........................................................................................................................................ 20
8.2 Outlet timer..................................................................................................................................... 21
Edit/Delete timer switch.......................................................................................................... 21
GPRS setting ......................................................................................................................................... 22
WIFI settings ...................................................................................................................................... 22
System setup ..................................................................................................................................... 23
11.1 Delay setting .................................................................................................................................. 23
Arm Delay............................................................................................................................... 23
Alarm Delay............................................................................................................................ 23
11.2 Auto Arm/Disarm............................................................................................................................ 24
Delete auto arm/disarm .......................................................................................................... 24
11.3 Volume adjustment ........................................................................................................................ 25
11.4 Siren/Ring time............................................................................................................................... 25
11.5 Arm/Disarm SMS ........................................................................................................................... 26
11.6 Key Tone ........................................................................................................................................ 26
11.7 Screensaver................................................................................................................................... 27
11.8 Language ....................................................................................................................................... 27
11.9 Security .......................................................................................................................................... 27
11.10 SMS Reply ................................................................................................................................. 28
11.11 Power Alarm............................................................................................................................... 29
Panel Power OFF................................................................................................................... 29
Panel Power ON..................................................................................................................... 29
Panel Low battery................................................................................................................... 29
Detector Low battery .............................................................................................................. 29
11.12 Ready to Arm.............................................................................................................................. 30
11.13 Keypad arm/disarm.................................................................................................................... 30
11.14 Contact ID .................................................................................................................................. 31

KR-K7 User manual
4
11.15 Restore factory........................................................................................................................... 31
11.16 Phone Call.................................................................................................................................. 32
11.17 Recording ................................................................................................................................... 32
11.18 Alarm Log ................................................................................................................................... 33
11.19 About me .................................................................................................................................... 34
SMS Setting and Command Chart .................................................................................................... 35
GPRS Management........................................................................................................................... 39
13.1 Login Management Center ............................................................................................................ 39
13.2 Add new user ................................................................................................................................. 39
13.3 Alarm System Networking ............................................................................................................. 39
APP K7............................................................................................................................................... 40
14.1 Phone Register .............................................................................................................................. 40
14.2 Email Register................................................................................................................................ 41
14.3 Binding equipment ......................................................................................................................... 42
14.4 Password of Device ....................................................................................................................... 42
14.5 Operation Control Panel in WIFI mode.......................................................................................... 43
14.6 Device Property ............................................................................................................................. 43
14.7 System setting................................................................................................................................ 43
14.8 Operation Control panel in GSM Mode ......................................................................................... 45
Measures after Receiving Alarm........................................................................................................ 47
Remote Control via Phone ................................................................................................................ 47
System Parameters ........................................................................................................................... 48
17.1 System Factory Default Zone Type ............................................................................................... 48
17.2 System Factory Default Value ....................................................................................................... 48
17.3 System Technical Parameters ....................................................................................................... 48
Installation and Usage of Sensors..................................................................................................... 49
18.1 Installation and Use of Door Sensor.............................................................................................. 49
18.2 Replacing the battery..................................................................................................................... 49
18.3 Installation and Use of PIR Motion Sensor.................................................................................... 50
Other sensors that can be used ........................................................................................................ 51
Trouble Shooting................................................................................................................................ 52
Sensor Zone list................................................................................................................................. 53

KR-K7 User manual
5
System Introduction
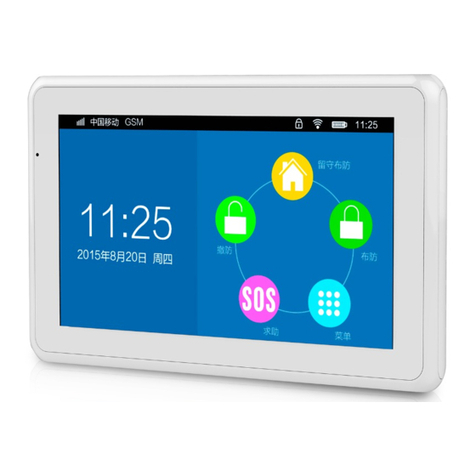
The KR-K7 is a 7 inch TFT color screen with built-in powerful CPU master and excellent full touch
screen menu alarm system. Embedded with high quality voice and clock chip, it is a high-end GSM
/WIFI alarm system. The host can connect PIR motion sensors, door contacts, smoke sensors, gas
sensors and emergency button accessories etc. Alarm zone number will be displayed on the host
once alarm, siren will be triggered. Also if available, the preset phone numbers will receive an SMS or
are dialed at the same time. It’s can be widely used in houses, factories, schools, shops, villas,
communities and other public place that need to be protected, and guarantees comprehensive
personal and property safety.
Function Features
•Host equipped with 7 inch color display, humanized menu, operation with voice prompt, easy to
use
•Support connect to 2.4G and/or WIFI networks, easy network connection.
•Support prompt message reminding, the alarm information can be sent to APP in time
•Apple iOS & Android App support, one cellphone can control multiple K7 control panels
•Two way communication
•Never lost settings even after power off
•Remote control panel, arm. disarm, monitor, ON/OFF siren switch
•SOS emergency function
•Automatic arm/disarm function
•Support GPRS function, upload arming information to server, remote control panel function
through computer software
•Support CID number, compatible international ID contact
•Max 99 zones, each zones has 8 different zone attributes settings
•Zones (1-9,10-99) can be separately armed or disarmed
•Support for 20 groups of wireless linked smart sockets
•Support for both wired and wireless siren
•Max of 99 remote controls
•Max of 99 sensors like door, pir, fire, gas, water, and temperature/humidity sensors.
•Actions history stored, it can display the latest 99 disarm records and 99 arming records
•Power OFF and Low battery reminder
•Anti-tamper function on the host and most sensors
•Build in large capacity back-up battery for power loss situations
•Power off & call reminding

KR-K7 User manual
6
Host Installation
Host should be installed in the central position of the guarded area to optimize the receiving of the
signals from all sensors. Keep away from large metal objects or appliances with high frequency
interference, also avoid reinforced concrete walls and fire door barriers etc. The distance from the
sensors to the host should be between 10-30 meters. If receival is insufficient additional 433 Mhz
repeaters can extend the distance up to 100 meters.
The host can be mounted on the wall or set on a table using the stand.
Host Side and Front
Host Back side with speaker and mounting with tamper detection

KR-K7 User manual
7
Host with stand
Host with Wall mount

KR-K7 User manual
8
Zones and their function
Before installing and configuring the system you need to know how zones work, because they play an
essential role in the use and operation of the KR-K7 alarm system. You will notice that most settings
use zone information to operate in a specific way by binding one or more zone specific settings to it.
However you should be aware that sensor zones have no relation with remote controls. Zones can
hold one or multiple sensors or remote controls, so you are able to group them if necessary.
4.1 Sensor zones
Zones in the sensors configuration menu can be used to define areas within your protected property
like garage, pantry, attic, kitchen etc., but you can use zones also for other reasons. Zones are
however also of interest if you want to arm/disarm certain protected areas separately because the
host can only arm/disarm 10 zones separately (the first 9 zones and zones 10-99 combined). But if
you want to see alarming information (remotely) for every sensor separately, it is better to put every
sensor in a unique zone, because alarming information is mainly based on zone info. Also if you want
to use for example the ‘auto arm/disarm’ function, it is good to know that this only functions for zones
1 to 8. So exam all ins and outs first in order to create the ideal configuration for your situation.
Sensor zone attributes
Every zone has one configurable zone attribute which defines the way the sensor(s) in this zone will
operate. When you want to use the Home Arm function, you need the have the sensors programmed
in a zone that has the Home (stay) attribute enabled in order to prevent alarming when being inside
the protected property. Other sensors you may want to give the ‘Doorbell’ attribute, so they sound an
ding-dong when triggered in Disarmed mode, so you will be notified that someone is entering a room.
See the zone attribute list in section 7.3 for a complete overview.
Sensor zone event codes
Every zone has one configurable zone event code that supplies information on the type or use of the
sensor(s) in it. Especially when using the app and sensors create an alarm they provide only
information about the zone number and the event code. So you probably not only want to know (when
receiving alarm messages or phone calls) which zone is alarming but also the event code. For smoke
detectors you can set a zone that has the ‘Fire’ event code set, so you are informed that a smoke
detector is alarming.
See the zone event code list in section 7.4 Network event codes
You can create and file your own list of zones in chapter 21.
4.2 Wireless smart socket zones
Zones in the remote control part are used to have the ability to set the sound On or Off. Zones can
hold one or multiple remote controls, so you are able to group them if necessary.

KR-K7 User manual
9
Operation and Settings
5.1 Initial Power-on
According to the installation method, insert the SIM card to the card slot in the side of the host panel,
then put the output of the powered adapter in the power supply hole of the host. At this time, host
voice prompts “Welcome”, and switches the back-up battery to the ON status.
5.2 Arm
Arm refers to the situation when nobody is at home and the full range of on-site alarm detection must
be enabled. All sensors are in working state, when there is danger (theft, fire, gas leak etc) it will
trigger the sensors, and the host will alarm immediately. Arm icon will show yellow on the screen after
the arm setting is enabled and the voice prompts “System Arming”.
5.3 Disarm
Disarm refers to host panel icon that stops the alarm or puts the alarm system in a disarm state. After
disarming, when sensors are triggered, the host doesn’t alarm, except the sensors that have the
‘Emergency’ attribute applied or the emergency button on remote control (See the zone attribute list in
section 7.3). Disarm icon will show yellow on the screen after the disarm setting is enabled and the
voice prompts “System Disarming”.
5.4 Home Arm (Stay)
Home Arm refers to the situation when someone is at home, but for safety, only the sensors in the
perimeter area like doors, windows, balconies must be in working state. To be able to move freely
indoors, make sure that the interior sensors have the Home, Doorbell or Medical attribute applied
(See the zone attribute list in section 7.3). The Home icon will change to yellow after the home arm
setting is enabled and the voice prompts “Home arming”.
5.5 Emergency Alarm
When an emergency occurs, press the [Emergency] key on the remote control or long press the
[SOS] key at host in standby state.
Note: if the host password keyboard protection function is turned on, the password needs to be input
before the keyboard can be operated. The initial password is 123456.
5.6 Settings
Pressing the dotted button directs you to the settings menu (after administrator login).
Here all sensors, settings and their behavior can be programmed.

KR-K7 User manual
10
5.7 GPRS
When a sim card is installed it shows the name of the provider and the signal strength. When no sim
is installed the message NO SIM is shown.
5.8 Sub Zones Arm/Disarm Setting
In Picture 5-1, there are 10 small circle at the top of main page, representing the first 10 zones, red
means armed and blue means disarmed. Clicking this area, the host will pop up a small menu [zones]
(after login), where you can arm or disarm each of the first nine zones separately. Pressing the 10-99
will arm/disarm all 10-99 zones.
Picture 5-1
5.9 Door sensor check
When the function ‘Ready to Arm’ is switched ‘ON’ this icon displays a white closed door when all door
sensors are closed or a red open door when one or more door sensors are open. In the last situation
when trying to arm the host will say “XX Zone on” and shall not arm.
5.10 Display lock
Displays the lock state of the host.
5.11 WIFI
Displays when WIFI is enabled and the signal strength. When WIFI is disconnected a red cross is
shown.
5.12 Charge state
Shows the charge state of the host and whether it is connected to power

KR-K7 User manual
11
Settings
In Picture 6-1, the settings screen is shown
Picture 6-1
6.1 Alarm Number
The panel will use the alarm number(s) when alarming. On the alarm number page, 8 groups of
numbers can be set and each number can be configured in what way the communication is performed
(Call, SMS or CID).
Set Alarm Numbers
As shown in Picture 6-2, when selecting a group shows a ‘Set Number’ input box. Besides the phone
number you can set 3 additional functions: Call, SMS and CID. Among the 3 functions, Call and SMS
can be single as well as multiple choices, but the CID function is a single option. Put in the phone
number to be set, then press key [OK] to save it.
Group 1-6 alarm number are telephone function in factory default, and 7-8 are used for CID.
Picture 6-2

KR-K7 User manual
12
Edit/Delete Alarm Number
To edit or delete single alarm number: after enter alarm number page and select number to be edited
or deleted the host will pop up a small menu as shown in Picture 6-3. Select ‘Edit’ to change the
number or select ‘Delete’ to remove it directly.
Picture 6-3
Delete all alarm numbers: As shown in Picture 6-3, there is a function ‘Delete all’ at the top-right
corner of the Alarm Numbers page.

KR-K7 User manual
13
Accessory Management
7.1 Remote Controls
Remote controls give the ability to remotly control the functions arm, disarm, emergency and silent.
These functions can be operated directly without having to operate the host and entering the security
code. The host can learning up to 99 different remote controls.
Note: In case when a remote control gets lost you need to delete it as soon as possible in order to
prevent others from operating your host.
Program Remote Control
On the remote control page, shown in Picture 7-1, there are 99 zones. Select a zone and press key
[ADD] at the top-right corner to enter remote control learning mode. At this moment, press any key on
the remote controller to send a signal to host. The host will sound “Learn success” which means the
remote control has been programmed to the host. If there is a voice prompt “Already programmed”
when pressing the remote control, and it means that the remote control has already been added to the
host and couldn’t be programmed repeatedly.
Picture 7-1

KR-K7 User manual
14
Delete Remote Control
Delete remote control in single zone: after enter remote control page as shown in Picture4-4, select
the zone needed to be deleted and press key [OK],or delete all the remote controls by press key
[DELETE ALL] at the top-right corner.
Remote Control SND Sound
As shown in Picture 7-1, on the remote control learning page you can switch on/off the sound.
Selecting ‘Sound ON’ the external siren shall beep “Di Di” when the remote control in this zone is used
to arm or disarm. Factory default of the sound is ON.
Note: there are two kind of host sirens: one is host horn siren called ‘built-in siren’, the others are the
external wired siren and wireless siren, called ‘external siren’.
7.2 Sensors
Add Sensors
As shown in Picture 7-2 there is a total of 99 zones (split up in 17 pages), and each zone displays the
number of sensors learned (xx Pcs), siren state (on/off), zone attribute and event code.
Picture 7-2
To enter the sensor learning page select one of the zones. Within the zone page press the ‘ADD’
button to start the learning mode as shown in Picture 7-3. At this moment, trigger the sensor to send a
signal to host. The host voice prompts “Add, successfully programmed” and the sensor and number is
displayed on the screen, which means the sensor has been added and is programmed to the host. If
there is a voice prompt “Configured” when triggering the sensor it means that the sensor was already
added to the host and couldn’t be programmed repeatedly. The host can learning 99 different sensors
in total.

KR-K7 User manual
15
Picture 7-3
Delete Sensors
In a single zone:
Enter the zone page and select the sensor you need to delete and in the popup press [DEL].
To delete all sensors in a single zone:
Enter a zone page and press [DELETE ALL] to delete all the sensors in the selected zones.
To delete all sensors in all zones:
Enter the sensor page and press [DELETE ALL] to delete all the sensors in all zones.
7.3 Zone Attribute
The zone attribute is used to set the correct alarm function to the different zones or sensor types.
As shown in Picture 7-4, the default attribute is ‘Instant’. Press the zone attribute in order to change
the attribute. Some firmware versions use other attribute names, mentioned between the brackets.
Picture 7-4

KR-K7 User manual
16
Zone attribute list
Zone
Attribute
Explanation of this attribute and preferred sensors
Action in Disarm status
Action in Home status
Action in Arm status
Sound in Disarm status
INSTANT
(Normal)
Alarms in both Armed en Home (stay) status.
Use: For sensors that monitor the outer ring of the armed area, that
need no sound in disarmed mode.
HOME
(Stay)
Only alarms in Armed status.
Use: To avoid in-house (ir)sensors from alarming when for example
someone is resting at home using the Home (stay) status.
SMART
(Intelligent)
The host will alarm only when triggered a second time within 5-30
seconds after first trigger in both Armed and Home (stay) status.
Use: To prevent alarming by one time detection with (ir) sensors
EMERGENCY
No matter on armed status, if sensor is triggered it will alert.
Use: Usually used with Smoke, Gas and Water detection sensors
and emergency button.
DISABLE
(Close)
In all modes sensors will not alert even when being triggered. Open
sensors will however prevent activating armed modes.
Use: To disable sensors temporary but with closed detection.
DOORBELL
(Chime)
Only alarms in Armed status. In Disarm status ‘Ding-Dong” will be
sound twice as notification when triggered.
Use: Mostly with indoor sensors to get a trigger when someone is
entering the armed area in Disarmed mode
CHIME
(Welcome)
In the Disarmed status, when sensor is triggered, a ‘Welcome’ voice
message will sound.
Use: For sensors that monitor the outer ring of the armed area, that
need notification in Disarmed mode to detect entrance.
MEDICAL:
The host will alarm only when triggered a second time within 5-30
seconds after first trigger in both Armed status only.
Use: To prevent alarming by one time detection with (ir) sensors
Table 7-1

KR-K7 User manual
17
7.4 Network Event Code
The selected Event Code shall be updated to the server for the remote security monitoring using the
K7 app. When an event occurs in a zone it shows in the app the selected event code for this zone.
Some versions of the K7 host use other names as listed between the brackets.
Event code
Use
Ambula (Medical)
Motion sensors
Fire
Smoke detectors
Hijack (Robbery)
Emergency button
Silent (Silent Robbery)
Thief (Burglar)
Door sensors
Around (Perimeter)
Gas
Gas sensors
Picture 7-5
7.5 Wireless Siren
As shown in Picture 7-6, enter the page of wireless strobe siren.
Picture 7-6

KR-K7 User manual
18
Programming the wireless siren
To program the wireless siren press the set button for 3 seconds until the indicator light is on. It is now
in program mode that will last about 20 seconds. In the wireless siren page of the panel, switch
‘wireless siren’ on or off, the host will send a signal; wireless siren will be ringing sound “DiDi” and
flashing 2 times after receive the signal. exist the programming state by press the set button of the
wireless siren.
Check if programming was successfully: after the wireless siren exist program state, on the wireless
siren page of the panel, switch ‘wireless siren’ on or off, if it is off, “DiDi” sound; if it is on, the wireless
siren will alarm, which means the programming was successfully.
Wireless Siren Alarm settings
In Wireless Siren page there is the ability to switch the wireless siren on or off, and press [OK] to save.
The default status is on.
If the wireless siren is on, the wireless siren will alarm when the host alarms, and the alarm will stop if
the panel is disarmed or panel stop alarm.
If the wireless siren is off, the wireless siren will not alarm when the panel alarms.
7.6 Program Wireless Smart Socket
To program the smart socket set it on standby mode state by press and hold the setting button until
the indicator light is off. In the smart socket page of the panel, switch [smart socket] on or off, the host
will send a signal and the indicator of smart socket will flash two times after received the signal
meaning the programming was successfully. Press the setting button of the smart socket to exit the
standby mode.
Check if programming was successfully: after the smart socket exits the program state, switch
[wireless socket] on or off, if it is off, the indicator light will be red; if it is on, the indicator light will be
blue, which means its programs successfully.

KR-K7 User manual
19
7.7 Alarm Linkage wireless smart socket
As Picture 7-7, in the wireless socket page of the panel you are able to switch output with alarm ON or
OFF, The system default status is ON.
If output with alarm is ON, the smart socket will be switched on when the panel alarms, and the smart
socket will be OFF if the panel is disarmed or panel stops alarming.
If output with alarm is OFF, the smart socket will not be switched on when the panel alarms.
Picture 7-7

KR-K7 User manual
20
Appliance
This function is for use of wireless smart sockets that will enable you to control electrical devices like
lamps, televisions etc. from the host or app. They are 20 groups, each can contain one or multiple
smart sockets. It also supports outlet control by the app from anywhere.
8.1 Outlet list
Picture 8-1.
As shown in Picture 8-1 you are able to switch the smart sockets ON or OFF by press the button [On]
or [Off] on the panel. They are 20 groups for smart sockets, each can contain one or multiple smart
sockets. The smart sockets default is OFF. The programming is the same as with the wireless siren.
Other manuals for KR-K7
1
Table of contents
Other KERUI Security System manuals
Popular Security System manuals by other brands

Gemini
Gemini 932MHW User's and installer's manual

Fishguard
Fishguard Fx System user manual

Eden
Eden HA33S Operation and installation manual

Federal Signal Corporation
Federal Signal Corporation Commander 371ST-250 Installation and maintenance manual

MAS
MAS MTGS user manual

NUUO
NUUO 6000S SERIES installation guide