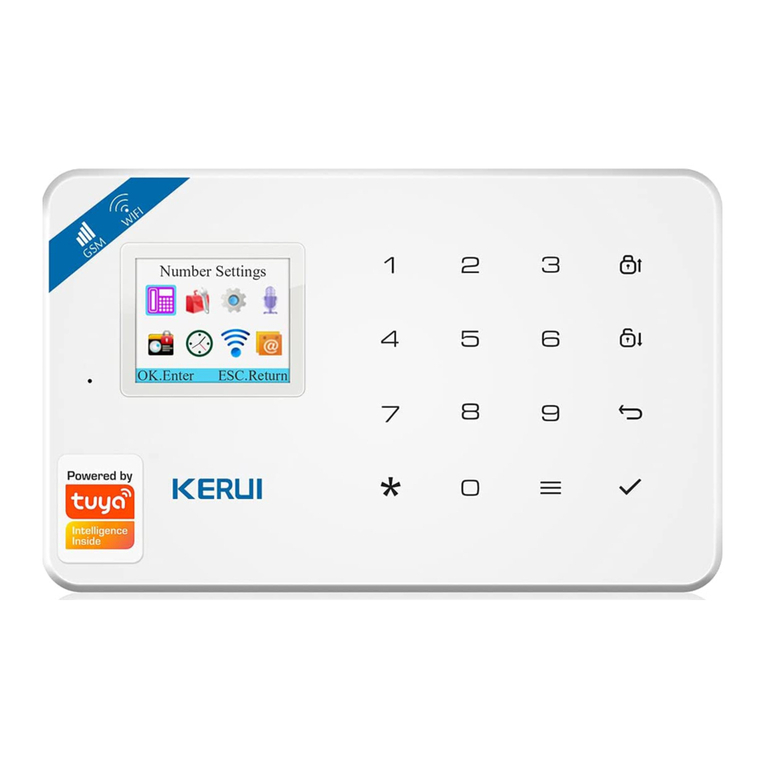
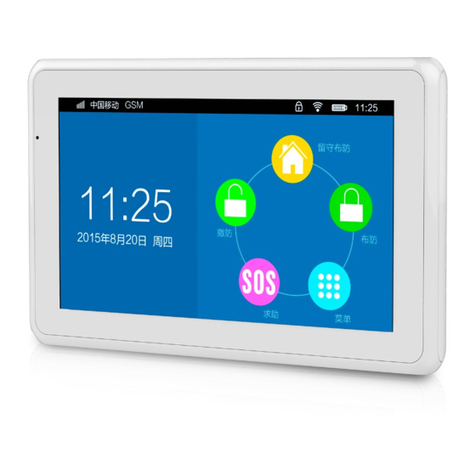
KERUI G19 Technical manual

封底 封面
尺寸:250*185MM
材质:128G铜版纸
Version 1.0
Reading carefully before handle
Keeping the user manual reserved
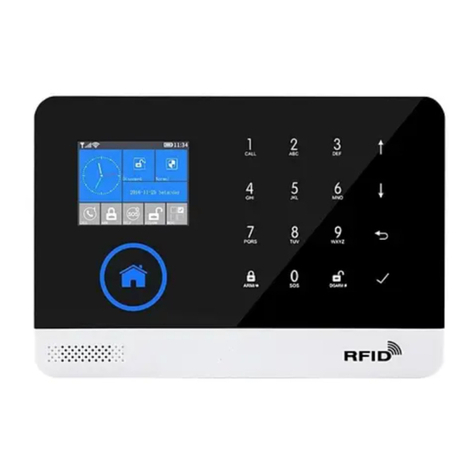
RFID Color Screen Intelligent GSM
Network Alarm System G19

4
4
5
6
6
6
6
6
16
16
16
Table of Contents
l. System Introduction
ll. Function Features
lll. Host Installation
lV. Operation and Set
4.1 Initial Power-on
4.2 Arm
4.3 Disarm
4.4 Stay Arm
4.5 Emergency Alarm
4.6 Alarm Number
4.6.1 Set Alarm Number
4.6.2 Delete Alarm Number
4.7 Accessories Management
4.7.1 Remote Control
4.7.1.1 Study Remote Control
4.7.1.2 Delete Remote Control
4.7.1.3 Remote Control SND Sound
4.7.2 Detector
4.7.2.1 Study Detectors
4.7.2.2 Delete Detectors
4.7.2.3 Call Alarm ON/OFF
4.7.2.4 Zone Attribute
4.7.2.5 Network Event Code
4.7.2.6 NO alarm/NC alarm in Wired Zone
4.7.3 Access Card
4.7.3.1 Study Access Card
4.7.3.2 Delete Access Cards
4.7.3.3 Read Card to Disarm
4.7.3.4 Card Read SMS Inform
4.7.4 Wireless Strobe Siren
4.7.4.1 Code Match between Host & Wireless Strobe Siren
4.7.4.2 Alarm Siren
4.7.5 Wireless Alarm Linkage Switch
4.7.5.1 Code Match between Host and Smart Socket
4.7.5.2 Alarm Linkage
4.7.6 Illegal Arm
4.8 Recording
4.9 Appliances
4.9.1 All Sockets
4.9.2 Time Switch
4.9.3 Delete Time Switch
4 10 System Set
4.10.1 Delay Set
4.10.1.1 Delay Arm Set
4.10.1.2 Delay Alarm Set
4.10.2 Timing Arm/Disarm
4.10.2.1 Timing Arm/Disarm Set
4.10.2.2 Delete Timing Arm/Disarm Set
4.10.3 Time Date Set
4.10.4 Volume Adjustment
4.10.4.1 Voice Volume
4.10.4.2 Alarm Volume
4.10.5 Set Alarm Siren Period
4.10.6 Ringing Number
4.10.7 Key Tone
4.10.8 Hibernate Time
4.10.9 Language Set
4.10.10 Security Set
4.10.10.1 User Password
4.10.10.2 Administrator Password
4.10.10.3 Keypad Lock
4.10.11 Network Center
4.10.11.1 Center Number
4.10.11.2 Upload Arm/Disarm
4.10.12 Arm/Disarm SMS
4.10.13 SMS Reply ON/OFF
4.10.14 Wallpaper Set
4.10.15 Power Supply Alarm
4.10.15.1 Host Power Off
4.10.15.2 Host Power On
4.10.15.3 Host Low-voltage
4.10.15.4 Detector Low-voltage
4.10.16 Restore Factor y Default Set
4.11 Phone Call
4.12 Black Box
4.12.1 Arm/Disarm Records
4.12.2 Alarm Records
4.12.3 Read Card Records
4.13 About
V. Set and Inquir y Command Chart by SMS
Vl. APP Remote Set
6.1 Download and Installation
6.2 Add Host Accounts
6.3 Operation Method
.
8
8
9
9
9
9
9
9
10
10
11
11
11
11
11
12
12
12
12
12
13
13
14
14
14
15
15
15
15
16
7
7
7
21
21
21
21
21
21
21
22
22
22
22
17
17
17
17
17
18
18
18
18
18
18
19
19
19
19
20
20
20
20
20
20
23
23
23
23
27
27
27
28

Vll. Receive Alarm and Remote Control
7.1 Measures after receiving Alarm
7.2 Remote Control by Phone
Vlll. System Parameters
8.1 System Factor y Default Zone Type
8.2 System Factor y Default Value
8.3 System Technical Parameters
lX. Detector Installation and Usage
9.1 Door Contact Installation and Usage
9.2 PIR Detector Installation and Usage
X. Troubleshooting
l. System Introduction
This alarm system is a high-end GSM alarm with stable and reliable per formance
and applies 2.4-inch TFT color screen and touch keyboard with built-in power ful
CPU master and excellent operation experience. Host connects PIR motion
sensors, door contacts, smoke detectors, gas detectors and emergency button
accessories etc. After receiving an alarm, host will display the alarm zone and
alarm siren on site, while texting to and dialing the number preset to inform user.
It’s widely used in houses, factories, schools, shops, convenience stores, financial
rooms, villas, communities and other area needed to be protected to ensure the
security of the person and property at all aspects.
■ TFT color display, humanized menu, operation with voice prompt, easy to use
■ Read RFID card to disarm, can learn 20 cards.
■ There are 99 zones and 8 zone types optional in each zone; ON/OFF siren in
each zone is available.
■ 2 wired zones, Open and Closed Alarm mode optional
■Host can be used as a normal cellphone to call other phones directly
■ To Set host through phone or SMS remotely, and it ’s compatible with China
Mobile Fly message function to save user ’s SMS costs.
■ APP control host set and administration, and supports IOS/Android.
■ 8 groups scheduling Arm/Disarm function, and date can be selected to avoid
arm and disarm frequently manually to realize automatic control.
■ One-way alarm linkage wireless relay, and one-way wireless strobe siren
■ Control as much as 20 smart sockets through phone or SMS remotely to realize
appliances remote control.
■ Host dial the phone number preset by user when alarms, and number never
lost even power off
■ 10s automatic message recording with built-in artificial voice, so that user can
know the alarm place and zone when receive the alarm call remotely.
■ Arm/Disarm, Monitor, Speaker, siren ON/OFF, relay ON/OFF remotely.
■ Wireless study 1527 series accessories, and as much as 99 detectors and
remote controls.
■ Integrate high precision clock chip so that time never lost even power failure.
■ Display the latest 99 arm/disarm, alarm and card read records with unique
black box function.
■ Low-voltage indication and anti-tamper
■ Built-in rechargeable high capacity LI battery and supply power automatically
when power supply failure
■ Caller ID display, power-off reminder.
■ Host applies four frequency GSM/GPRS module
ll. Function Features
29
29
29
29
30
30
30
30
33
31
32

48%
中国移动
1 2 3
4 5 6 0
7 8 9
+
CN3
+
Cn11
_
USB5 V
SIREN
SW
NO
开
关
Host Front View
Power
Siren
Z52
GND
Z51
ALARMALARM
Z52 GN D Z51
lll. Host Installation
Host should be installed in the central position of the guard area to receive the
signals from detectors best. Keep away from large mental objects or appliances
with high frequency interference, meanwhile, avoid the reinforced concrete
walls and fire doors barriers etc.
Host Rear View
Vl. Operation&Setting
4.1 Initial Power-on
According to the installation method, insert the SIM card to the card slot in the
back of the host panel, then put the output of the powered adapter in the power
supply hole of the host. Now then, host voice prompts “ Welcome to smart voice
alarm”, and switch the back-up batter y to the ON state.
4.2 Arm
Arm refers to a full range of on-site alarm detection alert when nobody at home;
All detectors are in working state, when there is danger ( theft, fire, gas leak etc )
trigger the detectors, the host alarms immediately. After arming operation, it
displays and locks “arm” icon.
Remote Control operation: press key [ARM] once.
Keyboard operation: press key [ARM] once.
4.3 Disarm
Disarm refers to host panel stops the alarm or make the alarm system in a non-
alert state. After disarming, when detectors are triggered, but host doesn’t alarm
(except the detectors of emergency zones and the emergency button on remote
control). After disarming operation, it displays and locks “disarm” icon.
Remote Control operation: press key [Disarm].
Keyboard operation: press key [Disarm].
4.4 Stay Arm
STAY refers to when someone at home, and for safety, the detectors in the
perimeter area like doors, windows, balconies are in working state but the
detectors indoor don’t work in case of the false alarm if triggered by user himself,
then the user chooses STAY to let some detectors work and other detectors not
02.01.2015 Fri.
Key Menu/Delete
Key Arm/Up
Key Disarm/Down
Confirm/Zone
98 Alarm
Key Back/Keyboard
Lock
Card Swipe Area
Key Number
SIM Card Base
Power ON/OFF
Terminal Block
Wired PIR
Terminal Block
Wired Door
Magnic
Terminal Block
Wired Parts Connection Chart
Alarm Panel
Terminal Block

Mar.01 .20 15 Fri.
01/08
Alarm Numbers
(Empty)
Please input numbers 02/08
01 Zone
1PCS
Sound: On
work. STAY function needs to be set that is the defense zones of the interior
detectors should be changed to be stay zones in order to work properly. After
STAY operation, it displays and locks “STAY” icon.
Remote Control operation: press key [STAY].
Keyboard operation: press key [ARM] twice
4.5 Emergency Alarm
When an emergency occurs, press panic key on the remote control or long press
panic key for 3s as host in standby state.
Note: if the host password keyboard protection function is turned on, the password
needs to be input before the operation to the keyboard, and the initial password
is 123456.
Disarm
Arm
Stay Emergency
4.6 Alarm Number
Press menu key, then it displays 8 menu icons in color as shown in picture 4-2. Press
key 【UP/DOWN】to move the cursor to alarm number icon, then press key【OK】
or put in number 1 directly to enter into alarm number set page. As shown in
picture 4-3, up to 8 groups number can be set and each number can be optional
for phone, SMS, access card or CID. The maximum length of each number is 31
digits. And the set method is in below:
Picture 4-1 Picture 4-2 Picture 4-3
Group 1-6 alarm number are telephone function in factory default, and 7-8 are CID.
Note: when entering number, long press Arm key to input * , and long press Disarm
key to input # .
4.6.1 Set Alarm Number
In alarm number page, 8 groups of number can be set. Press key【UP/DOWN】to
select 1 group, then press key【OK】to enter next level menu. As shown in picture
4-4, there is a number input box in the page and the 4 functions below optional:
phone, SMS, access card, CID. Among the 4 functions, phone, SMS and access
card can be single as well as multiple choices, but the CID function is single option.
Put in the number to be set in the input box like as 13812345678, the press key
【DOWN】to move cursor to the function needed and select by pressing key menu,
then press key【OK】to save it, then press key【Back】to return to desktop.
Picture 4-4 Picture 4-5 Picture 4-6
4.6.2 Delete Alarm Number
Delete single alarm number: after entering alarm number page, press key【UP/
DOWN】to select number to be deleted, press key【OK】, host will pop up a small
menu as shown in picture 4-5. If selecting【Edit/Add】, press key menu to delete
all original numbers or change number and function;If selecting【Delete】, host
will pop up a confirmation menu, and select Yes, and then press key【OK】to
delete it.
Delete all alarm numbers: As shown in picture 4-6, there is a function delete all
at the bottom of the alarm number page, press key【UP/DOWN】to select this
function, then press key【OK】, and after confirmation menu popped up, press
key【OK】again to delete all alarm numbers.
4.7 Accessories Management
As shown in picture 4-2, press key【UP/DOWN】to move cursor to Accessories
Manage icon, then press key【OK】or input number 2 to enter accessories manage
page, as shown in picture 4-7.
Picture 4-7 Picture 4-8 Picture 4-9
CHINA MOBLLE CHINA MOBLLE
16:10 16:10 16:10
Ala rmNum A ttach ment Re co rd in g Ap pl ia nce
Sys tem Pho ne Blac kbox Abou tMe
(Empty)
(Empty)
CHINA MOBLLE
Delete all
Alarm Numbers
16:10
CHINA MOBLLE
(Empty)
(Empty)
(Empty)
Alarm Numbers
(Empty)
(Empty)
(Empty)
16:10
CHINA MOBLLE
16:10
CHINA MOBLLE
Call
RFID CID
SMS
16:11
CHINA MOBLLE
16:10
CHINA MOBLLE
16:10
CHINA MOBLLE
Attachment
Remote
Detector
RFID
Wireless Sir en
Remote
02 Zone
03 Zone
04 Zone
1 PCS
0 PCS
0 PCS
0 PCS
Sound on
Sound on
Sound on
Sound on
01 Zone Remote
Have added:
Total:
Please trigg er rem ote
1 PCS
1 PCS
(Empty)
(Empty)Edi t / Add
Delete

16:10
CHINA MOBLLE
97 Zone
4 PCS
98 Zone
0 PCS
0 PCS
Detector
99 Zone 1 PCS
Delete all
Siren on Norma l
Thief
Siren on Norma l
Thief
Siren on Norma l
Thief
Sound: O n
Attribute: Norm al
CID eventcode: Th ief
16:11
CHINA MOBLLE
01 Zone Detector
Have added:
Total:
Please trigger detector
1 PCS
4 PCS
01 Zone
1PCS
16:10
CHINA MOBLLE
02 Zone
03 Zone
04 Zone
1 PCS
0 PCS
0 PCS
0 PCS
Sound on
Sound on
Sound on
Sound on
Edit / Add
Delete
4.7.1 Remote Control
4.7.1.1 Study Remote Control
On accessories manage page, press key【OK】directly or number 1 to enter
remote control page. As shown in picture 4-8, there are 99 zones in the page,
press key【UP/DOWN】to select zone or input number (01-99) by keyboard ( e.g.
Study No. 1 remote control, then input 01, study No. 22 remote control, input 22),
then press key【OK】to enter remote control study page as shown in picture 4-9.
At this moment, press any key on remote controller to send a signal to host, host
sounds “di” and the number of learned remote add 1 on the screen, which means
the remote control has been programmed to the host; If there is wrong voice
prompt when pressing remote control, and it means that the remote control has
been learned to the host already and couldn’t be programmed repeatedly. To
learn more remote controls, press any key on other remote controls. The host can
study as most as 99 different remote controls.
4.7.1.2 Delete Remote Control
Delete remote control in single zone: after entering remote control page, press
key【UP/DOWN】to select the zones needed to be deleted, press key【OK】, host
will pop up a small menu as shown in picture 4-10. If selecting【Edit/Add】, it can
continue to study remote control or set if there is accompany sound; if selecting
【Delete】, host will pop up a confirmation menu, select【Yes】, press key【OK】
to confirm, then all the remote controls in the zone be deleted.
Delete all remote controls: As shown in picture 4-11, there is Delete All function
at the bottom of remote control page. Press key【UP/DOWN】to select this function,
then press key【OK】, it will pop up the confirmation menu, then press key【OK】
again to delete all the remote controls in all zones.
Picture 4-10 Picture 4-11 Picture 4-12
4.7.1.3 Remote Control SND Sound
As shown in picture 4-12, on remote control study page, press key【DOWN】to
select sound ON/OFF. Press 1 to select Yes, then the sound is ON in this zone; Press
2 to select No, then the sound is OFF in this zone. If the sound is ON, the external
siren would beep “di di” when using the remote control in this zone to arm/disarm.
The factor y default of the sound is ON.
Note: there are two kinds of host sirens: one is host horn siren, called built-in siren;
the other are external wired siren and wireless siren, called external siren.
4.7.2 Detector
4.7.2.1 Study Detectors
On accessories manage page, as shown in picture 4-7. Press key【UP/DOWN】
to select Detector, then press key【OK】or number 2 directly to enter detector
page, as shown in picture 4-13. There are 99 zones in the page, and it displays
the number of detectors learned,siren state, event code, and zone attribute in
each zone. Press key【 UP/DOWN 】to select zone or input number ( 01-99 ) by
keyboard ( e.g. Study No. 1 detector, then input 01, study No. 22 detector, input
22), then press key【OK】to enter detector study page as shown in picture 4-14.
At this moment, trigger detector to send a signal to host, host beeps “di” and the
number of learned detector add 1 on the screen, which means the detector has
been programmed to the host; If there is wrong voice prompt when triggering
detector, and it means that the detector has been learned to the host already
and couldn’t be programmed repeatedly. To learn more detectors, continue to
trigger other detectors. The host can study as most as 99 different detectors.
Picture 4-13 Picture 4-14 Picture 4-15
Picture 4-16 Picture 4-17 Picture 4-18
4.7.2.2 Delete Detectors
Delete detector in single zone: after entering detector page, press key【 UP/
DOWN】to select the zones needed to be deleted, press key【OK】, host will pop
up a small menu as shown in picture 4-15. If selecting【Edit/Add】, it can continue
to study detector or set the zone attribute and event code; if selecting【Delete】,
host will pop up a confirmation menu, select【Yes】, press key【OK】to confirm,
then all the detectors in the zone be deleted.
Delete all detectors: As shown in picture 4-16, there is Delete All function at the
bottom of detector page. Press key【UP/DOWN】to select this function, then press
key【OK】, it will pop up the confirmation menu, then press key【OK】again to
delete all the detectors in all zones.
4.7.2.3 Call Alarm ON/OFF
On detector learning page, press key【DOWN】to select zone call alarm ON/OFF
as shown in picture 4-17. Press【1】to select Yes, call alarm ON; Press【2】to select
16:10
CHINA MOBLLE
Remote
16:10
CHINA MOBLLE
97 Zone
0 PCS
98 Zone
1 PCS
0 PCS
Sound on
Sound on
Remote
99 Zone 0 PCS Sound on
Delete all
01 Zone Remote
Sound: On
Have added:
Total: 1
1 PCS
PCS
1.On 2.Off
16:10
CHINA MOBLLE
Detector
01 Zone
1PCS
02 Zone
03 Zone
04 Zone
1 PCS
0 PCS
0 PCS
0 PCS
Siren on Norma l
Thief
Siren on Norma l
Thief
Siren on Norma l
Thief
Siren on Norma l
Thief
01 Zone Detector
Have added:
Total:
Siren: on
2 PCS
5 PCS
Attrebute: Norm al
1.Normal 2.Stay 3 .Sm art 4 .Ur gen t
5.Close 6.Doorbell 7 .Welc ome 8 .He lp
CID eventcod e: Th ief
16:10
CHINA MOBLLE
Detector
01 Zone
1PCS
02 Zone
03 Zone
04 Zone
1 PCS
0 PCS
0 PCS
0 PCS
Siren on Norma l
Thief
Siren on Norma l
Thief
Siren on Norma l
Thief
Siren on Norma l
Thief
0 PCS
Edit / Add
Delete
Attribute: Norm al
CID eventcode: Th ief
16:11
CHINA MOBLLE
Have added:
Total:
2 PCS
5 PCS
01 Zone Detector
Siren: O n
1.On 2.Off
16:11
CHINA MOBLLE

RFID 01 Added
Empty
Note: the siren in this function includes internal and external siren.
4.7.2.4 Zone Attribute
On detector learning page, press key【DOWN】to move cursor to Attribute as
shown in picture 4-18. Press number key to select: 【1】Normal,【2】Stay,【3】
Intelligent,【4】Emergency,【5】Close,【6】Chime,【7】Welcome,【8】Help
Senior, then press key【OK】to save.
No, call alarm OFF, then press key【OK】to save. If selecting OFF, the host will not
alarm if there is an alert in this zone. The factor y default of call alarm is ON.
4.7.2.5 Network Event Code
On detector learning page, press key【DOWN】to move the cursor to Event Code
as shown in picture 4-19. Press number key to select: 【 1】Medical 【 2 】Fire, ,
【3】Robbery 【4】Silent Robber y 【5】Burglar 【6】Perimeter 【7】Gas, then , , , ,
press key【OK】to save.
4.7.2.6 NO alarm/NC alarm in Wired Zone
Select wired zones (51-52), and press key【OK】to enter detector learning page,
press key【DOWN】to move the cursor behind【NO/NC】as shown in picture 4-20,
and press【1】to select NC alarm; 【2】to select NO alarm, then press key【OK】
to save. The factor y default is NO.
Picture 4-19 Picture 4-20 Picture 4-21
4.7.3 Access Card
4.7.3.1 Study Access Card
On accessories manage page, as shown in picture 4-7. Press key【UP/DOWN】to
move the cursor behind【Access Card】, then press key【OK】or number 3 directly
to enter access card page, as shown in picture 4-21. There are 20 zones in the
page, and only one access card can be learned in one single zone. Press key
【UP/DOWN】to select zone and the press key【OK】to enter access card study
page as shown in picture 4-22. At this moment, put the access card on the host
card reader location, host will beep “di ” if the card be learned successfully, and
the “unlearned” displayed on the screen will change to “learned”; If user continues
to learn access card in the zone has been learned, host will prompt wrong voice,
and it flashes “do not learn” on the screen; If user programs the access card being
learned to the zone unlearned, host will also prompt wrong voice, and it flashes “
re-code” on screen, which means the access card can’t be programmed
repeatedly. The host could learn as much as 20 different access cards.
Picture 4-22 Picture 4-23 Picture 4-24
4.7.3.2 Delete Access Cards
Delete access card in single zone: after entering access card page, press key
【UP/DOWN】to select the zones needed to be deleted, press key【OK】, host
will pop up a small menu as shown in picture 4-23. If selecting【Edit/Add】, it can
change the set of【 Read Card to Disarm 】and【 Card Read SMS Inform】; if
selecting【Delete】, host will pop up a confirmation menu, select【Yes】, press
key【OK】to confirm, then the access card in this zone be deleted.
Delete all access cards: As shown in picture 4-24, there is Delete All function at
the bottom of access card page. Press key【UP/DOWN】to select this function,
then press key【OK】, it will pop up the confirmation menu, then press key【OK】
again to delete all the access cards in all zones.
4.7.3.3 Read Card to Disarm
On access card learning page, press key【DOWN】to move the cursor behind
【Read Card to Disarm】, then press menu key to switch ON or OFF, press key【
OK】to save. If selecting ON, the access card can disarm the host. The factor y
default is OFF.
4.7.3.4 Card Read SMS Inform
On access card learning page, press key【DOWN】to move cursor behind【Card
Read SMS Inform】, press menu key to switch ON or OFF, then press key【OK】
to save. If selecting ON, after swiping access card, host will text to the alarm
number with access card and the message is “XX number is home”. The factor y
default is OFF.
4.7.4 Wireless Strobe Siren
On accessories manage page as shown in picture 4-7. Press key【UP/DOWN】to
move cursor behind【Wireless Strobe Siren】, then press key【OK】or input number
4 directly to enter wireless strobe siren page, as shown in picture 4-25.
Picture 4-25 Picture 4-26
4.7.4.1 Code Match between Host & Wireless Strobe Siren
Code Match Method: In strobe siren standby mode, long press key SET until the
51 Zone Detector
Have added:
Total:
Siren: on
Attrebute: Norm al
2 PCS
5 PCS
CID eventcod T hief
16:10
CHINA MOBLLE 16:11
CHINA MOBLLE
RFID
RFID 02
RFID 03
RFID 04
Added
Empty
Add RFID Added
16:11
CHINA MOBLLE
01 RFID
RFID Disarm:
RFID SMS notic e:
ON
ON
RFID 01 Added
Empty
16:11
CHINA MOBLLE
RFID
RFID 02
RFID 03
RFID 04
Added
Empty
Delete
Edit / Add
RFID 18 Added
Empty
16:11
CHINA MOBLLE
RFID
RFID 19
RFID 20 Added
Delete all
16:11
CHINA MOBLLE
Wireless Siren
Output with al arm
OFF
ON
Wireless Sir en Off
On
16:11
CHINA MOBLLE
Wireless Siren
Output with al arm
OFF
ON
Wireless Sir en Off
On
Senging…
ON
ON
01 Zone Detector
Have added:
Total:
Siren: on
Attrebute: Norm al
2 PCS
5 PCS
CID eventcod T hief
1.Ambula 2.Fire 3 .Hi jac k 4.S ile nt
5.Thief 6.Around 7.Gas
16:10
CHINA MOBLLE
NO/N C: N O
1.NC 2 .N O

16:11
CHINA MOBLLE
Attachment
ON
RFID
On
Wireless Sir en
Wireless Soc ket
Illegal armi ng
ON
Siren J009
alarm indicator lit constantly to enter learning state; Then on wireless strobe siren
page, press menu key to switch【Wireless Strobe Siren】ON or OFF, host will send
signal as shown in picture 4-26; wireless strobe siren will beep twice and indicator
flashes twice after receiving the signal, which means the code match successfully,
then press the SET key of strobe siren to exit the learning state.
Check the Success of Code Match: after wireless strobe siren exit learning state,
press menu key to switch【Wireless Strobe Siren】ON or OFF, if it ’s OFF, strobe siren
will beep “di di”; if it ’s ON, siren will alarm siren, which means the host match code
successfully with wireless strobe siren.
Solar Strobe Siren J1
4.7.4.2 Alarm Siren
On wireless strobe siren page, press key【DOWN】to move the cursor behind【
Alarm Siren】, press menu key to switch ON or OFF, then press key【OK】to save.
The factor y default is ON.
When【Alarm Siren】is ON, if host alarms, the wireless strobe siren learned will alarm
as well. After disarm or host alarm ends, strobe siren will stop alarm.
When【Alarm Siren】is OFF, if host alarms, the wireless strobe siren learned will not
alarm siren.
Picture 4-27 Picture 4-28 Picture 4-29
4.7.5 Wireless Alarm Linkage Switch
On accessories manage page, as shown in picture 4-27. Press key【UP/DOWN】
to move the cursor behind【Wireless Alarm Linkage Switch】, as shown in picture
4-27, then press key【OK】or number 5 directly to enter wireless alarm linkage
switch page, as shown in picture 4-28.
4.7.5.1 Code Match between Host and Smart Socket
Code Match Method: In smart socket standby mode, long press key SET for 5s
until the socket indicator light turns out to enter learning state; Then on wireless
alarm linkage switch page, press menu key to switch【Wireless Alarm Linkage
Switch】ON or OFF, host will send signal as shown in picture 4-29; smart socket
indicator light flashes twicel, which means the code match successfully, then
press the SET key of smart socket to exit the learning state.
Check the Success of Code Match: after smart socket exit learning state, press
menu key to switch【Wireless Alarm Linkage Switch】ON or OFF, if it’s OFF, smart
socket lit RED; if it ’s ON, socket lit BLUE, which means the host match code
successfully with smart socket.
mart socket S71
4.7.5.2 Alarm Linkage
As shown in picture, on wireless alarm linkage switch page, press key【DOWN】
to move the cursor behind【Alarm Linkage】, press menu key to switch ON or OFF,
then press key【OK】to save. The factory default is ON.
When【Alarm Linkage】is ON, if host alarms, the smart socket learned will close
automatically; After disarming or host alarm ends, it turns off automatically.
When【Alarm Linkage】is OFF, if host alarms, the smart socket learned will not
close automatically.
4.7.6 Illegal Arm
On accessories manage page, press key【UP/DOWN】to move the cursor behind
【Illegal Arm】or press number 6 directly, as shown in picture 4-30. Then press
menu key to switch【Illegal Arm】ON or OFF. This can be used to check if door is
closed. If the function is ON, and when you go out to arm it if the door is open, host
will voice prompt “XXX Zone is open”. If the function is OFF, there is no indication
to the unclosed door.
16:11
CHINA MOBLLE
Wireless Socket
Output with al arm
OFF
ON
Wireless Soc ket Off
On
16:11
CHINA MOBLLE
Wireless Socket
Output with al arm
OFF
ON
Wireless Soc ket Off
On
Senging…

16:11
CHINA MOBLLE
Appliance
Auto switch
Sockets lis t
48%
中国移动 16:15
Rccording
48%
中国移动 16:16
录音
Picture 4-30 Picture 4-31 Picture 4-32
4.8 Recording
Host will play the preset recording after dialing the preset alarm number . And
the recording set method is below:
As shown in picture 4-2, on main page, press key【UP/DOWN】to move the cursor
behind【Recording】, then press key【OK】or number 3 directly to enter recording
set page, as shown in picture 4-31; On recording set page, press key【BACK】to
return the main page; Press any key to start recording, and start the countdown
10s, as shown in picture 4-32, at this moment, speak to the host the recording
content. The content should be brief, e.g. “ This is XXX house, it ’s intruded illegally,
please help”.
Host will exit automatically after 10s, and user can press any key to end recording
during the recording process.
4.9 Appliances
As shown in picture 4-2, on main page, press key【UP/DOWN】to move the cursor
behind【Appliances】or press number 4 directly to enter appliances set page,
as shown in picture 4-33.
4.9.1 All Sockets
After entering appliances set page, stop the cursor on【All Sockets】and press
key【OK】to enter all sockets set page, as shown in picture 4-34. Press key【UP/
DOWN】to select socket number, then press menu key to switch ON or OFF ( Or
press number key【1】directly to turn on, and press【2】to turn off ) meanwhile,
host will send the signal of ON or OFF, as shown in picture 4-35. Host has 20 sockets
signal ans can program 20 smart sockets at least. The factor y default switch is OFF.
The code match between host and sockets is the same as the code match of
wireless alarm linkage switch, but it don’t link to host alarm.
4.9.2 Time Switch
After entering appliances set page, stop the cursor on【All Sockets】, press key
【UP/DOWN】to move the cursor behind【Time Switch】, then press key【OK】
to enter time switch page, as shown in picture 4-36. There are 40 set items on
the page, press key【UP/DOWN】to select set item, and press key【OK】to enter
time switch set page. As shown in picture 4-37, there are four set items: time,
act, week and socket number, and press key【UP/DOWN】to move cursor and
select and set one by one, press key【OK】to save at last, and exit the set page.
4.9.3 Delete Time Switch
Delete single time switch: After entering time switch page, press key【UP/DOWN】
to select the set items need to be deleted, then press key【OK】, host will pop
up a small menu, as shown in picture 3-38. If selecting【Edit/Add】, user can
edit and change set items; if selecting【Delete】, host will pop up a confirmation
menu, then select Yes, and press key【OK】to confirm to delete.
Delete all time switches: as shown in picture 3-39, there is a delete all function
at the bottom of time switch page, press key【UP/DOWN】to select this function,
and then press key【OK】, press again key【OK】after the confirmation menu
popped up to delete all set items.
Picture 4-33 Picture 4-34 Picture 4-35
Picture 4-36 Picture 4-37 Picture 4-38
Picture 4-39 Picture 4-40 Picture 4-41
4.10 System Set
On main page, press key【UP/DOWN】to move the cursor behind【System Set】,
then press key【OK】or number 5 directly to enter system set page, as shown
in picture 4-40.
4.10.1 Delay Set
On system set page, put cursor on【Delay Set】, and press key【OK】to enter
delay set page, as shown in picture 4-41.
4.10.1.1 Delay Arm Set
On delay set page, put cursor on【Delay Arm Time】, input the delay time(0-
16:11
CHINA MOBLLE
Attachment
OFF
RFID
Off
Wireless Sir en
Wireless Soc ket
Illegal armi ng
ON
Press any ke y to sta rt Press any ke y to sto p
16:11
CHINA MOBLLE
Sockets List
Socket 01
Socket 02
Socket 03
Socket 04
OFF
ON
OFF
On
Off
OnON
Off
1. On 2. O ff
1. On 2. O ff
1. On 2. O ff
1. On 2. O ff
16:11
CHINA MOBLLE
Sockets List
Socket 01
Socket 02
Socket 03
Socket 04
OFF
ON
OFF
On
Off
OnON
Off
1. On 2. O ff
1. On 2. O ff
1. On 2. O ff
1. On 2. O ff
Sending…
16:11
CHINA MOBLLE
Auto switch
(Empty)
(Empty)
(Empty)
(Empty)
16:11
CHINA MOBLLE
Auto switch
Time: 10:08
Oprate:Au to Off
Week: Mon Tue We d Th u Fr i Sat Sun
Socket No. 01
16:11
CHINA MOBLLE
Auto switch
(Empty)
(Empty)
Delete all
(Empty)
16:11
CHINA MOBLLE
Auto switch
(Empty)
(Empty)
(Empty)
(Empty)
Delete
Edit / Add
01/40
16:11
CHINA MOBLLE
System
16:11
CHINA MOBLLE
Delay
Delay
Auto arm/dis arm
Date&time
Volume Voi ce: 5 Al ar m: 5
Mar. 09.2 01 5 10 :09
Arm: 0 s A la rm: 0 s Arm delay(S) :
Alarm delay( S): 0 (0-255s)
0 (0-255s)
1/40
1/40

16:11
CHINA MOBLLE
Time: 10:08
Arm/Disarm : Auto A rm
Week: Mon Tue We d Th u Fr i Sat S un
255s), then press key【OK】to save setting. During delay arm, host beeps “di”
ever y 1s until the delay ends. If user press key ARM in delay arm state, host will
exit delay arm state and arm directly. 0 means no delay and arm at once.
4.10.1.2 Delay Alarm Set
On delay set page, press key【DOWN】to move cursor behind【Delay Alarm
Time】, input the delay period(0-255s), then press key【OK】to save the setting.
During delay alarm, host beeps “di” every 1s until the delay ends. 0 means no
delay and alarm at once.
4.10.2 Timing Arm/Disarm
As shown in picture 4-39, on system set page, press key【DOWN】to move cursor
behind【Timing Arm/Disarm】, and then press key【OK】to enter timing arm/disarm
page, as shown in picture 4-42.
4.10.2.1 Timing Arm/Disarm Set
On timing arm/disarm page, there are 8 set items, press key【UP/DOWN】to select
set item, then press key【OK】to enter timing arm/disarm set page. As shown in
picture 4-43, there are 3 set items: time, arm/disarm, and week, press key【UP/
DOWN】to move cursor to select and set one by one. Press key【OK】to save at
last, and exit set page.
Picture 4-42 Picture 4-43 Picture 4-44
4.10.2.2 Delete Timing Arm/Disarm Set
Delete Single Timing Arm/Disarm Set: After entering timing arm/disarm page,
press key【UP/DOWN】to select set items need to be deleted. Press key【OK】,
and host will pop up a small menu, if selecting【Edit/Add】, user can edit and
change set item; if selecting【Delete】, host will pop up a confirmation menu,
select Yes, and press key【OK】to confirm to delete it.
Delete All Timing Arm/Disarm Set: as shown in picture 4-44, there is a Delete All
function at the bottom of Timing Arm/Disarm page, press key【UP/DOWN】to select
this function, then press key【OK】, and press key【OK】again after confirmation
menu popped up to delete all set items.
4.10.3 Time Date Set
As shown in picture 4-40, on system set page, press key【DOWN】to move the
cursor behind【Time Date Set】, then press key【OK】to enter time, date set page.
As shown in picture 4-45, press numbers directly to set year, month, hour, minute,
and second. Press key【UP/DOWN】to switch year, month, day, hour,minute and
second. Press key【OK】to save the setting.
4.10.4 Volume Adjustment
As shown in picture 4-40, on system set page, press key【DOWN】to move the
cursor behind【Volume Adjustment】, then press key【OK】to enter volume
adjustment page, as shown in picture 4-46.
4.10.4.1 Voice Volume
On volume adjustment page, put the cursor on【Voice Volume】, input volume
level 0-7, then press key【OK】to save the setting. 0 means mute during the
operation to host, and 7 means the largest volume. The factor y default is level 5.
4.10.4.2 Alarm Volume
On volume adjustment page, press key【DOWN】to move the cursor behind【
Alarm Volume】, input level 0-7, then press key【OK】to save the setting. 0 means
the mute of internal siren when alarms, 7 means the largest volume. The factor y
default is level 5.
Picture 4-45 Picture 4-46 Picture 4-47
4.10.5 Set Alarm Siren Period
As shown in picture 4-40, on system set page, press key【DOWN】to move the
cursor behind【Set Alarm Siren Period】, then press key【OK】to enter alarm siren
period set page. As shown in picture 4-47, input minutes 0-20, then press key【
OK】to save the setting. 0 means no siren when alarms, and the factor y default
is 1 minute.
4.10.6 Ringing Number
As shown in picture 4-40, on system set page, press key【UP/DOWN】to move the
cursor behind【Ringing Number】, press key【OK】to enter ringing number page.
As shown in picture 4-48, input ringing number 0-20, then press key【OK】to save
the setting. 0 menas to close the remote control function, and 20 means host
answers the call after receiving 20 ringing continually. The factor y default is 1.
4.10.7 Key Tone
As shown in picture 4-40, on system set page, press key【DOWN】to move the
cursor behind【Key Tone】, then press key【OK】to enter key tone set page. As
shown in picture 4-49, press menu key to switch ON or OFF, then press key【OK】
to save and exit the setting. When it’s ON, host beeps “di” with press on the
keypad. The factor y default is ON.
16:11
CHINA MOBLLE
(Empty)
(Empty)
(Empty)
(Empty)
01/08 Auto arm/disarm
16:11
CHINA MOBLLE
(Empty)
(Empty)
Delete all
(Empty)
16:11
CHINA MOBLLE
Volume
Voice Volu me : 5 (0 -7)
Alarm Vol ume : 5 (0 -7 )
16:11
CHINA MOBLLE
Date&time
Monday
15 Ye ar 03 Mon th 0 9 Dat e
10 H ou r 09 Mi n 31 Se c
16:11
CHINA MOBLLE
Siren &Ring time
Siren time: 0 1 min (0 -2 0)
Ring times: 01 t imes ( 0-20)
Auto arm/disarmAuto arm/disarm Auto arm/disarm

16:11
CHINA MOBLLE
KeyTone
Key Tone: OnON
User passcode: 1234
Admin passcode: 123456
Keypad lock:
OFF Off
简体中文
English
CID code: 0910
Report effect:
Arm Disarm Stay
Arm SMS notice SMS Reply:ON 开On
Wallpaper
4.10.8 Hibernate Time
As shown in picture 4-40, on system set page, press key【UP/DOWN】to move the
cursor behind【Hibernate Time】, then press key【OK】to enter hibernate time
set page. As shown in picture 4-50, there are 6 items: 30s, 60s, 2 mins, 5 mins, 10
mins and never on hibernate time page. Press key【UP/DOWN】to move the cursor
to select, then press key menu to confirm the selection, press key【OK】to save
the setting at last and exit the setting page. The factor y default is 30s, which means
host will turn off the display and enter hibernate state if no operation within 30s.
4.10.9 Language Set
As shown in picture 4-40, on system set page, press key【UP/DOWN】to move the
cursor behind【Language Set】, then press key【OK】to enter language set page.
As shown in picture 4-51, there are simple Chinese and English to select on
language set page. Press key【 UP/DOWN 】to move the cursor to select, then
press key menu to confirm the selection, press key【 OK 】to save and exit the
setting page.
Picture 4-48 Picture 4-49 Picture 4-50
Picture 4-51 Picture 4-52 Picture 4-53
4.10.10 Security Set
As shown in picture 4-40, on system set page, press key【UP/DOWN】to move the
cursor behind【Security Set】, then press key【OK】to enter security set page,
as shown in picture 4-52.
4.10.10.1 User Password
On security set page, put the cursor on【User Password】, input 4-digit password,
and press key【OK】to save. User Password is used to restrict the access of others.
When keypad lock is ON, only input user password to arm, disarm and stay arm
host. Operation method: user password+arm/disarm/stay arm.
4.10.10.2 Administrator Password
On security set page, press key【DOWN】to move the cursor behind【Administrator
Password】, input the 6-digit password to set directly, then press key【OK】to
save. With the highest authority, administrator password can set through opening
keypad lock: to call, set and inquir y SMS remotely. The host factor y default
password is 123456.
4.10.10.3 Keypad Lock
On security set page, press key【DOWN】to move the cursor behind【Keypad
Lock】, press menu key to switch ON or OFF, then press key【OK】to save. When
the lock function is ON, host enters hibernate state, and the keypad is locked,
and no effect for any press on the function keys. User can operate the host only
by inputting the password. The factor y default is OFF.
Note: when the lock function is ON and host is not in hibernate state, user can
lock the keypad by long pressing【Keypad Lock】for 3s.
4.10.11 Network Center
As shown in picture 4-40, on system set page, press key【UP/DOWN】to move the
cursor behind【Network Center】, then press key【OK】to enter network center
page, as shown in picture 4-53.
4.10.11.1 Center Number
On network center page, put the cursor on【center number】, input the center
number needs to be set, and press key【OK】to save. The center number is the
account displayed on the network center of each host.
4.10.11.2 Upload Arm/Disarm
On network center page, press key【 DOWN 】to move the cursor on【 Upload
Arm/Disarm 】, there are 3 items: Arm, Disarm and Stay Arm to select, press key
【UP/DOWN 】to move the cursor to select ( can select multiple), then press
menu key to confirm the selection, and press key【OK】to save at last and exit
the setting page.
4.10.12 Arm/Disarm SMS
As shown in picture 4-40, on system set page, press key【UP/DOWN】to move the
cursor behind【Arm/Disarm SMS】, then press key【OK】to enter Arm/Disarm SMS
page, as shown in picture 4-54. On Arm/Disarm SMS page, there are 3 items:Arm
SMS Inform, Disarm SMS Inform and Stay Arm SMS Inform to select, press key【UP/
DOWN】to move the cursor to select, then press menu key to confirm the selection,
and press key【OK】to save and exit the setting page.
Picture 4-54 Picture 4-55 Picture 4-56
16:11
CHINA MOBLLE
Screensaver
Key Tone:
3 0 Seconds
6 0 Seconds
2 minutes
5 minutes
Language Secruity Contact ID
Arm/Disarm SMS SMS reply
Disarm SMS notice
Stay SMS notice
16:11
CHINA MOBLLE
GPRS
GPRS: off
APN:
APN User:
APN Passc ode:
Ser ver:
Por t:
User ID: 0000 00
Disconnect S er ver
16:11
CHINA MOBLLE 16:11
CHINA MOBLLE 16: 11
CHINA MOBLLE
16:11
CHINA MOBLLE 16:11
CHINA MOBLLE 16:11
CHINA MOBLLE

Phone
(Empty)
1 2 3
4 5 6 0
7 8 9 Call
01/66
Arm
Mar. 09 201 5 16:1 9 Ke yp ad
01/99
Disarm
01/66
01/66
4.10.13 SMS Reply ON/OFF
As shown in picture 4-40, on system set page, press key【UP/DOWN】to move the
cursor behind【 SMS Reply ON/OFF 】, then press key【 OK 】to enter SMS Reply
ON/OFF page. As shown in picture 4-55, press menu key to switch ON or OFF,
then press key【 OK 】to save and exit the setting. If selecting ON, host will text
back to inform whether the setting is right after user text to set the host. The factor y
default setting is ON.
4.10.14 Wallpaper Set
As shown in picture 4-40, on system set page, press key【UP/DOWN】to move the
cursor behind【Wallpaper Set】, then press key【OK】to enter Wallpaper Set page.
As shown in picture 4-56, on Wallpaper Set page, there are 4 to select, press key
【UP/DOWN】to move the cursor to select, and press key【OK】to save and exit
the setting page.
4.10.15 Power Supply Alarm
As shown in picture 4-40, on system set page, press key【UP/DOWN】to move the
cursor behind【Power Supply Alarm】, then press key【OK】to enter Power Supply
Alarm page, as shown in picture 4-57.
4.10.15.1 Host Power Off
On Power Supply Alarm page, put the cursor on【Host Power Off】, there are 4
items: voice, alarm,SMS, and Call to select, press key【UP/DOWN】to move the
cursor to select, then press menu key to confirm, and press key【OK】to save and
exit the setting page. After setting the Host Power Off function, host will remind
you if the power is off to avoid the unnecessar y lost.
4.10.15.2 Host Power On
On Power Supply Alarm page, put the cursor on【Host Power On】, there are 4
items: voice, alarm,SMS, and Call to select, press key【UP/DOWN】to move the
cursor to select, then press menu key to confirm, and press key【OK】to save
and exit the setting page. After setting the Host Power On function, host will remind
you if the power is on.
4.10.15.3 Host Low-voltage
On Power Supply Alarm page, put the cursor on【Host Low-voltage】, there are 4
items: voice, alarm,SMS, and Call to select, press key【UP/DOWN】to move the
cursor to select, then press menu key to confirm, and press key【OK】to save and
exit the setting page. After setting the Host Low-voltage function, host will remind
you to charge if the host is in low voltage.
4.10.15.4 Detector Low-voltage
On Power Supply Alarm page, put the cursor on【Detector Low-voltage】, there
are 4 items: voice, alarm,SMS, and Call to select, press key【UP/DOWN】to move
the cursor to select, then press menu key to confirm, and press key【OK】to save
and exit the setting page. After setting the Detector Low-voltage function, host
can receive the low voltage signal from the detector and remind you to change
the batter y.
Picture 4-57 Picture 4-58 Picture 4-59
Picture 4-60 Picture 4-61 Picture 4-62
4.10.16 Restore Factory Default Set
As shown in picture 4-40, on system set page, press key【UP/DOWN】to move
the cursor behind【Restore Factory Default Set】, then press key【OK】to enter
Restore Factor y Default Set page. As shown in picture 4-58, on Restore Factory
Default Set page, there are 4 function items: Delete All Remote Controls, Delete
All Detectors, Delete All Access Cards, and Restore All Settings to select, press
ey【UP/DOWN】to move the cursor to select, then press menu key to cancel the
state selected, press key【OK】to confirm, and press key【OK】again after the
confirmation menu popped up to delete all the setting item selected.
4.11 Phone Call
As shown in picture 4-2, on main page, press key【UP/DOWN】to move the cursor
behind【Phone Call】, then press key【OK】or number 6 directly to enter Phone
Call page. As shown in picture 4-59, press the number to call, e.g. 10086, then
press key【OK】to begin the call. Press key【Back】 or key【OK】 to hang off
during the calling.
On Phone Call page, there are the calling records, and it displays the number
dialed, date, and time etc on each records. User can press key【UP/DOWN】to
move the cursor to select the number and press key【OK】to redial the number.
4.12 Black Box
As shown in picture 4-2, on main page, press key【UP/DOWN】to move the cursor
behind【Black Box】, then press key【OK】or number 7 directly to enter Black
Box page, as shown in picture 4-60.
4.12.1 Arm/Disarm Records
On Black Box page, press key【 Confirmation 】to enter Arm/Disarm Records
Inquir y page. As shown in picture 4-61. Press key【UP/DOWN】to inquiry each
Arm/Disarm records. As high as 99 records can be saved, and it displays Arm/
STAY/Disarm, Arm/Disarm date, time and mode etc on each record.
Pan el low b atter y:
Detector low batte r y:
Voice s ir en SMS ca ll
Pan el pow er off:
44%
中国移动 16:18
Power alarm
Pan el pow er on:
Voice s ir en SMS ca ll
Delete remotes
Restore factor y
Delete detectors
Detector RFID card s
Restore set ting s
16:11
CHINA MOBLLE 16:11
CHINA MOBLLE
Arm/Disarm h isto r y
Black Box
Alarm histor y
RFID history
16:11
CHINA MOBLLE
Arm/Disarm histor y
16:11
CHINA MOBLLE 16:11
CHINA MOBLLE
Disarm
Disarm
Janr. 03 20 15 2 0:55 Key pa d 03
Alarm histor y
99 Zone
Janr. 03 20 15 2 0:52
99 Zone
Janr. 03 20 15 2 0:52
99 Zone
99 Zone
Janr. 03 20 15 2 0:52

01/66 RFID histor y
01 RFID
4
5
6
3
4
5
6
10 1389999
8888
10
7
8
11
12
1—NO
2—NC
51、52
Normal
Zone
9
10
11
12 12
13
13
14
13
14
15
14
15 08:00
Time
1234567
Day
17
16
4.12.2 Alarm Records
On Black Box page, press key【 DOWN 】 to move the cursor behind【 Alarm
Records】, As shown in picture 4-62, press key【Confirmation】to enter Alarm
Records Inquir y page.Press key【UP/DOWN】to inquir y each alarm records. As
high as 99 records can be saved, and it displays Alarm date, time and zones etc
on each record.
4.12.3 Read Card Records
On Black Box page, press key【DOWN】to move the cursor behind【Read Card
Records】, As shown in picture 4-63, press key【Confirmation】to enter Read Card
Records Inquir y page.Press key【UP/DOWN】to inquir y each card read records.
As high as 99 records can be saved, and it displays Read date, time and zones
etc on each record.
Picture 4-63
4.13 About
As shown in picture 4-2, on main page, press key【UP/DOWN】behind【About】
,
then press key【OK】or press number 8 directly to enter About page. there are
two and the second is our D Bar codes, the first one is our company website,
company We chat public ID; besides, there are product model, software version
number and IMEI code under D Bar code.
V. SMS Set and Inquir y Command Chart
In addition to set host parameter through menu, SMS or Fly Message is available
to set host parameter. SMS or Fly Message form is below:【Administrator Password】
+【Command Number】+ parameter 1+parameter 2+parameter 3+parameter
4+parameter 5. All commands begins with administrator password, and 123456
in commands below is host initial password. If user changed the administrator
password, and the password should be the one changed, or host will not response
to the commands.
1
2
3
0
1
2
NO. Name Comm
and No. Parameter 1 Para. 2 Para. 3 Para. 4 Para. 5 Example
Disarm
Arm
STAY
01~08 Set
the Phone
Number
Group, 8 at
the most
00 or 01~08
00: Delete
All the
Numbers
1234560
Disarm
1234561
Arm
1234562
Re-dial/
Monitor
Linkage
Socket ON
Linkage
Socket OFF
Inquir y State
Set Phone
No.
Delete
Phone No.
Inquir y
Phone No.
Set Zone
Attribute
Inquriy Zone
Attribute
Set Remote
Control
Attribute
Inquir y
Remote
Control
Attribute
Appliances
Control
Inquir y
Appliances
Attribute
Set
scheduling
appliances
01~08
Group 01-08
01~99
01-99 Zone
01~99
01~99
Remote
Control
01~99
01~99
Remote
Control
01~99
01-99 Zone
01-20
01-20 Smart
Socket
01-20
01-20 Smart
Socket
01-40
01-40
Scheduling
Group
1—Siren
when
Alarms
2—Not
Siren
When
Alarms
1–
Remote
SND Sound
0--No SND
Sound
01-20
01-20
Smart
Sockets
1--Close
0--Open
1234
1—Alarm
Phone
2—Alarm
Message
3—RFID
Inform
4—CID
1—Normal
Zone
2—STAY Zone
3—Intelligent
Zone
4—Emergency
Zone
5—Close Zone
6—Doorbell
Zone
7—Welcome
Zone
8—Elder Zone
1—Timing
Close
0—Timing
Open
1—Medical
2—Fire
3—Robber y
4—Silence
5—Burglar
6—Perimeter
7—Gas
1234563
Alarm Panel Redial
1234564
Linkage Socket ON
1234565
Linkage Socket OFF
1234566
Inquir y Arm/Disarm,
Power Supply, Relay
123456100113899998888,
123 Set 1st Group Phone
No., Call, SMS Message, RFID.
1234561005
Delete 5th Phone No.
1234561108
Inquir y 8th Phone Number
12345612511141
Set 51 Zone, Siren, Normal,
Silence, NO
1234561255
Inquir y 55 Zone Attribute
12345613200
No SND Sound to No. 20
Remote Control
1234561333
Inquir y SND Sound of No. 33
Remote Control ON/OFF
12345614011
No. 1 Intelligent Switch
Closed
1234561405
Inquir y No.5 Smart Socket
Switch ON/OFF State
1234561501031080012345
Set 1st group Timing, at 8:
00Day 12345 No. 3 Smart
Socket Timing Close
16:11
CHINA MOBLLE
Janr. 03 20 15 1 9:45
Janr. 03 20 15 2 0:52
01 RFID
01 RFID
Janr. 03 20 15 1 9:45
Janr. 03 20 15 2 0:52
03 RFID

18 15
19 16
17 0~255
17
18
1234567
Day
20
21
22
23 18
19
24
25
26
20 203000
20
21 1~7
21
22
27
28
29
22
23
30
31
32 23
33
34
35
36
37
38
39
40
41
42
43
44
45
46
24
24
26
27
25
25
26
27
28
28
29
29
30
30 01-20
31
47
Delete
Scheduling
Appliances
Set
Inquir y
Scheduling
Appliances
Set
Delay Set
Inquir y
Delay Set
08:00
Time
1—Disarm
0—Not
Disarm
Scheduling
Arm/Disarm
Set
Delete
Scheduling
Arm/Disarm
Set
Inquir y
Scheduling
Arm/Disarm
Set
Set Time &
Date
Inquir y
System
Time and
Date
Set Volume
Inquir y
Volume
Set Alarm
Siren Period
Inquir y
Alarm Siren
Period
Set Ringing
Times
Inquir y
Ringing
Times
Set Password
Inquir y
Password
0—Not Reply
1—Reply
00or01-40
Scheduling
Group
00:Delete All
Scheduling
01-40
Scheduling
Group
1—Delay
Alarm
2—Delay
Arm
1—Delay
Alarm
2—Delay
Arm
01-08
01-08
Scheduling
Group
00 or 01-08
Scheduling
Group
00: Delete
all Scheduling
01-08
Scheduling
Group
20140827
1—Voice
Volume
2—Alarm
Volume
1—Voice
Volume
2—Alarm
Volume
00~20
0-20 Minutes
00-20
0-20 Times
1—User
Password(
4 digits)
2—
Administrator
Password(6
digits)
1--User
Password
2–
Administrator
Password
1234
4 digit CID
Number
123/0
1—Arm
Upload
2—Disarm
Upload
3—STAY
Upload
0—No Upload
01-99
1-99 Zone
01-99
1-99 Zone
123/0
1—Arm
Inform
2—Disarm
Inform
3—STAY Inform
0—No Inform
01-20
RFID Card
No.
01-20
RFID Card
No.
01-20
RFID Card
No.
Set CID
Number
Inquir y CID
Number
Set Arm/
Disarm
Upload
Center
Inquir y Arm/
Disarm
Upload Set
Set Zone SMS
Message
Content
Inquir y Zone
SMS
Message
Content
Arm/Disarm
SMS Inform
Set
Inquir y Arm/
Disarm SMS
Inform Set
Set RFID SMS
Inform and
Disarm ON/
OFF
Inquir y RFID
SMS Inform
and Disarm
ON/OFF
Set RFID
SMS Inform
Content
Inquir y RFID
SMS Inform
Content
Set SMS
Reply ON/
OFF
1—Timing
Arm
0—Timing
Disarm
1234or
123456
ABCEFG
SMS
Contents(
less than 25
characters)
1--Inform
0—Not
Inform
ABCD
Message
Content(
less than 25
characters)
123456242345678
Set User Password as
345678
123456241
Inquir y User Password
123456251234
Set CID No. As 1234
12345625
Inquir y CID No.
1234562613
Set Arm, STAY Upload, Disarm
Not Upload
123456260
No Upload
12345626
Inquir y Arm/Disarm
Upload Set
1234562705ABCDEFG
Set Zone 5 Alarm Message
Content as ABCDEFG
1234562705
Inquir y Zone 5 Message
Content
12345628
Inquir y Arm/Disarm SMS
Message Inform Set
123456290110
Set 01 RFID Card SMS Inform
when Read, Not Disarm
1234562901
Inquir y 01 RFID Card SMS
Inform and Disarm ON/OFF
1234563005ABCD
Set 5th RFID Card Inform
Content as ABCD
1234563003
Inquir y 3rd RFID Card Inform
Message Content
123456310
Set Host Not Reply Set SMS
Message
1234561502
Delete 2nd Group
Appliance Timing
1234561601
Inquir y 1st Group
Appliances Timing Set
12345617136
Set Delay Alarm Period
as 36s
123456172
Inquir y Delay Arm Period
12345618011080012345
Set 1st Group Timing, Arm
at 8:00 on Day12345
1234561802
Delete 2nd Group Timing
Arm/Disarm
1234561901
Inquir y 1st Group Timing
Arm/Disarm Set
1234562020140827203000
Set Time as 20:30:00 on 27
Aug. 2014
12345620
Inquir y System Time& Date
1234562125
Set Alarm Volume Level as 5
123456211
Inquir y Voice Volume
1234562205
Set Alarm Siren Period as
5mins
12345622
Inquir y Alarm Siren Period
1234562308
Set Ringing 8 times
12345623
Inquir y Ringing Times
1234562812
Set Arm, Disarm Inform, STAY
not Inform
123456280
No Inform to Arm/Disarm
Note: “123456” in the chart above is the administrator password. If password
changed, use the password changed.

Input phone No……
Alarm Phone
CID
USER1
接警号码
防区短信
RFID短信
CID号设置
USER1
RFI D
CID
Select User +Register Account
13712345678
USER1
6
1 2 3
4 5 6
7 8 9
0
ABC DE F
GHI JK L MNO
PQRS T UV WXYZ
USER1
+
Function
Arm Stay Disarm
Callback S ocket O N Socket OFF
Appliance
NO
OFF
USER1
+
Vl. APP Remote Set
This host can be set remotely by APP in mobile phone. The mobile phone with iOS
system will change to SMS interface during operation while Android phone will
not but complete the SMS text operation in the background.
6.1 Download and Installation
iOS user log in APP Store, input key word”G19 alarm system”, or scan the bar code
in picture 6-1 below to reach G19 alarm host software, download and install it
in the phone.
Picture 6-1 Picture 6-2
Android user log in mobile phone Baidu Helper, input key word “G19 alarm system”,
or scan the bar code in picture 6-2 below to reach G19 alarm host software,
download and install it.
6.2 Add Host Accounts
This procedure can bound mobile phone APP and alarm host. One G19 alarm
host software can add multi accounts, that is one mobile phone control multi
G19 alarm hosts.
To add host accounts: click G19 alarm host software to enter 【 Select User 】
interface. Click icon to enter New User Registration interface, then input host
number and account name and password twice, click icon to finish registration.
The host number is the SIM card number in host, and user can define account
name, the password is host administrator password.
6.3 Operation Method
After adding host account, it will display account name on main page, then click
account name to enter function interface; move to the left to enter General Set
interface and System Set interface. For iOS user, click APP message send icon,
and APP interface will jump to message sending interface. Then click【Send】,
host will beep “di ” after receiving the message, and reply message to mobile
phone automatically, which means the setting is successful.
Take the setting of receiving alarm phone number for example:
Click the account name on main page to enter function interface, then move
left forward to enter General Set interface, click【Receiving Alarm Phone Number】
to enter Receiving Alarm Phone Number set main inter face. 8 groups of number
could be set in this interface, click any group to enter number set small interface.
Input receiving alarm phone number on【Input Phone Number】and select the
number function on Alarm Phone, Alarm SMS Message, RFIF Inform, CID( CID is
single selection, and other function can be single as well as multi-choice.) and
Common System
Quer y
Select User
Function Common System
Alarm Phone No.
Defence Zone SMS
RFID SMS
CID Set
1
RFID Notice
Alarm SMS
Inquire
Confirm
1
2
3
4
5
6
7
8
Alarm Phone No
Function Common System
Password Set
System Time
Delay Arm/Disarm
Siren Time
System Volume
Scheduled Arm/Dis arm
Appliance Timing
Zone Type
Remote Control
Ringing Times

01-59 60-79 80-89 90 91 92 93-99Zone Zone Zone Zone Zone Zone Zone
click【Confirm】after completing selection. APP interface jumps to SMS Message
interface, click【Send】, and the message will be sent to host SIM Card number.
Vll. Receive Alarm and Remote Control
7.1 Measures after Receiving Alarm
When there is an alarm, host will dial the preset phone number automatically
through GSM network, and text to the message receiving alarm phone number,
and siren alarm according to the setting. If owner ’s phone is busy or couldn’t be
connected, host will dial next alarm phone number and it will dial all the preset
phone numbers 3 times repeatedly. The recording will be played after the alarm
phone call is answered. User can press the number keys on the phone to realize
the corresponding control function with no need of password
Key [1]:Arm Key [2]:Disarm Key [3]:Turn On Monitor
Key [4]:Turn Off Monitor Key[5]:Turn On Speaker Key[6]:Turn Off Speaker
Key[7]:Alarm Siren Key[8]:Turn Off Siren Key[9]:Open Linkage Socket
Key[0]:Close Linkage Socket Key[*]:Exit and hang up
Press key[*]:Exit and hang up, host will not dial next alarm phone number. If no
press on key “*”or“2”, host will continue to dial next alarm receiving number.
7.2 Remote Control via Phone
User can user any telephone or mobile phone to dial alarm host SIM Card number
to control host remotely. Host will be connected automatically after 1 ringing
cycle, input password ( the default administrator password is”1234546”, and
user password is “1234”, user will be prompted to re-enter if password is wrong,
and host will hang up after 3rd wrong password) after hearing “ please input
password” voice indication. After correct password, user will hear correct password
prompt, and at this moment, press the number key below to realize the related
control function:
Key [1]:Arm Key [2]:Disarm Key [3]:Turn On Monitor
Key[5]:Turn On Speaker Key[6]:Turn Off SpeakerKey [4]:Turn Off Monitor
Key[7]:Alarm Siren Key[8]:Turn Off Siren Key[9]:Open Linkage Socket
Key[0]:Close Linkage Socket Key[*]:Exit and hang up.
After inputting administrator password, user press key【#】to enter phone remote
control set state, and press [01-20]+[0/1]to control the ON/OFF of 01-20 groups
smart sockets ( [0/1]—0 means OFF,1 means ON ).
Vlll. System Parameters
8.1 System Factory Default Zone Type
Normal
Zone STAY Zone Intelligent
Zone
Elder for Help
Zone
Doorbell
Zone
Welcome
Zone
Emergency
Zone
User Password 1234 Ringing Times 1 time
Illegal Arm OFF Remote Control SNS Sound ON
Alarm Siren Period 1 minute Delay Alarm 0S
Delay Arm 0s 1-99 Zone Alarm Alarm Siren
51-52 Wired Zone Short-circuit Alarm NO 1-99 Zone Message XX Zone Alarm
8.2 System Factory Default Value
Administrator Password 123456 Send SMS Message ON
8.3 System Technical Parameters
Input Voltage: DC5V
Standby Current:<50mA
Alarm Current:<450mA
Wireless Frequency:433MHz
GSM Standard:Support GSM850/900/1800/1900MHz
Back-up Batter y:3.7 High Capacity LI Batter y
Alarm Loudness:80dB
Accessories Parameters: this alarm can be compatible with PT2262 and EV1527
detectors. When using PT2262 coding, shock resistance is supposed to be 1.5M
-4.7M, when using the EV1527 coding, vibration resistance is supposed to be
150K-470K.
lX. Installation and Usage of Detectors
9.1 Installation and Use of Door Sensor
Door sensor is used in magnetic induction of close and open state, and is
consisted of transmitter and magnetic. It can be installed on doors, windows or
any object that can be closed and opened. When transmitters is separated with
magnetic, door senser will send alarm signal to alarm panel, and host begins
alarm siren.
P29 P30

P31 P32
The door contact should be installed on the movable door. Firstly, clean the
corresponding position, and take out wireless door contact , then put on the
double faced adhesive. The installation should note the items below:
1.The door sensor part A (transmitter) and part B (magnet) should be installed
separately, that is, A on fixed door frame and B on movable door. ( the side with
lights of transmitter should correspond with the magnet )
2. A and B should in the same vertical line and the distance between A and B
should not greater than 1 cm.
3. After the installation, the indicator light flashes for 1s as the door open, that
means the door sensor is installed successfully.
4.The indicator light lit for 1 second, means alarm. The indicator in constant light
is a suggestion of power lack.
5.A, B can also be reinforced by screws, (A: remove the bottom cover, then screw
in the bottom, buckle the cover to the bottom; B can be directly fixed on the
screw back.)
9.2 Installation and Use of PIR Motion Detector
Before use, make sure the power switch of PIR motion sensors is ON. Installation
height is about 2.2 meters above ground and it should be installed in the corner
of the room to get the best detection range and should form a certain angle with
the indoor walking line at the same time ( the 90 degree angle with people walking
direction is best for detection)
Installation:
Remove the supplied mounting bracket, press the bracket to the slot in the detector
bottom. Find the base and reinforce it with two screws in the wall. Press the PIR
ground
overlook side view
with bracket into the center hole of base. and then adjust the best angle of
detecting. (This method is suitable for project installation)
Attention:
1.The detector should not face the outside of window directly.
2. Within coverage of detection, there should be no any big objects for obstruction.
3. There should be no two infrared detectors in the same space as they will possibly
intervene with each other.
4.Avoid facing window, cooling or warming machines, stoves, or other appliances
that cause the temperature changing sharply and thus cause false alarm.
5. Infrared detector are indoor use and couldn’t be used outdoor.
X. Troubleshooting
Troubleshooting Reasons Methods
1.No dial for alarm
1. no arming
2. alarm phone unset
3.parts improperly installed,
distance too far
4. code no match
1. do arming operation
2.re-set according to the specification
3. coordinating the location of parts
4. re-coding
1、Insert SIM card
2.Cancel PIN code
3.change to a strong signal place
4.change to a normal SIM card
5.set alarm phone number
6.set message alarm number
7.charge SIM card
8.activate the message function
2.Host can’t read
SIM card or don’t
dial and text to
preset alarm
phone number
1.No SIM card
2.PIN code is set for SIM card
3.bad GSM signal
4.SIM card has scratched copper
5.Alarm phone number unset
6.Message Alarm number unset
7.Card balance is insufficient or out
of date
8.Message function is OFF
3.Can’t remote operate 1.input wrong password
1.Correct password or change to
a new password or restore to factory
default
4.no ISD recorded voice
prompt when alerting
ISD Voice prompt un-recorded Record it again according to user
manual
1.re-coding
2.change batter y of the same type
3.eliminating the dirt on the pieces
caused by corrosion
4.contact the local dealer to change
the matched remote controller
5.remote controller
not work
1.coding unmatched with the host
2.insufficient power
3.batter y pieces poor contact or
corroded
4.unmatched with host
1. re-coding
2. change batter y of the same type
3. eliminating the dirt on the pieces
caused by corrosion
4. contact the local dealer to change
the matched remote controller
6.PIR sensor not work
1.coding unmatched with the host
2.insufficient power
3.batter y pieces poor contact or
corroded
4.unmatched with host
1.find the interfering source and
eliminate it
2.post back to the factory for amendment
3.check host power whether plugged well
7, siren no sound 1.internal siren is OFF 1.Open internal siren
8.The transmitter
distance for host
is shortened
1.a nearby emitter is sending code
2. host receiver stop work
3.standby batter y of the host insufficient
9.Host no Voice prompt 1 voice prompt function is OFF. 1 open voice prompt function.

P33
Model: Product number: Invoice number: Purchase date:
Date Maintenance record
Notification:this product guarantee exchange within one month,and maintenance within its lifetime affer pur chased(But not include
man-made damage,exchange of damaged parts maychar gefees)
Table of contents
Other KERUI Security System manuals
Popular Security System manuals by other brands

LYD Technology
LYD Technology RC451 manual

Consilium
Consilium Salwico CS3004 user guide

RIDGID
RIDGID Camera System SeeSnake Specifications

DMP Electronics
DMP Electronics 1141 installation guide

Visonic
Visonic POWERMAXEXPRESS - INSTALLATION 2 Installer's guide

FRIEDLAND
FRIEDLAND SA1 Installation & operating manual