manuals.online logo
Brands
  1. Home
  2. •
  3. Brands
  4. •
  5. KEUCO
  6. •
  7. Plumbing Product
  8. •
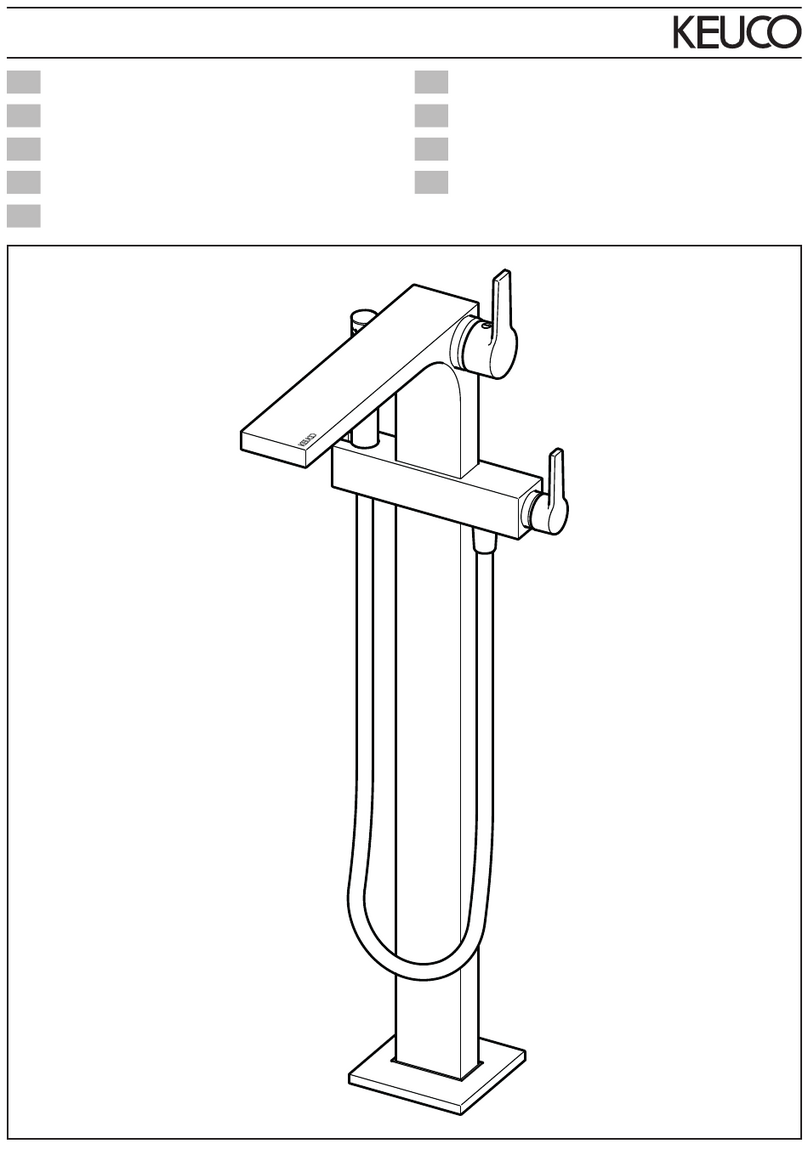
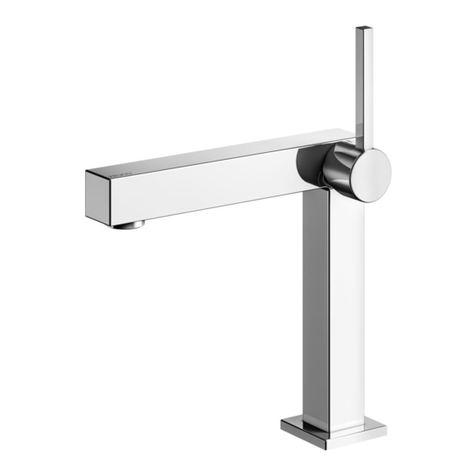
  9. KEUCO IXMO 59516 010101 User guide

KEUCO IXMO 59516 010101 User guide

DE
EN
ES
FR
IT
Montageanleitung
Mounting instruction
Instrucciones de instalación
Instructions d'installation
Istruzioni per l'installazione
NL
CS
PL
RU
Montagehandleiding
Návod k instalaci
Instrukcja montażu
Инструкция по монтажу
IXMO
74185_001/02.2021
59516 010101
59516 030101
59516 050101
59516 070101
59516 130101
59516 170101
59516 011101
59516 031101
59516 051101
59516 071101
59516 131101
59516 171101
59516 012101
59516 032101
59516 052101
59516 072101
59516 132101
59516 172101
59516 010102
59516 030102
59516 050102
59516 070102
59516 130102
59516 170102
59516 011102
59516 031102
59516 051102
59516 071102
59516 131102
59516 171102
59516 012102
59516 032102
59516 052102
59516 072102
59516 132102
59516 172102
2
DE
EN
ES
Einbaumaße
Mounting dimensions
Dimensiones de montaje
FR
IT
NL
Cotes de montage
Ingombro
Montageafmetingen
CS
PL
RU
Montážní rozměry
Wymiary montażowe
Монтажные размеры
52
74
6
Ø72
71
165/197/243
187/219/265
74
52
72
71
165/197/243
187/219/265
6
59516 XX0102 (187 mm)
59516 XX1102 (219 mm)
59516 XX2102 (265 mm)
59516 XX0101 (187 mm)
59516 XX1101 (219 mm)
59516 XX2101 (265 mm)
3
Diese Anleitung ist für den Installateur zur Mon-
tage sowie für den Nutzer zur Bedienung und
Wartung des Produktes. Bitte nach der Installati-
on an den Nutzer zur Verwahrung weitergeben.
Symbole und Bedeutung
Achtung! Warnung vor Personen- oder
Sachschaden.
Hinweis, Tipp oder Verweis
Falsche Montage
Korrekte Montage/Funktionsprüfung
Montagedetail beachten
Kaltwasser Warmwasser
Wasserfluss Kein Wasserfluss
Optional/Zubehör
Verwendungszweck
Einhebelmischer für die Verwendung in Bade-
zimmer und WC.
Technische Daten
– Durchfluss bei 3 bar Fließdruck: ca. 7,6 l/min
Einbaumaße, siehe Seite 2.
Installation, siehe ab Bild 1 auf Seite 8.
Trinkwasserleitungen vor und nach der Installa-
tion gründlich spülen (EN 806 und 1717 sowie
DIN 1988 beachten).
Nur neutral vernetzendes Silikon verwenden.
Bedienung, siehe Bild 9 auf Seite 9
Wartung, siehe Bild 10 und 11 auf Seite
9
Montage in umgekehrter Reihenfolge.
– Anzugsmoment Kartuschenmutter: 12-13 Nm
Ersatzteile mit Bestellnummern, siehe Seite 11.
Hinweise zur Gewährleistung und Pflege sind
dem beiliegendem Pflege- und Garantiepass
zu entnehmen.
DE Wichtige Informationen, bitte unbedingt lesen! EN Important information, please read!
These instructions are for both the installer for
installation and the user for operation and main-
tenance of the product. After installation, please
hand them over to the user to keep.
Symbols and explanations
Attention! Warning against bodily injury or
damage to property.
Note, tip or reference
Incorrect installation
Correct installation/test of functionality
Observe installation details
Cold water Hot water
Water flow No water flow
Optional/accessories
Intended use
Single lever mixer tap for use in bathrooms and
WCs.
Technical specifications
– Flow at 3 bar pressure: approx. 7.6 l/min
Installation dimensions, refer to page 2
Installation, refer to picture 1 on page 8
Flush potable water pipes thoroughly before and
after installation (observe EN 806 and 1717).
Use only neutrally netting silicone.
Operation, refer to picture 9 on page 9
Servicing, see refer to picture 10 and 11 on page
9
Assemble in reverse order.
– Cartridge nut torque: 12-13 Nm
For spare parts with order numbers, refer to page 11.
For warranty and care information please refer
to the attached warranty and care instruc-
tions.
4
ES ¡Información importante de lectura obligatoria!
Este manual está dirigido al instalador para el
montaje, así como al usuario para el manejo y
mantenimiento del producto. Por favor, después
de la instalación, este manual se debe entregar
al usuario para que lo conserve.
Símbolos y significado
¡Atención! Advertencia de daños personales o
materiales.
Indicación, consejo o referencia
Montaje erróneo
Montaje/comprobación de funcionamiento cor-
rectos
Observar el detalle de montaje
Agua fría Agua caliente
Flujo de agua Ningún flujo de
agua
Opcional/Accesorios
Uso previsto
Mezclador monomando para la utilización en el
baño y en el WC.
Datos técnicos
– Paso con una presión de caudal de 3 bares:
aprox. 7,6 l/min.
Medidas de montaje, véase página 2
Instalación, véase imagen 1 en la página 8
Lavar minuciosamente las tuberías de agua
potable antes y después de la instalación
(observar EN 806 y 1717).
Utilizar exclusivamente silicona de reticulación
neutra.
Manejo, véase imagen 9 en la página 9
Mantenimiento, véase imágenes 10 y 11 en la
página 9
El montaje se efectúa en el orden inverso.
– Par de apriete de la tuerca de fijación del
cartucho: 12-13 Nm
Piezas de recambio con números de pedido, véase
página 11.
En el pasaporte de mantenimiento y garantía
adjunto encontrará indicaciones sobre la
manual de mantenimiento y tarjeta de
garantía.
FR Informations importantes, à lire impérativement!
Ces instructions sont destinées à l'installateur,
pour effectuer le montage, et pour l'utilisateur,
pour utiliser le produit et procéder à sa
maintenance. Après l'installation, veuillez
remettre ces instructions à l'utilisateur pour qu'il
les conserve.
Symboles et leur signification
Attention ! Mise en garde contre les dégâts de
personnes et les dégâts matériels.
Remarque, conseil ou renvoi
Montage incorrect
Montage correct/contrôle fonctionnel
Respecter le détail de montage
Eau froide Eau chaude
Débit d'eau Pas de débit d'eau
Option/accessoires
Domaine d'utilisation
Mitigeur monocommande pour utilisation dans la
salle de bains et les WC.
Caractéristiques techniques
– Débit à une pression d'écoulement de 3 bar :
env. 7,6 l/mn
Cotes de montage, voir page 2
Installation, voir figure 1 à la page 8
Rincer soigneusement les conduites d'eau
potable avant et après l'installation (respecter les
normes EN 806 et 1717).
N'utiliser que du silicone à réticulation neutre.
Utilisation, voir figure 9 à la page 9
Maintenance, voir figures 10 et 11, page 9
Le montage s’effectue dans l’ordre inverse de la
dépose.
– Couple de serrage écrou de cartouche :
12-13 Nm
Pièces de rechange avec numéros de commande,
voir page 11.
Les consignes relatives à la garantie et à l'entre-
tien figurent sur la instructions d’entretien et
carte de garantie jointe.
5
IT Informazioni importanti! Assicurarsi di leggerle!
Il presente manuale è indirizzato agli installatori
per il montaggio nonché agli utilizzatori per l’uso
e la manutenzione del prodotto. Consegnarlo
all’utilizzatore dopo l’installazione affinché lo
custodisca.
Simboli e significato
Attenzione! Pericolo di lesioni o danni materiali.
Avvertenza, consiglio o rimando
Montaggio errato
Montaggio corretto/verifica del funzionamento
Prestare attenzione al dettaglio di montaggio
Acqua fredda Acqua calda
Flusso d’acqua Nessun flusso
d’acqua
Opzionale/accessorio
Scopo d’uso
Miscelatore monocomando per l’utilizzo in bag-
no e WC.
Dati tecnici
– Portata con pressione di flusso di 3 bar:
circa 7,6 l/min
Ingombro, vedi pagina 2
Installazione, vedi dalla figura 1 a pagina 8
Prima e dopo l’installazione lavare con acqua
abbondante le condotte di acqua potabile
(osservare EN 806 e 1717).
Utilizzare solo silicone neutro.
Uso, vedi figura 9 a pagina 9
Manutenzione, vedi figura 10 e 11 a pagina 9
Eseguire il montaggio in ordine inverso.
– Coppia del dado della cartuccia: 12-13 Nm
Ricambi con numero d’ordine, vedi pagina 11.
Indicazioni relative alla garanzia e al
trattamento vanno desunte dalle istruzioni di
manutenzione e certificato di garanzia.
NL Belangrijke informatie, zorgvuldig doorlezen!
Deze handleiding is bestemd voor zowel de
installateur voor de montage alsook voor de
gebruiker voor het gebruik en het onderhoud
van het product. Gelieve na de installatie door te
geven aan de gebruiker om te bewaren.
Symbolen en betekenis
Opgepast! Gevaar voor letsel of schade.
Opmerking, tip of referentie
Verkeerde montage
Correcte montage/werkingstest
Montagedetails in acht nemen
Koud water Heet water
Waterstroom Geen waterstroom
Optioneel/toebehoren
Bestemd gebruik
Eenhendelmengkraan voor gebruik in badkamer
en wc.
Technische gegevens
– Doorstroming bij 3 bar stromingsdruk:
ca. 7,6 l/min
Montageafmetingen, zie pagina 2
Installatie, zie vanaf afbeelding 1 op pagina 8
Drinkwaterleidingen voor en na de installatie
grondig spoelen (volgens EN 806 en 1717).
Uitsluitend neutraal vernette siliconen gebruiken.
Gebruik, zie afbeelding 9 op pagina 9
Onderhoud, zie afbeelding 10 en 11 op pagina 9
Montage in omgekeerde volgorde.
– Aandraaimoment moer voor cartouche:
12-13 Nm
Reserveonderdelen met bestelnummers, zie
pagina 11.
Instructies voor de waarborg en het onderhoud
vindt u in de meegeleverde aanwijzigen voor
het onderhoud en garantiebewijs.
6
CS Důležité informace, přečtěte si prosím pozorně!
Tento návod slouží instalatérům při montáži a
uživatelům při obsluze a údržběproduktu. Po
nainstalování ho předejte uživateli, aby si ho
mohl uschovat.
Symboly a význam
Pozor! Výstraha před zraněním a věcnými
škodami.
Upozornění, tip nebo odkaz
Nesprávná montáž
Správná montáž / kontrola funkčnosti
Při montáži dbejte na tento detail
Studená voda Teplá voda
Průtok vody Žádný průtok vody
Volitelná výbava / příslušenství
Účel použití
Páková směšovací armatura pro použití v kou-
pelnách a WC.
Technické údaje
–Průtok při průtokovém tlaku 3 bary:
cca. 7,6 l/min
Montážní rozměry viz strana 2
Instalace viz obrázek 1 na straně8
Potrubí na pitnou vodu před a po instalaci
důkladněvypláchněte (postupujte podle EN 806
a 1717).
Používejte pouze neutrální silikon.
Obsluha viz obrázek 9 na straně9
Údržba, viz snímky 10 a 11 na straně9
Montáž probíhá v obráceném pořadí.
– Utahovací moment matice kartuše: 12-13 Nm
Náhradní díly s objednacími čísly viz strany 11
Pokyny týkající se záruky a péče najdete v při-
loženém Návodu k údržběa záručním listu.
PL Ważne informacje, proszęprzeczytaćuważnie!
Instrukcja przeznaczona jest dla instalatora,
zapewniając pomoc w zakresie montażu oraz dla
użytkownika, informując go o sposobie obsługi
i konserwacji produktu. Po instalacji należy
przekazaćinstrukcjęużytkownikowi, aby jąu
siebie przechowywał.
Symbole i znaczenie
Uwaga! Ostrzeżenie przed szkodami
osobowymi i materialnymi.
Informacja, dobra rada lub odsyłacz
Niewłaściwy montaż
Właściwy montaż/ kontrola funkcjonowania
Należy stosowaćsiędo danych, dotyczących
montażu
Woda zimna Woda gorąca
Strumieńwody Brak strumienia
wody
Opcje / Osprzęt
Przeznaczenie
Bateria jednouchwytowa do stosowania w
łazience i WC.
Dane techniczne
– Przepływ w przypadku ciśnienia hydraulicznego
3 bar: około 7,6 l/min
Wymiary zabudowy, patrz strona 2
Instalacja, patrz rys. 1 na stronie 8
Przed instalacjąi po instalacji należy gruntownie
przepłukaćprzewody, prowadzące wodępitną
(należy stosowaćsiędo EN 806 i 1717).
Należy wykorzystywaćwyłącznie silikon,
ulegający naturalnemu usieciowaniu.
Obsługa, patrz rys. 9 na stronie 9
Konserwacja, patrz rys. 10
i 11
na stronie 9
Montażw odwrotnej kolejności.
– Moment obrotowy dokręcenia nakrętki głowicy:
12-13 Nm
Części zamienne z numerami zamówienia, patrz
strona 11.
Informacje dotyczące gwarancji dostępne
sąw dołączonej karcie pielęgnacyjno-
gwarancyjnej.
7
RU Важная информация, просим обязательно прочесть!
Данная инструкция содержит указания по
монтажу изделия для слесаря-сантехника
иуказания по эксплуатации итехническому
обслуживанию изделия для пользователя.
После установки передайте инструкцию поль-
зователю.
Символы иих значение
Внимание! Опасность физического и
материального ущерба.
Указание, совет или ссылка
Неправильный монтаж
Правильный монтаж / проверка
работоспособности
Важная информация по монтажу
Холодная вода Горячая вода
Водный поток Нет водного
потока
Опция/принадлежность
Назначение
Однорычажный смеситель для использования
вванной комнате итуалете.
Технические характеристики
– Пропускная способность при давлении
потока в3 бар: около 7,6 л/мин
Монтажные размеры, см. стр.2
Установка, см. рис.1 на стр. 8
Водопроводы питьевой воды до ипосле
установки тщательно промыть (EN 806
и1717).
Использовать только силикон нейтрального
сшивания.
Эксплуатация, см. рис.9 на стр. 9
Техническое обслуживание, см. Рисунок 10 и11 на
стр. 9
Монтаж производится вобратной
последовательности.
– Момент затяжки гайки картриджа: 12-13 Нм
Запасные части сномерами для заказа, см. стр. 11.
Информацию огарантии иуказания по уходу
см. вприлагаемом паспорте по уходу и
гарантийному обслуживанию.
8
6
5
3
12
0-4mm
2.
1.
4
3.
2.
1.
9
8
11
9
10
2.
3.
180°
1.
2.
1.
2.
7
1.
2.
1.
24mm
2,5mm
1.
2.
3.
3.
2,5mm
2,5mm
4.
10
11
DE
EN
ES
Ersatzteile
Spare parts
Piezas de recambio
FR
IT
NL
Pièces de rechange
Ricambi
Reserveonderdelen
CS
PL
RU
Náhradní díly
Części zamienne
Запчасти
50100000243
50100000495
50100000644
50100000643
59916000072
59916000075
50100000491
50100XX0638
50100XX0489
50100XX0650
50100XX0649
59516 XX0101
59516 XX1101
59516 XX0201
59516 XX0102
59516 XX1102
59516 XX0202 XX = 01, 03, 05, 07, 13, 17
DE
KEUCO GmbH Co. KG
Oesestraße 36
D-58675 Hemer
Telefon: +49 2372 904-0
E-Mail: [email protected]
AT
KEUCO GmbH
Söllheimerstraße 16
Objekt 6c
A-5020 Salzburg
Telefon: +43 662 4540560
E-Mail: offi[email protected]
CH
KEUCO AG
Winkelweg 3
CH-5702 Niederlenz
Telefon: +41 62 8880020
E-Mail: [email protected]
EN
KEUCO UK Ltd
Amersham House
Mill Street
GB-Berkhamsted HP4 2DT
Phone: +44 10442865220
E-Mail: [email protected]
FR
KEUCO SARL
5, Rue du Martelberg
F-67700 Monswiller
Téléphone: +33 3 88700200
E-Mail: [email protected]
NL
KEUCO GmbH Co. KG
Kantoor Nederland
Postbus 1286
5004 BG Tilburg
Telefoon: +31 88 6 333 999
E-Mail: [email protected]
RU
KEUCO GmbH Co. KG
Представительство вРоссии
Космодамианская набережная ,
дом 4 / 22, корпус Б
115035 Москва
Электронная почта:
US
VELLA LLC
d. b. a. KEUCO NORTH AMERICA
4485 Tench Road / Ste 1121
SUWANEE
GEORGIA 30024
Phone: +1 (678) 622-7164
offi[email protected] www.keuco.com
E-Mail: offi[email protected]

Other manuals for IXMO 59516 010101

1

This manual suits for next models

35

Other KEUCO Plumbing Product manuals

KEUCO Plan Care 35908 1616 Series User guide

KEUCO

KEUCO Plan Care 35908 1616 Series User guide

KEUCO 59916 000075 User guide

KEUCO

KEUCO 59916 000075 User guide

KEUCO 34903 0117 Series User manual

KEUCO

KEUCO 34903 0117 Series User manual

KEUCO IXMO 59509 User guide

KEUCO

KEUCO IXMO 59509 User guide

KEUCO Edition 400 51573 015181 User guide

KEUCO

KEUCO Edition 400 51573 015181 User guide

KEUCO Axess 35090 000137 User manual

KEUCO

KEUCO Axess 35090 000137 User manual

KEUCO IXMO 59502 012000 User guide

KEUCO

KEUCO IXMO 59502 012000 User guide

KEUCO IXMO 59511 011100 User manual

KEUCO

KEUCO IXMO 59511 011100 User manual

KEUCO Edition 90 square 59109 010000 User guide

KEUCO

KEUCO Edition 90 square 59109 010000 User guide

KEUCO 52773 010181 User guide

KEUCO

KEUCO 52773 010181 User guide

KEUCO IXMO 59509 012000 User guide

KEUCO

KEUCO IXMO 59509 012000 User guide

KEUCO 51127 010070 User manual

KEUCO

KEUCO 51127 010070 User manual

KEUCO 59983 010000 User guide

KEUCO

KEUCO 59983 010000 User guide

KEUCO 51130 00 0075 User manual

KEUCO

KEUCO 51130 00 0075 User manual

KEUCO Edition 11 51171 015182 User manual

KEUCO

KEUCO Edition 11 51171 015182 User manual

KEUCO Edition 90 Series User guide

KEUCO

KEUCO Edition 90 Series User guide

KEUCO IXMO 59517 011101 User manual

KEUCO

KEUCO IXMO 59517 011101 User manual

KEUCO 59027 010100 User guide

KEUCO

KEUCO 59027 010100 User guide
KEUCO Edition 400 51571 015181 User guide

KEUCO

KEUCO Edition 400 51571 015181 User guide

KEUCO 59982 010000 User guide

KEUCO

KEUCO 59982 010000 User guide

KEUCO IXMO 59509 013000 User guide

KEUCO

KEUCO IXMO 59509 013000 User guide

KEUCO Edition 400 Series User guide

KEUCO

KEUCO Edition 400 Series User guide

KEUCO Edition 400 51516 0101 Series User guide

KEUCO

KEUCO Edition 400 51516 0101 Series User guide

KEUCO IXMO 59517 011141 User manual

KEUCO

KEUCO IXMO 59517 011141 User manual

Popular Plumbing Product manuals by other brands

Pfister Lima F-529-6LM Quick installation guide

Pfister

Pfister Lima F-529-6LM Quick installation guide

Mira Play Installation & user guide

Mira

Mira Play Installation & user guide

ProFlo PF1030CP quick start guide

ProFlo

ProFlo PF1030CP quick start guide

enware AQUABLEND ESQX TOUCH FREE SERIES Installation & maintenance instructions

enware

enware AQUABLEND ESQX TOUCH FREE SERIES Installation & maintenance instructions

Spectrum Pfister Traditional RT6-1TF Quick installation guide

Spectrum

Spectrum Pfister Traditional RT6-1TF Quick installation guide

American Standard 1662.222 installation instructions

American Standard

American Standard 1662.222 installation instructions

Iqua lino Series Installation & user manual

Iqua

Iqua lino Series Installation & user manual

Sanela La Fontana 2.0 SLP 89Z Instructions for use

Sanela

Sanela La Fontana 2.0 SLP 89Z Instructions for use

LeakAlertor 6000 user guide

LeakAlertor

LeakAlertor 6000 user guide

Kohler K-7179 Homeowner's guide

Kohler

Kohler K-7179 Homeowner's guide

Moen SHOW HOUSE S243 Series manual

Moen

Moen SHOW HOUSE S243 Series manual

Hans Grohe Finoris 225 76050 0 Series Instructions for use/assembly instructions

Hans Grohe

Hans Grohe Finoris 225 76050 0 Series Instructions for use/assembly instructions

Axor Citterio Select Series Instructions for use/assembly instructions

Axor

Axor Citterio Select Series Instructions for use/assembly instructions

Hans Grohe Tecturis S 80 CoolStart 73301 Series Instructions for use/assembly instructions

Hans Grohe

Hans Grohe Tecturis S 80 CoolStart 73301 Series Instructions for use/assembly instructions

Brizo Siderna Series manual

Brizo

Brizo Siderna Series manual

Hans Grohe Raindance E 300 1jet 26238 Series Instructions for use/assembly instructions

Hans Grohe

Hans Grohe Raindance E 300 1jet 26238 Series Instructions for use/assembly instructions

Hans Grohe Starck X 10205001 Product specification

Hans Grohe

Hans Grohe Starck X 10205001 Product specification

Britton AW31 manual

Britton

Britton AW31 manual

manuals.online logo
manuals.online logoBrands
  • About & Mission
  • Contact us
  • Privacy Policy
  • Terms and Conditions

Copyright 2025 Manuals.Online. All Rights Reserved.