KIBI K1-S14 User manual

Installation Guide
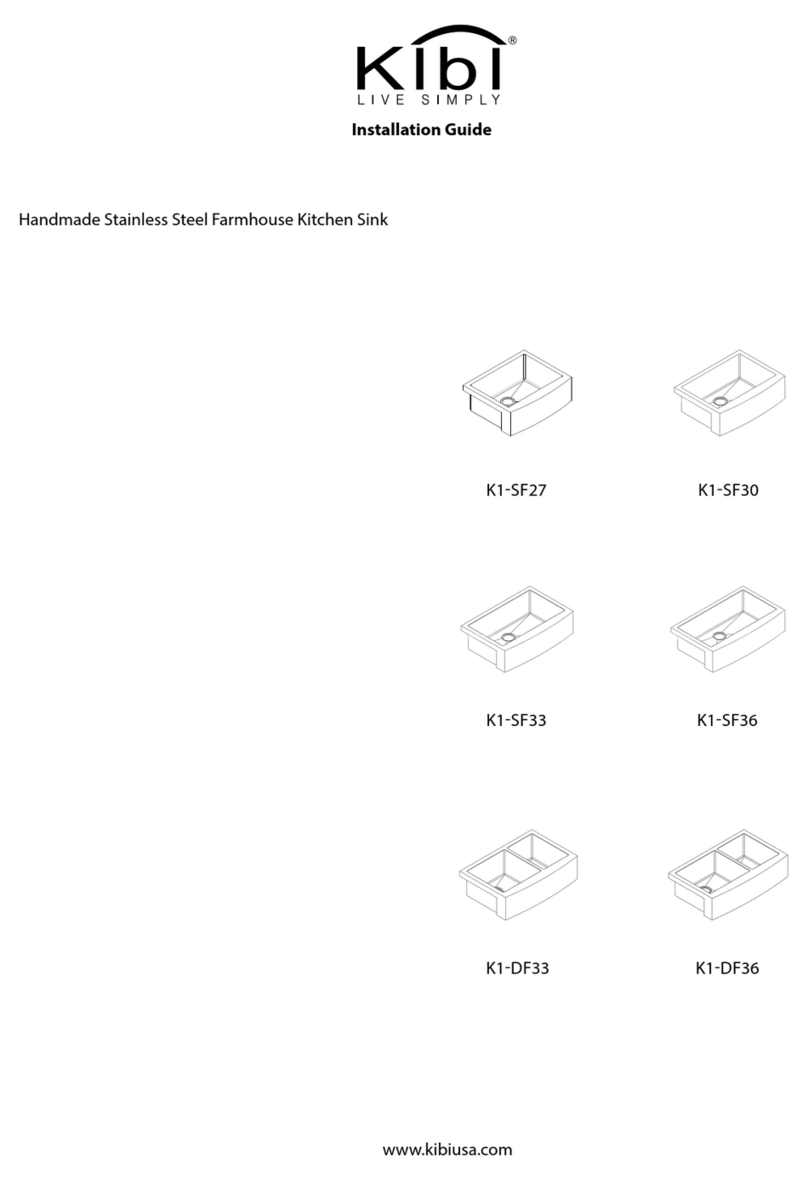
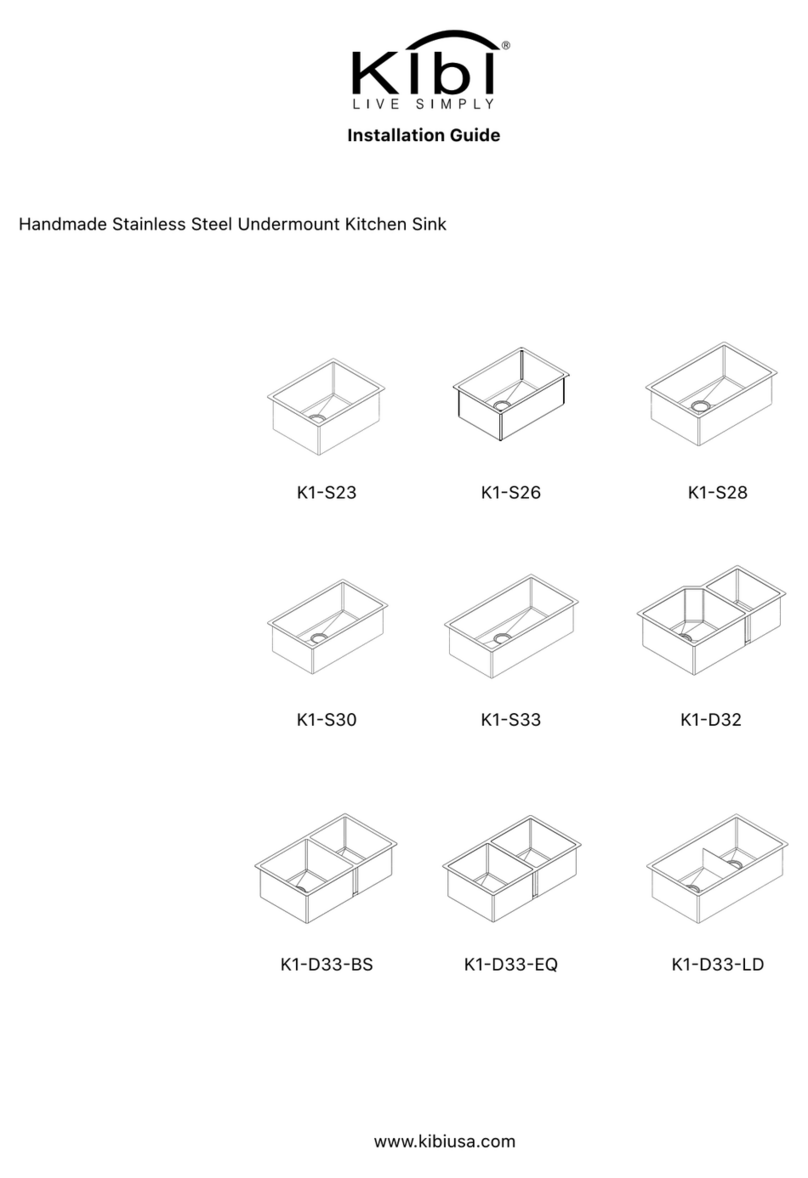
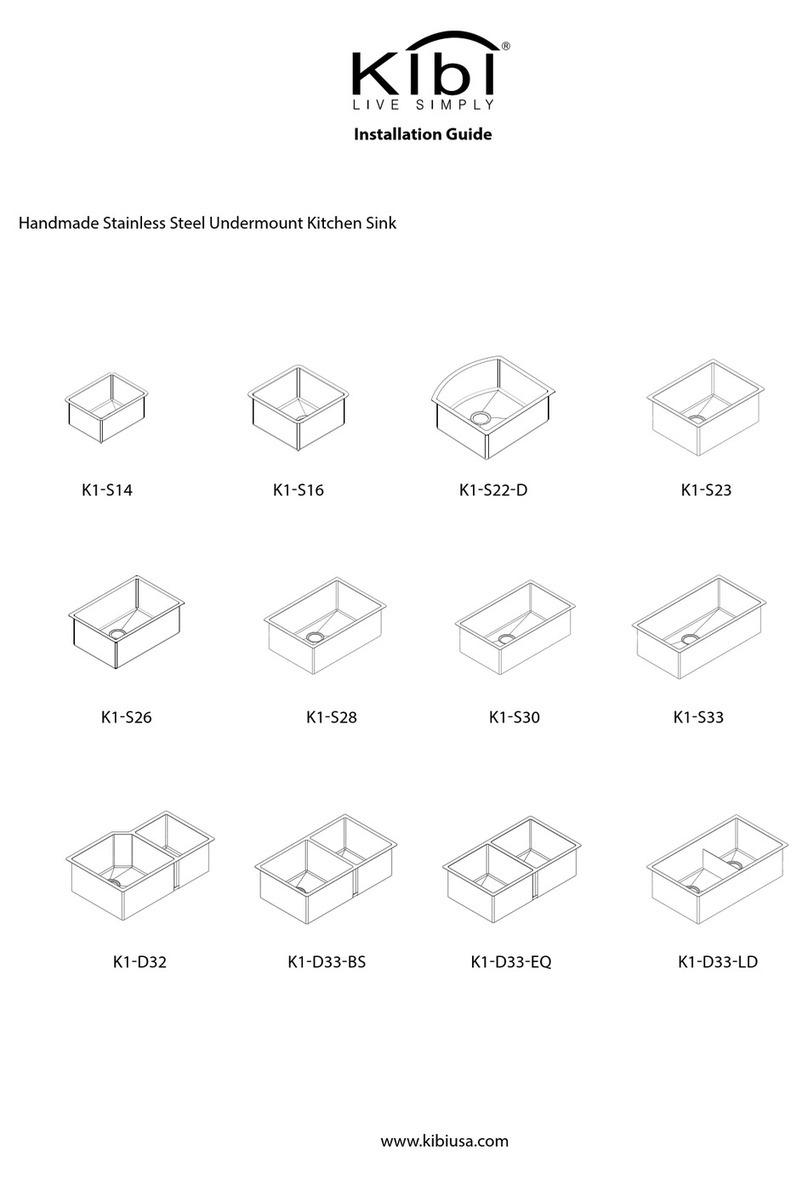
Handmade Stainless Steel Undermount Kitchen Sink
www.kibiusa.com
K1S26
K1S23K1S16K1S14
K1S30 K1S33
K1D32 K1D33BS K1D33EQ
K1S28
K1D33LD

Tools you may need
Installation
ScissorsTape MeasureSilicone sealantScrewdriver
PencilJig Saw Phillips ScrewdriverDrill
General Recommendations:
1- Read the instruction carefully before installation. Inspect the sink prior to installation to make sure that is not been
damaged during shipping.
2- The instructions are for installation with solid surface and composite material countertops. KIBI recommends pro-
fessional stone fabricator to perform the installation and is not responsible for damage to countertop or sink during
installation.
3- Template are only provided as a guide. Place template on sink to ensure the template will give you the proper
cutout for the sink.
4- Observe all local plumbing and building codes.
5- Keep this booklet and the receipt (or other proof of date and place of purchase) for this product in a safe place.
The receipt is necessary to request warranty parts.
6- KIBI does not accept any liability for damage to countertop, sink xture, faucets or personal injury during installa-
tion. Warranty is void if installation guide is not followed.
Please keep the box and packaging materials until your product is completely installed.
NOTE: These sinks are intended for indoor kitchen use only. They are not rated for outdoor use. Installation of
this sink in an outdoor setting will void any warranty on this product.

1/8“ Negative Reveal Flushed/Zero Reveal
Determine Reveal Type
KIBI Undermount sinks can be installed in three dierent types:
Use scissors to cut along the line of paper template for your desired reveal type
(Negative, Positive or Flushed reveal)
Flush installation: Countertop edge and sink edge are in alignment for a continuous look.
Negative installation: Sink sides are recessed 1/8”behind the countertop rim.
Positive installation: Countertop rim is cut back 3/8” from sink sides to reveal the sink edge.
Caution: When determining sink placement, be sure to check that there is adequate clearance behind the sink for
any faucet(s) and your backsplash, as well as clearance for a full range of motion for faucet spouts and handles.
3/8“ Positive Reveal
KIBI Recommended Installation type

1/2”
(13mm)
1/2”
3/8”
32
1
4 5
Decide location for mounting brackets, drill 3/8”X1/2”
deep hole in the countertop.
Turn countertop over and align sink with countertop.
Cut the opening in the countertop by carefully
following the traced line.
NOTE: Do not cut the sink opening with traditional
saw cut method.
Trace template on countertop with a pencil.
Unpack the new sink and check the contents of the materials supplied: Sink, Mounting brackets, and Cutout
template (depending on model). Contact your retailer if any product is damaged or missing prior to installation.
Never install a damaged sink as it can void your warranty.
Determine the installation type you prefer, cut out the appropriate template for your sink model.
Make sure clearance is suitable for backsplash, faucet, and plumbing for the sink.
Installation

98
10 11
Wipe o any excess caulk.
Allow the caulk to cure according to the
manufacturer's instructions before using the sink.
Tighten the mounting hardware evenly.
Tighten the fasteners until just snug.
Check the alignment of the sink in the opening.
Position the sink in the opening.
Installation
76
Apply a bead of silicone adhesive (not included) to the
sink edges.
Do not use epoxy.
Install anchors into drilled holes and lightly tap
with a hammer until ush.

Dimensions
14"
(355.6 mm)
12"
(304.8 mm)
Φ3-9/16”
(Φ90 mm)
4-3/4"
(120 mm)
R3/8”
(R10 mm)
R3/8”
(R10 mm)
7-3/4"
(197.2 mm)
8"
(203.2 mm)
18"
(457.2 mm)
16"
(406.4 mm)
R1-3/8”
(R35.4 mm)
1"
(25.4 mm)
Φ3-1/2”
(Φ90 mm)
R10
9-3/4"
(248 mm)
10"
(254 mm)
21"
(533.4 mm)
23"
(584.2 mm)
16"
(406.4 mm)
18"
(457.2 mm)
R10
1"
(25.4 mm)
1"
(25.4 mm)
4-3/4"
(120 mm)
R10
16"
(406.4 mm)
14"
[355.6 mm)
4-3/4"
(120 mm)
7-3/4"
(197.2 mm)
8"
(203.2 mm)
16"
(406.4 mm)
14"
(355.6 mm)
Φ3-9/16”
(Φ90 mm)
R1-3/8”
(R35.4 mm)
1"
(25.4 mm)
R3/8”
(R10 mm)
R3/8”
(R10 mm)
4-1/2”
(Φ117 mm)
9-3/4”
(248 mm)
10”
(254 mm)
24”
(610 mm)
26”
(660 mm)
16”
(406 mm)
18”
(457 mm)
R10
1”
(25.4 mm)
1”
(25.4 mm)
Φ3-1/2”
(Φ90 mm)
4-3/4”
(120 mm)
K1-S14
14”X18”X8”
Min Cabinet Size: 18”
K1-S23
23”X18”X10”
Min Cabinet Size: 27”
K1-S16
16”X16”X8”
Min Cabinet Size: 18”
K1-S26
26”X18”X10”
Min Cabinet Size: 30”

30"
(762 mm)
28"
(711.2 mm)
R10
1"
(25.4 mm)
Φ3-1/2”
(Φ90 mm)
4-3/4"
(120 mm)
R10
9-3/4"
(248 mm)
10"
(254 mm)
18"
(457.2 mm)
16"
(406.4 mm)
R10
1”
(25.4 mm)
R10
26"
(660.4 mm)
28"
(711.2 mm)
17"
(431.8 mm)
19"
(482.6 mm)
Φ3-1/2”
(Φ90 mm)
4-3/4"
(120 mm)
1"
(25.4 mm)
1"
(25.4 mm)
R10
9 3/4"
(248 mm)
10"
(254 mm)
R10
Dimensions
R10
9-3/4"
(248 mm)
10"
Φ3-1/2”
(Φ90 mm)
4-3/4"
(120 mm)
17"
(431.8 mm)
19"
(482.6 mm)
30-3/4"
(781.2 mm)
32-3/4"
(832 mm)
1"
(25.4 mm)
R10
R10
1"
(25.4 mm)
(254 mm)
K1-S33
32-3/4”X19”X10”
Min Cabinet Size: 36”
K1-S28
28”X19”X10”
Min Cabinet Size: 30”
K1-S30
30”X18”X10”
Min Cabinet Size: 33”
R10
R10
Φ3-1/2”
(Φ90 mm)
18"
(457.2 mm)
32"
(812.8 mm)
18"
(457.2 mm)
11"
(279.4 mm)
15"
(381 mm)
9-3/4"
(248 mm)
10"
(254 mm)
4-3/4"
(120 mm)
1"
(25.4 mm)
1"
(25.4 mm)
20"
(508 mm)
1"
(25.4 mm)
R
10
17"
(431.8 mm)
K1-D32
32”X20”X10”
Min Cabinet Size: 36”

Dimensions
18-5/8"
(473 mm)
12"
(305.2 mm)
32-3/4"
(832 mm)
17"
(431.8 mm)
19"
(482.6 mm)
4-3/4"
(120 mm)
Φ3-1/2”
(Φ90 mm)
1"
(25.4 mm)
1"
(25.4 mm)
R10
R10
9-3/4"
(248 mm)
10"
(254 mm)
6"
(152.4 mm)
3mm
30-3/4"
(781.2 mm)
R10
K1-D33-LD
32-3/4”X19”X10”
Min Cabinet Size: 36”
32-3/4"
(832 mm)
16-7/8"
(428.9 mm)
12-7/8"
(326.9 mm)
R10
R10
19"
(482.6 mm)
17"
(431.8 mm)
9-3/4"
(248 mm)
10"
(254 mm)
R10
1"
(25.4 mm)
1"
(25.4 mm)
1"
(25.4 mm)
4-3/4"
(120 mm)
Φ3-1/2”
(Φ90 mm)
K1-D33-BS
32-3/4”X19”X10”
Min Cabinet Size: 36”
32-3/4"
(832 mm)
14-7/8"
(377.9 mm)
14-7/8"
(377.9 mm)
R10
1"
(25.4 mm)
R10
19"
(482.6 mm)
17"
(431.8 mm)
9-3/4"
(248 mm)
10"
(254 mm)
1"
(25.4 mm)
R10
1"
(25.4 mm)
4-3/4"
(120 mm)
Φ3-1/2”
(Φ90 mm)
K1-D33-EQ
32-3/4”X19”X10”
Min Cabinet Size: 36”

Trouble - Shooting
PROBLEM ACTION
Scratches
Use a nylon pad with an iron-free abrasive polishing compound. Follow the direction of the
original brush lines and the scratch will disappear as it’s blended into the original nish. Be
careful to not polish too aggressively since you’ll polish out the original brush lines and end
up with a shiny spot.
Water deposits
Regular routine cleaning can usually prevent lime scale deposits from hard water. Do not al-
low excessive build up before treating. Soaking in a 25% vinegar solution or a 5% nitric acid
solution can remove these hard water spots. Periodically rub with a nylon-bristled brush or a
ne-mesh synthetic scouring pad. Rinse and towel dry after treatment.
Rust marks
If rust marks develop due to presence of, or contact with, ferrous (iron-containing) materials,
swab with a sponge wetted with a diluted (10-15%) solution of nitric acid (HNO3) and follow
with routine cleaning. Avoid prolonged contact of ferrous materials (like cast iron pans) with
stainless steel. Nitric acid in dilute concentrations (<20%) is the only acid that is safe to use
on stainless steel.
Trouble-Shooting
If you’ve followed the instructions carefully and your sink still does not work properly, take these corrective steps.

Care & Maintenance
Clean regularly with normal detergent and warm water.
Always make a habit of drying your sink after use and bung
with a soft cloth. This will ensure that no build up of limescale
or other mineral deposits can occur.
Clean the sink once a week using a non-abrasive cleanser such
as Comet and a clean soft sponge. Scrub in the same direction
as the natural grain of the sink.
Never let soap or other household cleaners to dry on the
surface of the sink. Most products contain addatives which
will aect the nish of the sink.
Never use bleach solutions on the sink, as it is harmful
to stainless steel. If left on the sink too long it can cause
surface pitting.
Never use a steel wool pad to clean your sink. Doing so may
damage the sink’s surface and cause discoloration.
Minor scratching of the sink’s surface is extremely dicult to
avoid and is not something to be unduly concerned about.
These marks are usually only supercial and can be removed
with a proprietary stainless steel cleaner.
Use of rinse grids will reduce exposure of the bottom of the
sink to scratches.
Limited Lifetime Warranty
This product has been manufactured and inspected to the
highest possible quality standards. Kibi sinks carry a limited
lifetime warranty for residential use.
Should you experience any defects in materials or workman-
ship within the warranty period, we will repair or replace the
defective product, subject to the following conditions:
• Any claim made under this warranty must include a copy
of a valid proof of purchase showing the date and place of
purchase.
• Our obligation under this warranty is to the original purchaser
only, and may not be transferred.
• Product replacement does not include shipping costs or labor
installation costs.
• This warranty applies to residential installations only.
• Kibi reserves the right to examine product in question and its
installation prior to replacement.
• If an identical replacement product is not available, Kibi re-
serves the right to replace the defective product with a similar
product.
NOTE: Accessories such as rinse grids, cutting boards, strainers
are not covered by this warranty.
This warranty relates to defects in manufacture, materials or
workmanship in a Kibi stainless steel kitchen sink supplied for
installation into domestic premises in the United States. It does
not extend to :
• Damage resulting from failure to maintain the product in
accordance with the Care and Maintenance instructions in this
manual.
• Normal wear and tear, scratches or accidental damage.
• Faults arising from improper use and/or installation.
• Defects in accessories, strainers and rinse grids.
All incidental or consequential damages are specically
excluded. No additional warranties, express or implied are
given, including but not limited to, any implied warranty of
merchantability or tness for a particular purpose.
Some states do not allow the exclusion or limitation of inciden-
tal or consequential damages or limitations on how long an
implied warranty lasts, so the above limitations or exclusions
may not apply to you.
This warranty gives you specic legal rights, and you may also
have other rights which vary from state to state.
This manual suits for next models
10
Table of contents
Other KIBI Plumbing Product manuals
Popular Plumbing Product manuals by other brands

Schell
Schell WALIS E 01 950 06 99 Assembly instructions

American Standard
American Standard Silhouette 25 Specification sheet

Hans Grohe
Hans Grohe Logis Classic 71286000 Instructions for use/assembly instructions

Akw
Akw iTherm 30306 instructions

Ecolab
Ecolab Inspexx S operating instructions

Dynamic Saunas
Dynamic Saunas GDI6106 owner's manual