2
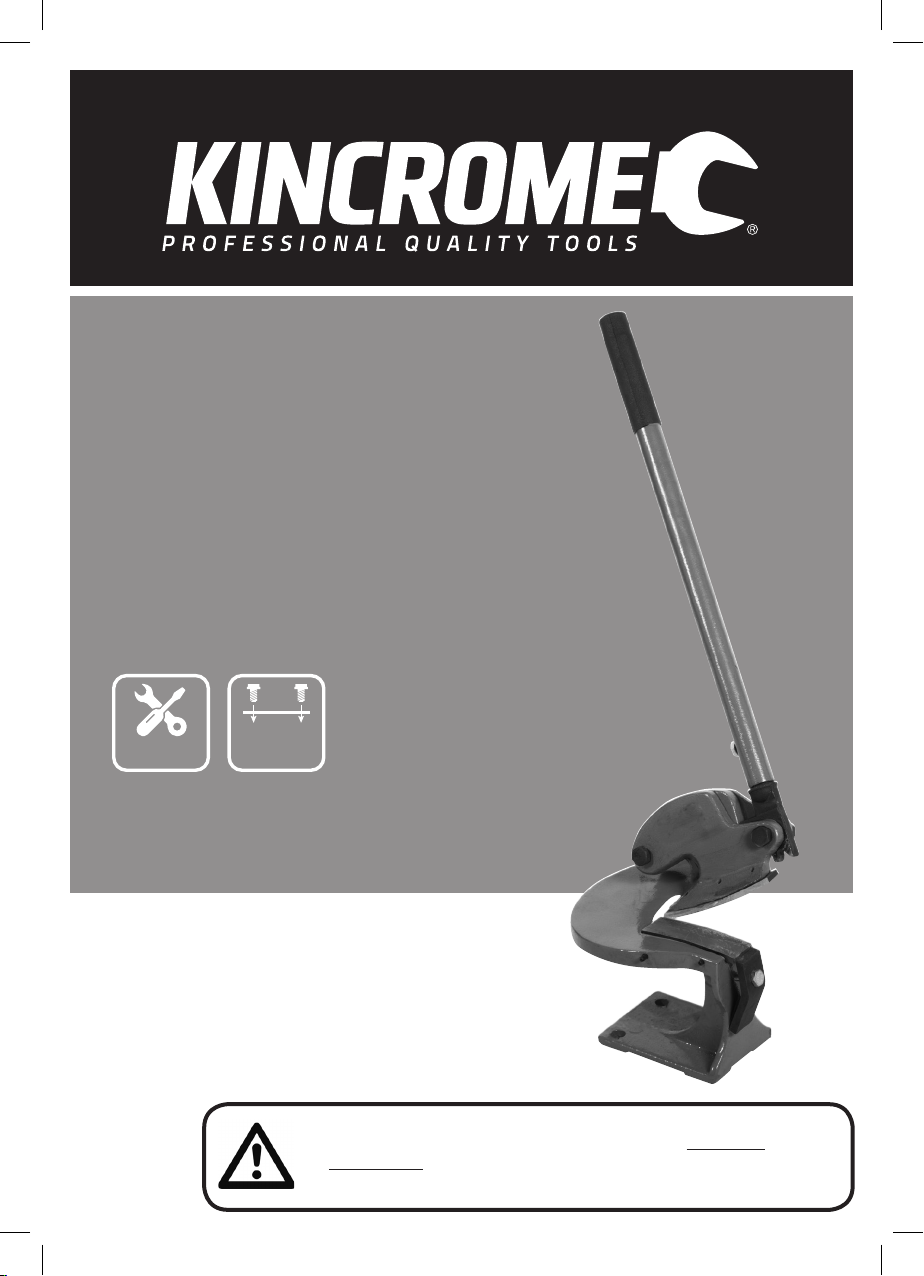
METAL THROATLESS SHEAR CUTTER
Model No:............................................................................................. KP15101
Cutting Material Types: ..................................................................... Aluminium, Mild Steel, Stainless Steel
Cutting Capacity:
Mild Steel: ..................................................................................... 1.5mm
Aluminium: .................................................................................... 2.5mm
Stainless Steel: .............................................................................1.2mm
Max Single Shear Width: ................................................................... 70mm
Blade Length: ..................................................................................... 100mm
Blade Material:.................................................................................... Hardened Alloy Steel
Handle Length:.................................................................................... 460mm
Product Height: ..................................................................................69.5cm
Product Length: .................................................................................. 21.5cm
Weight: ................................................................................................ 7kg
GENERAL SAFETY WARNINGS
Save all warnings and instructions for future reference.
WARNING! Read all safety warnings and all instructions. Failure to follow the warnings and instructions may
result in serious injury.
WARNING: The warnings, cautions, and instructions discussed in this instruction manual cannot cover all
possible conditions and situations that may occur. It must be understood by the operator that common sense and
caution are factors which cannot be built into this product, but must be supplied by the operator.
1) WORK AREA
a) Keep work area clean and well lit. Cluttered and/or dark areas invite accidents.
b) Keep children and bystanders away while operating a Shear. Distractions can cause you to lose concentration.
c) This Shear is not intended for use by persons (including children) with reduced physical, sensory or mental capabilities, or lack
of experience and knowledge, unless they have been given supervision or instruction concerning use of the Shear by a person
responsible for their safety.
d) Children should be supervised to ensure that they do not play with the Shear. This Shear is not a toy.
2) PERSONAL SAFETY
WARNING! Always wear Australian compliant personal protective equipment.
a) Stay alert, watch what you are doing and use common sense when operating a Shear. Do not use a Shear while you are
tired or under the influence of drugs, alcohol or medication. A moment of inattention while operating shears may result in
serious personal injury.
b) Use personal protective equipment. Always wear eye protection. Protective equipment such as gloves, dust mask, non-skid
safety shoes with steel caps, hard hat, full face shield, and/or hearing protection used for appropriate conditions will reduce
personal injuries, as the work can create metal splinters and chips.
d) Do not overreach. Keep proper footing and balance at all times. This enables better control of the Shear at all times.
c) Dress properly. Do not wear loose clothing or jewellery. Keep your hair, clothing and gloves away from moving parts.
Loose clothes, jewellery or long hair can be caught in moving parts.
3) ADDITIONAL SAFETY WARNINGS FOR SHEARS
WARNING! DO NOT let comfort or familiarity with product (gained from repeated use) replace strict adherence to the tool
safety rules. If you use this Shear unsafely or incorrectly, serious personal injury may occur.
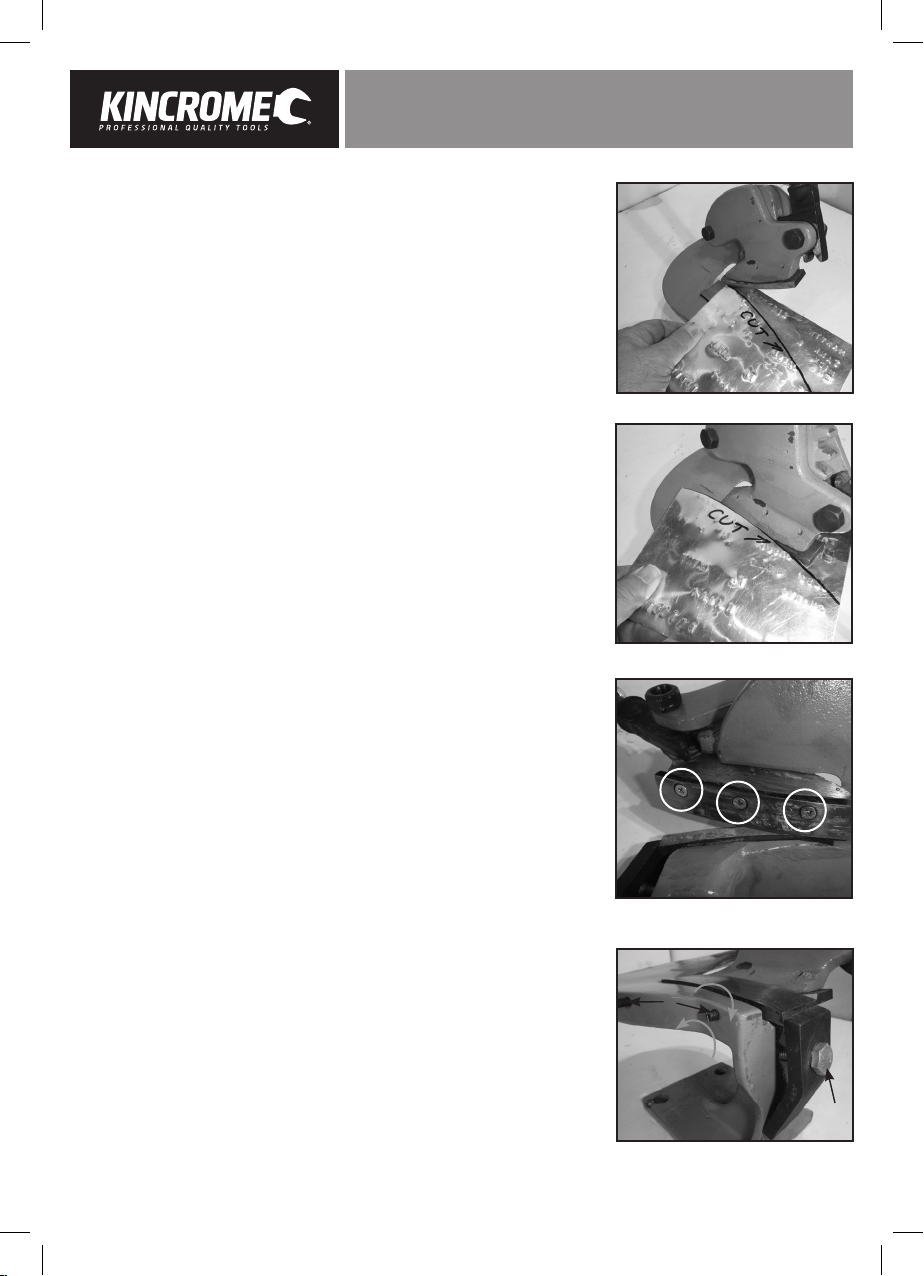
a) Do not force the Shear. Use the correct Shear for the application. The correct Shear will do the job better and safer at the
rate for which the Shear is designed.
b) Do not modify or alter this Shear or use it for an unintended purpose.
c) Do not increase the length of the handle temporarily or permanently.
d) Only use this Shear when fixed on a surface that is stable, level, dry and not slippery, and capable of sustaining the load.
e) Do not use the Shear if any parts are damage broken or misplaced. Repair or replace the parts.
f) The workpiece may be sharp after shearing, use caution. Be aware of sharp edges or sharp shreds of metal that may be
created. Use heavy gloves when handling the workpiece.
4) SERVICE
a) Have your Shear serviced by a qualified repair person using only identical replacement parts.
This will ensure that the correct operation of the Shear is maintained.
KP15101 Manual .indd 2 5/01/2018 1:55 PM