I stallatio I structio s
For the Ki gShield Air Curtai
Model No: AC3000N
IMPORTANT
This product should be installed by a competent
person and in accordance with the current IEE
Wiring Regulations. If in doubt, consult a qualified
electrician.
•This product is not intended to be used by
children and persons with sensory, physical
and/or mental impairments that would pre ent
them from using it safely.
•Extreme caution is necessary where children or
persons with reduced physical, sensory or mental
capabilities may come into contact with the
heater when in use.
The Air Curtain unit is esigne for easy
installation an can be wall or ceiling mounte .
The unit has a fan an two heat settings an its
angle can be a juste . This unit is i eal for
provi ing a heate air curtain if mounte over
oorways an re uces raughts an the iscomfort
of col air when oors are opene .
It is also an i eal choice for heating general areas.
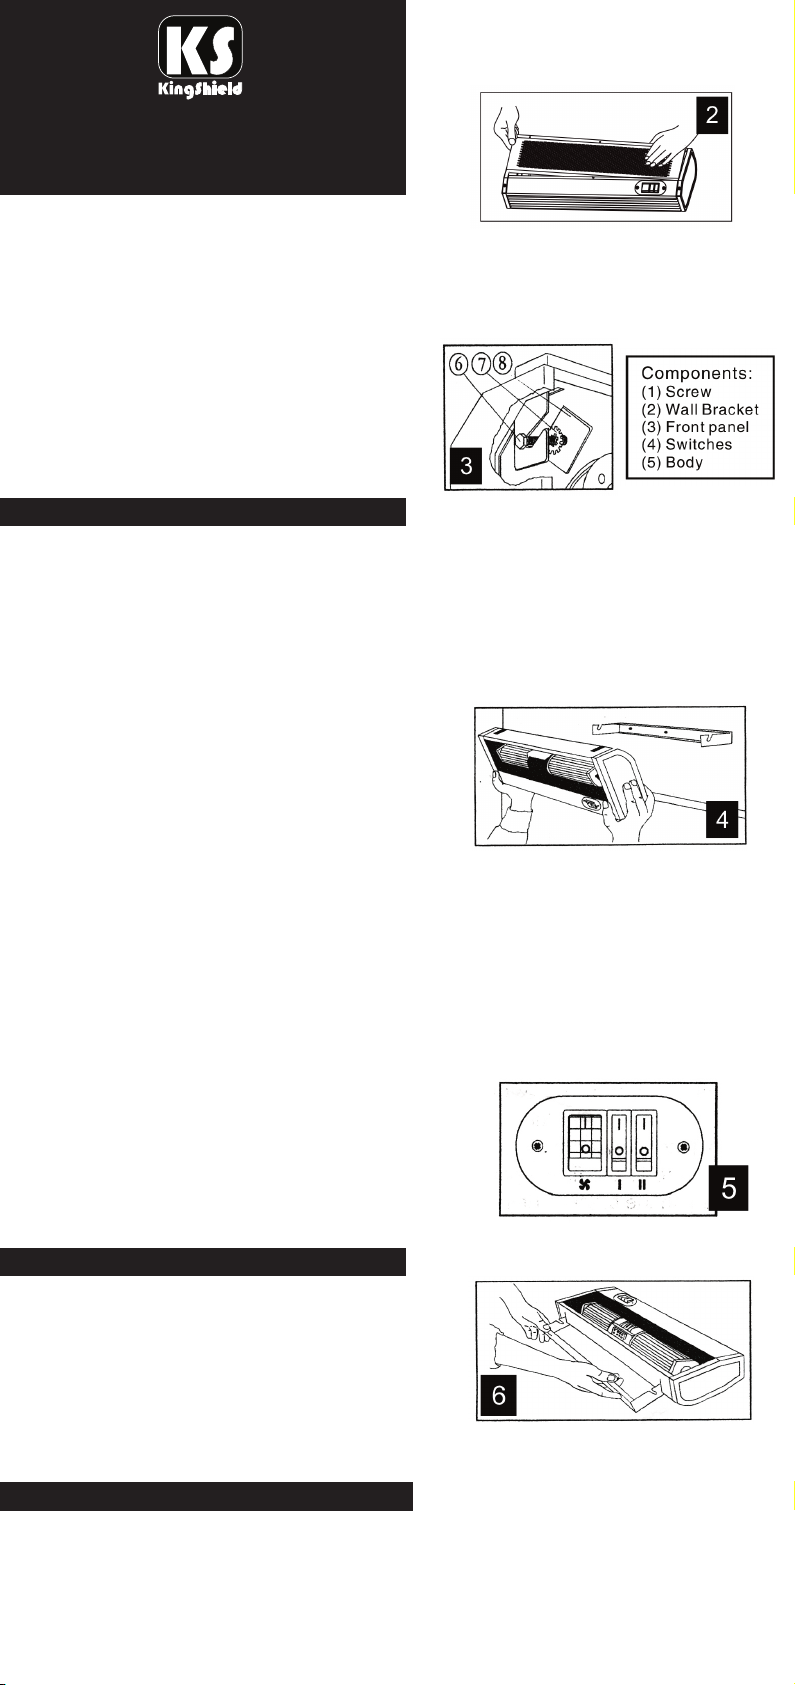
1. Remove the four screws from the front
panel an remove it see iagram (2).
2. Loosen, but o not remove the retaining
bolt using a spanner as shown in iagram
(3) an remove the bracket - see
iagram (6).
3. Make fixing holes in wall or ceiling using
the wall bracket as a template an secure
bracket using the fixings supplie . If the
fixings supplie are not suitable for your
installation, use appropriate alternative
fixings - see iagram (4). Note: the bracket
must be fixe to a soli point e.g. brick,
concrete, stu or joist.
4. Hang the heater on the bracket, ensure
that the bracket is locate between the bolt
an the serrate washer an that the bolts
are at the en of the slots in the bracket see
iagram (3).
5. A just the heater to the require angle an
tighten the bolts using a spanner.
Take care not to overtighten.
6. Re-fit the front panel.
7. Connect heater to mains supply using a
switche 13A fuse spur to the
correspon ing symbols.
Live - Brown or Re
Neutral - Blue or Black
Earth - Green an Yellow
Switch off mains supply and remo e the appropriate
circuit fuse or MCB before commencing installation
or maintenance.
• In or er to avoi overheating o not cover or
obstruct grilles or air intake openings when
in use.
• The heater must not be locate imme iately
a jacent to or un er/against an electrical
socket outlet.
• Do not operate the heater with a amage
cor /plug or if heater malfunctions. If the
supply cor is amage it must be replace
by a qualifie electrician
• Before making any fixing holes make sure
there are no pipes or cables below the
surface.
• Make sure the heater is anchore to a soli
surface which can take the weight of the
heater.
• This heater is for in oor use only.
• This heater must be connecte to earth.
• Position the heater ensuring that hot air
cannot blow irectly onto flammable surfaces.
• This heater is not equippe with a evice to
control the room temperature. Do not use
this heater in small rooms when they are
occupie by persons not capable of leaving
the room on their own, unless constant
supervision is provi e .
• If the unit overheats, thermal switches will cut
the power an will restore the power when the
unit has coole own. However, if the unit
overheats severly, thermal fuses will isolate
the power, these fuses will not reset an
cannot be replace by the user.
INTRODUCTION
INSTALLATION
WARNING


