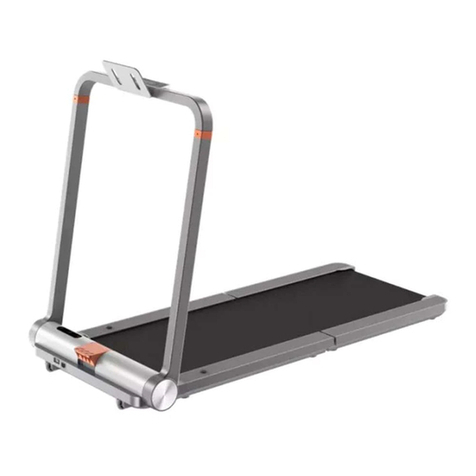
KingSmith TRK15F User manual

Model No. :
KingSmith Smart Foldable Treadmill User Manual
Manufacturer : Beijing Kingsmith Technology Co.,Ltd.
Address : Floor 4, Building 25, Area 18, ABP Park, Fengtai, Beijing, China.
MADE IN CHINA TRK15F
For security purpose, please read the User Manual carefully.

Contents
01 Product and accessories
02 Structure and Function Diagram
03 Guidance for initial Operation
04 Learn to Use the Treadmill
05 Warm-up Exercises
06 Safety Instructions
07 Maintenance and Service
08 Exploded Drawing
09 Part List
10 Trademark and Legal Statement
02
03
07
09
12
13
16
17
19
24
User Manual
Electric shock hazard, where the appliance is used without the earth connection.
This appliance is not intended for use by persons (including children) with reduced physical, sensory or mental capabilities, or
lack of experience and knowledge, unless they have been given supervision or instruction concerning use of the appliance by a
person responsible for their safety. Children should be supervised to ensure that they do not play with the appliance.
Noise emission under load is higher than without load.
To reduce the risk of personal injury, read and understand all the instructions before using this product.
WARNING

Welcome to use our treadmill 01 Product and Accessories
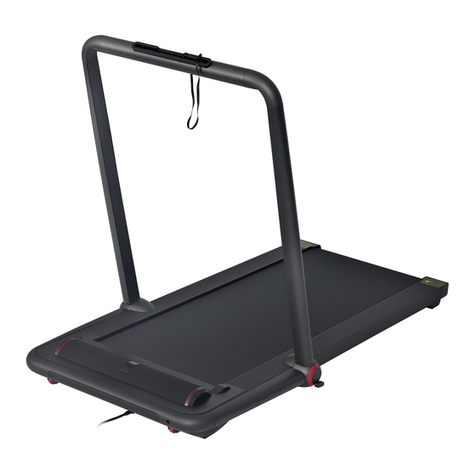
Thank you for choosing KingSmith Intelligent Folding Treadmill (hereinafter referred to as treadmill), which is featured with
compact, simple and innovative overall design. With our treadmill, you can start your quality life at home.
Please check carefully whether the contents of the package are complete. Please contact the seller for any missing or damage.
Main Part
Other AccessoriesParts
User Manual
Manual
01 02
Silicone Oil
Power Cord Phone Holder Safety Clip Wrench
Performance indicators Detailed parameters
Working dimensions
Folding dimensions
Running belt area
Applicable age
Applicable height
Minimum speed
Maximum speed
Rated power
Rated voltage
Sport mode HIIT mode / Fat burning mode /
Walking mode
1420×828×1140 mm
1420×828×310 mm
1200×480 mm
14 ~ 60 years old
Maximum load 110 kg
Net weight 57 kg
Gross weight 71 kg
No limit
0.8 km/ h
15 km/ h
918 W
220 - 240 V ~
Frequency 50 / 60 Hz
Class HC

1. Treadmill Body
02 Structure and Function Diagram
03 04
Running belt
Central function key
Folding handrail
Folding lockup button
Wheel
Phone holder socket
Power switch
Power socket
Wheel
Label

2. Introduction of display screen
02 Structure and Function Diagram
05 06
Time Distance Speed
Start/Stop/Stand by by Press;
Speed adjusting by Rotation Calorie
Selection Key of the Speed ShortcutHIIT MODE
Fat Burn MODE
Walk MODE

Please carefully consider your physical conditions when starting to use this product for training, and keep training properly and
regularly to ensure that you have enough physical strength to exercise. Inappropriate or excessive training will not benefit your
health.
03 Guidance for initial Operation
07 08
8. Start to use the treadmill.
Noisy level is 65dB(A).
The treadmill has an emergency stop mechanism for your safety. Before starting
your training, attach the safety key to your clothing. If the treadmill was switched
off due to the safety key being pulled out, insert it again. The continuous belt
does not start up again automatically.
Uncontrolled use of the treadmill by a third party can be avoided by taking the
safety key off and storing it in a secure place.
In an emergency, hold the handrails tightly with both hands and step off of the
belt onto the side surfaces of the side platforms. Activate the emergency stop
mechanism (safety disconnect).
4. Check if the handrail is locked.3. Rotate the handrail in the direction of arrows while
holding the lockup button below the handrail.
1. Remove the machine from the package, and
place the machine on a level surface.
2. Lift the column of the machine
from the side of the machine.
Actuator release force: 7N
Clamp release force: 18N
5. Connect the power
supply and turn on
the switch.
6. Download APP "KS Fit" and complete
the installation. If you woulf like to
use the remote control directly, you
can choose to skip Step 6 and 7.
7. Open the APP and complete the
registration. Connect the APP with
the equipment step by step.

1. Description of the mode button 2. Description of the HIIT mode 5. Description of Mode Selection
04 Learn to Use the Treadmill
09 10
HIIT is a high-intensity interval training mode that
can effectively improve the athletic ability.
HIIT mode
Fat burning mode
Walking mode
3. Description of Fat burning mode 4. Description of the walking mode
Walking mode, is a low-intensity exercise mode
suitable for users who have no running experience
and have used the treadmill for the first time.
Fat burning mode, is a medium-intensity exercise
mode that can effectively burn off calories.
After power-on, press the center function key to start working out directly. Then the machine starts slowly to the minimum
start-up speed (0.8km/h). At this time, enter the corresponding motion mode by selecting the icon. After pressing the speed
shortcut key, adjust the speed of this movement by rotating the center function key(the speed changes 0.1km/h each mark),
and then press the center function key again to enter the pause state. By the speed shortcut key,you can define the speed value
via APP and send to the treadmill.

04 Learn to Use the Treadmill 05 Warm-up Exercises
11 12
The users who have warmed up can be easier to stretch and prevent sports injuries. Therefore, it is recommended warm- up for
5 to 10 minutes before exercise. It is recommended to do the stretching exercise as follows, and repeat it after running or
walking.
1. Stretch down: Keep the knees slightly flexed and the body slowly bent forward, relax the back and the shoulders, touch the
toes with hands as much as possible, and keep for 10~15 seconds, then relax. Repeat 3 times.
2. Foot tendon stretch: Sit on a clean seat cushion, straighten one leg and keep the other leg inward to fit the inner side of the
straight leg. Try to touch the toes with your hands for 10 to 15 seconds, then relax. Repeat 3 times for each leg.
3. Stretch the calves and Achilles tendon: Stand close to the wall with hands on it, with one foot behind, keep the back leg
upright and the heels touching the ground, incline to the wall and keep for 10 to 15 seconds, then relax. Repeat 3 times for
each leg.
4. Stretch the quadriceps: balance yourself with the left hand holding the wall or a desk, then extend your right hand backwards,
grab the right heel and slowly pull it to your buttocks until you feel the muscles on the front of the thighs in tension, keep for
10 to 15 seconds, then relax. Repeat 3 times for each leg.
5. Stretch the sartorius muscle (muscle inside the thigh): Keep the soles opposite and sit with the knees outwards. Grasp the
feet with your hands and pull in the direction of the groin, keep for 10 to 15 seconds, then relax. Repeat 3 times.
* For any abnormality occurring during the use of the treadmill, pull up the body by holding the handrail, and keep the feet leave
the running belt, and jump to the side ground out of the treadmill.
After the treadmill fails, the abnormal state is shown, the electronic meter displays the error code in the speed information
window.
The faults include:
E01: The drive does not receive the signal of the electronic meter (communication fault);
E02: Stall protection;
E03: Speed sensing failure;
E05: Overcurrent protection;
E06: Open circuit of the motor;
E10: Output short circuit;
E13: The electronic meter does not receive the drive's signal (communication failure).
6. Error code
06 Safety Instructions
13 14
Keep the space between the
treadmill and two sides above
500 mm.
Do not place it uneven ground. Unplug the power cord when the
treadmill is not in use.
Keep the distance of 2000 mm ×
1000 mm between the treadmill
and the rear space.
Please wear sports shoes. Do clip the safety lock clip to the
clothes when using.
(Pull off the safety lock to
immediately stop the motor
running if there is an unexpected
situation.)
Please use it carefully for elders
and pregnant women.
Do not step on the treadmill
motor cover.
Do not store the treadmill upright.Do not store the treadmill
edge-on.
Pets are strictly prohibited.
Do not walk backwards.

1. Clean the treadmill • Shut down and disconnect the power from the treadmill.
• Wipe off the dust and smudges from the main frame and the motor over with a 100%
cotton rag dipped with a little of mild detergent. Do not spray the cleaner directly onto
the running belt or use the acid and corrosive cleaners while cleaning the surface of the
running belt. Do not wipe under the running belt. It is normal that there may be dust and
smudges on the rear ground after the product is used for a period of time. Please
remove the dust and smudges.
• Running belt inclined left: Turn the left adjustment screw 1/4 circle clockwise.
• Running belt inclined right: Turn the right adjustment screw 1/4 circle clockwise.
• Slip running belt: Turn the left and right adjustment screws clockwise at the same time a
half circle to run the running belt for a period of time (1~2 minutes) to observe the
centering situation. If necessary, please adjust it again.
• Shut down and pull out the power cord of the treadmill.
• Lift the edge of the running belt and apply silicone oil to the inner surface . Power on the
treadmill again to run the running belt at 4km/h for 10-20 seconds
• 5-10 ml of silicone oil is needed for one time of lubrication. If the lubrication is applied
too much, the belt will slip and affect normal use.
• Add the silicone oil every 3 months.
06 Safety Instructions 07 Maintenance and Servicing
15 16
Do Not Step to Prevent Being
Involved.
Keep the horizontal sight to void
visual dizziness.
Do Not Step to Prevent Being
Involved.
For Single-user only.
Warning: please make sure the
running surace comes to a complete
stop before folding. Do not fold with
power on. A folded treadmill should
not be operated.
2. Slip running belt and correction
3. Lubricate the running belt
Horizontal sight
Do not walk sideways.

17 18
08 Exploded Drawing 08 Exploded Drawing
E08 E07
B09
B15
B07
A03
C07
C06
D02
C01
B08
B02
B01
B03
A05
C08
B06
E15
C05
E02
E02
E02
B05 E06
E01
E01
E01
E01 C02
E01
E01
E01
E01 E02
E02
E02
E02
E02 E02
C10
C11
C12
E03 E04
E03
E04
D03
C09
B03 C10
C12
C11
B01
B02
E15
B05
A05
E06
A04
B04
B04
E05
E04
B17
D12
D13
D14
D15
D11
D10
A02
E05
E07 E08
C09
C05
C03
B07
B08 B06
B09
C08
B15
E02
E02
E02
C04
E03
E04
E03 E04
E04
C36
C35 C37
C36
E24
G02
B18
G01
F06
F07
F08
F09
E23
E23
E24
E23
E23
E23
E11
E04
E04
E04
E18
E12
E12
E21
E12
E21
E21
E21
E12
E12
D04
E18
B10
E12
C13 B11
C15
E02
E02
C18
E09
B12
E02
E02
C16
E20
E20
E20 E12
E20
C31
C32
C33
C32
C29
C29
C29
C29
E29
E29
B14
E12
C29
C29
C29
E29
E29
E29
E29
E29
C30
C29
C29
C34
B16
C14
E02
D07
D06 E22
E02
E02
E02
E02
B13
C19
E10
E10
C20
E10
E10
E10
E10
C21
B12 C16
E02
E09
C15
B11
E02
E02
E02
D05
E13
E14
E13 E14
E03
E03
C21
A01
C26
C28
E17
C25
E15
E15
E15
E19
C27
C21
C22
E19
C22
E17
C21
C22
E16
C27
C22
E16
E17
E17
E15
C24
C23 E15
E15
C25
C17
D09
C38
E02 F04
F01
F02
F03
F05
E02
D08
E02
E17
E17
E17
E02

19 20
09 Part List 09 Part List
Serial Number
A01
A02
A03
A04
A05
B01
B02
B03
B04
B05
B06
B07
B08
B09
B10
B11
B12
B13
B14
B15
B16
B17
B18
C01
C02
Name
Main frame assembly
Left column assembly
Right column assembly
Electronic watch frame assembly
Handrail assembly
Handrail adjustment pin
Bayonet
Pull-up card pin
Wave spring washer
Handrail latch spring
Bolt axis
Drop line pin
Column latch spring
Limit washer
Gas pressure bar
Flat solid rivet
Flat head semi-tubular rivet
Front roller
Gas pressure bar
Fine adjustment line
Rear roller
Equal length 6# hex wrench
Plug reed
Electronic watch cover
Electronic watch back cover
Specification
Welded parts
Welded parts
Welded parts
Welded parts
Welded parts
φ10*22.5
φ3*25
φ14*20
φ18*φ12*0.3
φ8*26
φ16*42
φ9*23.5
φ13*53
Force value500N
dk=10,d=8,L=28
dk=11,d=8,L=59
Φ46*t3.0*633
Force value80N
Line length1230
Φ42*t3.0*591
6mm/Q235
Quantity
1
1
1
1
2
2
2
2
2
2
2
2
2
2
1
2
2
1
1
2
1
1
2
1
1
Serial Number
C03
C04
C05
C06
C07
C08
C09
C10
C11
C12
C13
C14
C15
C16
C17
C18
C19
C20
C21
C22
C23
C24
C25
C26
C27
Name
Left column cover
Left column baffle
Column decorative handle
Right column cover
Right column baffle
Nylon washer
Ring retaining wire plug
Side Handrail cover
Handrail press board
Side handrail lower cover
Motor cover
Motor front cover
Small wheel
big wheel
Left roller seat
Right roller seat
Multi-ribbed belt
Front cover holder
Running board spacer
Foot pad
Left side cover
Left side strip
Plastic buckle
Right side cover
Cushion
Specification
φ25.9*φ19.1
φ12*φ24*9
φ49*φ8*21
φ103*φ8*50
7PJ-406/160J
1200*102*38
Φ20*20
Quantity
1
1
2
1
1
2
2
2
2
2
1
1
2
2
1
1
1
1
4
4
1
1
4
1
2

21 22
09 Part List 09 Part List
Serial Number
C28
C29
C30
C31
C32
C33
C34
C35
C36
C37
C38
D01
D02
D03
D04
D05
D06
D07
D08
D09
D10
D11
D12
D13
D14
Name
Right side strip
Nylon buckle
Dust cover
Rear cover
Back flip
Handle cover
Running belt
Electronic watch top cover
Safety switch base
Safety switch base fixing
Perforated band
Electronic watch panel
Safety lock component
Upper line of electronic watch
Control board
DC Motor
Overload protection switch
Power outlet
Standard power cord
Running board
Electronic watch lower line
Safety switch cable
AC single branch line / blue
AC single branch / brown
Specification
1200*102*38
Φ13*10.5
980*648/Blow molding
Line length1300
1.25HP
Linelength1500
1145*660*18mm
Line length350
Line length5CM
Linelength350mm Single core
Linelength150mm Single core
Quantity
1
16
1
1
2
1
1
1
1
1
1
1
1
1
1
1
1
1
1
1
1
1
2
1
1
Serial Number
D15
E01
E02
E03
E04
E05
E06
E07
E08
E09
E10
E11
E12
E13
E14
E15
E16
E17
E18
E19
E20
E21
E22
E23
E24
Name
Ground wire / yellow green
Cross recessed pan head tapping screws
Hexagon socket head cap screws
Internal serrated lock washer
Hexagon socket head screw
Cross recessed pan head tapping screws
Hexagon socket head cap screws
Large washer
Cross recessed pan head tapping screws
Hexagon socket head cap screw
Type I non-metallic insert hex lock nut
Flat Washers
Spring washer
Cross recessed pan head screws
Hex nuts
Cross recessed pan head tapping screws
Hexagon socket head cap screw
Cross recessed pan head screws
Large washer
Hexagon socket head screw
Cross recessed countersunk head screw
Specification
Linelength350mm Single core
ST2.9*12
ST4.2*12(Head with washer)
M8*15 full tooth
Φ8
M8*16full tooth
ST4.2*10
M10*15 full tooth
φ10*φ26*2.0
ST4.2*40
ST4.2*25(Head with washer)
M8*50 full tooth
M8
Φ8
Φ8
M4*20
M10
ST4.2*12(Head with washer)Black zinc
M8*70 full tooth
M5*12
φ8*φ22*2.0
M8*40full tooth
ST2.9*12
ST2.9*8
ST2.0*6
Quantity
1
8
33
6
9
2
4
2
2
8
6
1
8
2
2
2
2
6
2
2
4
4
2
10
4

10 Trademark and Legal Statement
Beijing Kingsmith Technology Co., Ltd has a number of patents covering the KINGSMITH Smart Folding Treadmill series.
This manual is copyrighted by KINGSMITH, Inc. No organization or individual may copy or distribute all or any part of this
manual without the written permission of KINGSMITH, or use these patents without permission.
This manual contains as much as possible the function descriptions and instructions for use when printing. However, it may still
be inconsistent with the product you purchased due to continuous improvement of product functions, design changes or other.
The description in this manual may differ from the actual product in terms of color and appearance due to product updates.
Please refer to the actual product.
Applicable product standard:
EN ISO 20957-1: 2013
EN 957-6: 2010+A1:2014
23 24
09 Part List
Serial Number
F01
F02
F03
F04
F05
F06
F07
F08
F09
G01
G02
Name
Reactor
filter
Lower control mask
Rear trim cover left EVA pad
Rear trim cover right EVA pad
Buckle
Square buckle
Big ring
Big ring
Phone holder
Silicone oil
Specification
Φ23
Φ19
Optional
Quantity
1
1
1
1
1
1
1
1
1
1
1
Table of contents
Other KingSmith Treadmill manuals

KingSmith
KingSmith WalkingPad TRMC21F User manual

KingSmith
KingSmith WalkingPad R1 User manual

KingSmith
KingSmith WalkingPad WPS1F User manual

KingSmith
KingSmith TRK12F User manual

KingSmith
KingSmith WalkingPad WPC1F User manual

KingSmith
KingSmith WalkingPad Smart Foldable Treadmill Series User manual

KingSmith
KingSmith WalkingPad WPS1F User manual

KingSmith
KingSmith WalkingPad WPA1F User manual