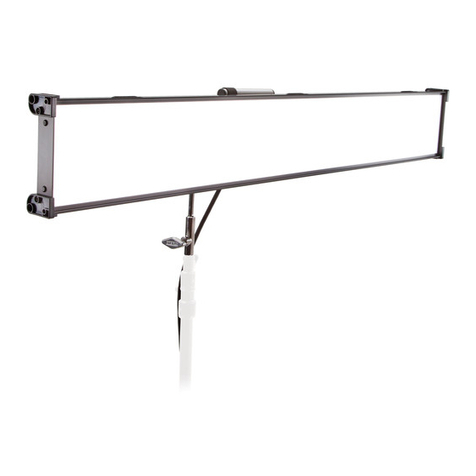
Kino Flo Image L40 Retrofit User manual

Instructions
Image L40 Retroit
Part No. 3100116 03-21-2019

Image L40 Retrofit
This instruction sheet is to be used with the Image L40 LED 120V or 230V
upgrade kit (L40-120U or L40-230U) to upgrade prior luorescent products:
IMG-40X, IMG-45X, IMG-47X models. Upgrade includes latest LED technology that
comes standard on Kino Flo’s Celeb, FreeStyle and Diva-Lite LED’s.
The Gel Frame and Silver Louver can be repurposed once completed.
The new LED conforms to ETL electrical standards.
Instructions for the Image L80 and L40 and latest LED software can be found on
Kino Flo’s website www.kinolo.com.
2

3
L40 LED DMX Upgrade Assembly
L40T
L40U Image L40 LED DMX Upgrade Assembly, Univ
L40T Image L40 LED Upgrade Drill Template

Required Tools
Tools required:
Drill
Drill bits for Template starter holes: 9/64” (3.5mm), #9 (5mm) (included with L40T)
Torx bit T20 2” (included with L40T)
Socket for Base: 5/32” or 8mm
Phillips Screwdriver
Wire Cutter
Torx T20 Driver
4

5
Unscrew lid and disconnect all the cables from the ballasts.
Remove the lid assembly.
Remove rubber plugs and disconnect ground wire.
Important note: Remove and keep the base and nuts as they will be re-used.
Disassembly

6
Important note: Remove and keep black nylon stand-offs as they will be reused.
Turn the ixture over.
Remove louver, gel frame and relector. The relector is held down by double-sided
tape. It is not necessary to remove all the tape.

7
Unscrew lamp holders with a screwdriver.
Note: For older models, remove lamp holders by pressing one end in and pushing
upwards to disengage tab.
Peel back corrugated plastic and wires. Feed cables out through ixture, remove
wire assembly and discard. Not important to remove remaining double-sided tape.

8
Remove all rubber bushings.
Drill Template
Place drill template (L40-T) on the back side of the ixture as shown. Studs that
held the base are used to register the drill template.

9
Clean off metal shavings. Remove template and drill out the template holes using
the #9 (5mm) drill bit (included).
Tape down the corners for added stability. Using the template, drill starter holes
with the 9/64” (3.5mm) drill bit (included) to drill out template holes.

10
Clean ixture of metal shavings and deburr any drilled holes that may have slight
burrs.
Assembly L40
Connect two (2) harnesses (P/N 6260035) to LED panel (P/N 6000148) by sliding
harness connectors into lock tabs.

11
Install LED panel (P/N 6000148) with two harnesses (P/N 6260035). Feed two
harnesses through hole positions 1 and 4 left to right as illustrated.
Secure the panel with eight (8) torx screws (P/N 2020177). Feed each screw
from back of ixture and loosely thread them to the panel. Hand tighten.
Do not completely tighten. The panel should be secured but able to move slightly.
This will make assembly of the clear diffuser panel easier.
1
4

12
Clean off any dust on the diffuser panel (P/N 5340032). Remove clear liner
making sure that panel is handled along the edge so as not to put inger prints on
the panel.

13
Install diffuser panel as shown and align with pre-drilled holes.
Do not peel off liner completely. Start peeling liner in one corner to expose a screw
point and loosely hand tighten screw (P/N 2020159). Continue to peel liner to next
screw point and loosely hand tighten screw and so on until eight (8) screws have
been hand tightened.

14
Tighten diffuser screws irst, then remaining screws for the LED panel from the
back of the ixture.
Replace the black nylon stand-offs for the base. Feed harnesses through the base
as illustrated.

15
Align the lid assembly (P/N 6000145) to the base as shown.
Add lock tooth washer (P/N 2030048) to the ground stud.
Secure the ground wire as illustrated.
Secure the base to the ixture. Re-use the nuts that were previously removed.

16
Connect harnesses from LED panel to LED power module as illustrated.
Ensure the connectors are locked in place. Take care not to disengage any of
the white ribbon control cables in the lid. Coil the excess cable.

17
Screw down the lid to the base using seven (7) provided screws (P/N 2020030).
Peel off protective plastic.
Connect power cable (P/N PWC-L12/120 or PWC-L12/230). Apply power and
check that all LED’s are responding correctly.

18
WARNING – RISK OF FIRE OR ELECTRIC SHOCK.
INSTALLATION OF THIS RETROFIT KIT REQUIRES A PERSON FAMILIAR WITH THE CONSTRUCTION AND OPERATION
OF THE LUMINAIRE’S ELECTRICAL SYSTEM AND THE HAZARD INVOLVED. IF NOT QUALIFIED, DO NOT ATTEMPT
INSTALLATION. CONTACT A QUALIFIED ELECTRICIAN
WARNING – RISK OF FIRE OR ELECTRIC SHOCK.
INSTALL THIS KIT ONLY IN THE LUMINAIRE THAT HAS THE CONSTRUCTION FEATURES AND DIMENSIONS SHOWN IN
THE PHOTOGRAPHS AND/OR DRAWINGS AND WHERE THE INPUT RATING OF THE RETROFIT KIT DOES NOT EXCEED
THE INPUT RATING OF THE LUMINAIRE.
WARNING – TO PREVENT WIRING DAMAGE OR ABRASION, DO NOT EXPOSE WIRING TO EDGES OF SHEET METAL OR
OTHER SHARP OBJECTS.
ONLY THOSE OPEN HOLES INDICATED IN THE PHOTOGRAPHS AND/OR DRAWINGS MAY BE MADE OR ALTERED
AS A RESULT OF KIT INSTALLATION. DO NOT LEAVE ANY OTHER OPEN HOLES IN AN ENCLOSURE OF WIRING OR
ELECTRICAL COMPONENTS.
THE RETROFIT KIT IS ACCEPTED AS A COMPONENT OF A LUMINAIRE WHERE THE SUITABILITY OF THE COMBINATION
SHALL BE DETERMINED BY AUTHORITIES HAVING JURISDICTION. PRODUCT MUST BE INSTALLED BY A QUALIFIED
ELECTRICIAN IN ACCORDANCE WITH THE APPLICABLE AND APPROPRIATE ELECTRICAL CODES. THE INSTALLATION
GUIDE DOES NOT SUPERSEDE LOCAL OR NATIONAL REGULATIONS FOR ELECTRICAL INSTALLATIONS.
AVERTISSEMENT – RISQUE D’INCENDIE OU DE CHOC ELECTRIQUE.
L’INSTALLATION DE CE NÉCESSAIRE DE ODERNISATION EXIGE UNE PERSONNE FAMILIÈRE AVEC LA CONSTRUCTION
ET LE FONCTIONNEMENT DU SYSTÈME ÉLECTRIQUE DU LUMINAIRE ET DES RISQUES ASSOCIÉS. TOUTE PERSONNE
QUI N’EST PAS QUALIFIÉE NE DOIT FAIRE AUCUNE TENTATIVE D’INSTALLATION ET DOIT CONTACTER UN ÉLECTRICIEN
QUALIFIÉ.
AVERTISSEMENT – RISQUE D’INCENDIE OU DE CHOC ÉLECTRIQUE.
N’INSTALLER CE NÉCESSAIRE QUE DANS LE LUMINAIRE DONT LES CARACTÉRISTIQUES DE CONSTRUCTION ET
LES DIMENSIONS SONT CONFORME À CELLES ILLUSTRÉES DANS LES PHOTOS ET/OU LES DESSINS ET DONT LA
PUISSANCE D’ENTRÉE NOMINALE DU NÉCESSAIRE DE MODERNISATION NE DÉPASSE PAS CELLE DU LUMINAIRE.
AVERTISSEMENT – AFIN DE PRÉVENIR L’ENDOMMAGEMENT OU L’ABRASION DES CÂBLES, ÉVITER TOUT CONTACT
ENTRE CES DERNIERS ET LE BORD D’UN OBJET TRANCHANT TEL QU’UNE TÔLE.
SEULS LES OUVERTURES INDIQUÉES DANS LES PHOTOS ET/OU LES DESSINS PEUVENT ÊTRE FAITS OU MODIFIÉS
À LA SUITE DE L’INSTALLATION DU NÉCESSAIRE. IL EST INTERDIT DE LAISSER D’AUTRES OUVERTURES DANS UN
BOÎTIER DE CÂBLAGE OU DE
COMPOSANTS ÉLECTRIQUES.
LE NÉCESSAIRE DE MODERNISATION EST ACCEPTÉ À TITRE DE COMPOSANT D’UN LUMINAIRE LORSQUE LA
PERTINENCE DE LA COMBINAISON DOIT ÊTRE DÉTERMINÉE PAR LES AUTORITÉS COMPÉTENTES. CE PRODUIT DOIT
ÊTRE MIS EN PLACE PAR UN ÉLECTRICIEN QUALIFIÉ CONFORMÉMENT AUX CODES ÉLECTRIQUES APPROPRIÉS
APPLICABLES. LE GUIDE D’INSTALLATION NE SUPPLANTE PAS LES RÈGLEMENTS LOCAUX OU NATIONAUX EN
MATIÈRE D’INSTALLATIONS ÉLECTRIQUES.

19
For latest Warranty information and Certiications, see Kino Flo website at www.kinolo.com.
Environmental: Disposal of Old Electrical & Electronic Equipment.
This symbol on the product or on its packaging indicates that this product shall not be treated as household
waste. This product is made of recyclable materials and should be disposed of in accordance with governmental
regulations.
Kino Flo, Inc. 2840 N. Hollywood Way, Burbank, CA 91505, USA
Tel: 818 767-6528 website: www.kinolo.com
FCC Part 15 Veriication:
This device complies with Part 15 of the FCC Rules. Operation is subject to the condition that this device does
not cause harmful interference.
FCC Part 15 Declaration of Conformity:
This device complies with Part 15 of the FCC Rules. Operation is subject to the following two conditions:
(1) this device may not cause harmful interference, and (2) this device must accept any interference received,
including interference that
KINO FLO, INC
Image L80 & L40 LED
ID: XRSCRMXTIMO101
IC: 8879A-CRMXT101
This manual suits for next models
1
Table of contents
Other Kino Flo Light Fixture manuals
Popular Light Fixture manuals by other brands

BALTENSWEILER
BALTENSWEILER HALO LED S CASAMBI Mounting and operating instructions

Foxfury Lighting Solutions
Foxfury Lighting Solutions NOMAD 360 product manual

Larson Electronics
Larson Electronics EPL-EMG-HB-50LED-RT-WLM instruction manual

STERNO HOME
STERNO HOME GL39064 quick start guide

Lightolier
Lightolier Pendalyte 404722XU3 specification

High End Systems
High End Systems DL.1 user manual