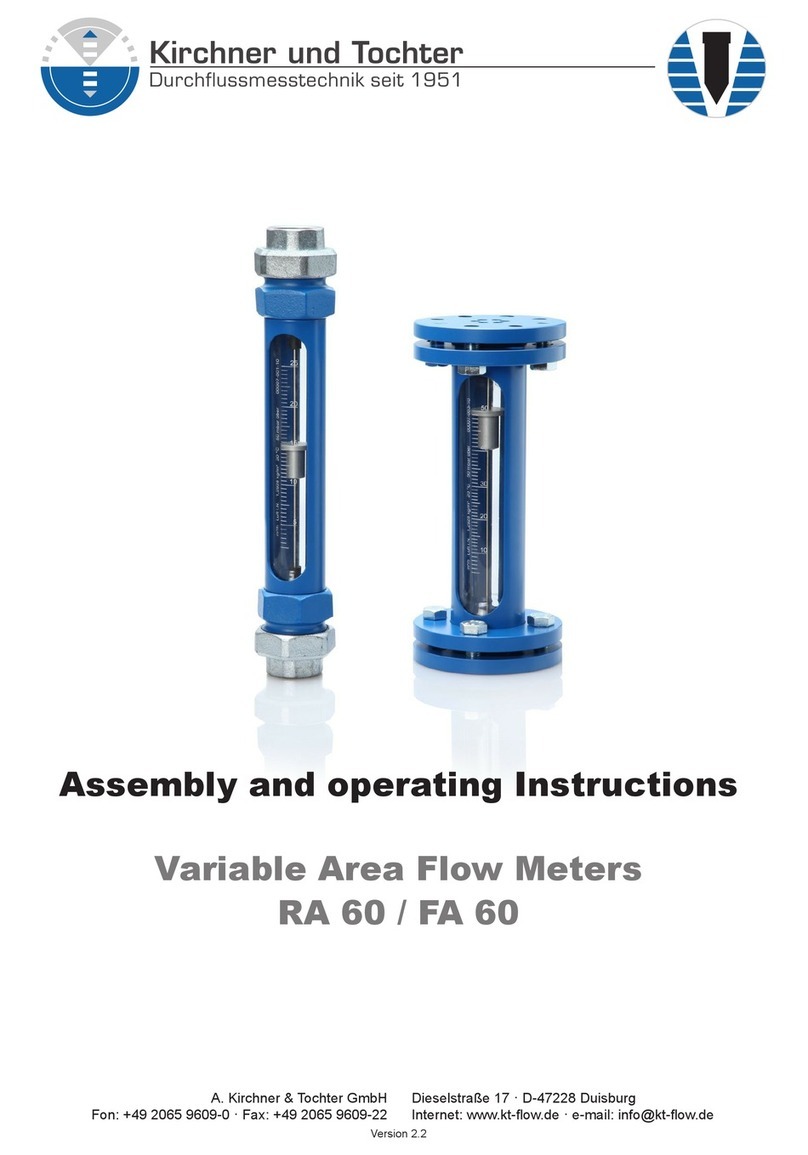
Kirchner und Tochter RA 60 User manual

A. Kirchner & Tochter GmbH Dieselstraße 17 · D-47228 Duisburg
Version 1.7
VA flow meters
RA 60 / FA 6
0
Assembly and operating Instructions
Variable Area Flow Meters
RA 60 / FA 60

A. Kirchner & Tochter GmbH Dieselstraße 17 · D-47228 Duisburg
Version 1.7
VA Flow Meters
RA 60 / FA 6
0
2
Contents
1. Foreword................................................................................................................................................................... 3
2. Safety .......................................................................................................................................................................... 3
2.1. Symbol and meaning......................................................................................................................... 3
2.2. General safety directions and exemption from liability ..................................................... 3
2.3. Intended use.......................................................................................................................................... 3
2.4. Special safety instructions concerning glass devices ....................................................... 4
2.5. Information for Operator and operating personnel............................................................ 4
2.6. Regulations and guidelines............................................................................................................. 4
2.7. Notice as required by the hazardous materials directive ............................................... 4
3. Transport and storage....................................................................................................................................... 4
4. Installation ................................................................................................................................................................ 5
4.1. Work preparatory to installation................................................................................................. 5
4.2. Preparation of the measuring device:.......................................................................................5
4.3. Installation RA 60............................................................................................................................... 6
4.4. Installation FA 60................................................................................................................................ 7
5. Start-up...................................................................................................................................................................... 7
6. Readings in operation......................................................................................................................................... 7
7. Limit switches MSK1 / MSK12 / MSKW ..............................................................................................8
7.1. Connection of limit switches.......................................................................................................... 8
7.2. Setting the limit switches................................................................................................................ 8
7.3. Right angle plug................................................................................................................................... 9
8. Maintenance and cleaning of the flow meter.......................................................................................10
8.1. Dismantling the glass cone RA 60..........................................................................................10
8.2. Assembling the glass cone RA 60 ..........................................................................................11
8.3. Replacement of the glass cone RA 60 .................................................................................11
8.4. Dismantling of the glass cone FA 60.....................................................................................12
8.5. Installation of the glass cone FA 60 .......................................................................................12
8.6. Replacement of the glass cone FA 60..................................................................................12
9. Service.....................................................................................................................................................................13
9.1. Disposal................................................................................................................................................13
10. Technical data .....................................................................................................................................................13
10.1. Materials..............................................................................................................................................14
10.2. Measuring ranges...........................................................................................................................15
10.3. Dimensions .........................................................................................................................................16
10.4. Technical data of limit switches................................................................................................18
10.5. Low-Voltage Directive ....................................................................................................................18


A. Kirchner & Tochter GmbH Dieselstraße 17 · D-47228 Duisburg
Version 1.7
VA Flow Meters
RA 60 / FA 6
0
3
1. Foreword
These Installation and Operating Instructions are applicable to devices of Series RA 60 and
FA 60. Please follow all instructions and information given for installation, operation,
inspection and maintenance. The Instructions form a component part of the device, and
should be kept in an appropriate place accessible to the personnel in the vicinity of the
location. Where various plant components are operated together, the operating instructions
pertaining to the other devices should also be observed.
2. Safety
2.1. Symbol and meaning
Safety notice
This symbol is placed against all directions/information relating to occupational health and
safety in these Installation and Operating Instructions, and draws attention to danger to life
and limb. Such notices should be strictly observed.
2.2. General safety directions and exemption from liability
This document contains basic instructions for the installation, operation, inspection and
maintenance of the variable area flow meter. Non-observance of these directions can lead
t
o hazardous situations for man and beast and also to damage to property, for which
Kirchner und Tochter disclaims all liability.
The operator is required to rule out potentially hazardous situations through voltage and
released media energy.
2.3. Intended use
The Series RA 60 / FA 60 device is a variable area flow meter designed for liquids and
gases, and for installation in vertical pipe runs. Installation in the pipeline should be carried
out solely in accordance with these Instructions. The required version of variable area flow
meter should be selected on the basis of the pipe diameter at the point of use of the device.
The limit values pertaining to the device are given in Section 10 and should not be exceeded.
Modifications or other alterations to the flow meter may only be carried out by Kirchner und
Tochter. Installation in horizontal pipe runs is possible using appropriate pipe bends. The
direction of flow must always be from bottom to top. Details of the process product and the
operating conditions are marked on the measuring glass.

A. Kirchner & Tochter GmbH Dieselstraße 17 · D-47228 Duisburg
Version 1.7
VA Flow Meters
RA 60 / FA 6
0
4
2.4. Special safety instructions concerning glass devices
For safety reasons, we recommend fitting a protective shield in front of the
measuring tube when starting up flow meters fitted with glass measuring tubes.
The devices should not be operated where there is a risk of pressure surges (water
hammer)!
To avoid glass breakage, all fitting work between measuring glass and heads inside the
glass should be carried out by twisting and simultaneously pressing after having wetted the
packing rings/gaskets.
2.5. Information for Operator and operating personnel
Authorized installation, operating, inspection and maintenance personnel should be suitably
qualified for the jobs assigned to them, and should receive appropriate training and
instruction.
2.6. Regulations and guidelines
In addition to the directions given in these Installation and Operating Instructions, observe
t
he regulations, guidelines and standards, such as DIN EN, and, for specific applications,
t
he codes of practice issued by DVGW (gas and water) and VdS (underwriters), or the
equivalent national codes, and applicable national accident prevention regulations.
2.7. Notice as required by the hazardous materials directive
In accordance with the law concerning handling of waste (critical waste) and the hazardous
materials directive (general duty to protect), we would point out that all flow meters returned
to Kirchner und Tochter for repair are required to be free from any and all hazardous
substances (alkaline solutions, acids, solvents, etc.).
Make sure that devices are thoroughly rinsed out to neutralize hazardous
substances.
3. Transport and storage
Always use the original packing for transport, handling and storage. Protect the device
against rough handling, impact, jolts, etc.

A. Kirchner & Tochter GmbH Dieselstraße 17 · D-47228 Duisburg
Version 1.7
VA Flow Meters
RA 60 / FA 6
0
5
4. Installation
4.1. Work preparatory to installation
Preparation of the installation point:
Check the pipe run at the point of installation. Variable area flow meters are only
suitable for vertical installation and an upward flow direction (from bottom to top). For all
other installation situations, appropriate pipe bends need to be fitted in the existing
pipeline to ensure upward vertical flow through the device.
The region of steady flow should be 4 to 6 x DN upstream and downstream of the
location. Control equipment for gaseous media in particular should be installed
downstream of the flow meter.
If necessary, support the pipeline on both sides of the flow meter to prevent vibration
from being transferred to the device.
Before connecting, clean the pipelines leading to the device by blowing out or flushing.
Prepare the installation point for the measuring device with appropriate pipe threads
(RA 60) or flanges (FA 60) before beginning installation work. Pay attention to the
correct spacing of the sealing faces and to exact alignment.
Under no circumstances should the variable area flow meter be used to draw the pipe
ends together (install free of stresses!). Do not over-tighten the union nuts.
4.2. Preparation of the measuring device:
1. Remove the device from the transport packing.
2. Remove the transport protection stoppers from the ends of the device.
3. Pull the float securing rod out of the device (PVC red or grey).
4. Check that the float can move freely in the device.
5. Have ready: flat gaskets (FA 60) or packing material such as hemp (RA 60). These are
not included with the supply.

A. Kirchner & Tochter GmbH Dieselstraße 17 · D-47228 Duisburg
Version 1.7
VA Flow Meters
RA 60 / FA 6
0
6
4.3. Installation RA 60
1. Remove the insert, Item 1, and the union
nuts, Item 3, from the device.
2. Slip the union nuts over the ends of the
pipeline at the installation point.
3. Screw the inserts using packing material
(e.g. hemp) to the ends of the pipeline.
4. Slide the device together with the flat
gaskets, Item 2, on both ends into the
installation point.
5. Screw the union nuts, Item 3, on to the
device heads, Item 4, and tighten them so
that the device is positioned in the pipeline
free of stresses.

A. Kirchner & Tochter GmbH Dieselstraße 17 · D-47228 Duisburg
Version 1.7
VA Flow Meters
RA 60 / FA 6
0
7
4.4. Installation FA 60
1. Slide the device together with the flat
gaskets (not included with supply) at both
ends (Item 1) into the installation point.
2. Check that the flat gaskets are in
alignment and do not project into the
pipeline.
3. Fit the bolts and nuts of the flanged
connection loosely.
4. Tighten the bolted connection between
customer-supplied flange and Item 1 in
diagonally opposite sequence so that the
device is fixed free of stresses in the
pipeline.
5. Start-up
The device must be properly installed before it is started up.
1. Check all device connections.
2. To set the flow: pressurize the pipelines by slowly opening the shut-off valves. On liquid
service: carefully evacuate the pipeline.
3. Check the leak-tightness of all components and, if necessary, tighten down threaded
joints or screw connections.
6. Readings in operation
The flow value is read off from the scale on the glass cone at the top edge of the float. The
measured-value readings are only correct when the operating condition at the measuring
point (flowing medium, operating pressure and temperature) corresponds to the values
marked on the measuring glass. If operating conditions should differ, the measured value
must be corrected with the aid of the general float equation, which you will find in our
t
echnical documents.
Y
ou can also do the recalculation with the help of our conversion program given on our
home page: www.kt-web.de, Section “Physical Basics“.

A. Kirchner & Tochter GmbH Dieselstraße 17 · D-47228 Duisburg
Version 1.7
VA Flow Meters
RA 60 / FA 6
0
8
7. Limit switches MSK1 / MSK12 / MSKW
The flow meter can be equipped with limit switches to provide local indication with
monitoring function. The limit switches consist of a limit switch (reed switch) that is switched
over by the magnet integrated in the float.
The limit switch is guided in a guide slot in the protective case and can be adjusted over the
full measuring range. The reed switches have a bistable characteristic.
Uncontrolled current and voltage peaks can occur in the case of inductive or capacitive
loads, e.g. from contactors or solenoid valves. Such peaks will also occur, depending on
cable geometry, where cables exceed a certain length.
We therefore recommend using an MSR contact protection relay, which is additionally
available. This will increase the contact rating and prevent occurrence of inductive and
capacitive peaks, thus ensuring long service life of the contacts.
Electrical data and limit values are specified in Section 10.4.
7.1. Connection of limit switches
Electrical connection of the device must be carried out in conformity with the
relevant VDE regulations (or equivalent national standards) and in accordance with
the regulations issued by the local power supply utility.
1. Disconnect the plant from supply before connecting the limit switch.
2. Provide a protective circuit for the switches in keeping with their capacity.
3. Connect line-side fuse elements matched to consumption.
4. Connect the cable using the supplied right-angle plug (Section 7.3, page 9. The circuit
diagram for the limit switches is shown in the Technical Data , Section 10.4 on page
18.
7.2. Setting the limit switches
1. Loosen the lock nut M8 on the neck of the switch.
2. Slide the switch to the flow value required to be monitored.
3. Please make sure the contact never touches the measuring glass and the clearance
between contact and glass is always approx. 1mm. This clearance can be obtained by
turning the contact in the sliding block.
4. Test the switching characteristic by moving the float over and beyond the switching
position.
5. Retighten the lock nut. Maximum fastening torque is 2 Nm.

A. Kirchner & Tochter GmbH Dieselstraße 17 · D-47228 Duisburg
Version 1.7
VA Flow Meters
RA 60 / FA 6
0
9
7.3. Right angle plug
Connector field-wireable female connector, M12 x 1, angled
Number of poles 4-pole
Contacts metal, CuZn, optalloy-plated
Contact carriers plastic, PA, black
Grip plastic, PBT, black
Seal plastic, FPM
Degree of protection IP67, only tightened with screws
External diameter
of the cable 4…6mm
Core cross-section
/Clamping ability max. 0.75 mm2
Screw-in thread PG 7
Connection mode screw clamp
Mechanical lifespan min. 50 contact durability
Pollution degree 3
Rated voltage max. 250 V
Insulation resistance ≥108 Ω
Ampacity 4 A
Forward resistance ≤8 mΩ
Ambient temperature Connector -25… +85°C
pin configurationdimensions

A. Kirchner & Tochter GmbH Dieselstraße 17 · D-47228 Duisburg
Version 1.7
VA Flow Meters
RA 60 / FA 6
0
10
8. Maintenance and cleaning of the flow meter
The device is maintenance-free. Should the glass cone become fouled, the device can be
removed from the pipeline as follows.
8.1. Dismantling the glass cone RA 60
1. First dismantle the device by
undoing the screw connections, Item 3.
2. Take the device out together with the
gaskets, Item 2.
3. Detach upper head, Item 4, together
with gasket, Item 5, and thrust collar,
Item 6, from the device. If the float is
provided with a guide, Item 17,
remove this completely with the head
but without dismantling it any further.
4. Unscrew the lower head, Item 4, and
remove the gasket and thrust collar.
5. On nonguided floats, the float stops
(receptacles) in the measuring glass
are either helical springs or inserts
made of plastics. Remove these together
with the float and make a note of the
installation positions and directions.
6. Remove the glass from the case by
pressing it towards an opening. Avoid
using sharp pointed tools. If not required,
leave the rubber ring in place on the glass
cone.
Clean the glass cone. Do not use any abrasive implements or aggressive cleaning agents
(wire brushes, scouring cleaners, alkaline solutions, acids, etc.).

A. Kirchner & Tochter GmbH Dieselstraße 17 · D-47228 Duisburg
Version 1.7
VA Flow Meters
RA 60 / FA 6
0
11
8.2. Assembling the glass cone RA 60
Reassemble in the reverse order of dismantling:
1. Be aware of the original direction of installation and the installation positions.
In particular, do not let tools come into direct contact with the glass when inserting
the glass cone and jointing the loose rubber ring.
In this instance, use water as a lubricant.
2. Inspect all gaskets to see whether they can still be used, and replace if necessary.
3. Align the glass cone so that the markings can be read off through the cutout in the
case.
8.3. Replacement of the glass cone RA 60
Proceed as described in point 8.1. and point 8.2

A. Kirchner & Tochter GmbH Dieselstraße 17 · D-47228 Duisburg
Version 1.7
VA Flow Meters
RA 60 / FA 6
0
12
8.4. Dismantling of the glass cone FA 60
1. Remove the device together with the gaskets pertaining to
the flanged connections (detach the flanged connections).
2. Dismantle the outer flanges, Items 1 and 16.
3. On non-guided floats: the float stops in the measuring
glass are either helical springs or inserts made of plastics.
Remove these together with the float and make a note of
the installation positions and directions.
4. Press the glass cone to one side out of the case. Avoid
using sharp pointed tools. Remove the loose rubber ring
from the glass cone.
The ring remaining on the glass cone does not need
to be removed.
5. Clean the glass cone. Do not use abrasive tools or
aggressive cleansing agents (wire brush,
scouring cleaner, alkaline solutions, acids, etc.).
8.5. Installation of the glass cone FA 60
Reassemble in reverse order:
1. Replace the glass cone together with the rubber ring in the case and slip the loose
rubber ring over the glass cone. Use water as lubricant (wet rubber ring first).
2. Align the glass cone so that the inscriptions can be read through the cutout in the case.
3. Tighten down the bolts of the outer flanges (in diagonally opposite sequence).
8.6. Replacement of the glass cone FA 60
Proceed as described in point 8.4 and in Point 8.5.

A. Kirchner & Tochter GmbH Dieselstraße 17 · D-47228 Duisburg
Version 1.7
VA Flow Meters
RA 60 / FA 6
0
13
9. Service
All devices with defects or deficiencies should be sent direct to our repair department.
To enable our customer service facility to deal with complaints and repairs as quickly
as possible, you are kindly requested to coordinate the return of devices with our sales
department, Tel. +49 2065-96090.
9.1. Disposal
Please help to protect our environment, and dispose of workpieces in conformity with
current regulations or use them for some other purpose.
10. Technical data
Max. operating pressure See table measuring ranges
Thermal endurance
Turndown ratio
Accuracy class
Connection FA 60
DIN 2999, ISO 7-1
Flanges PN 10 to DIN EN 1092-1
Nominal pressure rating
Connection RA 60
FA 60: PN 10 at 20°C
RA 60: PN 10 at 20°C
80°C at 5 bar gauge
1:10
1.6 to VDI/VDE 3513
Bolted joint consisting of nut with
fastening thread to DIN ISO 228 T1
Insert with fitting thread to

A. Kirchner & Tochter GmbH Dieselstraße 17 · D-47228 Duisburg
Version 1.7
VA Flow Meters
RA 60 / FA 6
0
14
10.1. Materials
Protective case Precision steel tubing (grade St35)
Grey cast iron GG20 (cast aluminium AlSi9Cu3 for
size 43 and higher)
Screw connection Malleable cast iron EN-GJMW-400-5, galvanized
Flanges FA 60 SJ235JR (grade St37-2 steel)
Measuring glass Borosilicate glass
Gaskets NBR, optionally Viton, EPDM
Float for fluids1) Standard: 1.4571 1)
Special version: PVC, PP, PVDF or PTFE with lead core
Float for gases1) Standard: anodized aluminium 1)
Special version: PVC, PP, PTFE, PVDF or
1.4571
Standard: 1.4571 sst with magnetic core 1)
or PVC with magnetic core
Heads RA 60
with limit switches1)
1) Floats up to size 19 are non-guided, floats from size 30 on are guided.
Optional size 19 is in guided version available.

A. Kirchner & Tochter GmbH Dieselstraße 17 · D-47228 Duisburg
Version 1.7
VA Flow Meters
RA 60 / FA 6
0
15
10.2. Measuring ranges
Size
Measuring range
m3/h H2O
Measuring range
m3/h air at STP 1)
Max. oper. press
[bar] at 20 °C
0,1 – 1 l/h 0,001 – 0,0110
15 – 150 l/h 0,22 – 2,2
10
– 0,12 0,15 – 1,50,012
19
0,12 – 1,2
1,6 – 16
10
30 0,1 – 1 1,3 – 13 10
0,4 – 4 4 – 4036
0,8 – 8 8 – 80
8
0,9 – 9 5 – 5043
1,6 – 16 16 – 160
8
1,6 – 16 12 – 120100
2 – 20 28 – 280
6
2,5 – 25 14 – 140110
3 – 30 44 – 440
5
30 – 300150
100 – 1000
4
180 30 – 300
150 – 1500
3
1) at STP: at standard conditions (0 °C and 1013 bar abs.)

A. Kirchner & Tochter GmbH Dieselstraße 17 · D-47228 Duisburg
Version 1.7
VA Flow Meters
RA 60 / FA 6
0
16
10.3. Dimensions
Quantity Thread
10 90 60 4 M 12 M 12
15 95 65 4 M 12 M 12
20 105 75 4 M 12 M 12
25 115 85 4 M 12 M 12
10 90 60 4 M 12 M 12
15 95 65 4 M 12 M 12
20 105 75 4 M 12 M 12
25 115 85 4 M 12 M 12
32 140 100 4 M 16 M 16
40 150 110 4 M 16 M 16
32 140 100 4 M 16 M 16
40 150 110 4 M 16 M 16
50 165 125 4 M 16 M 16
40 150 110 4 M 16 M 16
50 165 125 4 M 16 M 16
65 185 145 4 M 16 M 16
80 200 160 8 M 16 M 16
100 220 180 8 M 16 M 16
65 185 145 4 M 16 M 16
80 200 160 8 M 16 M 16
100 220 180 8 M 16 M 16
802) 220 160 8 M 16 M 16
100 220 180 8 M 16 M 16
125 250 210 8 M 16 M 16
150 285 240 8 M 20 M 20
200 340 295 8 M 20 M 20
2) 655 mm overall length
150 640 178
180 640 219
110 340 133
43 340 95
100 340 115
30 340 60
36 340 75
10 340 28
19 340 45
FA 60
Size DN L H D k Screws d2

A. Kirchner & Tochter GmbH Dieselstraße 17 · D-47228 Duisburg
Version 1.7
VA Flow Meters
RA 60 / FA 6
0
17
Size Pipe union d 1) S L H
Rp 1/4 12 28 388
Rp 3/8 16 32 390
Rp 1/2 20 39 393
Rp 1/2 20 39 405
Rp 3/4 25 48 407
Rp 1 32 55 415
Rp 1 32 55 415
Rp 1 1/4 40 67 430
Rp 1 1/2 50 74 436
Rp 1 1/4 40 67 430
Rp 1 1/2 50 74 436
Rp 2 63 90 446
Rp 1 1/2 50 74 440
Rp 2 63 90 446
Rp 2 1/2 75 111 460
Rp 3 90 131 470
Rp 2 63 90 446
Rp 2 1/2 75 111 458
Rp 3 90 131 470
Rp 2 1/2 75 111 462
Rp 3 90 131 474
1)
RA 60
10 28
d with gluing and welding sleeves
19 45
30 60
36 75
43 95
100 115
110 133

A. Kirchner & Tochter GmbH Dieselstraße 17 · D-47228 Duisburg
Version 1.7
VA Flow Meters
RA 60 / FA 6
0
18
10.4. Technical data of limit switches
Design MSK1 MSK12
Voltage switched 50VAC/75VDC 50VAC/75VDC
Current switched 0,5A 0,5A
Contact rating 10W/VA 10W/VA
Dielectric strength 230VAC/400VDC 230VAC/400VDC
Temperature range -20 to +90°C -20 to +90°C
Switching function
Connection
normally closed contact normally open contact
Design MSKW
Voltage switched 50VAC/75VDC
Current switched 0,5A
Contact rating 5W/VA
Dielectric strength 110VAC/200VDC
Temperature range -20 to +90°C
Switching function
Connection
change over contact
1) The deciding factor is the thermal endurance of the flow meter!
Connection via right angle plug M12x1
10.5. Low-Voltage Directive
Above 50 V AC/75 V DC, contacts are subject to the EU Low
-
Voltage Directive.
The user is required to verify their use accordingly.

A. Kirchner & Tochter GmbH Dieselstraße 17 · D-47228 Duisburg
Version 1.7
VA flow meters
RA 60 / FA 6
0
The equipment from Kirchner und Tochter has
been tested in compliance with applicable
CE-regulations of the European Community.
The respective declaration of conformity is
available on request.
Technical data supplied without liability. The
current valid version of our documents can be
found under this URL: www.kt-web.de
The Kirchner und Tochter QM-System is
certified in accordance with DIN-EN-ISO
9001:2008. The quality is systematically
adapted to the continuously increasing demands.
Other manuals for RA 60
1
This manual suits for next models
1
Table of contents
Other Kirchner und Tochter Measuring Instrument manuals

Kirchner und Tochter
Kirchner und Tochter SMB Series User manual

Kirchner und Tochter
Kirchner und Tochter RA 65 User manual

Kirchner und Tochter
Kirchner und Tochter KLA User manual

Kirchner und Tochter
Kirchner und Tochter RA 77 User manual

Kirchner und Tochter
Kirchner und Tochter RA 65 User manual

Kirchner und Tochter
Kirchner und Tochter KFS Series User manual

Kirchner und Tochter
Kirchner und Tochter RA 60 User manual

Kirchner und Tochter
Kirchner und Tochter SGK 1-3 User manual