KIRLOSKAR KMW MIN T 8 DLX User manual

<DtʹD/Edϴ>y

)25(:25'
.,5/26.$52,/(1*,1(6/,0,7('.2(/FRQJUDWXODWHV\RXIRUEHFRPLQJDSUHVWLJLRXVFXVWRPHU
RI .2(/E\SXUFKDVLQJWKH0,17
5HDG8QGHUVWDQGDQGIROORZDOOWKHLQVWUXFWLRQVRQWKHPDFKLQHDQGLQWKHPDQXDOEHIRUHDWWHPSWLQJ
WRRSHUDWH
7KH 2SHUDWRU 0DQXDO FRYHUV LPSRUWDQW XVDJH LQVWUXFWLRQV JXLGHOLQHV RQ PDFKLQH RSHUDWLQJ
SURFHGXUHV VDIHW\ LQVWUXFWLRQ ZDUUDQW\ SROLF\ 'RV DQG 'RQWV WURXEOHVKRRWLQJ SHULRGLF VHUYLFH
PDLQWHQDQFHVFKHGXOHDQG3DUWVFDWDORJXH
5HJLVWHU\RXUSURGXFWZDUUDQW\E\VXEPLWWLQJGXO\ILOOHGZDUUDQW\UHJLVWUDWLRQ&DUGWR.2(/GHDOHU:H
DUH SURYLGLQJ WKUHH ODERXUV IUHH 6HUYLFHV ZLWKLQ VL[ PRQWKV RI SXUFKDVH UHTXHVWHG WR XWLOL]H RXU
VHUYLFHVDFFRUGLQJWRWKHVHUYLFHPDLQWHQDQFHVFKHGXOHPHQWLRQHGLQWKHRSHUDWRUPDQXDO
7KLV0DQXDOFRYHUVDOOYDULDQWVRI0,17+3'/;3RZHU:HHGHU
3OHDVHUHIHUUHOHYDQWGHWDLOVRQO\
DSSOLFDEOHIRU\RXU0DFKLQH
7KLVPDQXDOLV.2(/GHVLJQPD\ QRWEHUHSURGXFHGLQDQ\IRUPQRWHYHQSDUWRILWZLWKRXWSULRUSHUPLVVLRQ
E\.,5/26.$52,/(1*,1(6/,0,7('
$VFRQWLQXRXVLPSURYHPHQWVDUHFRQWHPSODWHGWKHLOOXVWUDWLRQVDQGGHVFULSWLRQDUHQRWELQGLQJ
.,5/26.$52,/(1*,1(6/,0,7('
$.LUORVNDU*URXS&RPSDQ\

.,5/26.$52,/(1*,1(6/,0,7('
$.LUORVNDU*URXS&RPSDQ\

&217(176
6512'(6&5,37,213$*(12
0,17:$55$17<3(5,2'32/,&<*8,'(/,1(6
:$55$17<5(*,675$7,21&$5'
7(&+1,&$/63(&,),&$7,2160,17'/;
6$)(7<35(&$87,21$1''26'2176
&21752/6(48,30(176
23(5$7,1*,16758&7,21
0$,17(1$1&(6(59,&(
67$57,1*67233,1*2)7+(0$&+,1(
7528%/(6+227,1*
3$576&$7$/2*8(
6(59,&(&283216&+(&./,67
3',&+(&./,67
.,5/26.$52,/(1*,1(6/,0,7('
$.LUORVNDU*URXS&RPSDQ\

1. MINT 8 DLX Warranty Period and Warranty PolicyGuide Lines
1.1 Warranty Period
Sl. No. Product Warranty Coverage
1 Machine ( Engine, Transmission) 6 months or 250 operational hours whichever is earlier
from Date of Sale to First Purchaser
2
Proprietary parts,
Like:
Fuel Injection Pump, Fuel Injector, Tyre,
etc.
Warranties for Proprietary parts are subject to
respective manufactures as per their warranty policy
and guidelines.
3 Accessories / Implements Will not be covered
1.2 Warranty Policy Guide Lines
1. The warranty period shall start from the date of purchase of product and applicable to the
first purchaser on receipt of the warranty Registration Card.
2. The warranty only covers the manufacturing defect or defective part within the specified
warranty timeframe only.
3. The warranty will cease if Service maintenance is not carried out as per periodical
maintenance schedule.
4. Warranty voids if KOEL genuine parts or approved blades are not used on machine during
periodical maintenance.
5. The warranty will not cover for normal wear & tear of parts such as clutch plate, rubber
parts, plastic parts, electrical parts.
6. Under warranty period, only repair or replacement of defective parts will be considered,
replacement of the machine is not warranted.
7. Warranty is not transferable to the second and subsequent owners.
8. The warranty ceases if the machine is serviced or repaired by unauthorized persons or at
any Local workshop.
9. The warranty will not cover for any accidental damage, fire, collision, improper usage,
tampering, customer abuse and external modifications/fabrications done by the customer.
KOEL reserves the right to refuse warranty if the product was found not to be carried
periodical maintenance& installed as per our installation instructions.
.,5/26.$52,/(1*,1(6/,0,7('
$.LUORVNDU*URXS&RPSDQ\

2. WARRANTY REGISTRATION CARD / SALES INTIMATION CARD
MIN T%-9 Details
ModelEngine No.
Frame No.
Invoice No. Invoice Date
Warranty Start Date Warranty End Date
l'HDOHUKDVWRPDLQWDLQWKHSKRWRFRS\RIWKH:5&
&RPSDQ\&RS\
Customer’s Signature
,DFNQRZOHGJHWKDW,KDYHUHDGXQGHUVWRRGDQG,DFFHSWWKH
ZDUUDQW\SROLF\DQGWHUPVH[SODLQHGLQ&KDSWHU
Dealer’s Seal & Signature
Use of
MIN T
)RUHVW3URIHVVLRQDOV2UFKDUG 9HJHWDEOH&URSV
$Q\2WKHU3OHDVH6SHFLI\
Customer Details
Name
Village
City
State
Mobile / mail ID
PIN
District
Country
Date of Birth
+LOO$UHD +RXVH*DUGHQ
7$/8.7$/8.$
.,5/26.$52,/(1*,1(6/,0,7('
$.LUORVNDU*URXS&RPSDQ\


2.
TechnicalSpecifications
PowerWeederSpecifications
ProductMINT8D>y
Engine
ModelCC418
BoreXStroke(mm)86x72
Displacement(cc)418
Type
SingleCylinder,Air
cooledDiesel
engine
Power7.5hp
Ratedrpm3000
HighIdlerpm3150
TypeofStartingRecoilType(Manual)/
ElectricStart
Transmission
No.ofSpeeds5(3forward+2reverse)
withDifferentiallock
Workingspeed1.25,2.5&9.25kmph
ClutchDryͲDoubleConetype
RotaryTiller
Rotation850rpm
Blades(nos.)24
TillingWidth650mmmax./300mmmin.
Tillingdepth 1to6inches
Tyresize5.00Ͳ10
Dimension
L*W*H(mm)1120X720X900
Weight170kgs.
.,5/26.$52,/(1*,1(6/,0,7('
$.LUORVNDU*URXS&RPSDQ\

3.
SafetyPrecautionsDo’sandDon’ts
3.1SafetyPrecautionsofMINT8DLX
1. Readandfollowtheowner’smanualandsafetyinstructionscarefullybefore
operating.
2. Don’tallowchildrentousethemachine.
3. Ingeneralallmovingpartsparticularshafts&bladesshallbetreatedasdangerous
3.2
DOs
Training
1. Read,Understandandfollowallinstructionsonthemachineandinthemanual
beforeattemptingtooperate.Keepthismanualinasafeplaceforfutureand
regularreferenceandfororderingreplacementforparts.
2. Befamiliarwithallcontrolsandtheirproperoperations,knowhowtostopthe
machineanddisengagethemquickly.
A. General - Operator should:
a) Be in good health, sound mind and be not under the influence of any sort of
intoxicants;
b) Be adequately trained on MINT 8 DLX and when required;
c) Obtain and read the operator’s manual before using the MINT 8 DLX for the first
time; and when required.
d) Wear suitable non slip footwear, suitable hearing protection and comfortable
clothing.
B. Before Starting MINT 8 DLX - Operator should:
a) Inspect the machine and make certain that it is properly adjusted and in good
working condition;
b) Keep all controls in neutral before starting.
c) Check the oil level of engine and fuel level in tank.
d) Check the transmission oil level
e) Clear the work area of objects that might jam or wrap around the tines such as
glass, large sticks, stones, metal objects, wire, rope, and string-like materials.
C. Maintenance & Storage - Operator should:
a) Only use genuine spare parts/accessories approved by MINT 8 DLX.
b) Keep machine, attachment and accessories in safe working order.
.,5/26.$52,/(1*,1(6/,0,7('
$.LUORVNDU*URXS&RPSDQ\

c) Apply Grease/Oil to all link, pins and rivets.
d) Check for tightness of all fasteners.
g) Wash and clean the machine periodically.
i) Keep Machine in level platform.
J) During storage, and whenever the power unit is unattended, disengage the PTO
(power take- off) and render the engine unstartable by disconnecting the battery.
h) When storing the machine for longer intervals, use the spring latch to latch the
clutch lever in the depressed (disengaged) position. This prevents the clutch cone
from sticking to the lining during storage.
i) Store the machine in a well-ventilated place, protected from dampness and the
weather.
3.3 Don’ts
1. Do not put hands or feet near or under rotating parts.
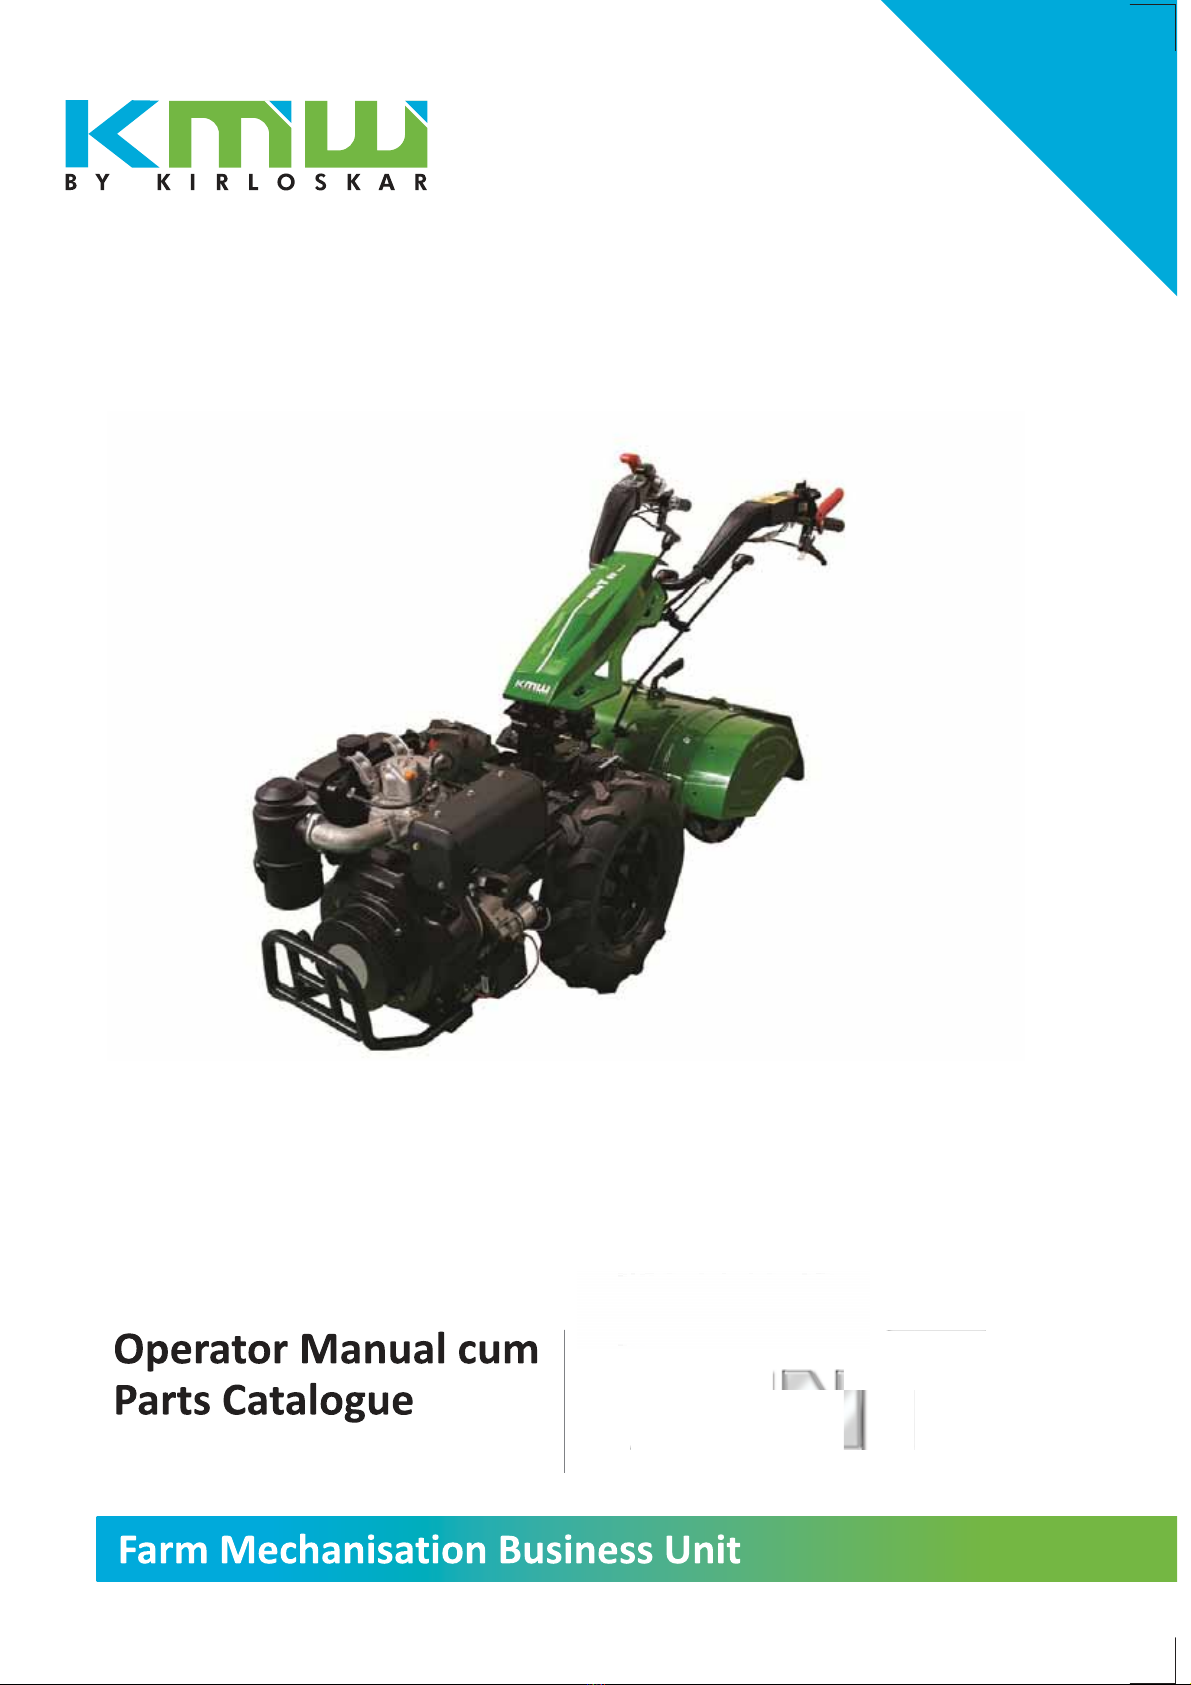
2. Don’t operate the MINT 8 DLX without any Demonstration training.
3. Do not operate if you found any leakage of Fuelor lubricants.
4. Never place your hands, feet, or any part of your body near or under any moving part
while the MINTengine isrunning.
5. Do not touchthe muffler and engine when the machine is in use.
6. Do not use this machinearound large roots and surfacerocks.
7. Do not use this machine around underground pipes and wiring.
8. Do not use machine when fuelleakage is observed near FIP, Injector and Fuel lines.
9. Do not operate the machine without good visibility.
10.Do not tamper with any safety devices or fittings.
11.Do not use unapproved attachments.
12.Don’t use non recommended blades.
13.Disengage clutch before shifting gear
14.Ensure gears are aligned properly during shifting and if not release clutch to align the
gear.
15. Do not wear open-toed sandals or go barefoot when operating the machines.
16. Do not wear loose fitting, scarf, ties or jewels which might caught in the machine
while operating.
17. Do not operate the MINT 8 DLX on terrain.
.,5/26.$52,/(1*,1(6/,0,7('
$.LUORVNDU*URXS&RPSDQ\

18. Don’t store the fuel in Closed (Unventilated atmosphere) and in area where source of
flames or sharks are there. Don’t smoke while fueling
19. Don’t fuel a running or hot engine. Don’t loosen the fuel cap while engine is running.
20. Don’t make any adjustment when the engine is in use
21. Handle LH/RH and other levers to be used only for controlling the machine
3.4 Recognize Decals Information’s
An important the safety incorporated into MINT 8 DLX is the warning and information
decals found in various parts of the machine.
4. Control & Equipment
.,5/26.$52,/(1*,1(6/,0,7('
$.LUORVNDU*URXS&RPSDQ\

5. Maintenance & Service-Operating Instructions
5.1 Recoil Starter Grip
Pulling the starter grip operates the recoil starter to crank the engine
Recoil Starter Grip
5.2 Accelerator (Throttle) Control Lever
The throttle lever controls the engine speed and tine rotations. Moving the throttle lever in
the direction shown, run the engine faster or slower.
To increase engine RPM, pull the lever to anti clockwise direction
To decrease engine RPM, push the lever to clockwise direction
Increase Engine
RPM
Off Position
Decrease Engine
RPM
.,5/26.$52,/(1*,1(6/,0,7('
$.LUORVNDU*URXS&RPSDQ\

5.4 Lever for Forward & Reverse Speed
The transmission offers a choice of fast & slow speed in forward direction. The drive gears
are available through a rod on the left side of the handlebar. Forward and reverse are
controlled with the red lever on the right top of the handlebar.
On each of these models, a PTO/ reverse lockout device prevents shifting into reverse with
the tiller engaged. But the lockout disengages automatically during operation with a front
mount attachment on the unit. When a front mount attachment is on the unit, the third
gear (transport gear) is blocked out.
5.3 Main Clutch Lever
The main clutch lever engages and disengages the transmission that drives the blades. It is
located on left hand side of handlebar.
ENGAGE
DISENGAGE
.,5/26.$52,/(1*,1(6/,0,7('
$.LUORVNDU*URXS&RPSDQ\

6. Maintenance and Installation
The purpose of the maintenance schedule is to keep the tiller in the best operating
condition. Inspect or service as scheduled in the table below.
Remember that your servicing dealer knows your tiller best and is fully equipped to
maintain and repair it.
To ensure the best quality and reliability, use only new, KOEL genuine parts or their equivalents for
repair and replacement.
6.1 Maintenance Chart
DailyFree Service Period
(from date of delivery) Frequency
20 hrs. /
30 days
100 hrs. /
75 days
100 hrs. /
75 days
200 hrs./
150 days
Clean Crank CaseCCC
Engine OilIRRR
Clean Air cleaner ICCC
Fuel Level I
Fuel Filter Element 55
Valve Clearance DGMXVWLIQHFHVVDU\I/AI/AI/A
Cylinder Head BoltsI/TI/TI/T
Main Gear Box OilRI/F
DecompressionleverI
Blade fitting Nuts and BoltsI/T
Injector Pressure and timingII
Clutch free playI/AI/AI/AI/A
5RXWLQHSDLGVHUYLFHVWREHGRQHDWHYHU\GD\VRUKUV:KLFKHYHULVHDUOLHU
C - Clean I - Inspect R – Replace T – Torque A – Adjust F – Fill/Top-up
.,5/26.$52,/(1*,1(6/,0,7('
$.LUORVNDU*URXS&RPSDQ\

6.2 Engine Oil Change Procedure
Place MINT on flat surface, remove sump drain plug & engine oil filler cap / dipstick.
Drain the old/ used oil and collect it in a container while the engine is warm to assure rapid
and complete draining.
After complete oil drain out, tighten the drain plug securely.
Fill recommended, new engine oil to the outer edge of the oil filler hole. Use funnel to avoid
oil spilling.
Reinstall oil filler cap & tighten.
After completing the process, start engine for 2-3 minutes for complete oil circulations.
.,5/26.$52,/(1*,1(6/,0,7('
$.LUORVNDU*URXS&RPSDQ\

6.3 Air Cleaner Oil Change & Cleaning Procedure
Step 1 - Loosen air filter clamps, separate oil bath bowl & filter element.
Step 2 - Dispose old oil from bowl & wipe out dust particles from bowl by use of clean cloth.
Step 3 - Fill new recommended oil into the oil bath bowl.
Step 4 - Clean filter elements with diesel or kerosene & reinstall. If filter elements are
damaged, replace with new one.
Step 5 - Reinstall oil bath bowl & tighten filter bowl clamps.
Note: Operating engine with dusty oil or damaged filter element causes engine
performance.
6.4 Transmission Oil Change Procedure xPlace MINT on flat surface & keep oil container
tray at bottom of gear box to collect old oil.
• Drain out transmission oil by removing
transmission drain plug and oil filer cap
• After complete oil drain out, reinstall the drain
plug securely & fill recommended transmission
oil into the gear box. Use funnel to avoid oil
spilling.
• Use oil filler gun or oil applicator to avoid oil
spilling.
• After complete of process, reinstall oil filler
cap.
•To
check transmission oil level, remove oil level filler cap provided at top side of gear box assy.
• When it drops near the low mark add oil, but do not fill above the full mark.
•Put
the dipstick back into the filler hole and twist the stick around so the flat side is toward the
cente
r of the transmission gearbox
6.5 Lubrication Specification Chart
USE ONLY KOEL RECOMMENDED OIL & LUBICANTS
Lubricants Type Specifications Quantity Replacement
Engine Oil SAE 15W-40, CF-4 1.65 lit Every Service
Transmission Oil SAE 80W-90, GL-4 2.2 lit 200 Hrs or 5 months
Air Cleaner SAE 15W-40, CF-4 15-20 ml Every Service
.,5/26.$52,/(1*,1(6/,0,7('
$.LUORVNDU*URXS&RPSDQ\

6.6 Free Service Schedule
Free Service recommended with following schedule (Month or Hours of usage whichever is earlier)
Sr. No. Free Service Days Total Hours Used
Date of Sale
11st Free Service 30 20
22nd Free Service 75 100
33rd Free Service 150 200
6.7 Maintenance Program
1. Refer to the maintenance instructions and illustrations in the "Use and Maintenance"
manual furnished for your model engine. Change oil, filters, etc., and clean the cylinder fins
and crankcase breather as instructed in the engine manual.
2. Daily Clean-Up:
When the machine is very dirty you may hose down everything except the engine
immediately after use. But to avoid cracking the engine, you must let it cool before hosing it
down. You may, however, idle the engine until it is warm enough to evaporate the wash
water from around the spark plug.
3. After First 10 Operating Hours
(and afterwards as recommended):
a) Tighten nuts and bolts:
b) Check tire pressure;
c) Originally, the position of A lever is
normal. As clutch wears out the same lever
could have a wider opening being so
uneasy to use, this means that it is
necessary to adjust the cable, setting lever
A on its original position acting on
adjustment device B and on counter-nut C;
d) Check the gear oil level of each attachment.
Re-check rear tyne tillers and other attachments
every 100 hours.
.,5/26.$52,/(1*,1(6/,0,7('
$.LUORVNDU*URXS&RPSDQ\

4. Occasionally as needed
Clean any dirt and old grease from the PTO
connections of all equipment and pack with clean
bearing grease.
5. Seasonally
Lubricate the control cables with a light oil;
Clean parts thoroughly and apply grease to the
control column indexing rod or lever, column fork,
column support or pivot post.
6.8 Use and Care Of Attachments
Lubrication of Attachments
1.Rototiller and cover assembly: Remove the pipe plug on top of the attachment gear
housing. If the oil level is more than 2 inches (50 mm) below the filler hole, fill to the top
with SAE 80/ 90 or SAE 90EP (extreme pressure) gear oil. Maintain at the nearly full level.
2. All other attachments: Remove dirty grease and lubricate the PTO coupling of the
Attachment with bearing grease whenever greasing the unit PTO.
6.9 Coupling Attachment To PTO
When the PTO flange of the attachment is coupled to the unit PTO flange and the PTO is
engaged, the splined shaft slides out to engage the splined (grooved) shaft of the
attachment. Then the shafts rotate as a single member until the PTO shift lever is used to
retract the drive shaft.
Although the attachment may be coupled directly to the unit PTO, there is a quick hitch that
can shorten the time for coupling and uncoupling attachments. There are also PTO
extensions in lengths of 3" and 6"which can be coupled between the PTO and attachment
for better balance with certain attachment and engine combinations.
.,5/26.$52,/(1*,1(6/,0,7('
$.LUORVNDU*URXS&RPSDQ\

6.9.1 Direct Coupling:
1. Remove the lock nuts and washers from the tractor PTO studs.
2. Align the tractor PTO with the connecting flange of the attachment. Always bring the
weeder to the attachment. If necessary use props to level the attachment.
3. Slide the PTO studs into the attachment flange and secure with the washers and lock
nuts.
6.9.2 Quick Hitch:
1. The hitch consists of two parts held together by a captive T-handled pin. Pull and turn pin
sideways to separate the parts.
2. Remove the two nuts from the tractor PTO studs and the two bolts and nuts from the
quick hitch.
3. Attach the female part, pin-side-up, to the tractor PTO. Attach the male part, hole-side-
up, to the attachment-connecting flange. Install and tighten the four nuts.
4. Fit the attachment part into the PTO part. Twist the pin so it drops down into locking
position, securing the two parts together.
5. To uncouple, pull the pin.
6.10 Use and Care Of Rear-Tine Tiller Attachment
6.10.1 Tilling Width
Important
When changing sets of tines, it is important to keep the tines in place on one side for use as a
model while changing tines on the other.
Do not mount the tines backwards on the flange.
.,5/26.$52,/(1*,1(6/,0,7('
$.LUORVNDU*URXS&RPSDQ\

6.10.2 Tilling Depth Adjustment
The procedure is the opposite of what many people first would believe. For the deepest soil
penetration, you raise the depth controlling "knife" by pinning the bar in the bottom hole
(see drawing).
1. Remove the hairpin and the clevis pin from the bracket and bar.
2. Raise or lower the bar handle to align the holes in the bar and brackets. Pin the bar at
desired setting, or as recommended in step 3.
3. In hard ground, as when tilling a patch of ground for the first time, pin the depth
adjustment rod through the top hole for a shallow cut.
After a pass or two to break up the hard top crust, stop the engine and pin the depth
adjustment bar through the lower position hole.
Pinning the bar through the bottom holes raises the depth-gauging "knife" for maximum
tilling depth.
Warning – Obstruction such as rocks and tree roots in the soil can cause ”blade breakage /
bending where the machine suddenly jerks or leaps forward. Do not try to control the unit
in this type of condition Just let it go and the machine will stop.
6.10.3 Tilling Suggestions
1. When breaking new ground or preparing hard,
rocky soil, till at a maximum depth at the lowest
gear setting and at a fast throttle setting.
In soft soil you can probably start right off tilling at
maximum depth and are achieved in the lowest
gear speeds.
2. You can avoid trampling over and tamping the
fresh tilled rows by walking to one side of the tiller.
Swing the handlebar to the side and adjust it to a
comfortable height. After a bit of practice with the
tiller, you can work out a pattern where your
footprints will be erased with each new pass.
.,5/26.$52,/(1*,1(6/,0,7('
$.LUORVNDU*URXS&RPSDQ\
Table of contents
Other KIRLOSKAR Farm Equipment manuals