Guidelines for Best Practice
To ensure good practice when considering
purchasing a Suffolk Rehab chair and
effective use post purchase we advise that
the following guidelines are considered:
1. Seek advice and input from a qualified
therapist/professional and/or Kirton
representative/distributor at the initial
prescription of the chair.
2. If unsure when ordering the chair and
any accessories contact either the
therapist involved or your Kirton
representative or distributor or our
Customer Services Team on
Freephone 0800 212709 or
+44 (0) 1440 705352 to discuss
further.
3.
It is recommended that following
receipt of the chair all staff members
that will be supervising the user(s)
should be
trained in adjusting the chair
to ensure it is adjusted safely and
correct positioning is maintained for
the benefit of the user.
4. Users of the Suffolk Rehab should be
supervised and checked regularly to
ensure their most appropriate position
is maintained in the chair.
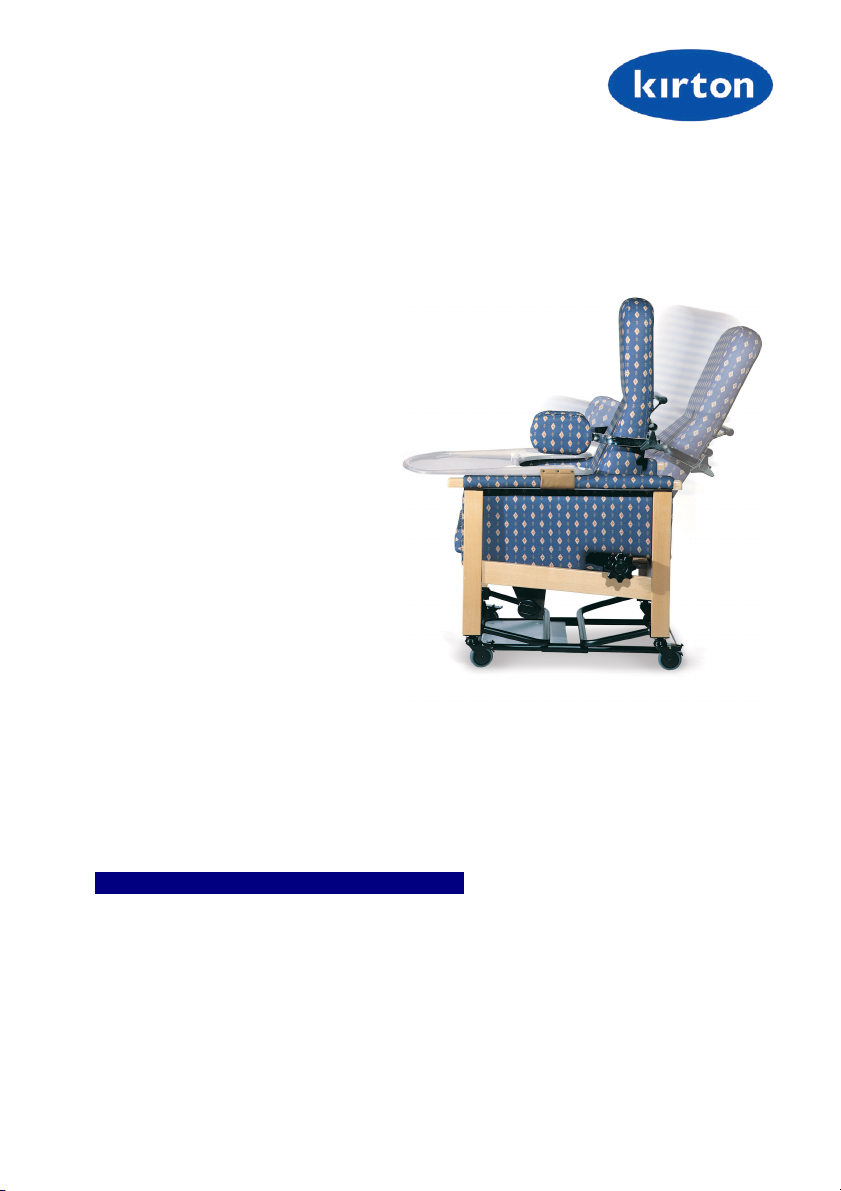
The User Instructions
The purpose of the following user
instructions is to provide a guide on how to
utilise, adjust and maintain the Suffolk
Rehab chair.
These instructions should be read by all
those involved with the supervision of the
user and/or the care of the chair before use.
The Suffolk Rehab must be adjusted in
terms of seat length, seat angle and back
angle positioning for each individual using
the chair to ensure safe and comfortable
use.
Please retain these instructions with the
Care and Maintenance card enclosed for
Page 3
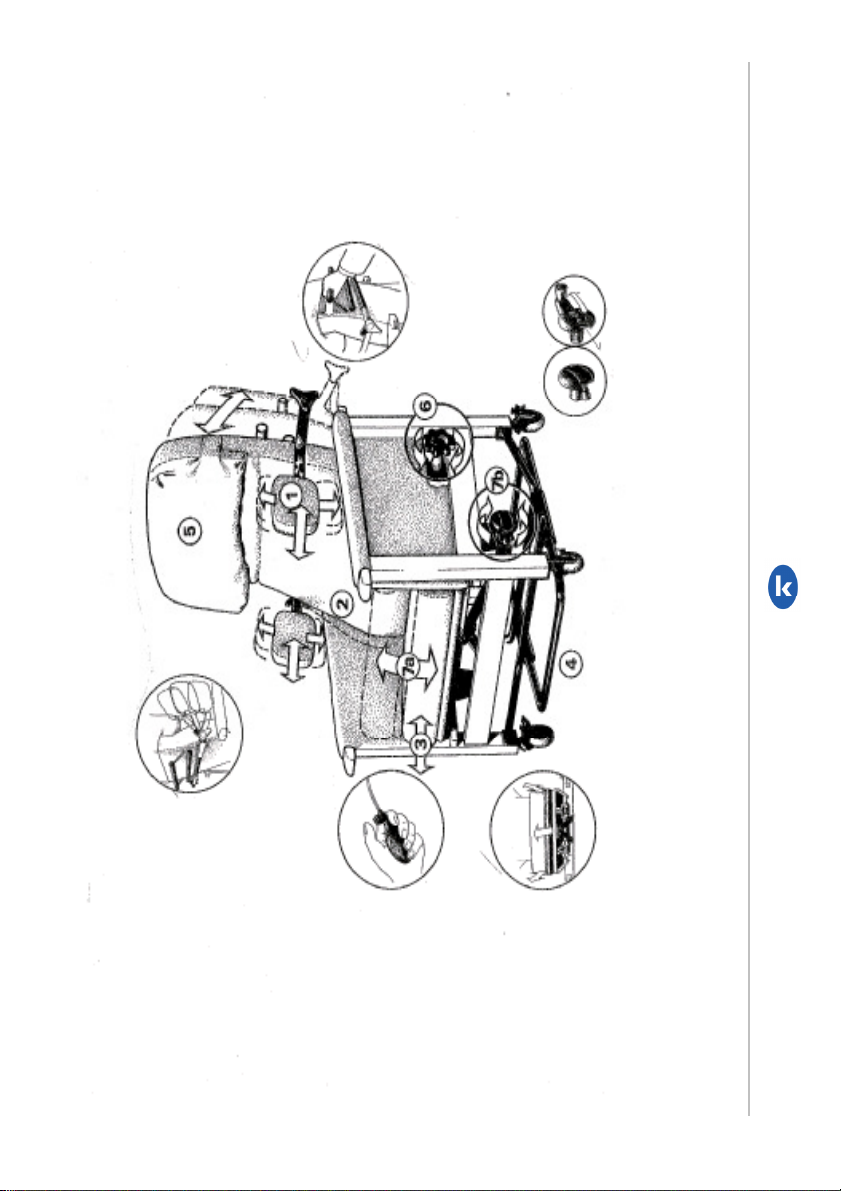
The Suffolk Rehab is fitted with two lateral
supports that operate independently but a
adjusted in the same way.
Both lateral supports can be completely
removed and fitted to either of the two
positional bars on the back of the chair.
•
To detach or adjust the lateral supports
loosen the “triangular” handle and adjust
to preference.
•
The two supports can be moved
horizontally across the bar to suit the
individual in the chair (ie: they can be
positioned closer or further from the
person’s rib cage).
•
The lateral supports are also marked to
ensure they are positioned evenly to
provide balanced support where
appropriate.
•
Ideally the lumbar supports should be
positioned firmly against the lower rib
cage rather than underneath the armpit
area. The lower positioning bar is
designed for shorter individuals. When
the most appropriate position has been
found then the “triangular” handles should
be tightened to provide stable and secure
support.